ECU FORD EDGE 2020 Owner's Manual
[x] Cancel search | Manufacturer: FORD, Model Year: 2020, Model line: EDGE, Model: FORD EDGE 2020Pages: 495, PDF Size: 6.38 MB
Page 147 of 495
Easy Entry and Exit Feature (If
Equipped)
If you enable the easy entry and exit
feature, it moves the driver seat position
rearward up to 2 in (5 cm) when you switch
the ignition off.
The driver seat returns to the previous
position when you switch the ignition on.
You can enable or disable this feature
through the information display. See
Information Displays
(page 105).
REAR SEATS
Adjusting the Rear Seats WARNING:
To prevent possible
damage to the seat or seatbelts, make
sure that the seatbelts are not fastened
before folding the seatback. WARNING:
When folding or
unfolding the seats, take care not to get
your fingers caught between the seat
backrest and seat frame. Failure to
follow this warning could result in serious
personal injury. WARNING:
When unfolding the
seat backrests, make sure that the
seatbelts are not trapped behind the
seat. WARNING:
Make sure that the
seats and the seat backrests are secure
and fully locked in their catches. Folding the Seat Backrest
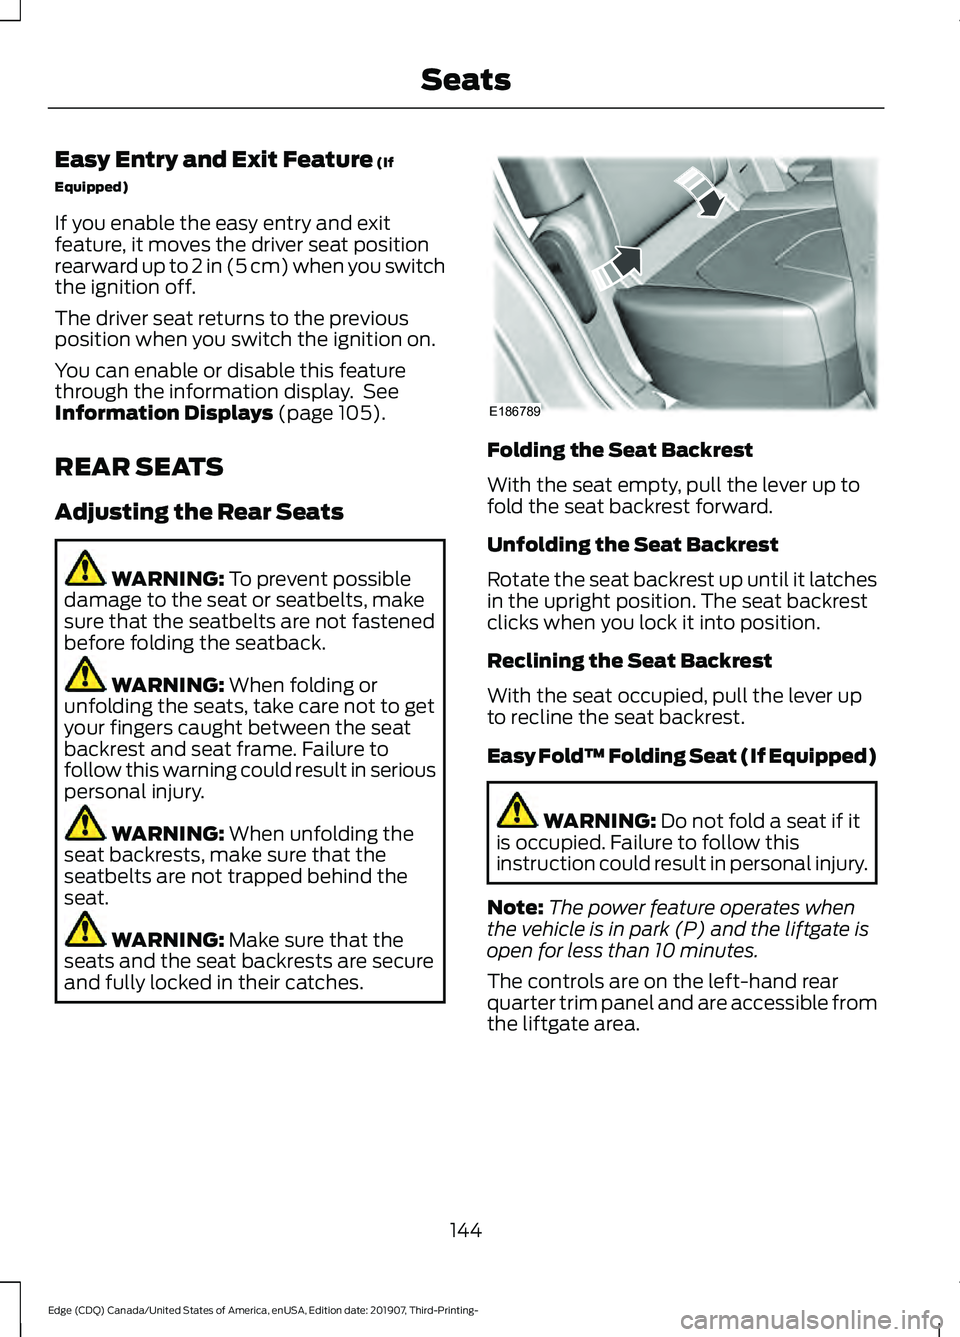
With the seat empty, pull the lever up to
fold the seat backrest forward.
Unfolding the Seat Backrest
Rotate the seat backrest up until it latches
in the upright position. The seat backrest
clicks when you lock it into position.
Reclining the Seat Backrest
With the seat occupied, pull the lever up
to recline the seat backrest.
Easy Fold™ Folding Seat (If Equipped)
WARNING:
Do not fold a seat if it
is occupied. Failure to follow this
instruction could result in personal injury.
Note: The power feature operates when
the vehicle is in park (P) and the liftgate is
open for less than 10 minutes.
The controls are on the left-hand rear
quarter trim panel and are accessible from
the liftgate area.
144
Edge (CDQ) Canada/United States of America, enUSA, Edition date: 201907, Third-Printing- SeatsE186789
Page 151 of 495
UNIVERSAL GARAGE DOOR
OPENER
HomeLink Wireless Control
System
WARNING: Do not use the system
with any garage door opener that does
not have the safety stop and reverse
feature as required by U.S. Federal
Safety Standards (this includes any
garage door opener manufactured
before April 1, 1982). A garage door
opener which cannot detect an object,
signaling the door to stop and reverse,
does not meet current federal safety
standards. Using a garage door opener
without these features increases the risk
of serious injury or death.
Note: Make sure that the garage door and
security device are free from obstruction
when you are programming. Do not program
the system with the vehicle in the garage.
Note: Make sure you keep the original
remote control transmitter for use in other
vehicles as well as for future system
programming.
Note: We recommend that upon the sale
or lease termination of your vehicle, you
erase the programmed function buttons for
security reasons. See Erasing the Function
Button Codes
.
Note: You can program a maximum of
three devices. To change or replace any of
the three devices after it has been initially
programmed, you must first erase the
current settings. See Erasing the Function
Button Codes
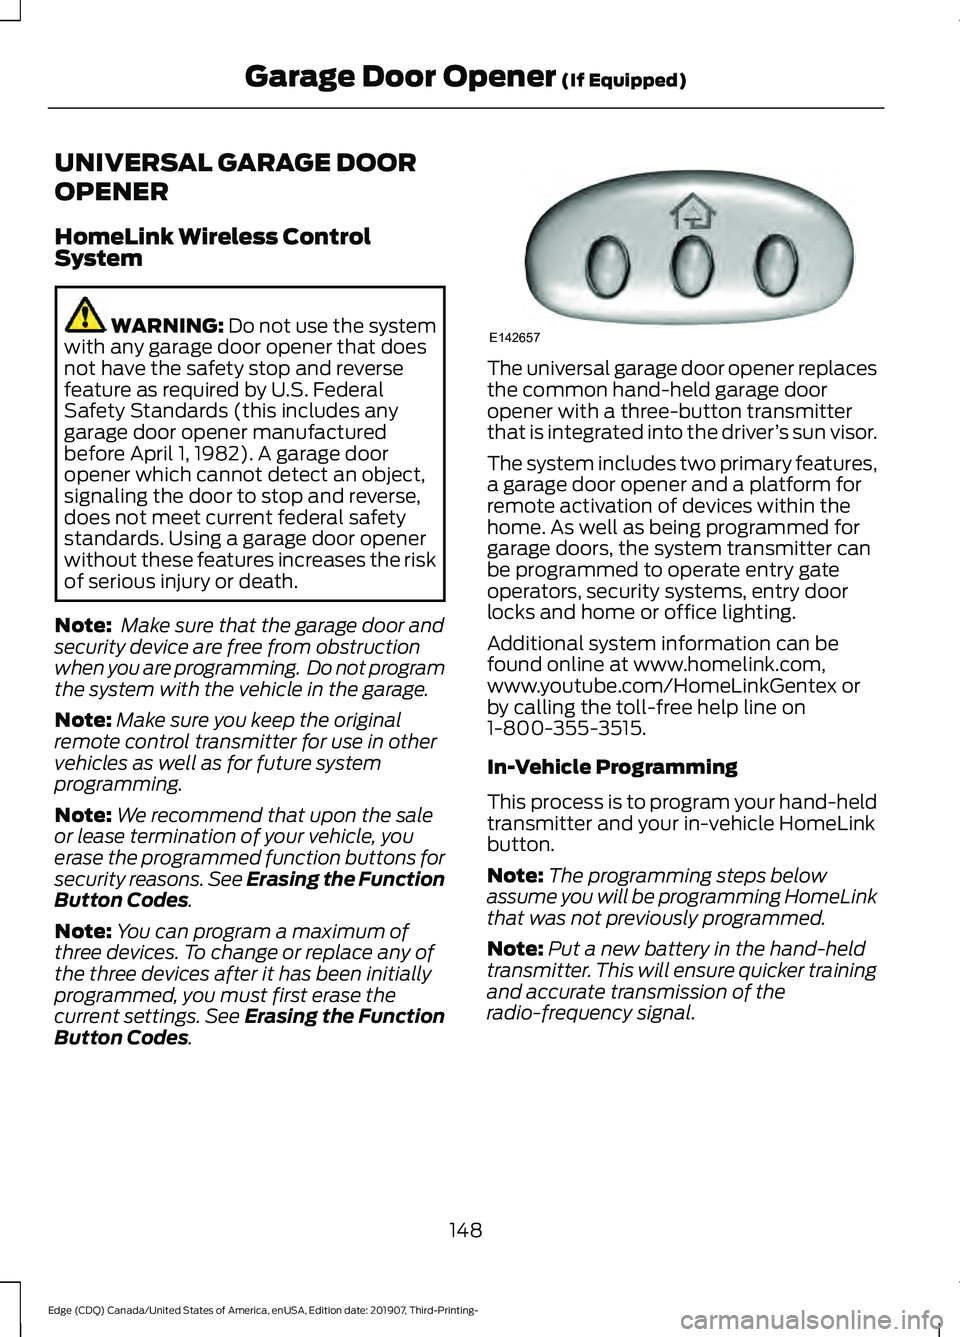
. The universal garage door opener replaces
the common hand-held garage door
opener with a three-button transmitter
that is integrated into the driver
’s sun visor.
The system includes two primary features,
a garage door opener and a platform for
remote activation of devices within the
home. As well as being programmed for
garage doors, the system transmitter can
be programmed to operate entry gate
operators, security systems, entry door
locks and home or office lighting.
Additional system information can be
found online at www.homelink.com,
www.youtube.com/HomeLinkGentex or
by calling the toll-free help line on
1-800-355-3515.
In-Vehicle Programming
This process is to program your hand-held
transmitter and your in-vehicle HomeLink
button.
Note: The programming steps below
assume you will be programming HomeLink
that was not previously programmed.
Note: Put a new battery in the hand-held
transmitter. This will ensure quicker training
and accurate transmission of the
radio-frequency signal.
148
Edge (CDQ) Canada/United States of America, enUSA, Edition date: 201907, Third-Printing- Garage Door Opener
(If Equipped)E142657
Page 240 of 495
REAR UNDER FLOOR
STORAGE
Cargo Management System
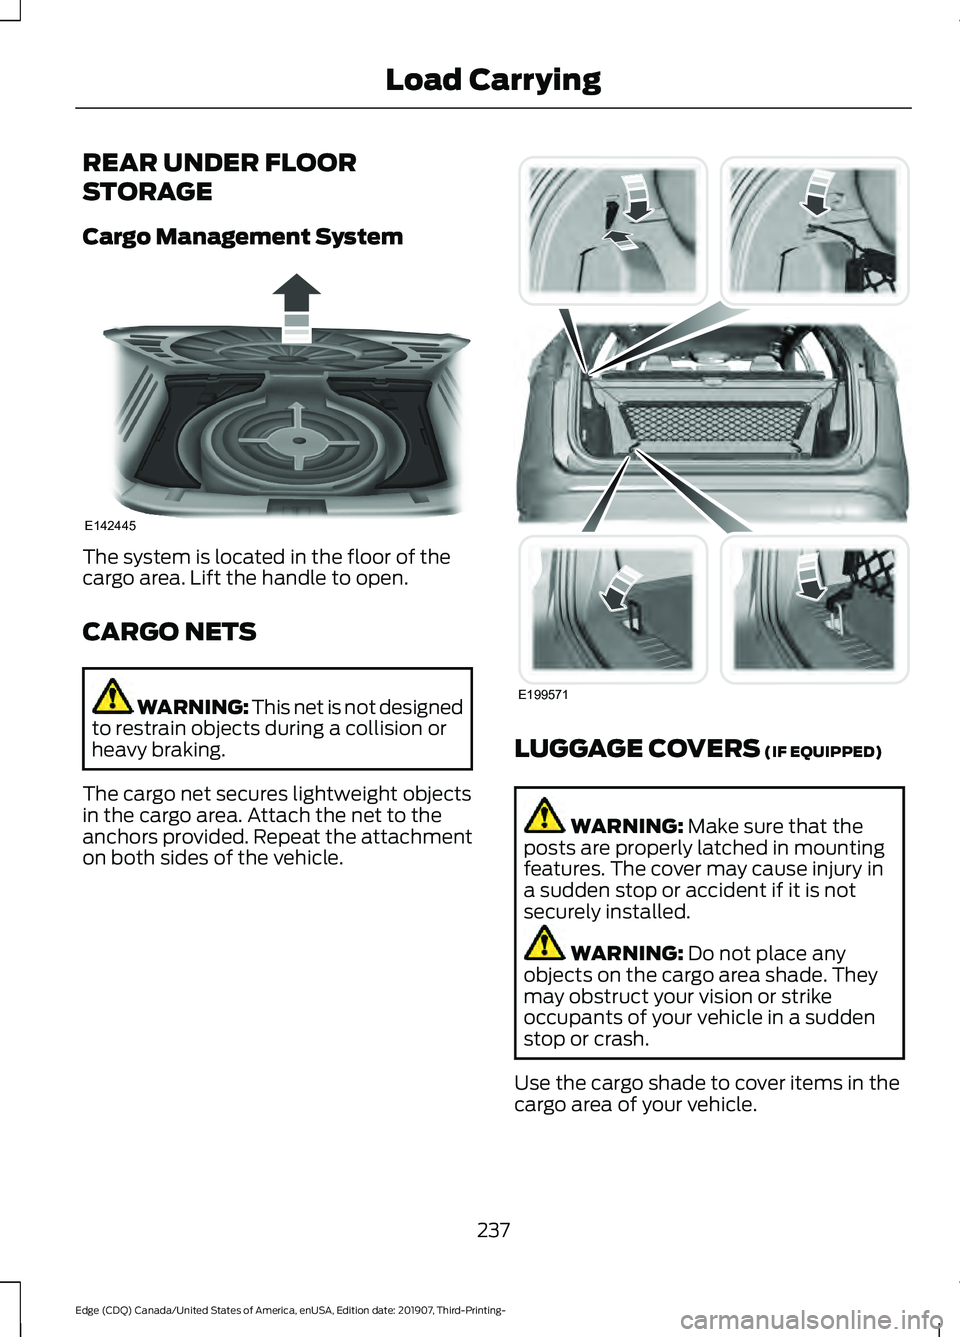
The system is located in the floor of the
cargo area. Lift the handle to open.
CARGO NETS
WARNING: This net is not designed
to restrain objects during a collision or
heavy braking.
The cargo net secures lightweight objects
in the cargo area. Attach the net to the
anchors provided. Repeat the attachment
on both sides of the vehicle. LUGGAGE COVERS
(IF EQUIPPED)
WARNING:
Make sure that the
posts are properly latched in mounting
features. The cover may cause injury in
a sudden stop or accident if it is not
securely installed. WARNING:
Do not place any
objects on the cargo area shade. They
may obstruct your vision or strike
occupants of your vehicle in a sudden
stop or crash.
Use the cargo shade to cover items in the
cargo area of your vehicle.
237
Edge (CDQ) Canada/United States of America, enUSA, Edition date: 201907, Third-Printing- Load CarryingE142445 E199571
Page 241 of 495
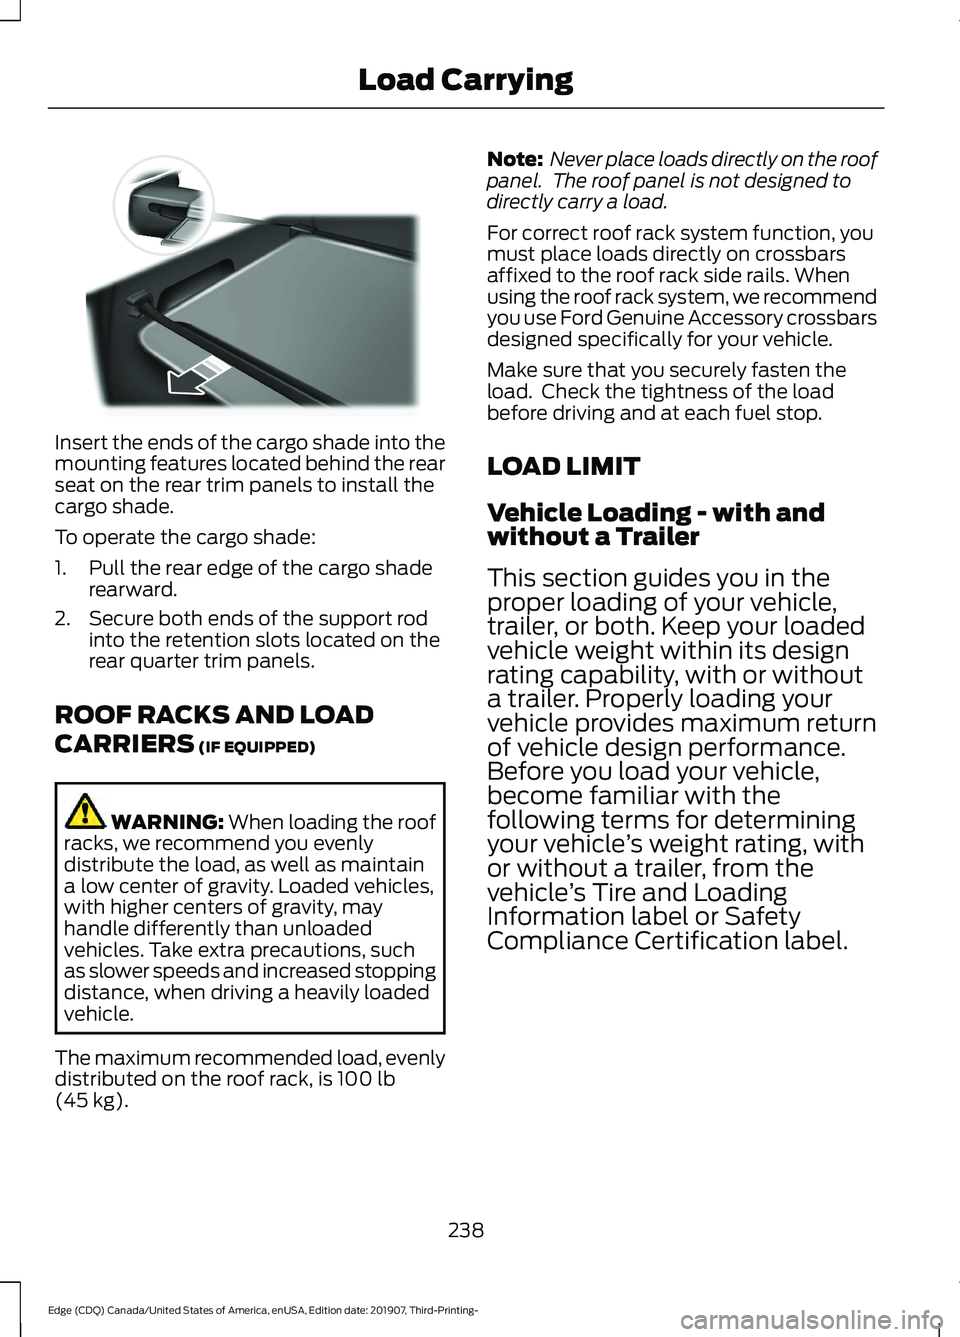
Insert the ends of the cargo shade into the
mounting features located behind the rear
seat on the rear trim panels to install the
cargo shade.
To operate the cargo shade:
1. Pull the rear edge of the cargo shade
rearward.
2. Secure both ends of the support rod into the retention slots located on the
rear quarter trim panels.
ROOF RACKS AND LOAD
CARRIERS (IF EQUIPPED) WARNING:
When loading the roof
racks, we recommend you evenly
distribute the load, as well as maintain
a low center of gravity. Loaded vehicles,
with higher centers of gravity, may
handle differently than unloaded
vehicles. Take extra precautions, such
as slower speeds and increased stopping
distance, when driving a heavily loaded
vehicle.
The maximum recommended load, evenly
distributed on the roof rack, is
100 lb
(45 kg). Note:
Never place loads directly on the roof
panel. The roof panel is not designed to
directly carry a load.
For correct roof rack system function, you
must place loads directly on crossbars
affixed to the roof rack side rails. When
using the roof rack system, we recommend
you use Ford Genuine Accessory crossbars
designed specifically for your vehicle.
Make sure that you securely fasten the
load. Check the tightness of the load
before driving and at each fuel stop.
LOAD LIMIT
Vehicle Loading - with and
without a Trailer
This section guides you in the
proper loading of your vehicle,
trailer, or both. Keep your loaded
vehicle weight within its design
rating capability, with or without
a trailer. Properly loading your
vehicle provides maximum return
of vehicle design performance.
Before you load your vehicle,
become familiar with the
following terms for determining
your vehicle ’s weight rating, with
or without a trailer, from the
vehicle ’s Tire and Loading
Information label or Safety
Compliance Certification label.
238
Edge (CDQ) Canada/United States of America, enUSA, Edition date: 201907, Third-Printing- Load CarryingE142447
Page 255 of 495
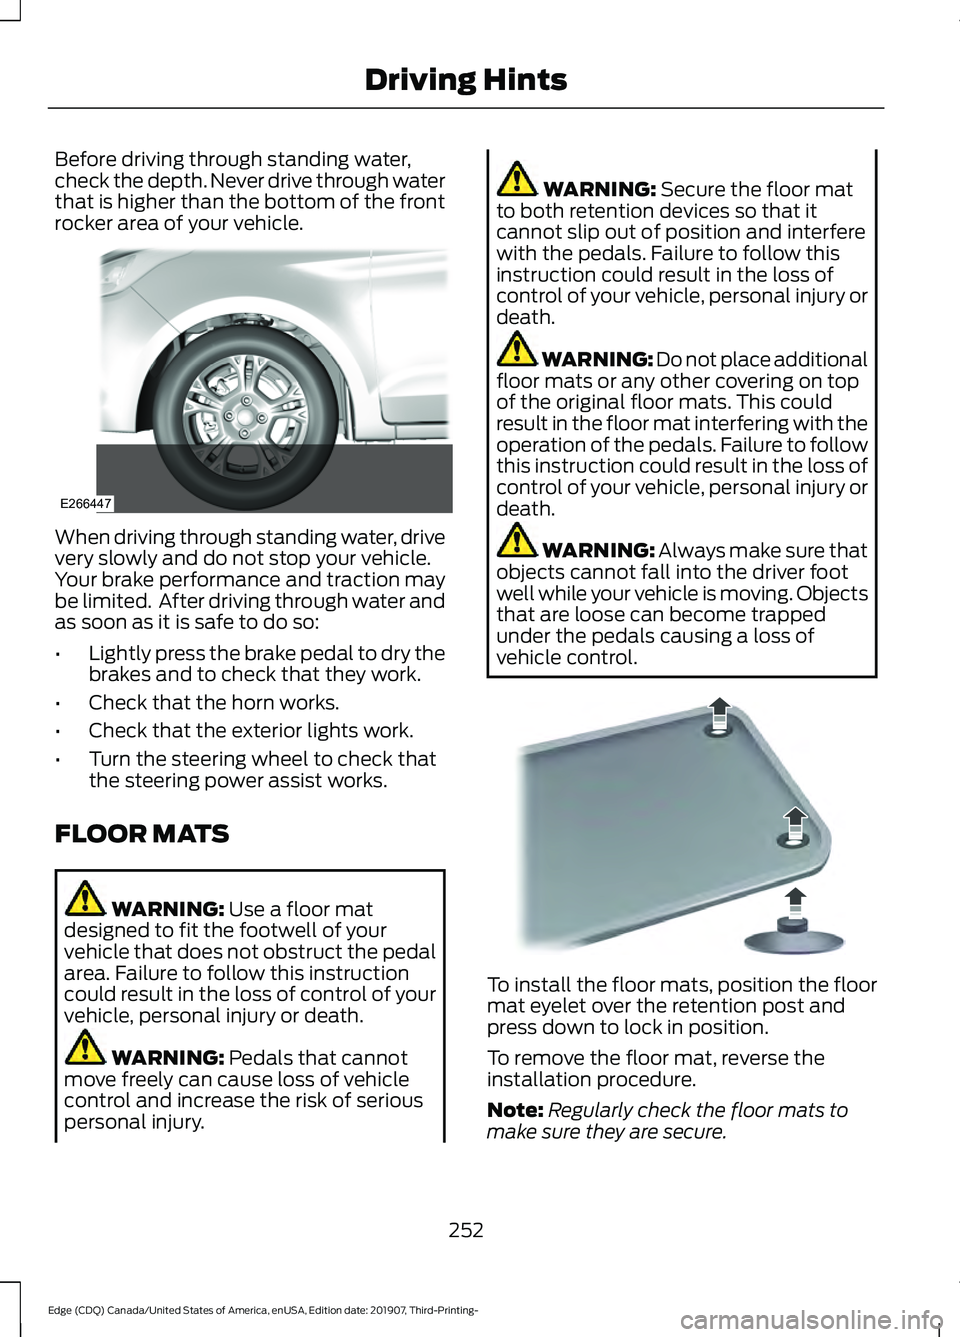
Before driving through standing water,
check the depth. Never drive through water
that is higher than the bottom of the front
rocker area of your vehicle.
When driving through standing water, drive
very slowly and do not stop your vehicle.
Your brake performance and traction may
be limited. After driving through water and
as soon as it is safe to do so:
•
Lightly press the brake pedal to dry the
brakes and to check that they work.
• Check that the horn works.
• Check that the exterior lights work.
• Turn the steering wheel to check that
the steering power assist works.
FLOOR MATS WARNING: Use a floor mat
designed to fit the footwell of your
vehicle that does not obstruct the pedal
area. Failure to follow this instruction
could result in the loss of control of your
vehicle, personal injury or death. WARNING:
Pedals that cannot
move freely can cause loss of vehicle
control and increase the risk of serious
personal injury. WARNING:
Secure the floor mat
to both retention devices so that it
cannot slip out of position and interfere
with the pedals. Failure to follow this
instruction could result in the loss of
control of your vehicle, personal injury or
death. WARNING: Do not place additional
floor mats or any other covering on top
of the original floor mats. This could
result in the floor mat interfering with the
operation of the pedals. Failure to follow
this instruction could result in the loss of
control of your vehicle, personal injury or
death. WARNING:
Always make sure that
objects cannot fall into the driver foot
well while your vehicle is moving. Objects
that are loose can become trapped
under the pedals causing a loss of
vehicle control. To install the floor mats, position the floor
mat eyelet over the retention post and
press down to lock in position.
To remove the floor mat, reverse the
installation procedure.
Note:
Regularly check the floor mats to
make sure they are secure.
252
Edge (CDQ) Canada/United States of America, enUSA, Edition date: 201907, Third-Printing- Driving HintsE266447 E142666
Page 262 of 495
Additional Assistance
If you have questions or concerns, or are
unsatisfied with the service you are
receiving, follow these steps:
1. Contact your Sales Representative or
Service Advisor at your selling or
servicing authorized dealer.
2. If your inquiry or concern remains unresolved, contact the Sales Manager,
Service Manager or Customer Relations
Manager.
3. If you require assistance or clarification
on Ford Motor Company policies,
please contact the Ford Customer
Relationship Center.
In order to help us serve you better, please
have the following information available
when contacting a Customer Relationship
Center:
• Vehicle Identification Number.
• Your telephone number (home and
business).
• The name of the authorized dealer and
city where located.
• The vehicle ’s current odometer reading.
In some states within the United States,
you must directly notify Ford in writing
before pursuing remedies under your
state's warranty laws, and Ford is also
allowed a final repair attempt.
Additionally, in some states within the
United States, a consumer has the option
of submitting a warranty dispute to the
BBB Auto Line before taking action under
the Magnuson-Moss Warranty Act, or to
the extent allowed by state law, before
pursuing replacement or repurchase
remedies provided by certain state laws.
This dispute handling procedure is not
required prior to enforcing state created
rights or other rights which are independent
of the Magnuson-Moss Warranty Act or
state replacement or repurchase laws. IN CALIFORNIA (U.S. ONLY)
California Civil Code Section 1793.2(d)
requires that, if a manufacturer or its
representative is unable to repair a motor
vehicle to conform to the vehicle
’s
applicable express warranty after a
reasonable number of attempts, the
manufacturer shall be required to either
replace the vehicle with one substantially
identical or repurchase the vehicle and
reimburse the buyer in an amount equal to
the actual price paid or payable by the
consumer (less a reasonable allowance
for consumer use). The consumer has the
right to choose whether to receive a refund
or replacement vehicle.
California Civil Code Section 1793.22(b)
presumes that the manufacturer has had
a reasonable number of attempts to
conform the vehicle to its applicable
express warranties if, within the first 18
months of ownership of a new vehicle or
the first 18,000 mi (29,000 km), whichever
occurs first:
1. Two or more repair attempts are made
on the same non-conformity likely to
cause death or serious bodily injury OR
2. Four or more repair attempts are made
on the same nonconformity (a defect
or condition that substantially impairs
the use, value or safety of the vehicle)
OR
3. The vehicle is out of service for repair of nonconformities for a total of more
than 30 calendar days (not necessarily
all at one time).
In the case of 1 or 2 above, the consumer
must also notify the manufacturer of the
need for the repair of the nonconformity
at the following address:
Ford Motor Company
16800 Executive Plaza Drive
Mail Drop 3NE-B
Dearborn, MI 48126
259
Edge (CDQ) Canada/United States of America, enUSA, Edition date: 201907, Third-Printing- Customer Assistance
Page 267 of 495
Transport Canada Contact Information
http://www.tc.gc.ca/eng/motorvehiclesafety/reporting-defects-motor-
vehicles.html (English)
Website
http://www.tc.gc.ca/fra/securiteautomobile/signaler-defauts-vehicules-
automobiles.html (French)
Website
1-800-333-0510
Phone Ford of Canada Contact Information
www.ford.ca
Website
1-800-565-3673
Phone
264
Edge (CDQ) Canada/United States of America, enUSA, Edition date: 201907, Third-Printing- Customer Assistance
Page 286 of 495
Action and description
Message
Reset Successful
When the oil change indic-
ator resets the instrument
cluster displays 100%.
Remaining Life
{00}%
If the instrument cluster
displays one of the following
messages, repeat the
process.
Not Reset
Reset Cancelled
CHANGING THE ENGINE AIR
FILTER WARNING: To reduce the risk of
vehicle damage and personal burn
injuries, do not start your engine with the
air cleaner removed and do not remove
it while the engine is running.
When changing the air filter element, use
only the air filter element listed. See
Capacities and Specifications
(page
341).
For turbocharged equipped vehicles: When
servicing the air cleaner, it is important that
no foreign material enter the air induction
system. The engine and turbocharger are
susceptible to damage from even small
particles.
Change the air filter element at the proper
interval. See
Scheduled Maintenance
(page 429). Note:
Failure to use the correct air filter
element may result in severe engine
damage. The customer warranty may be
void for any damage to the engine if the
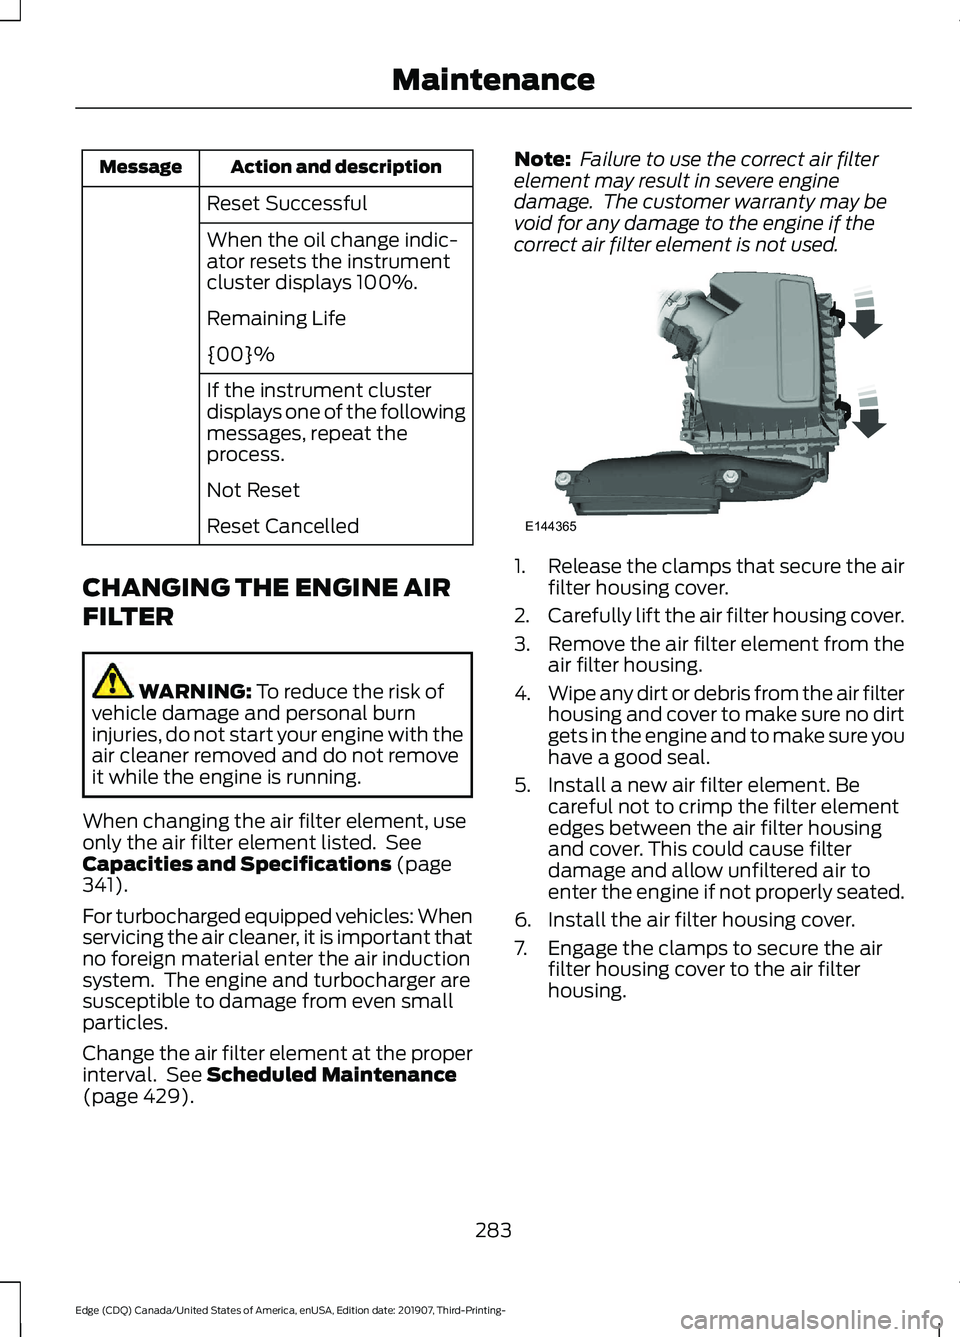
correct air filter element is not used. 1.
Release the clamps that secure the air
filter housing cover.
2. Carefully lift the air filter housing cover.
3. Remove the air filter element from the
air filter housing.
4. Wipe any dirt or debris from the air filter
housing and cover to make sure no dirt
gets in the engine and to make sure you
have a good seal.
5. Install a new air filter element. Be careful not to crimp the filter element
edges between the air filter housing
and cover. This could cause filter
damage and allow unfiltered air to
enter the engine if not properly seated.
6. Install the air filter housing cover.
7. Engage the clamps to secure the air filter housing cover to the air filter
housing.
283
Edge (CDQ) Canada/United States of America, enUSA, Edition date: 201907, Third-Printing- MaintenanceE144365
Page 310 of 495
Tire valve connector.
G
Accessory power plug.
H
Casing/housing.
I
Bike/raft/sports ball adapters.
J
General Information WARNING: Failure to follow these
guidelines could result in an increased
risk of loss of vehicle control, injury or
death.
Note: Do not use the kit if you have severely
damaged a tire. Only seal punctures within
the tire tread with the kit.
Do not attempt to repair punctures larger
than ¼ inch (6 millimeters) or damage to
the tire's sidewall. The tire may not
completely seal.
Loss of air pressure may adversely affect
tire performance. For this reason:
Note: Do not drive the vehicle above
50 mph (80 km/h)
.
Note: Do not drive further than
120 mi
(200 km). Drive only to the closest
authorized dealer or tire repair shop to have
your tire inspected.
• Drive carefully and avoid abrupt
steering maneuvers.
• Periodically monitor tire inflation
pressure in the affected tire; if the tire
is losing pressure, have the vehicle
towed.
• Read the information in the Tips for
Use of the Kit section to make sure safe
operation of the kit and your vehicle.
Tips for Use of the Kit
To ensure safe operation of the kit: •
Read all instructions and cautions fully.
• Before operating the kit, make sure
your vehicle is safely off the road and
away from moving traffic. Switch on
the hazard lights.
• Always set the parking brake to ensure
the vehicle does not move
unexpectedly.
• Do not remove any foreign objects,
such as nails or screws, from the tire.
• When using the kit, leave the engine
running (only if the vehicle is outdoors
or in a well-ventilated area) so the
compressor does not drain the
vehicle's battery.
• Do not allow the compressor to
operate continuously for more than 15
minutes. This will help prevent the
compressor from overheating.
• Never leave the kit unattended during
operation.
• Sealant compound contains latex.
Those with latex sensitivities should
use appropriate precautions to avoid
an allergic reaction.
• Keep the kit away from children.
• Only use the kit when the ambient
temperature is between -22°F (-30°C)
and 158°F (70°C).
• Only use the sealing compound before
the use-by date. The use-by date is on
a label on the sealant canister, which
you can see through the rectangular
viewing window on the bottom of the
compressor. Check the use-by date
regularly and replace the canister when
the sealant expires.
• Do not store the kit unsecured inside
the passenger compartment of the
vehicle as it may cause injury during a
sudden stop or crash. Always store the
kit in its original location.
307
Edge (CDQ) Canada/United States of America, enUSA, Edition date: 201907, Third-Printing- Wheels and Tires
Page 311 of 495
•
After sealant use, an authorized dealer
must replace the tire pressure
monitoring system sensor and valve
stem on the wheel.
• Operating the kit could cause an
electrical disturbance in radio, CD and
DVD player operation. * When inflation only is required
for a tire or other objects, the
selector must be in the Air
position.
What to do When a Tire Is
Punctured
You can repair a tire puncture within the
tire's tread area in two stages with the kit.
• In the first stage, inflate the tire with a
sealing compound and air. After you
inflate the tire, you will need to drive
the vehicle a short distance 4 mi
(6 km) to distribute the sealant in the
tire.
• In the second stage, check the tire
pressure and adjust, if necessary, to the
vehicle's specified tire inflation
pressure.
First Stage: Inflating the Tire with
Sealing Compound and Air WARNING:
Do not stand directly
over the kit while inflating the tire. If you
notice any unusual bulges or
deformations in the tire's sidewall during
inflation, stop and call roadside
assistance. WARNING:
If the tire does not
inflate to the recommended tire pressure
within 15 minutes, stop and call roadside
assistance. WARNING:
Do not run the engine
when operating the air compressor
unless the vehicle is outdoors or in a
well-ventilated area.
Preparation: Park the vehicle in a safe, level
and secure area, away from moving traffic.
Switch the hazard lights on. Apply the
parking brake and switch the engine off.
Inspect the flat tire for visible damage.
Sealant compound contains latex. Use
appropriate precautions to avoid any
allergic reactions.
Do not remove any foreign object that has
pierced the tire. If a puncture is in the tire
sidewall, stop and call roadside assistance.
1. Remove the valve cap from the tire valve.
2. Unwrap the dual purpose hose (black tube) from the back of the compressor
housing.
3. Fasten the hose to the tire valve by turning the connector clockwise.
Tighten the connection securely.
308
Edge (CDQ) Canada/United States of America, enUSA, Edition date: 201907, Third-Printing- Wheels and TiresE175978