ECU FORD EDGE 2020 Owner's Guide
[x] Cancel search | Manufacturer: FORD, Model Year: 2020, Model line: EDGE, Model: FORD EDGE 2020Pages: 495, PDF Size: 6.38 MB
Page 338 of 495
When driving with the full-size dissimilar
spare wheel and tire assembly additional
caution should be given to:
•
Towing a trailer.
• Driving vehicles equipped with a
camper body.
• Driving vehicles with a load on the
cargo rack.
Drive cautiously when using a full-size
dissimilar spare wheel and tire assembly
and seek service as soon as possible.
Tire Change Procedure WARNING: Do not work on your
vehicle when the jack is the only support
as your vehicle could slip off the jack.
Failure to follow this instruction could
result in personal injury or death. WARNING:
To help prevent your
vehicle from moving when changing a
wheel, shift the transmission into park
(P), set the parking brake and use an
appropriate block or wheel chock to
secure the wheel diagonally opposite to
the wheel being changed. For example,
when changing the front left wheel,
place an appropriate block or wheel
chock on the right rear wheel. WARNING:
Never place anything
between the vehicle jack and your
vehicle. WARNING:
Never place anything
between the vehicle jack and the ground. WARNING:
Park your vehicle so
that you do not obstruct the flow of
traffic or place yourself in any danger and
set up a warning triangle. WARNING:
Do not get under a
vehicle that is only supported by a
vehicle jack. WARNING:
Do not attempt to
change a tire on the side of the vehicle
close to moving traffic. Pull far enough
off the road to avoid the danger of being
hit when operating the jack or changing
the wheel. WARNING:
Use only the specified
jacking points. If you use other positions,
you may damage the body, steering,
suspension, engine, braking system or
the fuel lines. WARNING:
Always use the jack
provided as original equipment with your
vehicle. If using a jack other than the one
provided, make sure the jack capacity is
adequate for the vehicle weight,
including any vehicle cargo or
modifications. If you are unsure if the jack
capacity is adequate, contact the
authorized dealer. WARNING:
The jack supplied with
this vehicle is only intended for changing
wheels. Do not use the vehicle jack other
than when you are changing a wheel in
an emergency. WARNING:
Make sure there is no
grease or oil on the threads or the
surface between the wheel lugs and
nuts. This can cause the lug nuts to
loosen while driving.
335
Edge (CDQ) Canada/United States of America, enUSA, Edition date: 201907, Third-Printing- Wheels and Tires
Page 339 of 495
Note:
The jack does not require
maintenance or additional lubrication over
the service life of your vehicle.
Note: Passengers should not remain in your
vehicle when the vehicle is being jacked.
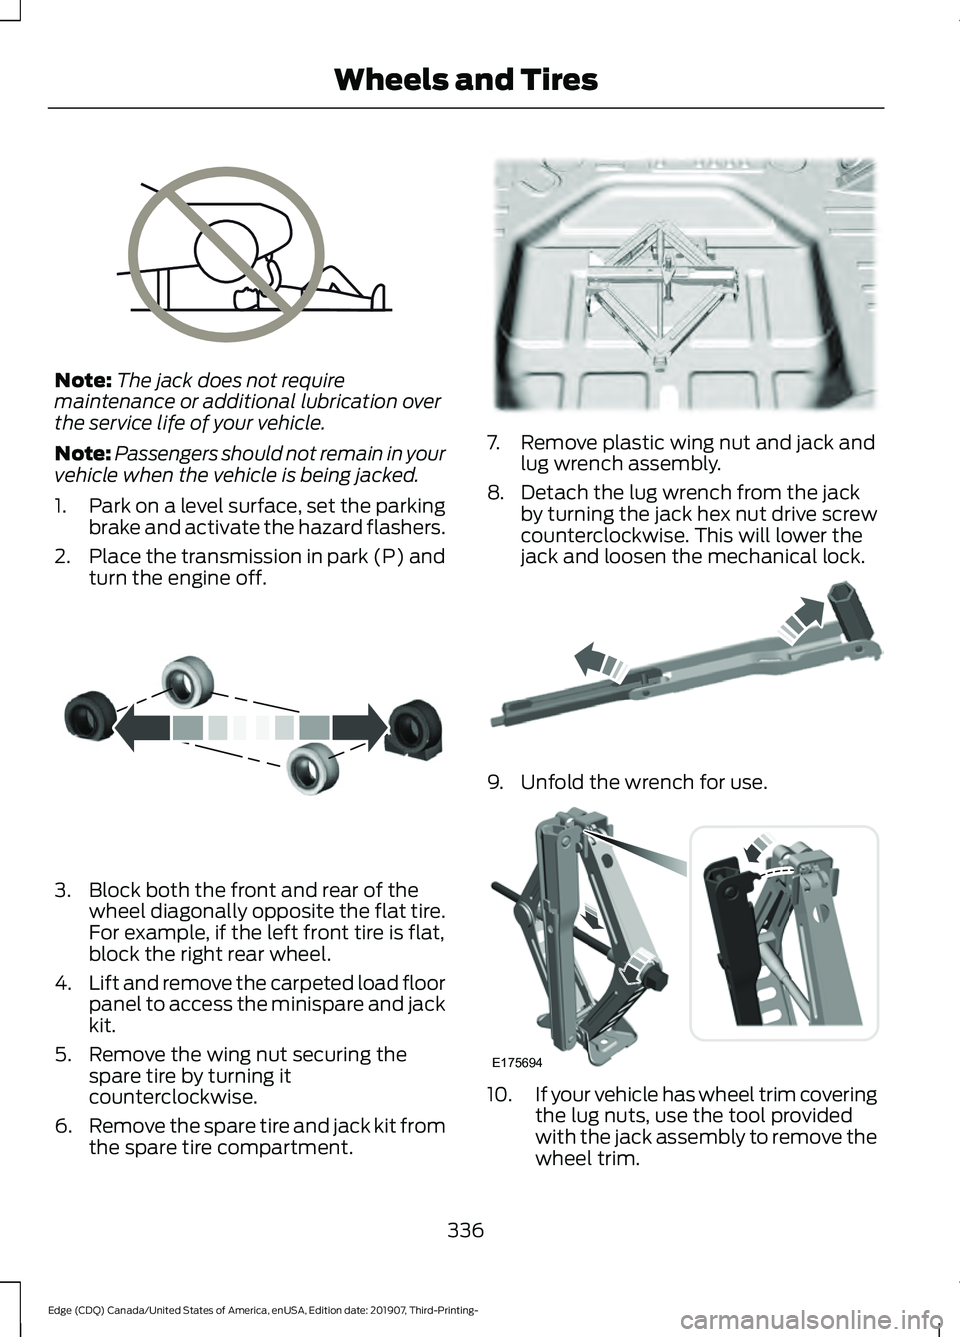
1. Park on a level surface, set the parking
brake and activate the hazard flashers.
2. Place the transmission in park (P) and
turn the engine off. 3. Block both the front and rear of the
wheel diagonally opposite the flat tire.
For example, if the left front tire is flat,
block the right rear wheel.
4. Lift and remove the carpeted load floor
panel to access the minispare and jack
kit.
5. Remove the wing nut securing the spare tire by turning it
counterclockwise.
6. Remove the spare tire and jack kit from
the spare tire compartment. 7. Remove plastic wing nut and jack and
lug wrench assembly.
8. Detach the lug wrench from the jack by turning the jack hex nut drive screw
counterclockwise. This will lower the
jack and loosen the mechanical lock. 9. Unfold the wrench for use.
10.
If your vehicle has wheel trim covering
the lug nuts, use the tool provided
with the jack assembly to remove the
wheel trim.
336
Edge (CDQ) Canada/United States of America, enUSA, Edition date: 201907, Third-Printing- Wheels and TiresE166722 E175447 E178186 E181744 E175694
Page 341 of 495
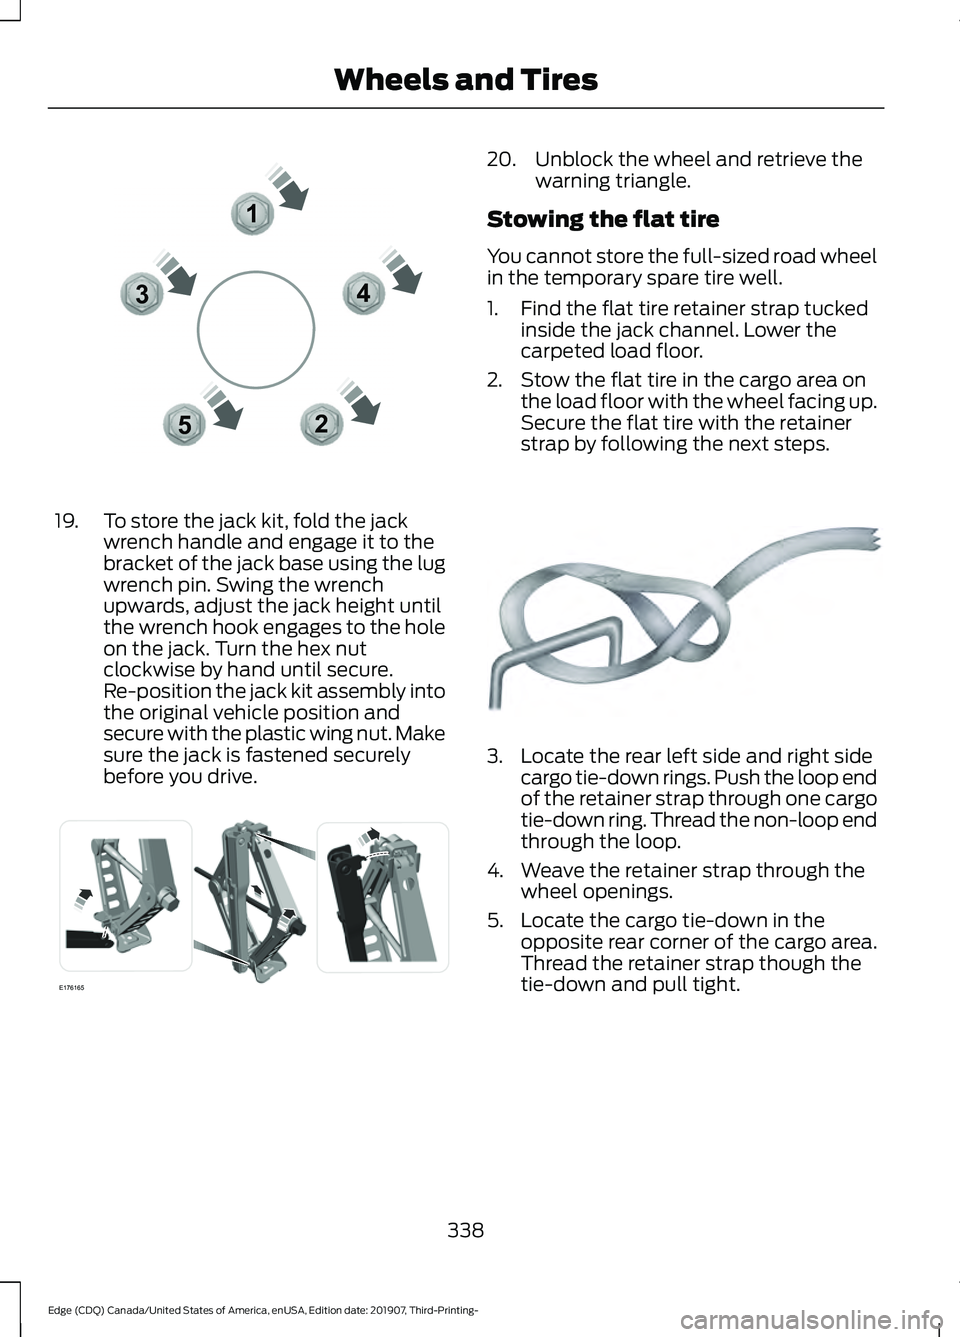
19. To store the jack kit, fold the jack
wrench handle and engage it to the
bracket of the jack base using the lug
wrench pin. Swing the wrench
upwards, adjust the jack height until
the wrench hook engages to the hole
on the jack. Turn the hex nut
clockwise by hand until secure.
Re-position the jack kit assembly into
the original vehicle position and
secure with the plastic wing nut. Make
sure the jack is fastened securely
before you drive. 20. Unblock the wheel and retrieve the
warning triangle.
Stowing the flat tire
You cannot store the full-sized road wheel
in the temporary spare tire well.
1. Find the flat tire retainer strap tucked inside the jack channel. Lower the
carpeted load floor.
2. Stow the flat tire in the cargo area on the load floor with the wheel facing up.
Secure the flat tire with the retainer
strap by following the next steps. 3. Locate the rear left side and right side
cargo tie-down rings. Push the loop end
of the retainer strap through one cargo
tie-down ring. Thread the non-loop end
through the loop.
4. Weave the retainer strap through the wheel openings.
5. Locate the cargo tie-down in the opposite rear corner of the cargo area.
Thread the retainer strap though the
tie-down and pull tight.
338
Edge (CDQ) Canada/United States of America, enUSA, Edition date: 201907, Third-Printing- Wheels and Tires12
3
4
5E306781 E176165 E142906
Page 342 of 495
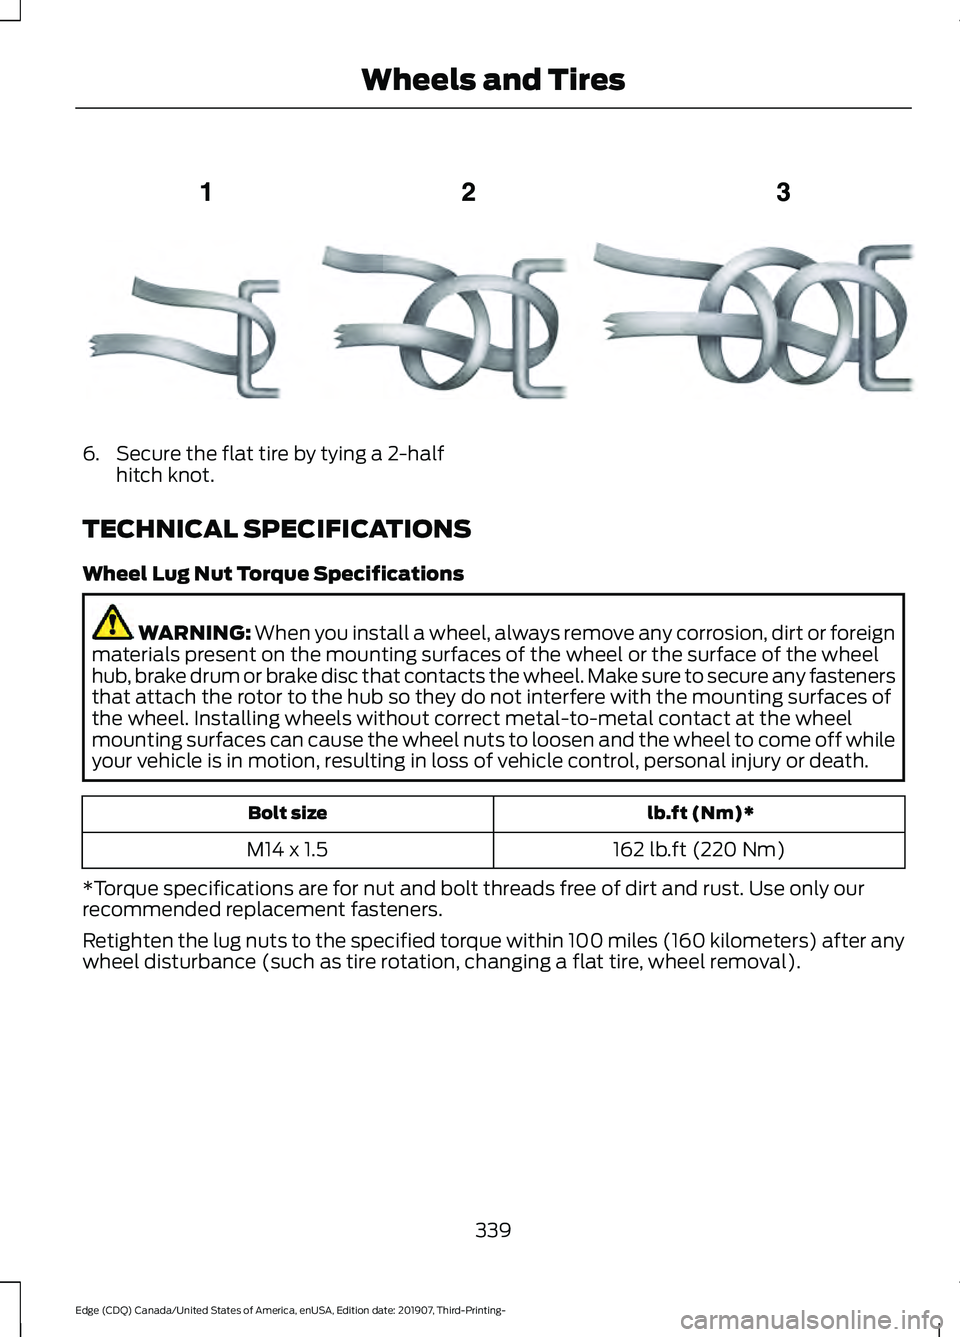
6. Secure the flat tire by tying a 2-half
hitch knot.
TECHNICAL SPECIFICATIONS
Wheel Lug Nut Torque Specifications WARNING: When you install a wheel, always remove any corrosion, dirt or foreign
materials present on the mounting surfaces of the wheel or the surface of the wheel
hub, brake drum or brake disc that contacts the wheel. Make sure to secure any fasteners
that attach the rotor to the hub so they do not interfere with the mounting surfaces of
the wheel. Installing wheels without correct metal-to-metal contact at the wheel
mounting surfaces can cause the wheel nuts to loosen and the wheel to come off while
your vehicle is in motion, resulting in loss of vehicle control, personal injury or death. lb.ft (Nm)*
Bolt size
162 lb.ft (220 Nm)
M14 x 1.5
*Torque specifications are for nut and bolt threads free of dirt and rust. Use only our
recommended replacement fasteners.
Retighten the lug nuts to the specified torque within 100 miles (160 kilometers) after any
wheel disturbance (such as tire rotation, changing a flat tire, wheel removal).
339
Edge (CDQ) Canada/United States of America, enUSA, Edition date: 201907, Third-Printing- Wheels and TiresE143746
Page 371 of 495
WHAT IS A CONNECTED
VEHICLE
A connected vehicle has technology that
allows your vehicle to connect to a mobile
network and for you to access a range of
features. When used in conjunction with
the FordPass app, it could allow you to
monitor and control your vehicle further,
for example checking the tire pressures,
the fuel level and the vehicle location. For
additional information, refer to the local
Ford website.
CONNECTED VEHICLE
REQUIREMENTS
Connected service and related feature
functionality requires a compatible vehicle
network.
Some remote features require additional
service activation. Log in to your Ford
account for details. Some restrictions, third
party terms and message or data rates
may apply.
CONNECTED VEHICLE
LIMITATIONS
Evolving technology, cellular networks, or
regulations could affect functionality and
availability, or continued provision of some
features. These changes could even stop
some features from functioning.
CONNECTING THE VEHICLE TO
A MOBILE NETWORK
What Is the Modem
The modem allows access to a
range of features built into your
vehicle. Enabling and Disabling the Modem
1. Press Settings.
2. Press
FordPass Connect.
3. Press
Connectivity Settings.
4. Switch connectivity features on or off.
Connecting FordPass to the
Modem
1. Make sure that the modem is enabled using the vehicle settings menu.
2. Open the FordPass app on your device
and log in.
3. Add your vehicle or select your vehicle if already added.
4. Select the option for vehicle details.
5. Select the option to activate your vehicle.
6. Make sure that the name on the screen
matches the name shown in your
FordPass account.
7. Confirm that FordPass account is connected to the modem.
CONNECTING THE VEHICLE TO
A WI-FI NETWORK
1. Press
Settings.
2. Press
Wi-Fi.
3. Switch
System Wi-Fi on.
4. Press
View Available Networks.
5. Select an available Wi-Fi network.
Note: Enter the network password to
connect to a secure network.
368
Edge (CDQ) Canada/United States of America, enUSA, Edition date: 201907, Third-Printing- Connected Vehicle
(If Equipped)
Page 374 of 495
CREATING A VEHICLE WI-FI
HOTSPOT
You can create a Wi-Fi hotspot in your
vehicle and allow devices to connect to it
for access to the Internet.
Press the button to enter the
settings menu.
1. Select Connectivity Features.
2. Select
Vehicle Hotspot.
Note: The vehicle hotspot default setting
is on.
3. Select
Settings.
4. Make sure that you have Wi-Fi visibility
switched on.
Note: The Wi-Fi Visibility default setting is
on.
Finding the Wi-Fi Hotspot Name
and Password Press the button to enter the
settings menu.
1. Select
Connectivity Features.
2. Select
Vehicle Hotspot.
3. Select
Settings.
Note: The SSID is the hotspot name.
4. Scroll to
Hide password.
5. Uncheck the box.
Connecting a Device to the Wi-Fi
Hotspot
1. On your device, turn on Wi-Fi and select
the hotspot from the list of available
Wi-Fi networks.
2. When prompted, enter the password.
Purchasing a Data Plan
1. Connect a device to the hotspot. Note:
The vehicle network carrier ’s portal
opens on your device.
2. If the portal does not open on your device, open a website and it redirects
to the vehicle network carrier ’s portal.
Note: Secure websites do not redirect.
Note: If you have an active plan, the system
does not redirect to the vehicle network
carrier ’s portal when you connect a device.
Visit the vehicle network carrier ’s website
to purchase more data.
Note: If data usage information is available
in the vehicle hotspot menu, it is
approximate.
Note: If you carry out a master reset, the
system does not remove your vehicle from
your vehicle network carrier ’s account. To
remove your vehicle from the account,
contact your vehicle network carrier.
Note: The vehicle network carrier provides
Vehicle Hotspot services, subject to your
vehicle network carrier agreement, coverage
and availability.
CHANGING THE VEHICLE WI-
FI HOTSPOT NAME OR
PASSWORD Press the button to enter the
settings menu.
1. Select
Connectivity Features.
2. Select
Vehicle Hotspot.
3. Select
Settings.
4. Select
SSID: ___.
5. Enter your required SSID.
6. Select
Done.
7. Select
Password: ___.
8. Enter your required password.
9. Select
Done.
371
Edge (CDQ) Canada/United States of America, enUSA, Edition date: 201907, Third-Printing- Vehicle Wi-Fi Hotspot
Page 385 of 495
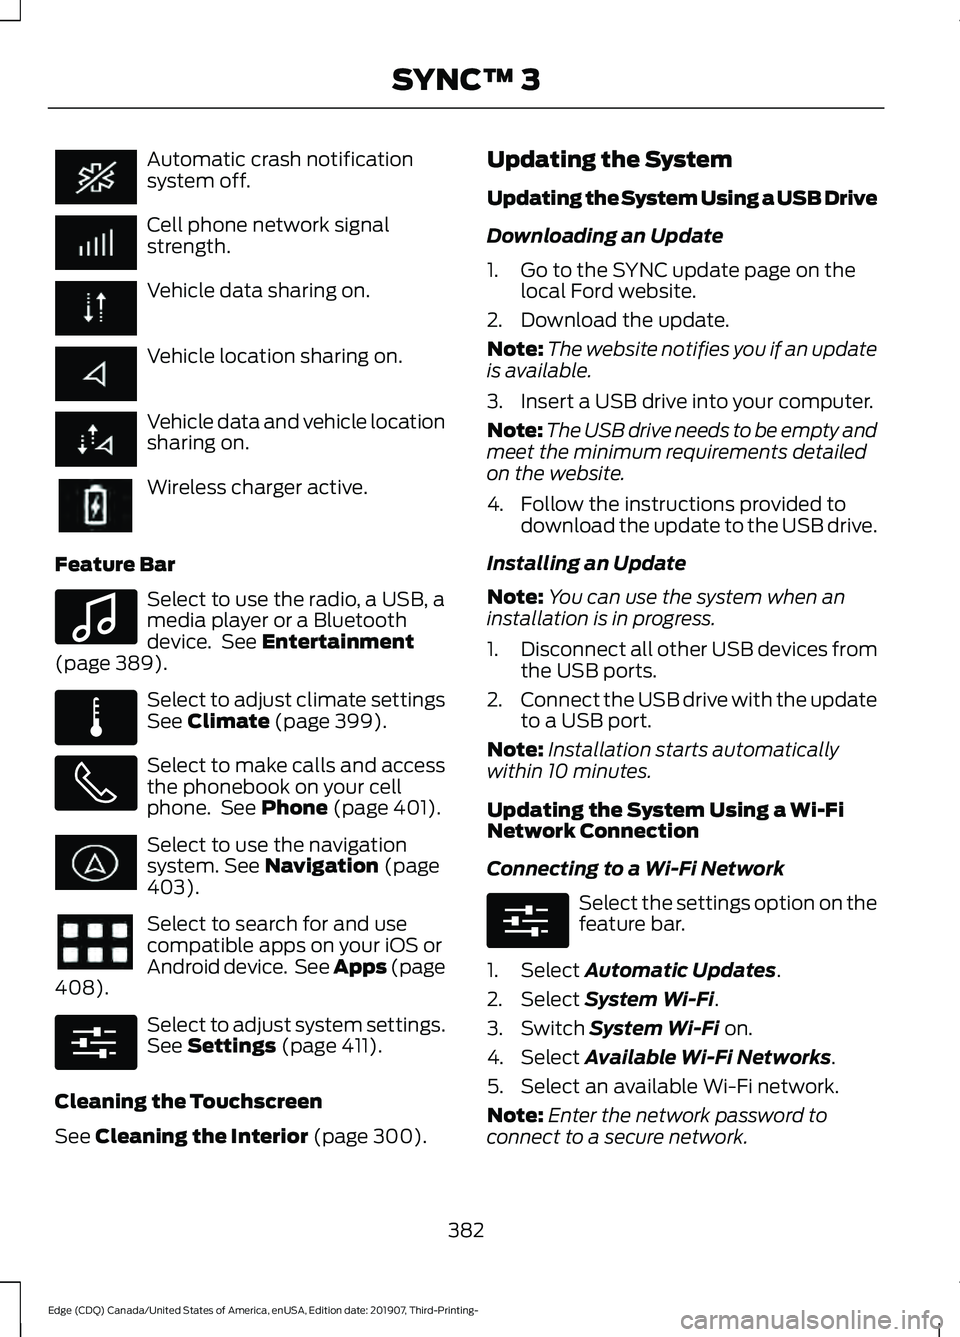
Automatic crash notification
system off.
Cell phone network signal
strength.
Vehicle data sharing on.
Vehicle location sharing on.
Vehicle data and vehicle location
sharing on.
Wireless charger active.
Feature Bar Select to use the radio, a USB, a
media player or a Bluetooth
device. See Entertainment
(page 389). Select to adjust climate settings
See
Climate (page 399).
Select to make calls and access
the phonebook on your cell
phone. See
Phone (page 401).
Select to use the navigation
system.
See Navigation (page
403). Select to search for and use
compatible apps on your iOS or
Android device. See Apps (page
408
). Select to adjust system settings.
See
Settings (page 411).
Cleaning the Touchscreen
See
Cleaning the Interior (page 300). Updating the System
Updating the System Using a USB Drive
Downloading an Update
1. Go to the SYNC update page on the
local Ford website.
2. Download the update.
Note: The website notifies you if an update
is available.
3. Insert a USB drive into your computer.
Note: The USB drive needs to be empty and
meet the minimum requirements detailed
on the website.
4. Follow the instructions provided to download the update to the USB drive.
Installing an Update
Note: You can use the system when an
installation is in progress.
1. Disconnect all other USB devices from
the USB ports.
2. Connect the USB drive with the update
to a USB port.
Note: Installation starts automatically
within 10 minutes.
Updating the System Using a Wi-Fi
Network Connection
Connecting to a Wi-Fi Network Select the settings option on the
feature bar.
1. Select
Automatic Updates.
2. Select
System Wi-Fi.
3. Switch
System Wi-Fi on.
4. Select
Available Wi-Fi Networks.
5. Select an available Wi-Fi network.
Note: Enter the network password to
connect to a secure network.
382
Edge (CDQ) Canada/United States of America, enUSA, Edition date: 201907, Third-Printing- SYNC™ 3 E100027 E283811 E280315 E280315
Page 418 of 495
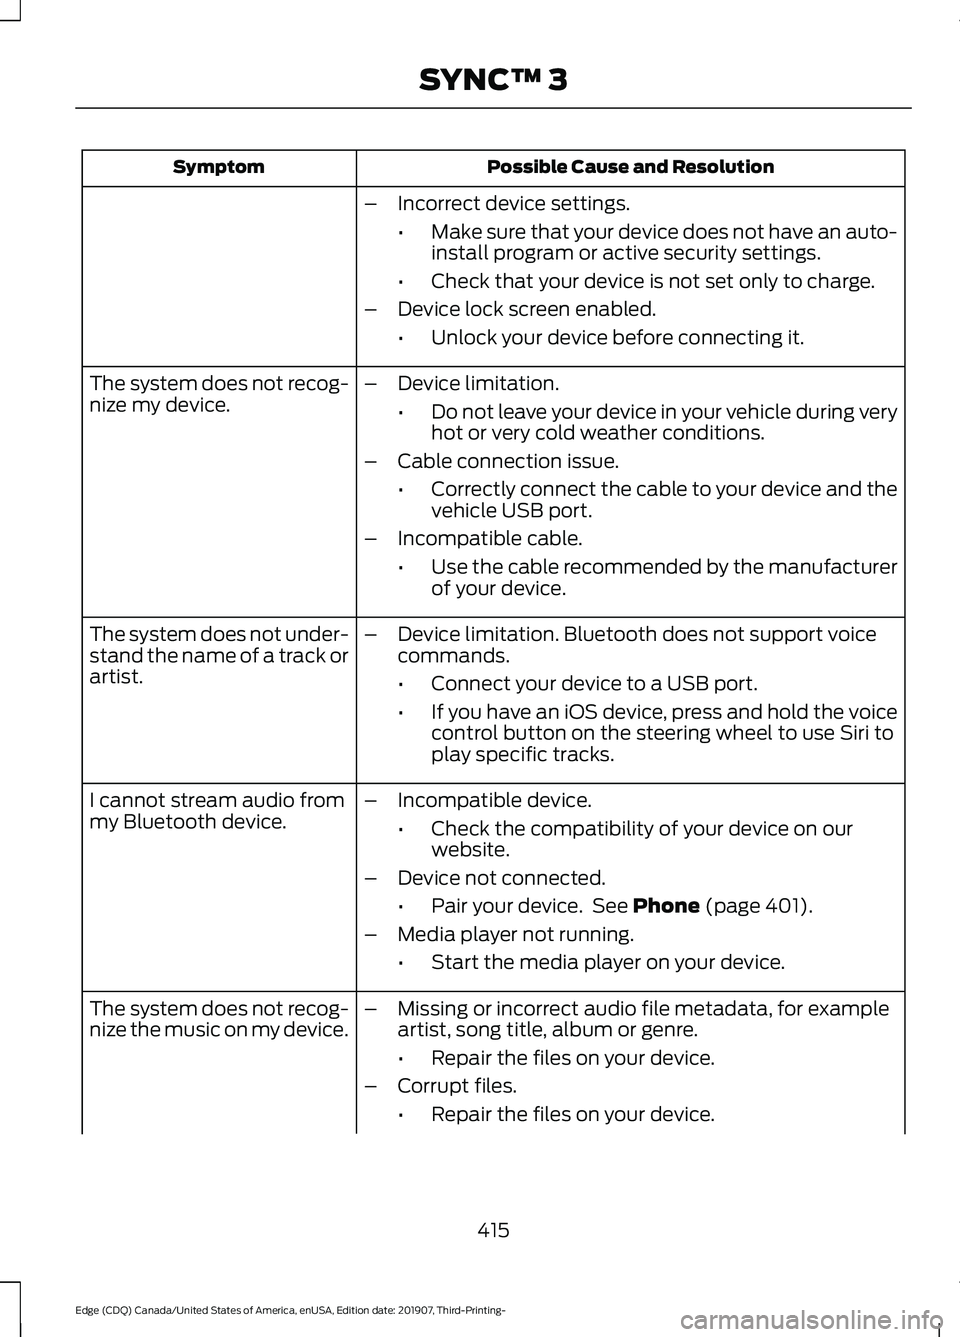
Possible Cause and Resolution
Symptom
–Incorrect device settings.
•Make sure that your device does not have an auto-
install program or active security settings.
• Check that your device is not set only to charge.
– Device lock screen enabled.
•Unlock your device before connecting it.
The system does not recog-
nize my device. –
Device limitation.
•Do not leave your device in your vehicle during very
hot or very cold weather conditions.
– Cable connection issue.
•Correctly connect the cable to your device and the
vehicle USB port.
– Incompatible cable.
•Use the cable recommended by the manufacturer
of your device.
The system does not under-
stand the name of a track or
artist. –
Device limitation. Bluetooth does not support voice
commands.
•Connect your device to a USB port.
• If you have an iOS device, press and hold the voice
control button on the steering wheel to use Siri to
play specific tracks.
I cannot stream audio from
my Bluetooth device. –
Incompatible device.
•Check the compatibility of your device on our
website.
– Device not connected.
•Pair your device. See Phone (page 401).
– Media player not running.
•Start the media player on your device.
The system does not recog-
nize the music on my device. –
Missing or incorrect audio file metadata, for example
artist, song title, album or genre.
•Repair the files on your device.
– Corrupt files.
•Repair the files on your device.
415
Edge (CDQ) Canada/United States of America, enUSA, Edition date: 201907, Third-Printing- SYNC™ 3
Page 431 of 495
Less Cost to Properly Maintain Your
Vehicle
Ford Protect extended service plan also
offers a Premium Maintenance Plan that
covers all scheduled maintenance, and
selected wear items. The coverage is
prepaid, so you never have to worry about
the cost of your vehicle
’s maintenance.
Covered maintenance includes:
• Windshield wiper blades.
• Spark plugs.
• The clutch disc (if equipped).
• Brake pads and linings.
• Shock absorbers.
• Struts.
• Engine Belts.
• Engine coolant hoses, clamps and
o-rings.
• Diesel exhaust fluid replenishment (if
equipped).
• Cabin air filter replacement every
20,000 mi (32,000 km) (electric
vehicles only).
Interest Free Finance Options
Just a 5% down payment will provide you
with an affordable, no interest, no fee
payment program allowing you all the
security and benefits Ford Protect
extended service plan has to offer while
paying over time. You are pre-approved
with no credit check or hassles. To learn
more, call our Ford Protect extended
service plan specialists at 800-367-3377.
Ford Protect Extended Service Plan
P.O. Box 321067
Detroit, MI 48232 Ford Protect Extended Service
Plan (CANADA ONLY)
You can get more protection for your
vehicle by purchasing a Ford Protect
extended service plan. Ford Protect
extended service plan is the only service
contract backed by Ford Motor Company
of Canada, Limited. Depending on the plan
you purchase, Ford Protect extended
service plan provides benefits such as:
•
Rental reimbursement.
• Coverage for certain maintenance and
wear items.
• Protection against repair costs after
your New Vehicle Limited Warranty
Coverage expires.
• Roadside Assistance benefits.
There are several Ford Protect extended
service plans available in various time,
distance and deductible combinations.
Each plan is tailored to fit your own driving
needs, including reimbursement for towing
and rental. When you purchase Ford
Protect extended service plan, you receive
added peace-of-mind protection
throughout Canada, the United States and
Mexico, provided by a network of
participating authorized Ford Motor
Company dealers.
Note: Repairs performed outside of Canada
and the United States are not eligible for
Ford Protect extended service plan
coverage.
This information is subject to change. For
more information; visit your local Ford of
Canada dealer or www.ford.ca to find the
Ford Protect extended service plan that is
right for you.
428
Edge (CDQ) Canada/United States of America, enUSA, Edition date: 201907, Third-Printing- Ford Protect
Page 461 of 495
1. Safe and Lawful Use
You acknowledge that devoting attention
to the TeleNav Software may pose a risk
of injury or death to you and others in
situations that otherwise require your
undivided attention, and you therefore
agree to comply with the following when
using the TeleNav Software:
(a) observe all traffic laws and otherwise
drive safely;
(b) use your own personal judgment while
driving. If you feel that a route suggested
by the TeleNav Software instructs you to
perform an unsafe or illegal maneuver,
places you in an unsafe situation, or directs
you into an area that you consider to be
unsafe, do not follow such instructions;
(c) do not input destinations, or otherwise
manipulate the TeleNav Software, unless
your vehicle is stationary and parked;
(d) do not use the TeleNav Software for
any illegal, unauthorized, unintended,
unsafe, hazardous, or unlawful purposes,
or in any manner inconsistent with this
Agreement;
(e) arrange all GPS and wireless devices
and cables necessary for use of the
TeleNav Software in a secure manner in
your vehicle so that they will not interfere
with your driving and will not prevent the
operation of any safety device (such as an
airbag).
You agree to indemnify and hold TeleNav
harmless against all claims resulting from
any dangerous or otherwise inappropriate
use of the TeleNav Software in any moving
vehicle, including as a result of your failure
to comply with the directions above.
2. Account Information
You agree: (a) when registering the
TeleNav Software, to provide TeleNav with
true, accurate, current, and complete
information about yourself, and (b) to
inform TeleNav promptly of any changes
to such information, and to keep it true,
accurate, current and complete.
3. Software License
•
Subject to your compliance with the
terms of this Agreement, TeleNav
hereby grants to you a personal,
non-exclusive, non-transferable license
(except as expressly permitted below
in connection with your permanent
transfer of the TeleNav Software
license), without the right to
sublicense, to use the TeleNav
Software (in object code form only) in
order to access and use the TeleNav
Software. This license shall terminate
upon any termination or expiration of
this Agreement. You agree that you will
use the TeleNav Software only for your
personal business or leisure purposes,
and not to provide commercial
navigation services to other parties.
3.1 License Limitations
• (a) reverse engineer, decompile,
disassemble, translate, modify, alter
or otherwise change the TeleNav
Software or any part thereof;
(b)
attempt to derive the source code,
audio library or structure of the
TeleNav Software without the prior
express written consent of TeleNav;
(c)
remove from the TeleNav
Software, or alter, any of TeleNav's or
its suppliers' trademarks, trade names,
logos, patent or copyright notices, or
other notices or markings;
(d)
458
Edge (CDQ) Canada/United States of America, enUSA, Edition date: 201907, Third-Printing- Appendices