clock FORD ESCAPE 2002 1.G Owners Manual
[x] Cancel search | Manufacturer: FORD, Model Year: 2002, Model line: ESCAPE, Model: FORD ESCAPE 2002 1.GPages: 280, PDF Size: 2.75 MB
Page 24 of 280
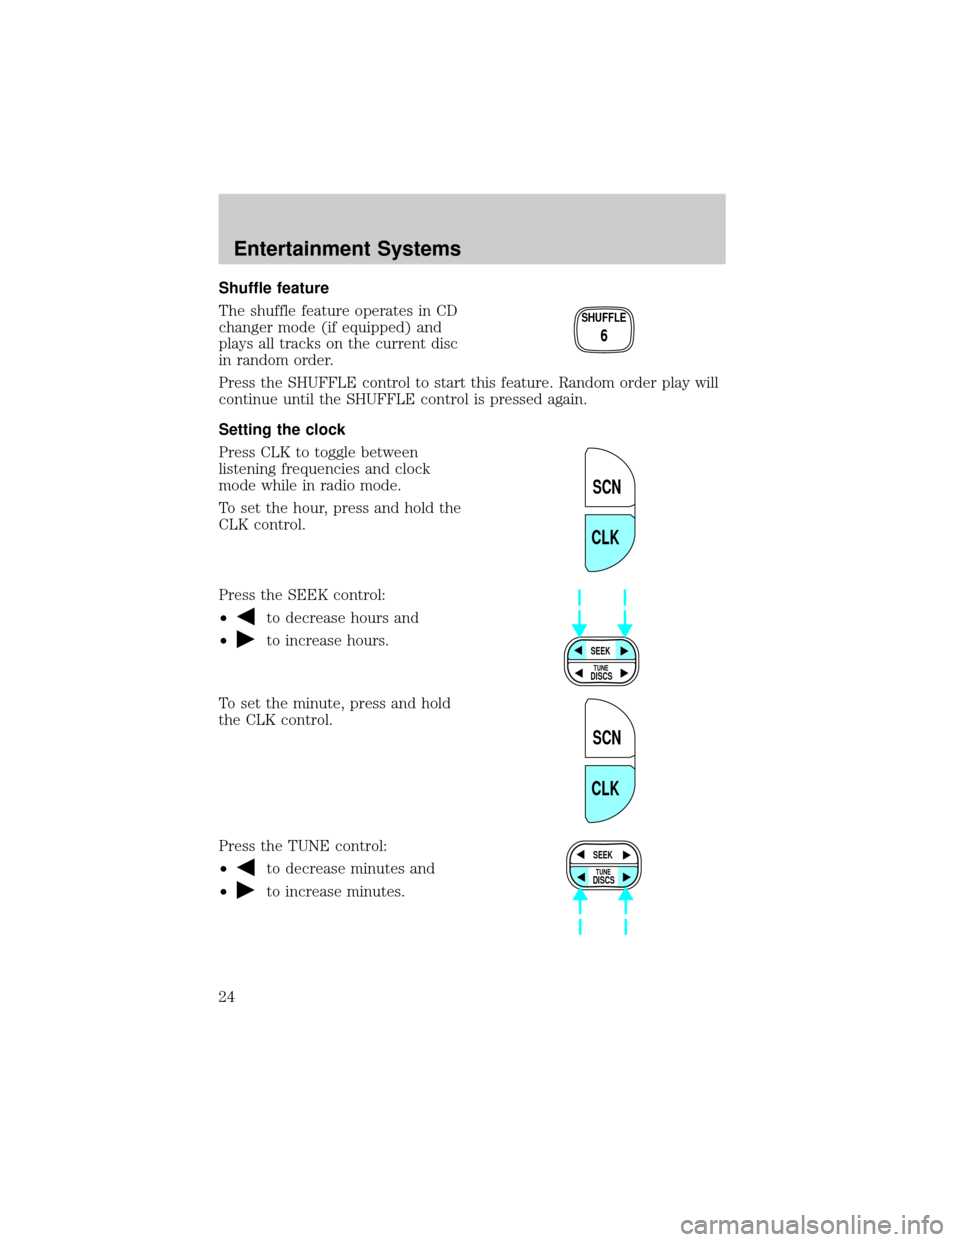
Shuffle feature
The shuffle feature operates in CD
changer mode (if equipped) and
plays all tracks on the current disc
in random order.
Press the SHUFFLE control to start this feature. Random order play will
continue until the SHUFFLE control is pressed again.
Setting the clock
Press CLK to toggle between
listening frequencies and clock
mode while in radio mode.
To set the hour, press and hold the
CLK control.
Press the SEEK control:
²
to decrease hours and
²
to increase hours.
To set the minute, press and hold
the CLK control.
Press the TUNE control:
²
to decrease minutes and
²
to increase minutes.
SHUFFLE
6
SCN
CLK
SEEK
DISCS
TUNE
SCN
CLK
SEEK
DISCS
TUNE
Entertainment Systems
24
Page 33 of 280
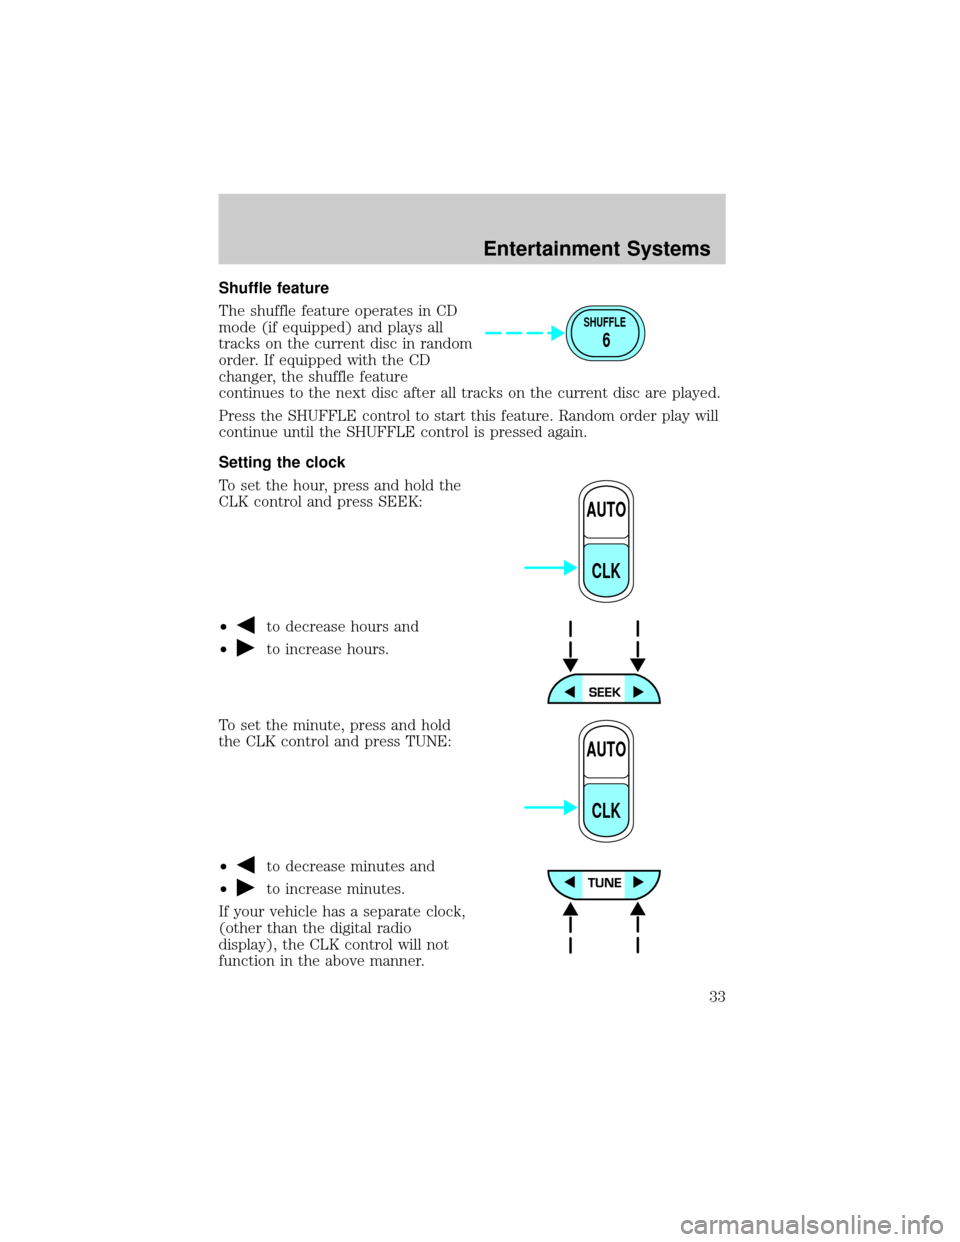
Shuffle feature
The shuffle feature operates in CD
mode (if equipped) and plays all
tracks on the current disc in random
order. If equipped with the CD
changer, the shuffle feature
continues to the next disc after all tracks on the current disc are played.
Press the SHUFFLE control to start this feature. Random order play will
continue until the SHUFFLE control is pressed again.
Setting the clock
To set the hour, press and hold the
CLK control and press SEEK:
²
to decrease hours and
²
to increase hours.
To set the minute, press and hold
the CLK control and press TUNE:
²
to decrease minutes and
²
to increase minutes.
If your vehicle has a separate clock,
(other than the digital radio
display), the CLK control will not
function in the above manner.
SHUFFLE
6
AUTO
CLK
AUTO
CLK
Entertainment Systems
33
Page 34 of 280
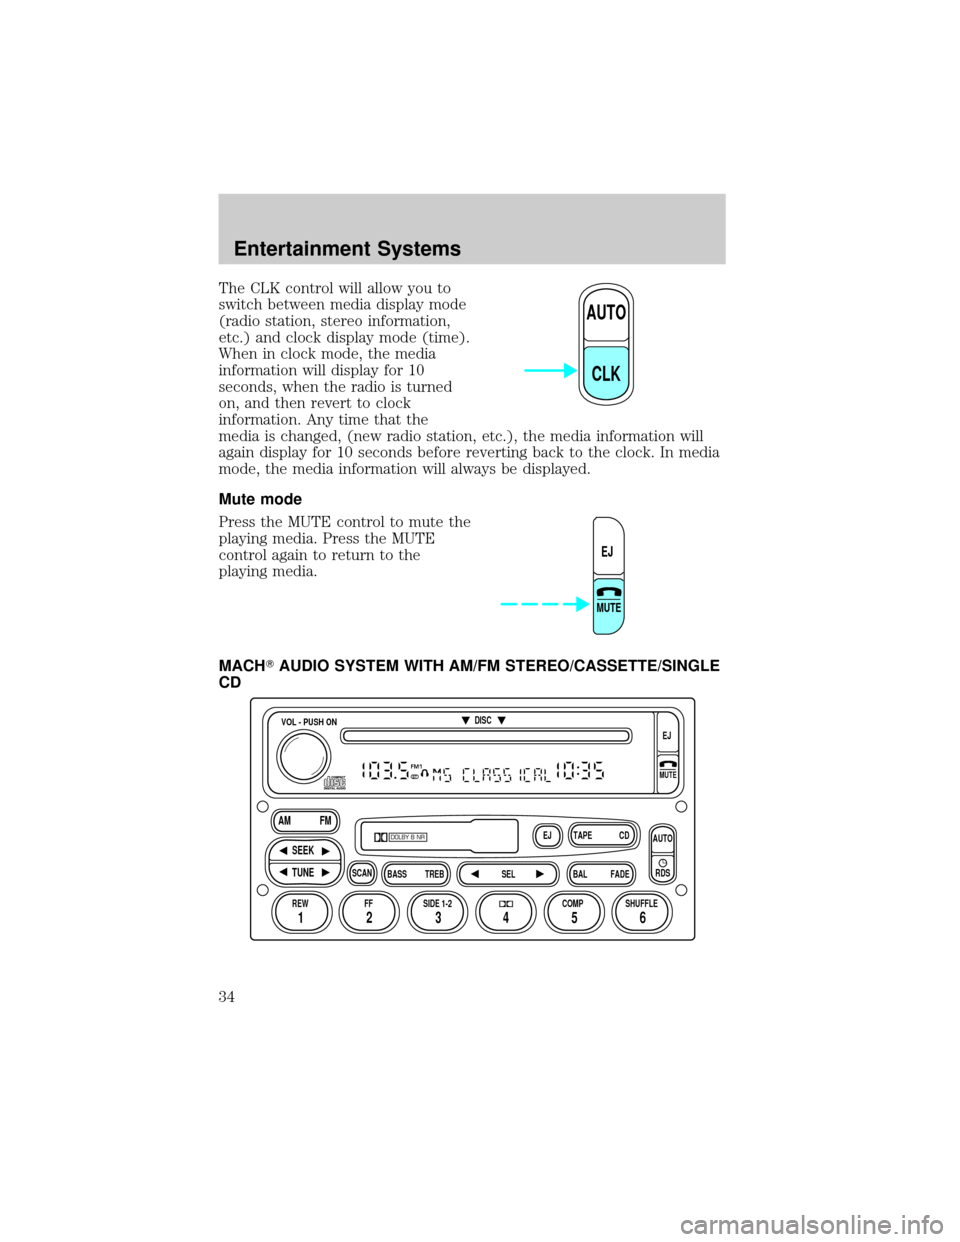
The CLK control will allow you to
switch between media display mode
(radio station, stereo information,
etc.) and clock display mode (time).
When in clock mode, the media
information will display for 10
seconds, when the radio is turned
on, and then revert to clock
information. Any time that the
media is changed, (new radio station, etc.), the media information will
again display for 10 seconds before reverting back to the clock. In media
mode, the media information will always be displayed.
Mute mode
Press the MUTE control to mute the
playing media. Press the MUTE
control again to return to the
playing media.
MACHTAUDIO SYSTEM WITH AM/FM STEREO/CASSETTE/SINGLE
CD
AUTO
CLK
EJ
MUTE
FM1ST
REW FFSCAN
BASS TREB SEL BALTAPE DISC
EJ CD
FADEAUTO
RDS
SIDE 1-2 COMP SHUFFLEEJ
MUTE
VOL - PUSH ON
SEEK
TUNE AM FM
12 3456
DOLBY B NR
Entertainment Systems
34
Page 43 of 280
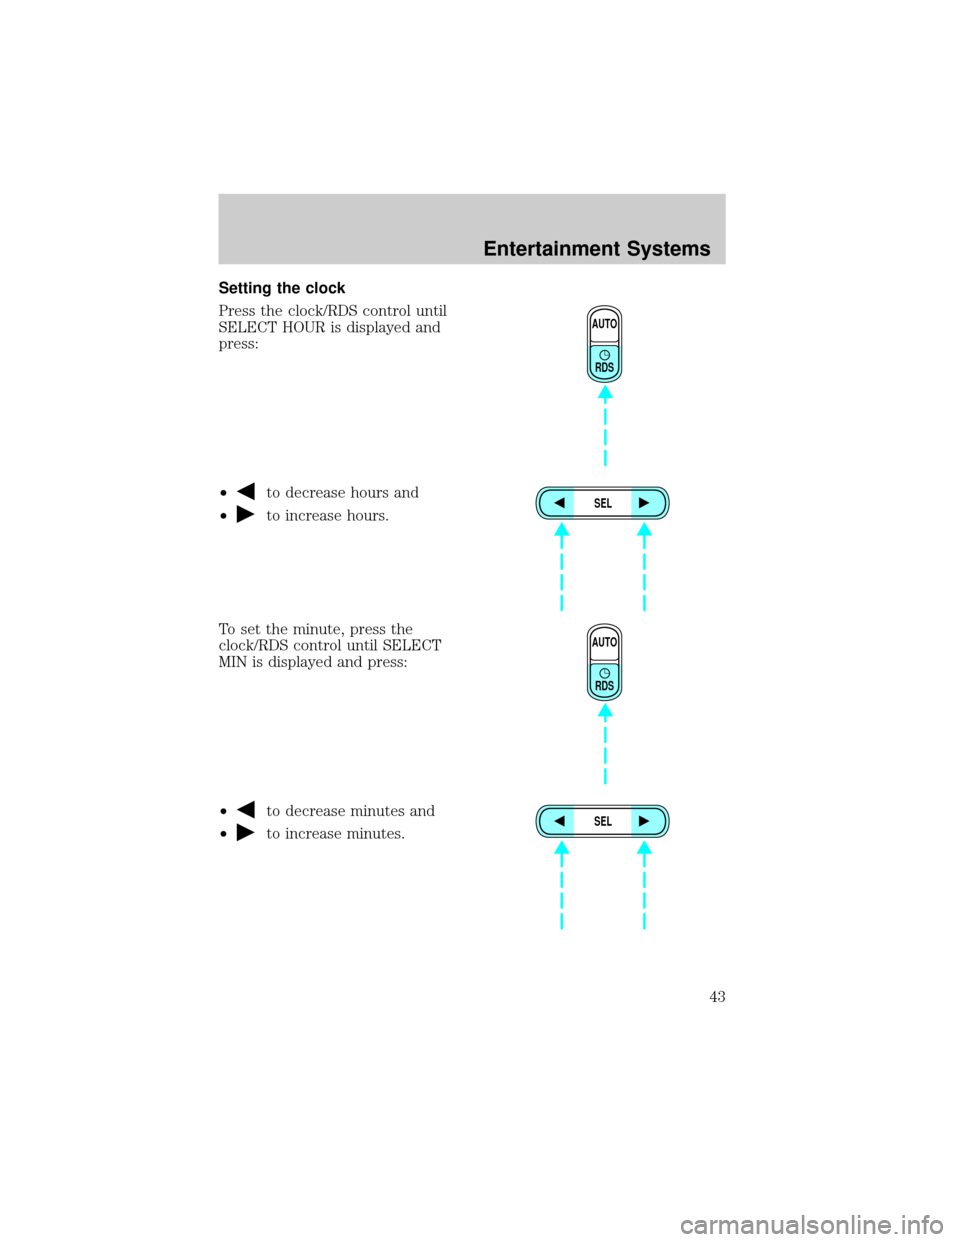
Setting the clock
Press the clock/RDS control until
SELECT HOUR is displayed and
press:
²
to decrease hours and
²
to increase hours.
To set the minute, press the
clock/RDS control until SELECT
MIN is displayed and press:
²
to decrease minutes and
²
to increase minutes.
AUTO
RDS
SEL
AUTO
RDS
SEL
Entertainment Systems
43
Page 55 of 280
While in FM mode, two menus are available.If RDS is turned OFF, you
can access the following:
²SELECT HOURS Ð Refer toSetting the clock.
²SELECT MINUTES Ð Refer toSetting the clock.
²RDS OFF Ð Refer toRadio data system feature.
If RDS is turned ON, you can access the following:
²TRAFFIC ON/OFF-Refer toTraffic announcements.
²FIND type-Refer toProgram type.
²SHOW (NAME, TYPE, NONE)- Refer toRadio data system feature.
²RDS ONÐ Refer toRadio data system feature.
²SELECT HOURS Ð Refer toSetting the clock.
²SELECT MINUTES ÐRefer toSetting the clock.
When in CD mode, you can access: SELECT HOURS, SELECT MINUTES
or COMP ON/OFF.
SELECT HOURS, SELECT MINUTESÐ Allows you to adjust the hours
and minutes. Refer toSetting the clock.
TRAFFIC ON/OFFÐ Traffic announcements can be programmed as local
or distant. Refer toTraffic announcements.
RDS ON/OFFÐ This feature allows your audio system to receive text
information from RDS-equipped FM radio stations. Refer toRadio Data
System feature.
FIND type Ð Allows you to select your desired FM program type and
search for that selection.
SHOW Ð Allows you to select from NAME (displays the name of the
radio station), TYPE (displays the RDS program type: rock, jazz, etc.), or
NONE (deactivates the RDS display).
Entertainment Systems
55
Page 59 of 280
Use the SEL control to select the
desired signal mode (the selected
mode will appear in the display).
The following signal modes can be
selected:
²DSP OFFÐdisengages the feature
²NEWSкvoice-onlyº type of sound with a limited audio band
²JAZZ CLUBÐjazz club with clearly reflected sounds
²HALLÐrectangular concert hall capacity of about 2 000
²CHURCHÐchurch with a high vault
²STADIUMÐoutdoor stadium with a capacity of about 30 000
Press the DSP control again to access the Occupancy Modes. Use the
SEL control to optimize the sound based upon the occupants in the
vehicle. The following occupancy modes can be selected:
²ALL SEATS Ð Optimizes the acoustic sound for all seating locations.
Rear seat performance may be compromised in the interest of the
front seats.
²DRIVER SEAT Ð Optimizes the acoustic sound for the driver. Rear
seat and passenger seat performance may be compromised in favor of
the driver.
²REAR SEATS- Optimizes the acoustic sound for the rear seat
passengers and reduces the audio level in the front speakers. This
enables the front seat passengers to speak while the rear seat
passengers listen to the audio system.
Mute mode
Press the control to mute the
playing media. Press the control
again to return to the playing media.
Setting the clock
Press the MENU control until
SELECT HOUR or SELECT
MINUTE is displayed. (The menu
mode must be engaged to enable
clock mode).
SEL
Entertainment Systems
59
Page 60 of 280
Use the SEL control to manually set
the time.
²Press
to increase
hours/minutes.
²Press
to decrease
hours/minutes.
Press the MENU control again to disengage the clock mode.
TROUBLESHOOTING THE CD CHANGER (IF EQUIPPED)
The laser beam used in the compact disc player is harmful to the
eyes. Do not attempt to disassemble the case.
If sound skips:
²You may be traveling on a rough road, playing badly scratched discs or
the disc may be dirty. Skipping will not scratch the discs or damage
the player.
If your changer does not work, it may be that:
²A disc is already loaded where you want to insert a disc.
²The disc is inserted with the label surface downward.
²The disc is dusty or defective.
²The player's internal temperature is above 60ÉC (140ÉF). Allow the
player to cool down before operating.
²A disc with format and dimensions not within industry standards is
inserted.
CLEANING COMPACT DISCS
Inspect all discs for contamination before playing. If necessary, clean
discs only with an approved CD cleaner and wipe from the center out to
the edge. Do not use circular motion.
CD AND CD CHANGER CARE
²Handle discs by their edges only. Never touch the playing surface.
²Do not expose discs to direct sunlight or heat sources for extended
periods of time.
²Do not insert more than one disc into each slot of the CD changer
magazine.
CD units are designed to play commercially pressed 12 cm audio
compact discs only. Due to technical incompatibility, certain
SEL
Entertainment Systems
60
Page 71 of 280
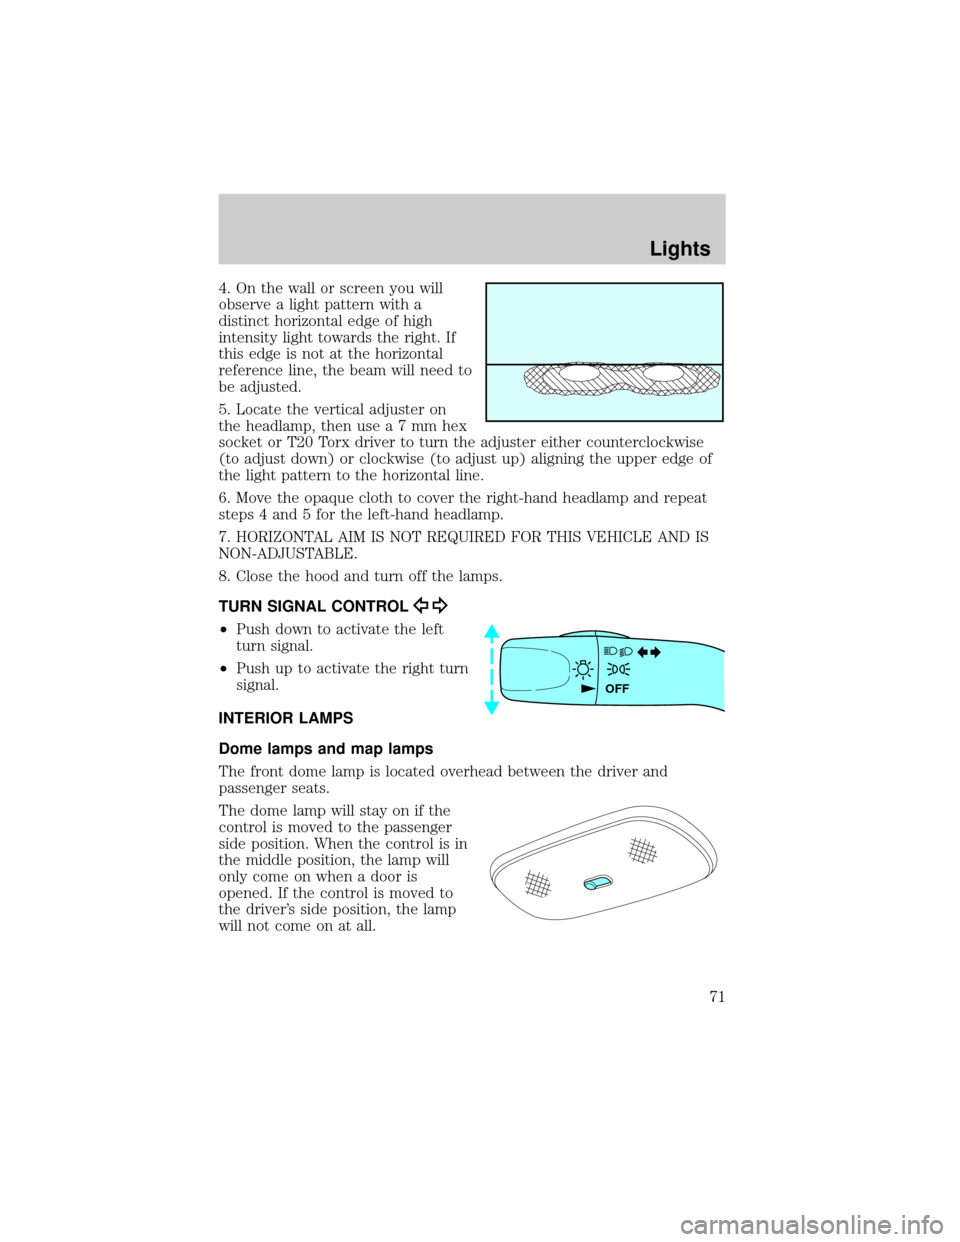
4. On the wall or screen you will
observe a light pattern with a
distinct horizontal edge of high
intensity light towards the right. If
this edge is not at the horizontal
reference line, the beam will need to
be adjusted.
5. Locate the vertical adjuster on
the headlamp, then usea7mmhex
socket or T20 Torx driver to turn the adjuster either counterclockwise
(to adjust down) or clockwise (to adjust up) aligning the upper edge of
the light pattern to the horizontal line.
6. Move the opaque cloth to cover the right-hand headlamp and repeat
steps 4 and 5 for the left-hand headlamp.
7. HORIZONTAL AIM IS NOT REQUIRED FOR THIS VEHICLE AND IS
NON-ADJUSTABLE.
8. Close the hood and turn off the lamps.
TURN SIGNAL CONTROL
²Push down to activate the left
turn signal.
²Push up to activate the right turn
signal.
INTERIOR LAMPS
Dome lamps and map lamps
The front dome lamp is located overhead between the driver and
passenger seats.
The dome lamp will stay on if the
control is moved to the passenger
side position. When the control is in
the middle position, the lamp will
only come on when a door is
opened. If the control is moved to
the driver's side position, the lamp
will not come on at all.
OFF
Lights
71
Page 72 of 280
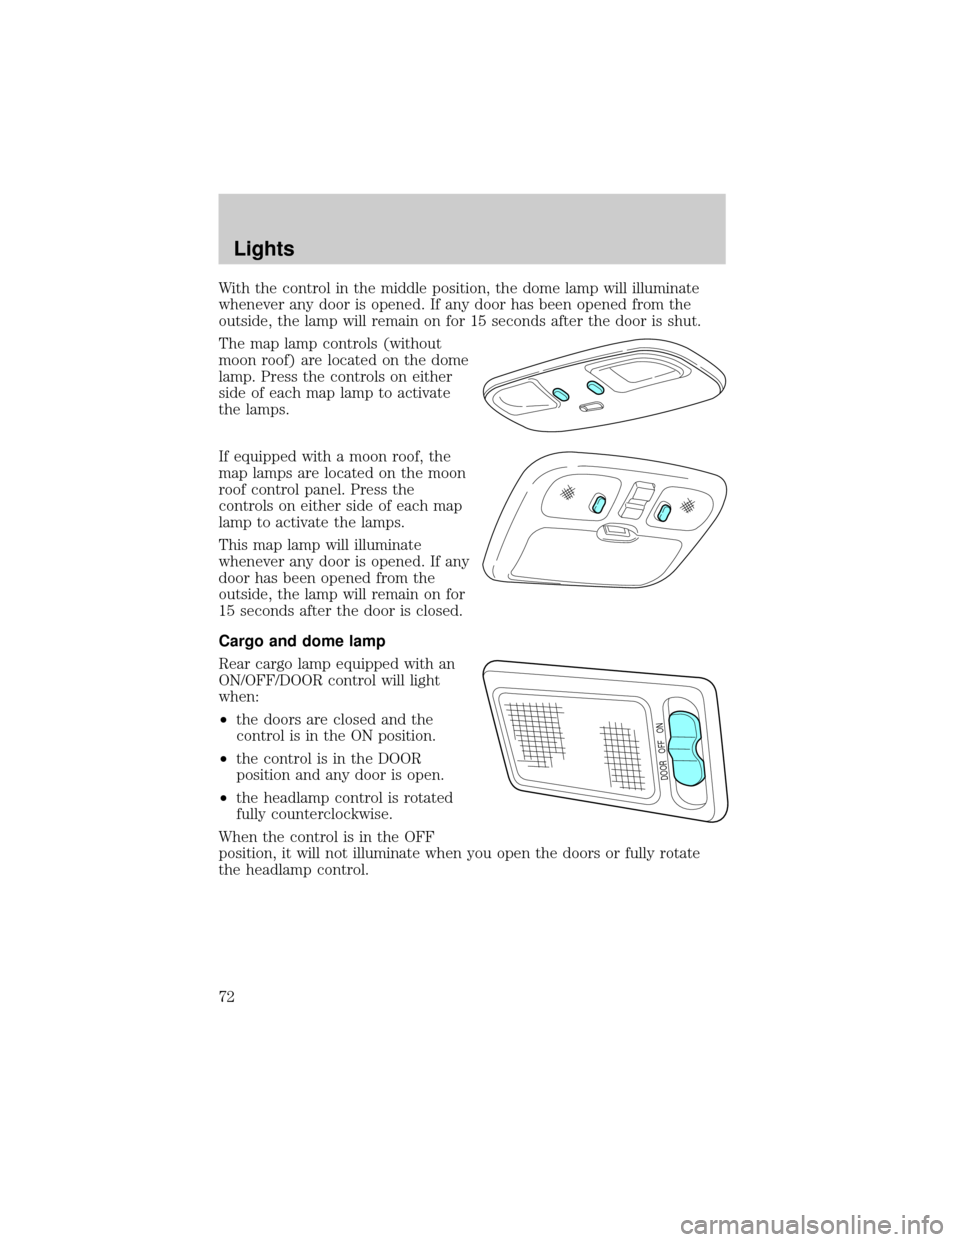
With the control in the middle position, the dome lamp will illuminate
whenever any door is opened. If any door has been opened from the
outside, the lamp will remain on for 15 seconds after the door is shut.
The map lamp controls (without
moon roof) are located on the dome
lamp. Press the controls on either
side of each map lamp to activate
the lamps.
If equipped with a moon roof, the
map lamps are located on the moon
roof control panel. Press the
controls on either side of each map
lamp to activate the lamps.
This map lamp will illuminate
whenever any door is opened. If any
door has been opened from the
outside, the lamp will remain on for
15 seconds after the door is closed.
Cargo and dome lamp
Rear cargo lamp equipped with an
ON/OFF/DOOR control will light
when:
²the doors are closed and the
control is in the ON position.
²the control is in the DOOR
position and any door is open.
²the headlamp control is rotated
fully counterclockwise.
When the control is in the OFF
position, it will not illuminate when you open the doors or fully rotate
the headlamp control.
DOOR OFF ON
Lights
72
Page 76 of 280

1. Open the liftgate to expose the
lamp assemblies.
2. Remove the two screws from the
lamp assembly.
3. Carefully remove the lamp
assembly by pulling it rearward to
disengage snap features on the
outward side of the lamp.
4. Twist the bulb socket
counterclockwise and remove from
lamp assembly.
5. Pull the bulb straight out of the
socket and push in the new bulb.
6. To complete installation, follow
the removal procedure in reverse
order.
Replacing license plate lamp bulbs
1. Pry the license plate lamp
assembly (located above the license
plate) from the liftgate.
2. Remove bulb socket from lamp
assembly by turning
counterclockwise.
3. Pull the bulb out from the socket
and push in the new bulb.
4. Install the bulb socket in lamp
assembly turning it clockwise,
5. To install, press the lamp assembly in to liftgate.
Lights
76