FORD ESCAPE 2003 1.G Workshop Manual
Manufacturer: FORD, Model Year: 2003, Model line: ESCAPE, Model: FORD ESCAPE 2003 1.GPages: 240, PDF Size: 2.6 MB
Page 51 of 240
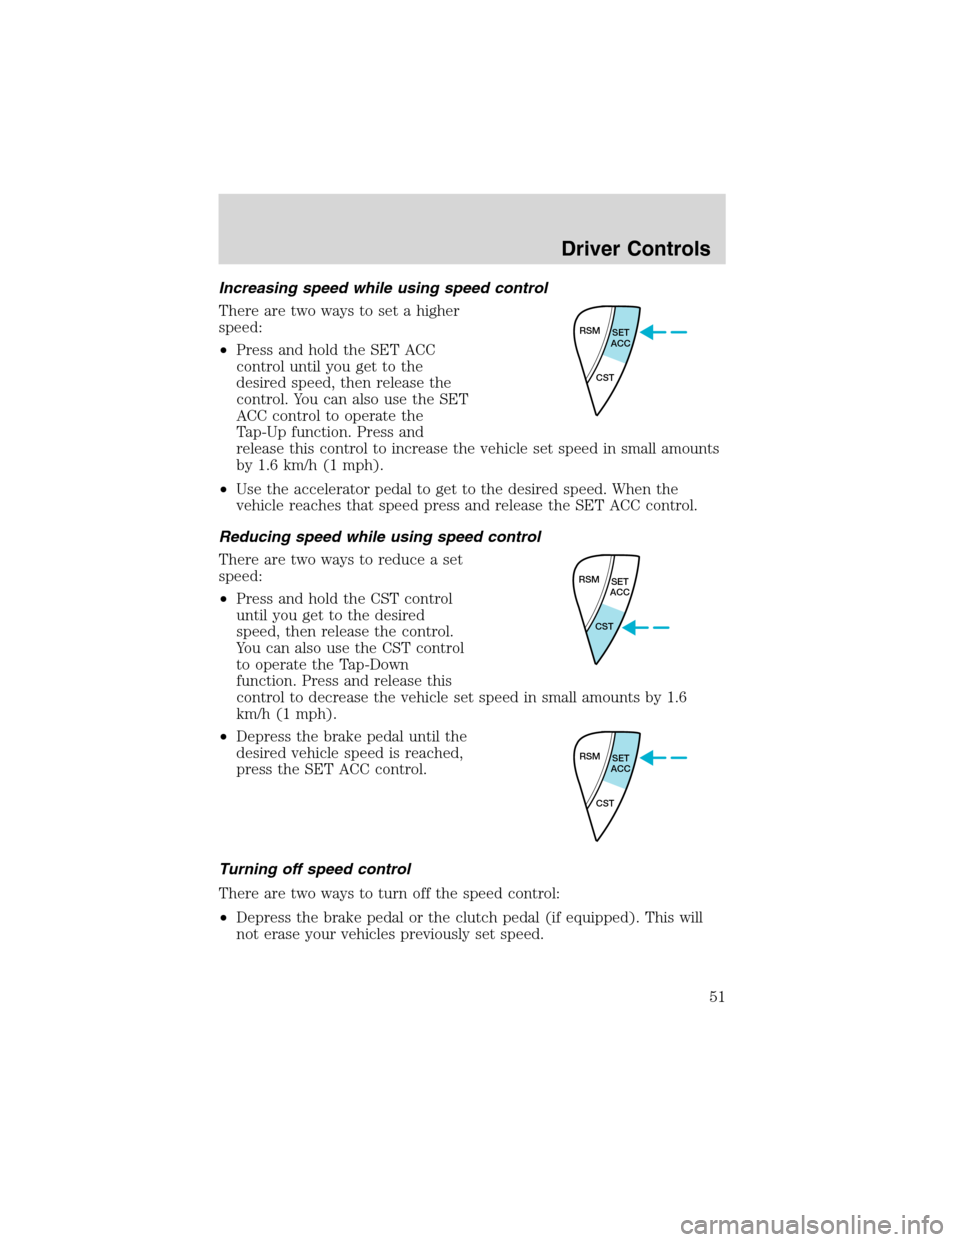
Increasing speed while using speed control
There are two ways to set a higher
speed:
•Press and hold the SET ACC
control until you get to the
desired speed, then release the
control. You can also use the SET
ACC control to operate the
Tap-Up function. Press and
release this control to increase the vehicle set speed in small amounts
by 1.6 km/h (1 mph).
•Use the accelerator pedal to get to the desired speed. When the
vehicle reaches that speed press and release the SET ACC control.
Reducing speed while using speed control
There are two ways to reduce a set
speed:
•Press and hold the CST control
until you get to the desired
speed, then release the control.
You can also use the CST control
to operate the Tap-Down
function. Press and release this
control to decrease the vehicle set speed in small amounts by 1.6
km/h (1 mph).
•Depress the brake pedal until the
desired vehicle speed is reached,
press the SET ACC control.
Turning off speed control
There are two ways to turn off the speed control:
•Depress the brake pedal or the clutch pedal (if equipped). This will
not erase your vehicles previously set speed.
RSM
SET
ACC
CST
RSM
SET
ACC
CST
RSM
SET
ACC
CST
Driver Controls
51
Page 52 of 240
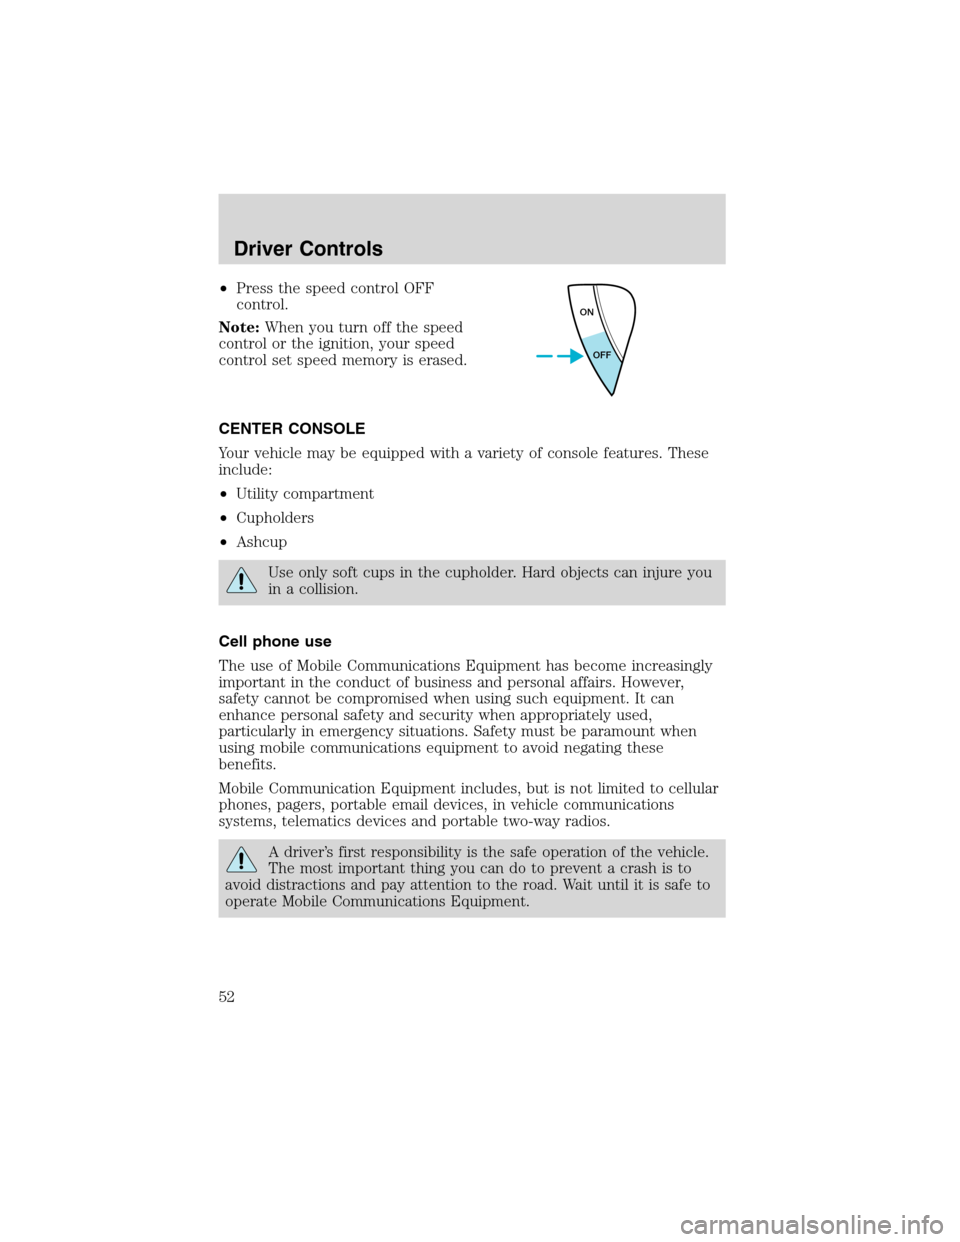
•Press the speed control OFF
control.
Note:When you turn off the speed
control or the ignition, your speed
control set speed memory is erased.
CENTER CONSOLE
Your vehicle may be equipped with a variety of console features. These
include:
•Utility compartment
•Cupholders
•Ashcup
Use only soft cups in the cupholder. Hard objects can injure you
in a collision.
Cell phone use
The use of Mobile Communications Equipment has become increasingly
important in the conduct of business and personal affairs. However,
safety cannot be compromised when using such equipment. It can
enhance personal safety and security when appropriately used,
particularly in emergency situations. Safety must be paramount when
using mobile communications equipment to avoid negating these
benefits.
Mobile Communication Equipment includes, but is not limited to cellular
phones, pagers, portable email devices, in vehicle communications
systems, telematics devices and portable two-way radios.
A driver’s first responsibility is the safe operation of the vehicle.
The most important thing you can do to prevent a crash is to
avoid distractions and pay attention to the road. Wait until it is safe to
operate Mobile Communications Equipment.
ON
OFF
Driver Controls
52
Page 53 of 240
MOON ROOF (IF EQUIPPED)
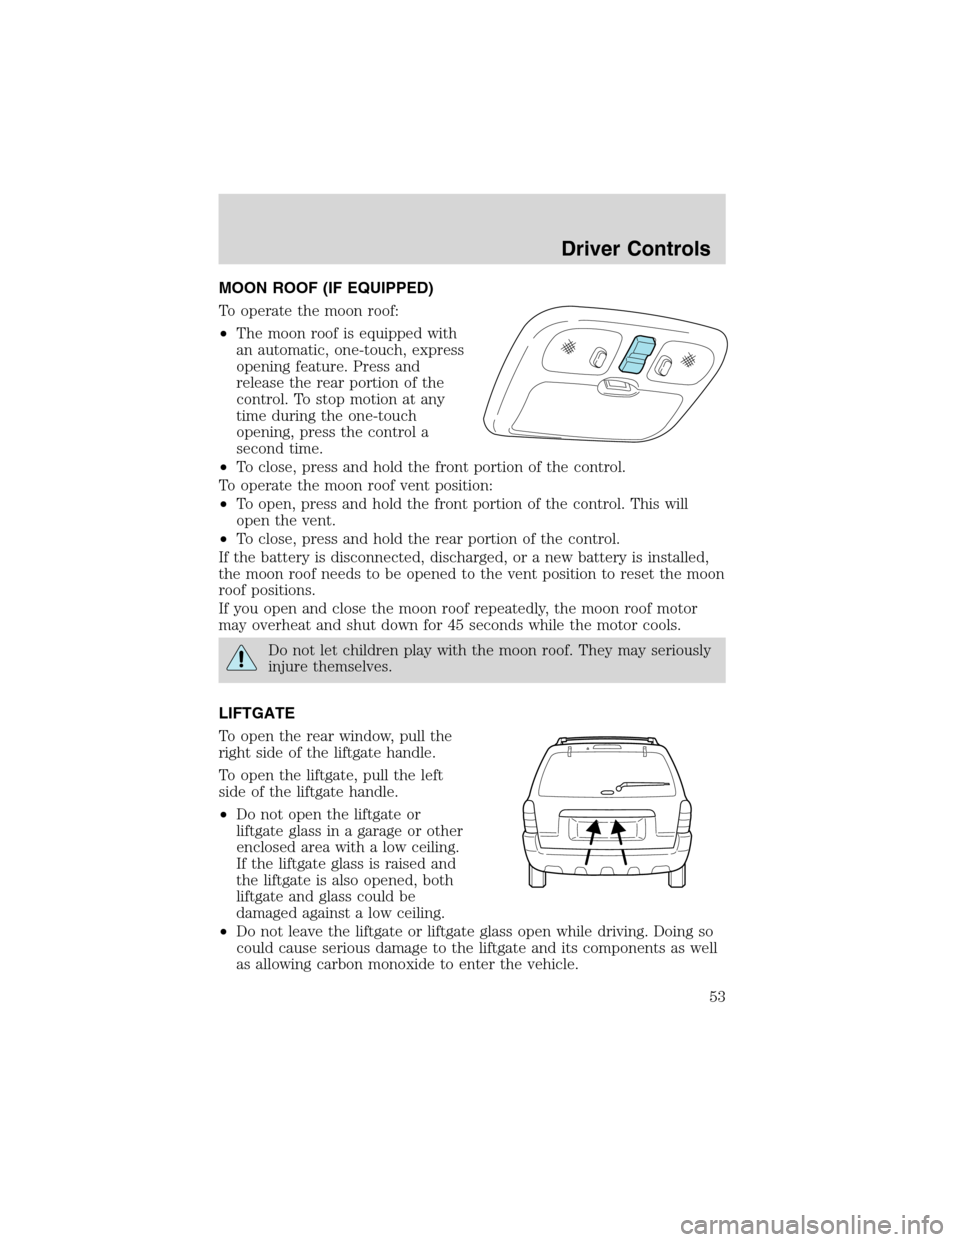
To operate the moon roof:
•The moon roof is equipped with
an automatic, one-touch, express
opening feature. Press and
release the rear portion of the
control. To stop motion at any
time during the one-touch
opening, press the control a
second time.
•To close, press and hold the front portion of the control.
To operate the moon roof vent position:
•To open, press and hold the front portion of the control. This will
open the vent.
•To close, press and hold the rear portion of the control.
If the battery is disconnected, discharged, or a new battery is installed,
the moon roof needs to be opened to the vent position to reset the moon
roof positions.
If you open and close the moon roof repeatedly, the moon roof motor
may overheat and shut down for 45 seconds while the motor cools.
Do not let children play with the moon roof. They may seriously
injure themselves.
LIFTGATE
To open the rear window, pull the
right side of the liftgate handle.
To open the liftgate, pull the left
side of the liftgate handle.
•Do not open the liftgate or
liftgate glass in a garage or other
enclosed area with a low ceiling.
If the liftgate glass is raised and
the liftgate is also opened, both
liftgate and glass could be
damaged against a low ceiling.
•Do not leave the liftgate or liftgate glass open while driving. Doing so
could cause serious damage to the liftgate and its components as well
as allowing carbon monoxide to enter the vehicle.
Driver Controls
53
Page 54 of 240
Make sure that the liftgate door and/or window are closed to
prevent exhaust fumes from being drawn into the vehicle. This
will also prevent passengers and cargo from falling out. If you must
drive with the liftgate door or window open, keep the vents open so
outside air comes into the vehicle.
CARGO SHADE (IF EQUIPPED)
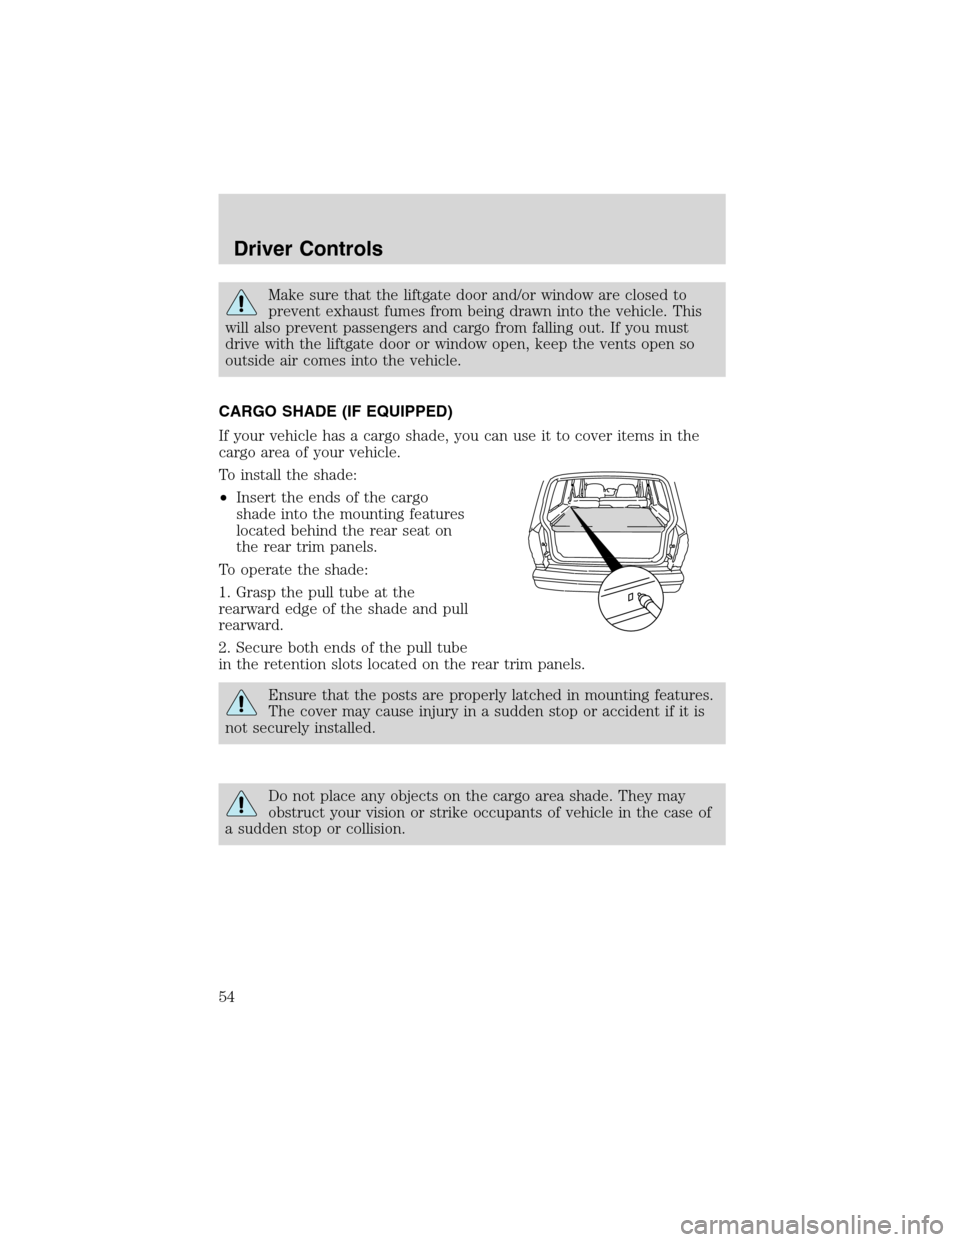
If your vehicle has a cargo shade, you can use it to cover items in the
cargo area of your vehicle.
To install the shade:
•Insert the ends of the cargo
shade into the mounting features
located behind the rear seat on
the rear trim panels.
To operate the shade:
1. Grasp the pull tube at the
rearward edge of the shade and pull
rearward.
2. Secure both ends of the pull tube
in the retention slots located on the rear trim panels.
Ensure that the posts are properly latched in mounting features.
The cover may cause injury in a sudden stop or accident if it is
not securely installed.
Do not place any objects on the cargo area shade. They may
obstruct your vision or strike occupants of vehicle in the case of
a sudden stop or collision.
Driver Controls
54
Page 55 of 240
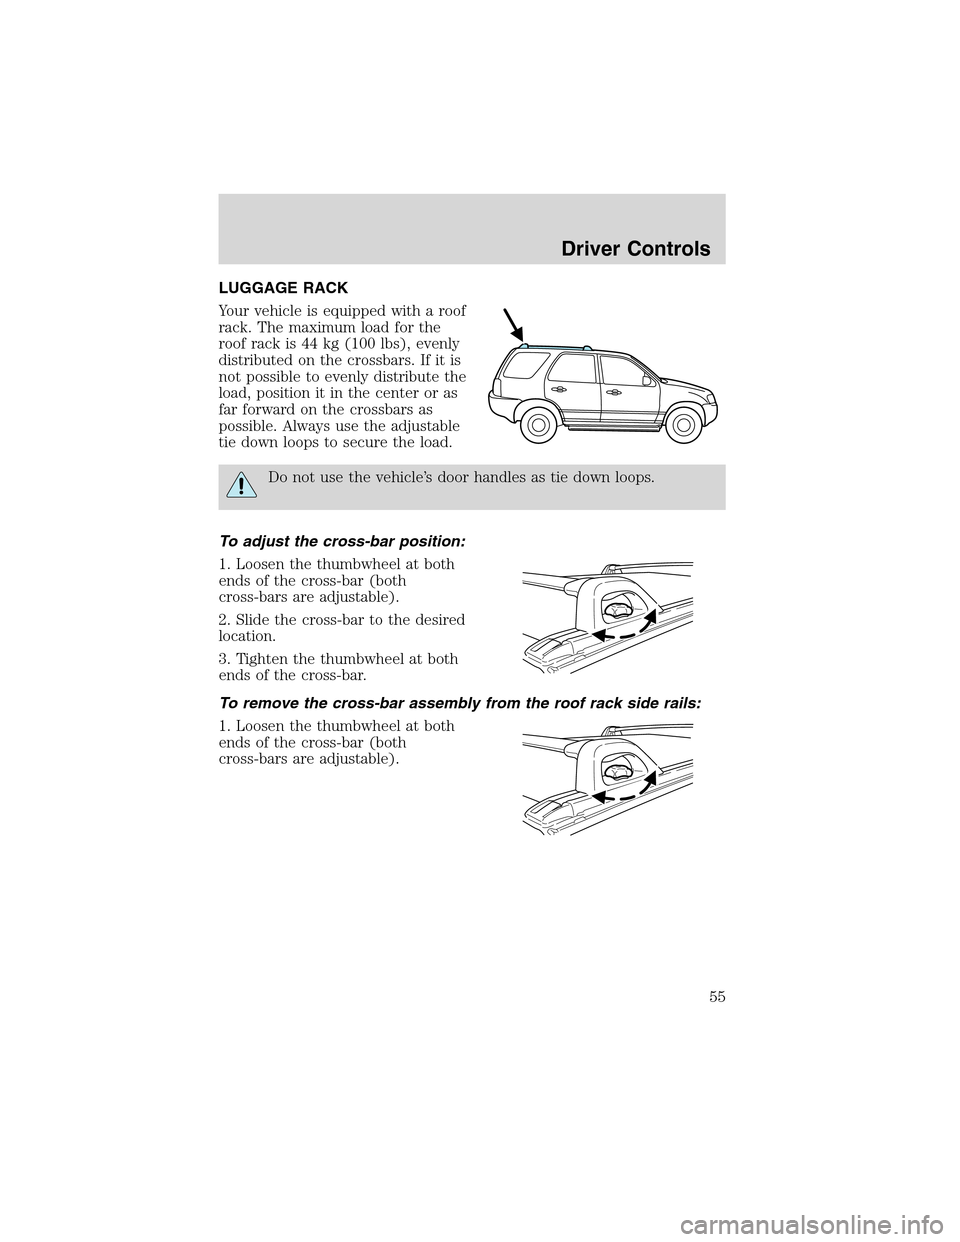
LUGGAGE RACK
Your vehicle is equipped with a roof
rack. The maximum load for the
roof rack is 44 kg (100 lbs), evenly
distributed on the crossbars. If it is
not possible to evenly distribute the
load, position it in the center or as
far forward on the crossbars as
possible. Always use the adjustable
tie down loops to secure the load.
Do not use the vehicle’s door handles as tie down loops.
To adjust the cross-bar position:
1. Loosen the thumbwheel at both
ends of the cross-bar (both
cross-bars are adjustable).
2. Slide the cross-bar to the desired
location.
3. Tighten the thumbwheel at both
ends of the cross-bar.
To remove the cross-bar assembly from the roof rack side rails:
1. Loosen the thumbwheel at both
ends of the cross-bar (both
cross-bars are adjustable).
Driver Controls
55
Page 56 of 240
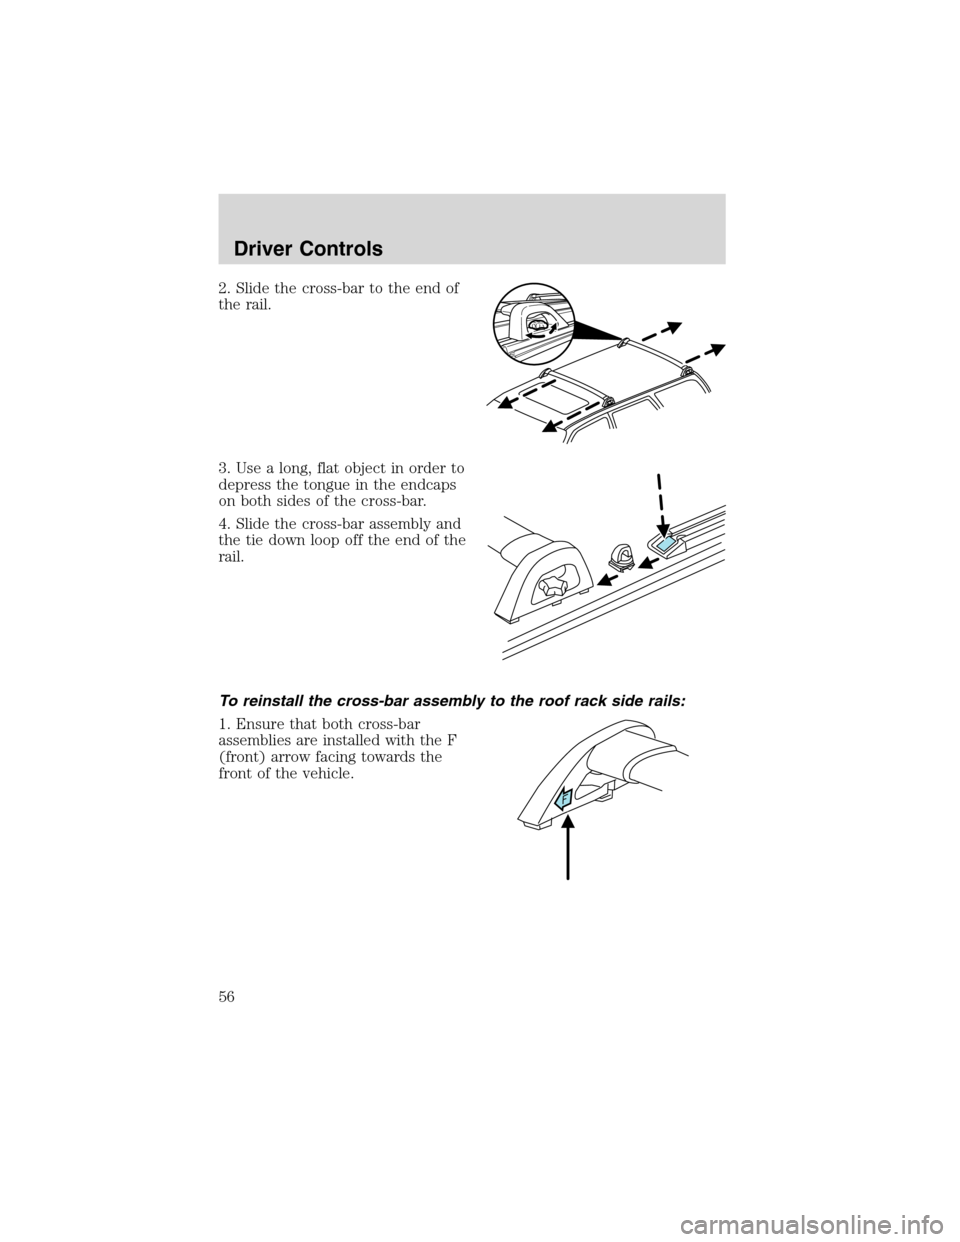
2. Slide the cross-bar to the end of
the rail.
3. Use a long, flat object in order to
depress the tongue in the endcaps
on both sides of the cross-bar.
4. Slide the cross-bar assembly and
the tie down loop off the end of the
rail.
To reinstall the cross-bar assembly to the roof rack side rails:
1. Ensure that both cross-bar
assemblies are installed with the F
(front) arrow facing towards the
front of the vehicle.
Driver Controls
56
Page 57 of 240
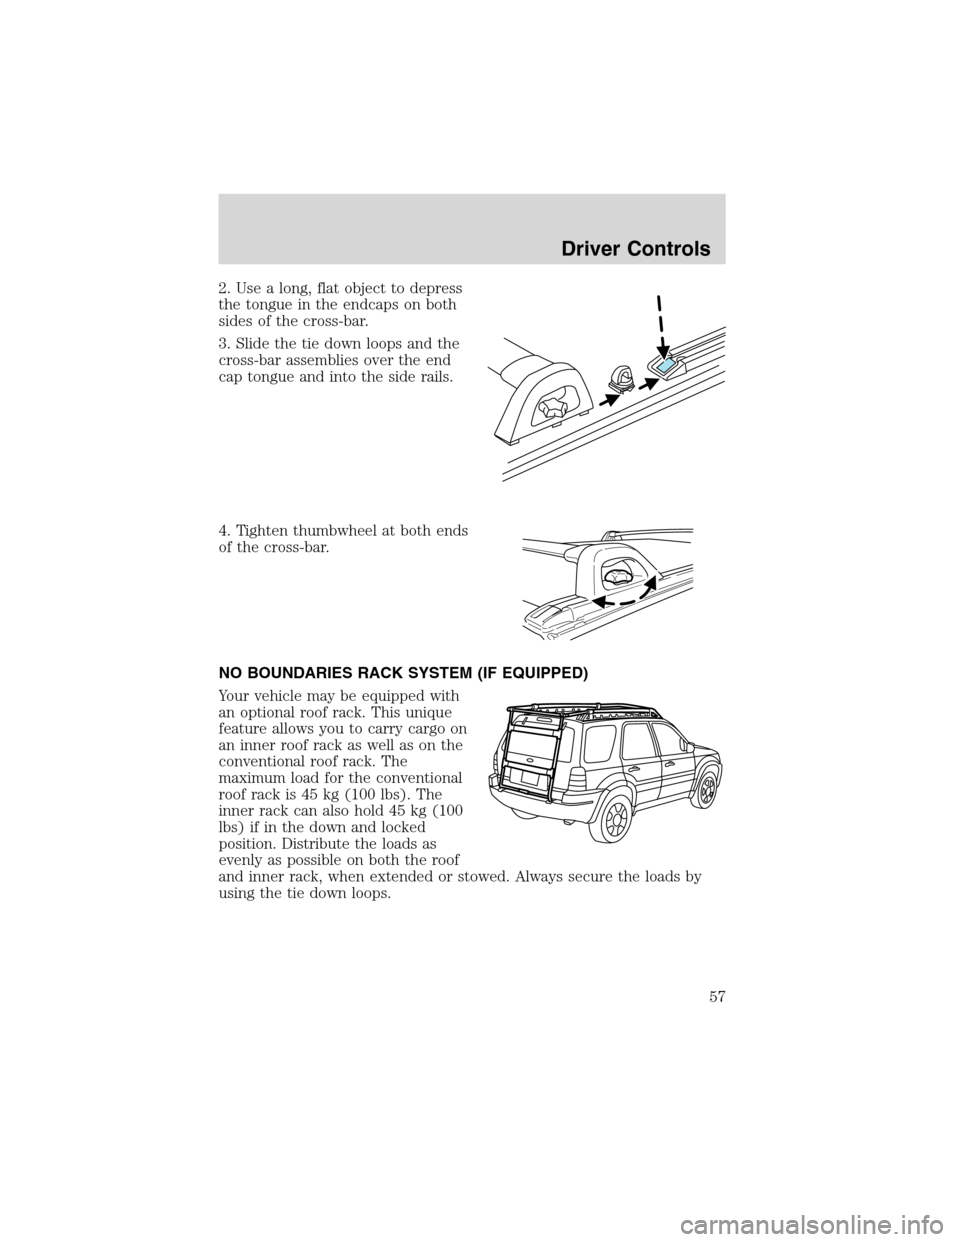
2. Use a long, flat object to depress
the tongue in the endcaps on both
sides of the cross-bar.
3. Slide the tie down loops and the
cross-bar assemblies over the end
cap tongue and into the side rails.
4. Tighten thumbwheel at both ends
of the cross-bar.
NO BOUNDARIES RACK SYSTEM (IF EQUIPPED)
Your vehicle may be equipped with
an optional roof rack. This unique
feature allows you to carry cargo on
an inner roof rack as well as on the
conventional roof rack. The
maximum load for the conventional
roof rack is 45 kg (100 lbs). The
inner rack can also hold 45 kg (100
lbs) if in the down and locked
position. Distribute the loads as
evenly as possible on both the roof
and inner rack, when extended or stowed. Always secure the loads by
using the tie down loops.
Driver Controls
57
Page 58 of 240
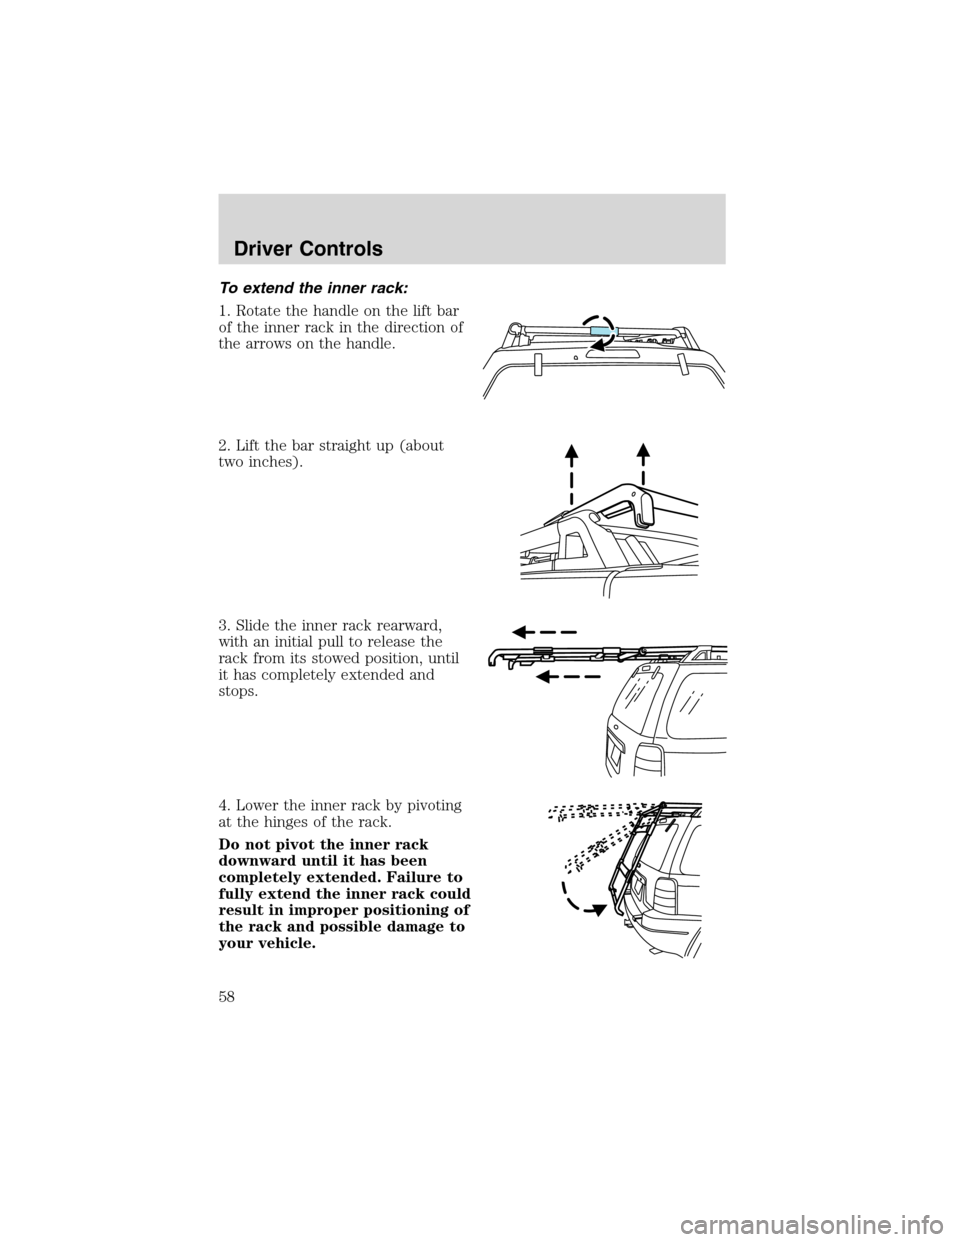
To extend the inner rack:
1. Rotate the handle on the lift bar
of the inner rack in the direction of
the arrows on the handle.
2. Lift the bar straight up (about
two inches).
3. Slide the inner rack rearward,
with an initial pull to release the
rack from its stowed position, until
it has completely extended and
stops.
4. Lower the inner rack by pivoting
at the hinges of the rack.
Do not pivot the inner rack
downward until it has been
completely extended. Failure to
fully extend the inner rack could
result in improper positioning of
the rack and possible damage to
your vehicle.
Driver Controls
58
Page 59 of 240
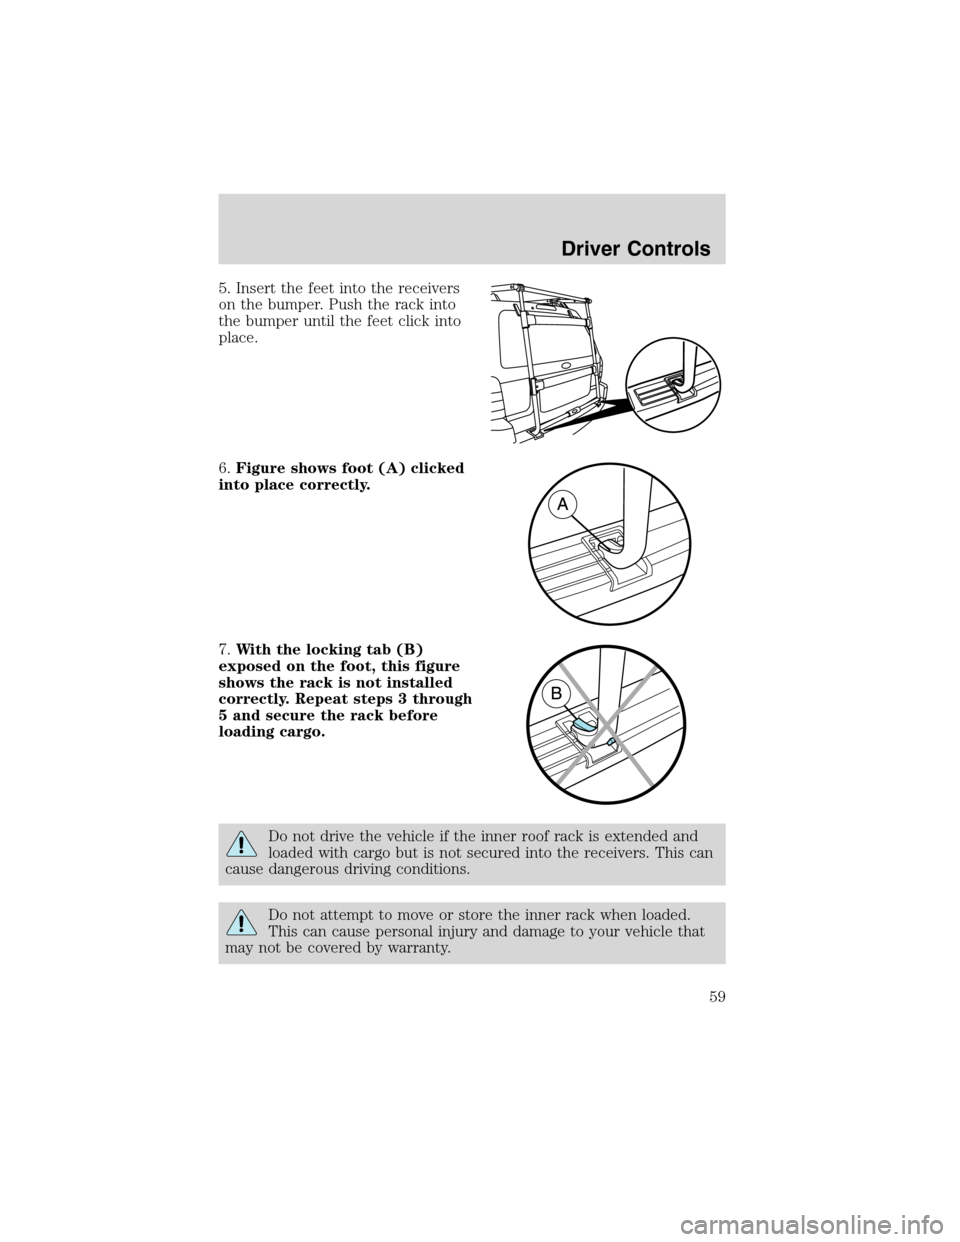
5. Insert the feet into the receivers
on the bumper. Push the rack into
the bumper until the feet click into
place.
6.Figure shows foot (A) clicked
into place correctly.
7.With the locking tab (B)
exposed on the foot, this figure
shows the rack is not installed
correctly. Repeat steps 3 through
5 and secure the rack before
loading cargo.
Do not drive the vehicle if the inner roof rack is extended and
loaded with cargo but is not secured into the receivers. This can
cause dangerous driving conditions.
Do not attempt to move or store the inner rack when loaded.
This can cause personal injury and damage to your vehicle that
may not be covered by warranty.
Driver Controls
59
Page 60 of 240
Do not use the inner rack as a ladder. This could result in
personal injury and damage to your roof rack.
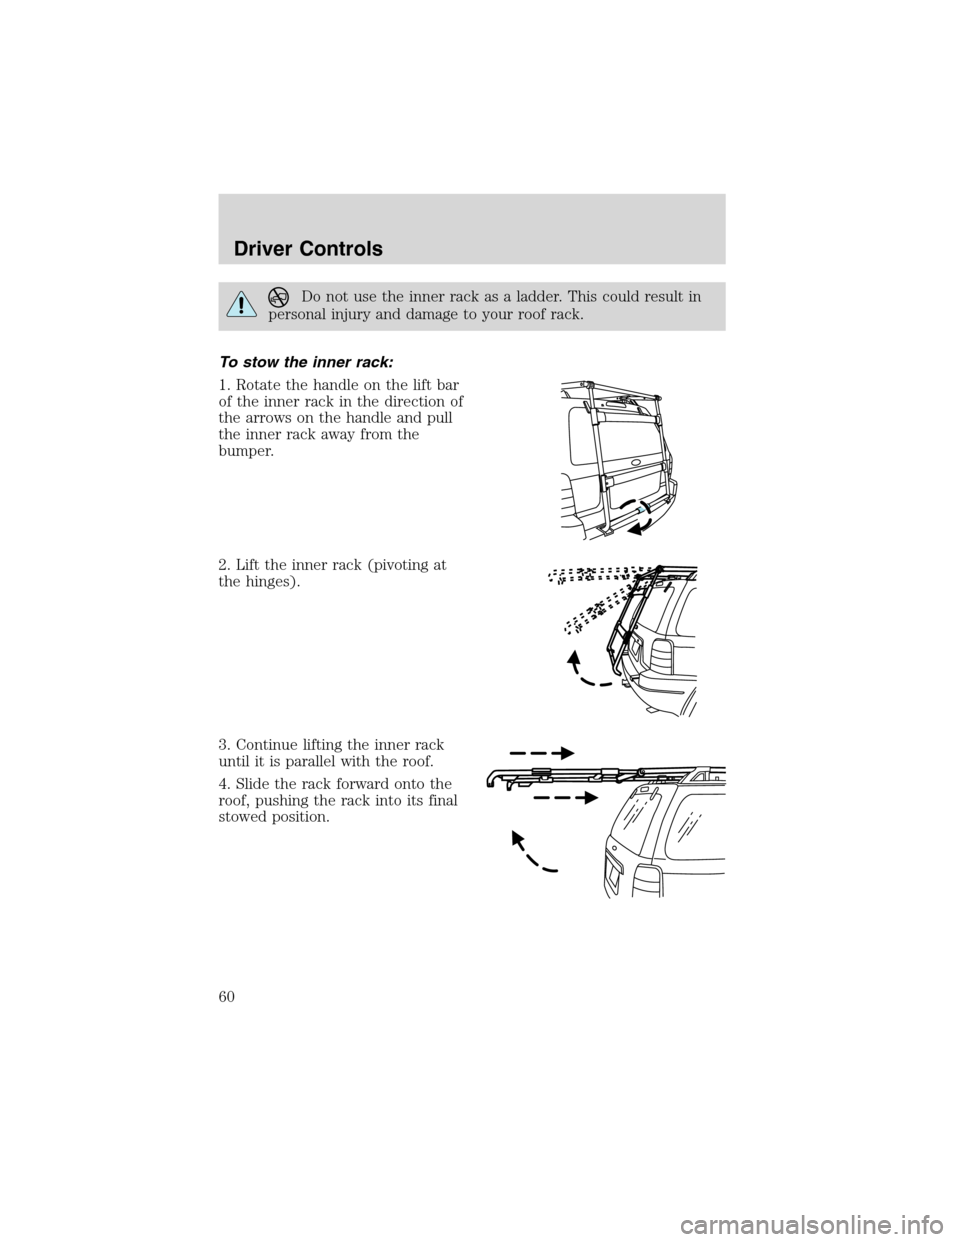
To stow the inner rack:
1. Rotate the handle on the lift bar
of the inner rack in the direction of
the arrows on the handle and pull
the inner rack away from the
bumper.
2. Lift the inner rack (pivoting at
the hinges).
3. Continue lifting the inner rack
until it is parallel with the roof.
4. Slide the rack forward onto the
roof, pushing the rack into its final
stowed position.
Driver Controls
60