door lock FORD ESCAPE 2013 3.G Quick Reference Guide
[x] Cancel search | Manufacturer: FORD, Model Year: 2013, Model line: ESCAPE, Model: FORD ESCAPE 2013 3.GPages: 10, PDF Size: 1.96 MB
Page 6 of 10

11
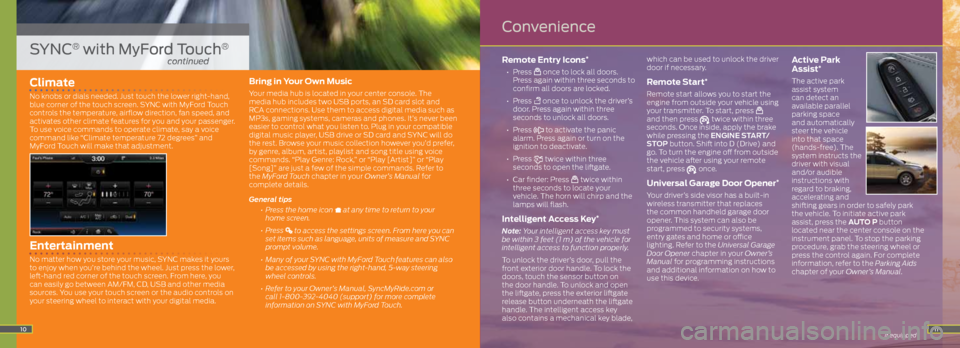
Climate
No knobs or dials needed. Just touch the lower right-hand,
blue corner of the touch screen. SYNC with MyFord Touch
controls the temperature, airflow direction, fan speed, and
activates other climate features for you and your passenger.
To use voice commands to operate climate, say a voice
command like “Climate temperature 72 degrees” and
MyFord Touch will make that adjustment.
Entertainment
No matter how you store your music, SYNC makes it yours
to enjoy when you’re behind the wheel. Just press the lower,
left-hand red corner of the touch screen. From here, you
can easily go between AM/FM, CD, USB and other media
sources. You use your touch screen or the audio controls on
your steering wheel to interact with your digital media.
Bring in Your Own Music
Your media hub is located in your center console. The
media hub includes two USB ports, an SD card slot and
RCA connections. Use them to access digital media such as
MP3s, gaming systems, cameras and phones. It’s never been
easier to control what you listen to. Plug in your compatible
digital music player, USB drive or SD card and SYNC will do
the rest. Browse your music collection however you’d prefer,
by genre, album, artist, playlist and song title using voice
commands. “Play Genre: Rock,” or “Play [Artist]” or “Play
[Song]” are just a few of the simple commands. Refer to
the MyFord Touch chapter in your Owner’s Manual for
complete details.
General tips
• Press the home icon
at any time to return to your
home screen.
• Press
to access the settings screen. From here you can
set items such as language, units of measure and SYNC
prompt volume.
• Many of your SYNC with MyFord Touch
features can also
be accessed by using the right-hand, 5-way steering
wheel controls.
• Refer to your Owner’s Manual, SyncMyRide.com or
call 1-800-392-4040 (support) for more complete
information on SYNC with MyFord Touch.
Remote Entry Icons*
• Press once to lock all doors.
Press again within three seconds to
confirm all doors are locked.
• Press
once to unlock the driver’s
door. Press again within three
seconds to unlock all doors.
• Press
to activate the panic
alarm. Press again or turn on the
ignition to deactivate.
• Press
twice within three
seconds to open the liftgate.
• Car finder: Press
twice within
three seconds to locate your
vehicle. The horn will chirp and the
lamps will flash.
Intelligent Access Key*
Note: Your intelligent access key must
be within 3 feet (1 m) of the vehicle for
intelligent access to function properly.
To unlock the driver’s door, pull the
front exterior door handle. To lock the
doors, touch the sensor button on
the door handle. To unlock and open
the liftgate, press the exterior liftgate
release button underneath the liftgate
handle. The intelligent access key
also contains a mechanical key blade, which can be used to unlock the driver
door if necessary.
Remote Start*
Remote start allows you to start the
engine from outside your vehicle using
your transmitter. To start, press
and then press twice within three
seconds. Once inside, apply the brake
while pressing the ENGINE START/
STOP button. Shift into D (Drive) and
go. To turn the engine off from outside
the vehicle after using your remote
start, press
once.
Universal Garage Door Opener*
Your driver’s side visor has a built-in
wireless transmitter that replaces
the common handheld garage door
opener. This system can also be
programmed to security systems,
entry gates and home or office
lighting. Refer to the Universal Garage
Door Opener chapter in your Owner’s
Manual for programming instructions
and additional information on how to
use this device.
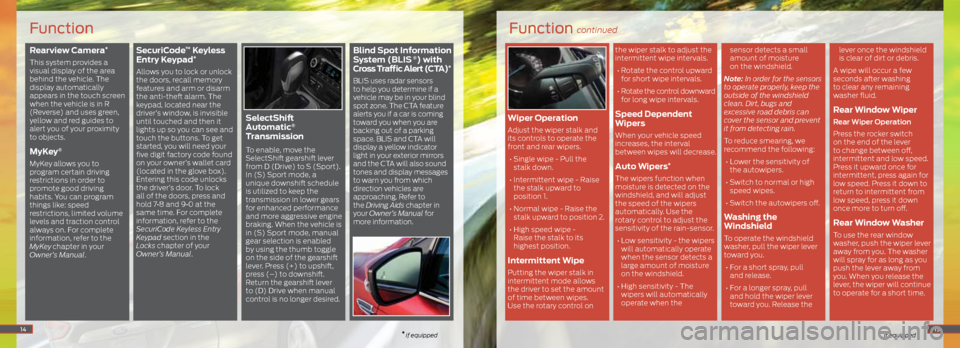
Active Park
Assist*
The active park
assist system
can detect an
available parallel
parking space
and automatically
steer the vehicle
into that space
(hands-free). The
system instructs the
driver with visual
and/or audible
instructions with
regard to braking,
accelerating and
shifting gears in order to safely park
the vehicle. To initiate active park
assist, press the AUTO P button
located near the center console on the
instrument panel. To stop the parking
procedure, grab the steering wheel or
press the control again. For complete
information, refer to the Parking Aids
chapter of your Owner’s Manual.
* if equipped10
SYNC® with MyFord Touch®
continued
Convenience
Page 8 of 10

Rearview Camera*
This system provides a
visual display of the area
behind the vehicle. The
display automatically
appears in the touch screen
when the vehicle is in R
(Reverse) and uses green,
yellow and red guides to
alert you of your proximity
to objects.
MyKey®
MyKey allows you to
program certain driving
restrictions in order to
promote good driving
habits. You can program
things like: speed
restrictions, limited volume
levels and traction control
always on. For complete
information, refer to the
MyKey
chapter in your
Owner’s Manual.
SecuriCode™ Keyless
Entry Keypad*
Allows you to lock or unlock
the doors, recall memory
features and arm or disarm
the anti-theft alarm. The
keypad, located near the
driver’s window, is invisible
until touched and then it
lights up so you can see and
touch the buttons. To get
started, you will need your
five digit factory code found
on your owner’s wallet card
(located in the glove box).
Entering this code unlocks
the driver’s door. To lock
all of the doors, press and
hold 7•8 and 9•0 at the
same time. For complete
information, refer to the
SecuriCode Keyless Entry
Keypad section in the
Locks chapter of your
Owner’s Manual.
SelectShift
Automatic®
Transmission
To enable, move the
SelectShift gearshift lever
from D (Drive) to S (Sport).
In (S) Sport mode, a
unique downshift schedule
is utilized to keep the
transmission in lower gears
for enhanced performance
and more aggressive engine
braking. When the vehicle is
in (S) Sport mode, manual
gear selection is enabled
by using the thumb toggle
on the side of the gearshift
lever. Press (+) to upshift,
press (–) to downshift.
Return the gearshift lever
to (D) Drive when manual
control is no longer desired.
Blind Spot Information
System (BLIS ®) with
Cross Traffic Alert (CTA)*
BLIS uses radar sensors
to help you determine if a
vehicle may be in your blind
spot zone. The CTA feature
alerts you if a car is coming
toward you when you are
backing out of a parking
space. BLIS and CTA will
display a yellow indicator
light in your exterior mirrors
and the CTA will also sound
tones and display messages
to warn you from which
direction vehicles are
approaching. Refer to
the Driving Aids chapter in
your Owner’s Manual for
more information.
14
Function
* if equipped
Function continued
* if equipped
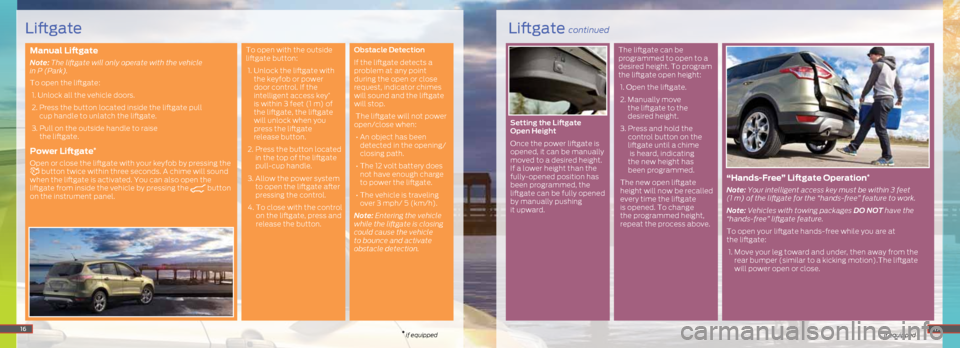
Wiper Operation
Adjust the wiper stalk and
its controls to operate the
front and rear wipers.
• Single wipe - Pull the
stalk down.
• Intermittent wipe - Raise
the stalk upward to
position 1.
• Normal wipe - Raise the
stalk upward to position 2.
• High speed wipe -
Raise the stalk to its
highest position.
Intermittent Wipe
Putting the wiper stalk in
intermittent mode allows
the driver to set the amount
of time between wipes.
Use the rotary control on the wiper stalk to adjust the
intermittent wipe intervals.
• Rotate the control upward
for short wipe intervals.
• Rotate the control downward
for long wipe intervals.
Speed Dependent
Wipers
When your vehicle speed
increases, the interval
between wipes will decrease.
Auto Wipers*
The wipers function when
moisture is detected on the
windshield, and will adjust
the speed of the wipers
automatically. Use the
rotary control to adjust the
sensitivity of the rain-sensor.
• Low sensitivity - the wipers
will automatically operate
when the sensor detects a
large amount of moisture
on the windshield.
• High sensitivity - The
wipers will automatically
operate when the sensor detects a small
amount of moisture
on the windshield.
Note: In order for the sensors
to operate properly, keep the
outside of the windshield
clean. Dirt, bugs and
excessive road debris can
cover the sensor and prevent
it from detecting rain.
To reduce smearing, we
recommend the following: • Lower the sensitivity of
the autowipers.
• Switch to normal or high
speed wipes.
• Switch the autowipers off.
Washing the
Windshield
To operate the windshield
washer, pull the wiper lever
toward you. • For a short spray, pull
and release.
• For a longer spray, pull
and hold the wiper lever
toward you. Release the lever once the windshield
is clear of dirt or debris.
A wipe will occur a few
seconds after washing
to clear any remaining
washer fluid.
Rear Window Wiper
Rear Wiper Operation
Press the rocker switch
on the end of the lever
to change between off,
intermittent and low speed.
Press it upward once for
intermittent, press again for
low speed. Press it down to
return to intermittent from
low speed, press it down
once more to turn off.
Rear Window Washer
To use the rear window
washer, push the wiper lever
away from you. The washer
will spray for as long as you
push the lever away from
you. When you release the
lever, the wiper will continue
to operate for a short time.
15
Page 9 of 10

Manual Liftgate
Note: The liftgate will only operate with the vehicle
in P (Park).
To open the liftgate:
1. Unlock all the vehicle doors.
2. Press the button located inside the liftgate pull
cup handle to unlatch the liftgate.
3. Pull on the outside handle to raise
the liftgate.
Power Liftgate*
Open or close the liftgate with your keyfob by pressing the button twice within three seconds. A chime will sound
when the liftgate is activated. You can also open the
liftgate from inside the vehicle by pressing the
button
on the instrument panel. To open with the outside
liftgate button:
1. Unlock the liftgate with
the keyfob or power
door control. If the
intelligent access key
*
is within 3 feet (1 m) of
the liftgate, the liftgate
will unlock when you
press the liftgate
release button.
2. Press the button located
in the top of the liftgate
pull-cup handle.
3. Allow the power system
to open the liftgate after
pressing the control.
4. To close with the control
on the liftgate, press and
release the button. Obstacle Detection
If the liftgate detects a
problem at any point
during the open or close
request, indicator chimes
will sound and the liftgate
will stop.
The liftgate will not power
open/close when:
• An object has been
detected in the opening/
closing path.
• The 12 volt battery does
not have enough charge
to power the liftgate.
• The vehicle is traveling
over 3 mph/ 5 (km/h).
Note: Entering the vehicle
while the liftgate is closing
could cause the vehicle
to bounce and activate
obstacle detection. Setting the Liftgate
Open Height
Once the power liftgate is
opened, it can be manually
moved to a desired height.
If a lower height than the
fully-opened position has
been programmed, the
liftgate can be fully opened
by manually pushing
it upward. The liftgate can be
programmed to open to a
desired height. To program
the liftgate open height:
1. Open the liftgate.
2. Manually move
the liftgate to the
desired height.
3. Press and hold the
control button on the
liftgate until a chime
is heard, indicating
the new height has
been programmed.
The new open liftgate
height will now be recalled
every time the liftgate
is opened. To change
the programmed height,
repeat the process above.
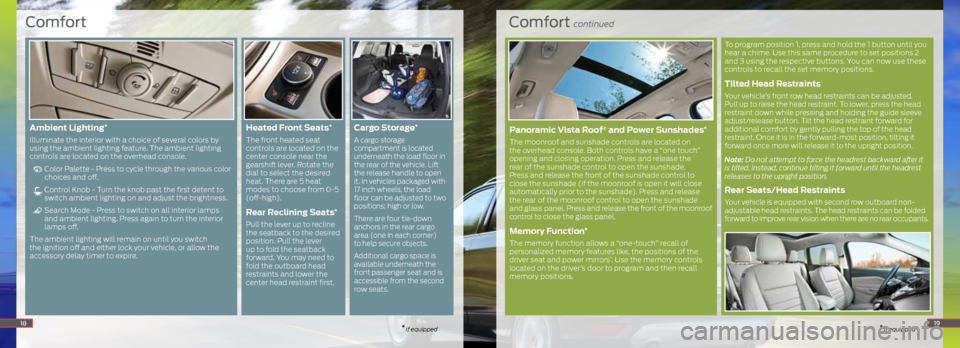
“ Hands-Free” Liftgate Operation*
Note: Your intelligent access key must be within 3 feet
(1 m) of the liftgate for the “hands-free” feature to work.
Note: Vehicles with towing packages DO NOT have the
“hands-free” liftgate feature.
To open your liftgate hands-free while you are at
the liftgate:
1. Move your leg toward and under, then away from the
rear bumper (similar to a kicking motion).The liftgate
will power open or close.
16* if equipped* if equipped17
Liftgate continuedLiftgate
Page 10 of 10

Comfort continued
* if equipped
To program position 1, press and hold the 1 button until you
hear a chime. Use this same procedure to set positions 2
and 3 using the respective buttons. You can now use these
controls to recall the set memory positions.
Tilted Head Restraints
Your vehicle’s front row head restraints can be adjusted.
Pull up to raise the head restraint. To lower, press the head
restraint down while pressing and holding the guide sleeve
adjust/release button. Tilt the head restraint forward for
additional comfort by gently pulling the top of the head
restraint. Once it is in the forward-most position, tilting it
forward once more will release it to the upright position.
Note: Do not attempt to force the headrest backward after it
is tilted. Instead, continue tilting it forward until the headrest
releases to the upright position.
Rear Seats/Head Restraints
Your vehicle is equipped with second row outboard non-
adjustable head restraints. The head restraints can be folded
forward to improve rear vision when there are no rear occupants.
Comfort
* if equipped18
Ambient Lighting*
Illuminate the interior with a choice of several colors by
using the ambient lighting feature. The ambient lighting
controls are located on the overhead console.
Color Palette - Press to cycle through the various color
choices and off.
Control Knob - Turn the knob past the first detent to
switch ambient lighting on and adjust the brightness.
Search Mode - Press to switch on all interior lamps
and ambient lighting. Press again to turn the interior
lamps off.
The ambient lighting will remain on until you switch
the ignition off and either lock your vehicle, or allow the
accessory delay timer to expire.
Heated Front Seats*
The front heated seat
controls are located on the
center console near the
gearshift lever. Rotate the
dial to select the desired
heat. There are 5 heat
modes to choose from 0-5
(off-high).
Rear Reclining Seats*
Pull the lever up to recline
the seatback to the desired
position. Pull the lever
up to fold the seatback
forward. You may need to
fold the outboard head
restraints and lower the
center head restraint first.
Cargo Storage*
A cargo storage
compartment is located
underneath the load floor in
the rear of the vehicle. Lift
the release handle to open
it. In vehicles packaged with
17 inch wheels, the load
floor can be adjusted to two
positions; high or low.
There are four tie-down
anchors in the rear cargo
area (one in each corner)
to help secure objects.
Additional cargo space is
available underneath the
front passenger seat and is
accessible from the second
row seats.
19
Panoramic Vista Roof® and Power Sunshades*
The moonroof and sunshade controls are located on
the overhead console. Both controls have a “one touch”
opening and closing operation. Press and release the
rear of the sunshade control to open the sunshade.
Press and release the front of the sunshade control to
close the sunshade (if the moonroof is open it will close
automatically prior to the sunshade). Press and release
the rear of the moonroof control to open the sunshade
and glass panel. Press and release the front of the moonroof
control to close the glass panel.
Memory Function*
The memory function allows a “one-touch” recall of
personalized memory features like, the positions of the
driver seat and power mirrors
*. Use the memory controls
located on the driver’s door to program and then recall
memory positions.