warning lights FORD ESCAPE 2014 3.G Owners Manual
[x] Cancel search | Manufacturer: FORD, Model Year: 2014, Model line: ESCAPE, Model: FORD ESCAPE 2014 3.GPages: 428, PDF Size: 16.6 MB
Page 37 of 428
The Personal Safety System provides an
improved overall level of frontal crash
protection to front seat occupants and is
designed to help further reduce the risk of
airbag-related injuries. The system is able
to analyze different occupant conditions
and crash severity before activating the
appropriate safety devices to help better
protect a range of occupants in a variety
of frontal crash situations.
Your vehicle's Personal Safety System
consists of:
• Driver and passenger dual-stage airbag
supplemental restraints.
• Front outboard safety belts with
pretensioners, energy management
retractors (first row only), and safety
belt usage sensors.
• Driver’s seat position sensor.
• Front passenger sensing system.
• Passenger airbag off and on indicator
lamp.
• Front crash severity sensors.
• Restraints control module with impact
and safing sensors.
• Restraint system warning light and
backup tone.
• The electrical wiring for the airbags,
crash sensor(s), safety belt
pretensioners, front safety belt usage
sensors, driver seat position sensor,
front passenger sensing system, and
indicator lights.
How Does the Personal Safety
System Work?
The Personal Safety System can adapt the
deployment strategy of your vehicle’s
safety devices according to crash severity
and occupant conditions. A collection of
crash and occupant sensors provides
information to the restraints controlmodule. During a crash, the restraints
control module may activate the safety
belt pretensioners and may activate either
one or both stages of the dual-stage airbag
supplemental restraints based on crash
severity and occupant conditions.
34
Personal Safety System™
Page 61 of 428
1. Switch the ignition on.
2. Press the power door unlock button
three times.
3. Switch the ignition off.
4. Press the power door unlock button
three times.
5. Switch the ignition on. The horn will
sound indicating your vehicle is in
programming mode.
Autolock: Press the power door unlock
button then the lock button. The horn will
sound once if disabled or twice (one short
and one long) if enabled.
Autounlock: Press the power door lock
button then the unlock button. The horn
will sound once if disabled or twice (one
short and one long) if enabled.
After programming the feature, switch the
ignition off. The horn will sound once
indicating programming is complete.
Note:You can enable or disable the
autounlock feature independently of the
autolock feature.
Illuminated Entry
The interior lamps and select exterior
lamps will illuminate when you unlock the
doors with the remote entry system.
The illuminated entry system will turn off
the lights if:
• you start your vehicle,
• you press the remote control lock
button, or
• after 25 seconds of illumination.
The lights will not turn off if:
• you turn them on with the lamp control,
or
• any door is open.
Illuminated Exit
The interior lamps and select exterior
lamps will illuminate when all doors are
closed and you switch the ignition off.
The lamps will turn off if all the doors
remain closed and:
• 25 seconds elapse, or
• you lock your vehicle from the outside.
Battery Saver
If you leave the courtesy lamps or dome
lamps on and switch the ignition off, the
battery saver shuts them off after some
time.
Accessory Mode Battery Saver for
Intelligent Access Keys (If Equipped)
If you leave the ignition on after leaving
your vehicle, it will shut off 15 minutes after
you close all of the doors.
MANUAL LIFTGATE
WARNINGS
It is extremely dangerous to ride in a
cargo area, inside or outside of a
vehicle. In a crash, people riding in
these areas are more likely to be seriously
injured or killed. Do not allow people to ride
in any area of your vehicle that is not
equipped with seats and safety belts. Be
sure everyone in your vehicle is in a seat
and using a safety belt properly. Failure to
follow this warning could result in serious
personal injury or death.
Make sure to close and latch the
liftgate to prevent drawing exhaust
fumes into your vehicle. This will also
prevent passengers and cargo from falling
out. If you must drive with the liftgate open,
keep the vents or windows open so outside
air comes into your vehicle. Failure to
follow this warning could result in serious
personal injury.
58
Locks
Page 65 of 428
Obstacle Detection
When Closing
The system stops when it detects an
obstacle and two short tones sound. Once
you remove the obstacle, you can power
close the liftgate.
Note:Entering your vehicle while the
liftgate is closing can cause your vehicle to
bounce and activate obstacle detection. To
prevent this, let the power liftgate close
completely before you enter your vehicle.
Before driving off, check the instrument
cluster for a liftgate or door ajar message or
warning indicator. Failure to do this could
result in unintentionally leaving the liftgate
open while driving.
When Opening
The system stops when it detects an
obstacle and two short tones sound.
Remove the obstacle to operate the
liftgate.
KEYLESS ENTRY (IF EQUIPPED)
SECURICODE™ KEYLESS ENTRY
KEYPAD
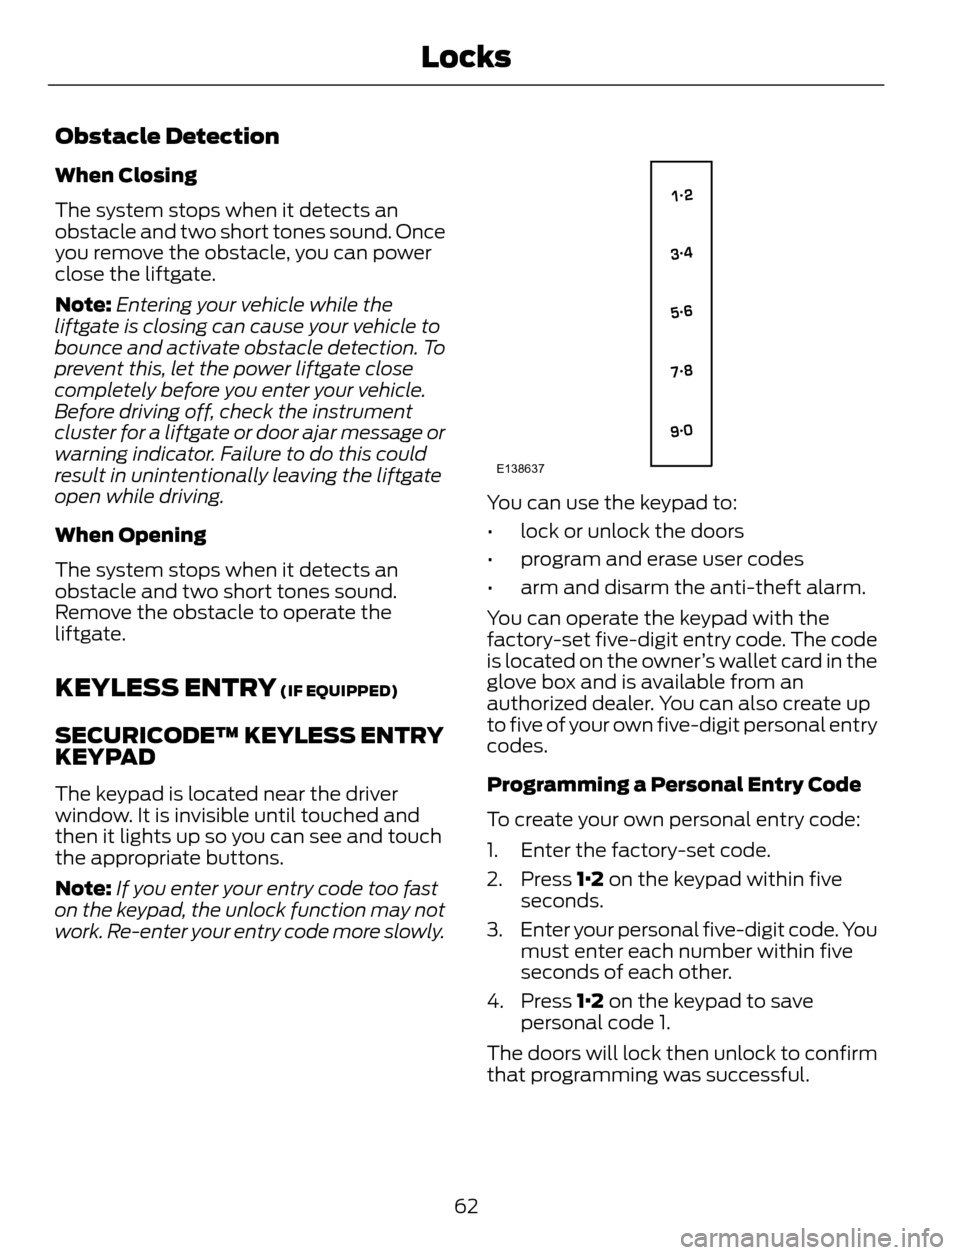
The keypad is located near the driver
window. It is invisible until touched and
then it lights up so you can see and touch
the appropriate buttons.
Note:If you enter your entry code too fast
on the keypad, the unlock function may not
work. Re-enter your entry code more slowly.
E138637
You can use the keypad to:
• lock or unlock the doors
• program and erase user codes
• arm and disarm the anti-theft alarm.
You can operate the keypad with the
factory-set five-digit entry code. The code
is located on the owner’s wallet card in the
glove box and is available from an
authorized dealer. You can also create up
to five of your own five-digit personal entry
codes.
Programming a Personal Entry Code
To create your own personal entry code:
1. Enter the factory-set code.
2. Press 1·2 on the keypad within five
seconds.
3. Enter your personal five-digit code. You
must enter each number within five
seconds of each other.
4. Press 1·2 on the keypad to save
personal code 1.
The doors will lock then unlock to confirm
that programming was successful.
62
Locks
Page 84 of 428
Note:Do not clean the housing or glass of
any mirror with harsh abrasives, fuel or other
petroleum or ammonia-based cleaning
products.
You can adjust the interior mirror to your
preference. Some mirrors also have a
second pivot point. This lets you move the
mirror head up or down and from side to
side.
Pull the tab below the mirror toward you
to reduce glare at night.
Auto-Dimming Mirror (If Equipped)
Note:Do not block the sensors on the front
and back of the mirror. Mirror performance
may be affected. A rear center passenger or
raised rear center head restraint may also
block light from reaching the sensor.
The mirror will dim automatically to reduce
glare when bright lights are detected from
behind your vehicle. It will automatically
return to normal reflection when you select
reverse gear to make sure you have a clear
view when backing up.
SUN VISORS
E138666
Rotate the sun visor toward the side
window and extend it rearward for extra
shade.
Illuminated Vanity Mirror (If Equipped)
E162197
Lift the cover to switch the lamp on.
MOONROOF (IF EQUIPPED)
WARNINGS
Do not let children play with the
moonroof or leave them unattended
in the vehicle. They may seriously
hurt themselves.
When closing the moonroof, you
should verify that it is free of
obstructions and make sure that
children and pets are not in the proximity
of the roof opening.
The moonroof and sunscreen controls are
located on the overhead console.
The moonroof and sunscreen have a
one-touch open and close feature. To stop
them during one-touch operation, press
the control a second time.
81
Windows and Mirrors
Page 141 of 428
E142627
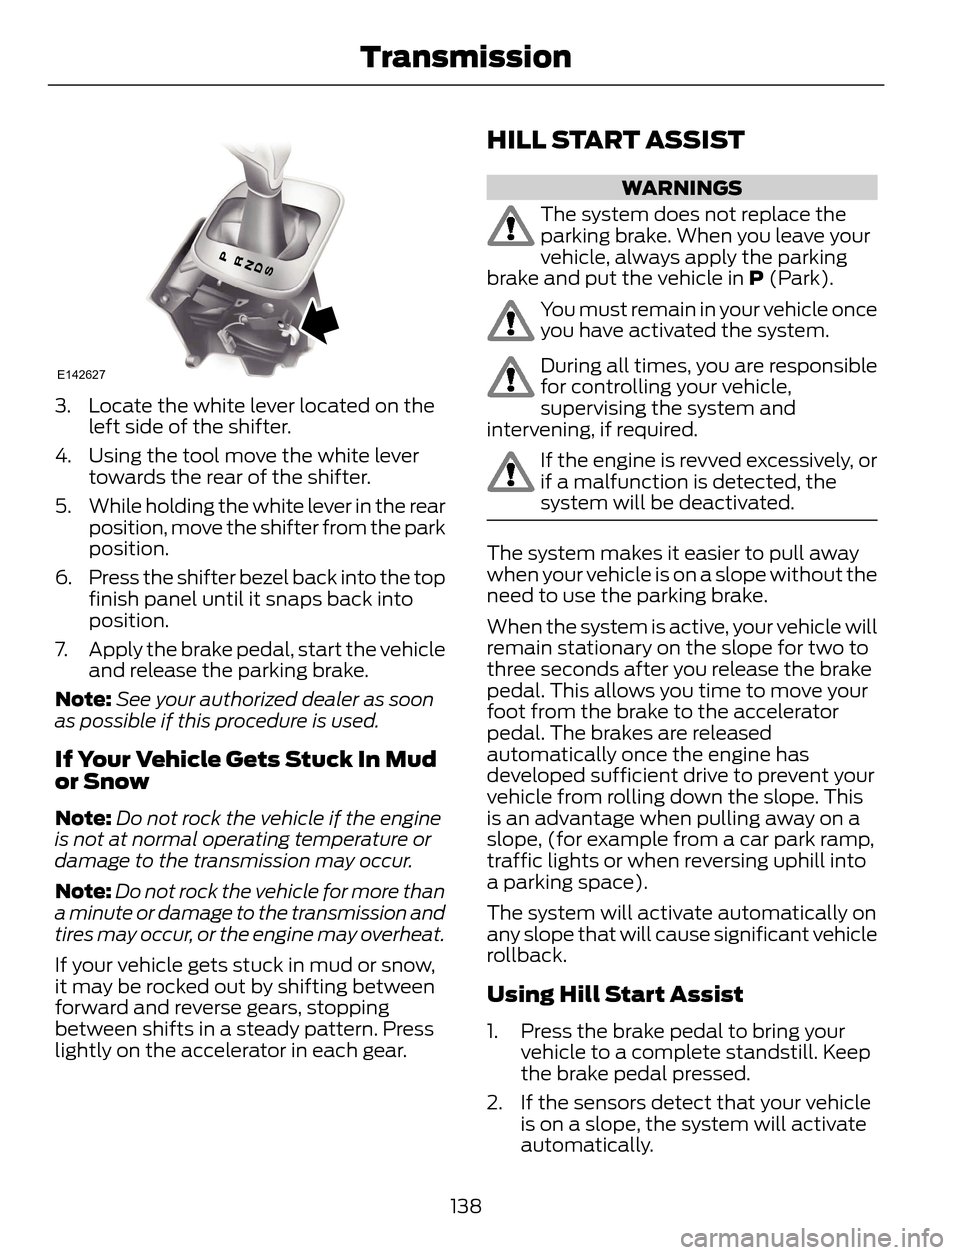
3. Locate the white lever located on the
left side of the shifter.
4. Using the tool move the white lever
towards the rear of the shifter.
5. While holding the white lever in the rear
position, move the shifter from the park
position.
6. Press the shifter bezel back into the top
finish panel until it snaps back into
position.
7. Apply the brake pedal, start the vehicle
and release the parking brake.
Note:See your authorized dealer as soon
as possible if this procedure is used.
If Your Vehicle Gets Stuck In Mud
or Snow
Note:Do not rock the vehicle if the engine
is not at normal operating temperature or
damage to the transmission may occur.
Note:Do not rock the vehicle for more than
a minute or damage to the transmission and
tires may occur, or the engine may overheat.
If your vehicle gets stuck in mud or snow,
it may be rocked out by shifting between
forward and reverse gears, stopping
between shifts in a steady pattern. Press
lightly on the accelerator in each gear.
HILL START ASSIST
WARNINGS
The system does not replace the
parking brake. When you leave your
vehicle, always apply the parking
brake and put the vehicle in P (Park).
You must remain in your vehicle once
you have activated the system.
During all times, you are responsible
for controlling your vehicle,
supervising the system and
intervening, if required.
If the engine is revved excessively, or
if a malfunction is detected, the
system will be deactivated.
The system makes it easier to pull away
when your vehicle is on a slope without the
need to use the parking brake.
When the system is active, your vehicle will
remain stationary on the slope for two to
three seconds after you release the brake
pedal. This allows you time to move your
foot from the brake to the accelerator
pedal. The brakes are released
automatically once the engine has
developed sufficient drive to prevent your
vehicle from rolling down the slope. This
is an advantage when pulling away on a
slope, (for example from a car park ramp,
traffic lights or when reversing uphill into
a parking space).
The system will activate automatically on
any slope that will cause significant vehicle
rollback.
Using Hill Start Assist
1. Press the brake pedal to bring your
vehicle to a complete standstill. Keep
the brake pedal pressed.
2. If the sensors detect that your vehicle
is on a slope, the system will activate
automatically.
138
Transmission
Page 149 of 428
PARKING BRAKE
WARNING
Always set the parking brake fully
and leave your vehicle with the
transmission selector lever in
position P.
Note:Do not press the release button while
pulling the lever up.
To apply the parking brake:
1. Press the foot brake pedal firmly.
2. Pull the parking brake lever up to its
fullest extent.
Note:If you park your vehicle on a hill and
facing uphill, move the transmission selector
lever to position P and turn the steering
wheel away from the curb.
Note:If you park your vehicle on a hill and
facing downhill, move the transmission
selector lever to P and turn the steering
wheel toward the curb.
To release the parking brake:
1. Press the brake pedal firmly.
2. Pull the lever up slightly.
3. Press the release button and push the
lever down.
HILL START ASSIST
WARNINGS
The system does not replace the
parking brake. When you leave your
vehicle, always apply the parking
brake and put the vehicle in P (Park).
You must remain in your vehicle once
you have activated the system.
During all times, you are responsible
for controlling your vehicle,
supervising the system and
intervening, if required.
WARNINGS
If the engine is revved excessively, or
if a malfunction is detected, the
system will be deactivated.
The system makes it easier to pull away
when your vehicle is on a slope without the
need to use the parking brake.
When the system is active, your vehicle will
remain stationary on the slope for two to
three seconds after you release the brake
pedal. This allows you time to move your
foot from the brake to the accelerator
pedal. The brakes are released
automatically once the engine has
developed sufficient drive to prevent your
vehicle from rolling down the slope. This
is an advantage when pulling away on a
slope, (for example from a car park ramp,
traffic lights or when reversing uphill into
a parking space).
The system will activate automatically on
any slope that will cause significant vehicle
rollback.
Using Hill Start Assist
1. Press the brake pedal to bring your
vehicle to a complete standstill. Keep
the brake pedal pressed.
2. If the sensors detect that your vehicle
is on a slope, the system will activate
automatically.
3. When you remove your foot from the
brake pedal, your vehicle will remain
on the slope without rolling away for
approximately two or three seconds.
This hold time will automatically be
extended if you are in the process of
driving off.
4. Drive off in the normal manner. The
brakes will release automatically.
146
Brakes
Page 150 of 428
PRINCIPLE OF OPERATION
The traction control system helps avoid
drive wheel spin and loss of traction.
If your vehicle begins to slide, the system
applies the brakes to individual wheels
and, when needed, reduces engine power
at the same time. If the wheels spin when
accelerating on slippery or loose surfaces,
the system reduces engine power in order
to increase traction.
USING TRACTION CONTROL
In certain situations (for example, stuck in
snow or mud), turning the traction control
off may be beneficial as this allows the
wheels to spin with full engine power. Turn
off the traction control system through the
information display. See General
Information (page 88).
System Indicator Lights and
Messages
WARNING
If a failure has been detected within
the AdvanceTrac system, the
stability control light will illuminate
steadily. Verify that the AdvanceTrac
system was not manually disabled through
the information display. If the stability
control light still illuminates steadily, have
the system serviced by an authorized
dealer immediately. Operating your vehicle
with AdvanceTrac disabled could lead to
an increased risk of loss of vehicle control,
vehicle rollover, personal injury and death.
E138639
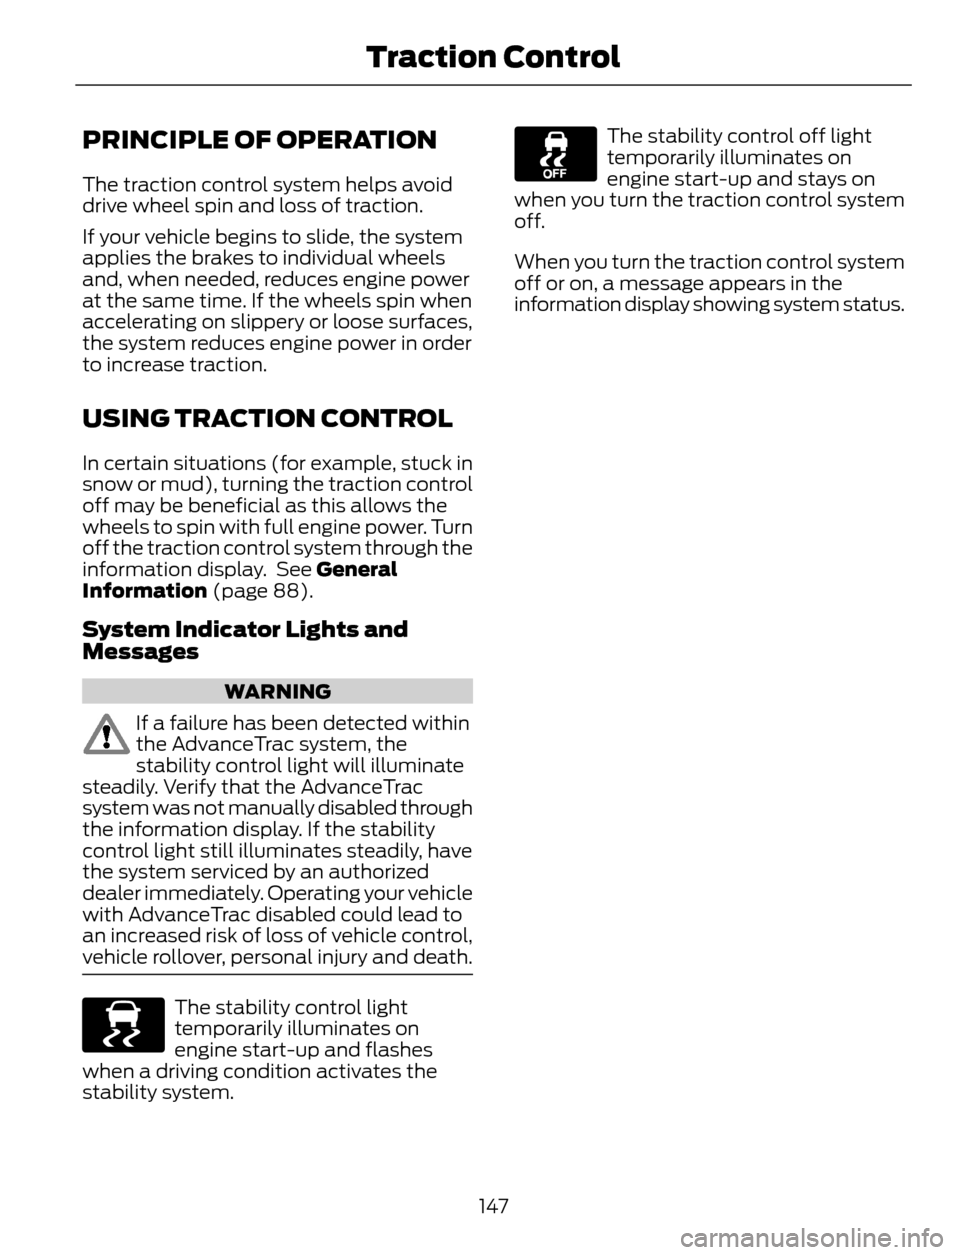
The stability control light
temporarily illuminates on
engine start-up and flashes
when a driving condition activates the
stability system.
The stability control off light
temporarily illuminates on
engine start-up and stays on
when you turn the traction control system
off.
When you turn the traction control system
off or on, a message appears in the
information display showing system status.
147
Traction Control
Page 161 of 428
Always use caution while reversing.
Objects in the red zone are closest to your
vehicle and objects in the green zone are
farther away. Objects are getting closer to
your vehicle as they move from the green
zone to the yellow or red zones. Use the
side view mirrors and rear view mirror to
get better coverage on both sides and rear
of the vehicle.
Selectable settings for this feature are
ACTIVE + FIXED, FIXED and OFF.
Visual Park Aid Alert
Note:Visual park alert is only available
when the transmission is in R (Reverse).
Note:The reverse sensing system is not
effective at speeds above 3 mph (5 km/h)
and may not detect certain angular or
moving objects.
The system uses red, yellow and green
highlights which appear on top of the video
image when an object is detected by the
reverse sensing system. The alert highlights
the closest object detected. The reverse
sensing alert can be disabled and if visual
park aid alert is enabled, highlighted areas
are still displayed.
Selectable settings for this feature are ON
and OFF.
Manual Zoom
WARNING
When manual zoom is on, the full
area behind the vehicle is not shown.
Be aware of your surroundings when
using the manual zoom feature.
Note:Manual zoom is only available when
the transmission is in R (Reverse).
Note:When manual zoom is enabled, only
the centerline is shown.This allows you to get a closer view of an
object behind the vehicle. The zoomed
image keeps the bumper in the image to
provide a reference. The zoom is only
active while the transmission is in R
(Reverse). When the transmission is
shifted out of R (Reverse), the feature
automatically turns off and must be reset
when it is used again.
Selectable settings for this feature are OFF,
Level 1, Level 2 or Level 3. Press the up and
down arrows to change the view. The
selection level appears between the
buttons (for example, Level 1). The default
setting for the manual zoom is OFF.
Rear Camera Delay
When shifting the transmission out of R
(Reverse) and into any gear other than P
(Park), the camera image remains in the
display until the vehicle speed reaches 5
mph (8 km/h). This occurs when the rear
camera delay feature is on, or until a radio
button is selected.
Selectable settings for this feature are ON
and OFF. The default setting for the rear
camera delay is OFF.
158
Parking Aids
Page 165 of 428
System Lights and Messages
E142442
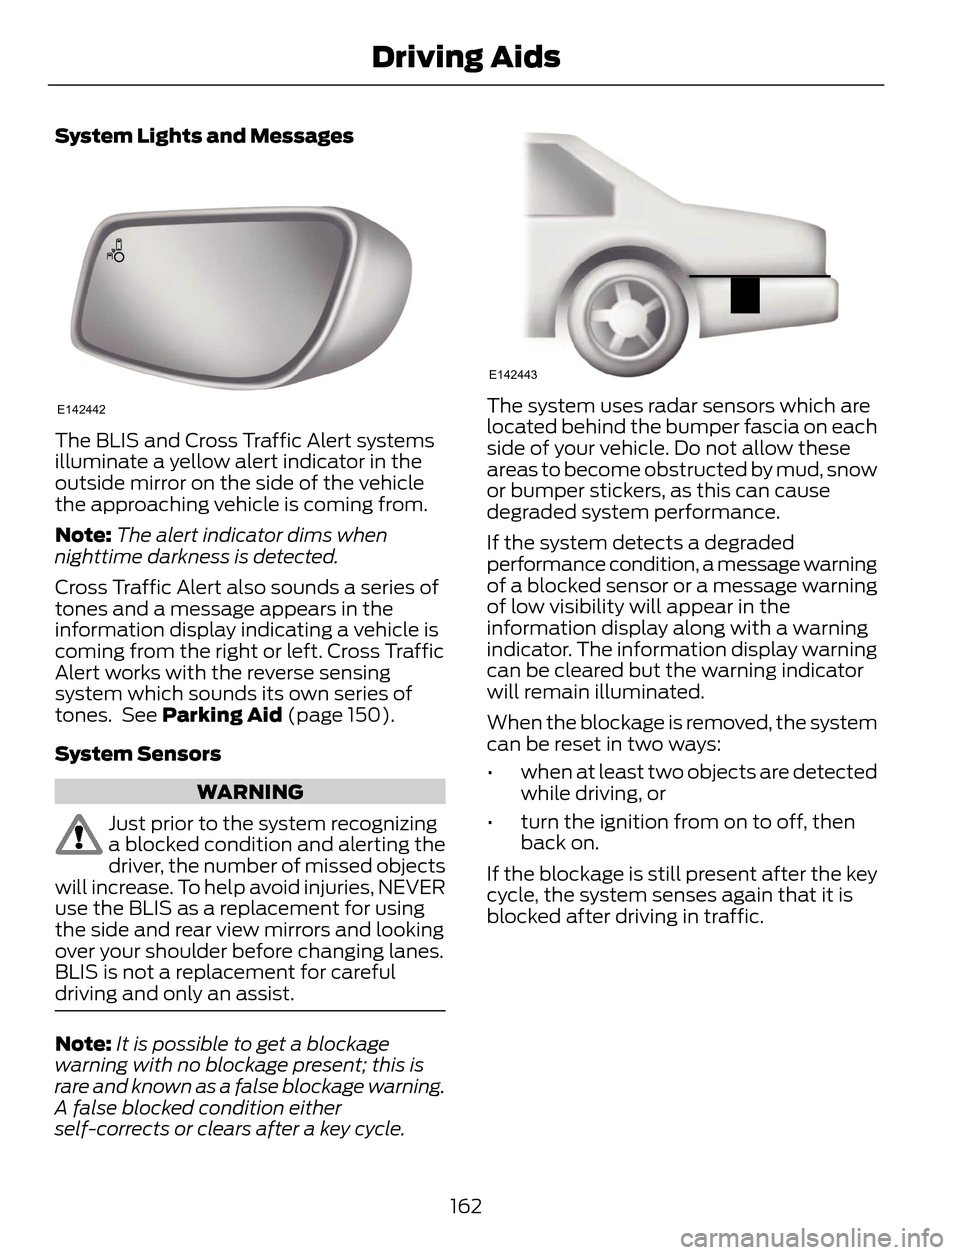
The BLIS and Cross Traffic Alert systems
illuminate a yellow alert indicator in the
outside mirror on the side of the vehicle
the approaching vehicle is coming from.
Note:The alert indicator dims when
nighttime darkness is detected.
Cross Traffic Alert also sounds a series of
tones and a message appears in the
information display indicating a vehicle is
coming from the right or left. Cross Traffic
Alert works with the reverse sensing
system which sounds its own series of
tones. See Parking Aid (page 150).
System Sensors
WARNING
Just prior to the system recognizing
a blocked condition and alerting the
driver, the number of missed objects
will increase. To help avoid injuries, NEVER
use the BLIS as a replacement for using
the side and rear view mirrors and looking
over your shoulder before changing lanes.
BLIS is not a replacement for careful
driving and only an assist.
Note:It is possible to get a blockage
warning with no blockage present; this is
rare and known as a false blockage warning.
A false blocked condition either
self-corrects or clears after a key cycle.
E142443
The system uses radar sensors which are
located behind the bumper fascia on each
side of your vehicle. Do not allow these
areas to become obstructed by mud, snow
or bumper stickers, as this can cause
degraded system performance.
If the system detects a degraded
performance condition, a message warning
of a blocked sensor or a message warning
of low visibility will appear in the
information display along with a warning
indicator. The information display warning
can be cleared but the warning indicator
will remain illuminated.
When the blockage is removed, the system
can be reset in two ways:
• when at least two objects are detected
while driving, or
• turn the ignition from on to off, then
back on.
If the blockage is still present after the key
cycle, the system senses again that it is
blocked after driving in traffic.
162
Driving Aids
Page 182 of 428
ESSENTIAL TOWING CHECKS
Follow these guidelines for safe towing:
• Do not tow a trailer until you drive your
vehicle at least 1000 miles (1600
kilometers).
• Consult your local motor vehicle laws
for towing a trailer.
• See the instructions included with
towing accessories for the proper
installation and adjustment
specifications.
• Service your vehicle more frequently if
you tow a trailer. See your scheduled
maintenance information.
• If you use a rental trailer, follow the
instructions the rental agency gives
you.
Another chapter of this manual contains
load specification terms found on the tire
label and Safety Compliance label and
instructions on calculating your vehicle's
load. See Load Limit (page 168).
Remember to account for the trailer
tongue weight as part of your vehicle load
when calculating the total vehicle weight.
Hitches
Do not use a hitch that either clamps onto
the bumper or attaches to the axle.
Distribute the trailer load so 10-15% of the
total trailer weight is on the tongue.
Safety Chains
Note:Never attach safety chains to the
bumper.
Always connect the safety chains to the
hook retainers of your vehicle hitch.
To connect the safety chains, cross them
under the trailer tongue and allow enough
slack for turning tight corners. Do not allow
the chains to drag on the ground.
Trailer Brakes
WARNING
Do not connect a trailer's hydraulic
brake system directly to your
vehicle's brake system. Your vehicle
may not have enough braking power and
your chances of having a collision greatly
increase.
Electric brakes and manual, automatic or
surge-type trailer brakes are safe if you
install them properly and adjust them to
the manufacturer's specifications. The
trailer brakes must meet local and federal
regulations.
The rating for the tow vehicle's braking
system operation is at the gross vehicle
weight rating, not the gross combined
weight rating.
Separate functioning brake systems
are required for safe control of towed
vehicles and trailers weighing more
than 1500 pounds (680 kilograms)
when loaded.
Trailer Lamps
WARNING
Never connect any trailer lamp wiring
to the vehicle's tail lamp wiring; this
may damage the electrical system
resulting in fire. Contact your authorized
dealer as soon as possible for assistance
in proper trailer tow wiring installation.
Additional electrical equipment may be
required.
Trailer lamps are required on most towed
vehicles. Make sure all running lights, brake
lights, turn signals and hazard lights are
working.
179
Towing