ECU FORD ESCAPE 2016 3.G User Guide
[x] Cancel search | Manufacturer: FORD, Model Year: 2016, Model line: ESCAPE, Model: FORD ESCAPE 2016 3.GPages: 393, PDF Size: 5.85 MB
Page 66 of 393
KEYLESS ENTRY (If Equipped)
SECURICODE™ KEYLESS ENTRY
KEYPAD
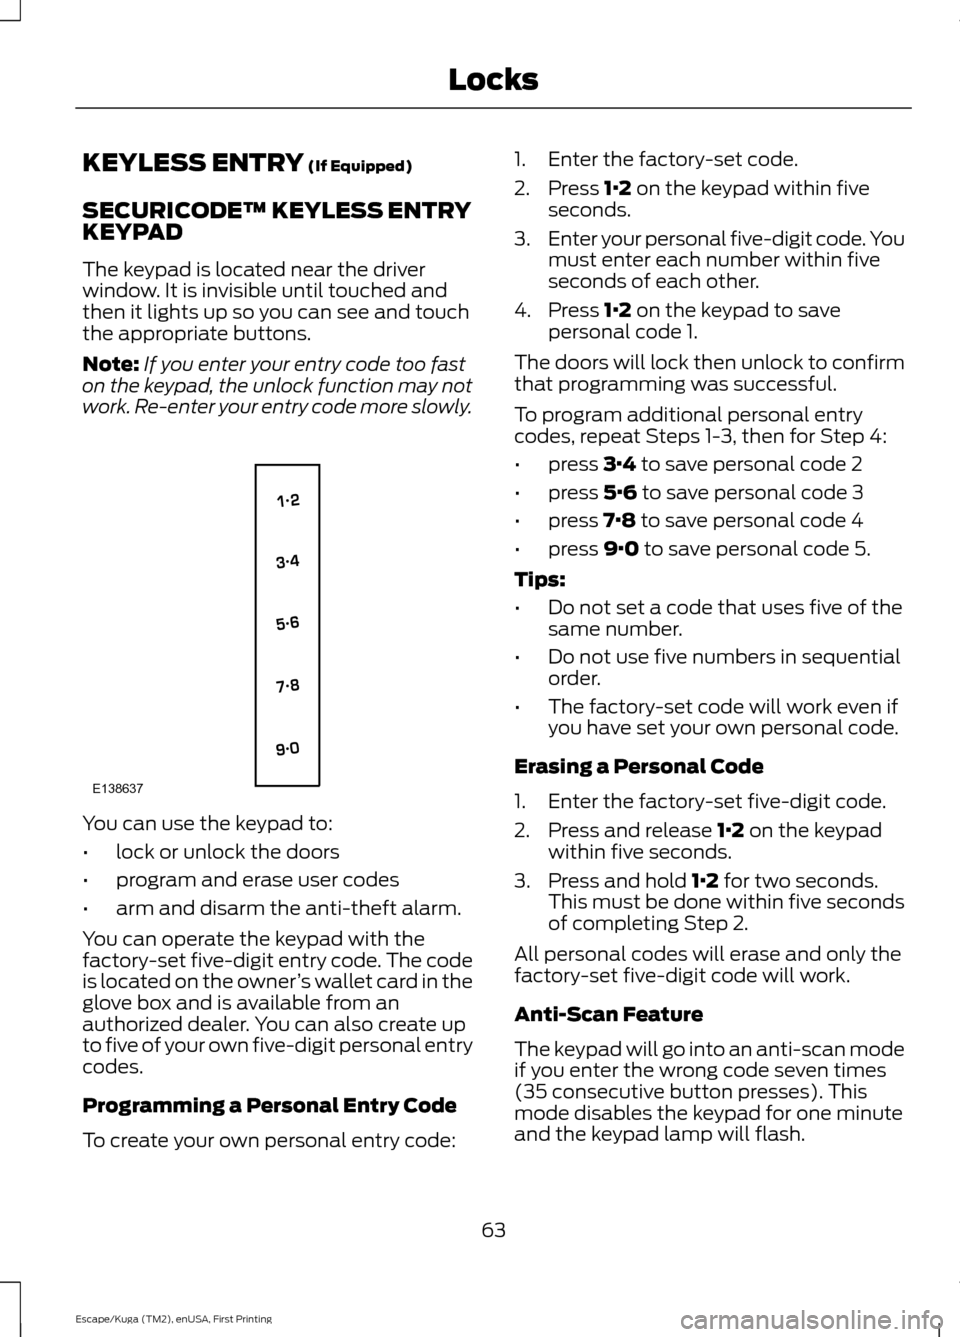
The keypad is located near the driver
window. It is invisible until touched and
then it lights up so you can see and touch
the appropriate buttons.
Note: If you enter your entry code too fast
on the keypad, the unlock function may not
work. Re-enter your entry code more slowly. You can use the keypad to:
•
lock or unlock the doors
• program and erase user codes
• arm and disarm the anti-theft alarm.
You can operate the keypad with the
factory-set five-digit entry code. The code
is located on the owner ’s wallet card in the
glove box and is available from an
authorized dealer. You can also create up
to five of your own five-digit personal entry
codes.
Programming a Personal Entry Code
To create your own personal entry code: 1. Enter the factory-set code.
2. Press 1·2 on the keypad within five
seconds.
3. Enter your personal five-digit code. You
must enter each number within five
seconds of each other.
4. Press
1·2 on the keypad to save
personal code 1.
The doors will lock then unlock to confirm
that programming was successful.
To program additional personal entry
codes, repeat Steps 1-3, then for Step 4:
• press
3·4 to save personal code 2
• press
5·6 to save personal code 3
• press
7·8 to save personal code 4
• press
9·0 to save personal code 5.
Tips:
• Do not set a code that uses five of the
same number.
• Do not use five numbers in sequential
order.
• The factory-set code will work even if
you have set your own personal code.
Erasing a Personal Code
1. Enter the factory-set five-digit code.
2. Press and release
1·2 on the keypad
within five seconds.
3. Press and hold
1·2 for two seconds.
This must be done within five seconds
of completing Step 2.
All personal codes will erase and only the
factory-set five-digit code will work.
Anti-Scan Feature
The keypad will go into an anti-scan mode
if you enter the wrong code seven times
(35 consecutive button presses). This
mode disables the keypad for one minute
and the keypad lamp will flash.
63
Escape/Kuga (TM2), enUSA, First Printing LocksE138637
Page 68 of 393
PASSIVE ANTI-THEFT
SYSTEM
Note:
The system is not compatible with
non-Ford aftermarket remote start systems.
Use of these systems may result in vehicle
starting problems and a loss of security
protection.
Note: Metallic objects, electronic devices
or a second coded key on the same key
chain may cause vehicle starting problems
if they are too close to the key when starting
the engine. Prevent these objects from
touching the coded key while starting the
engine. Switch the ignition off, move all
objects on the key chain away from the
coded key and restart the engine if a
problem occurs.
Note: Do not leave a duplicate coded key
in the vehicle. Always take your keys and
lock all doors when leaving the vehicle.
SecuriLock®
The system is an engine immobilization
system. It is designed to help prevent the
engine from being started unless a coded
key programmed to your vehicle is used.
Using the wrong key may prevent the
engine from starting. A message may
appear in the information display.
If you are unable to start the engine with a
correctly coded key, a malfunction has
happened and a message may appear in
the information display.
Automatic Arming
The vehicle arms immediately after you
switch the ignition off.
Automatic Disarming
Switching the ignition on with a coded key
disarms the vehicle. Replacement Keys
Note:
Your vehicle comes equipped with
two integrated keyhead transmitters or two
intelligent access keys.
The integrated keyhead transmitter
functions as a programmed ignition key
that operates all the locks and starts the
vehicle, as well as a remote control.
The intelligent access key functions as a
programmed key that operates the driver
door lock and activates the intelligent
access with push button start system, as
well as a remote control.
If your programmed transmitters or
standard SecuriLock coded keys
(integrated keyhead transmitters only) are
lost or stolen and you do not have an extra
coded key, you will need to have your
vehicle towed to an authorized dealer. You
need to erase the key codes from your
vehicle and program new coded keys.
Store an extra programmed key away from
the vehicle in a safe place to help prevent
any inconveniences. See your authorized
dealer to purchase additional spare or
replacement keys.
Programming a Spare Integrated
Keyhead Transmitter
Note: You can program a maximum of eight
coded keys to your vehicle. All eight can be
integrated keyhead transmitters.
You can program your own integrated
keyhead transmitter or standard
SecuriLock coded keys to your vehicle. This
procedure will program both the engine
immobilizer keycode and the remote entry
portion of the remote control to your
vehicle
Only use integrated keyhead transmitters
or standard SecuriLock keys.
65
Escape/Kuga (TM2), enUSA, First Printing Security
Page 69 of 393
You must have two previously
programmed coded keys and the new
unprogrammed key readily accessible. See
your authorized dealer to have the spare
key programmed if two previously
programmed coded keys are not available.
Read and understand the entire procedure
before you begin.
1.
Insert the first previously programmed
coded key into the ignition.
2. Switch the ignition from off to on. Keep
the ignition on for at least three
seconds, but no more than 10 seconds.
3. Switch the ignition off and remove the
first coded key from the ignition.
4. After three seconds but within 10 seconds of switching the ignition off,
insert the second previously coded key
into the ignition.
5. Switch the ignition from off to on. Keep
the ignition on for at least three
seconds, but no more than 10 seconds.
6. Switch the ignition off and remove the
second previously programmed coded
key from the ignition.
7. After three seconds but within 10 seconds of switching the ignition off
and removing the previously
programmed coded key, insert the new
unprogrammed key into the ignition.
8. Switch the ignition from off to on. Keep
the ignition on for at least six seconds.
9. Remove the newly programmed coded
key from the ignition.
If the key has been successfully
programmed it will start the engine and
operate the remote entry system (if the
new key is an integrated keyhead
transmitter).
If programming was not successful, wait
10 seconds and repeat Steps 1 through 8.
If you are still unsuccessful, take your
vehicle to your authorized dealer. Programming a Spare Intelligent
Access Key
See your authorized dealer to have
additional keys programmed to your
vehicle.
ANTI-THEFT ALARM (If Equipped)
The system will warn you of an
unauthorized entry to your vehicle. It will
be triggered if any door, the luggage
compartment or the hood is opened
without using the key, remote control or
keyless entry keypad.
The direction indicators will flash and the
horn will sound if unauthorized entry is
attempted while the alarm is armed.
Take all remote controls to an authorized
dealer if there is any potential alarm
problem with your vehicle.
Arming the Alarm
The alarm is ready to arm when there is
not a key in the ignition. Electronically lock
the vehicle to arm the alarm. The message indicator flashes
when theft protection is active.
Disarming the Alarm
Disarm the alarm by any of the following
actions:
• Unlock the doors or luggage
compartment with the remote control
or keyless entry keypad.
• Switch the ignition on or start the
vehicle.
• Use a key in the driver ’s door to unlock
the vehicle, then switch the ignition on
within 12 seconds.
Note: Pressing the panic button on the
remote control will stop the horn and signal
indicators, but will not disarm the system.
66
Escape/Kuga (TM2), enUSA, First Printing Security
Page 119 of 393
HomeLink Wireless Control
System
WARNINGS
Make sure that the garage door and
security device are free from
obstruction when you are
programming. Do not program the system
with the vehicle in the garage. Do not use the system with any
garage door opener that does not
have the safety stop and reverse
feature as required by U.S. Federal Safety
Standards (this includes any garage door
opener manufactured before April 1, 1982).
A garage door opener which cannot detect
an object, signaling the door to stop and
reverse, does not meet current federal
safety standards. Using a garage door
opener without these features increases
the risk of serious injury or death. Note:
Make sure you keep the original
remote control transmitter for use in other
vehicles as well as for future system
programming.
Note: We recommend that upon the sale
or lease termination of your vehicle, you
erase the programmed function buttons for
security reasons. See Erasing the Function
Button Codes.
Note: You can program a maximum of
three devices. To change or replace any of
the three devices after it has been initially
programmed, you must first erase the
current settings. See Erasing the Function
Button Codes
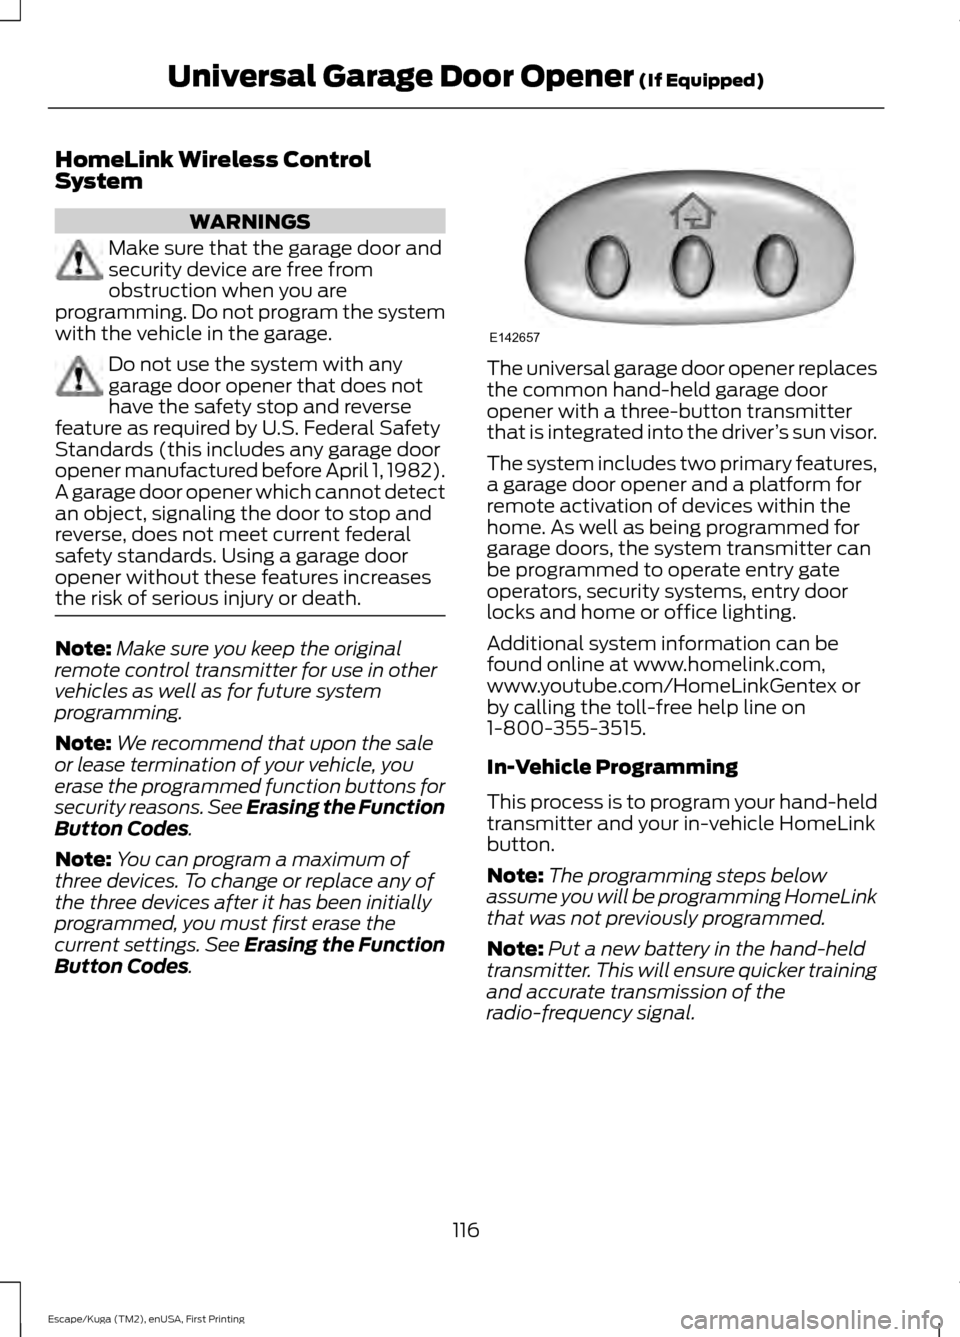
. The universal garage door opener replaces
the common hand-held garage door
opener with a three-button transmitter
that is integrated into the driver
’s sun visor.
The system includes two primary features,
a garage door opener and a platform for
remote activation of devices within the
home. As well as being programmed for
garage doors, the system transmitter can
be programmed to operate entry gate
operators, security systems, entry door
locks and home or office lighting.
Additional system information can be
found online at www.homelink.com,
www.youtube.com/HomeLinkGentex or
by calling the toll-free help line on
1-800-355-3515.
In-Vehicle Programming
This process is to program your hand-held
transmitter and your in-vehicle HomeLink
button.
Note: The programming steps below
assume you will be programming HomeLink
that was not previously programmed.
Note: Put a new battery in the hand-held
transmitter. This will ensure quicker training
and accurate transmission of the
radio-frequency signal.
116
Escape/Kuga (TM2), enUSA, First Printing Universal Garage Door Opener
(If Equipped)E142657
Page 159 of 393
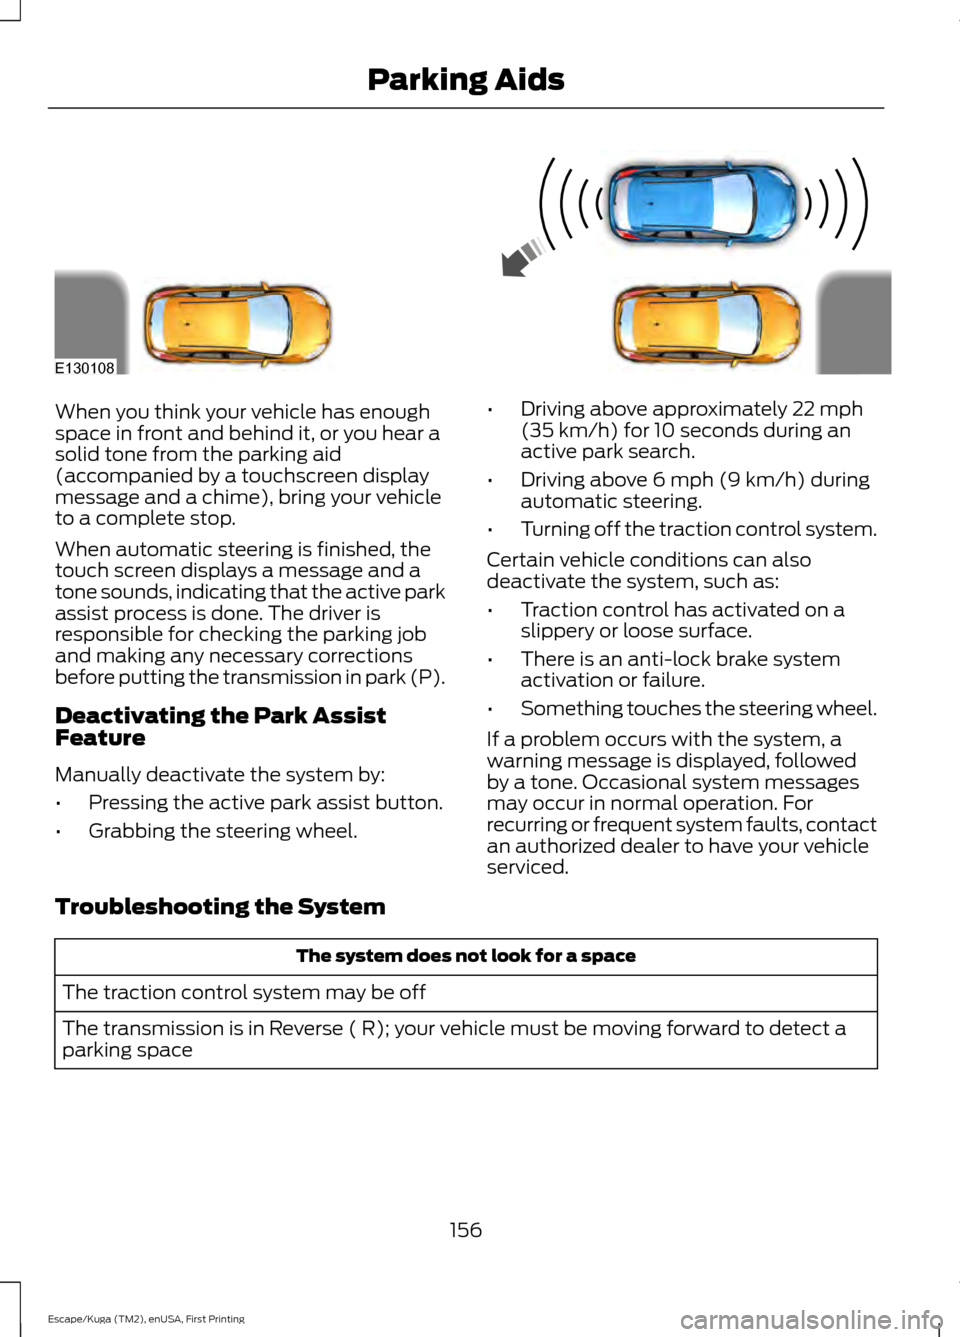
When you think your vehicle has enough
space in front and behind it, or you hear a
solid tone from the parking aid
(accompanied by a touchscreen display
message and a chime), bring your vehicle
to a complete stop.
When automatic steering is finished, the
touch screen displays a message and a
tone sounds, indicating that the active park
assist process is done. The driver is
responsible for checking the parking job
and making any necessary corrections
before putting the transmission in park (P).
Deactivating the Park Assist
Feature
Manually deactivate the system by:
•
Pressing the active park assist button.
• Grabbing the steering wheel. •
Driving above approximately 22 mph
(35 km/h) for 10 seconds during an
active park search.
• Driving above
6 mph (9 km/h) during
automatic steering.
• Turning off the traction control system.
Certain vehicle conditions can also
deactivate the system, such as:
• Traction control has activated on a
slippery or loose surface.
• There is an anti-lock brake system
activation or failure.
• Something touches the steering wheel.
If a problem occurs with the system, a
warning message is displayed, followed
by a tone. Occasional system messages
may occur in normal operation. For
recurring or frequent system faults, contact
an authorized dealer to have your vehicle
serviced.
Troubleshooting the System The system does not look for a space
The traction control system may be off
The transmission is in Reverse ( R); your vehicle must be moving forward to detect a
parking space
156
Escape/Kuga (TM2), enUSA, First Printing Parking AidsE130108
Page 173 of 393
REAR UNDER FLOOR
STORAGE
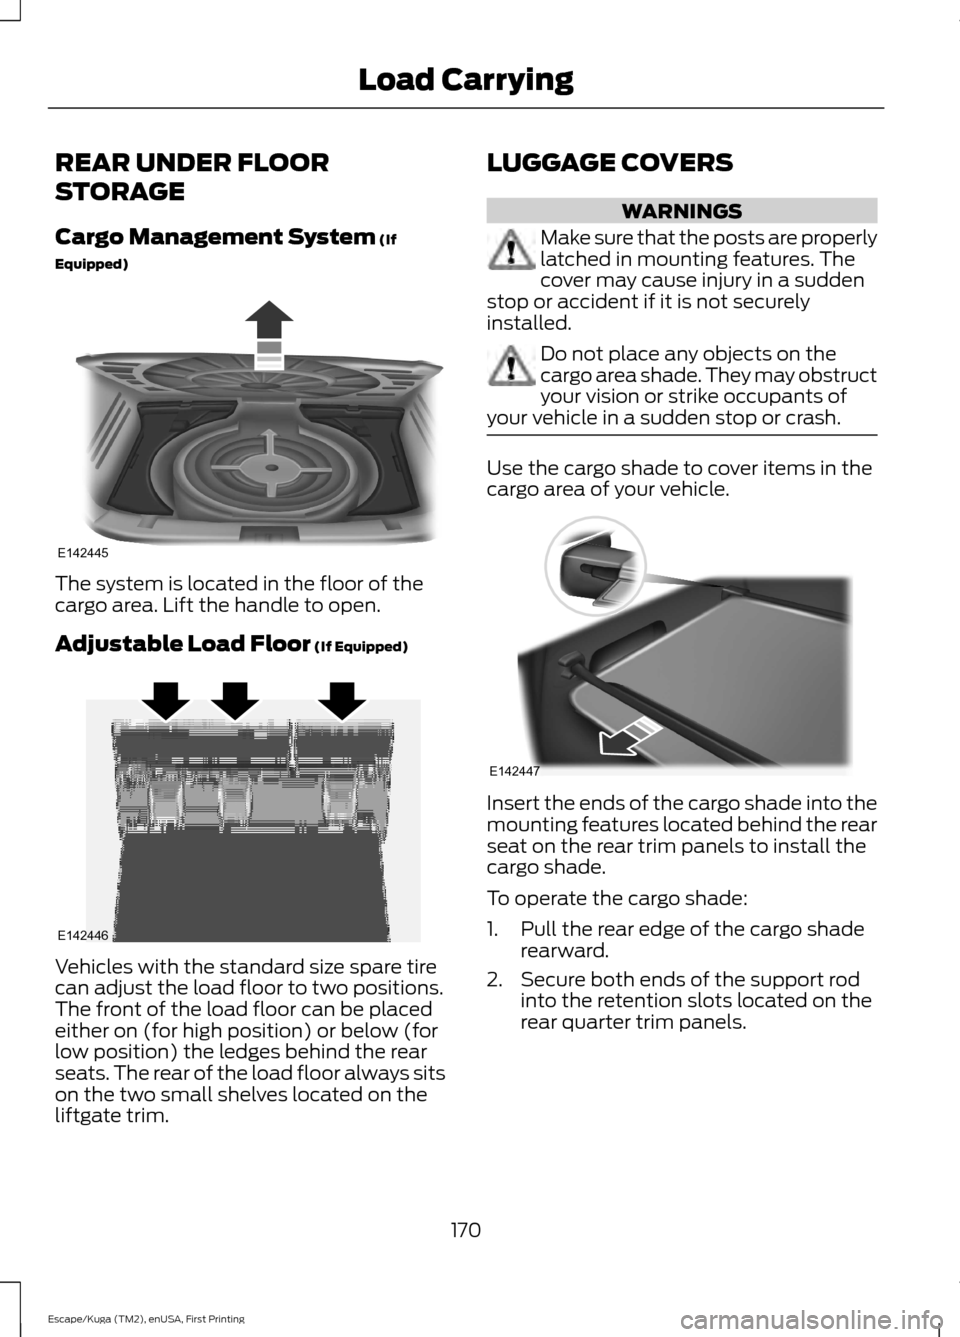
Cargo Management System (If
Equipped) The system is located in the floor of the
cargo area. Lift the handle to open.
Adjustable Load Floor
(If Equipped)
Vehicles with the standard size spare tire
can adjust the load floor to two positions.
The front of the load floor can be placed
either on (for high position) or below (for
low position) the ledges behind the rear
seats. The rear of the load floor always sits
on the two small shelves located on the
liftgate trim. LUGGAGE COVERS WARNINGS
Make sure that the posts are properly
latched in mounting features. The
cover may cause injury in a sudden
stop or accident if it is not securely
installed. Do not place any objects on the
cargo area shade. They may obstruct
your vision or strike occupants of
your vehicle in a sudden stop or crash. Use the cargo shade to cover items in the
cargo area of your vehicle.
Insert the ends of the cargo shade into the
mounting features located behind the rear
seat on the rear trim panels to install the
cargo shade.
To operate the cargo shade:
1. Pull the rear edge of the cargo shade
rearward.
2. Secure both ends of the support rod into the retention slots located on the
rear quarter trim panels.
170
Escape/Kuga (TM2), enUSA, First Printing Load CarryingE142445 E142446 E142447
Page 174 of 393
ROOF RACKS AND LOAD
CARRIERS
WARNING
When loading the roof racks, we
recommend you evenly distribute the
load, as well as maintain a low
center of gravity. Loaded vehicles, with
higher centers of gravity, may handle
differently than unloaded vehicles. Take
extra precautions, such as slower speeds
and increased stopping distance, when
driving a heavily loaded vehicle. The maximum recommended load, evenly
distributed on the crossbars, is:
•
100 pounds (45 kilograms) for vehicles
without a moonroof
• 45 pounds (20 kilograms) for vehicles
with a moonroof.
Note: Never place loads directly on the roof
panel. The roof panel is not designed to
directly carry a load.
For correct roof rack system function, you
must place loads directly on crossbars
affixed to the roof rack side rails. When
using the roof rack system, we recommend
you use Ford Genuine Accessory crossbars
designed specifically for your vehicle.
Make sure that you securely fasten the
load. Check the tightness of the load
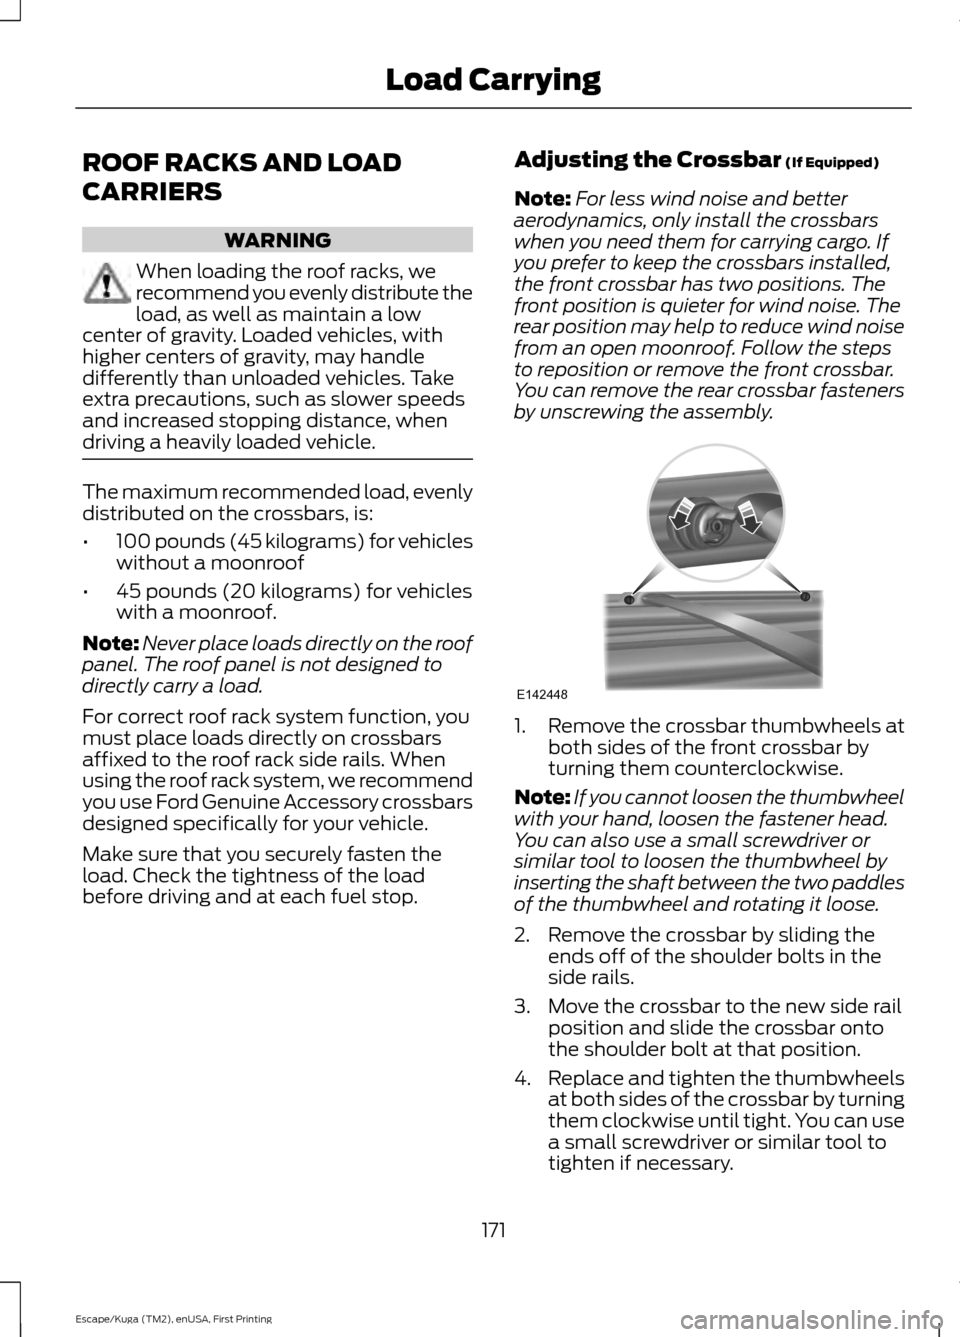
before driving and at each fuel stop. Adjusting the Crossbar (If Equipped)
Note: For less wind noise and better
aerodynamics, only install the crossbars
when you need them for carrying cargo. If
you prefer to keep the crossbars installed,
the front crossbar has two positions. The
front position is quieter for wind noise. The
rear position may help to reduce wind noise
from an open moonroof. Follow the steps
to reposition or remove the front crossbar.
You can remove the rear crossbar fasteners
by unscrewing the assembly. 1.
Remove the crossbar thumbwheels at
both sides of the front crossbar by
turning them counterclockwise.
Note: If you cannot loosen the thumbwheel
with your hand, loosen the fastener head.
You can also use a small screwdriver or
similar tool to loosen the thumbwheel by
inserting the shaft between the two paddles
of the thumbwheel and rotating it loose.
2. Remove the crossbar by sliding the ends off of the shoulder bolts in the
side rails.
3. Move the crossbar to the new side rail position and slide the crossbar onto
the shoulder bolt at that position.
4. Replace and tighten the thumbwheels
at both sides of the crossbar by turning
them clockwise until tight. You can use
a small screwdriver or similar tool to
tighten if necessary.
171
Escape/Kuga (TM2), enUSA, First Printing Load CarryingE142448
Page 175 of 393
Make sure to check that the thumbwheels
are tight each time you add or remove load
from the roof rack, and periodically while
traveling. Make sure that the load is secure
before traveling.
LOAD LIMIT
Vehicle Loading - with and
without a Trailer
This section will guide you in the
proper loading of your vehicle,
trailer or both, to keep your loaded
vehicle weight within its design
rating capability, with or without
a trailer. Properly loading your
vehicle will provide maximum
return of vehicle design
performance. Before loading your
vehicle, familiarize yourself with
the following terms for
determining your vehicle
’s weight
ratings, with or without a trailer,
from the vehicle ’s Tire Label or
Safety Compliance Certification
Label:
Base Curb Weight - is the weight
of the vehicle including a full tank
of fuel and all standard
equipment. It does not include
passengers, cargo, or optional
equipment.
Vehicle Curb Weight -
is the
weight of your new vehicle when
you picked it up from your
authorized dealer plus any
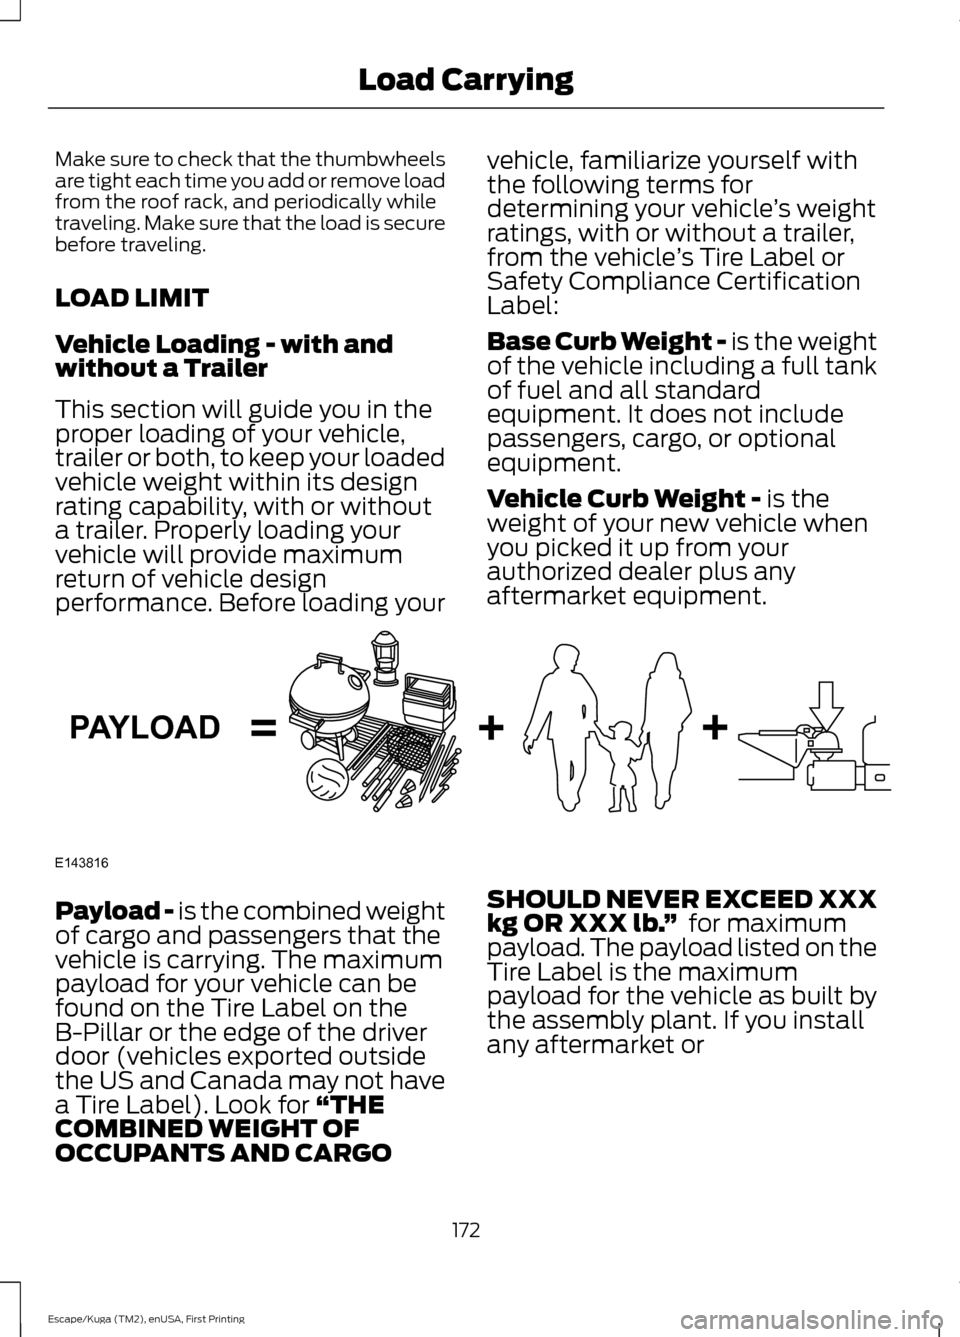
aftermarket equipment. Payload -
is the combined weight
of cargo and passengers that the
vehicle is carrying. The maximum
payload for your vehicle can be
found on the Tire Label on the
B-Pillar or the edge of the driver
door (vehicles exported outside
the US and Canada may not have
a Tire Label). Look for
“THE
COMBINED WEIGHT OF
OCCUPANTS AND CARGO SHOULD NEVER EXCEED XXX
kg OR XXX lb.
” for maximum
payload. The payload listed on the
Tire Label is the maximum
payload for the vehicle as built by
the assembly plant. If you install
any aftermarket or
172
Escape/Kuga (TM2), enUSA, First Printing Load CarryingE143816PAYLOAD
Page 186 of 393
6.
Check that the trailer is level or
slightly nose down toward your
vehicle. If not, adjust the ball
height accordingly and repeat
Steps 2-6.
When the trailer is level or slightly
nose down toward the vehicle:
• Lock the bar tension adjuster
in place.
• Check that the trailer tongue
securely attaches and locks
onto the hitch.
• Install safety chains, lighting,
and trailer brake controls as
required by law or the trailer
manufacturer.
Safety Chains
Note: Never attach safety chains
to the bumper.
Always connect the safety chains
to the hook retainers of your
vehicle hitch.
To connect the trailer ’s safety
chains, cross them under the
trailer tongue and allow enough
slack for turning tight corners. Do
not allow the chains to drag on the
ground. Trailer Brakes WARNING
Do not connect a trailer's
hydraulic brake system
directly to your vehicle's brake
system. Your vehicle may not have
enough braking power and your
chances of having a collision
greatly increase. Electric brakes and manual,
automatic or surge-type trailer
brakes are safe if you install them
properly and adjust them to the
manufacturer's specifications. The
trailer brakes must meet local and
federal regulations.
The rating for the tow vehicle's
braking system operation is at
the gross vehicle weight rating,
not the gross combined weight
rating.
Separate functioning brake
systems are required for safe
control of towed vehicles and
trailers weighing more than
1500 pounds (680 kilograms)
when loaded.
183
Escape/Kuga (TM2), enUSA, First Printing Towing
Page 192 of 393
•
Transmissions give their best fuel
economy when operated in the top
cruise gear and with steady pressure
on the gas pedal.
• Four-wheel-drive operation (if
equipped) is less fuel efficient than
two-wheel-drive operation.
• Close the windows for high-speed
driving.
DRIVING THROUGH WATER WARNING
Do not drive through flowing or deep
water as you may lose control of your
vehicle.
Note:
Driving through standing water can
cause vehicle damage.
Note: Engine damage can occur if water
enters the air filter.
Before driving through standing water,
check the depth. Never drive through water
that is higher than the bottom of the front
rocker area of your vehicle. When driving through standing water, drive
very slowly and do not stop your vehicle.
Your brake performance and traction may
be limited. After driving through water and
as soon as it is safe to do so: •
Lightly press the brake pedal to dry the
brakes and to check that they work.
• Check that the horn works.
• Check that the exterior lights work.
• Turn the steering wheel to check that
the steering power assist works.
FLOOR MATS WARNINGS
Always use floor mats that are
designed to fit the foot well of your
vehicle. Only use floor mats that
leave the pedal area unobstructed. Only
use floor mats that are firmly secured to
retention posts so that they cannot slip out
of position and interfere with the pedals
or impair safe operation of your vehicle in
other ways. Pedals that cannot move freely can
cause loss of vehicle control and
increase the risk of serious personal
injury. Always make sure that the floor
mats are properly attached to the
retention posts in the carpet that are
supplied with your vehicle. Floor mats must
be properly secured to both retention posts
to make sure mats do not shift out of
position. Never place floor mats or any other
covering in the vehicle foot well that
cannot be properly secured to
prevent them from moving and interfering
with the pedals or the ability to control the
vehicle. Never place floor mats or any other
covering on top of already installed
floor mats. Floor mats should always
rest on top of vehicle carpeting surface and
not another floor mat or other covering.
Additional floor mats or any other covering
will reduce the pedal clearance and
potentially interfere with pedal operation.
189
Escape/Kuga (TM2), enUSA, First Printing Driving HintsE176360