tow FORD ESCAPE 2021 User Guide
[x] Cancel search | Manufacturer: FORD, Model Year: 2021, Model line: ESCAPE, Model: FORD ESCAPE 2021Pages: 589, PDF Size: 9.2 MB
Page 95 of 589
WIPERS
Wiper Precautions
Do not operate the wipers on a dry
windshield. This could scratch the glass or
damage the wiper blades. Use the
windshield washers before wiping a dry
windshield.
Fully defrost the windshield before you
switch the windshield wipers on.
Switch the windshield wipers off before
entering a car wash.
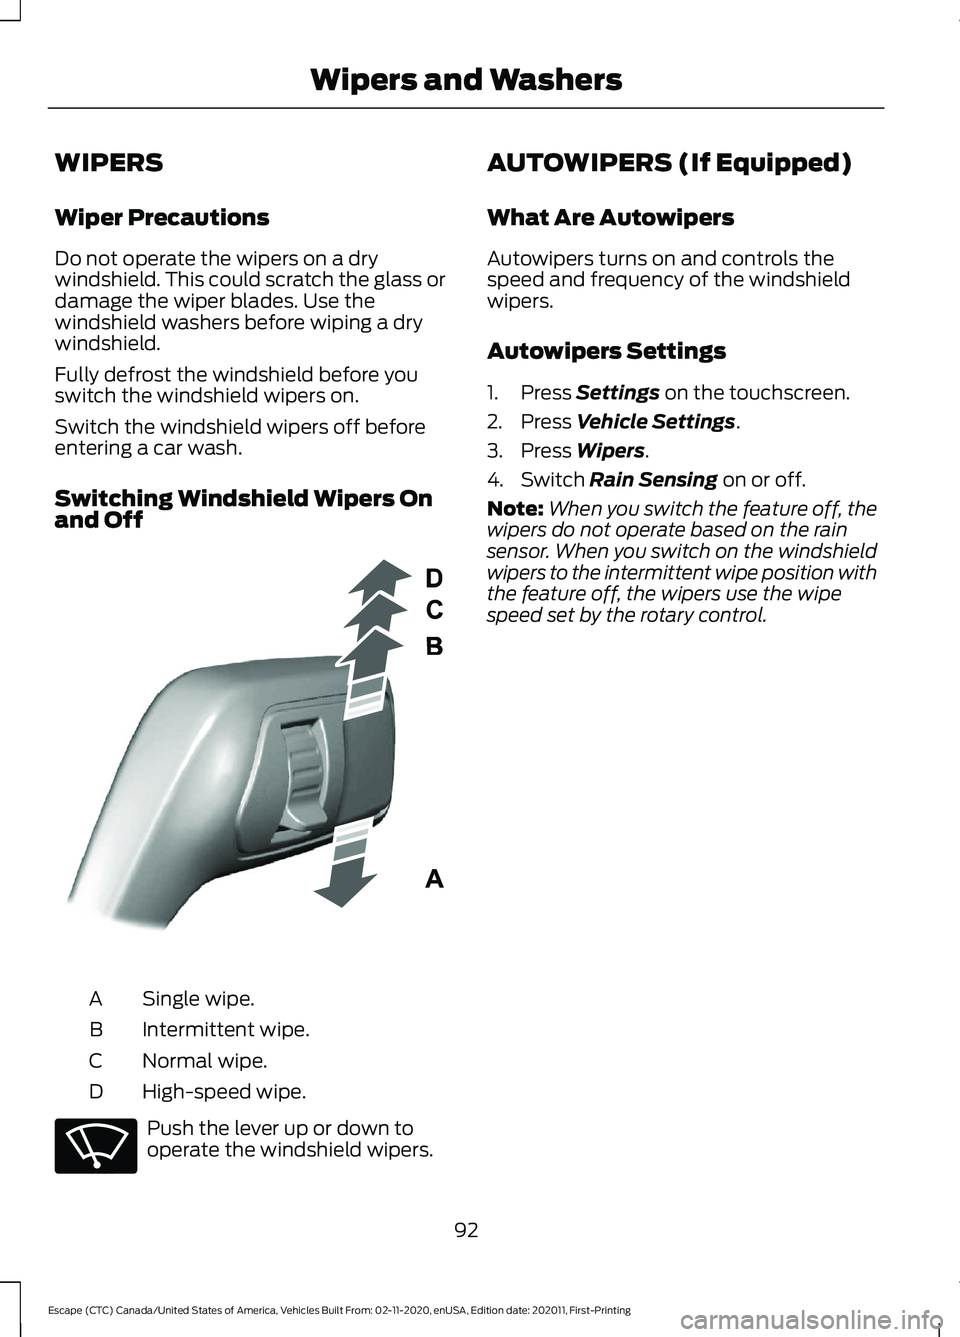
Switching Windshield Wipers On
and Off
Single wipe.
A
Intermittent wipe.
B
Normal wipe.
C
High-speed wipe.
D Push the lever up or down to
operate the windshield wipers. AUTOWIPERS (If Equipped)
What Are Autowipers
Autowipers turns on and controls the
speed and frequency of the windshield
wipers.
Autowipers Settings
1. Press Settings on the touchscreen.
2. Press
Vehicle Settings.
3. Press
Wipers.
4. Switch
Rain Sensing on or off.
Note: When you switch the feature off, the
wipers do not operate based on the rain
sensor. When you switch on the windshield
wipers to the intermittent wipe position with
the feature off, the wipers use the wipe
speed set by the rotary control.
92
Escape (CTC) Canada/United States of America, Vehicles Built From: 02-11-2020, enUSA, Edition date: 202011, First-Printing Wipers and WashersE295996 E270969
Page 98 of 589
WASHERS
Washer Precautions
WARNING: If you operate your
vehicle in temperatures below 41°F
(5°C), use washer fluid with antifreeze
protection. Failure to use washer fluid
with antifreeze protection in cold
weather could result in impaired
windshield vision and increase the risk
of injury or accident.
Do not operate the washers when the
washer reservoir is empty. This could cause
the washer pump to overheat.
Keep the outside of the windshield clean.
The rain sensor is very sensitive and the
wipers may operate if dirt, mist or insects
hit the windshield.
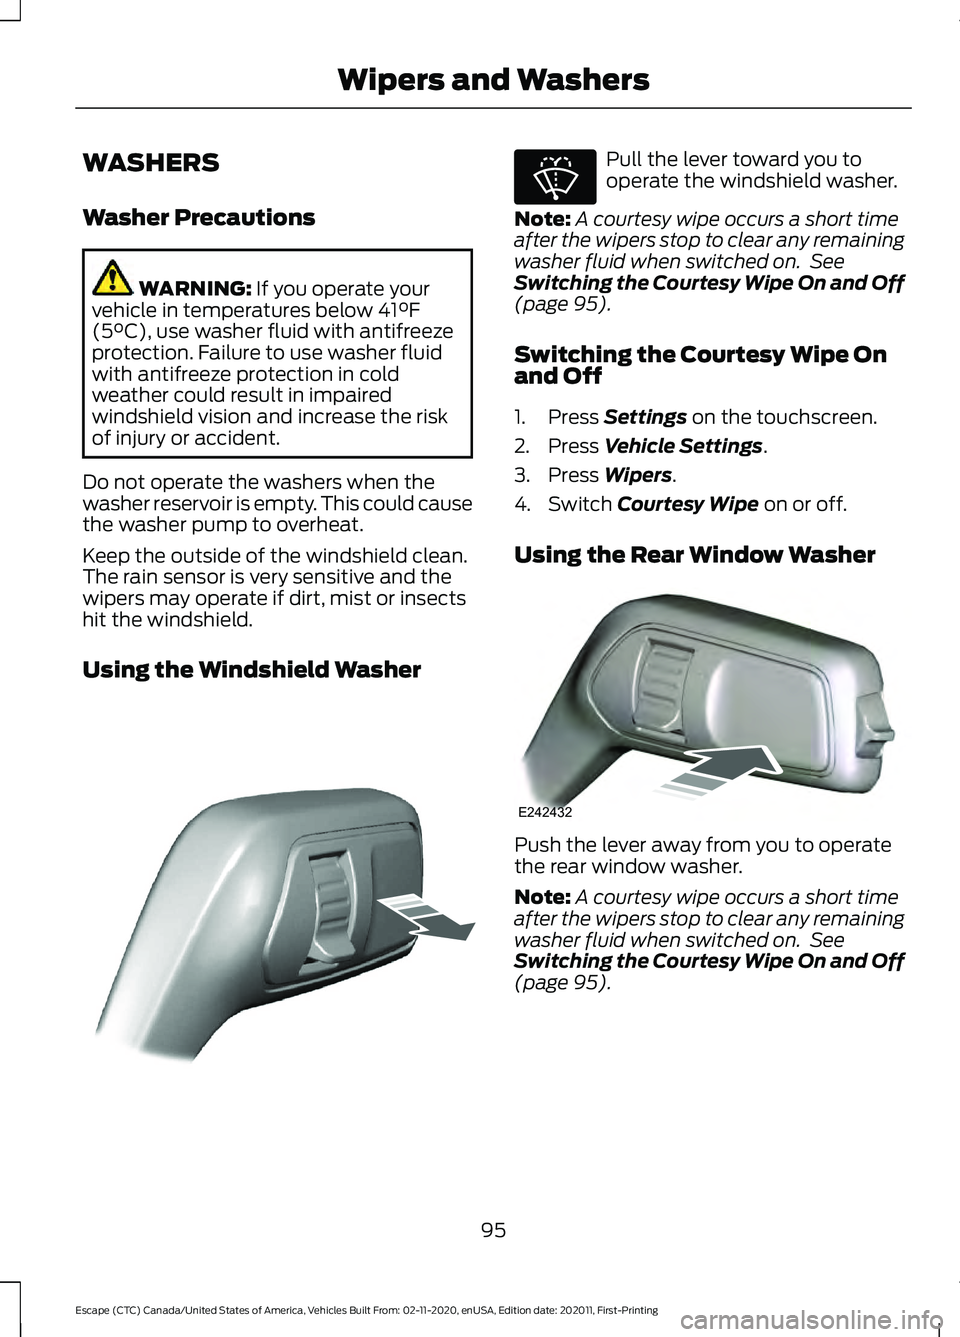
Using the Windshield Washer Pull the lever toward you to
operate the windshield washer.
Note: A courtesy wipe occurs a short time
after the wipers stop to clear any remaining
washer fluid when switched on. See
Switching the Courtesy Wipe On and Off
(page
95).
Switching the Courtesy Wipe On
and Off
1. Press
Settings on the touchscreen.
2. Press
Vehicle Settings.
3. Press
Wipers.
4. Switch
Courtesy Wipe on or off.
Using the Rear Window Washer Push the lever away from you to operate
the rear window washer.
Note:
A courtesy wipe occurs a short time
after the wipers stop to clear any remaining
washer fluid when switched on. See
Switching the Courtesy Wipe On and Off
(page
95).
95
Escape (CTC) Canada/United States of America, Vehicles Built From: 02-11-2020, enUSA, Edition date: 202011, First-Printing Wipers and WashersE308825 E270967 E242432
Page 100 of 589
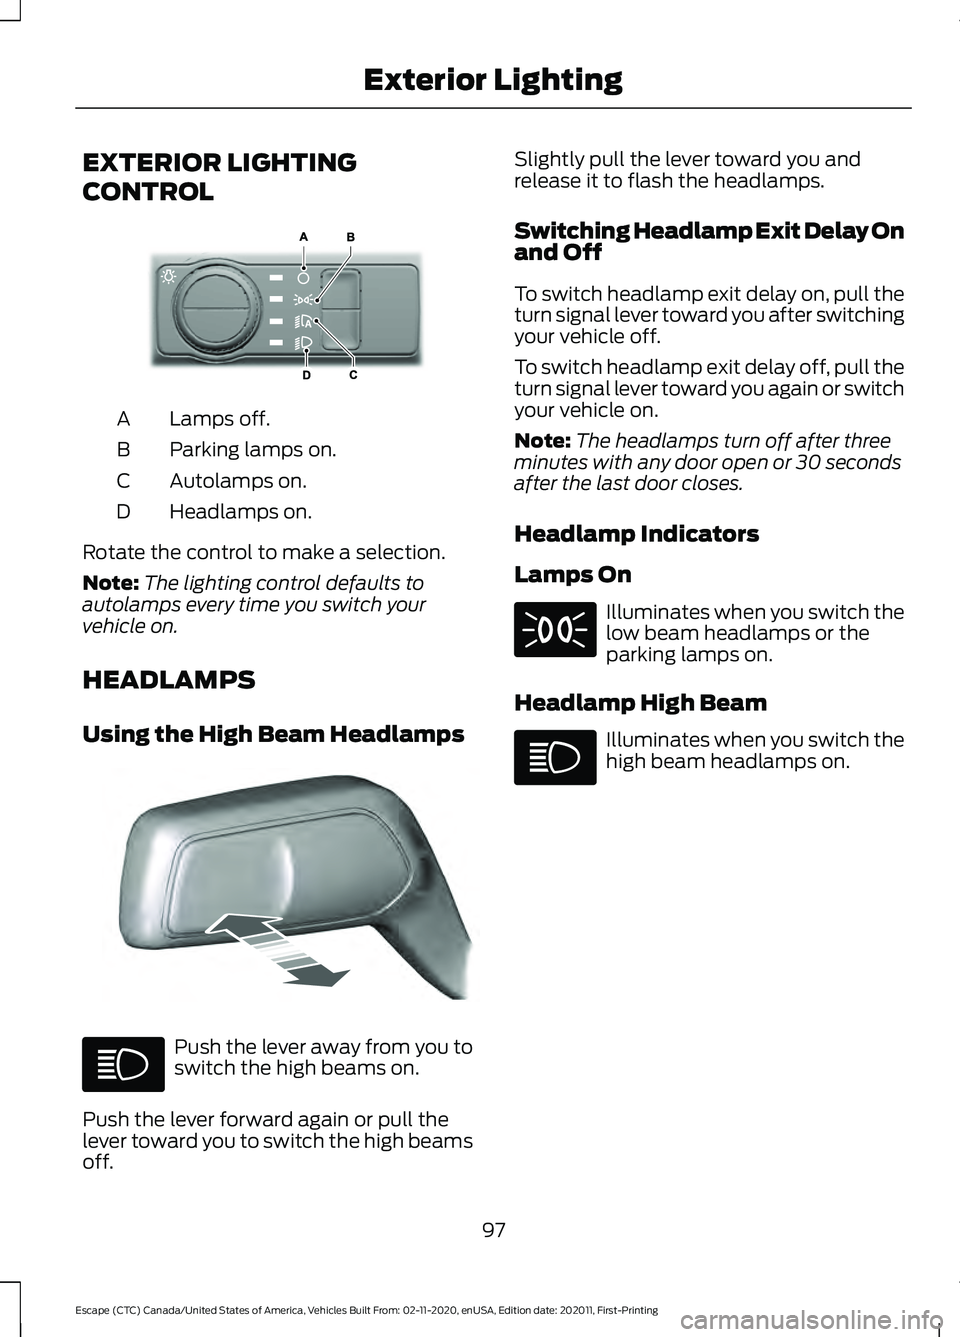
EXTERIOR LIGHTING
CONTROL
Lamps off.
A
Parking lamps on.
B
Autolamps on.
C
Headlamps on.
D
Rotate the control to make a selection.
Note: The lighting control defaults to
autolamps every time you switch your
vehicle on.
HEADLAMPS
Using the High Beam Headlamps Push the lever away from you to
switch the high beams on.
Push the lever forward again or pull the
lever toward you to switch the high beams
off. Slightly pull the lever toward you and
release it to flash the headlamps.
Switching Headlamp Exit Delay On
and Off
To switch headlamp exit delay on, pull the
turn signal lever toward you after switching
your vehicle off.
To switch headlamp exit delay off, pull the
turn signal lever toward you again or switch
your vehicle on.
Note:
The headlamps turn off after three
minutes with any door open or 30 seconds
after the last door closes.
Headlamp Indicators
Lamps On Illuminates when you switch the
low beam headlamps or the
parking lamps on.
Headlamp High Beam Illuminates when you switch the
high beam headlamps on.
97
Escape (CTC) Canada/United States of America, Vehicles Built From: 02-11-2020, enUSA, Edition date: 202011, First-Printing Exterior LightingE327629 E328253
Page 110 of 589
INTERIOR MIRROR
PRECAUTIONS
WARNING: Do not adjust the
mirrors when your vehicle is moving. This
could result in the loss of control of your
vehicle, serious personal injury or death.
Note: Do not clean the mirror housing or
glass with harsh abrasives, fuel or other
petroleum-based cleaning products.
MANUALLY DIMMING THE
INTERIOR MIRROR
Pull the tab below the mirror toward you
to reduce glare at night.
AUTO-DIMMING INTERIOR
MIRROR (If Equipped)
What Is the Auto-Dimming Interior
Mirror
The mirror dims to reduce the effect of
bright light from behind. It returns to
normal when the bright light from behind
is no longer present or when you shift into
reverse (R).
Auto-Dimming Interior Mirror
Limitations
Do not block the sensors on the front and
back of the mirror.
Note: A rear center passenger or raised rear
center head restraint could prevent light
from reaching the sensor.
107
Escape (CTC) Canada/United States of America, Vehicles Built From: 02-11-2020, enUSA, Edition date: 202011, First-Printing Interior Mirror
Page 111 of 589
ADJUSTING THE EXTERIOR
MIRRORS
WARNING: Do not adjust the
mirrors when your vehicle is moving. This
could result in the loss of control of your
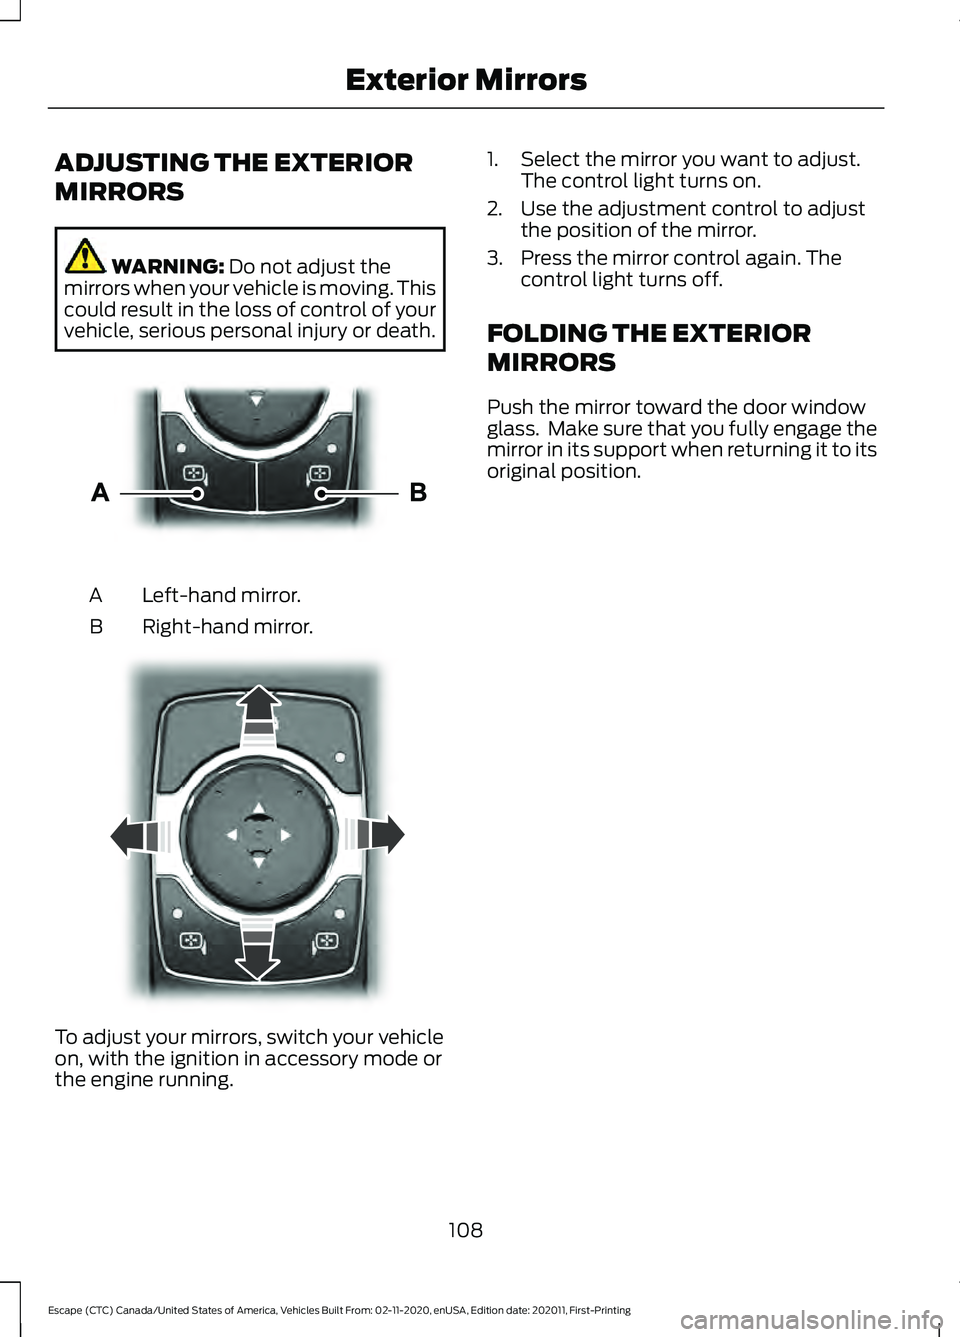
vehicle, serious personal injury or death. Left-hand mirror.
A
Right-hand mirror.
B To adjust your mirrors, switch your vehicle
on, with the ignition in accessory mode or
the engine running. 1. Select the mirror you want to adjust.
The control light turns on.
2. Use the adjustment control to adjust the position of the mirror.
3. Press the mirror control again. The control light turns off.
FOLDING THE EXTERIOR
MIRRORS
Push the mirror toward the door window
glass. Make sure that you fully engage the
mirror in its support when returning it to its
original position.
108
Escape (CTC) Canada/United States of America, Vehicles Built From: 02-11-2020, enUSA, Edition date: 202011, First-Printing Exterior MirrorsE303926 E303927
Page 149 of 589
4. Adjust the blower motor speed to the
lowest speed setting.
Defogging the Side Windows in
Cold Weather
1. Direct air to the instrument panel and windshield air vents.
2. Press and release A/C.
3. Adjust the temperature control to the setting you prefer.
4. Adjust the blower motor speed to the highest setting.
5. Direct air toward the side windows.
6. Close the instrument panel air vents.
HEATED WINDSHIELD
(IF
EQUIPPED)
Windshield Wiper De-Icer When you switch the heated rear
window on, the windshield wiper
de-icer turns on.
HEATED REAR WINDOW Press the button to clear the rear
window of thin ice and fog. The
heated rear window turns off
after a short period of time.
Note: Make sure the engine is on before
operating the heated windows.
Note: Do not use harsh chemicals, razor
blades or other sharp objects to clean or
remove decals from the inside of the heated
rear window. The vehicle warranty may not
cover damage to the heated rear window
grid lines. HEATED EXTERIOR MIRRORS
(IF EQUIPPED)
When you switch the heated rear window
on, the heated exterior mirrors turn on.
Note:
Do not remove ice from the mirrors
with a scraper or adjust the mirror glass
when it is frozen in place.
Note: Do not clean the mirror housing or
glass with harsh abrasives, fuel or other
petroleum-based cleaning products. The
vehicle warranty may not cover damage
caused to the mirror housing or glass.
146
Escape (CTC) Canada/United States of America, Vehicles Built From: 02-11-2020, enUSA, Edition date: 202011, First-Printing Climate Control
Page 150 of 589
WHAT IS THE CABIN AIR
FILTER
The cabin air filter improves the quality of
air in your vehicle by trapping dust, pollen
and other particles.
REPLACING THE CABIN AIR
FILTER
Replace the filter at regular intervals. See
Scheduled Maintenance (page 487).
The cabin air filter is behind the glove
compartment.
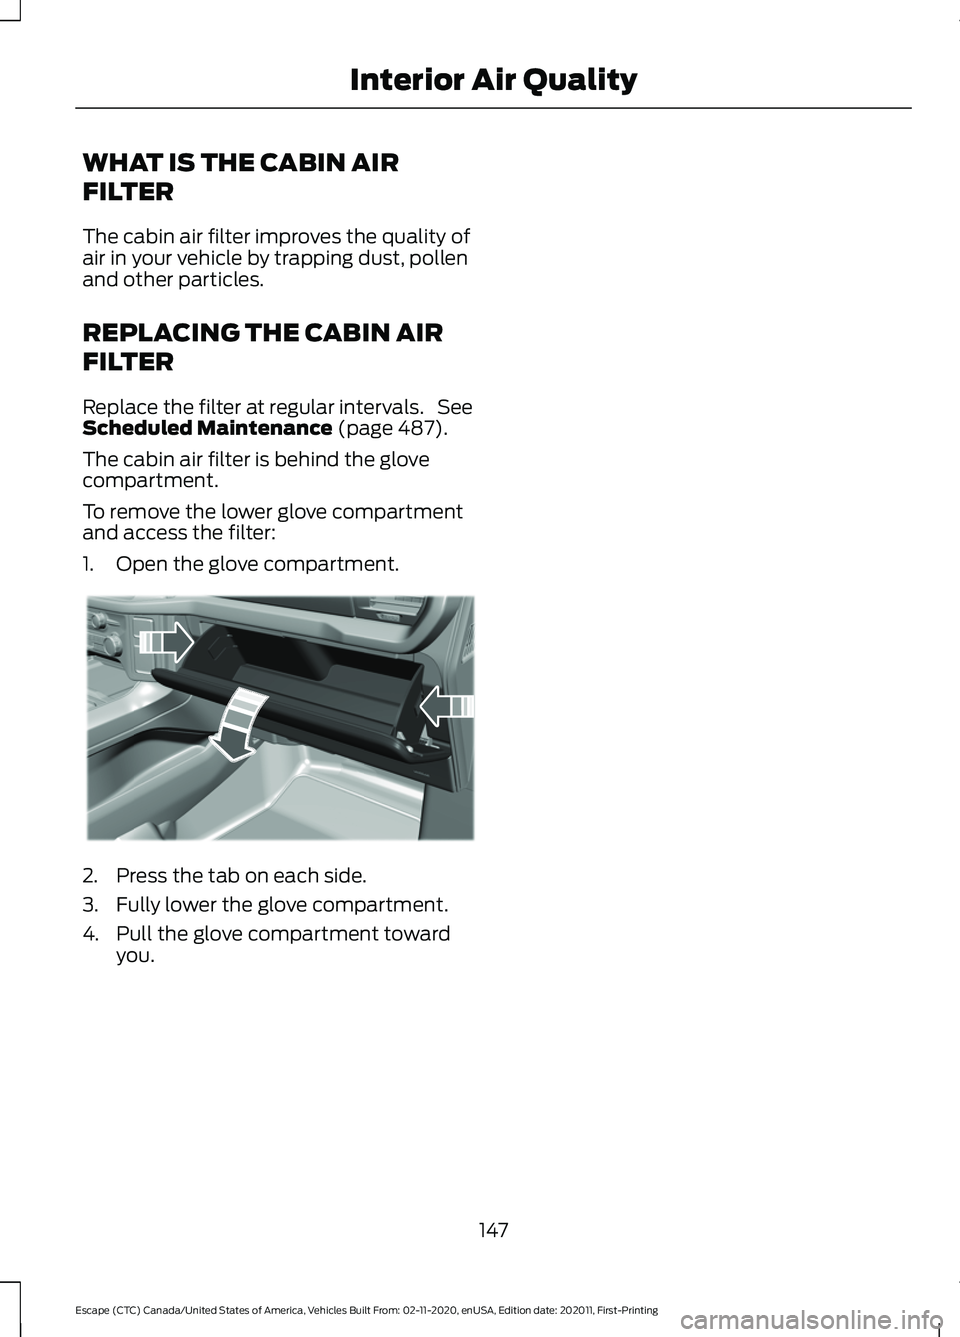
To remove the lower glove compartment
and access the filter:
1. Open the glove compartment. 2. Press the tab on each side.
3. Fully lower the glove compartment.
4. Pull the glove compartment toward
you.
147
Escape (CTC) Canada/United States of America, Vehicles Built From: 02-11-2020, enUSA, Edition date: 202011, First-Printing Interior Air QualityE311296
Page 153 of 589
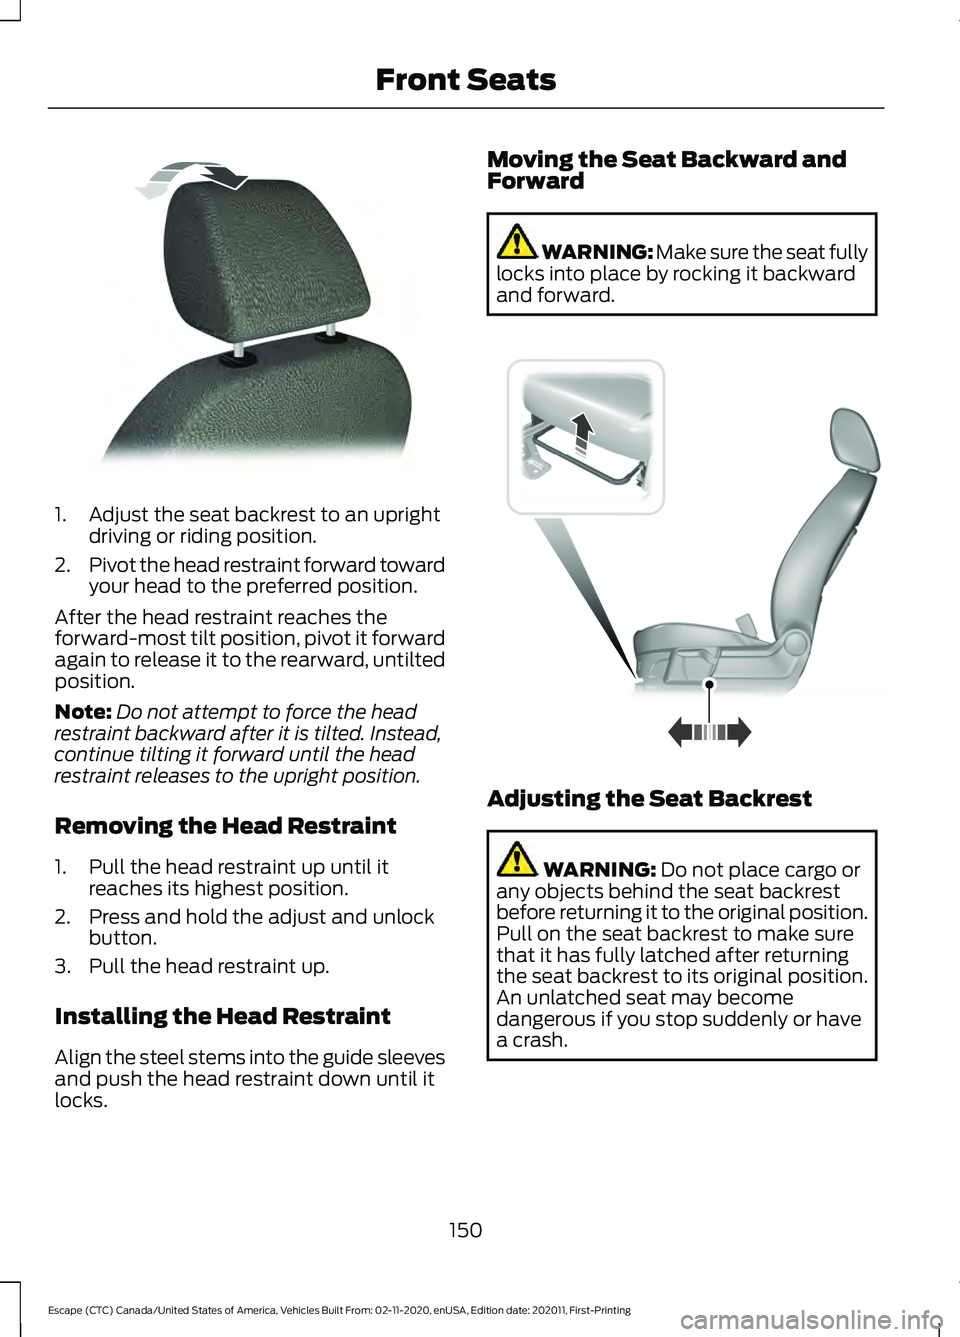
1. Adjust the seat backrest to an upright
driving or riding position.
2. Pivot the head restraint forward toward
your head to the preferred position.
After the head restraint reaches the
forward-most tilt position, pivot it forward
again to release it to the rearward, untilted
position.
Note: Do not attempt to force the head
restraint backward after it is tilted. Instead,
continue tilting it forward until the head
restraint releases to the upright position.
Removing the Head Restraint
1. Pull the head restraint up until it reaches its highest position.
2. Press and hold the adjust and unlock button.
3. Pull the head restraint up.
Installing the Head Restraint
Align the steel stems into the guide sleeves
and push the head restraint down until it
locks. Moving the Seat Backward and
Forward WARNING: Make sure the seat fully
locks into place by rocking it backward
and forward. Adjusting the Seat Backrest
WARNING: Do not place cargo or
any objects behind the seat backrest
before returning it to the original position.
Pull on the seat backrest to make sure
that it has fully latched after returning
the seat backrest to its original position.
An unlatched seat may become
dangerous if you stop suddenly or have
a crash.
150
Escape (CTC) Canada/United States of America, Vehicles Built From: 02-11-2020, enUSA, Edition date: 202011, First-Printing Front SeatsE144727 E163870
Page 155 of 589
WARNING: Adjust the head
restraints for all passengers before you
drive your vehicle. This will help minimize
the risk of neck injury in the event of a
crash. Do not adjust the head restraints
when your vehicle is moving.
Note: Adjust the seat backrest to an upright
driving position before adjusting the head
restraint. Adjust the head restraint so that
the top of it is level with the top of your head
and as far forward as possible. Make sure
that you remain comfortable. If you are
extremely tall, adjust the head restraint to
its highest position.
Pull the head restraint up to raise it.
To lower the head restraint:
1. Press and hold the adjust and unlock button.
2. Push the head restraint down.
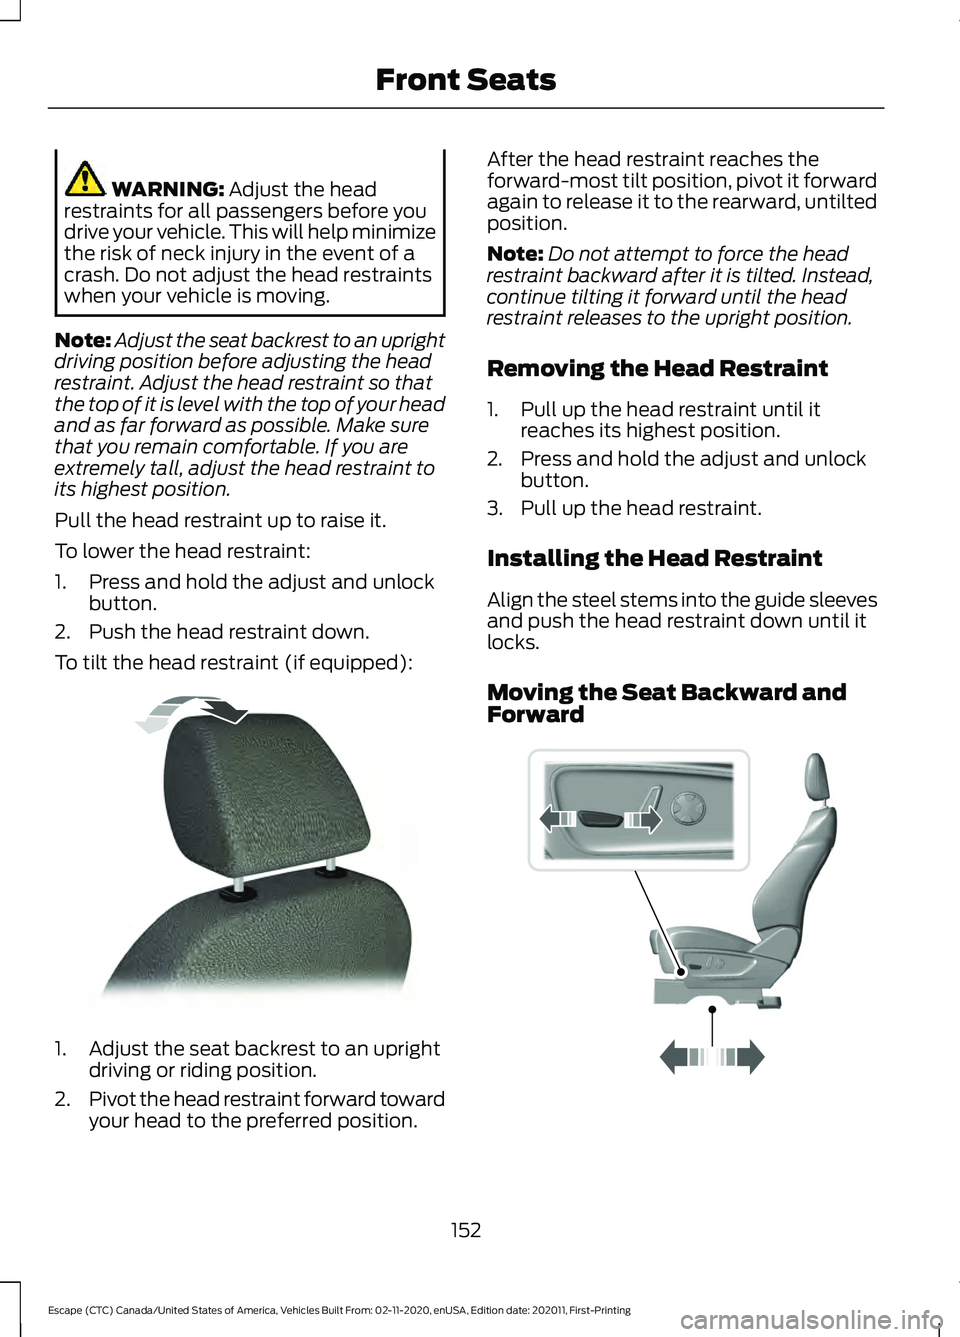
To tilt the head restraint (if equipped): 1. Adjust the seat backrest to an upright
driving or riding position.
2. Pivot the head restraint forward toward
your head to the preferred position. After the head restraint reaches the
forward-most tilt position, pivot it forward
again to release it to the rearward, untilted
position.
Note:
Do not attempt to force the head
restraint backward after it is tilted. Instead,
continue tilting it forward until the head
restraint releases to the upright position.
Removing the Head Restraint
1. Pull up the head restraint until it reaches its highest position.
2. Press and hold the adjust and unlock button.
3. Pull up the head restraint.
Installing the Head Restraint
Align the steel stems into the guide sleeves
and push the head restraint down until it
locks.
Moving the Seat Backward and
Forward 152
Escape (CTC) Canada/United States of America, Vehicles Built From: 02-11-2020, enUSA, Edition date: 202011, First-Printing Front SeatsE144727 E298944
Page 174 of 589
CUP HOLDERS
Cup Holder Precautions
WARNING: Use caution when
stowing items or hot drinks in the cup
holders. Items could become loose or
spill during hard braking, acceleration or
crashes. Failure to follow this instruction
could result in personal injury.
GLASSES HOLDER
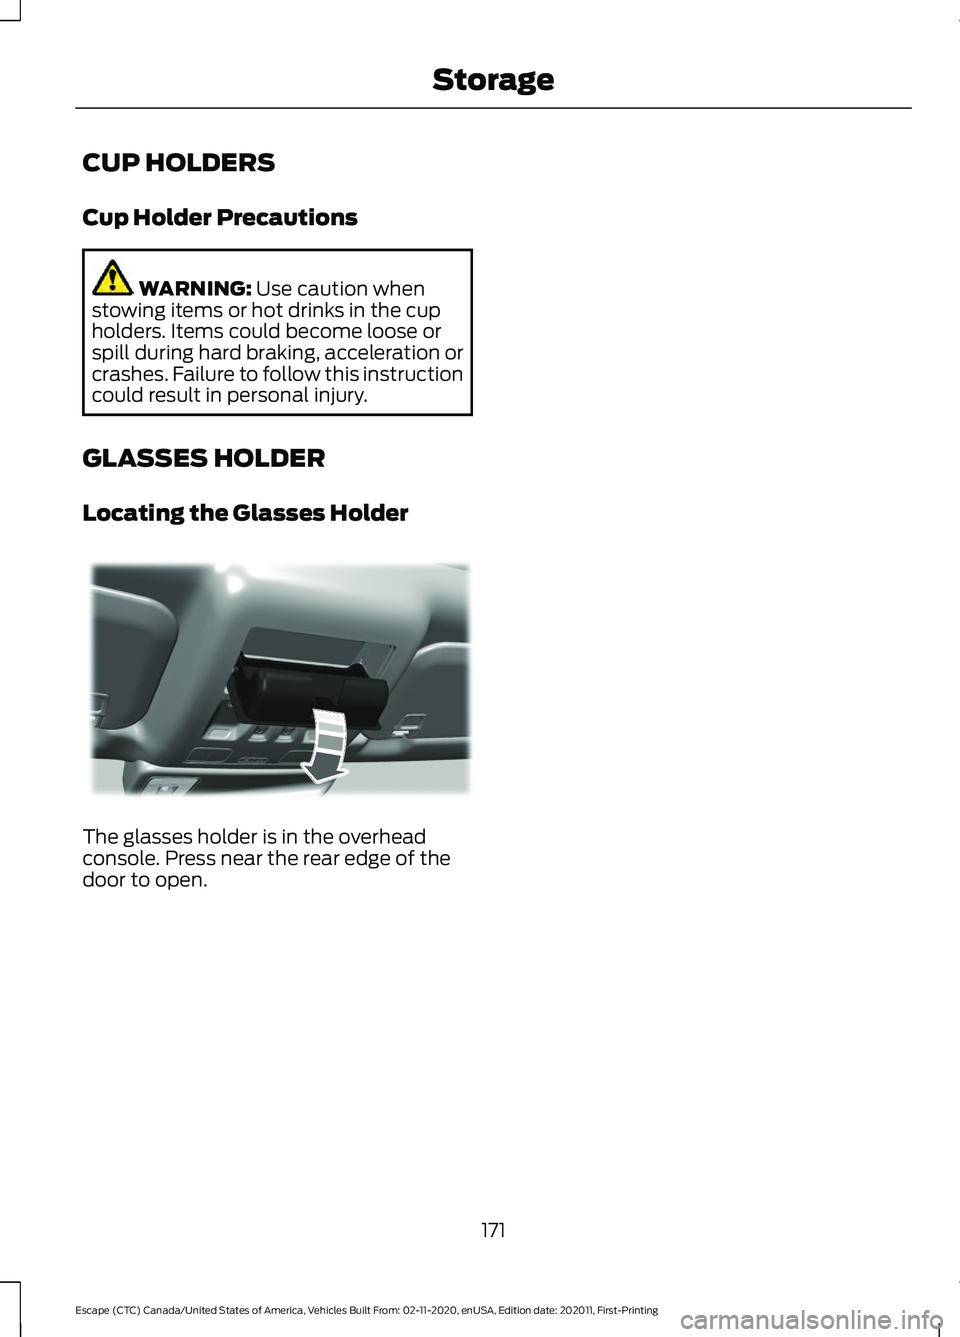
Locating the Glasses Holder The glasses holder is in the overhead
console. Press near the rear edge of the
door to open.
171
Escape (CTC) Canada/United States of America, Vehicles Built From: 02-11-2020, enUSA, Edition date: 202011, First-Printing StorageE324912