buttons FORD ESCAPE 2021 Owners Manual
[x] Cancel search | Manufacturer: FORD, Model Year: 2021, Model line: ESCAPE, Model: FORD ESCAPE 2021Pages: 589, PDF Size: 9.2 MB
Page 8 of 589
Switching the Head Up Display On and
Off ..................................................................131
Head Up Display Settings ..........................
131
Head Up Display Indicators ......................
132
Head Up Display – Troubleshooting ........................................................................\
.
133
Remote Start
What Is Remote Start ................................
134
Remote Start Precautions .......................
134
Remote Start Limitations .........................
134
Enabling Remote Start ..............................
134
Remotely Starting and Stopping the Vehicle .........................................................
134
Extending the Remote Start Duration ........................................................................\
.
134
Remote Start Remote Control Indicators ........................................................................\
.
135
Remote Start Settings ...............................
135
Climate Control
Manual Climate Control ............................
137
Automatic Climate Control - Vehicles With: Dual Automatic Temperature
Control (DATC) ........................................
138
Automatic Climate Control - Vehicles With: Electronic Automatic
Temperature Control (EATC) ...............
141
Hints on Controlling the Interior Climate - Vehicles With: Automatic
Temperature Control .............................
144
Hints on Controlling the Interior Climate - Vehicles With: Manual Temperature
Control .........................................................
145
Heated Windshield .....................................
146
Heated Rear Window .................................
146
Heated Exterior Mirrors .............................
146
Interior Air Quality
What Is the Cabin Air Filter .......................
147
Replacing the Cabin Air Filter ..................
147Front Seats
Front Seat Precautions
.............................
148
Sitting in the Correct Position .................
148
Manual Seats ................................................
149
Power Seats ....................................................
151
Heated Seats .................................................
153
Rear Seats
Manual Seats ................................................
155
Rear Occupant Alert System
What is the Rear Occupant Alert System ........................................................................\
.
158
How Does the Rear Occupant Alert System Work .............................................
158
Rear Occupant Alert System Precautions ........................................................................\
.
158
Rear Occupant Alert System Limitations ........................................................................\
.
158
Switching Rear Occupant Alert System On and Off .................................................
158
Rear Occupant Alert System Indicators ........................................................................\
.
159
Rear Occupant Alert System Audible Warnings .....................................................
159
Memory Function
How Does the Memory Function Work ........................................................................\
160
Memory Function Precautions ...............
160
Locating the Memory Function Buttons ........................................................................\
160
Saving a Preset Position ...........................
160
Recalling a Preset Position ......................
160
Garage Door Opener
What Is the Garage Door Opener ..........
162
How Does the Garage Door Opener Work ........................................................................\
.
162
Garage Door Opener Precautions .........
162
Garage Door Opener Limitations ..........
162
5
Escape (CTC) Canada/United States of America, Vehicles Built From: 02-11-2020, enUSA, Edition date: 202011, First-Printing Table of Contents
Page 61 of 589
REMOTE CONTROL
LIMITATIONS
WARNING: Changes or
modifications not expressively approved
by the party responsible for compliance
could void the user's authority to operate
the equipment. The term "IC:" before the
radio certification number only signifies
that Industry Canada technical
specifications were met.
This device complies with Part 15 of the
FCC Rules and with Industry Canada
license-exempt RSS standard(s).
Operation is subject to the following two
conditions: (1) This device may not cause
harmful interference, and (2) This device
must accept any interference received,
including interference that may cause
undesired operation.
Make sure a valid remote control is within
5 ft (1.5 m)
from the front door handles
and rear of vehicle.
The system may not function if:
• The remote control remains stationary
for about a minute.
• The vehicle battery has no charge.
• The remote control battery has no
charge.
• There is interference causing issues
with the remote control frequencies.
• The remote control is too close to
metal objects or electronic devices, for
example keys or a cell phone.
USING THE REMOTE CONTROL
Use your remote control to access various
vehicle systems.
Note: The buttons on your remote may vary
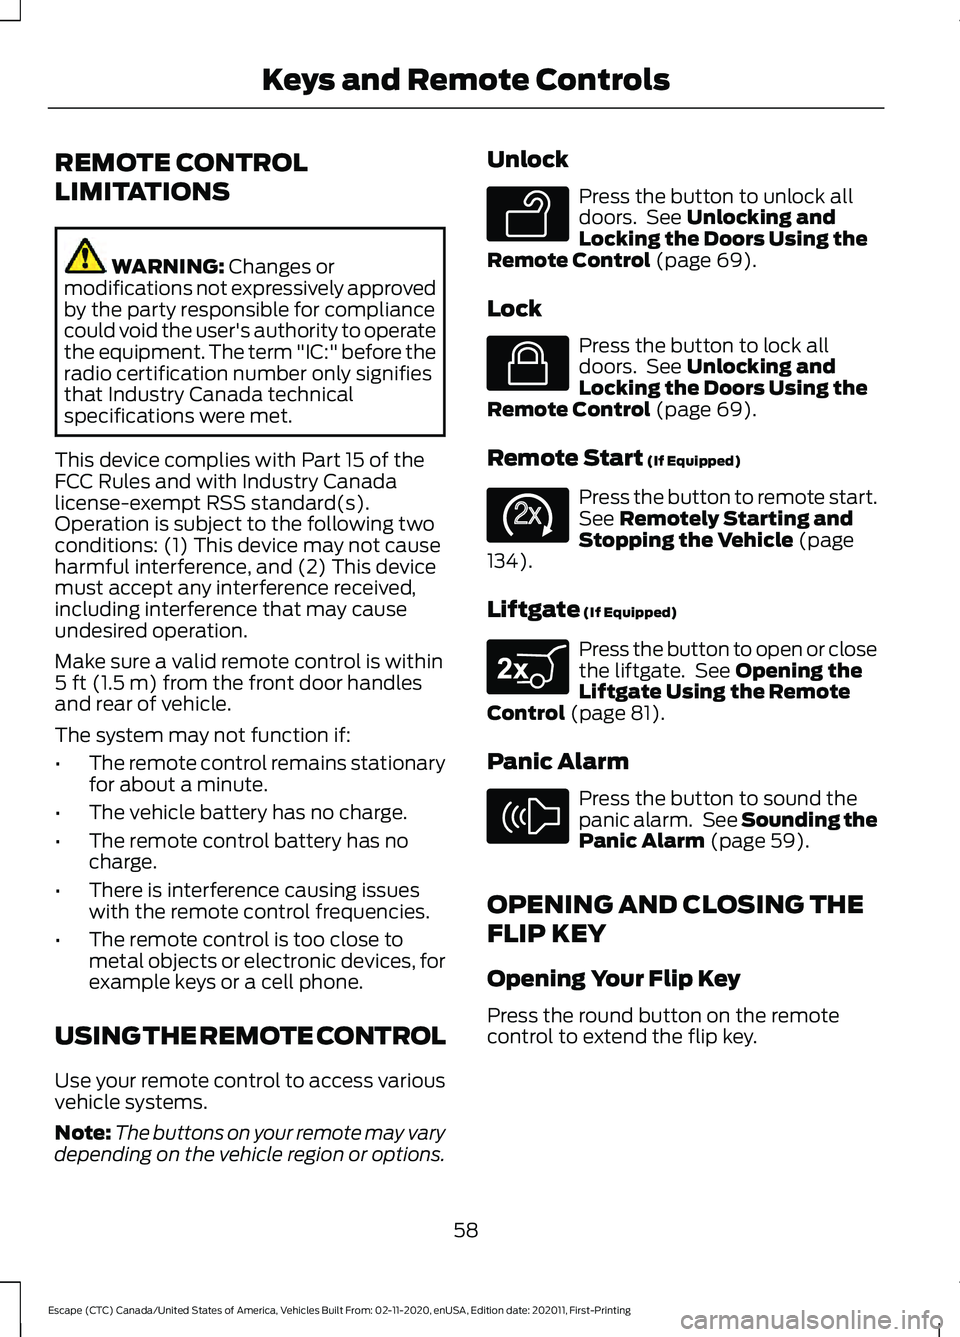
depending on the vehicle region or options. Unlock Press the button to unlock all
doors. See
Unlocking and
Locking the Doors Using the
Remote Control
(page 69).
Lock Press the button to lock all
doors. See
Unlocking and
Locking the Doors Using the
Remote Control
(page 69).
Remote Start
(If Equipped) Press the button to remote start.
See
Remotely Starting and
Stopping the Vehicle (page
134).
Liftgate
(If Equipped) Press the button to open or close
the liftgate. See
Opening the
Liftgate Using the Remote
Control
(page 81).
Panic Alarm Press the button to sound the
panic alarm. See Sounding the
Panic Alarm
(page 59).
OPENING AND CLOSING THE
FLIP KEY
Opening Your Flip Key
Press the round button on the remote
control to extend the flip key.
58
Escape (CTC) Canada/United States of America, Vehicles Built From: 02-11-2020, enUSA, Edition date: 202011, First-Printing Keys and Remote ControlsE138629 E138623 E138625 E267940 E138624
Page 68 of 589
Emergency Assistance
If you set emergency assistance to always
on, you cannot switch it off with a MyKey.
Do Not Disturb
If you set do not disturb to always on, you
cannot switch it off with a MyKey.
Note:
If a phone is connected using Apple
CarPlay or Android Auto while driving with
a MyKey, the driver can receive phone calls
and text messages even if the do not disturb
restriction is on, and if the vehicle is
equipped with satellite radio, the adult
content is not restricted.
Traction Control
If you set traction control to always on, you
cannot switch it off with a MyKey.
CREATING A MYKEY -
VEHICLES WITH: PUSH
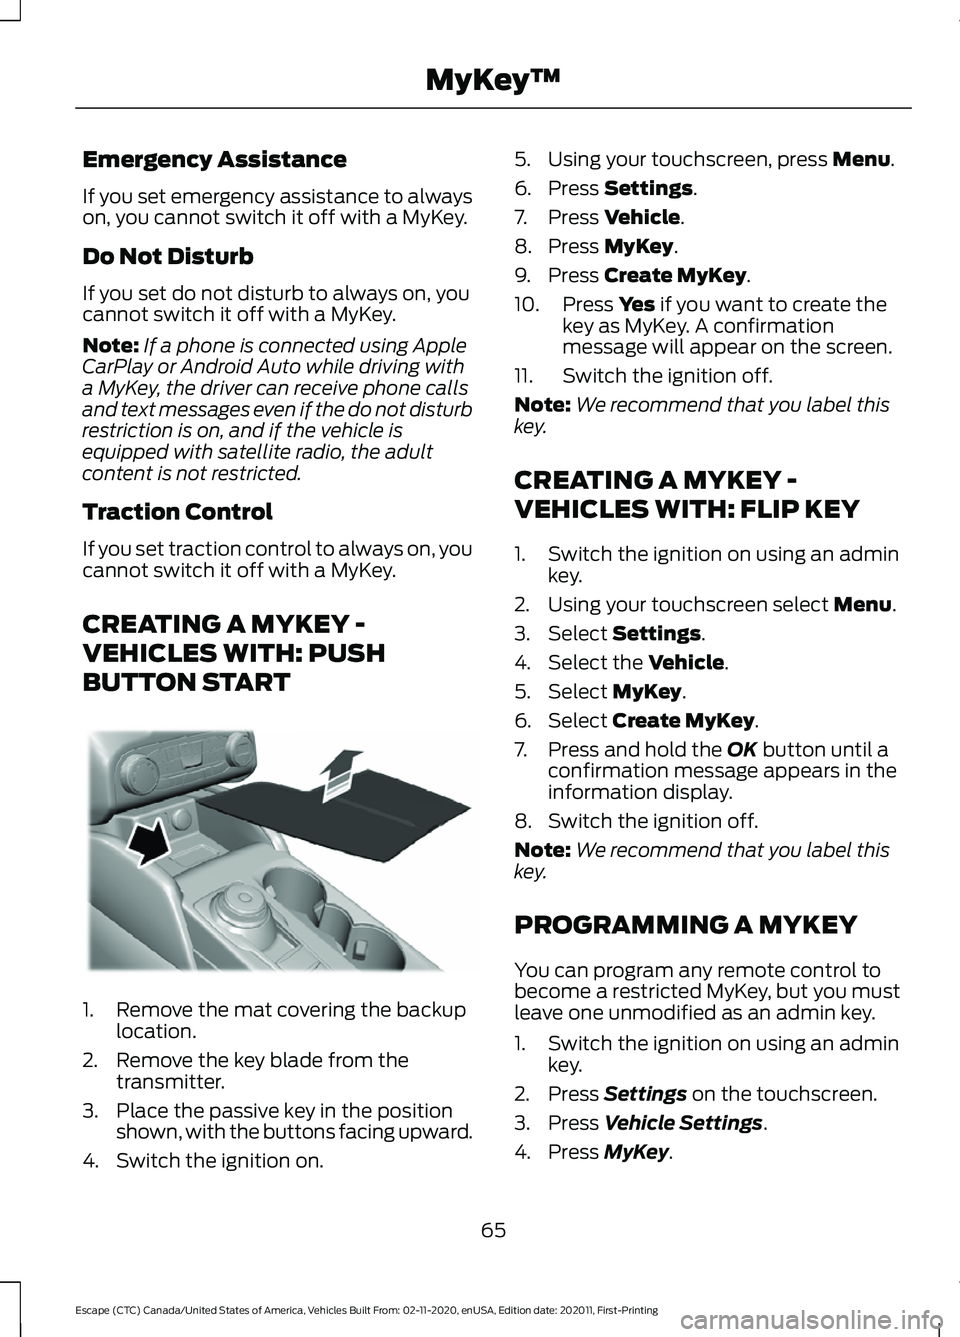
BUTTON START 1. Remove the mat covering the backup
location.
2. Remove the key blade from the transmitter.
3. Place the passive key in the position shown, with the buttons facing upward.
4. Switch the ignition on. 5. Using your touchscreen, press Menu.
6. Press
Settings.
7. Press
Vehicle.
8. Press
MyKey.
9. Press
Create MyKey.
10. Press
Yes if you want to create the
key as MyKey. A confirmation
message will appear on the screen.
11. Switch the ignition off.
Note: We recommend that you label this
key.
CREATING A MYKEY -
VEHICLES WITH: FLIP KEY
1. Switch the ignition on using an admin key.
2. Using your touchscreen select
Menu.
3. Select
Settings.
4. Select the
Vehicle.
5. Select
MyKey.
6. Select
Create MyKey.
7. Press and hold the
OK button until a
confirmation message appears in the
information display.
8. Switch the ignition off.
Note: We recommend that you label this
key.
PROGRAMMING A MYKEY
You can program any remote control to
become a restricted MyKey, but you must
leave one unmodified as an admin key.
1. Switch the ignition on using an admin key.
2. Press
Settings on the touchscreen.
3. Press
Vehicle Settings.
4. Press
MyKey.
65
Escape (CTC) Canada/United States of America, Vehicles Built From: 02-11-2020, enUSA, Edition date: 202011, First-Printing MyKey
™E306769
Page 77 of 589
5. Within 10 seconds, place a second
programmed intelligent access key in
the backup slot and press the push
button ignition switch.
The factory-set code appears in the
information display for a few seconds.
Note: You need to have two programmed
intelligent access keys for this procedure.
Note: The code may not display until after
any other warning messages first display.
KEYLESS ENTRY SETTINGS
Switching Keyless Entry On and
Off
1. Switch the ignition on using an original
key that has not been created as a
MyKey.
2. Press Settings on the touchscreen.
3. Press
Vehicle Settings.
4. Press
Locks.
Reprogramming the Unlocking
Function
You can enable two-stage unlocking
function allowing you to unlock only the
driver door when you touch the unlock
sensor.
Press and hold both the lock and unlock
buttons on the remote control for four
seconds to disable or enable two-stage
unlocking.
If you program the unlocking function so
that only the driver door unlocks, you can
unlock all of the other doors from inside
your vehicle using the power door lock
control. You can unlock individual doors
by pulling the interior door handles on
those doors. Creating Personal Access Codes
To create your own personal access code:
1. Enter the factory-set code.
2. Press
1·2 on the keypad within five
seconds.
3. Enter your personal five-digit code.
4. Press
1·2 on the keypad to save
personal code one.
The doors lock then unlock to confirm that
programming was successful.
To program additional personal access
codes, repeat Steps 1-3, then for Step 4:
• Press
3·4 to save personal code two.
• Press
5·6 to save personal code three.
• Press
7·8 to save personal code four.
• Press
9·0 to save personal code five.
Hints:
• Do not set a code that uses five of the
same number.
• Do not use five numbers in sequential
order.
• The factory-set code works even if you
have set your own personal code.
Clearing All Personal Access
Codes
1. Enter the factory-set five-digit code.
2. Press and release
1·2 on the keypad
within five seconds.
3. Press and hold
1·2 for a few seconds.
This must be done within five seconds
of completing Step 2.
All personal codes erase and only the
factory-set five-digit code works.
74
Escape (CTC) Canada/United States of America, Vehicles Built From: 02-11-2020, enUSA, Edition date: 202011, First-Printing Keyless Entry
(If Equipped)
Page 97 of 589
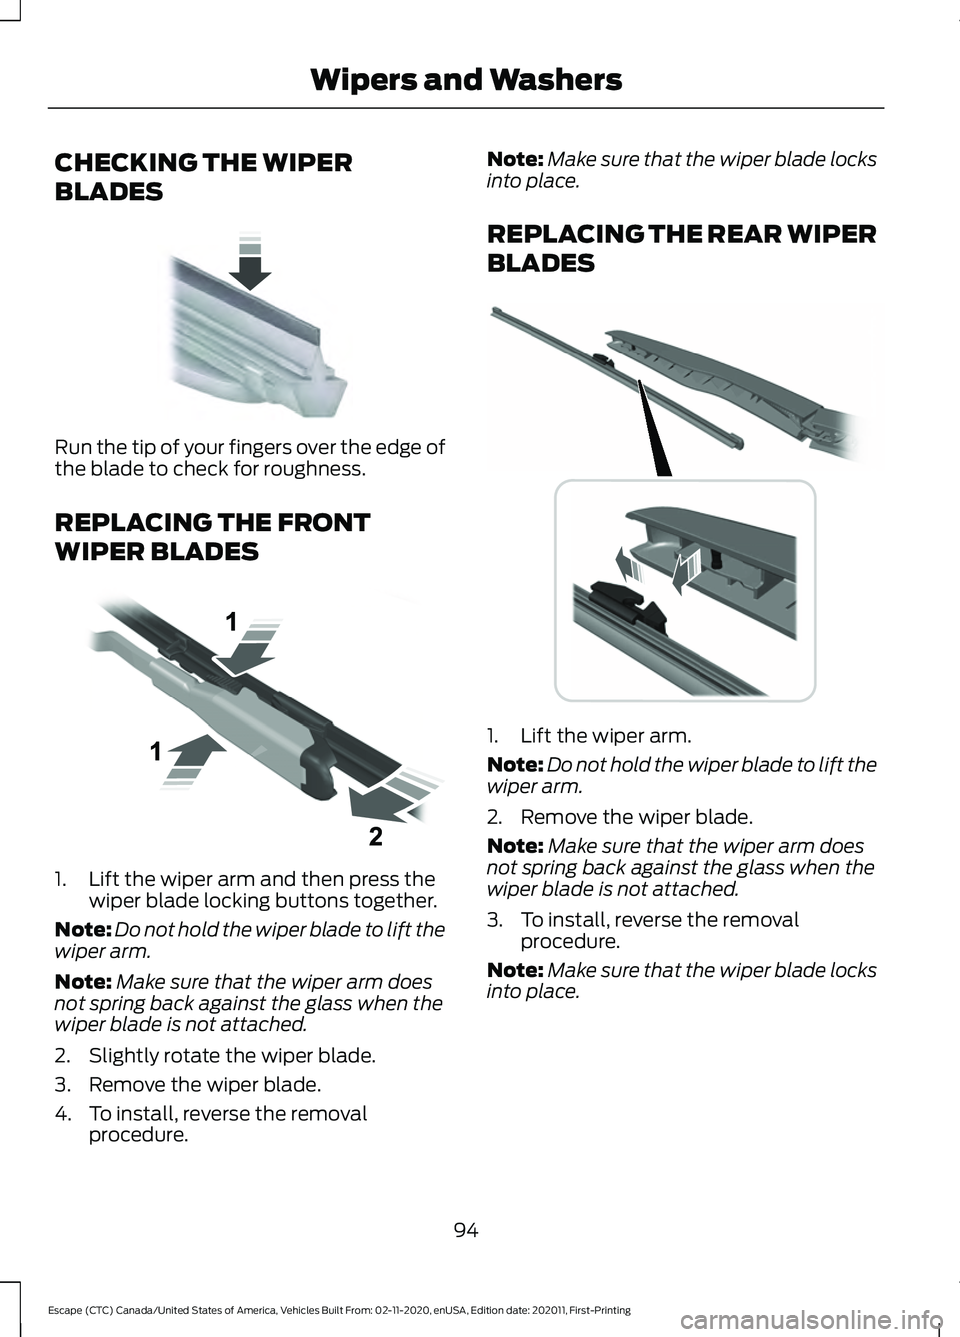
CHECKING THE WIPER
BLADES
Run the tip of your fingers over the edge of
the blade to check for roughness.
REPLACING THE FRONT
WIPER BLADES
1. Lift the wiper arm and then press the
wiper blade locking buttons together.
Note: Do not hold the wiper blade to lift the
wiper arm.
Note: Make sure that the wiper arm does
not spring back against the glass when the
wiper blade is not attached.
2. Slightly rotate the wiper blade.
3. Remove the wiper blade.
4. To install, reverse the removal procedure. Note:
Make sure that the wiper blade locks
into place.
REPLACING THE REAR WIPER
BLADES 1. Lift the wiper arm.
Note:
Do not hold the wiper blade to lift the
wiper arm.
2. Remove the wiper blade.
Note: Make sure that the wiper arm does
not spring back against the glass when the
wiper blade is not attached.
3. To install, reverse the removal procedure.
Note: Make sure that the wiper blade locks
into place.
94
Escape (CTC) Canada/United States of America, Vehicles Built From: 02-11-2020, enUSA, Edition date: 202011, First-Printing Wipers and WashersE142463 E129990 E271380
Page 106 of 589
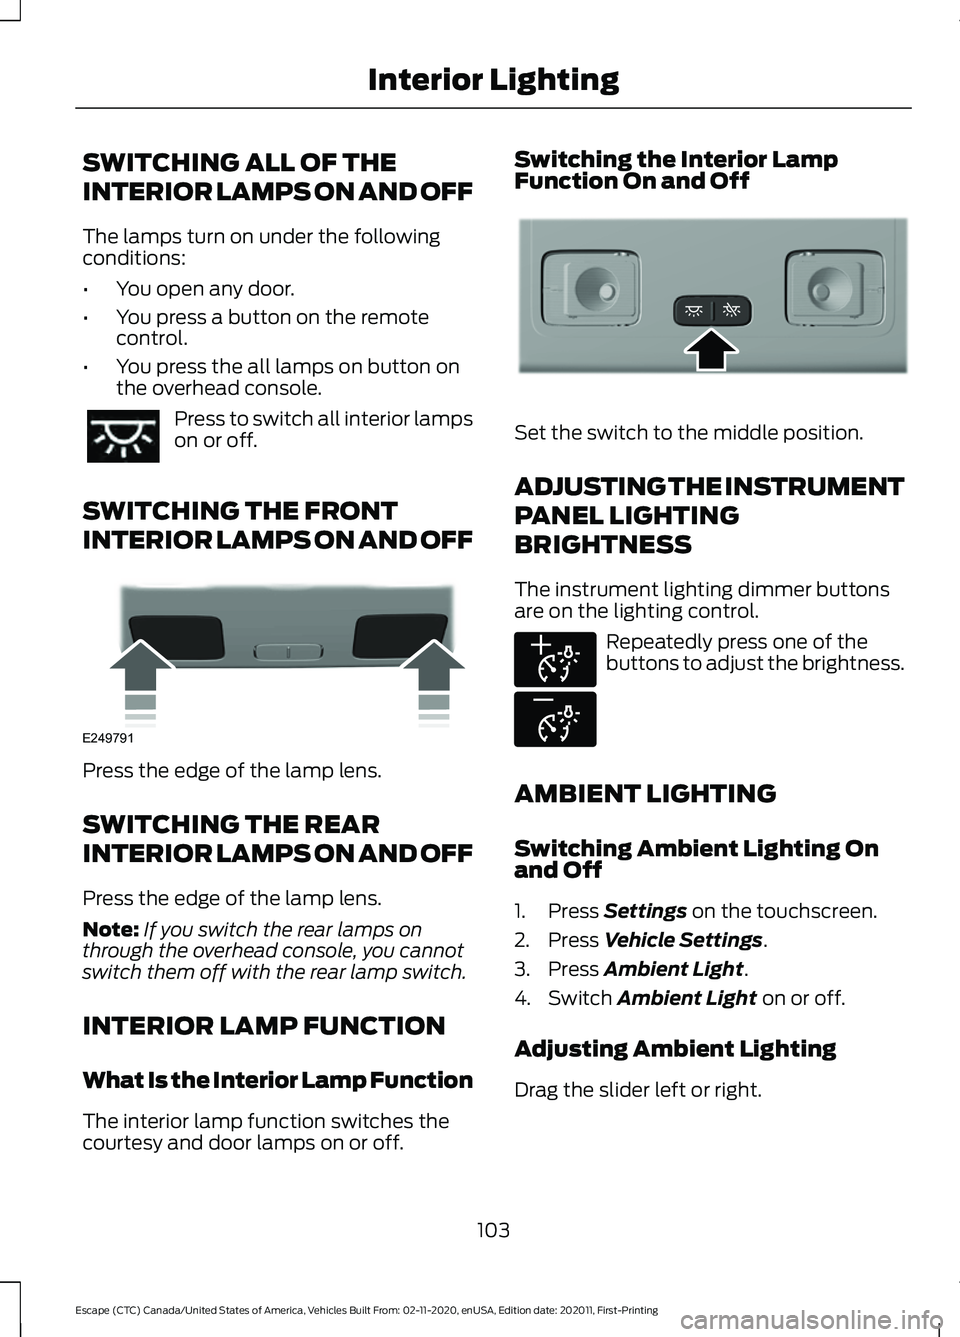
SWITCHING ALL OF THE
INTERIOR LAMPS ON AND OFF
The lamps turn on under the following
conditions:
•
You open any door.
• You press a button on the remote
control.
• You press the all lamps on button on
the overhead console. Press to switch all interior lamps
on or off.
SWITCHING THE FRONT
INTERIOR LAMPS ON AND OFF Press the edge of the lamp lens.
SWITCHING THE REAR
INTERIOR LAMPS ON AND OFF
Press the edge of the lamp lens.
Note:
If you switch the rear lamps on
through the overhead console, you cannot
switch them off with the rear lamp switch.
INTERIOR LAMP FUNCTION
What Is the Interior Lamp Function
The interior lamp function switches the
courtesy and door lamps on or off. Switching the Interior Lamp
Function On and Off
Set the switch to the middle position.
ADJUSTING THE INSTRUMENT
PANEL LIGHTING
BRIGHTNESS
The instrument lighting dimmer buttons
are on the lighting control.
Repeatedly press one of the
buttons to adjust the brightness.
AMBIENT LIGHTING
Switching Ambient Lighting On
and Off
1. Press Settings on the touchscreen.
2. Press
Vehicle Settings.
3. Press
Ambient Light.
4. Switch
Ambient Light on or off.
Adjusting Ambient Lighting
Drag the slider left or right.
103
Escape (CTC) Canada/United States of America, Vehicles Built From: 02-11-2020, enUSA, Edition date: 202011, First-Printing Interior Lighting E249791 E299443 E291299 E296433
Page 126 of 589
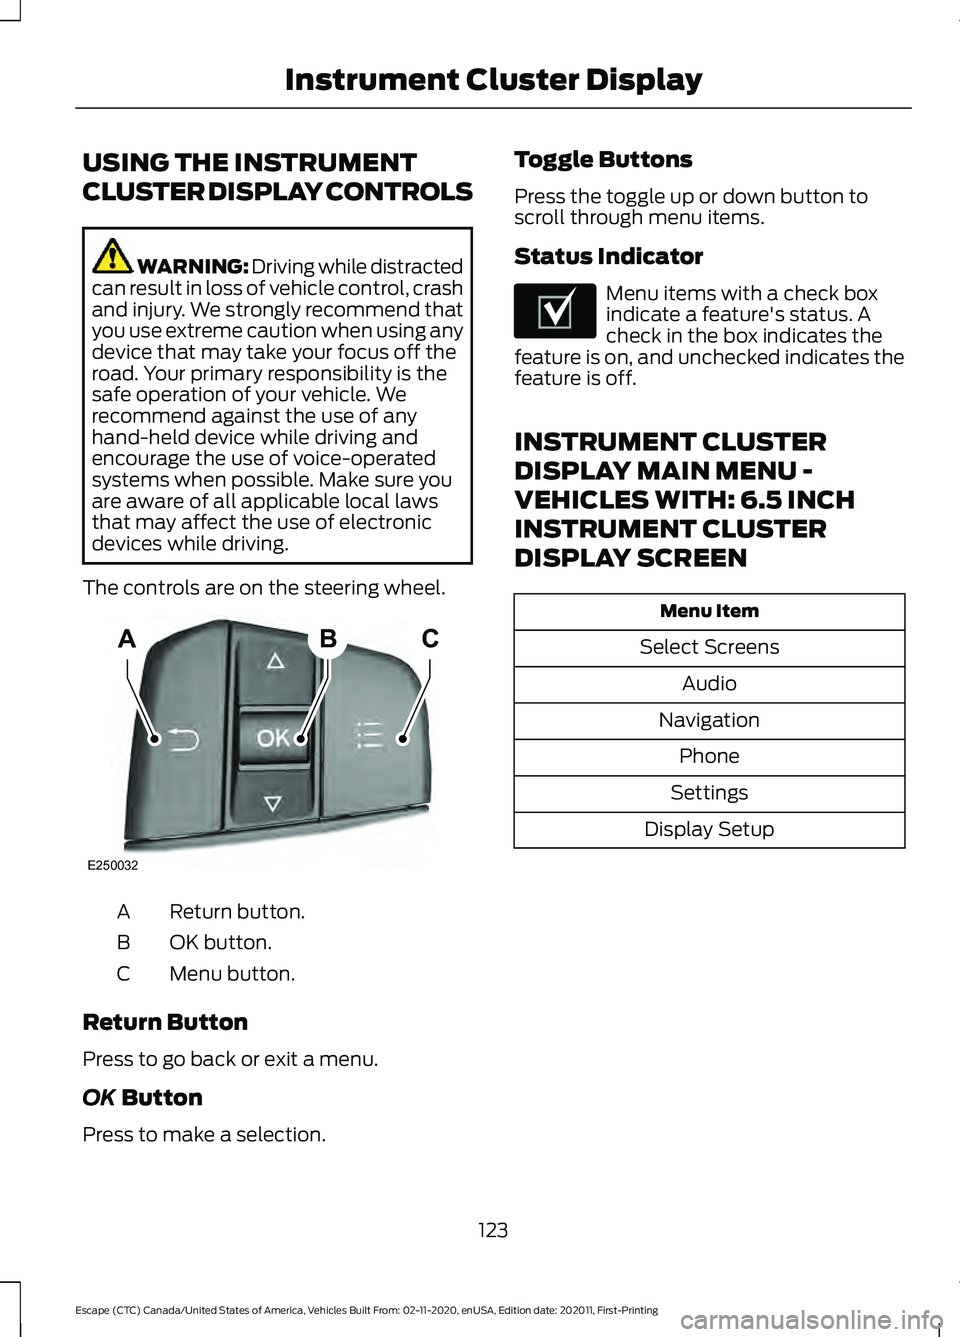
USING THE INSTRUMENT
CLUSTER DISPLAY CONTROLS
WARNING: Driving while distracted
can result in loss of vehicle control, crash
and injury. We strongly recommend that
you use extreme caution when using any
device that may take your focus off the
road. Your primary responsibility is the
safe operation of your vehicle. We
recommend against the use of any
hand-held device while driving and
encourage the use of voice-operated
systems when possible. Make sure you
are aware of all applicable local laws
that may affect the use of electronic
devices while driving.
The controls are on the steering wheel. Return button.
A
OK button.
B
Menu button.
C
Return Button
Press to go back or exit a menu.
OK Button
Press to make a selection. Toggle Buttons
Press the toggle up or down button to
scroll through menu items.
Status Indicator Menu items with a check box
indicate a feature's status. A
check in the box indicates the
feature is on, and unchecked indicates the
feature is off.
INSTRUMENT CLUSTER
DISPLAY MAIN MENU -
VEHICLES WITH: 6.5 INCH
INSTRUMENT CLUSTER
DISPLAY SCREEN Menu Item
Select Screens Audio
Navigation Phone
Settings
Display Setup
123
Escape (CTC) Canada/United States of America, Vehicles Built From: 02-11-2020, enUSA, Edition date: 202011, First-Printing Instrument Cluster DisplayABC
E250032 E204495
Page 134 of 589
WHAT IS THE HEAD UP
DISPLAY
The system displays information on a
display screen in your field of vision,
allowing you to keep your eyes on the road.
You can select which information the
system displays.
SWITCHING THE HEAD UP
DISPLAY ON AND OFF
Press the button on the steering
wheel or center console.
Note:
The head up display menu appears
in the information display. Action
Menu Item
Press the OK
button.
Head-Up Display
(HUD)
Press the
OK
button.
Note: The system remembers the last
setting when you start the engine.
HEAD UP DISPLAY SETTINGS Action
Menu Item
Press the
OK button.
Adjustment
Position 1. Press the
OK button.
2. Use the up and down toggle buttons to adjust the vertical position of the blue frame.
•Make sure that you can see all of the blue frame.
• Do not physically move the screen. This can cause
damage not covered by the vehicle Warranty.
Brightness 1. Press the
OK button.
2. Use the up and down toggle buttons to adjust the brightness of the display screen.
•The system adjusts the brightness based on how
dark it is. If you set the brightness to a high level,
the system reduces the brightness at night.
Vertical Size 1. Press the
OK button.
2. Use the up and down toggle buttons to adjust the vertical size of the display screen.
•A small vertical size could be more suitable if you
sit in a high position.
131
Escape (CTC) Canada/United States of America, Vehicles Built From: 02-11-2020, enUSA, Edition date: 202011, First-Printing Head Up Display
(If Equipped)E265900
Page 163 of 589
HOW DOES THE MEMORY
FUNCTION WORK
The memory function recalls the position
of these features:
•
Driver seat.
• Power mirrors.
MEMORY FUNCTION
PRECAUTIONS WARNING: Before activating the
memory seat, make sure that the area
immediately surrounding the seat is clear
of obstructions and that all occupants
are clear of moving parts. WARNING:
Do not use the memory
function when your vehicle is moving.
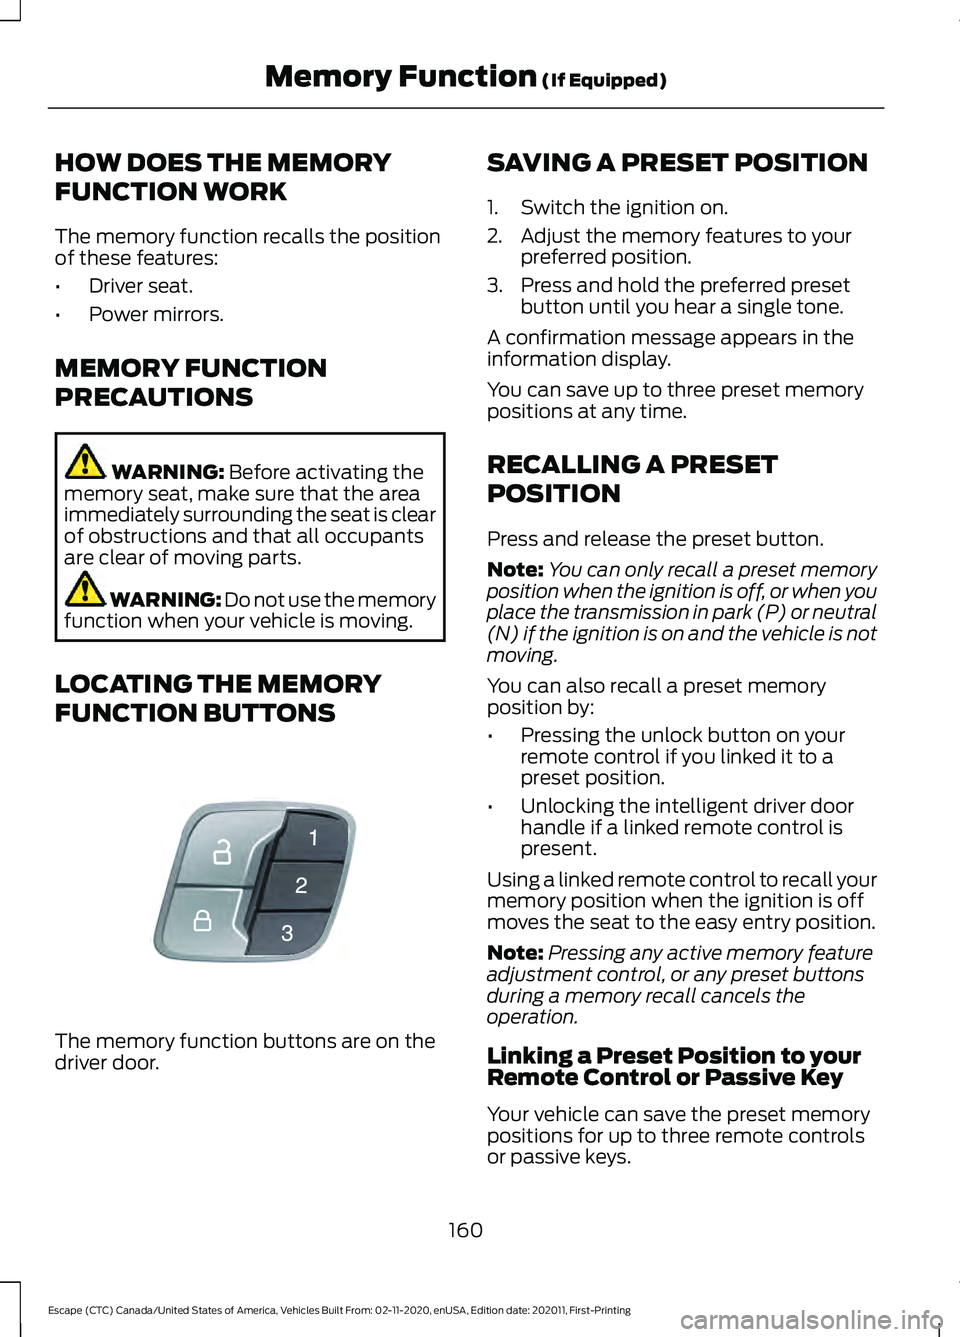
LOCATING THE MEMORY
FUNCTION BUTTONS The memory function buttons are on the
driver door. SAVING A PRESET POSITION
1. Switch the ignition on.
2. Adjust the memory features to your
preferred position.
3. Press and hold the preferred preset button until you hear a single tone.
A confirmation message appears in the
information display.
You can save up to three preset memory
positions at any time.
RECALLING A PRESET
POSITION
Press and release the preset button.
Note: You can only recall a preset memory
position when the ignition is off, or when you
place the transmission in park (P) or neutral
(N) if the ignition is on and the vehicle is not
moving.
You can also recall a preset memory
position by:
• Pressing the unlock button on your
remote control if you linked it to a
preset position.
• Unlocking the intelligent driver door
handle if a linked remote control is
present.
Using a linked remote control to recall your
memory position when the ignition is off
moves the seat to the easy entry position.
Note: Pressing any active memory feature
adjustment control, or any preset buttons
during a memory recall cancels the
operation.
Linking a Preset Position to your
Remote Control or Passive Key
Your vehicle can save the preset memory
positions for up to three remote controls
or passive keys.
160
Escape (CTC) Canada/United States of America, Vehicles Built From: 02-11-2020, enUSA, Edition date: 202011, First-Printing Memory Function
(If Equipped)E142554
Page 165 of 589
WHAT IS THE GARAGE DOOR
OPENER
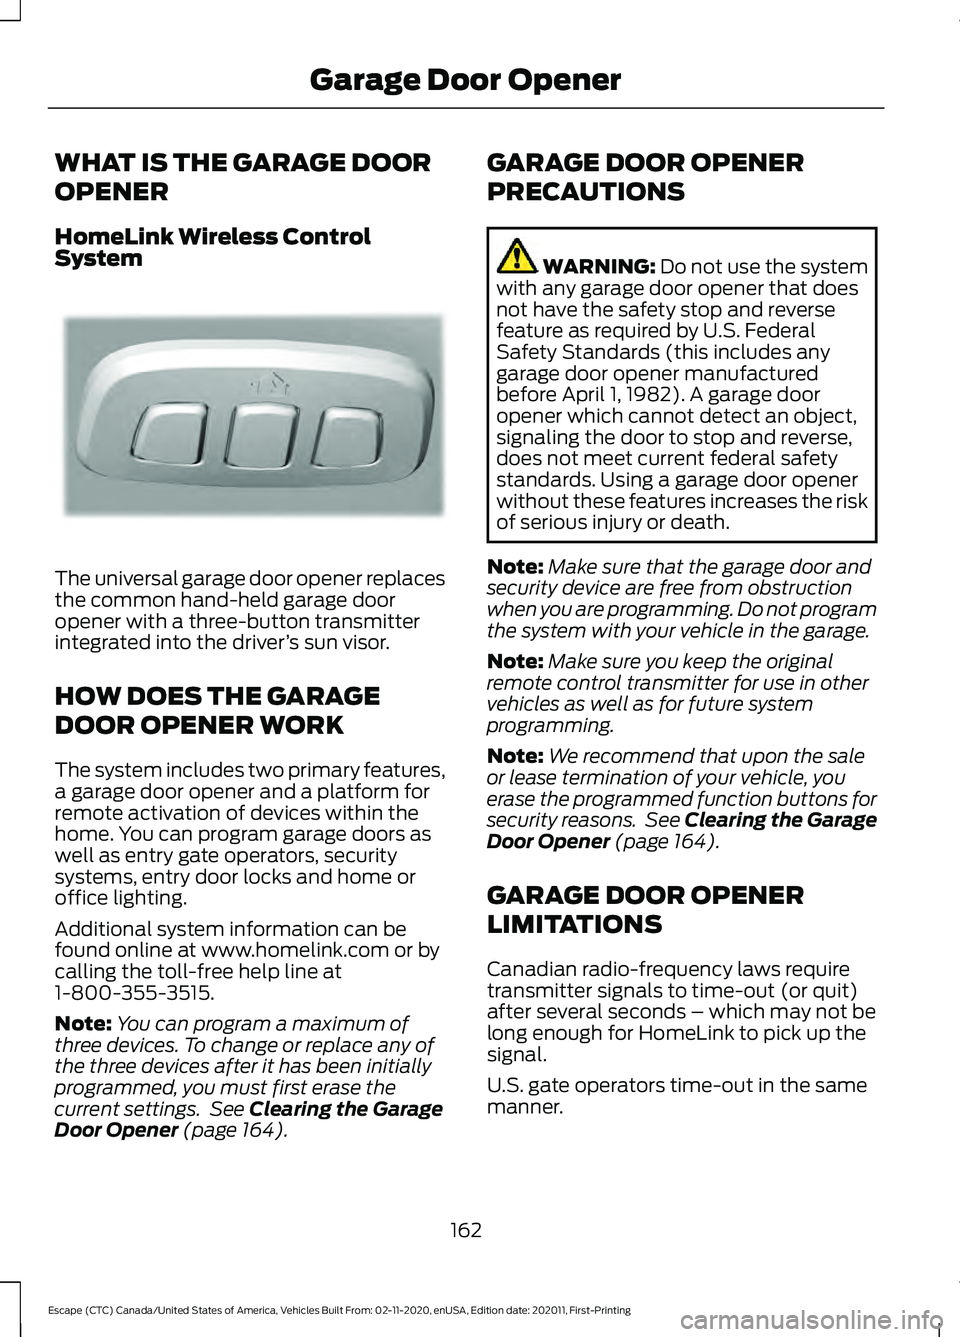
HomeLink Wireless Control
System
The universal garage door opener replaces
the common hand-held garage door
opener with a three-button transmitter
integrated into the driver
’s sun visor.
HOW DOES THE GARAGE
DOOR OPENER WORK
The system includes two primary features,
a garage door opener and a platform for
remote activation of devices within the
home. You can program garage doors as
well as entry gate operators, security
systems, entry door locks and home or
office lighting.
Additional system information can be
found online at www.homelink.com or by
calling the toll-free help line at
1-800-355-3515.
Note: You can program a maximum of
three devices. To change or replace any of
the three devices after it has been initially
programmed, you must first erase the
current settings. See Clearing the Garage
Door Opener (page 164). GARAGE DOOR OPENER
PRECAUTIONS WARNING:
Do not use the system
with any garage door opener that does
not have the safety stop and reverse
feature as required by U.S. Federal
Safety Standards (this includes any
garage door opener manufactured
before April 1, 1982). A garage door
opener which cannot detect an object,
signaling the door to stop and reverse,
does not meet current federal safety
standards. Using a garage door opener
without these features increases the risk
of serious injury or death.
Note: Make sure that the garage door and
security device are free from obstruction
when you are programming. Do not program
the system with your vehicle in the garage.
Note: Make sure you keep the original
remote control transmitter for use in other
vehicles as well as for future system
programming.
Note: We recommend that upon the sale
or lease termination of your vehicle, you
erase the programmed function buttons for
security reasons. See Clearing the Garage
Door Opener
(page 164).
GARAGE DOOR OPENER
LIMITATIONS
Canadian radio-frequency laws require
transmitter signals to time-out (or quit)
after several seconds – which may not be
long enough for HomeLink to pick up the
signal.
U.S. gate operators time-out in the same
manner.
162
Escape (CTC) Canada/United States of America, Vehicles Built From: 02-11-2020, enUSA, Edition date: 202011, First-Printing Garage Door OpenerE188211