ECU FORD ESCAPE 2022 Owner's Manual
[x] Cancel search | Manufacturer: FORD, Model Year: 2022, Model line: ESCAPE, Model: FORD ESCAPE 2022Pages: 585, PDF Size: 6.15 MB
Page 297 of 585
INSTALLING AND REMOVING
THE LUGGAGE
COMPARTMENT COVER
WARNING: Make sure that you
properly secure the luggage cover.
Failure to follow this instruction could
result in personal injury in the event of a
sudden stop or crash.
WARNING: Do not place objects
on the luggage cover. Failure to follow
this instruction could result in personal
injury or death in the event of a sudden
stop or crash.
Installing the Luggage Cover
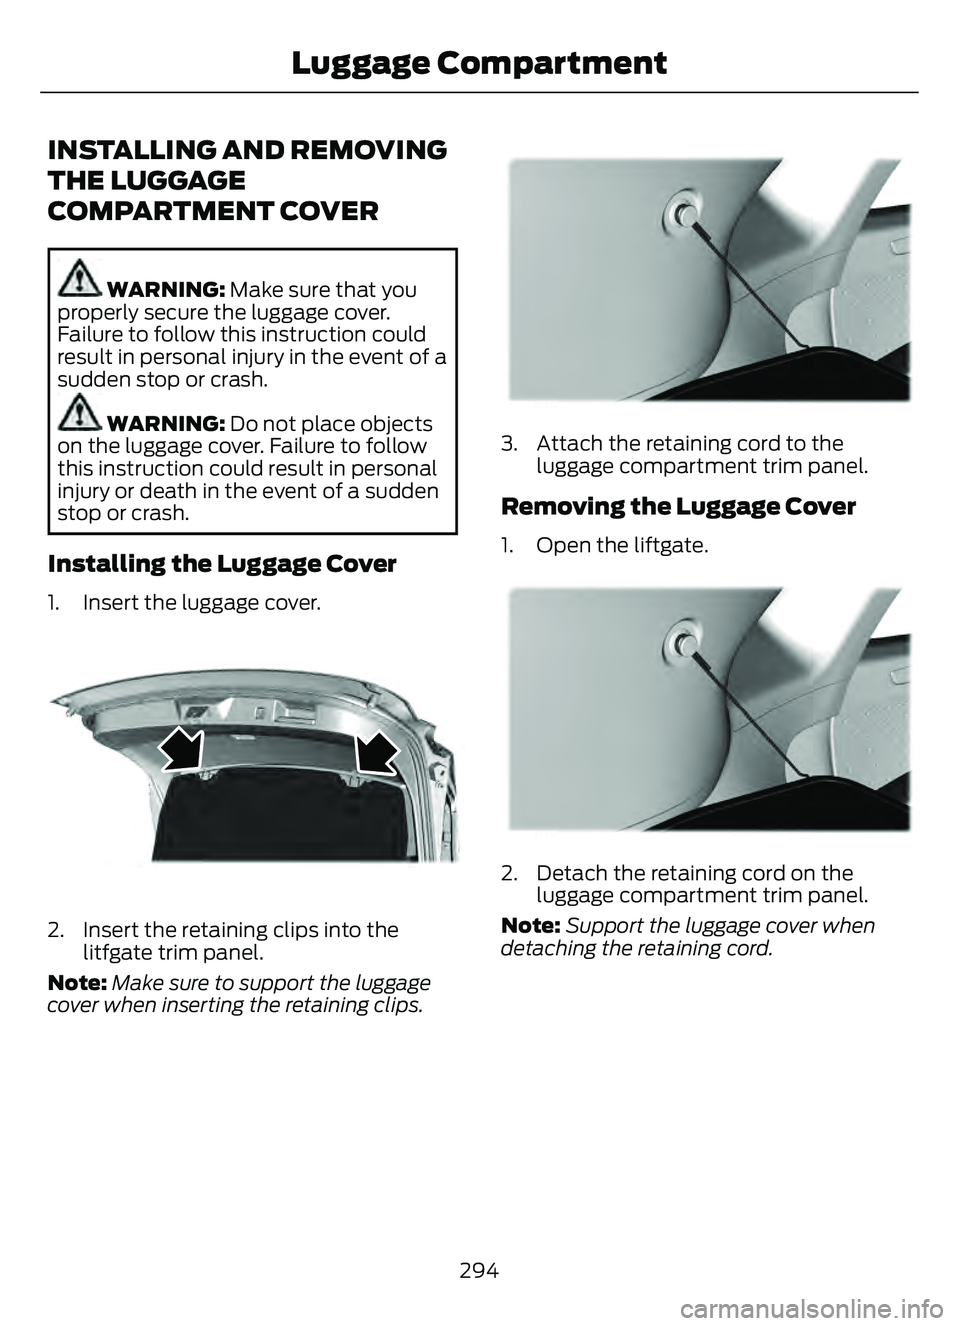
1. Insert the luggage cover.
E309671E309671
2. Insert the retaining clips into the litfgate trim panel.
Note: Make sure to support the luggage
cover when inserting the retaining clips.
E309672E309672E309 672
3. Attach the retaining cord to the
luggage compartment trim panel.
Removing the Luggage Cover
1. Open the liftgate.
E309672E309672E309 672
2. Detach the retaining cord on the
luggage compartment trim panel.
Note: Support the luggage cover when
detaching the retaining cord.
294
Luggage Compartment
Page 310 of 585
WARNING: Secure the floor mat
to both retention devices so that it
cannot slip out of position and interfere
with the pedals. Failure to follow this
instruction could result in the loss of
control of your vehicle, personal injury or
death.
WARNING: Do not place additional
floor mats or any other covering on top
of the original floor mats. This could
result in the floor mat interfering with the
operation of the pedals. Failure to follow
this instruction could result in the loss of
control of your vehicle, personal injury or
death.
WARNING: Always make sure that
objects cannot fall into the driver foot
well while your vehicle is moving. Objects
that are loose can become trapped
under the pedals causing a loss of
vehicle control.
E14266626666666
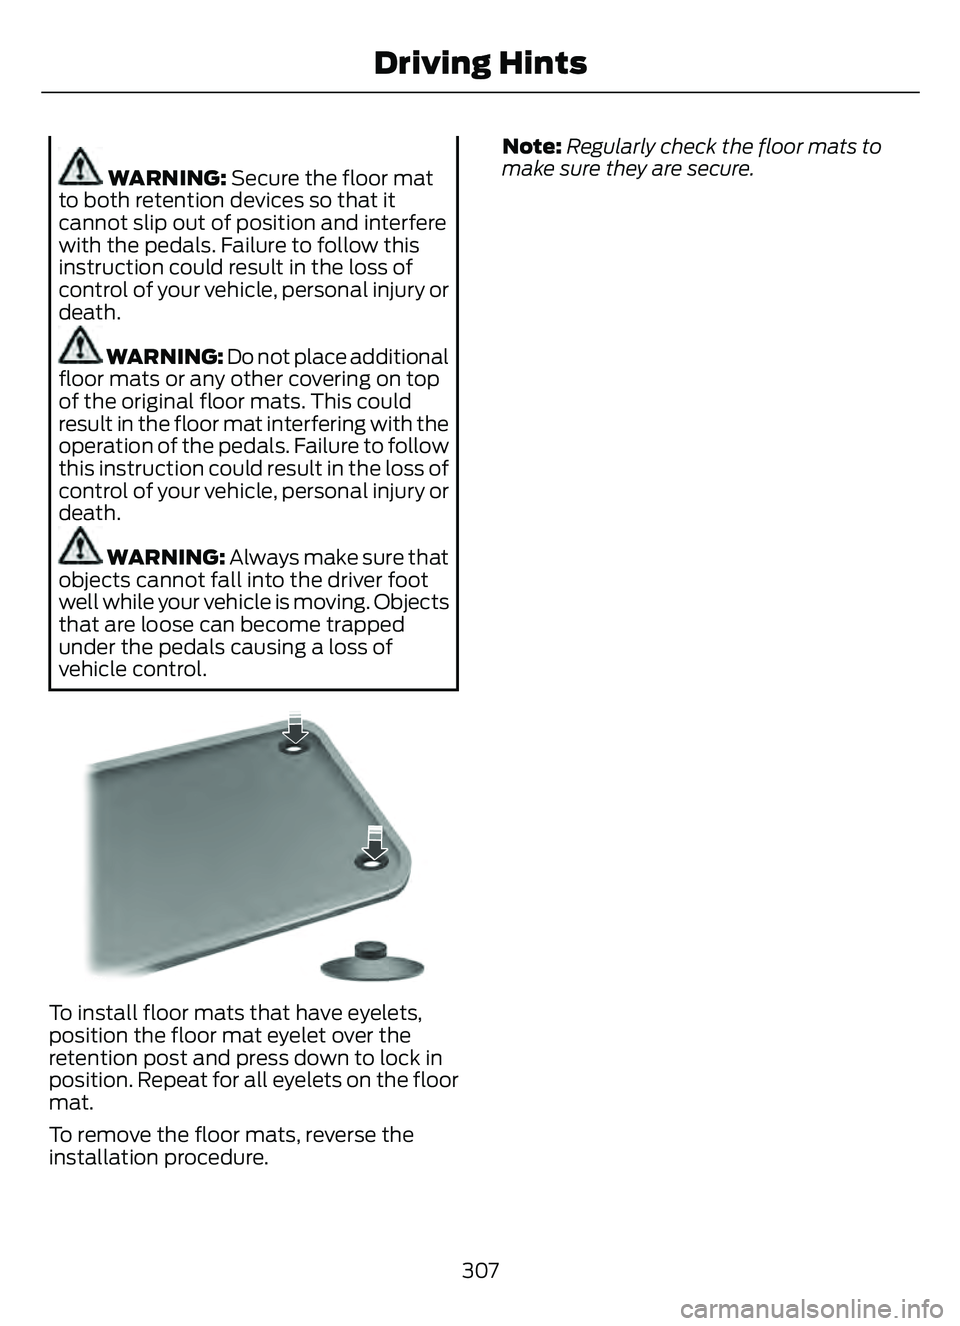
To install floor mats that have eyelets,
position the floor mat eyelet over the
retention post and press down to lock in
position. Repeat for all eyelets on the floor
mat.
To remove the floor mats, reverse the
installation procedure. Note:
Regularly check the floor mats to
make sure they are secure.
307
Driving Hints
Page 319 of 585
TOWING YOUR VEHICLE
PRECAUTIONS
Use the following guidelines when towing
your vehicle. Failure to follow this
instruction could result in vehicle damage
not covered by the vehicle warranty.
Note: Make sure you properly secure your
vehicle to the tow vehicle.
Note: If you are unsure of the vehicle’s
configuration, contact an authorized dealer.
RECREATIONALLY TOWING
YOUR VEHICLE - GASOLINE,
AWD
You cannot recreational tow your vehicle
with all wheels on the ground because
vehicle or transmission damage could
occur. You must recreational tow your
vehicle with all four wheels off the ground,
such as when using a car-hauling trailer.
Otherwise, you cannot recreational tow
your vehicle.
RECREATIONALLY TOWING
YOUR VEHICLE - GASOLINE,
FWD
You cannot recreational tow your vehicle
with all wheels on the ground because
vehicle or transmission damage could
occur. Place the front wheels on a
two-wheel tow dolly. If you are using a tow
dolly, follow the instructions specified by
the equipment provider.
Note: Release the parking brake before
towing your vehicle. See Manually
Releasing the Electric Parking Brake
(page 220).
RECREATIONALLY TOWING
YOUR VEHICLE - HYBRID
ELECTRIC VEHICLE (HEV)/
PLUG-IN HYBRID ELECTRIC
VEHICLE (PHEV)
Follow these guidelines if you have a need
for recreational towing. An example of
recreational towing is towing your vehicle
behind a motorhome. These guidelines
ensure that you do not damage the
transmission.
Note: Put your climate control system in
recirculated air mode to prevent exhaust
fumes from entering your vehicle. See
Climate Control (page 137).
You can tow your vehicle with all four
wheels on the ground under the following
conditions:
• You switch Neutral Tow on.
• Your vehicle is facing forward for towing in a forward direction.
• You release the parking brake.
• You do not exceed 70 mph (113 km/h).
Switching Neutral Tow On
1. Switch your vehicle on in accessory mode.
2. Press the menu button on the steering wheel to enter the information display
main menu.
3. Select Settings .
4. Select Neutral Tow.
5. Follow the instructions on the information display.
6. Fully press the brake pedal.
7. Shift into neutral (N).
8. Switch the ignition off.
Note: Switching neutral tow on requires
battery power.
316
Towing Your Vehicle
Page 332 of 585
E193263
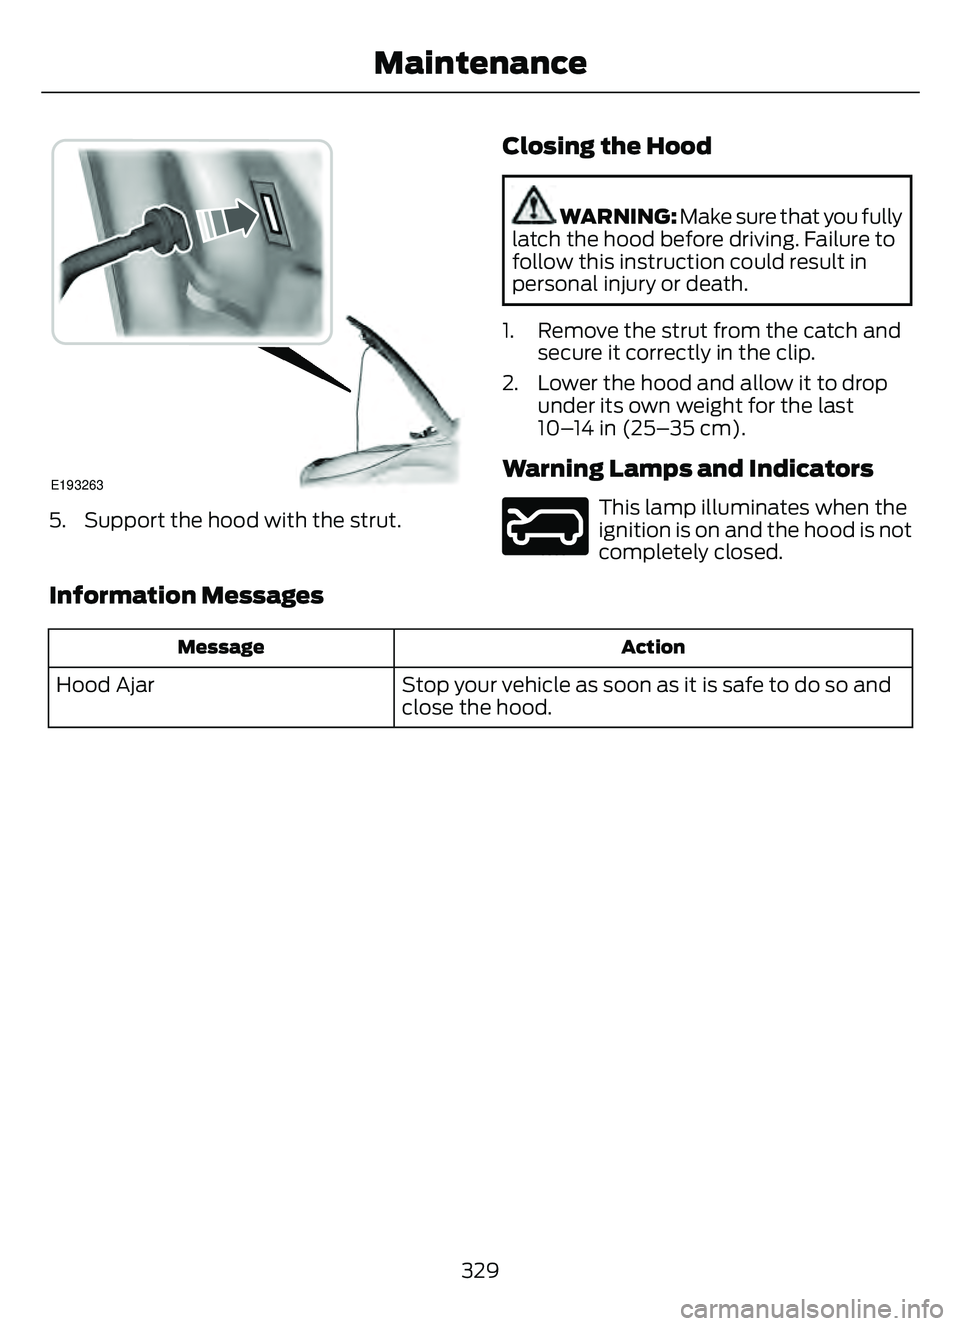
5. Support the hood with the strut.
Closing the Hood
WARNING: Make sure that you fully
latch the hood before driving. Failure to
follow this instruction could result in
personal injury or death.
1. Remove the strut from the catch and secure it correctly in the clip.
2. Lower the hood and allow it to drop under its own weight for the last
10–14 in (25–35 cm).
Warning Lamps and Indicators
E246598
This lamp illuminates when the
ignition is on and the hood is not
completely closed.
Information Messages
Action
Message
Stop your vehicle as soon as it is safe to do so and
close the hood.
Hood Ajar
329
Maintenance
Page 342 of 585
E299073E299073
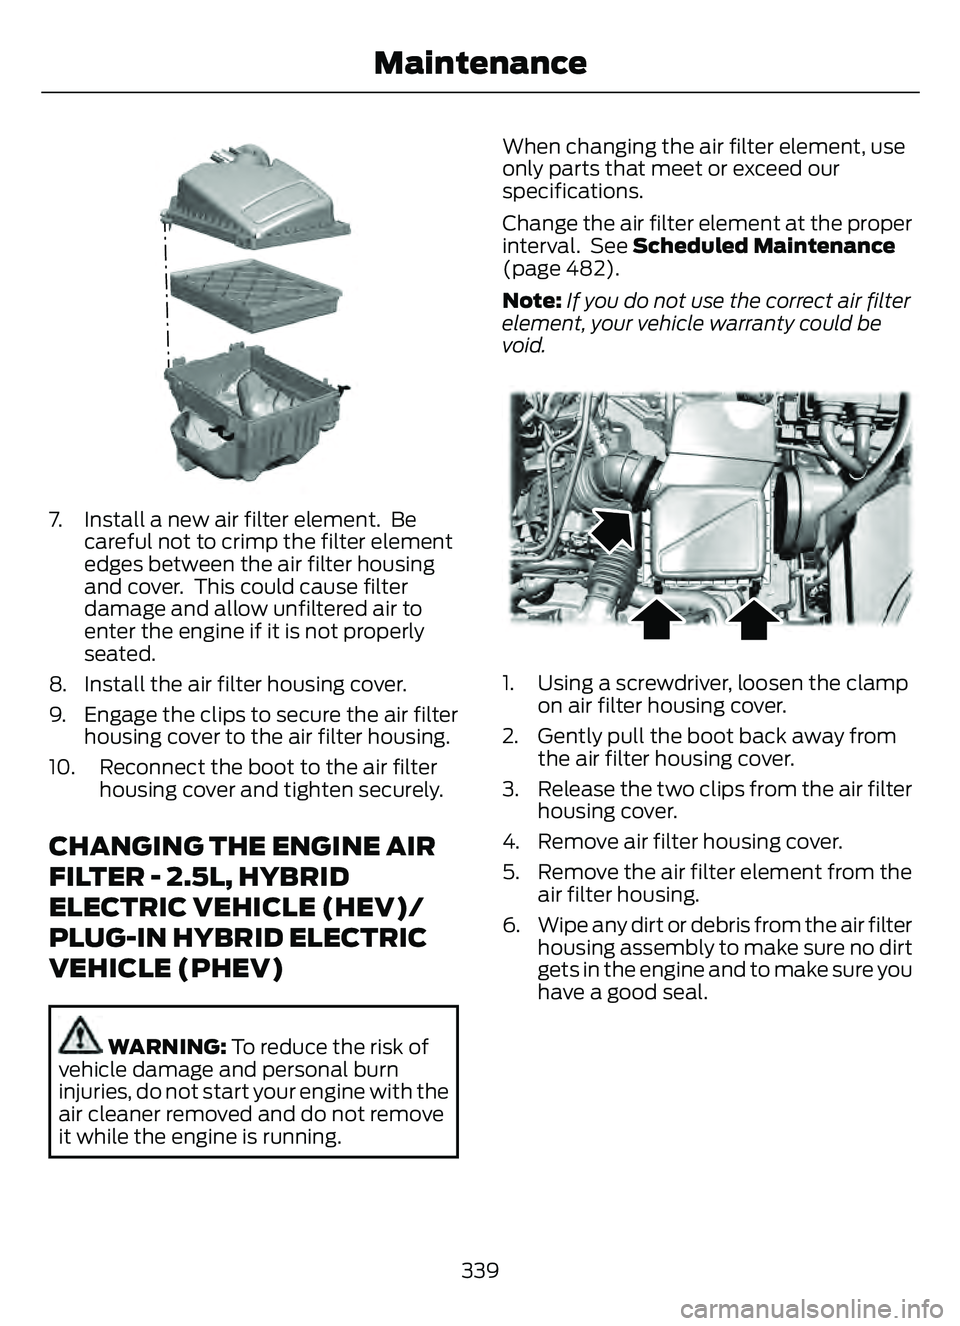
7. Install a new air filter element. Becareful not to crimp the filter element
edges between the air filter housing
and cover. This could cause filter
damage and allow unfiltered air to
enter the engine if it is not properly
seated.
8. Install the air filter housing cover.
9. Engage the clips to secure the air filter housing cover to the air filter housing.
10. Reconnect the boot to the air filter housing cover and tighten securely.
CHANGING THE ENGINE AIR
FILTER - 2.5L, HYBRID
ELECTRIC VEHICLE (HEV)/
PLUG-IN HYBRID ELECTRIC
VEHICLE (PHEV)
WARNING: To reduce the risk of
vehicle damage and personal burn
injuries, do not start your engine with the
air cleaner removed and do not remove
it while the engine is running. When changing the air filter element, use
only parts that meet or exceed our
specifications.
Change the air filter element at the proper
interval. See Scheduled Maintenance
(page 482).
Note:
If you do not use the correct air filter
element, your vehicle warranty could be
void.
E299071E299071
1. Using a screwdriver, loosen the clamp on air filter housing cover.
2. Gently pull the boot back away from the air filter housing cover.
3. Release the two clips from the air filter housing cover.
4. Remove air filter housing cover.
5. Remove the air filter element from the air filter housing.
6. Wipe any dirt or debris from the air filter housing assembly to make sure no dirt
gets in the engine and to make sure you
have a good seal.
339
Maintenance
Page 343 of 585
E299074E299074
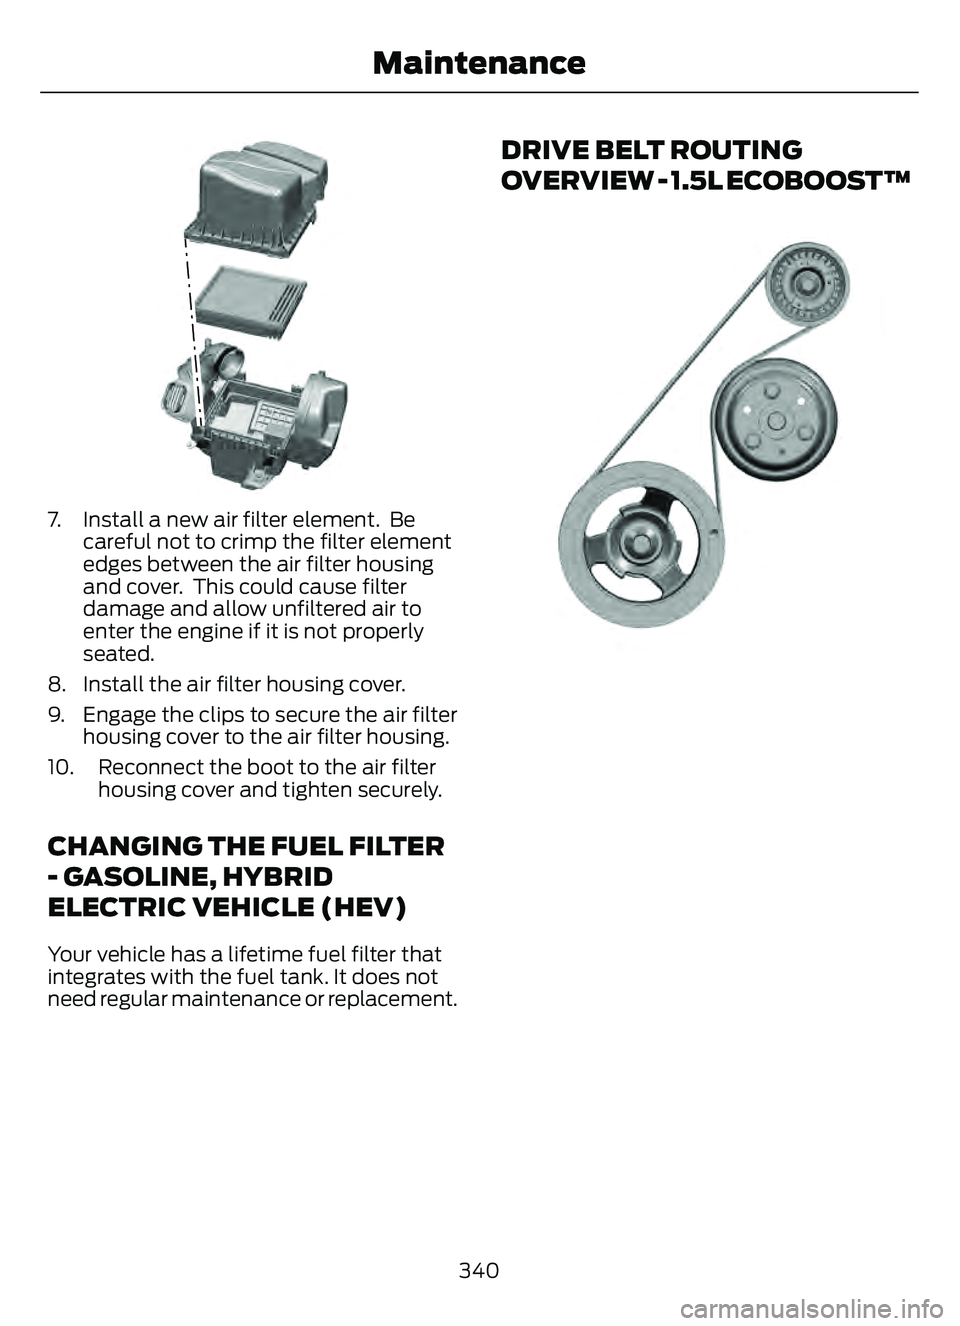
7. Install a new air filter element. Becareful not to crimp the filter element
edges between the air filter housing
and cover. This could cause filter
damage and allow unfiltered air to
enter the engine if it is not properly
seated.
8. Install the air filter housing cover.
9. Engage the clips to secure the air filter housing cover to the air filter housing.
10. Reconnect the boot to the air filter housing cover and tighten securely.
CHANGING THE FUEL FILTER
- GASOLINE, HYBRID
ELECTRIC VEHICLE (HEV)
Your vehicle has a lifetime fuel filter that
integrates with the fuel tank. It does not
need regular maintenance or replacement.
DRIVE BELT ROUTING
OVERVIEW - 1.5L ECOBOOST™
E3338613
340
Maintenance
Page 346 of 585
CHANGING THE 12V BATTERY
The battery is in the engine compartment.
See Under Hood Overview (page 330).
Your vehicle has a maintenance-free
battery. It does not require additional
water during service.
For longer, trouble-free operation, keep the
top of the battery clean and dry and the
battery cables tightly fastened to the
battery terminals. If any corrosion is
present on the battery or terminals, remove
the cables from the terminals and clean
with a wire brush. You can neutralize the
acid with a solution of baking soda and
water.
We recommend that you disconnect the
negative battery cable terminal from the
battery if you plan to store your vehicle for
an extended period.
Note: If you only disconnect the negative
battery cable terminal, make sure it is
isolated or placed away from the battery
terminal to avoid unintended connection or
arcing.
To maintain correct operation of the
battery management system, if you add
any electrical devices to your vehicle, do
not connect the ground connection directly
to the negative battery terminal. A
connection at the negative battery terminal
can cause inaccurate measurements of
the battery condition and potential
incorrect system operation.
Note: If you add electrical accessories or
components to your vehicle this may
adversely affect battery performance,
durability and the performance of other
electrical systems on your vehicle.
If you replace the battery make sure it
matches the electrical requirements of
your vehicle. If you disconnect or replace the battery
and your vehicle has an automatic
transmission, it must relearn its adaptive
strategy. Because of this, the transmission
may shift firmly when first driven. This is
normal operation while the transmission
fully updates its operation to optimum
shift feel.
Remove and Reinstall the Battery
To disconnect or remove the battery, do
the following:
1. Apply the parking brake and switch the
ignition off.
2. Switch all electrical equipment off, for example lights and radio.
3. Wait a minimum of two minutes before disconnecting the battery.
Note: The engine management system has
a power hold function and remains powered
for a period of time after you switch the
ignition off. This is to allow diagnostic and
adaptive tables to be stored. Disconnecting
the battery without waiting can cause
damage not covered by the vehicle
Warranty.
4. Disconnect the negative battery cable terminal.
5. Disconnect the positive battery cable terminal.
6. Remove the battery securing clamp.
7. Remove the battery.
8. To install, reverse the removal procedure.
Note: Before reconnecting the battery,
make sure the ignition remains switched off.
Note: Make sure the battery cable terminals
are fully tightened.
Note: After cleaning or replacing the
battery, make sure you reinstall the battery
cover or shield.
343
Maintenance
Page 370 of 585
WARNING: Remember that even
advanced technology cannot defy the
laws of physics. It's always possible to
lose control of a vehicle due to
inappropriate driver input for the
conditions. Aggressive driving on any
road condition can cause you to lose
control of your vehicle increasing the risk
of personal injury or property damage.
Activation of the electronic stability
control system is an indication that at
least some of the tires have exceeded
their ability to grip the road; this could
reduce the operator's ability to control
the vehicle potentially resulting in a loss
of vehicle control, vehicle rollover,
personal injury and death.
WARNING: Wheels and tires must
be the same size, load index and speed
rating as those originally fitted on the
vehicle. Use of any other tire or wheel
can affect the safety and performance
of your vehicle. Additionally, the use of
non-recommended tires and wheels can
cause steering, suspension, axle, transfer
case or power transfer unit failure.
Follow the recommended tire inflation
pressures found on the Safety
Compliance Certification label, or the
Tire Label on the B-Pillar or the edge of
the driver door. Failure to follow this
instruction could result in loss of vehicle
control, vehicle rollover, or personal injury
or death.
The tires on your vehicle could have
all-weather treads to provide traction in
rain and snow. In some climates you will
need to use snow tires and chains on your
vehicle in emergency situations or if
required by law.
Note: The suspension insulation and
bumpers will help prevent vehicle damage.
Do not remove these components from your
vehicle when using snow tires and chains. Note:
Driving too fast for road conditions
creates the possibility of loss of vehicle
control. Driving at very high speeds for
extended periods of time may result in
damage to vehicle components.
Follow these guidelines when using snow
tires and chains:
• Chains may damage aluminum wheels.
• Use ultra low profile cables, 10 mm or less in dimension as measured on the
sidewall of your tire, only with
225/60R18 all season tires.
• Do not use snow chains or cables with 225/55R19, or 245/45R20.
• Not all S-class snow chains or cables meet these restrictions. Chains of this
size restriction will include a tensioning
device.
• Purchase chains or cables from a manufacturer that clearly labels body
to tire dimension restrictions. The snow
chains or cables must be mounted in
pairs on the rear tires only.
• When driving with snow chains do not exceed 30 mph (50 km/h) or the
maximum speed recommended by the
chain manufacturer, whichever is less.
• Install cables securely, verifying that the cables do not touch any wiring or
brake lines.
• Drive cautiously. If you hear the cables rub or bang against the vehicle, stop
and retighten them. If this does not
work, remove the cables to prevent
vehicle damage.
• Remove the tire chains when they are no longer needed. Do not use tire
chains on dry roads.
If you have any questions regarding snow
chains or cables, please contact your
authorized dealer.
367
Wheel and Tire Information
Page 376 of 585
Accessory power plug
H
Casing/housing
I
Bike/raft/sports ball adapters
J
USING THE TIRE SEALANT
AND INFLATOR KIT
Tips for use of the kit
To ensure safe operation of the kit:
• Before operating the kit, make sure
your vehicle is safely off the road and
away from moving traffic.
• Do not remove any foreign objects, such as nails or screws, from the tire.
• Do not allow the compressor to operate continuously for more than 15
minutes. This will help prevent the
compressor from overheating.
• Only use the kit when the ambient temperature is between -22°F (-30°C)
and 158°F (70°C).
• Only use the sealing compound before the use-by date. The use-by date is on
a label on the sealant canister and can
be seen through the rectangular
viewing window on the bottom of the
compressor. Check the use-by date
regularly and replace the canister when
the sealant expires.
Note: Sealant compound contains latex.
Use appropriate precautions to avoid any
allergic reactions.
E175978
When inflation only is required
for a tire or other objects, the
selector must be in the Air
position.
What to do when a tire is punctured
A tire puncture within the tire's tread area
can be repaired in two stages with the kit. • In the first stage, the tire will be
reinflated with a sealing compound
and air. After the tire has been inflated,
you will need to drive the vehicle a
short distance approximately 4 mi
(6 km) to distribute the sealant in the
tire.
• In the second stage, you will need to check the tire pressure and adjust, if
necessary, to the vehicle's specified
tire inflation pressure.
First Stage: Reinflating the Tire
with sealing compound and air
WARNING: Do not stand directly
over the kit while inflating the tire. If you
notice any unusual bulges or
deformations in the tire's sidewall during
inflation, stop and call roadside
assistance.
WARNING: If the tire does not
inflate to the recommended tire pressure
within 15 minutes, stop and call roadside
assistance.
Park the vehicle in a safe, level and secure
area, away from moving traffic.
Turn the hazard lights on. Apply the parking
brake and power off the vehicle. Inspect
the flat tire for visible damage.
If a puncture is located in the tire sidewall,
stop and call roadside assistance.
1. Remove the valve cap from the tire valve.
2. Unwrap the dual purpose hose (black tube) from the back of the compressor
housing.
3. Fasten the hose to the tire valve by turning the connector clockwise.
Tighten the connection securely.
373
Tire Sealant and Inflator Kit (If Equipped)
Page 385 of 585
CHANGING A FLAT TIRE
WARNING: Never place anything
between the vehicle jack and the ground.
WARNING: Never place anything
between the vehicle jack and your
vehicle.
WARNING: To help prevent your
vehicle from moving when changing a
wheel, shift the transmission into park
(P), set the parking brake and use an
appropriate block or wheel chock to
secure the wheel diagonally opposite to
the wheel being changed. For example,
when changing the front left wheel,
place an appropriate block or wheel
chock on the right rear wheel.
WARNING: It is recommended that
the wheels of the vehicle be chocked,
and that no person should remain in a
vehicle that is being jacked.
WARNING: Always use the jack
provided as original equipment with your
vehicle. If using a jack other than the one
provided, make sure the jack capacity is
adequate for the vehicle weight,
including any vehicle cargo or
modifications. If you are unsure if the jack
capacity is adequate, contact the
authorized dealer.
WARNING: The jack supplied with
this vehicle is only intended for changing
wheels. Do not use the vehicle jack other
than when you are changing a wheel in
an emergency.
WARNING: Check that the vehicle
jack is not damaged or deformed and
the thread is lubricated and clean.
WARNING: The jack should be
used on level firm ground wherever
possible.
WARNING: Use only the specified
jacking points. If you use other positions,
you may damage the body, steering,
suspension, engine, braking system or
the fuel lines.
WARNING: Switch the ignition off
and apply the park brake fully before
lifting vehicle.
WARNING: Park your vehicle so
that you do not obstruct the flow of
traffic or place yourself in any danger and
set up a warning triangle.
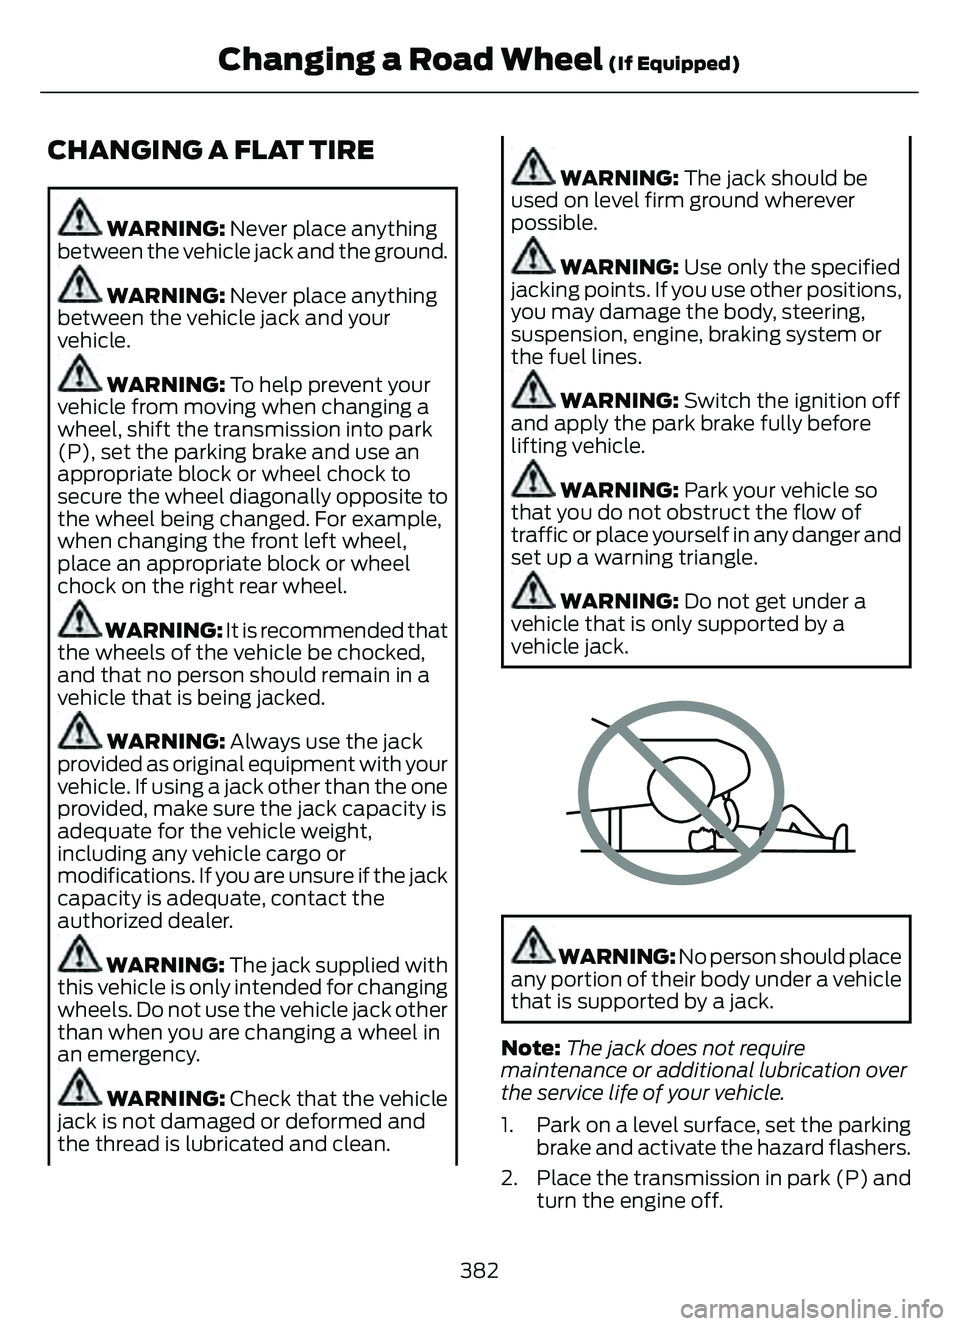
WARNING: Do not get under a
vehicle that is only supported by a
vehicle jack.
E166722E166722
WARNING: No person should place
any portion of their body under a vehicle
that is supported by a jack.
Note: The jack does not require
maintenance or additional lubrication over
the service life of your vehicle.
1. Park on a level surface, set the parking brake and activate the hazard flashers.
2. Place the transmission in park (P) and turn the engine off.
382
Changing a Road Wheel (If Equipped)