park assist FORD ESCAPE 2022 Owner's Manual
[x] Cancel search | Manufacturer: FORD, Model Year: 2022, Model line: ESCAPE, Model: FORD ESCAPE 2022Pages: 585, PDF Size: 6.15 MB
Page 313 of 585
1. Exit the vehicle immediately.
2. Advise emergency assistance that anelectric or hybrid-electric vehicle is
involved.
3. As with any vehicle fire, do not inhale smoke, vapors or gas from the vehicle,
as they may be hazardous.
Post-Incident
1. Do not store a severely damagedvehicle with a lithium-ion battery inside
a structure or within 49 ft (15 m) of any
structure or vehicle.
2. Make sure that passenger and luggage compartments remain ventilated.
3. Call emergency assistance if you observe leaking fluids, sparks, smoke
or flames, or hear gurgling or bubbling
from the high-voltage battery.
SWITCHING THE HAZARD
FLASHERS ON AND OFF
The hazard flashers operate when the
ignition is in any position, or if the key is not
in the ignition. The battery loses charge
and may have insufficient power to restart
your vehicle if your vehicle is in use or if the
key is not in the ignition.
E308147E308147E308EEEEE308E308EEEEEEEE308308EEEE30808EE308E330008147147147147147147147147
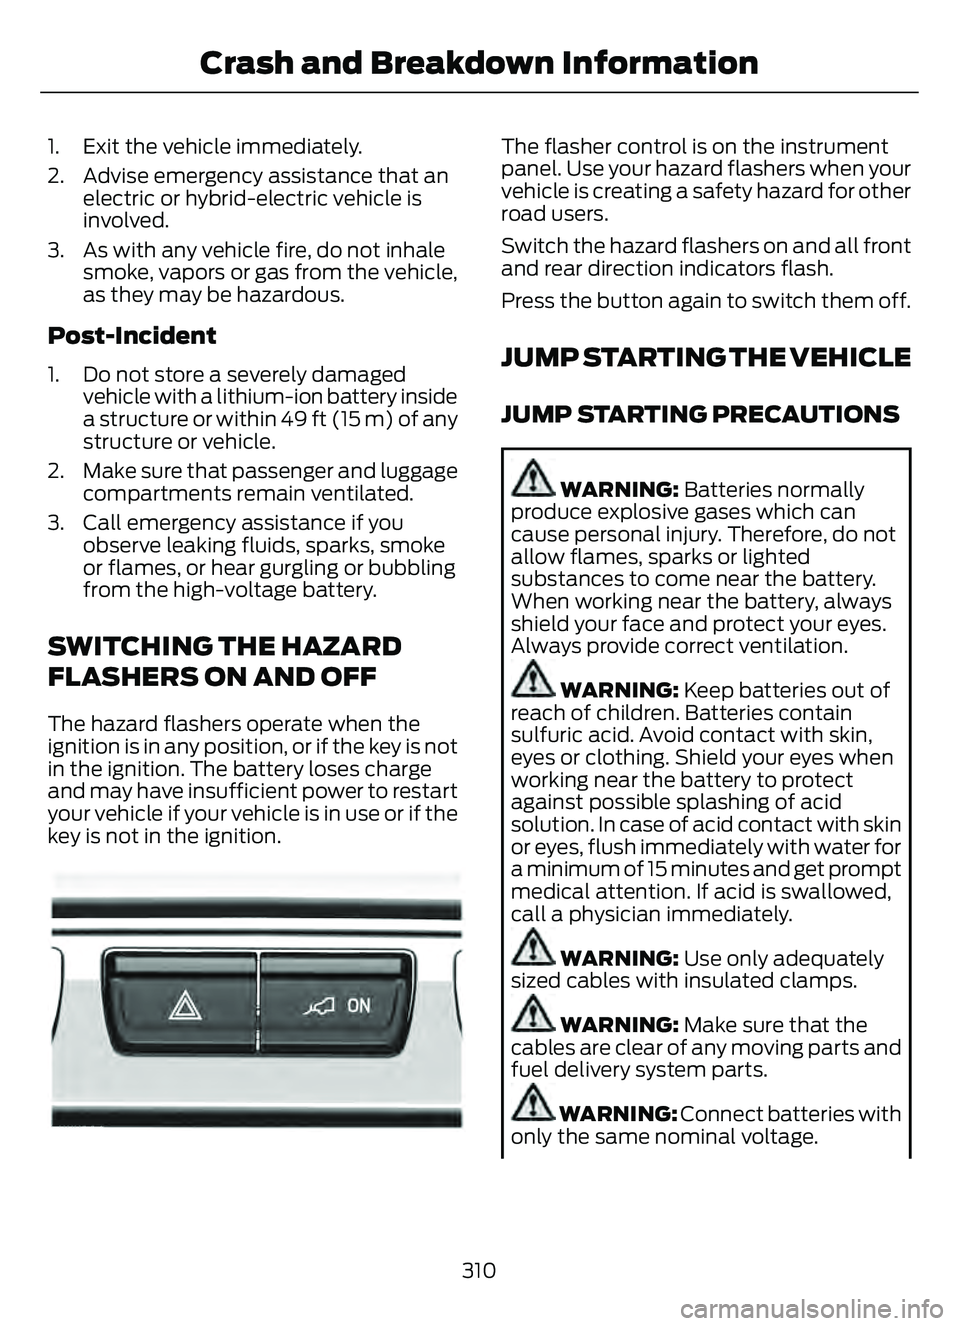
The flasher control is on the instrument
panel. Use your hazard flashers when your
vehicle is creating a safety hazard for other
road users.
Switch the hazard flashers on and all front
and rear direction indicators flash.
Press the button again to switch them off.
JUMP STARTING THE VEHICLE
JUMP STARTING PRECAUTIONS
WARNING: Batteries normally
produce explosive gases which can
cause personal injury. Therefore, do not
allow flames, sparks or lighted
substances to come near the battery.
When working near the battery, always
shield your face and protect your eyes.
Always provide correct ventilation.
WARNING: Keep batteries out of
reach of children. Batteries contain
sulfuric acid. Avoid contact with skin,
eyes or clothing. Shield your eyes when
working near the battery to protect
against possible splashing of acid
solution. In case of acid contact with skin
or eyes, flush immediately with water for
a minimum of 15 minutes and get prompt
medical attention. If acid is swallowed,
call a physician immediately.
WARNING: Use only adequately
sized cables with insulated clamps.
WARNING: Make sure that the
cables are clear of any moving parts and
fuel delivery system parts.
WARNING: Connect batteries with
only the same nominal voltage.
310
Crash and Breakdown Information
Page 320 of 585
Note:If the parking brake is applied, a
message appears in the information display.
Note: If your vehicle has an ignition key, you
cannot remove the key from the ignition
when the transmission is in neutral (N) and
your vehicle is off.
Note: Start the engine and allow it to run
for a few minutes at the beginning of each
day, and every six hours or fewer. With the
engine running and your foot on the brake,
shift into drive (D) and then into reverse (R)
before shifting back into neutral (N). Before
continuing to tow, switch neutral tow on.
EMERGENCY TOWING -
HYBRID ELECTRIC VEHICLE
(HEV)/PLUG-IN HYBRID
ELECTRIC VEHICLE (PHEV)
If your vehicle becomes inoperable without
access to wheel dollies or a vehicle
transport trailer, it can be flat-towed with
all wheels on the ground, regardless of the
powertrain and transmission configuration,
under the following conditions:
• Your vehicle is facing forward for towing in a forward direction.
• You switch Neutral Tow on.
• You release the parking brake.
• Maximum speed is 35 mph (55 km/h).
• Maximum distance is 50 mi (80 km).
Switching Neutral Tow On
1. Switch your vehicle on in accessory mode.
2. Press the menu button on the steering wheel to enter the instrument cluster
display main menu.
3. Select Settings .
4. Select Neutral Tow.
5. Follow the instructions on the information display. 6. Fully press the brake pedal.
7. Shift into neutral (N).
8. Switch the ignition off.
Note:
Failure to follow these instructions
could result in damage to the transmission.
Note: Switching neutral tow on requires
battery power.
Note: Put your climate control system in
recirculated air mode to prevent exhaust
fumes from entering your vehicle. See
Climate Control (page 137).
Switching Neutral Tow Off
1. Switch your vehicle on in accessory
mode.
2. Fully press the brake pedal.
3. Shift into park (P).
EMERGENCY TOWING - 8-
SPEED AUTOMATIC
TRANSMISSION – 8F24
If you need to tow your vehicle, contact a
professional towing service or, if you are a
member of a roadside assistance program,
your roadside assistance service provider.
317
Towing Your Vehicle
Page 325 of 585
Protected Component
Fuse Rating
Fuse Location
Not used.
—
25
Not used.
—
26
Not used.
—
27
Brake on-off switch.
10 A
28
Powertrain control module
(hybrid electric vehicle).
5 A
29
Electronic stability control
(gas).
10 A
30
Transmission oil pump
(hybrid electric vehicle).
Electronic power assist
steering.
5 A
31
Body control module.
30 A
32
Front parking aid camera.
10 A
33
Rear view camera.
Blind spot information
system.
Adaptive cruise control.
Not used (spare).
10 A
34
Heated steering wheel.
15 A
35
Powertrain control module
(hybrid electric vehicle).
10 A
36
Horn.
20 A
37
Blower motor.
40 A
38
Not used.
—
39
Not used.
—
40
Amplifier.
20 A
41
Driver power seat.
30 A
42
Electric water pump (hybrid
electric vehicle).
50 A
43
Trailer tow module.
40 A
44
322
Fuses
Page 329 of 585
Protected Component
Fuse Rating
Fuse Location
Ignition switch.
10 A
4
Lock.
20 A
5
Unlock.
Moonroof.
10 A
6
Passenger door module.
30 A
7
Parking assist control
module.
5 A
8
Electrochromatic mirror.
5 A
9
Image processing module A.
Extended power module.
10 A
10
Power liftgate.
5 A
11
Hands-free liftgate actu-
ation module.
Telematics control unit
module.
Head up display module.
5 A
12
Keyless keypad switch.
Driver door lock.
15 A
13
Driver door module.
30 A
14
Extended power module.
15 A
15
Not used (spare).
15 A
16
SYNC.
15 A
17
Receiver transceiver
module.
Integrated control panel.
Wireless accessory charging
module.
7.5 A
18
Headlamp switch pack.
7.5 A
19
Not used (spare).
10 A
20
Climate control.
7.5 A
21
E-shifter module.
Instrument cluster.
7.5 A
22
Gateway module
326
Fuses
Page 353 of 585
Do not wipe lamps when they are dry.
CLEANING WINDOWS AND WIPER
BLADES
To clean the windshield and wiper blades:
• Clean the windshield with anon-abrasive glass cleaner.
Note: When cleaning the interior of the
windshield, avoid getting any glass cleaner
on the instrument panel or door panels.
Wipe any glass cleaner off these surfaces
immediately.
• Clean the wiper blades with washer fluid or water applied with a soft
sponge or cloth.
Note: Do not use razor blades or other
sharp objects to clean or remove decals
from the inside of the heated rear window.
This can cause damage not covered by the
vehicle Warranty.
CLEANING CHROME, ALUMINIUM
OR STAINLESS STEEL
We recommend that you only use a car
shampoo, a soft cloth and water on
bumpers and other chrome, aluminium or
stainless steel parts.
Note: For additional information and
assistance, we recommend that you contact
an authorized dealer.
Note: Rinse the area well after cleaning.
Note: Do not use abrasive materials, for
example steel wool or plastic pads, as they
can scratch these surfaces.
Note: Do not use chrome cleaner, metal
cleaner or polish on wheels or wheel covers.
CLEANING WHEELS
Only use a recommended wheel and tire
cleaner to clean the wheels weekly. For
additional information and assistance, we
recommend that you contact an
authorized dealer.
1. Use a sponge to remove heavy deposits of dirt and brake dust.
2. Rinse well after cleaning.
Note: Do not apply a cleaning chemical to
warm or hot wheel rims and covers.
If you intend on parking your vehicle for an
extended period after cleaning the wheels
with a wheel cleaner, drive your vehicle for
a few minutes before parking your vehicle.
This reduces the risk of corrosion of the
brake discs, brake pads and linings.
Do not clean the wheels when they are hot.
Note: Some car washes could damage
wheel rims and covers.
Note: Using non-recommended cleaners,
harsh cleaning products, chrome wheel
cleaners or abrasive materials could
damage wheel rims and covers.
CLEANING THE ENGINE
COMPARTMENT
Use a vacuum cleaner to remove debris
from the screen area below windshield.
Note: If you are not familiar with the parts
around the engine do not wash the engine
compartment. Avoid frequent engine
washes.
When washing the engine compartment:
• Never wash or rinse the engine while it is hot or running.
• Never wash or rinse any ignition coil, spark plug wire or spark plug well.
• Cover the battery, power distribution box, and air filter assembly to prevent
water damage.
350
Vehicle Care
Page 356 of 585
For heavy stains, spot clean the area. If a
ring forms on the fabric, clean the entire
area immediately, but do not oversaturate
or the ring could set.
We recommend that you only clean your
floor mats in the following way:
1. Remove dust and loose dirt with avacuum cleaner.
2. Wash rubber floor mats using mild soap and lukewarm or cold water.
3. Completely dry the floor mat before placing them back in your vehicle.
CLEANING SEATBELTS
WARNING: Do not use cleaning
solvents, bleach or dye on the vehicle's
seatbelts, as these actions may weaken
the belt webbing.
1. Wipe the surface with a soft, damp cloth and a mild soap and water
solution. Dry the area with a clean, soft
cloth.
CLEANING STORAGE
COMPARTMENTS
1. Remove dust and loose dirt with avacuum cleaner.
2. Wipe the surface with a soft, damp cloth and a mild soap and water
solution. Dry the area with a clean, soft
cloth.
CLEANING MOONROOF TRACKS
1. Remove debris from the tracks with avacuum cleaner.
2. Wipe the bulb seal and mating painted roof metal surface with a soft, damp
cloth and a mild soap and water
solution. Note:
The moonroof rail tracks are greased
to maintain proper functionality. Do not
wipe off the grease.
REPAIRING MINOR PAINT
DAMAGE
Authorized dealers have touch-up paint to
match your vehicle’s color. Your vehicle
color code is printed on a sticker on the
front, left-hand side door jamb. Take your
color code to your authorized dealer to
make sure you get the correct color.
Before repairing minor paint damage, use
a cleaner to remove particles such as bird
droppings, tree sap, insect deposits, tar
spots, road salt and industrial fallout.
Read the instructions before using cleaning
products.
WAXING YOUR VEHICLE
Wax the high-gloss painted surface of your
prewashed vehicle once or twice a year.
We recommend that you only use an
approved quality wax that does not
contain abrasives. Follow the
manufacturer's instructions to apply and
remove the wax. For additional information
and assistance, we recommend that you
contact an authorized dealer.
When washing and waxing, park your
vehicle in a shaded area out of direct
sunlight.
Note: Avoid waxing unpainted or low-gloss
black colored parts, they discolor over time.
353
Vehicle Care
Page 376 of 585
Accessory power plug
H
Casing/housing
I
Bike/raft/sports ball adapters
J
USING THE TIRE SEALANT
AND INFLATOR KIT
Tips for use of the kit
To ensure safe operation of the kit:
• Before operating the kit, make sure
your vehicle is safely off the road and
away from moving traffic.
• Do not remove any foreign objects, such as nails or screws, from the tire.
• Do not allow the compressor to operate continuously for more than 15
minutes. This will help prevent the
compressor from overheating.
• Only use the kit when the ambient temperature is between -22°F (-30°C)
and 158°F (70°C).
• Only use the sealing compound before the use-by date. The use-by date is on
a label on the sealant canister and can
be seen through the rectangular
viewing window on the bottom of the
compressor. Check the use-by date
regularly and replace the canister when
the sealant expires.
Note: Sealant compound contains latex.
Use appropriate precautions to avoid any
allergic reactions.
E175978
When inflation only is required
for a tire or other objects, the
selector must be in the Air
position.
What to do when a tire is punctured
A tire puncture within the tire's tread area
can be repaired in two stages with the kit. • In the first stage, the tire will be
reinflated with a sealing compound
and air. After the tire has been inflated,
you will need to drive the vehicle a
short distance approximately 4 mi
(6 km) to distribute the sealant in the
tire.
• In the second stage, you will need to check the tire pressure and adjust, if
necessary, to the vehicle's specified
tire inflation pressure.
First Stage: Reinflating the Tire
with sealing compound and air
WARNING: Do not stand directly
over the kit while inflating the tire. If you
notice any unusual bulges or
deformations in the tire's sidewall during
inflation, stop and call roadside
assistance.
WARNING: If the tire does not
inflate to the recommended tire pressure
within 15 minutes, stop and call roadside
assistance.
Park the vehicle in a safe, level and secure
area, away from moving traffic.
Turn the hazard lights on. Apply the parking
brake and power off the vehicle. Inspect
the flat tire for visible damage.
If a puncture is located in the tire sidewall,
stop and call roadside assistance.
1. Remove the valve cap from the tire valve.
2. Unwrap the dual purpose hose (black tube) from the back of the compressor
housing.
3. Fasten the hose to the tire valve by turning the connector clockwise.
Tighten the connection securely.
373
Tire Sealant and Inflator Kit (If Equipped)
Page 467 of 585
Action and Description
Menu Item
Touch this button to view the nearby weather, current weather,
or the five-day forecast for the chosen area.
Weather
Select to see the weather map,
which can show storms, radar
information, charts and winds.
Map
Select to choose from a listing of
weather locations.
Area
Touch this button to view scores and schedules from a variety
of sports. You can also save up to 10 favorite teams for easier
access. The score automatically refreshes when a game is in
progress.
Sports Info
Touch this button to view ski conditions for a specific area.
Ski Conditions
SETTINGS
E280315
Press the button to enter the
settings menu.
E268570
Once you select a tile, press the
button next to a menu item to
view an explanation of the
feature or setting.
Sound
Select this tile to adjust the sound settings.
Clock
Select this tile to adjust the clock settings.
Bluetooth®
Select this tile to switch Bluetooth® on
and off and adjust the settings.
Phone
Select this tile to connect, disconnect, and
manage the connected device settings.
Audio
Select this tile to adjust the audio settings.
Driver Assist (If Equipped)
Select this tile to adjust Driver Assist
features like Parking Aids, Lane Keeping
System, Pedestrian Detection, and
Auto-Start-Stop.
Vehicle
Select this tile to adjust vehicle settings
like windows, alarm, lighting, and MyKey
settings.
FordPass
Select this tile to adjust the FordPass
settings.
General
Select this tile to adjust settings like
language, measurement units, or to reset
the system.
911 Assist (If Equipped)
Select this tile to switch 911 Assist on and
off.
464
SYNC™ 3 (If Equipped)
Page 484 of 585
Less Cost to Properly Maintain Your
Vehicle
The Ford Protect extended service plan
also offers a Premium Maintenance Plan
that covers all scheduled maintenance,
and selected wear items. The coverage is
prepaid, so you never have to worry about
the cost of your vehicle’s maintenance.
Covered maintenance includes:
• Windshield wiper blades.
• Spark plugs.
• The clutch disc (if equipped).
• Brake pads and linings.
• Shock absorbers.
• Struts.
• Engine belts.
• Engine coolant hoses, clamps and o-rings.
• Diesel exhaust fluid replenishment (if equipped).
• Cabin air filter replacement every 20,000 mi (32,000 km) for electric
vehicles only.
Interest Free Finance Options
Just a 5% down payment provides you
with an affordable, no interest, no fee
payment program allowing you all the
security and benefits Ford Protect
extended service plan has to offer while
paying over time. You are pre-approved
with no credit check or hassles. To learn
more, call our Ford Protect extended
service plan specialists at 800-367-3377.
Ford Protect Extended Service Plan
P.O. Box 321067
Detroit, MI 48232Ford Protect Extended Service
Plan (Canada Only)
You can get more protection for your
vehicle by purchasing a Ford Protect
extended service plan. Ford Protect
extended service plan is the only service
contract backed by Ford Motor Company
of Canada, Limited. Depending on the plan
you purchase, Ford Protect extended
service plan provides benefits such as:
• Rental reimbursement.
• Coverage for cert ain maintenance and
wear items.
• Protection against repair costs after your New Vehicle Limited Warranty
Coverage expires.
• Roadside Assistance benefits.
There are several Ford Protect extended
service plans available in various time,
distance and deductible combinations.
Each plan is tailored to fit your own driving
needs, including reimbursement for towing
and rental. When you purchase Ford
Protect extended service plan, you receive
added peace-of-mind protection
throughout Canada, the United States and
Mexico, provided by a network of
participating authorized Ford Motor
Company dealers.
Note: Repairs performed outside of Canada
and the United States are not eligible for
Ford Protect extended service plan
coverage.
This information is subject to change. Visit
your local Ford of Canada dealer or
www.ford.ca to find the Ford Protect
extended service plan that is right for you.
481
Ford Protect
Page 566 of 585
1
12V Battery......................................................34112V Battery Precautions...................................341
Battery Management SystemLimitations.......................................................342
How Does the Battery Management System Work..................................................342
Recycling and Disposing of the 12V Battery..............................................................342
Resetting the Battery Sensor........................342
What Is the Battery Management System..............................................................342
9
911 Assist............................................................57
A
A/CSee: Climate Control..........................................137About This Publication..................................17
ABS
See: Brakes............................................................217Accessing the Trip Computer - VehiclesWith: 4.2 Inch Instrument Cluster
Display Screen............................................129
Accessing the Trip Computer - Vehicles With: 6.5 Inch Instrument Cluster
Display Screen/ 12.3 Inch Instrument
Cluster Display Screen.............................129
Accessories....................................................479
AC Charging...................................................205
Connecting the Charger..................................205
Stopping Charging............................................206
Active Park Assist........................................238Active Park Assist –
Trouble shooting............................................240
Active Park Assist Precautions...............238
Active Park Assist –
Troubleshooting........................................240
Active Park Assist – Frequently Asked
Questions ........................................................240
Active Park Assist – Information Messages.........................................................240
Adaptive Cruise Control............................244Adaptive Cruise Control –Troubleshooting............................................ 254
Intelligent Adaptive Cruise Control.............253
Lane Centering...................................................250
Adaptive Cruise Control Automatic Cancellation................................................247
Adaptive Cruise Control Indicators.......250
Adaptive Cruise Control Limitations..................................................245
Adaptive Cruise Control Precautions.................................................244
Adaptive Cruise Control – Troubleshooting........................................254
Adaptive Cruise Control – Information
Messages.........................................................254
Adjusting the Exterior Mirrors..................108
Adjusting the Headlamps........................344
Adjusting the Instrument Panel LightingBrightness....................................................103
Adjusting the Seatbelt Height...................42
Adjusting the Seatbelts During Pregnancy......................................................42
Adjusting the Sound Settings...................411
Adjusting the Steering Wheel....................91
Adjusting the Volume.................................410
Aid Mode.........................................................263
How Does Aid Mode Work.............................263
What Is Aid Mode..............................................263
Airbag Precautions........................................49
Airbags................................................................47
Front Passenger Sensing System...................51Air ConditioningSee: Climate Control..........................................137Air Conditioning System Capacity and Specification - 1.5L EcoBoost™.........400
Air Conditioning System Capacity and Specification - 2.0L EcoBoost™.........401
Air Conditioning System Capacity and Specification - 2.5L, Hybrid Electric
Vehicle (HEV)/Plug-In Hybrid Electric
Vehicle (PHEV).........................................402
Air Filter
See: Changing the Engine Air Filter - 1.5L
EcoBoost™/2.0L EcoBoost™.................338
See: Changing the Engine Air Filter - 2.5L, Hybrid Electric Vehicle (HEV)/Plug-In
Hybrid Electric Vehicle (PHEV)...............339
563
Index