steering FORD ESCORT 1998 7.G Owners Manual
[x] Cancel search | Manufacturer: FORD, Model Year: 1998, Model line: ESCORT, Model: FORD ESCORT 1998 7.GPages: 191, PDF Size: 1.51 MB
Page 26 of 191
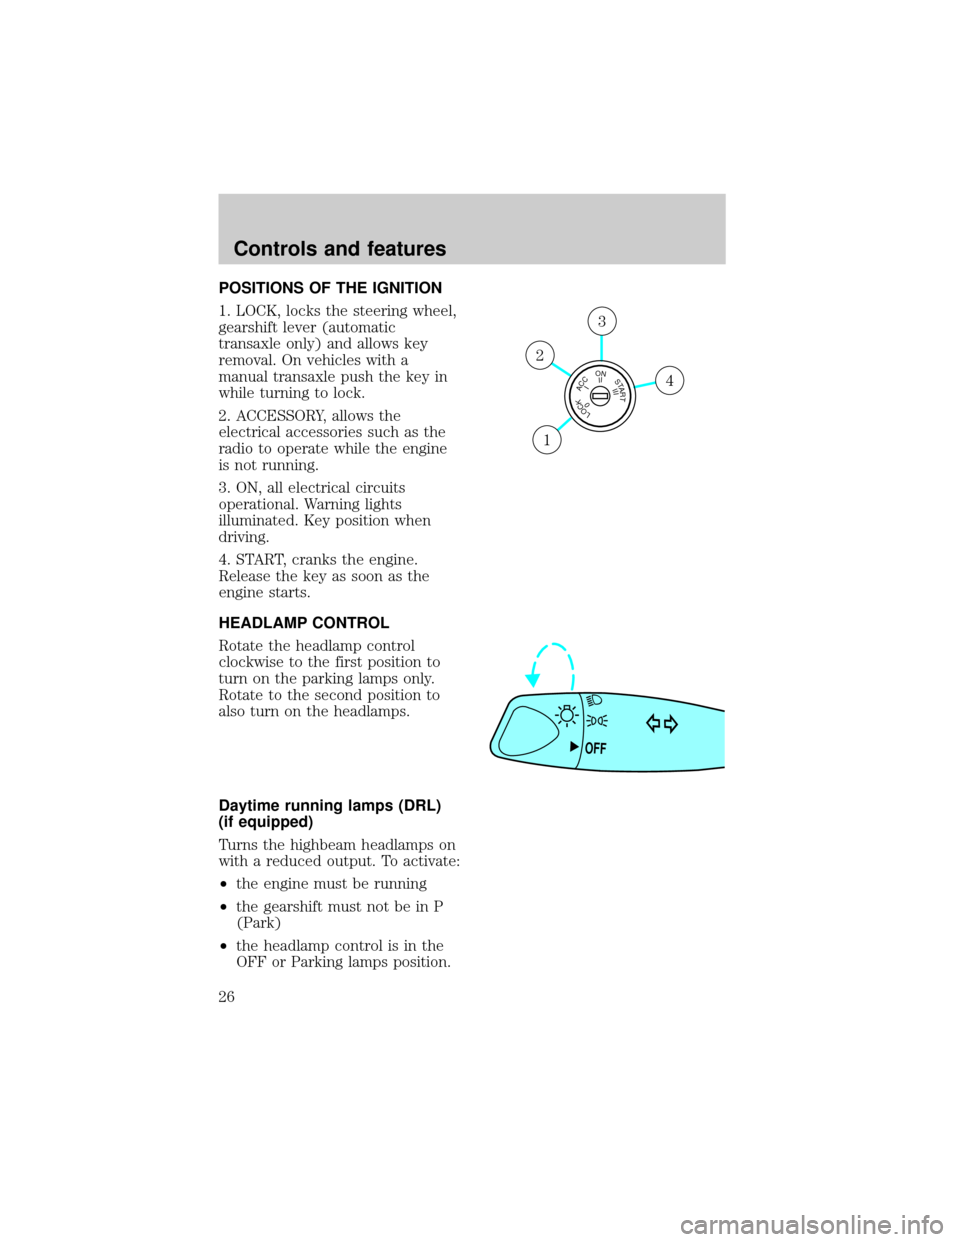
POSITIONS OF THE IGNITION
1. LOCK, locks the steering wheel,
gearshift lever (automatic
transaxle only) and allows key
removal. On vehicles with a
manual transaxle push the key in
while turning to lock.
2. ACCESSORY, allows the
electrical accessories such as the
radio to operate while the engine
is not running.
3. ON, all electrical circuits
operational. Warning lights
illuminated. Key position when
driving.
4. START, cranks the engine.
Release the key as soon as the
engine starts.
HEADLAMP CONTROL
Rotate the headlamp control
clockwise to the first position to
turn on the parking lamps only.
Rotate to the second position to
also turn on the headlamps.
Daytime running lamps (DRL)
(if equipped)
Turns the highbeam headlamps on
with a reduced output. To activate:
²the engine must be running
²the gearshift must not be in P
(Park)
²the headlamp control is in the
OFF or Parking lamps position.
LOCKACCONSTART0IIIIII4
3
2
1
OFF
Controls and features
26
Page 33 of 191
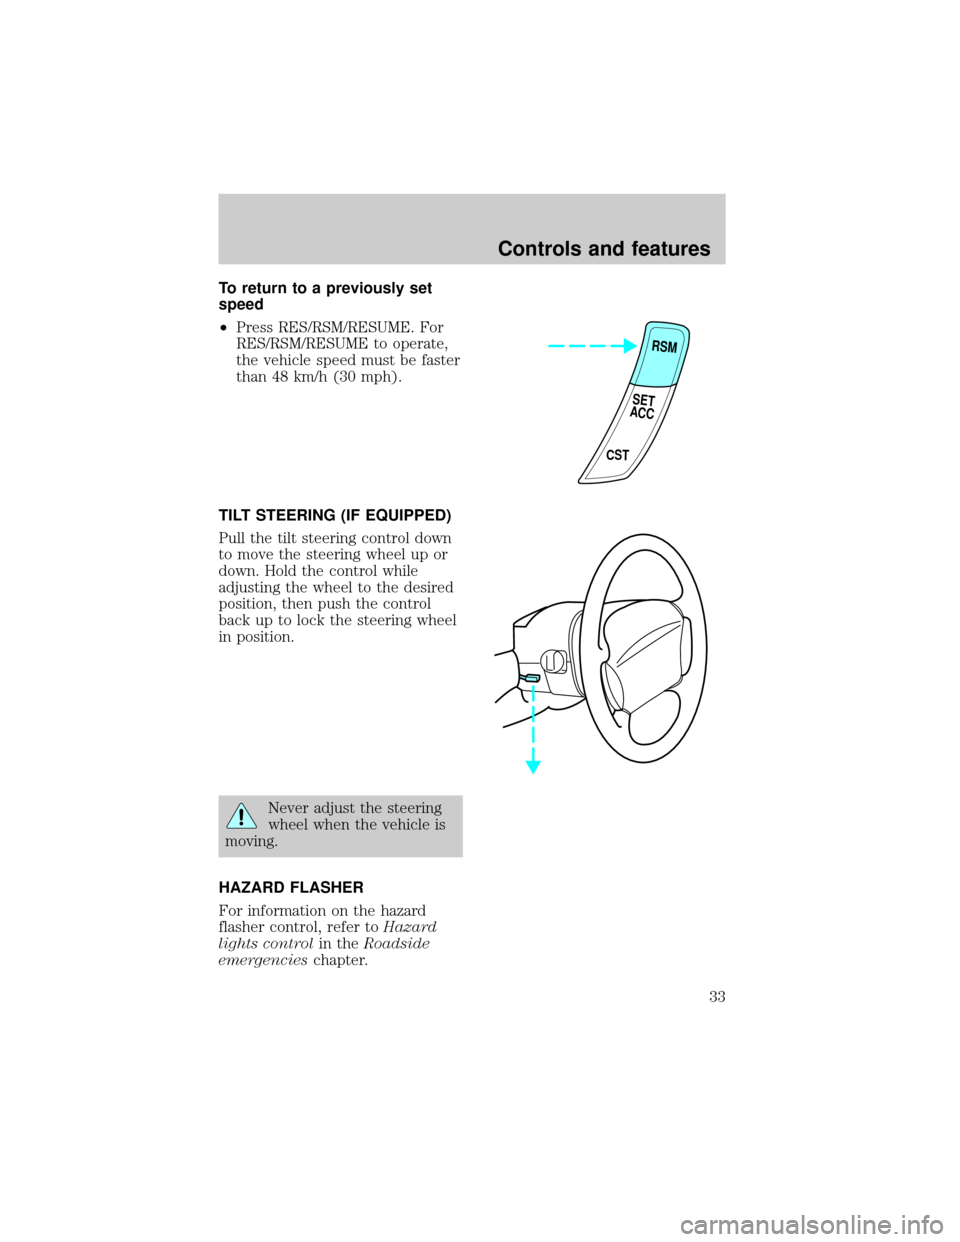
To return to a previously set
speed
²Press RES/RSM/RESUME. For
RES/RSM/RESUME to operate,
the vehicle speed must be faster
than 48 km/h (30 mph).
TILT STEERING (IF EQUIPPED)
Pull the tilt steering control down
to move the steering wheel up or
down. Hold the control while
adjusting the wheel to the desired
position, then push the control
back up to lock the steering wheel
in position.
Never adjust the steering
wheel when the vehicle is
moving.
HAZARD FLASHER
For information on the hazard
flasher control, refer toHazard
lights controlin theRoadside
emergencieschapter.
RSM
CST
SET
ACC
Controls and features
33
Page 60 of 191
Do not place objects or
mount equipment on or
near the air bag cover on the
steering wheel or in front seat
areas that may come into contact
with a deploying air bag. Failure
to follow this instruction may
increase the risk of personal
injury in the event of a collision.
Do not attempt to service,
repair, or modify the Air
Bag Supplemental Restraint
System or its fuses. See your
Ford or Lincoln-Mercury dealer.
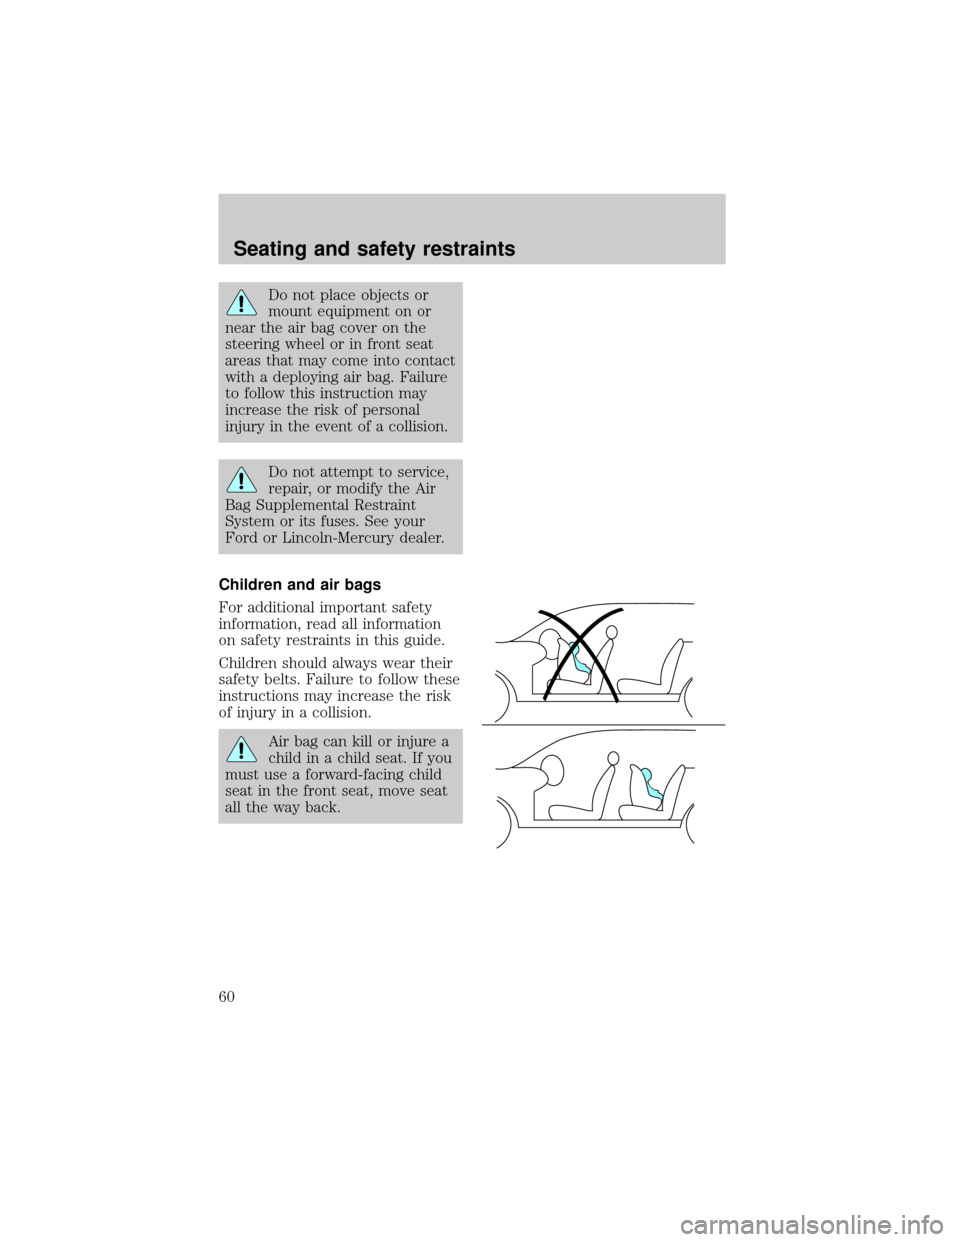
Children and air bags
For additional important safety
information, read all information
on safety restraints in this guide.
Children should always wear their
safety belts. Failure to follow these
instructions may increase the risk
of injury in a collision.
Air bag can kill or injure a
child in a child seat. If you
must use a forward-facing child
seat in the front seat, move seat
all the way back.
Seating and safety restraints
60
Page 88 of 191
vehicle has continuous vibration or
shudder while braking, felt mainly
in the steering wheel, the vehicle
most likely needs service.
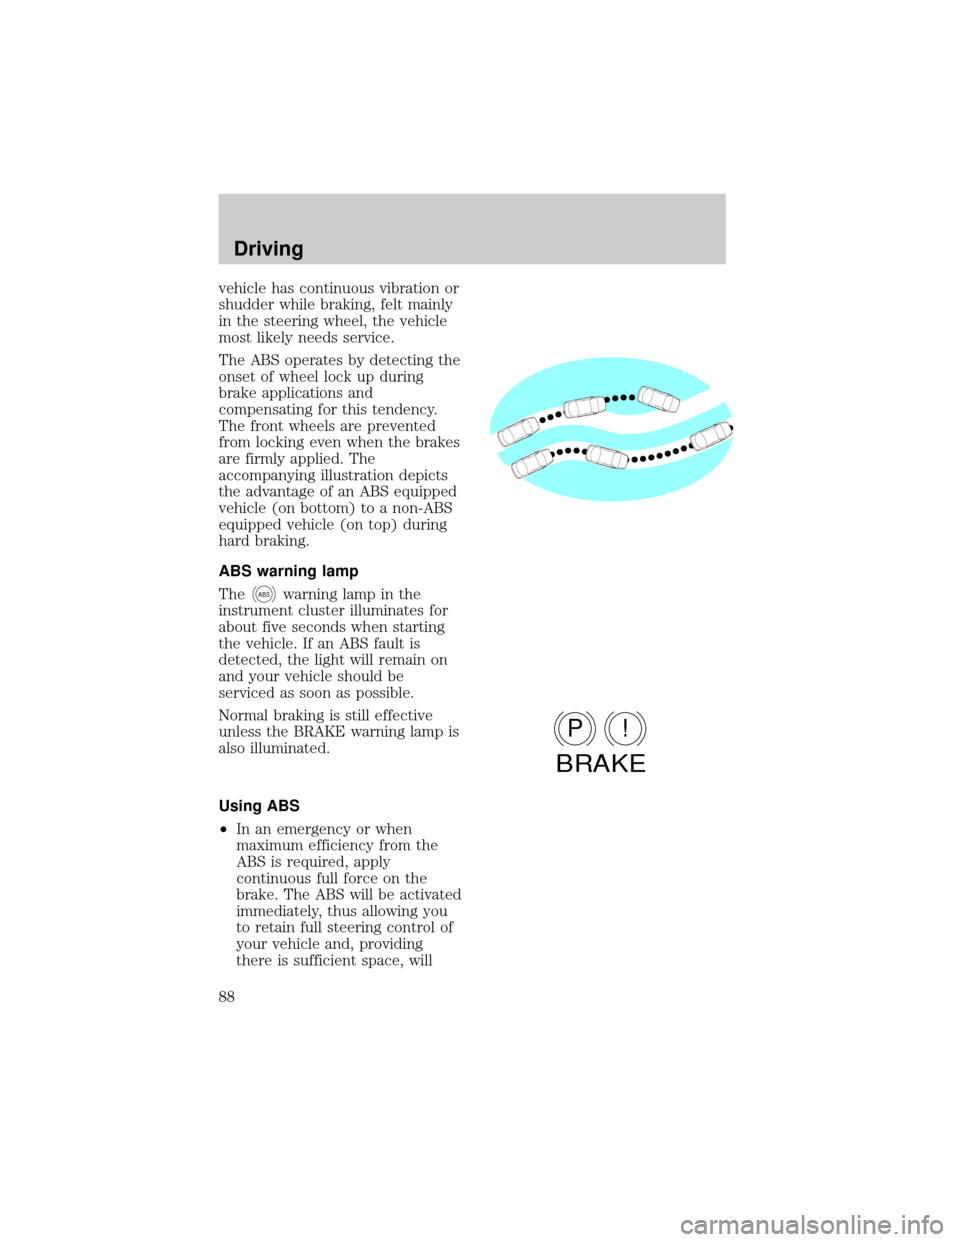
The ABS operates by detecting the
onset of wheel lock up during
brake applications and
compensating for this tendency.
The front wheels are prevented
from locking even when the brakes
are firmly applied. The
accompanying illustration depicts
the advantage of an ABS equipped
vehicle (on bottom) to a non-ABS
equipped vehicle (on top) during
hard braking.
ABS warning lamp
The
ABSwarning lamp in the
instrument cluster illuminates for
about five seconds when starting
the vehicle. If an ABS fault is
detected, the light will remain on
and your vehicle should be
serviced as soon as possible.
Normal braking is still effective
unless the BRAKE warning lamp is
also illuminated.
Using ABS
²In an emergency or when
maximum efficiency from the
ABS is required, apply
continuous full force on the
brake. The ABS will be activated
immediately, thus allowing you
to retain full steering control of
your vehicle and, providing
there is sufficient space, will
P!
BRAKE
Driving
88
Page 113 of 191

Fuse/Fuse Link
Cartridge
LocationFuse Amp
RatingDescription
MAIN 100A* Charging System, BTN, Cooling
Fan, Fuel Pump, OBD-II, ABS
Fuses, Ignition Switch, Headlamps
BTN 40A* Hazard
ABS 60A* ABS Main Relay
COOLING FAN 40A* Constant Control Relay Module
OBD-II 10A** Data Link Connector (DLC),
Instrument Cluster
FUEL PUMP 30A** Engine Controls
HEAD RH 10A** Headlamps
HEAD LH 10A** Headlamps
* Fuse Link Cartridge ** Fuse
Relays
Relays are located in the power
distribution box and should be
replaced by qualified technicians.
CHANGING THE TIRES
If you get a flat tire while driving,
do not apply the brake heavily.
Instead, gradually decrease your
speed. Hold the steering wheel
firmly and slowly move to a safe
place on the side of the road.
Roadside emergencies
113
Page 130 of 191
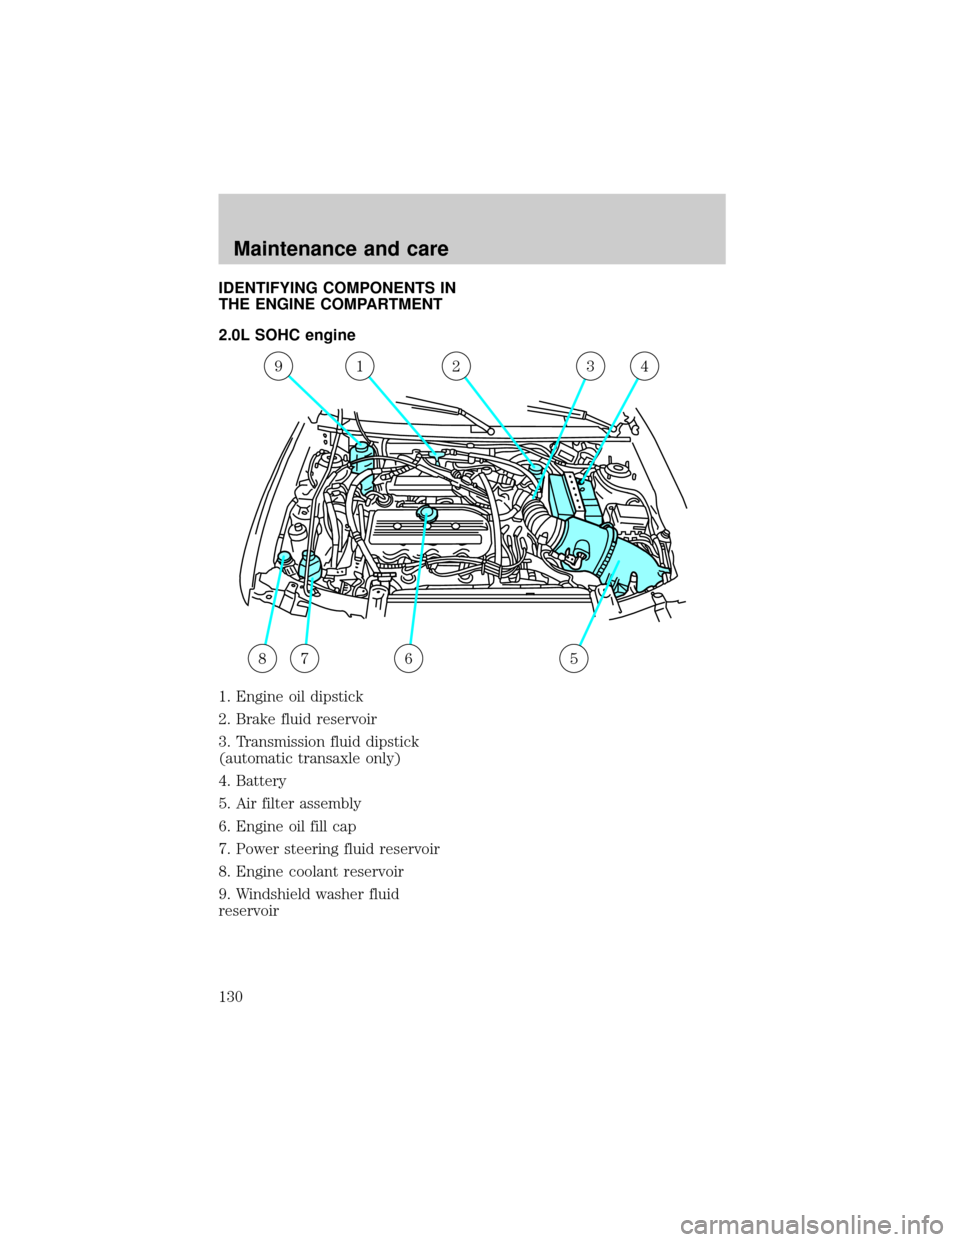
IDENTIFYING COMPONENTS IN
THE ENGINE COMPARTMENT
2.0L SOHC engine
1. Engine oil dipstick
2. Brake fluid reservoir
3. Transmission fluid dipstick
(automatic transaxle only)
4. Battery
5. Air filter assembly
6. Engine oil fill cap
7. Power steering fluid reservoir
8. Engine coolant reservoir
9. Windshield washer fluid
reservoir
91234
8756
Maintenance and care
130
Page 131 of 191
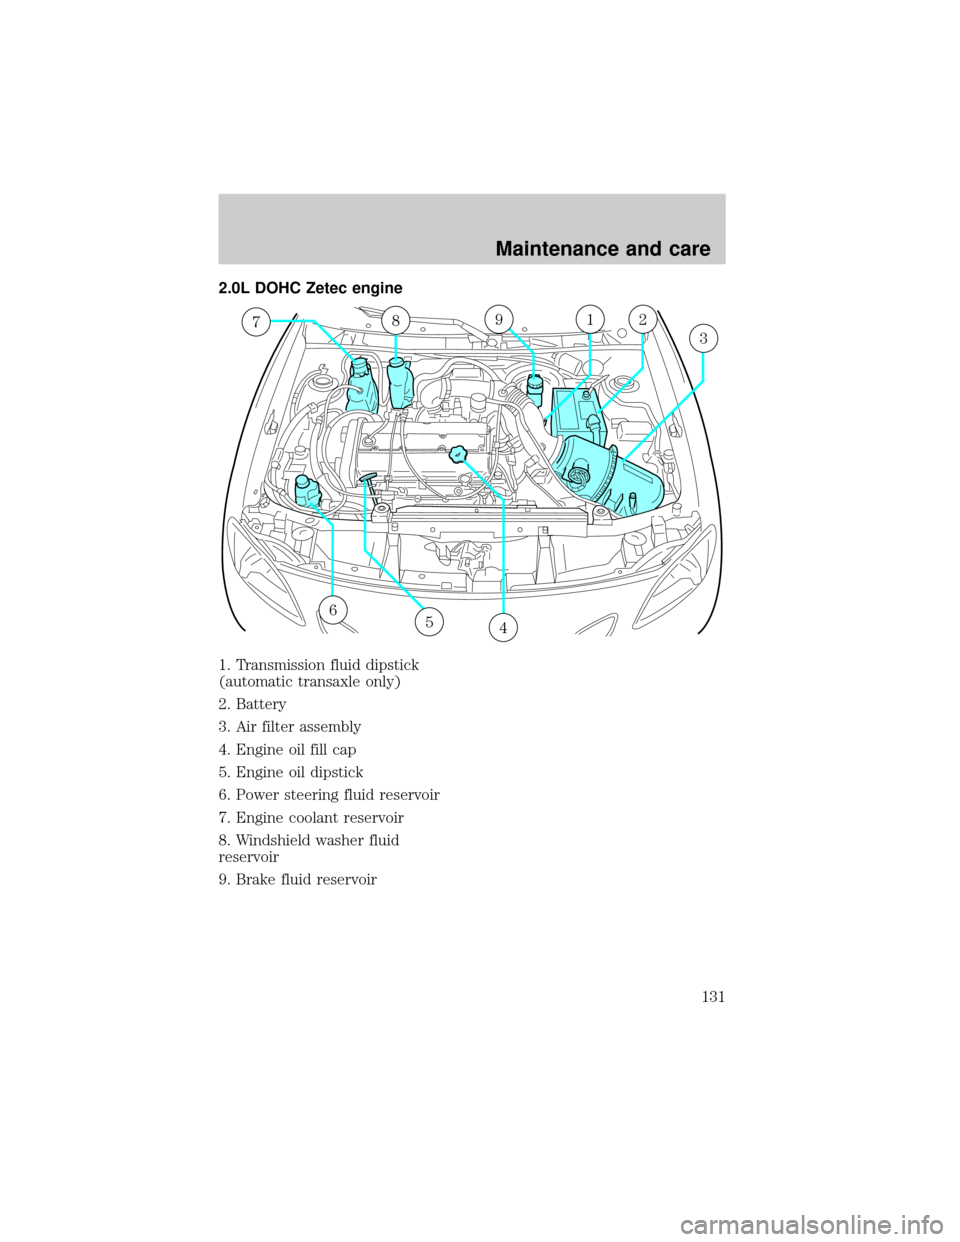
2.0L DOHC Zetec engine
1. Transmission fluid dipstick
(automatic transaxle only)
2. Battery
3. Air filter assembly
4. Engine oil fill cap
5. Engine oil dipstick
6. Power steering fluid reservoir
7. Engine coolant reservoir
8. Windshield washer fluid
reservoir
9. Brake fluid reservoir
98712
3
4
65
Maintenance and care
131
Page 142 of 191
such that the coolant will not
freeze at the temperature level in
which you drive during winter
months. Never increase the engine
coolant concentration above 60%.
Leave a 50/50 mixture of engine
coolant and water in your vehicle
year-round in non-extreme
climates.
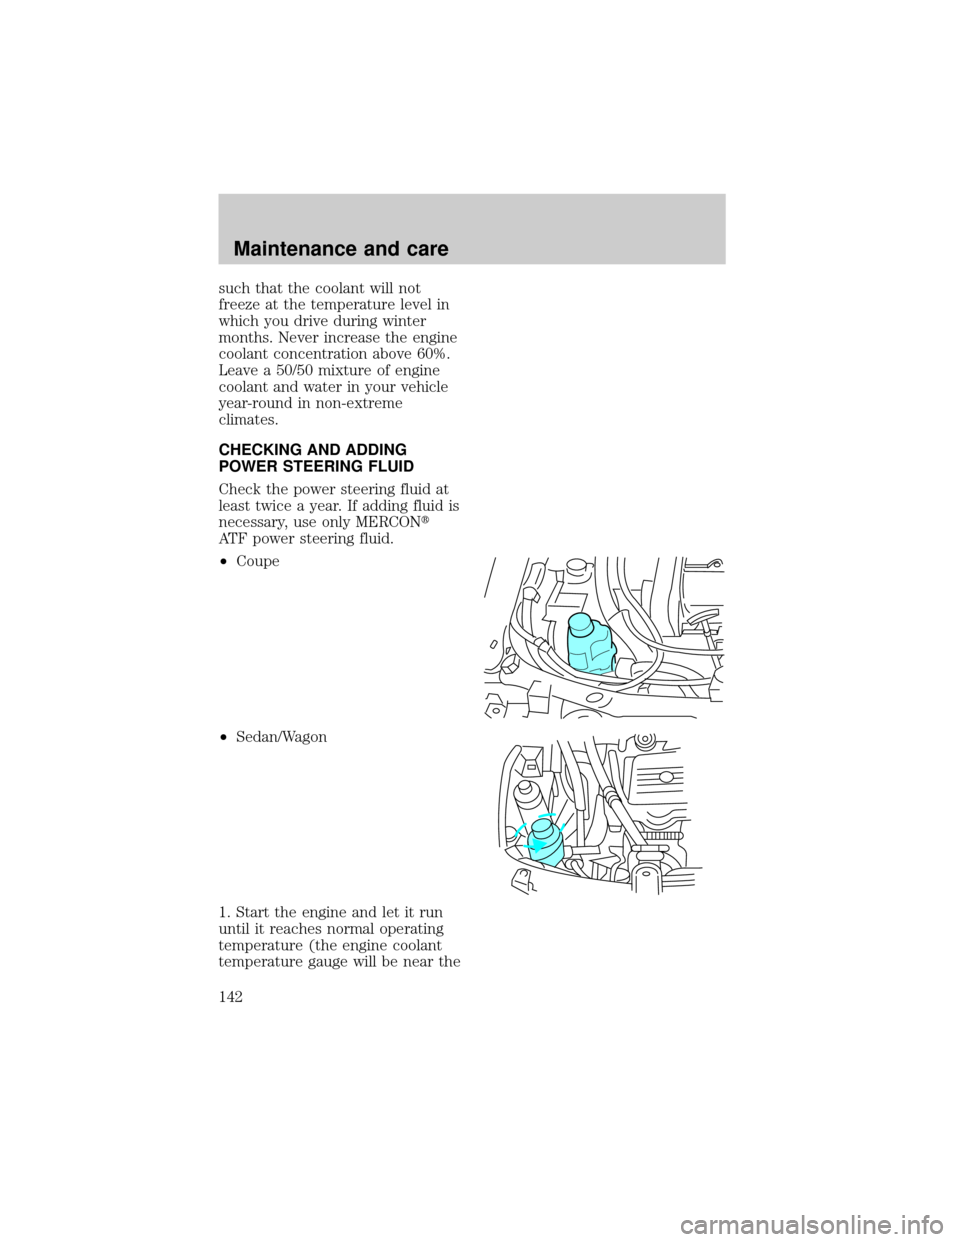
CHECKING AND ADDING
POWER STEERING FLUID
Check the power steering fluid at
least twice a year. If adding fluid is
necessary, use only MERCONt
ATF power steering fluid.
²Coupe
²Sedan/Wagon
1. Start the engine and let it run
until it reaches normal operating
temperature (the engine coolant
temperature gauge will be near the
Maintenance and care
142
Page 143 of 191

center of the NORMAL band).
2. While the engine idles, turn the
steering wheel left and right
several times.
3. Turn the engine off.
4. Check the fluid level in the
reservoir. It should be between the
MIN and MAX lines. Do not add
fluid if the level is in this range.
5. If the fluid is low, add fluid in
small amounts, continuously
checking the level until it reaches
the range between the MIN and
MAX lines. Be sure to put the cap
back on the reservoir.
TRANSMISSION FLUID
Checking and adding automatic
transmission fluid
Follow the scheduled service
intervals outlined in the ªService
Guide.º
Before adding any fluid, make sure
the correct type is used. The type
of fluid used is normally indicated
on the dipstick and/or dipstick
handle and also in theLubricant
specificationssection in the
Capacities and specifications
chapter.
Do not drive the vehicle if the fluid
level is below the hole at the
bottom of the dipstick and outside
temperatures are above 10ÉC
(50ÉF).
Your transaxle does not use up
fluid. However, it is recommended
that you check the transmission
Maintenance and care
143
Page 154 of 191
SNOW TIRES AND CHAINS
Snow tires must be the
same size and grade as the
tires you currently have on your
vehicle.
The tires on your vehicle have all
weather treads to provide traction
in rain and snow. However, in some
climates, you may need to use
snow tires and chains. If you need
to use snow tires and chains, you
must install steel wheels of the
same size and specifications as
those originally installed.
Follow these guidelines when using
snow tires and chains:
²Use only SAE Class S chains.
²Install chains securely, verifying
that the chains do not touch any
wiring, brake lines or fuel lines.
²Drive cautiously. If you hear the
chains rub or bang against your
vehicle, stop and re-tighten the
chains. If this does not work,
remove the chains to prevent
damage to your vehicle.
²If possible, avoid fully loading
your vehicle.
²Do not use tire chains on
aluminum wheels. Chains may
chip the wheels.
²Do not use tire chains with
38 cm (15 inch) wheel/tire
options. Using chains on this
size tire may cause damage to
steering, suspension and/or body
components.
Maintenance and care
154