lights FORD ESCORT 2003 7.G User Guide
[x] Cancel search | Manufacturer: FORD, Model Year: 2003, Model line: ESCORT, Model: FORD ESCORT 2003 7.GPages: 184, PDF Size: 1.28 MB
Page 39 of 184
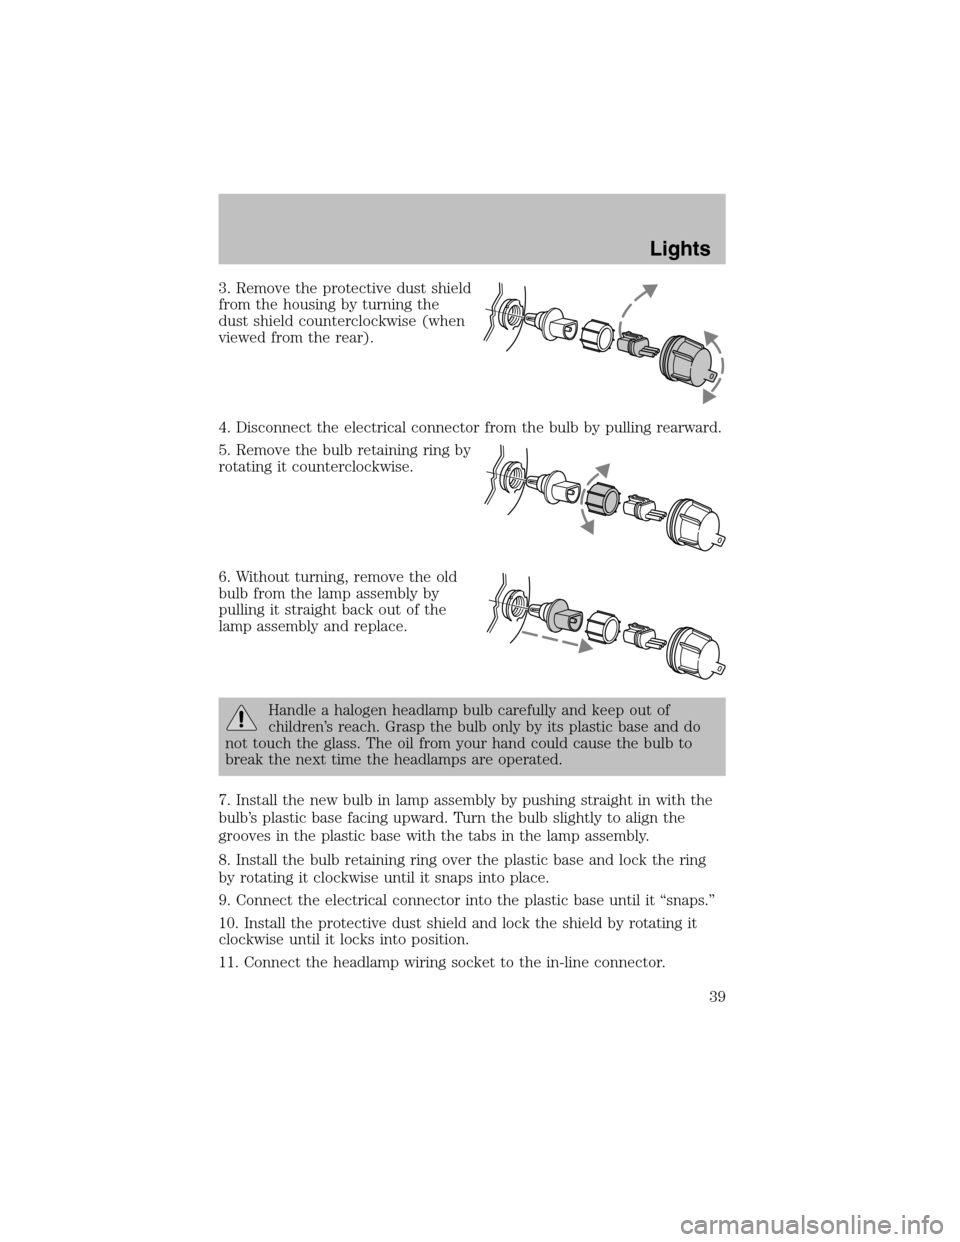
3. Remove the protective dust shield
fromthe housing by turning the
dust shield counterclockwise (when
viewed fromthe rear).
4. Disconnect the electrical connector fromthe bulb by pulling rearward.
5. Remove the bulb retaining ring by
rotating it counterclockwise.
6. Without turning, remove the old
bulb from the lamp assembly by
pulling it straight back out of the
lamp assembly and replace.
Handle a halogen headlamp bulb carefully and keep out of
children’s reach. Grasp the bulb only by its plastic base and do
not touch the glass. The oil fromyour hand could cause the bulb to
break the next time the headlamps are operated.
7. Install the new bulb in lamp assembly by pushing straight in with the
bulb’s plastic base facing upward. Turn the bulb slightly to align the
grooves in the plastic base with the tabs in the lamp assembly.
8. Install the bulb retaining ring over the plastic base and lock the ring
by rotating it clockwise until it snaps into place.
9. Connect the electrical connector into the plastic base until it “snaps.”
10. Install the protective dust shield and lock the shield by rotating it
clockwise until it locks into position.
11. Connect the headlamp wiring socket to the in-line connector.
Lights
39
Page 40 of 184
12. Turn the headlamps on and make sure they work properly. If the
headlamp was correctly aligned before you changed the bulb, you should
not need to align it again.
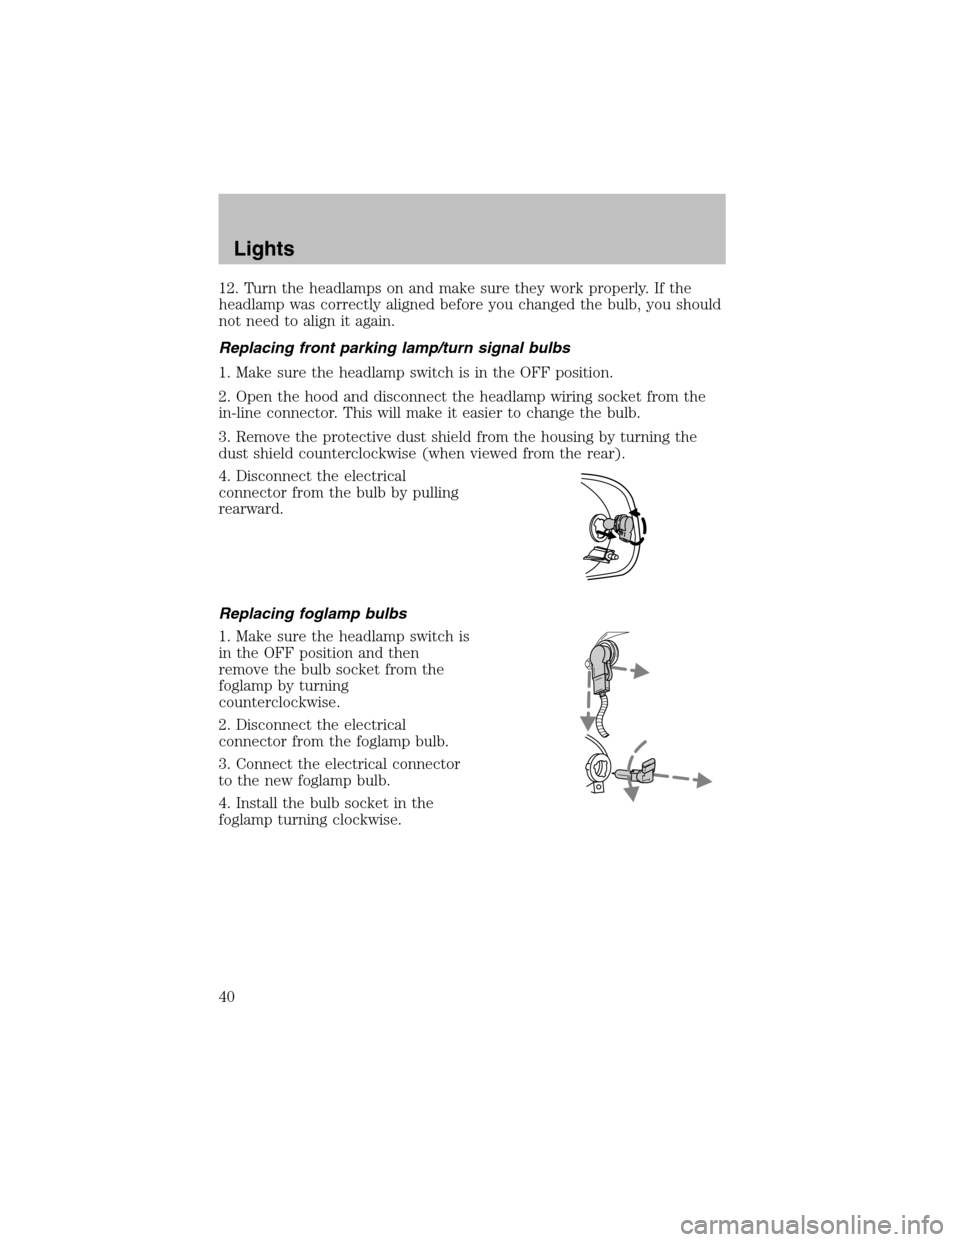
Replacing front parking lamp/turn signal bulbs
1. Make sure the headlamp switch is in the OFF position.
2. Open the hood and disconnect the headlamp wiring socket from the
in-line connector. This will make it easier to change the bulb.
3. Remove the protective dust shield from the housing by turning the
dust shield counterclockwise (when viewed fromthe rear).
4. Disconnect the electrical
connector fromthe bulb by pulling
rearward.
Replacing foglamp bulbs
1. Make sure the headlamp switch is
in the OFF position and then
remove the bulb socket from the
foglamp by turning
counterclockwise.
2. Disconnect the electrical
connector fromthe foglamp bulb.
3. Connect the electrical connector
to the new foglamp bulb.
4. Install the bulb socket in the
foglamp turning clockwise.
Lights
40
Page 41 of 184
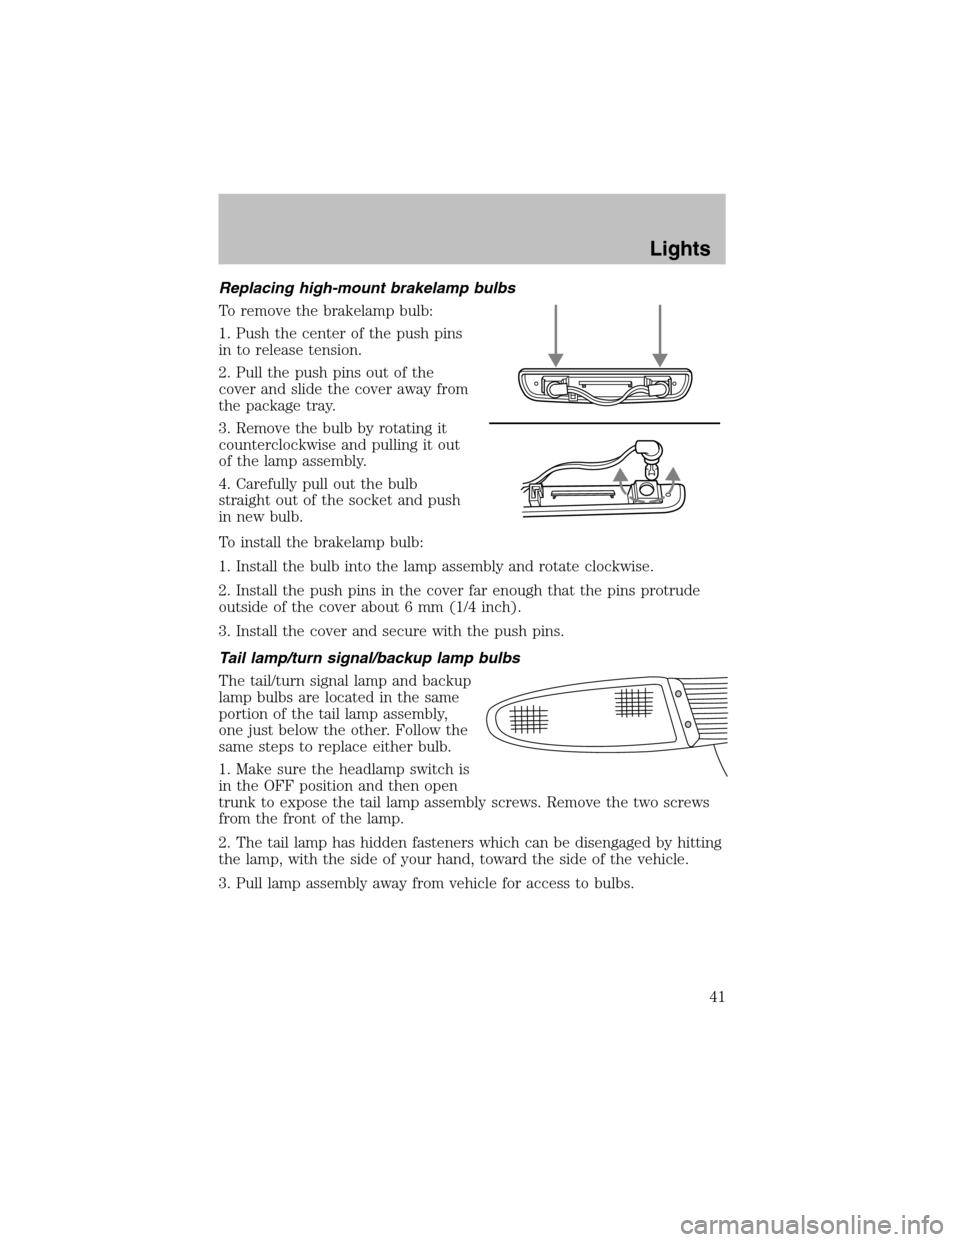
Replacing high-mount brakelamp bulbs
To remove the brakelamp bulb:
1. Push the center of the push pins
in to release tension.
2. Pull the push pins out of the
cover and slide the cover away from
the package tray.
3. Remove the bulb by rotating it
counterclockwise and pulling it out
of the lamp assembly.
4. Carefully pull out the bulb
straight out of the socket and push
in new bulb.
To install the brakelamp bulb:
1. Install the bulb into the lamp assembly and rotate clockwise.
2. Install the push pins in the cover far enough that the pins protrude
outside of the cover about 6 mm (1/4 inch).
3. Install the cover and secure with the push pins.
Tail lamp/turn signal/backup lamp bulbs
The tail/turn signal lamp and backup
lamp bulbs are located in the same
portion of the tail lamp assembly,
one just below the other. Follow the
same steps to replace either bulb.
1. Make sure the headlamp switch is
in the OFF position and then open
trunk to expose the tail lamp assembly screws. Remove the two screws
fromthe front of the lamp.
2. The tail lamp has hidden fasteners which can be disengaged by hitting
the lamp, with the side of your hand, toward the side of the vehicle.
3. Pull lamp assembly away from vehicle for access to bulbs.
Lights
41
Page 42 of 184
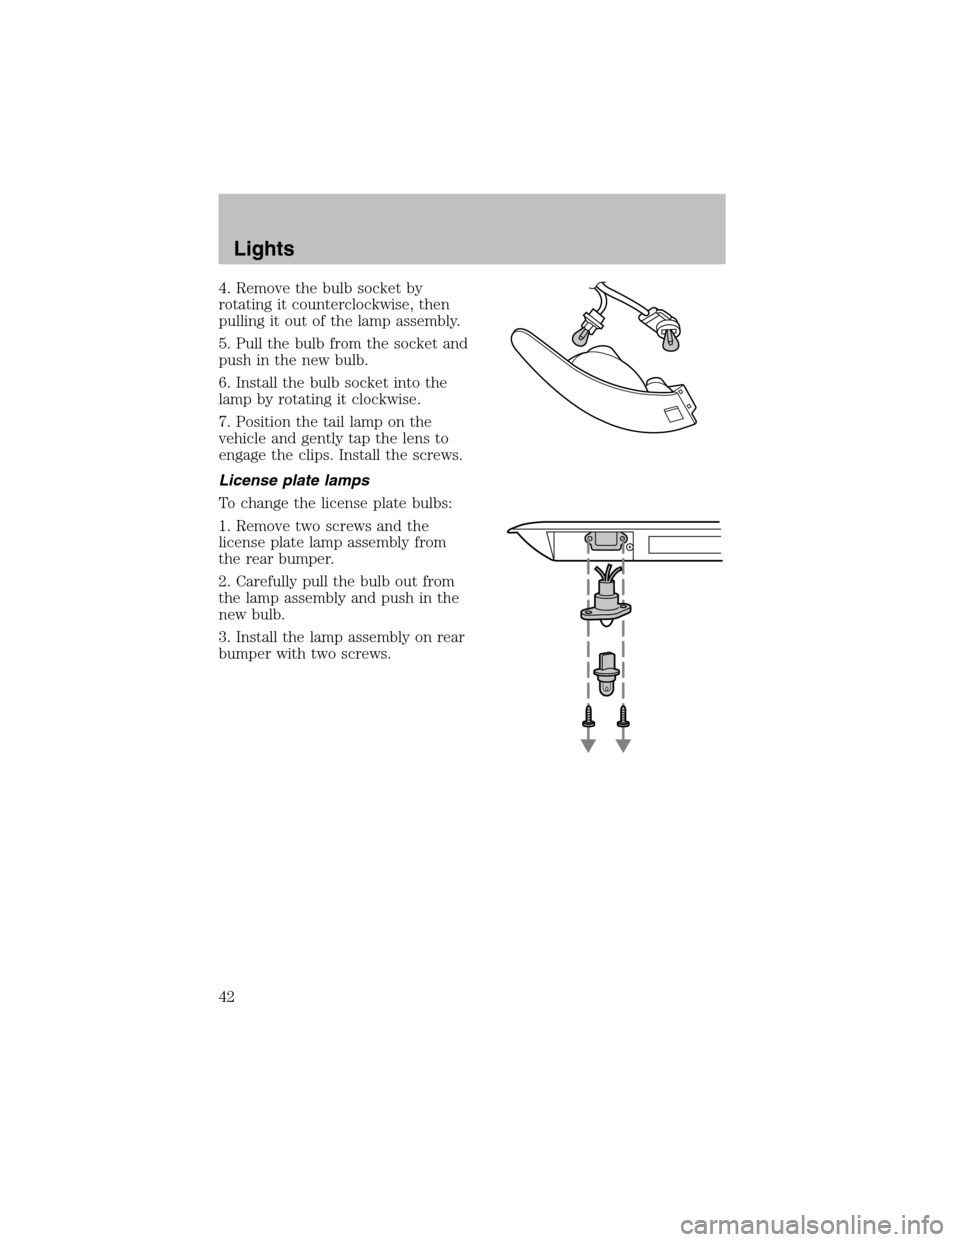
4. Remove the bulb socket by
rotating it counterclockwise, then
pulling it out of the lamp assembly.
5. Pull the bulb fromthe socket and
push in the new bulb.
6. Install the bulb socket into the
lamp by rotating it clockwise.
7. Position the tail lamp on the
vehicle and gently tap the lens to
engage the clips. Install the screws.
License plate lamps
To change the license plate bulbs:
1. Remove two screws and the
license plate lamp assembly from
the rear bumper.
2. Carefully pull the bulb out from
the lamp assembly and push in the
new bulb.
3. Install the lamp assembly on rear
bumper with two screws.
Lights
42
Page 84 of 184
STARTING
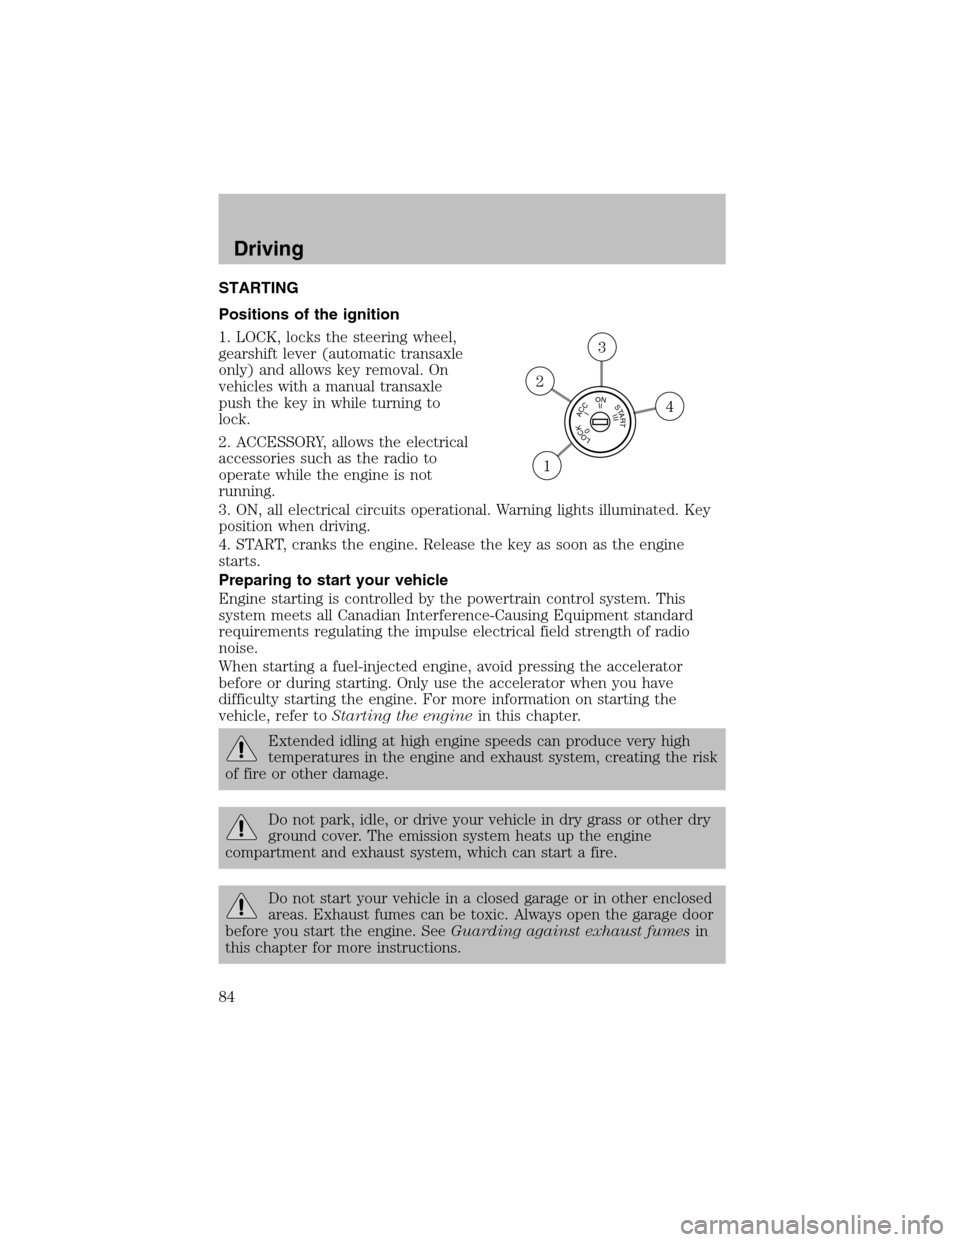
Positions of the ignition
1. LOCK, locks the steering wheel,
gearshift lever (automatic transaxle
only) and allows key removal. On
vehicles with a manual transaxle
push the key in while turning to
lock.
2. ACCESSORY, allows the electrical
accessories such as the radio to
operate while the engine is not
running.
3. ON, all electrical circuits operational. Warning lights illuminated. Key
position when driving.
4. START, cranks the engine. Release the key as soon as the engine
starts.
Preparing to start your vehicle
Engine starting is controlled by the powertrain control system. This
system meets all Canadian Interference-Causing Equipment standard
requirements regulating the impulse electrical field strength of radio
noise.
When starting a fuel-injected engine, avoid pressing the accelerator
before or during starting. Only use the accelerator when you have
difficulty starting the engine. For more information on starting the
vehicle, refer toStarting the enginein this chapter.
Extended idling at high engine speeds can produce very high
temperatures in the engine and exhaust system, creating the risk
of fire or other damage.
Do not park, idle, or drive your vehicle in dry grass or other dry
ground cover. The emission system heats up the engine
compartment and exhaust system, which can start a fire.
Do not start your vehicle in a closed garage or in other enclosed
areas. Exhaust fumes can be toxic. Always open the garage door
before you start the engine. SeeGuarding against exhaust fumesin
this chapter for more instructions.
LOCKACCONSTART0IIIIII4
3
2
1
Driving
84
Page 85 of 184
If you smell exhaust fumes inside your vehicle, have your dealer
inspect your vehicle immediately. Do not drive if you smell
exhaust fumes.
Make sure the corresponding lights illuminate or illuminate briefly. If a
light fails to illuminate, have the vehicle serviced.
•If the driver’s safety belt is fastened, the
light may not illuminate.
Important safety precautions
When the engine starts, the idle RPM runs faster to warmthe engine. If
the engine idle speed does not slow down automatically, have the vehicle
checked.
Before starting the vehicle:
1. Make sure all occupants buckle their safety belts. For more
information on safety belts and their proper usage, refer to theSeating
and safety restraintschapter.
2. Make sure the headlamps and electrical accessories are off.
If starting a vehicle with an automatic transaxle:
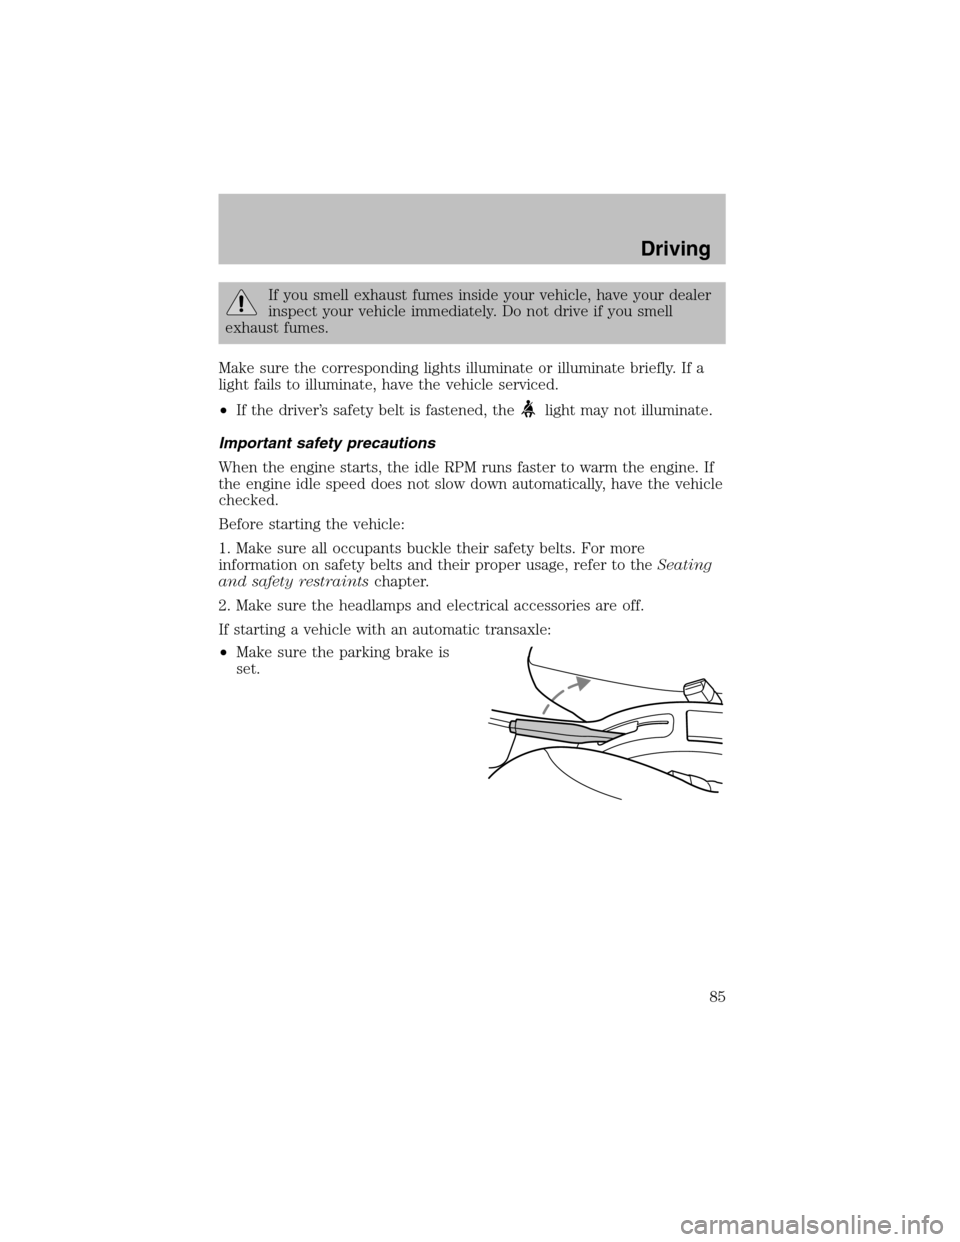
•Make sure the parking brake is
set.
Driving
85
Page 87 of 184
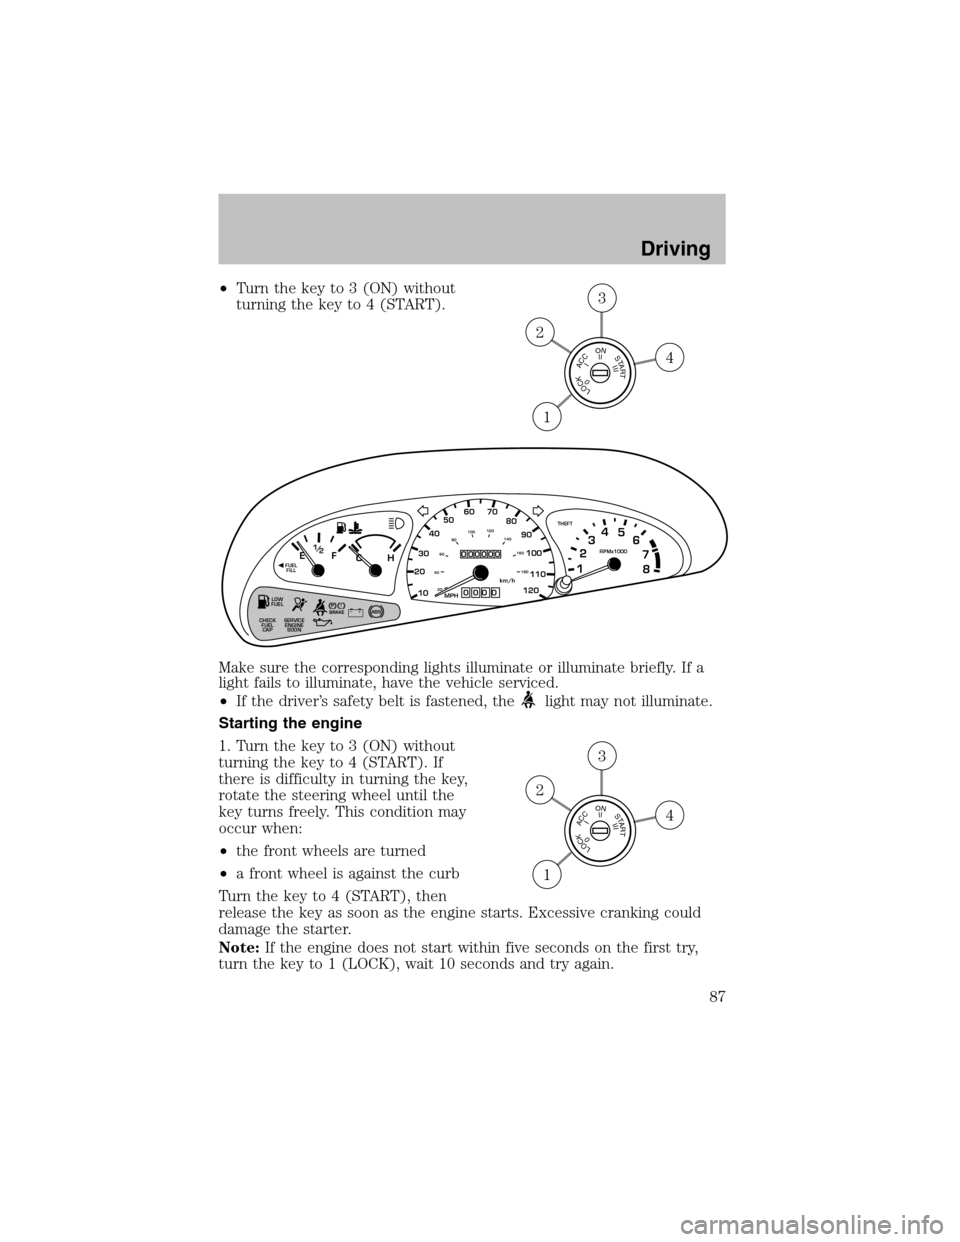
•Turn the key to 3 (ON) without
turning the key to 4 (START).
Make sure the corresponding lights illuminate or illuminate briefly. If a
light fails to illuminate, have the vehicle serviced.
•If the driver’s safety belt is fastened, the
light may not illuminate.
Starting the engine
1. Turn the key to 3 (ON) without
turning the key to 4 (START). If
there is difficulty in turning the key,
rotate the steering wheel until the
key turns freely. This condition may
occur when:
•the front wheels are turned
•a front wheel is against the curb
Turn the key to 4 (START), then
release the key as soon as the engine starts. Excessive cranking could
damage the starter.
Note:If the engine does not start within five seconds on the first try,
turn the key to 1 (LOCK), wait 10 seconds and try again.
LOCKACCONSTART0IIIIII4
3
2
1
!
THEFT
LOW
FUEL
SERVICE
ENGINE
SOON CHECK
FUEL
CAP
PBRAKEABS+ –MPH
205060 70FUEL
FILLEF
CH1
2 /RPMx1000
1234
5
6
7
8
304080
90
100
110
120
10
20 406080100120
140
160
180km/h
0
000000
00 0
LOCKACCONSTART0IIIIII4
3
2
1
Driving
87
Page 159 of 184
•Do not turn off the ignition while your vehicle is moving, especially at
high speeds.
•Have the items listed in your scheduled maintenance guide performed
according to the specified schedule.
The scheduled maintenance items listed in the scheduled maintenance
guide are essential to the life and performance of your vehicle and to its
emissions system.
If other than Ford, Motorcraft or Ford-authorized parts are used for
maintenance replacements or for service of components affecting
emission control, such non-Ford parts should be equivalent to genuine
Ford Motor Company parts in performance and durability.
Do not park, idle, or drive your vehicle in dry grass or other dry
ground cover. The emission system heats up the engine
compartment and exhaust system, which can start a fire.
Illumination of the “Service Engine Soon” light, charging system warning
light or the temperature warning light, fluid leaks, strange odors, smoke
or loss of engine power, could indicate that the emission control system
is not working properly.
Exhaust leaks may result in entry of harmful and potentially
lethal fumes into the passenger compartment.
Do not make any unauthorized changes to your vehicle or engine. By
law, vehicle owners and anyone who manufactures, repairs, services,
sells, leases, trades vehicles, or supervises a fleet of vehicles are not
permitted to intentionally remove an emission control device or prevent
it from working. Information about your vehicle’s emission system is on
the Vehicle Emission Control Information Decal located on or near the
engine. This decal identifies engine displacement and gives some tune up
specifications.
Please consult yourWarranty Guidefor complete emission warranty
information.
Readiness for Inspection/Maintenance (I/M) testing
In some localities, it may be a legal requirement to pass an I/M test of
the on-board diagnostics system. If your “Check Engine/Service Engine
Soon” light is on, refer to the description in theWarning lights and
chimessection of theInstrument clusterchapter. Your vehicle may not
pass the I/M test with the “Check Engine/Service Engine Soon” light on.
Maintenance and Specifications
159
Page 177 of 184

Travel equipment
Auto headlamps with daytime running lights (DRL)
Console armrest
Daytime running lights (DRL)
Electrochromic inside mirror with compass
Electrochromic inside mirror with compass and temperature display
Highway safety kit
First aid kit
Removable luggage rack
Removable luggage rack adapters (bike, ski and snowboard)
Speed control
Protection and appearance equipment
Air bag anti-theft locks
All-weather floor mats
Car cover
Cargo liner
Carpet floor mats
Flat splash guards
Front end covers (full)
Molded splash guards
Rear decklid spoiler
Universal floor mats
For maximum vehicle performance, keep the following information in
mind when adding accessories or equipment to your vehicle:
•When adding accessories, equipment, passengers and luggage to your
vehicle, do not exceed the total weight capacity of the vehicle or of
the front or rear axle (GVWR or GAWR as indicated on the Safety
compliance certification label). Consult your dealer for specific weight
information.
•Loaded vehicles, with a higher center of gravity, may handle
differently than unloaded vehicles. Extra precautions, such as lower
speeds and increased stopping distance, should be taken when driving
a heavily loaded vehicle.
Accessories
177
Page 182 of 184

cargo lamps ...............................34
fog lamps ...................................33
headlamps ...........................33, 38
headlamps, flash to pass ..........34
instrument panel, dimming .....34
interior lamps .....................37–38
replacing bulbs .............37, 40–42
Lane change indicator
(see Turn signal) ........................36
Lights, warning and indicator ....10
anti-lock brakes (ABS) ............90
Load limits ...................................99
GAWR ........................................99
GVWR ........................................99
trailer towing ............................99
Lubricant specifications ...171–172
M
Manual transaxle
fluid capacities ........................170
lubricant specifications ..........172
Manual transmission ...................97
reverse .......................................98
Mirrors
side view mirrors (power) .......45
Moon roof ....................................48
Motorcraft parts ................155, 169
O
Octane rating ............................154
Oil (see Engine oil) ..................141
P
Parking brake ..............................90
Parts (see Motorcraft parts) ....169Power distribution box
(see Fuses) ...............................108
Power door locks ........................51
Power steering ............................91
fluid, checking and adding ....160
fluid, refill capacity ................170
fluid, specifications .........171–172
Power Windows ...........................44
R
Radio ............................................19
Rear window defroster ...............32
Relays ................................105, 110
Remote entry system .................53
locking/unlocking doors ...........51
opening the trunk .....................54
Roadside assistance ..................103
S
Safety belts
(see Safety restraints) .........60–63
Safety defects, reporting ..........129
Safety restraints ....................60–63
belt minder ...............................65
cleaning the safety belts ..........68
extension assembly ..................64
for adults .............................61–63
for children .........................73–74
warning light and chime ..........64
Safety seats for children ............76
Seat belts (see Safety
restraints) ....................................60
Seats ............................................58
child safety seats ......................76
Servicing your vehicle ..............136
Index
182