check engine light FORD ESCORT 2003 7.G Owners Manual
[x] Cancel search | Manufacturer: FORD, Model Year: 2003, Model line: ESCORT, Model: FORD ESCORT 2003 7.GPages: 184, PDF Size: 1.28 MB
Page 10 of 184
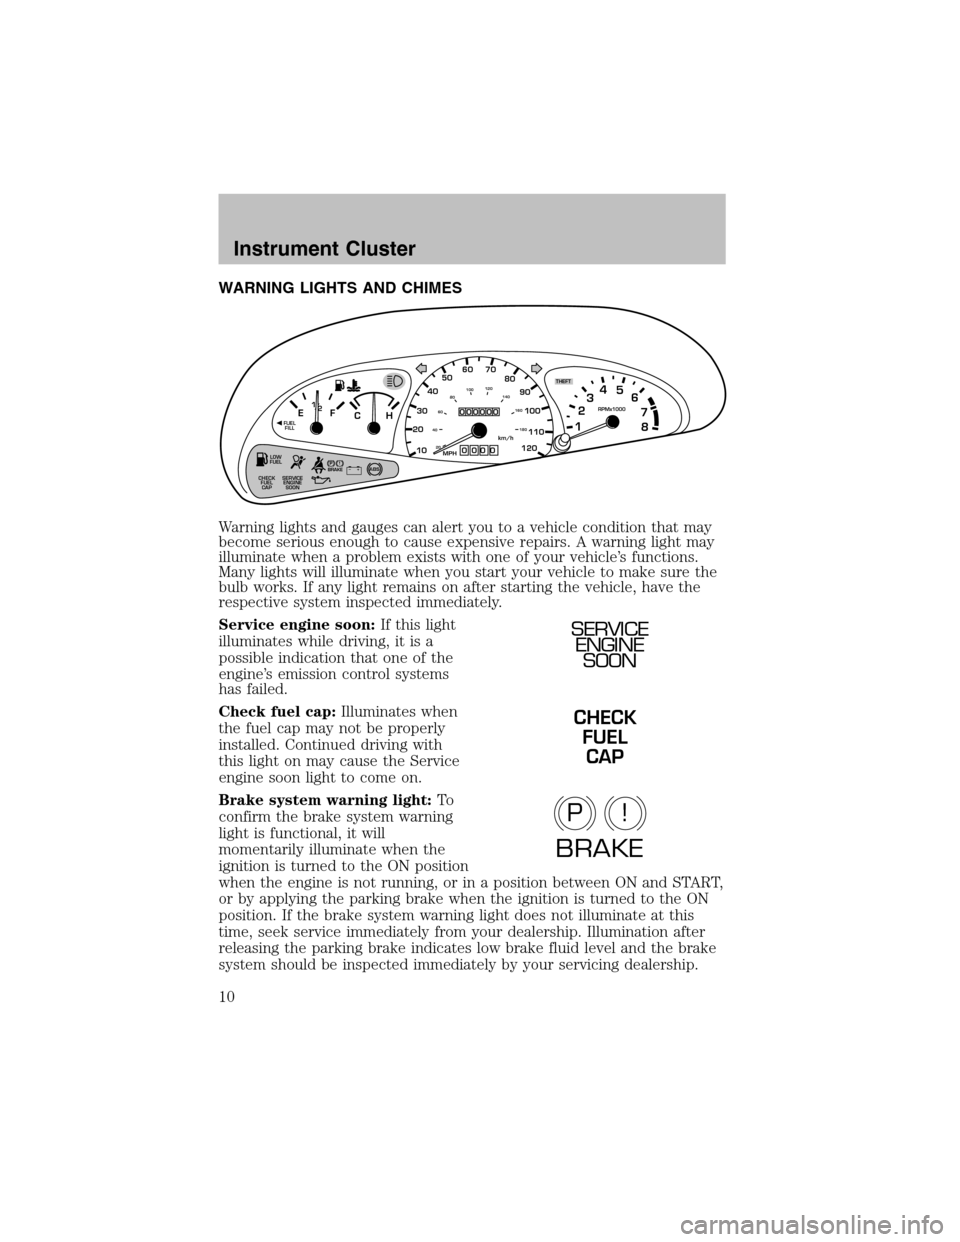
WARNING LIGHTS AND CHIMES
Warning lights and gauges can alert you to a vehicle condition that may
become serious enough to cause expensive repairs. A warning light may
illuminate when a problem exists with one of your vehicle’s functions.
Many lights will illuminate when you start your vehicle to make sure the
bulb works. If any light remains on after starting the vehicle, have the
respective system inspected immediately.
Service engine soon:If this light
illuminates while driving, it is a
possible indication that one of the
engine’s emission control systems
has failed.
Check fuel cap:Illuminates when
the fuel cap may not be properly
installed. Continued driving with
this light on may cause the Service
engine soon light to come on.
Brake system warning light:To
confirmthe brake systemwarning
light is functional, it will
momentarily illuminate when the
ignition is turned to the ON position
when the engine is not running, or in a position between ON and START,
or by applying the parking brake when the ignition is turned to the ON
position. If the brake systemwarning light does not illuminate at this
time, seek service immediately from your dealership. Illumination after
releasing the parking brake indicates low brake fluid level and the brake
system should be inspected immediately by your servicing dealership.
!
THEFT
LOW
FUEL
SERVICE
ENGINE
SOON CHECK
FUEL
CAP
PBRAKEABS+ –MPH
205060 70FUEL
FILLEF
CH1
2 /RPMx1000
1234
5
6
7
8
304080
90
100
110
120
10
20 406080100120
140
160
180km/h
0
000000
00 0
SERVICE
ENGINE
SOON
CHECK
FUEL
CAP
P!
BRAKE
Instrument Cluster
10
Page 11 of 184
Driving a vehicle with the brake systemwarning light on is
dangerous. A significant decrease in braking performance may
occur. It will take you longer to stop the vehicle. Have the vehicle
checked by your dealer immediately.
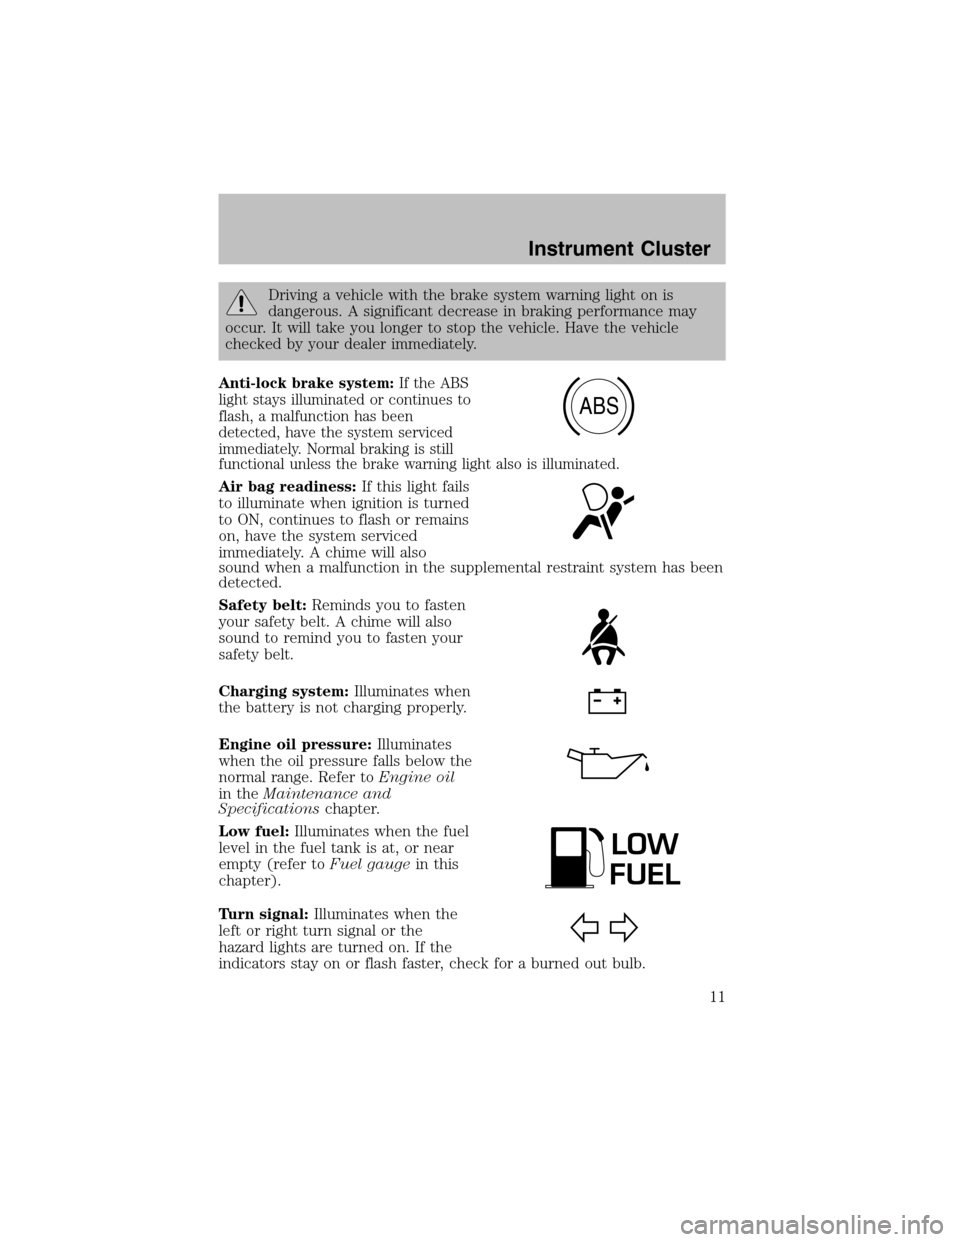
Anti-lock brake system:If the ABS
light stays illuminated or continues to
flash, a malfunction has been
detected, have the systemserviced
immediately. Normal braking is still
functional unless the brake warning light also is illuminated.
Air bag readiness:If this light fails
to illuminate when ignition is turned
to ON, continues to flash or remains
on, have the systemserviced
immediately. A chime will also
sound when a malfunction in the supplemental restraint system has been
detected.
Safety belt:Reminds you to fasten
your safety belt. A chime will also
sound to remind you to fasten your
safety belt.
Charging system:Illuminates when
the battery is not charging properly.
Engine oil pressure:Illuminates
when the oil pressure falls below the
normal range. Refer toEngine oil
in theMaintenance and
Specificationschapter.
Low fuel:Illuminates when the fuel
level in the fuel tank is at, or near
empty (refer toFuel gaugein this
chapter).
Turn signal:Illuminates when the
left or right turn signal or the
hazard lights are turned on. If the
indicators stay on or flash faster, check for a burned out bulb.
ABS
LOW
FUEL
Instrument Cluster
11
Page 85 of 184
If you smell exhaust fumes inside your vehicle, have your dealer
inspect your vehicle immediately. Do not drive if you smell
exhaust fumes.
Make sure the corresponding lights illuminate or illuminate briefly. If a
light fails to illuminate, have the vehicle serviced.
•If the driver’s safety belt is fastened, the
light may not illuminate.
Important safety precautions
When the engine starts, the idle RPM runs faster to warmthe engine. If
the engine idle speed does not slow down automatically, have the vehicle
checked.
Before starting the vehicle:
1. Make sure all occupants buckle their safety belts. For more
information on safety belts and their proper usage, refer to theSeating
and safety restraintschapter.
2. Make sure the headlamps and electrical accessories are off.
If starting a vehicle with an automatic transaxle:
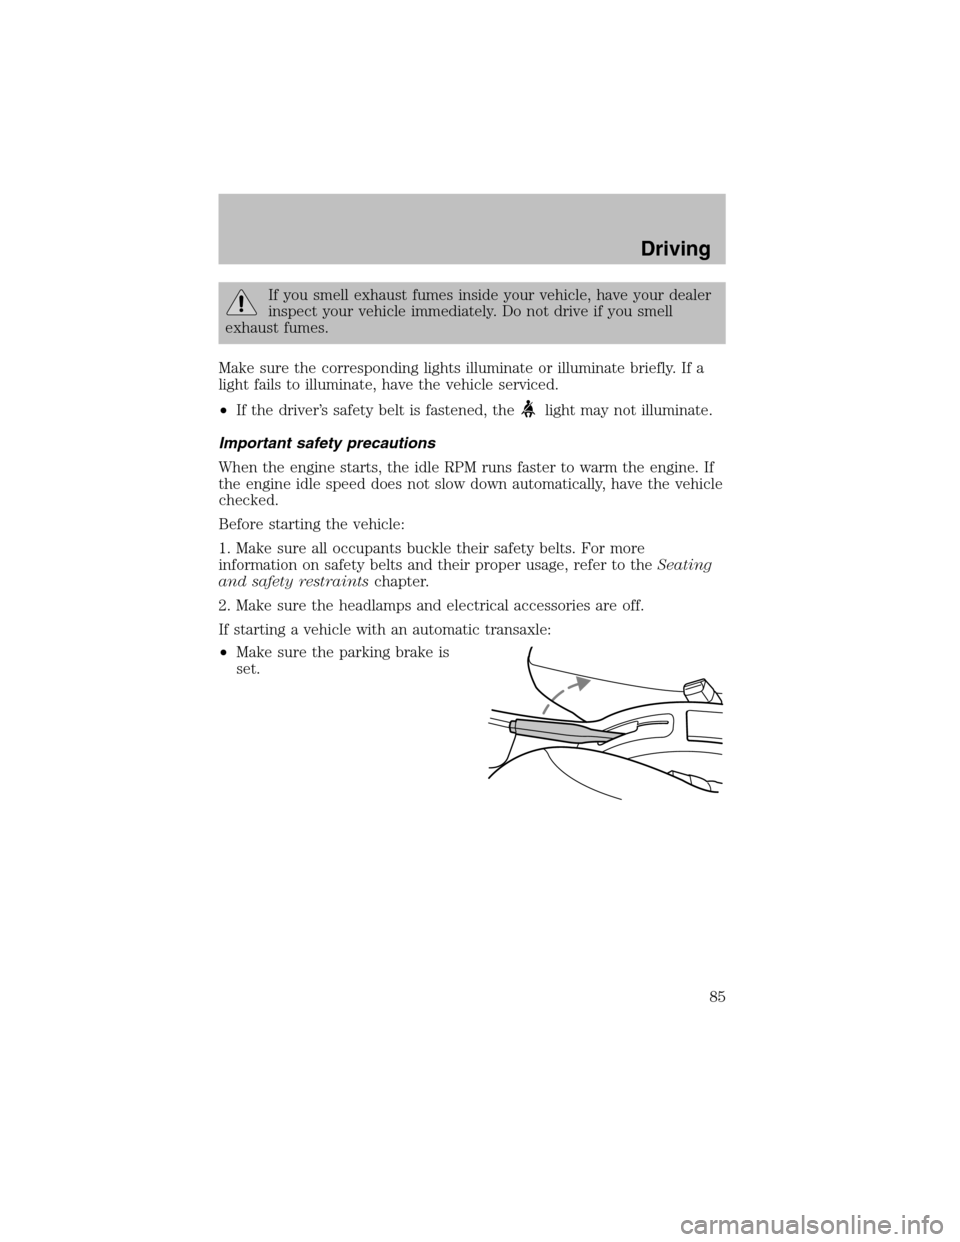
•Make sure the parking brake is
set.
Driving
85
Page 87 of 184
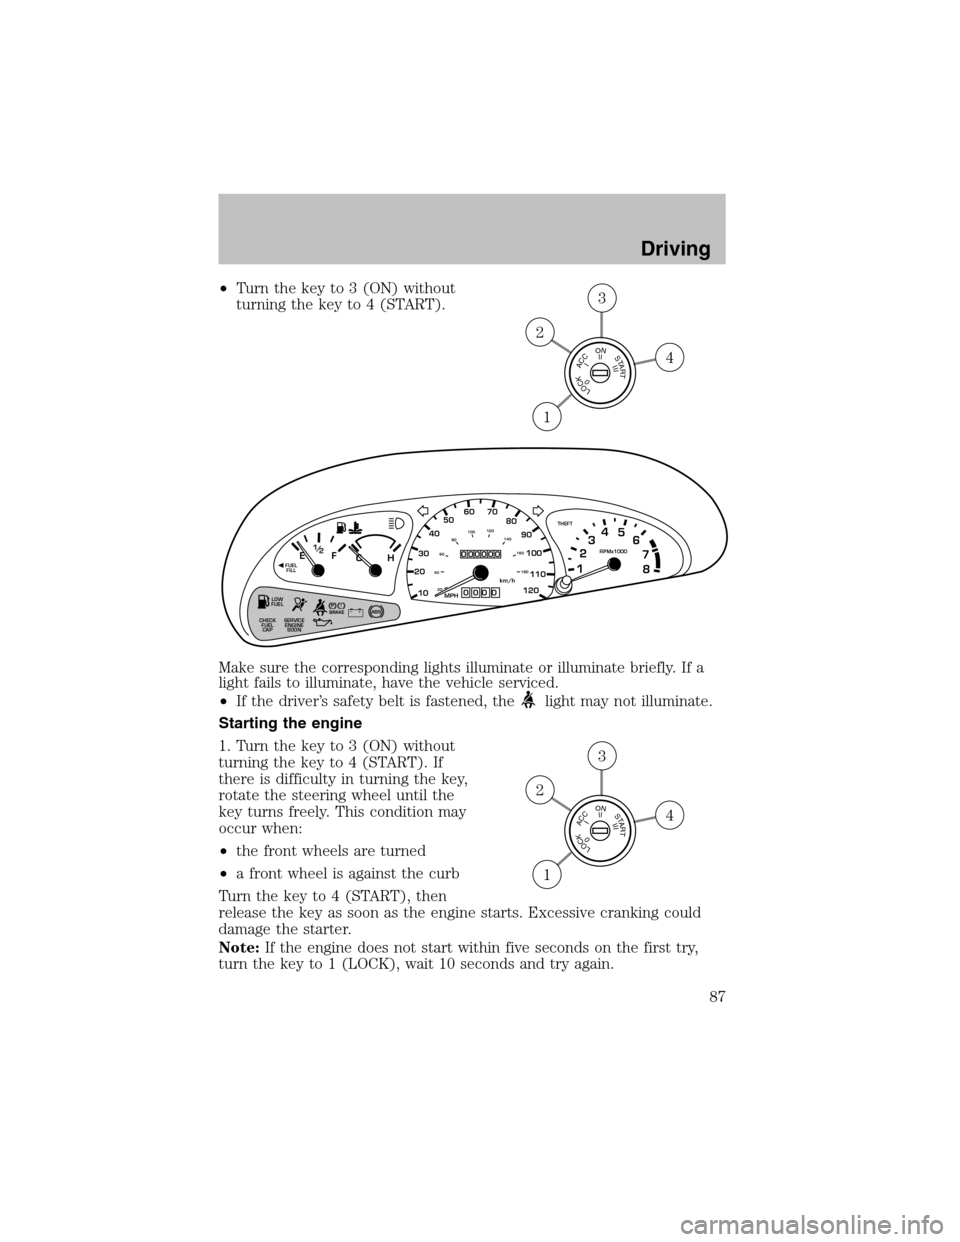
•Turn the key to 3 (ON) without
turning the key to 4 (START).
Make sure the corresponding lights illuminate or illuminate briefly. If a
light fails to illuminate, have the vehicle serviced.
•If the driver’s safety belt is fastened, the
light may not illuminate.
Starting the engine
1. Turn the key to 3 (ON) without
turning the key to 4 (START). If
there is difficulty in turning the key,
rotate the steering wheel until the
key turns freely. This condition may
occur when:
•the front wheels are turned
•a front wheel is against the curb
Turn the key to 4 (START), then
release the key as soon as the engine starts. Excessive cranking could
damage the starter.
Note:If the engine does not start within five seconds on the first try,
turn the key to 1 (LOCK), wait 10 seconds and try again.
LOCKACCONSTART0IIIIII4
3
2
1
!
THEFT
LOW
FUEL
SERVICE
ENGINE
SOON CHECK
FUEL
CAP
PBRAKEABS+ –MPH
205060 70FUEL
FILLEF
CH1
2 /RPMx1000
1234
5
6
7
8
304080
90
100
110
120
10
20 406080100120
140
160
180km/h
0
000000
00 0
LOCKACCONSTART0IIIIII4
3
2
1
Driving
87
Page 89 of 184
If you are driving down a long or steep hill, shift to a lower gear.
Do not apply your brakes continuously, as they may overheat
and become less effective.
Under normal operating conditions, brake dust may accumulate on the
wheels. Some brake dust is inevitable as brakes wear and does not
contribute to brake noise. The use of modern friction materials with
emphasis on improved performance and environmental considerations
can lead to more dust than in the past. Brake dust can be cleaned by
weekly washing with soapy water and a soft sponge. Heavier deposits can
be removed with Motorcraft Wheel and Tire Cleaner (ZC-37–A).
Anti-lock brake system (ABS) (if equipped)
On vehicles equipped with an anti-lock braking system(ABS), a noise
from the hydraulic pump motor and pulsation in the pedal may be
observed during ABS braking events. Pedal pulsation coupled with noise
while braking under panic conditions or on loose gravel, bumps, wet or
snowy roads is normal and indicates proper functioning of the vehicle’s
anti-lock brake system. The ABS performs a self-check after you start
the engine and begin to drive away. A brief mechanical noise may be
heard during this test. This is normal. If a malfunction is found, the ABS
warning light will come on. If the vehicle has continuous vibration or
shudder in the steering wheel while braking, the vehicle should be
inspected by a qualified service technician.
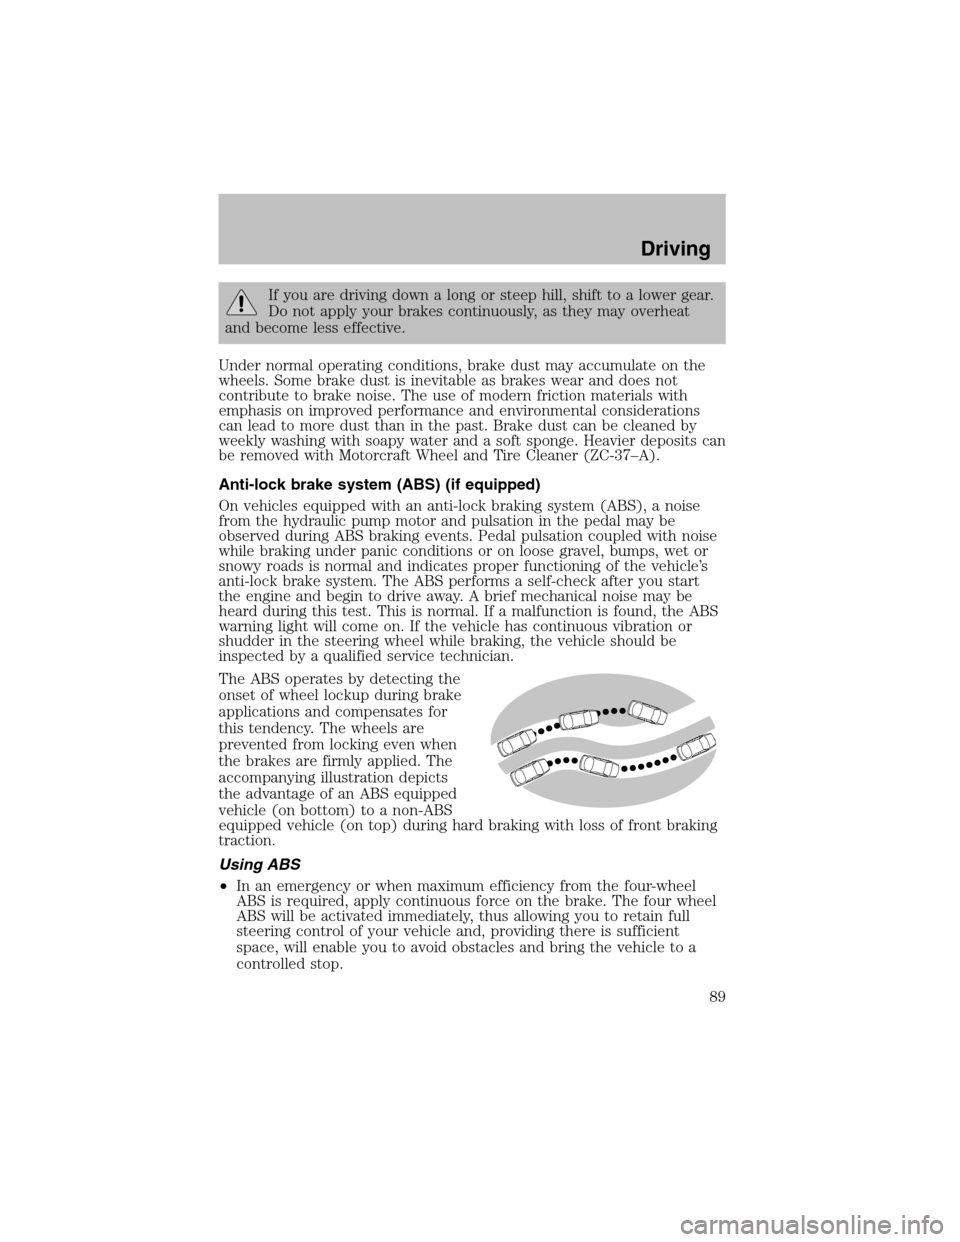
The ABS operates by detecting the
onset of wheel lockup during brake
applications and compensates for
this tendency. The wheels are
prevented fromlocking even when
the brakes are firmly applied. The
accompanying illustration depicts
the advantage of an ABS equipped
vehicle (on bottom) to a non-ABS
equipped vehicle (on top) during hard braking with loss of front braking
traction.
Using ABS
•In an emergency or when maximum efficiency from the four-wheel
ABS is required, apply continuous force on the brake. The four wheel
ABS will be activated immediately, thus allowing you to retain full
steering control of your vehicle and, providing there is sufficient
space, will enable you to avoid obstacles and bring the vehicle to a
controlled stop.
Driving
89
Page 98 of 184
Recommended shift speeds
Upshift according to the following charts for best fuel economy:
Upshifts when accelerating (recommended for best fuel economy)
1-2 21 km/h (13 mph)
2-3 40 km/h (25 mph)
3-4 53 km/h (33 mph)
4-5 70 km/h (44 mph)
Upshifts when cruising (recommended for best fuel economy)
1-2 18 km/h (11 mph)
2-3 32 km/h (20 mph)
3-4 46 km/h (29 mph)
4-5 61 km/h (38 mph)
Reverse
1. Make sure that your vehicle is at a complete stop before you shift into
R (Reverse). Failure to do so may damage the transaxle.
2. Move the gearshift lever into the neutral position and wait at least
three seconds before shifting into R (Reverse).
•The gearshift lever can only be moved into R (Reverse) by moving it
fromleft of 3 (Third) and 4 (Fourth) before shifting into R (Reverse).
This is a lockout feature that protects the transaxle fromaccidentally
being shifted into R (Reverse) from5 (Overdrive).
DRIVING THROUGH WATER
Do not drive quickly through standing water, especially if the depth is
unknown. Traction or brake capability may be limited and if the ignition
system gets wet, your engine may stall. Water may also enter your
engine’s air intake and severely damage your engine.
If driving through deep or standing water is unavoidable, proceed very
slowly. Never drive through water that is higher than the bottomof the
hubs (for trucks) or the bottomof the wheel rims (for cars).
Once through the water, always try the brakes. Wet brakes do not stop the
vehicle as effectively as dry brakes. Drying can be improved by moving
your vehicle slowly while applying light pressure on the brake pedal.
Driving through deep water where the transmission vent tube is
submerged may allow water into the transmission and cause
internal transmission damage. Have the fluid checked and, if
water is found, replace the fluid.
Driving
98
Page 136 of 184
SERVICE RECOMMENDATIONS
To help you service your vehicle:
•We highlight do-it-yourself items in the engine compartment for easy
location.
•We provide a scheduled maintenance guide which makes tracking
routine service easy.
If your vehicle requires professional service, your dealership can provide
the necessary parts and service. Check yourWarranty Guide/Owner
Information Guideto find out which parts and services are covered.
Use only recommended fuels, lubricants, fluids and service parts
conforming to specifications. Motorcraft parts are designed and built to
provide the best performance in your vehicle.
PRECAUTIONS WHEN SERVICING YOUR VEHICLE
•Do not work on a hot engine.
•Make sure that nothing gets caught in moving parts.
•Do not work on a vehicle with the engine running in an enclosed
space, unless you are sure you have enough ventilation.
•Keep all open flames and other burning (cigarettes) material away
fromthe battery and all fuel related parts.
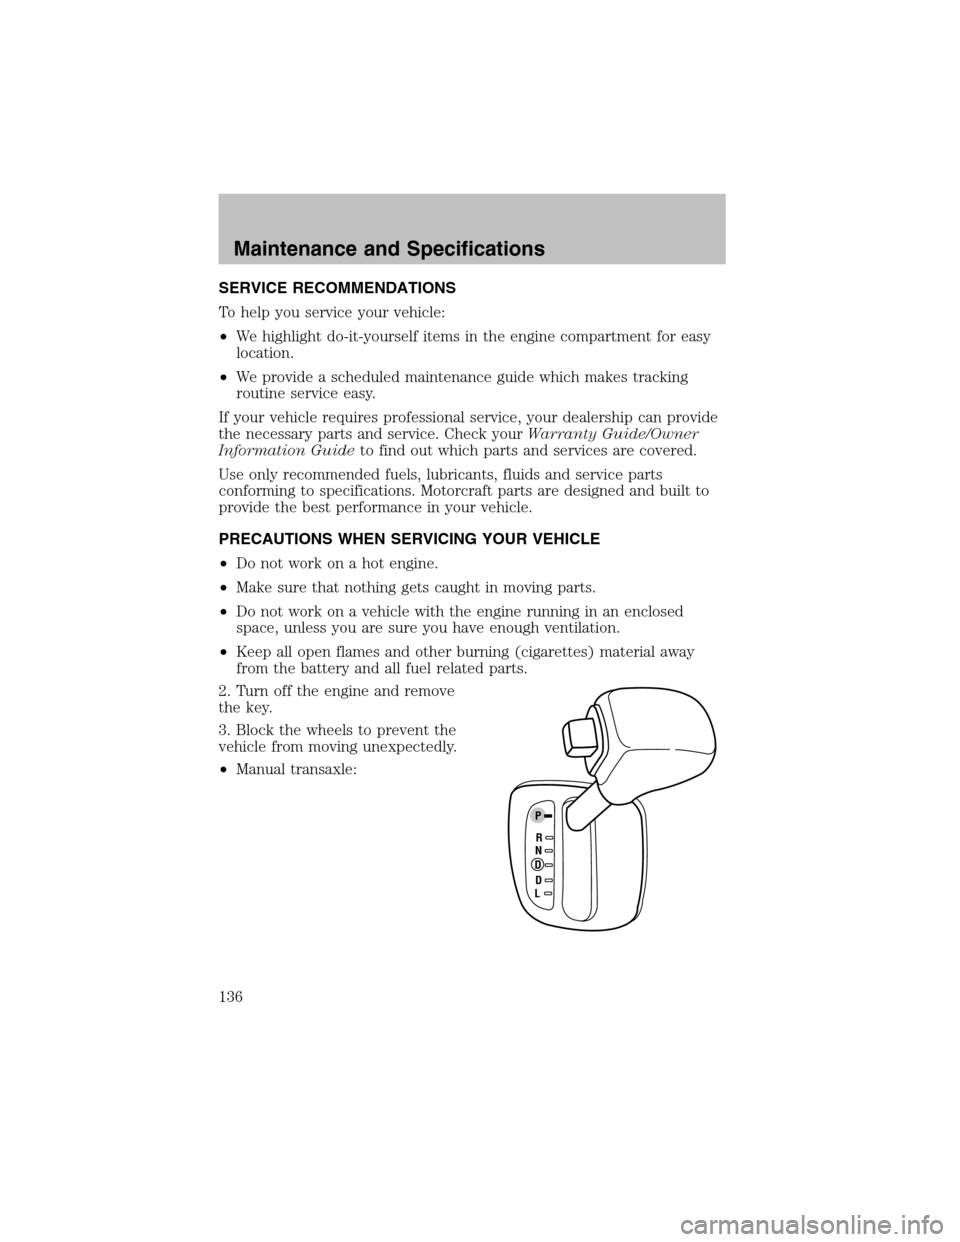
2. Turn off the engine and remove
the key.
3. Block the wheels to prevent the
vehicle frommoving unexpectedly.
•Manual transaxle:
P
RNDDL
Maintenance and Specifications
136
Page 141 of 184
WINDSHIELD WASHER FLUID
Windshield washer fluid
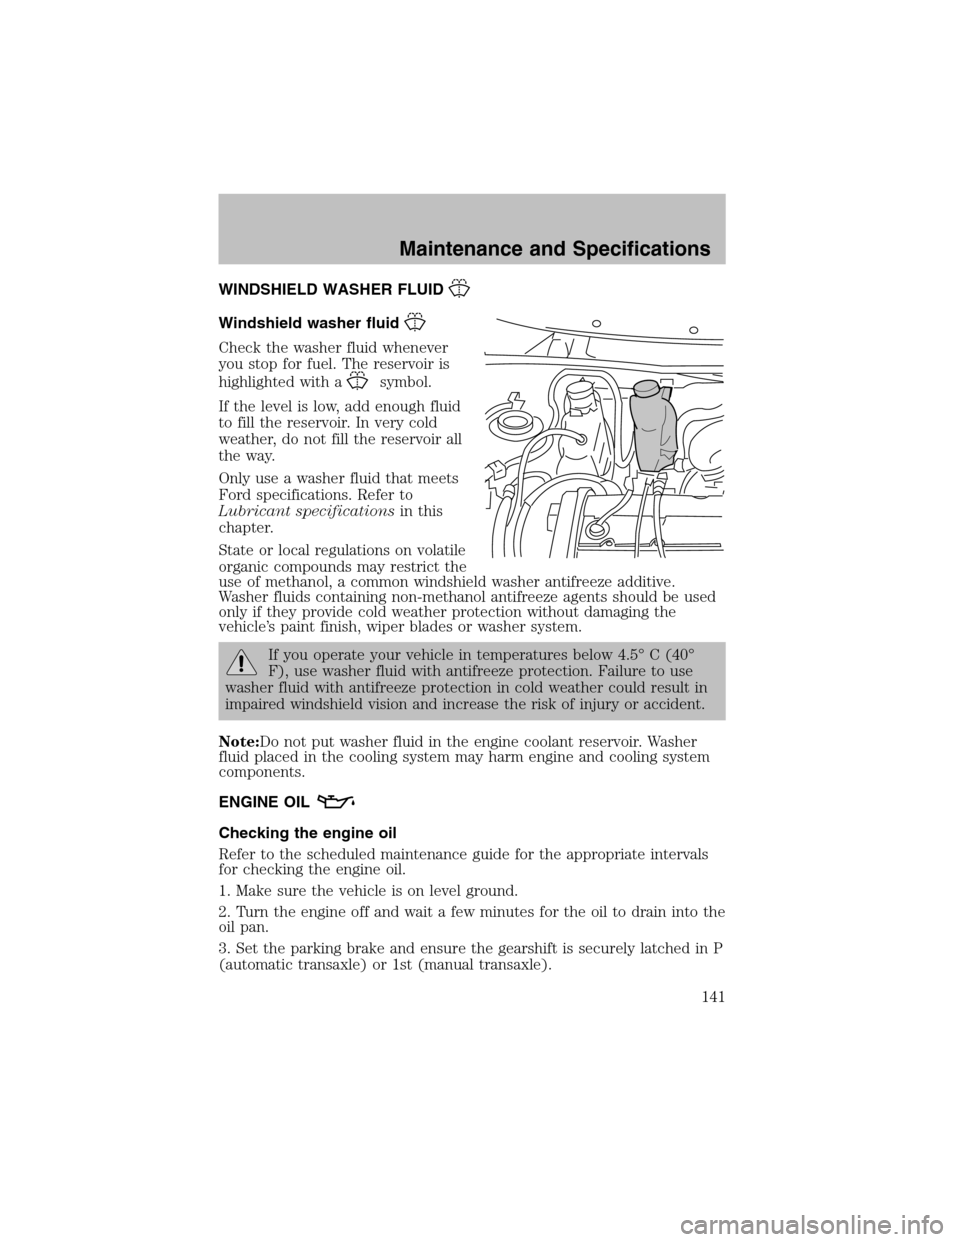
Check the washer fluid whenever
you stop for fuel. The reservoir is
highlighted with a
symbol.
If the level is low, add enough fluid
to fill the reservoir. In very cold
weather, do not fill the reservoir all
the way.
Only use a washer fluid that meets
Ford specifications. Refer to
Lubricant specificationsin this
chapter.
State or local regulations on volatile
organic compounds may restrict the
use of methanol, a common windshield washer antifreeze additive.
Washer fluids containing non-methanol antifreeze agents should be used
only if they provide cold weather protection without damaging the
vehicle’s paint finish, wiper blades or washer system.
If you operate your vehicle in temperatures below 4.5° C (40°
F), use washer fluid with antifreeze protection. Failure to use
washer fluid with antifreeze protection in cold weather could result in
impaired windshield vision and increase the risk of injury or accident.
Note:Do not put washer fluid in the engine coolant reservoir. Washer
fluid placed in the cooling systemmay harmengine and cooling system
components.
ENGINE OIL
Checking the engine oil
Refer to the scheduled maintenance guide for the appropriate intervals
for checking the engine oil.
1. Make sure the vehicle is on level ground.
2. Turn the engine off and wait a few minutes for the oil to drain into the
oil pan.
3. Set the parking brake and ensure the gearshift is securely latched in P
(automatic transaxle) or 1st (manual transaxle).
Maintenance and Specifications
141
Page 144 of 184
that does not meet Ford material and design specifications, start-up
engine noises or knock may be experienced.
It is recommended you use the appropriate Motorcraft oil filter (or
another brand meeting Ford specifications) for your engine application.
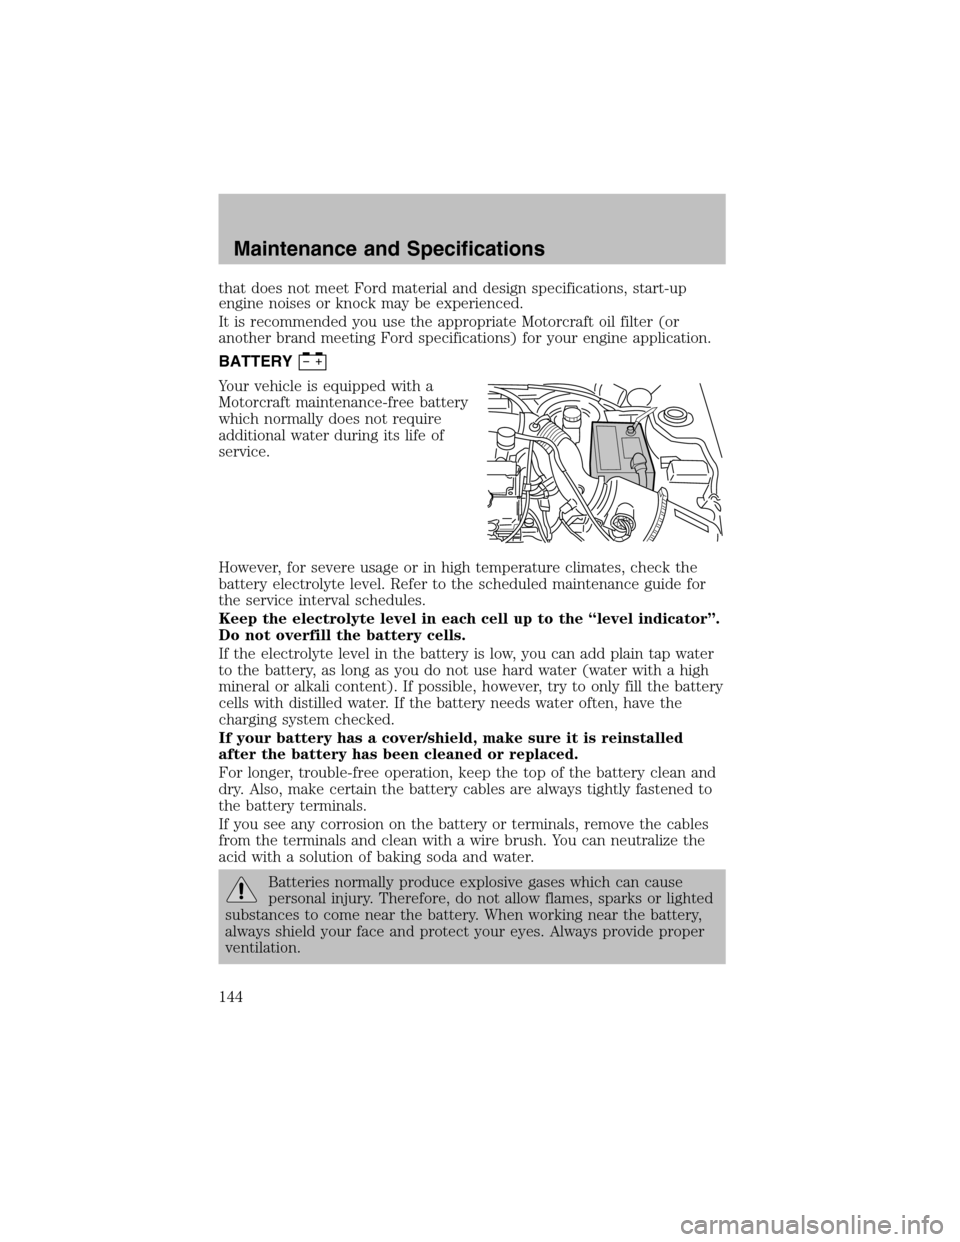
BATTERY
Your vehicle is equipped with a
Motorcraft maintenance-free battery
which normally does not require
additional water during its life of
service.
However, for severe usage or in high temperature climates, check the
battery electrolyte level. Refer to the scheduled maintenance guide for
the service interval schedules.
Keep the electrolyte level in each cell up to the “level indicator”.
Do not overfill the battery cells.
If the electrolyte level in the battery is low, you can add plain tap water
to the battery, as long as you do not use hard water (water with a high
mineral or alkali content). If possible, however, try to only fill the battery
cells with distilled water. If the battery needs water often, have the
charging systemchecked.
If your battery has a cover/shield, make sure it is reinstalled
after the battery has been cleaned or replaced.
For longer, trouble-free operation, keep the top of the battery clean and
dry. Also, make certain the battery cables are always tightly fastened to
the battery terminals.
If you see any corrosion on the battery or terminals, remove the cables
fromthe terminals and clean with a wire brush. You can neutralize the
acid with a solution of baking soda and water.
Batteries normally produce explosive gases which can cause
personal injury. Therefore, do not allow flames, sparks or lighted
substances to come near the battery. When working near the battery,
always shield your face and protect your eyes. Always provide proper
ventilation.
Maintenance and Specifications
144
Page 149 of 184
To reduce the risk of personal injury, make sure the engine is
cool before unscrewing the coolant pressure relief cap. The
cooling systemis under pressure; steamand hot liquid can come out
forcefully when the cap is loosened slightly.
1. Before you begin, turn the engine off and let it cool.
2. When the engine is cool, wrap a thick cloth around the coolant
pressure relief cap on the coolant reservoir (an opaque plastic bottle).
Slowly turn cap counterclockwise (left) until pressure begins to release.
3. Step back while the pressure releases.
4. When you are sure that all the pressure has been released, use the
cloth to turn it counterclockwise and remove the cap.
5. Fill the coolant reservoir slowly with the proper coolant mixture (see
above), to within the “cold fill range” or the “cold full” level on the
reservoir. If you removed the radiator cap in an overflow system, fill the
radiator until the coolant is visible and radiator is almost full.
6. Replace the cap. Turn until tightly installed. (Cap must be tightly
installed to prevent coolant loss.)
After any coolant has been added, check the coolant concentration, refer
toChecking Engine Coolantsection. If the concentration is not 50/50
(protection to –34° F/–36° C), drain some coolant and adjust the
concentration. It may take several drains and additions to obtain a 50/50
coolant concentration.
Whenever coolant has been added, the coolant level in the coolant
reservoir should be checked the next few times you drive the vehicle. If
necessary, add enough 50/50 concentration of engine coolant and
distilled water to bring the liquid level to the proper level.
If you have to add more than 1.0 liter (1.0 quart) of engine coolant per
month, have your dealer check the engine cooling system. Your cooling
systemmay have a leak. Operating an engine with a low level of coolant
can result in engine overheating and possible engine damage.
Recycled engine coolant
Ford Motor Company recommends the use of a recycled engine coolant
produced by Ford-approved processes in vehicles originally equipped
with Motorcraft Premium Engine Coolant (green-colored). However, not
all coolant recycling processes produce coolant that meets Ford
specification ESE-M97B44–A. Use of such coolant may harm the engine
and cooling systemcomponents.
Maintenance and Specifications
149