clock FORD EXCURSION 2000 1.G Owners Manual
[x] Cancel search | Manufacturer: FORD, Model Year: 2000, Model line: EXCURSION, Model: FORD EXCURSION 2000 1.GPages: 232, PDF Size: 2.01 MB
Page 36 of 232
Setting the clock
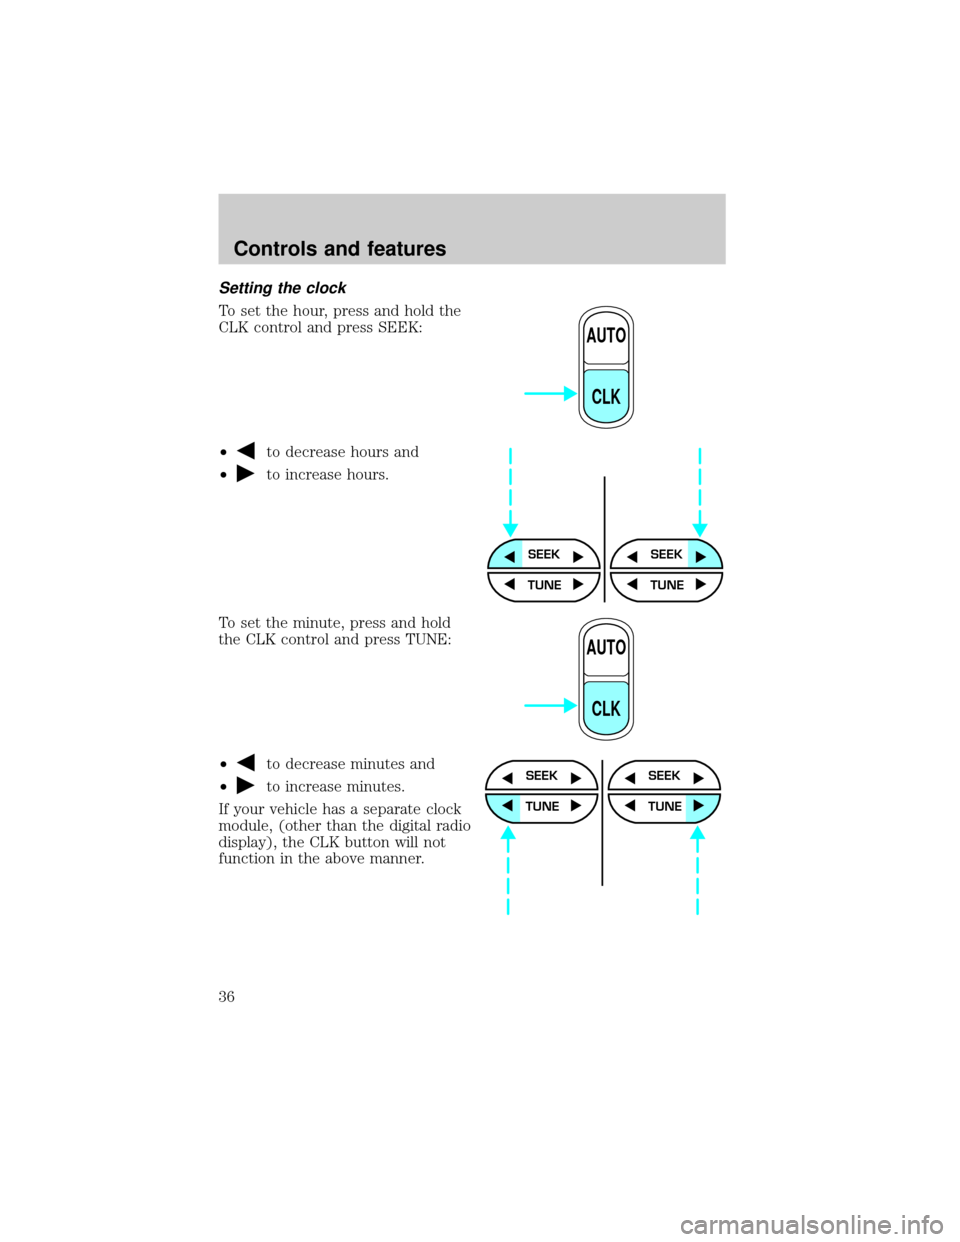
To set the hour, press and hold the
CLK control and press SEEK:
²
to decrease hours and
²
to increase hours.
To set the minute, press and hold
the CLK control and press TUNE:
²
to decrease minutes and
²
to increase minutes.
If your vehicle has a separate clock
module, (other than the digital radio
display), the CLK button will not
function in the above manner.
AUTO
CLK
SEEKSEEK
TUNE TUNE
AUTO
CLK
SEEK
TUNE
SEEK
TUNE
Controls and features
36
Page 37 of 232
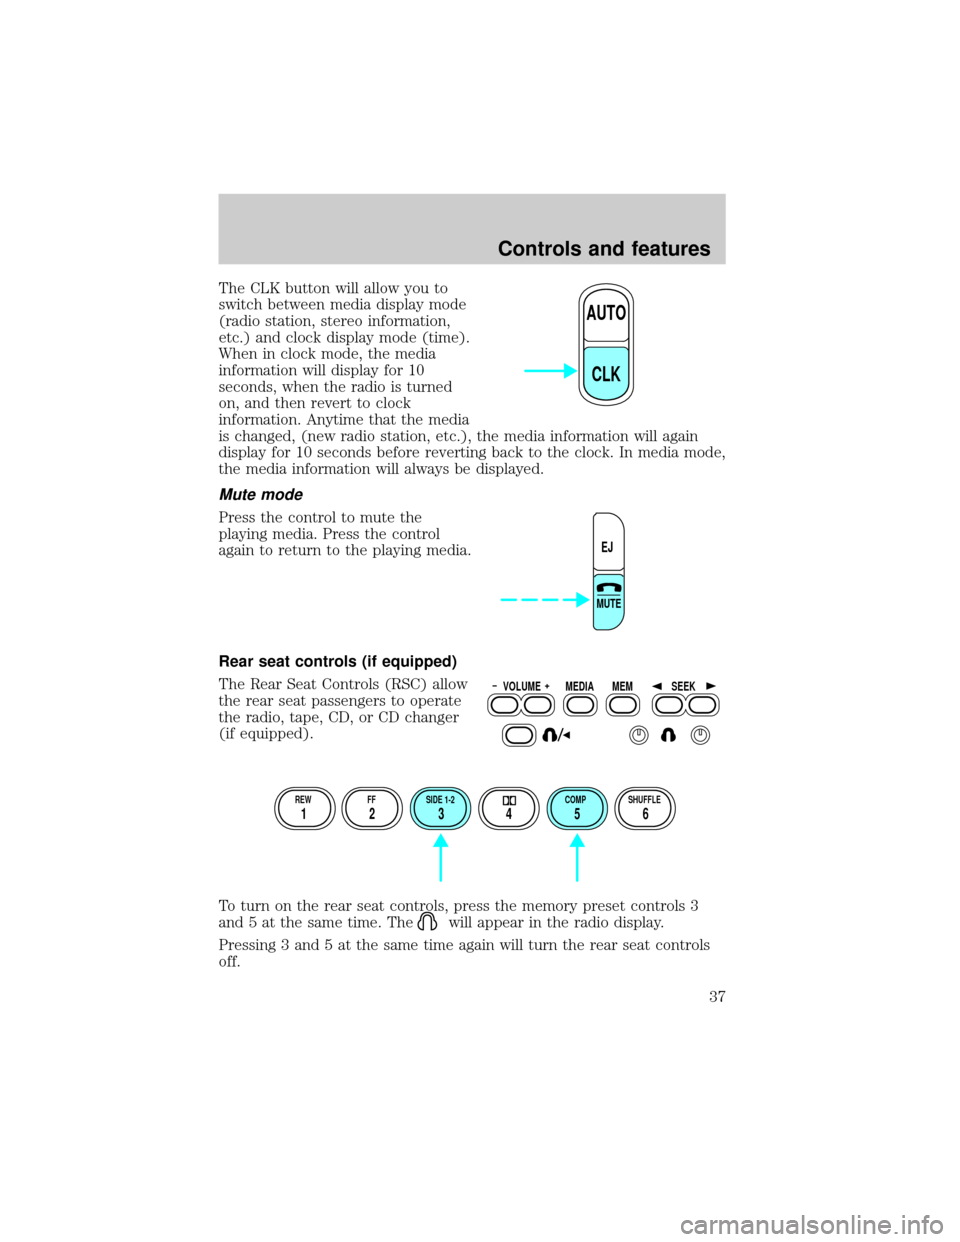
The CLK button will allow you to
switch between media display mode
(radio station, stereo information,
etc.) and clock display mode (time).
When in clock mode, the media
information will display for 10
seconds, when the radio is turned
on, and then revert to clock
information. Anytime that the media
is changed, (new radio station, etc.), the media information will again
display for 10 seconds before reverting back to the clock. In media mode,
the media information will always be displayed.
Mute mode
Press the control to mute the
playing media. Press the control
again to return to the playing media.
Rear seat controls (if equipped)
The Rear Seat Controls (RSC) allow
the rear seat passengers to operate
the radio, tape, CD, or CD changer
(if equipped).
To turn on the rear seat controls, press the memory preset controls 3
and 5 at the same time. The
will appear in the radio display.
Pressing 3 and 5 at the same time again will turn the rear seat controls
off.
AUTO
CLK
EJ
MUTE
VOLUME MEDIA
MEMSEEK
REW FF SIDE 1-2 COMP SHUFFLE
12 3456
Controls and features
37
Page 140 of 232
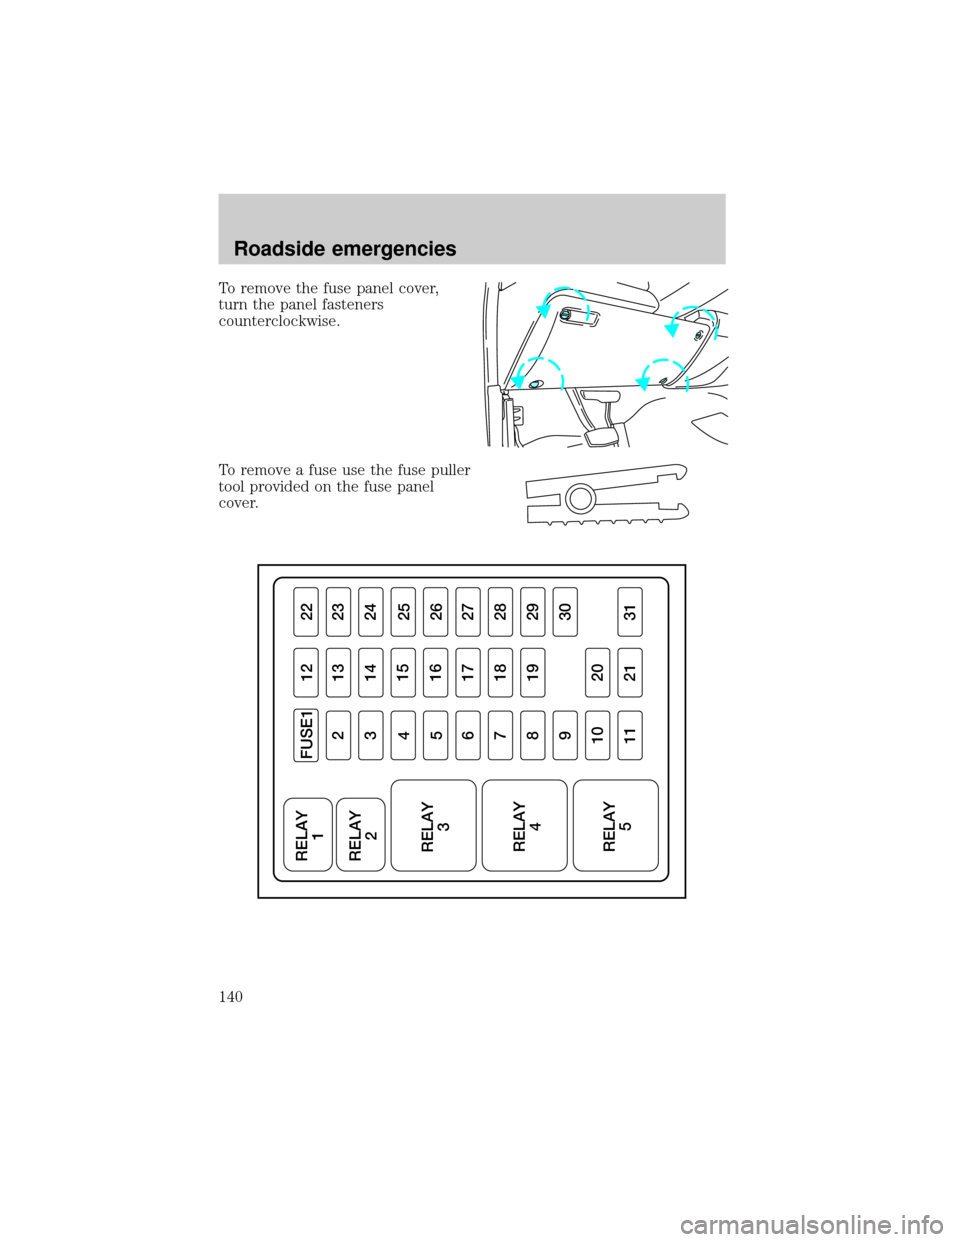
To remove the fuse panel cover,
turn the panel fasteners
counterclockwise.
To remove a fuse use the fuse puller
tool provided on the fuse panel
cover.
FUSE1 RELAY
1
RELAY
2
RELAY
3
RELAY
4
RELAY
512 22
21323
31424
4
16 15
25
526
61727
71828
81929
11 21 31930
10 20
Roadside emergencies
140
Page 148 of 232
2. Turn engine OFF and block the
diagonally opposite wheel (block not
provided).
3. Remove the jack, jack handle, lug
wrench and spare tire from the
stowage locations.
4. Use the tip of the lug wrench to remove any wheel trim.
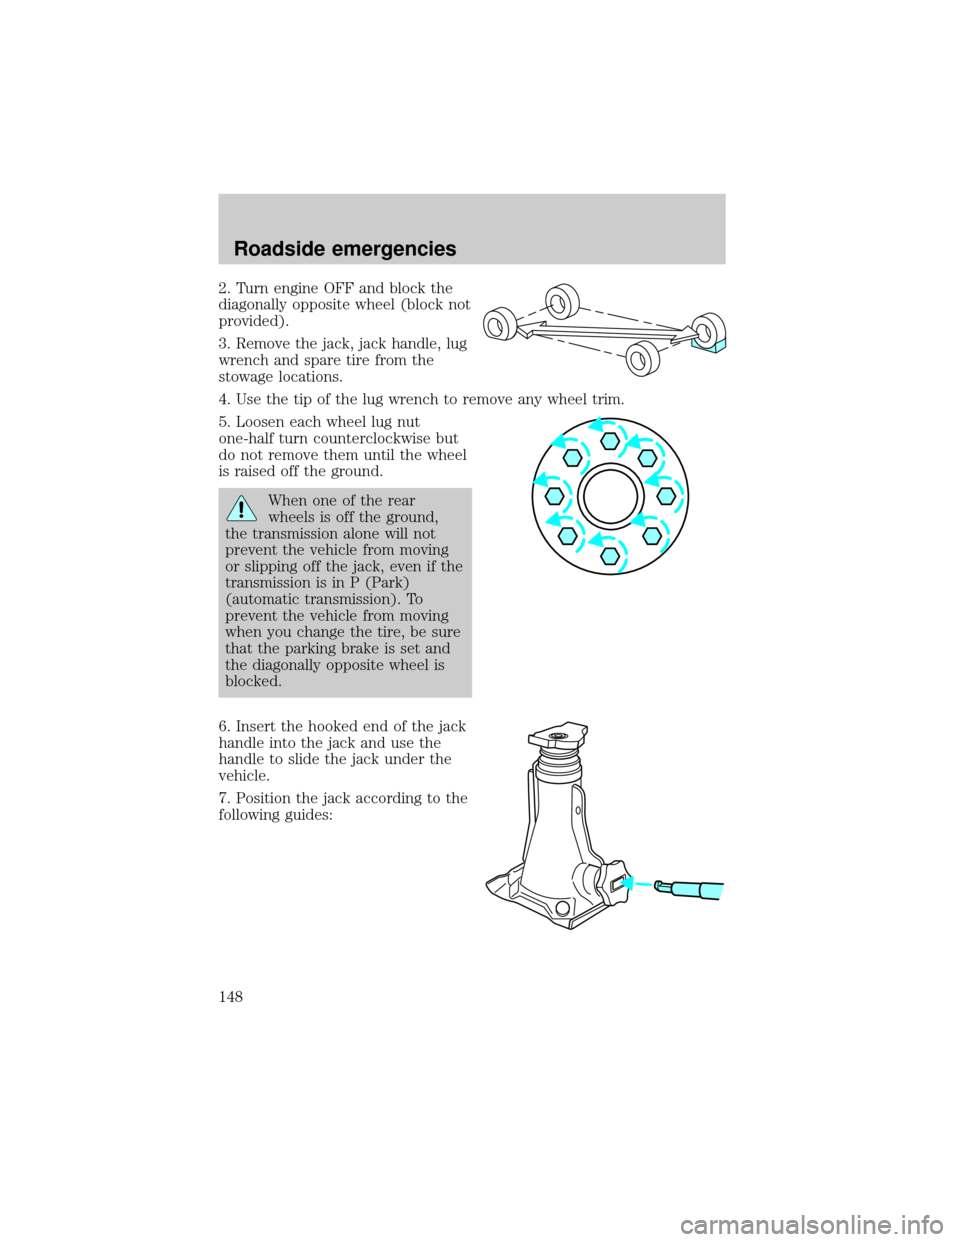
5. Loosen each wheel lug nut
one-half turn counterclockwise but
do not remove them until the wheel
is raised off the ground.
When one of the rear
wheels is off the ground,
the transmission alone will not
prevent the vehicle from moving
or slipping off the jack, even if the
transmission is in P (Park)
(automatic transmission). To
prevent the vehicle from moving
when you change the tire, be sure
that the parking brake is set and
the diagonally opposite wheel is
blocked.
6. Insert the hooked end of the jack
handle into the jack and use the
handle to slide the jack under the
vehicle.
7. Position the jack according to the
following guides:
Roadside emergencies
148
Page 150 of 232
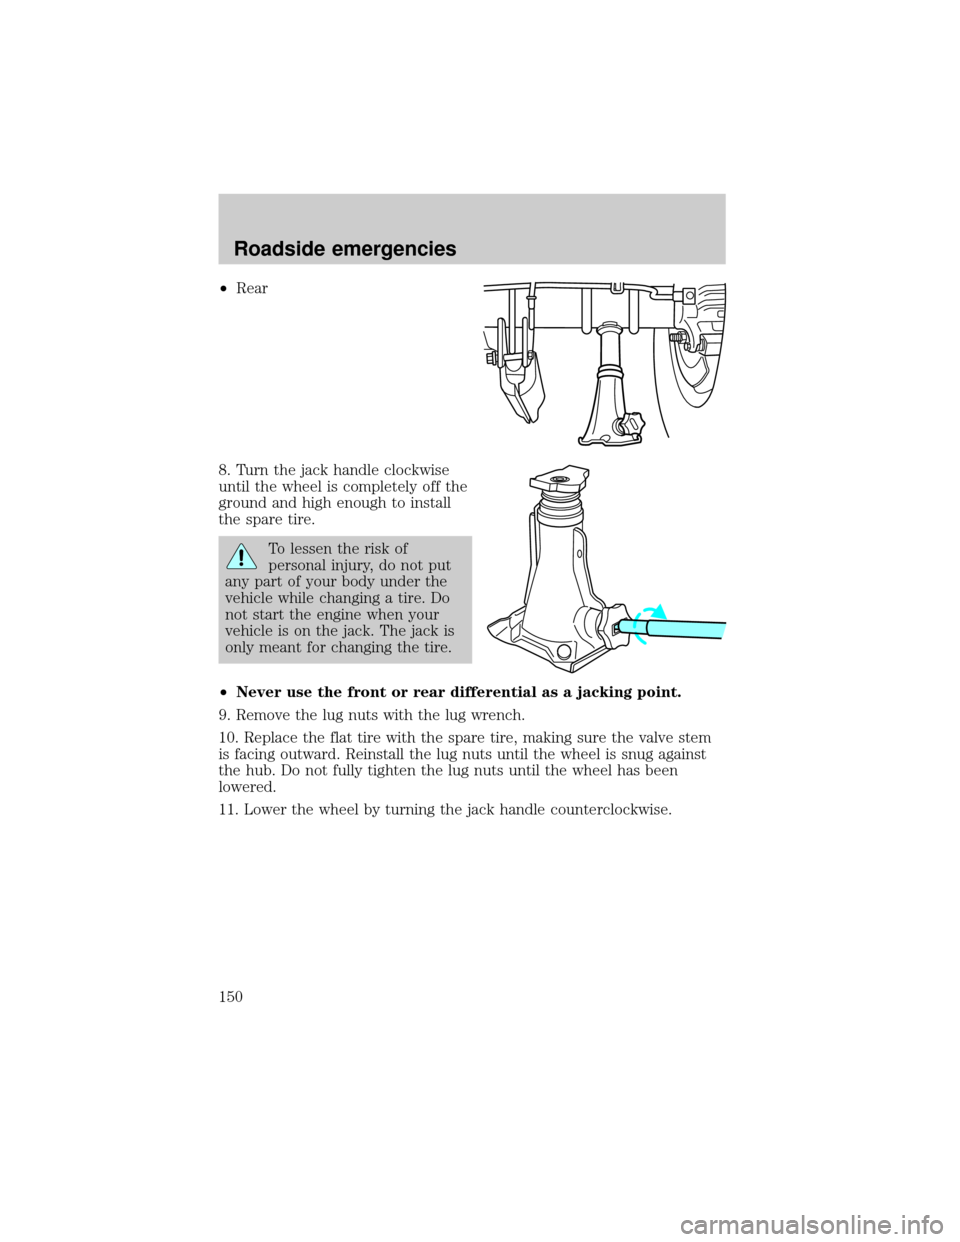
²Rear
8. Turn the jack handle clockwise
until the wheel is completely off the
ground and high enough to install
the spare tire.
To lessen the risk of
personal injury, do not put
any part of your body under the
vehicle while changing a tire. Do
not start the engine when your
vehicle is on the jack. The jack is
only meant for changing the tire.
²Never use the front or rear differential as a jacking point.
9. Remove the lug nuts with the lug wrench.
10. Replace the flat tire with the spare tire, making sure the valve stem
is facing outward. Reinstall the lug nuts until the wheel is snug against
the hub. Do not fully tighten the lug nuts until the wheel has been
lowered.
11. Lower the wheel by turning the jack handle counterclockwise.
Roadside emergencies
150
Page 162 of 232
Adding engine oil
1. Check the engine oil. For instructions, refer toChecking the engine
oilin this chapter.
2. If the engine oil level is not within the normal range, add only certified
engine oil of the recommended viscosity. Remove the engine oil filler cap
and use a funnel to pour the engine oil into the opening.
3. Recheck the engine oil level. Make sure the oil level is not above the
MAX mark on the engine oil level indicator (dipstick).
4. Install the indicator and ensure it is fully seated.
5. Fully install the engine oil filler cap by turning the filler cap clockwise
until three clicks are heard or until it is latched.
To avoid possible oil loss, DO NOT operate the vehicle with the
engine oil level indicator and/or the engine oil filler cap removed.
Engine oil and filter recommendations
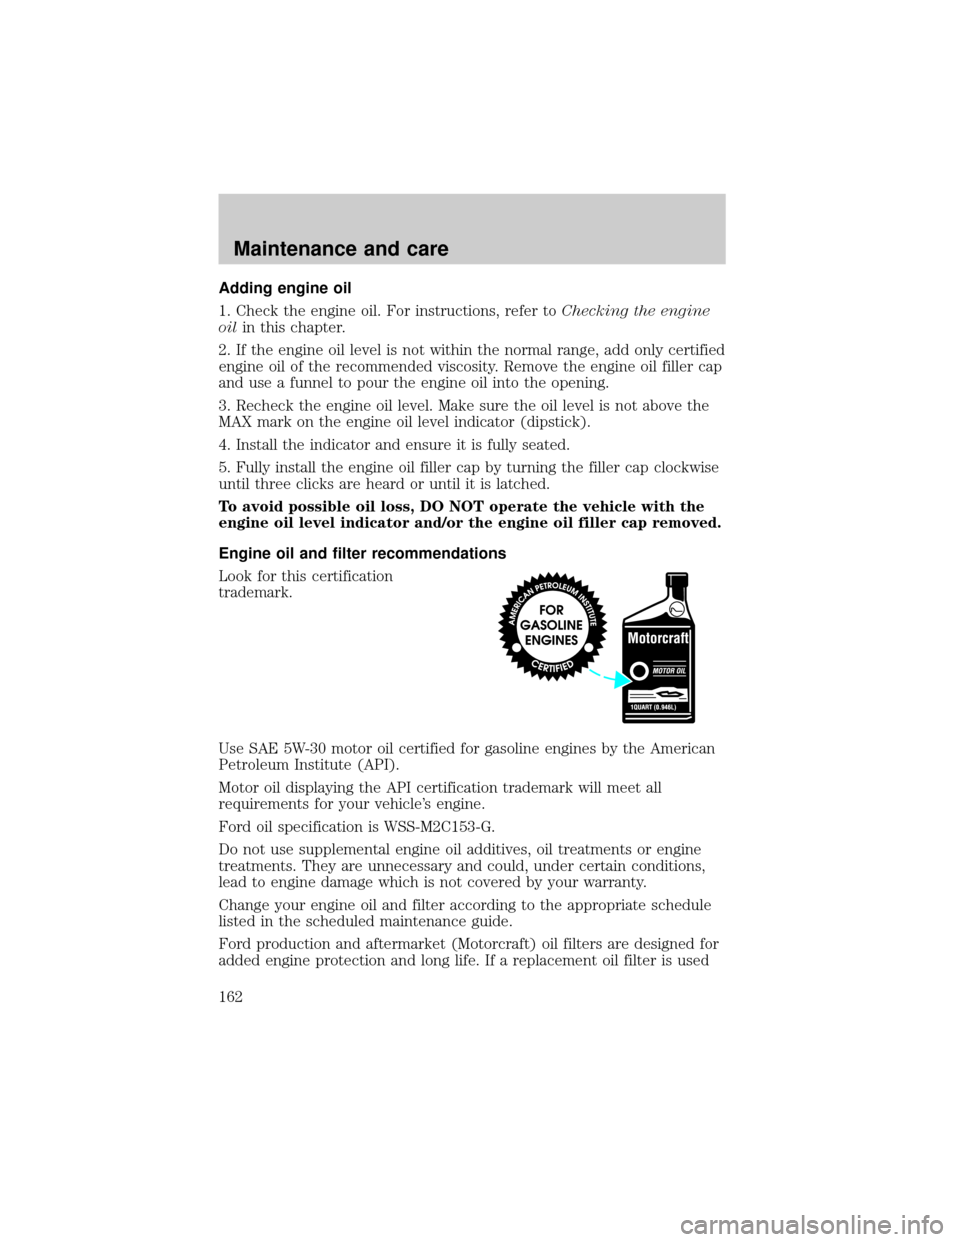
Look for this certification
trademark.
Use SAE 5W-30 motor oil certified for gasoline engines by the American
Petroleum Institute (API).
Motor oil displaying the API certification trademark will meet all
requirements for your vehicle's engine.
Ford oil specification is WSS-M2C153-G.
Do not use supplemental engine oil additives, oil treatments or engine
treatments. They are unnecessary and could, under certain conditions,
lead to engine damage which is not covered by your warranty.
Change your engine oil and filter according to the appropriate schedule
listed in the scheduled maintenance guide.
Ford production and aftermarket (Motorcraft) oil filters are designed for
added engine protection and long life. If a replacement oil filter is used
Maintenance and care
162
Page 168 of 232
Plain water may be added in an emergency, but youmustreplace it with
a 50/50 mixture of engine coolant and distilled water as soon as possible.
Check the coolant level in the reservoir before you drive your vehicle the
next few times (with the engine cool). If necessary, add a50/50
mixtureof engine coolant and distilled water to the engine coolant
reservoir until the coolant level is at the ªcold fill levelº or within the
ªcold fill rangeº as listed on the reservoir (depending upon application).
Have your dealer check the engine cooling system for leaks if you have
to add more than 1.0 liter (1.0 quart) of engine coolant per month.
To avoid scalding hot steam or coolant from being released from
the engine cooling system, never remove the reservoir cap while
the engine is running or hot. Failure to follow this warning may result
in damage to the engine's cooling system and possible severe personal
injury.
If you must remove the coolant cap, follow these steps to avoid personal
injury:
1. Before you remove the cap, turn the engine off and let it cool.
2. When the engine is cool, wrap a thick cloth around the cap. Slowly
turn cap counterclockwise until pressure begins to release.
3. Step back while the pressure releases.
4. When you are sure that all the pressure has been released, use the
cloth to turn it counterclockwise and remove the cap.
Recycled engine coolant
Ford Motor Company recommends the use of a recycled engine coolant
produced by Ford-approved processes.
Not all coolant recycling processes produce coolant which meets Ford
specification ESE-M97B44-A. Use of a recycled engine coolant which
does not meet the Ford specification may harm engine and cooling
system components.
Always dispose of used automotive fluids in a responsible manner.
Follow your community's regulations and standards for recycling and
disposing of automotive fluids.
Maintenance and care
168
Page 177 of 232
1. With the vehicle at a complete stop, set the parking brake.
2. Put the gearshift in P (Park), turn off all accessories and start the
engine.
3. Run the engine until it reaches normal operating temperature.
4. Allow the engine to idle for at least one minute.
5. Turn the A/C on and allow the engine to idle for at least one minute.
6. With your foot on the brake pedal and with the A/C on, put the
vehicle in D (Drive) and allow the engine to idle for at least one minute.
7. Drive the vehicle to complete the relearning process.
²The vehicle may need to be driven 16 km (10 miles) or more to
relearn the idle and fuel trim strategy.
²If you do not allow the engine to relearn its idle trim, the idle
quality of your vehicle may be adversely affected until the idle
trim is eventually relearned.
If the battery has been disconnected or a new battery has been installed,
the clock must be reset once the battery is reconnected.
²Always dispose of automotive
batteries in a responsible manner.
Follow your local authorized
standards for disposal. Call your
local authorized recycling center
to find out more about recycling
automotive batteries.
AIR FILTER MAINTENANCE
Refer to the scheduled maintenance guide for the appropriate intervals
for changing the air filter element.
When changing the air filter element, use only the Motorcraft air filter
element listed. Refer toMotorcraft Part Numbersin theCapacities and
specificationschapter.
Do not start your engine with the air cleaner removed and do
not remove it while the engine is running.
LEAD
RETURN
RECYCLE
Maintenance and care
177
Page 188 of 232

your fuel supplier about gasolines that meet the World-wide Fuel
Charter. In Canada, look for fuels that display the Automaker's Choice
Logo.
Cleaner air
Ford approves the use of reformulated ªcleaner-burningº gasolines to
improve air quality. These gasolines may contain oxygenates up to 10%
ethanol or 15% MTBE.
Running out of fuel
Avoid running out of fuel because this situation may have an adverse
affect on powertrain components.
If you have run out of fuel:
²You may need to cycle the ignition from OFF to ON several times after
refueling, to allow the fuel system to pump the fuel from the tank to
the engine.
²Your ªService Engine Soonº indicator may come on. For more
information on the ªService Engine Soonº indicator, refer to the
Instrumentationchapter.
Fuel Filler Cap
Your fuel tank filler cap has an indexed design with a 1/8 turn on/off
feature.
When fueling your vehicle:
1. Turn the engine off.
2. Carefully turn the filler cap counterclockwise 1/8 of a turn until it
stops.
3. Pull to remove the cap from the fuel filler pipe.
4. To install the cap, align the tabs on the cap with the notches on the
filler pipe.
5. Turn the filler cap clockwise 1/8 of a turn until it stops.
If the ªService Engine Soon/Check Engineº indicator comes on and stays
on after you start the engine, the fuel filler cap may not be properly
installed. Turn off the engine, remove the fuel filler cap, align the cap
properly and reinstall it.
If you must replace the fuel filler cap, replace it with a fuel filler
cap that is designed for your vehicle. The customer warranty may
Maintenance and care
188
Page 195 of 232
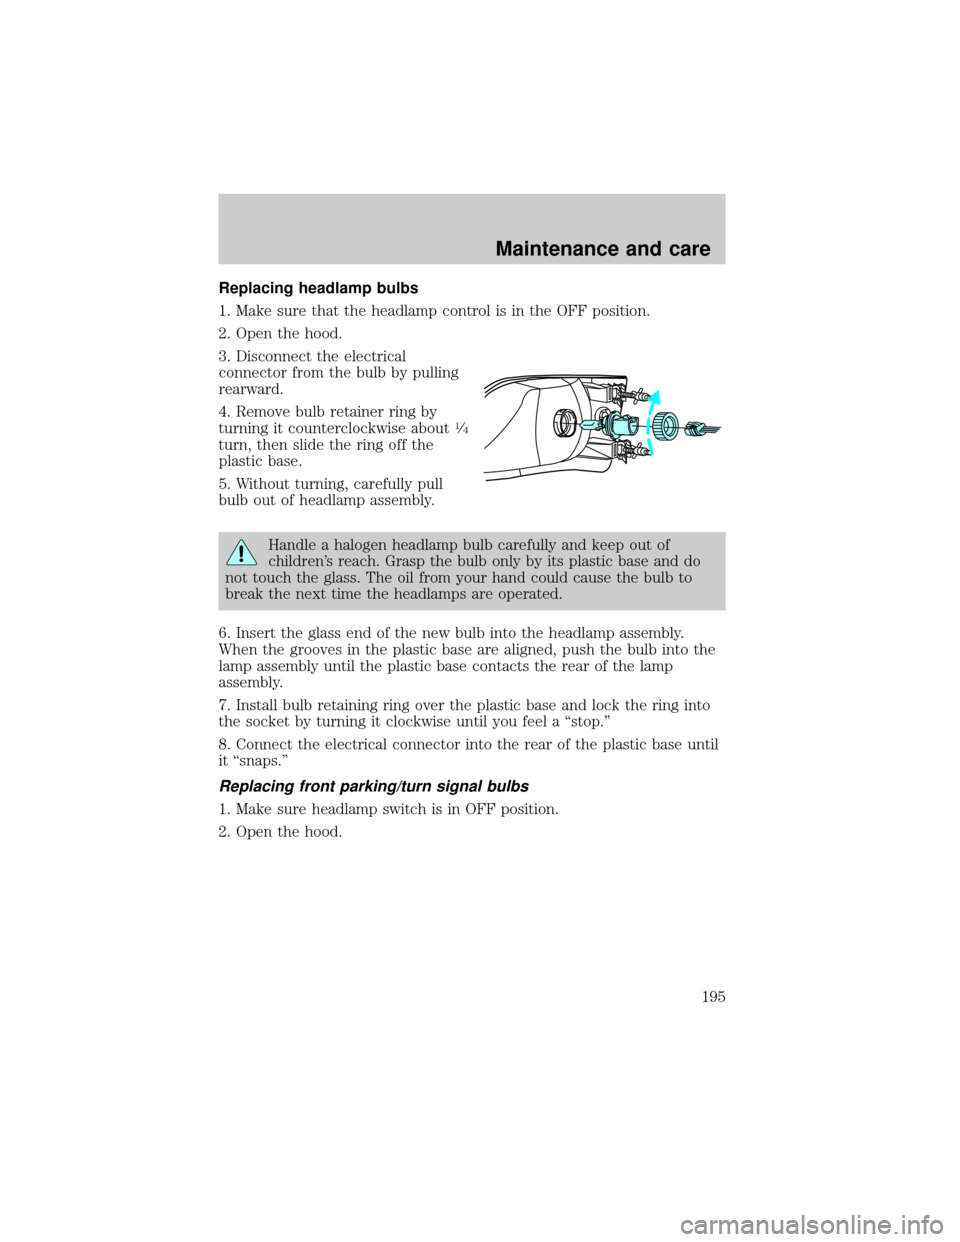
Replacing headlamp bulbs
1. Make sure that the headlamp control is in the OFF position.
2. Open the hood.
3. Disconnect the electrical
connector from the bulb by pulling
rearward.
4. Remove bulb retainer ring by
turning it counterclockwise about
1¤4
turn, then slide the ring off the
plastic base.
5. Without turning, carefully pull
bulb out of headlamp assembly.
Handle a halogen headlamp bulb carefully and keep out of
children's reach. Grasp the bulb only by its plastic base and do
not touch the glass. The oil from your hand could cause the bulb to
break the next time the headlamps are operated.
6. Insert the glass end of the new bulb into the headlamp assembly.
When the grooves in the plastic base are aligned, push the bulb into the
lamp assembly until the plastic base contacts the rear of the lamp
assembly.
7. Install bulb retaining ring over the plastic base and lock the ring into
the socket by turning it clockwise until you feel a ªstop.º
8. Connect the electrical connector into the rear of the plastic base until
it ªsnaps.º
Replacing front parking/turn signal bulbs
1. Make sure headlamp switch is in OFF position.
2. Open the hood.
Maintenance and care
195