heater FORD EXCURSION 2000 1.G Owners Manual
[x] Cancel search | Manufacturer: FORD, Model Year: 2000, Model line: EXCURSION, Model: FORD EXCURSION 2000 1.GPages: 232, PDF Size: 2.01 MB
Page 24 of 232
Operating tips
²In humid weather, selectbefore driving. This will reduce fogging
on your windshield. After a few minutes, select any desired position.
²To prevent humidity buildup inside the vehicle, don't drive with the
climate control system in the OFF or MAX A/C position.
²Don't put objects under the front seat that will interfere with the
airflow to the rear seats (if equipped).
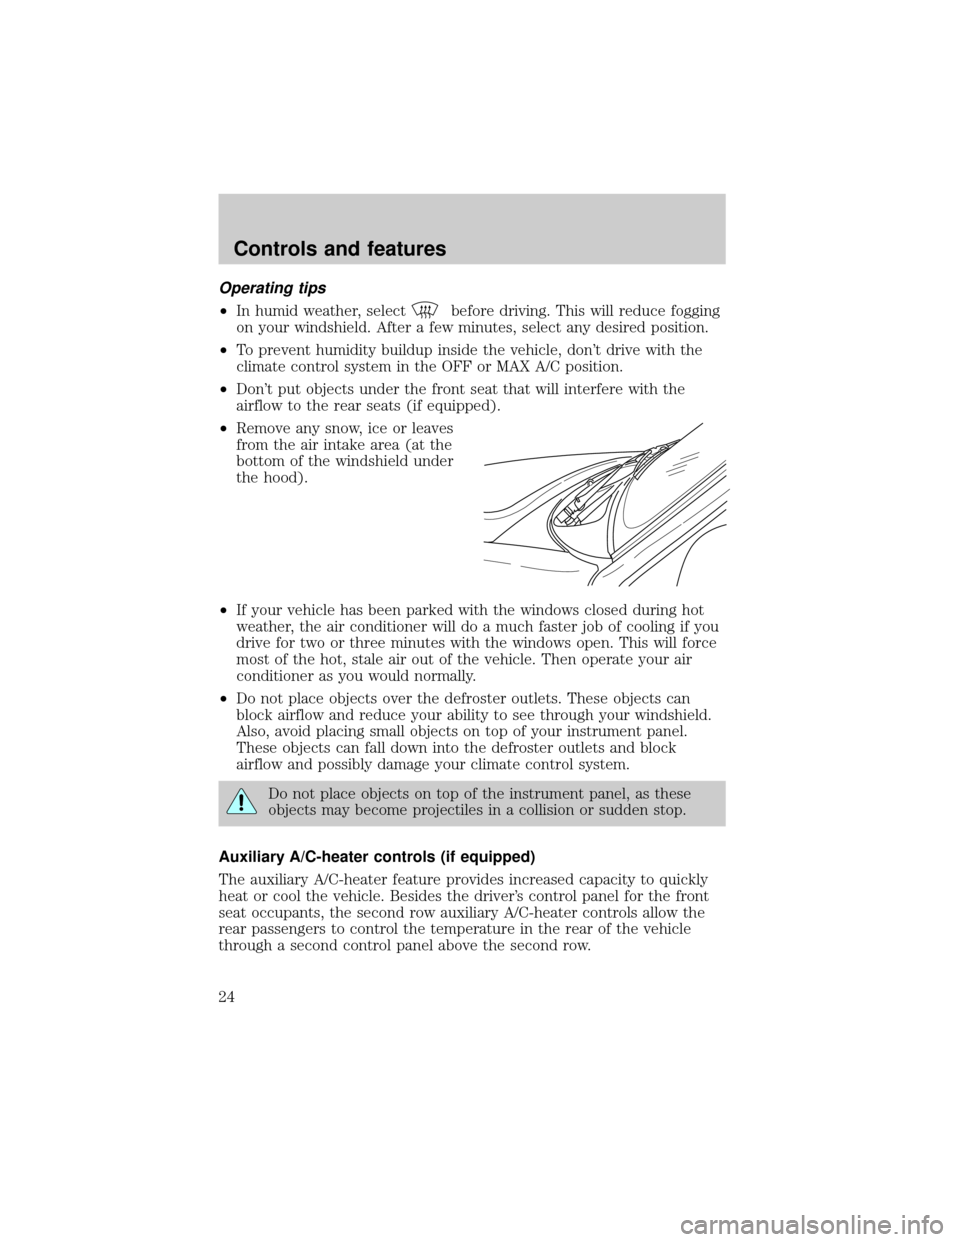
²Remove any snow, ice or leaves
from the air intake area (at the
bottom of the windshield under
the hood).
²If your vehicle has been parked with the windows closed during hot
weather, the air conditioner will do a much faster job of cooling if you
drive for two or three minutes with the windows open. This will force
most of the hot, stale air out of the vehicle. Then operate your air
conditioner as you would normally.
²Do not place objects over the defroster outlets. These objects can
block airflow and reduce your ability to see through your windshield.
Also, avoid placing small objects on top of your instrument panel.
These objects can fall down into the defroster outlets and block
airflow and possibly damage your climate control system.
Do not place objects on top of the instrument panel, as these
objects may become projectiles in a collision or sudden stop.
Auxiliary A/C-heater controls (if equipped)
The auxiliary A/C-heater feature provides increased capacity to quickly
heat or cool the vehicle. Besides the driver's control panel for the front
seat occupants, the second row auxiliary A/C-heater controls allow the
rear passengers to control the temperature in the rear of the vehicle
through a second control panel above the second row.
Controls and features
24
Page 25 of 232
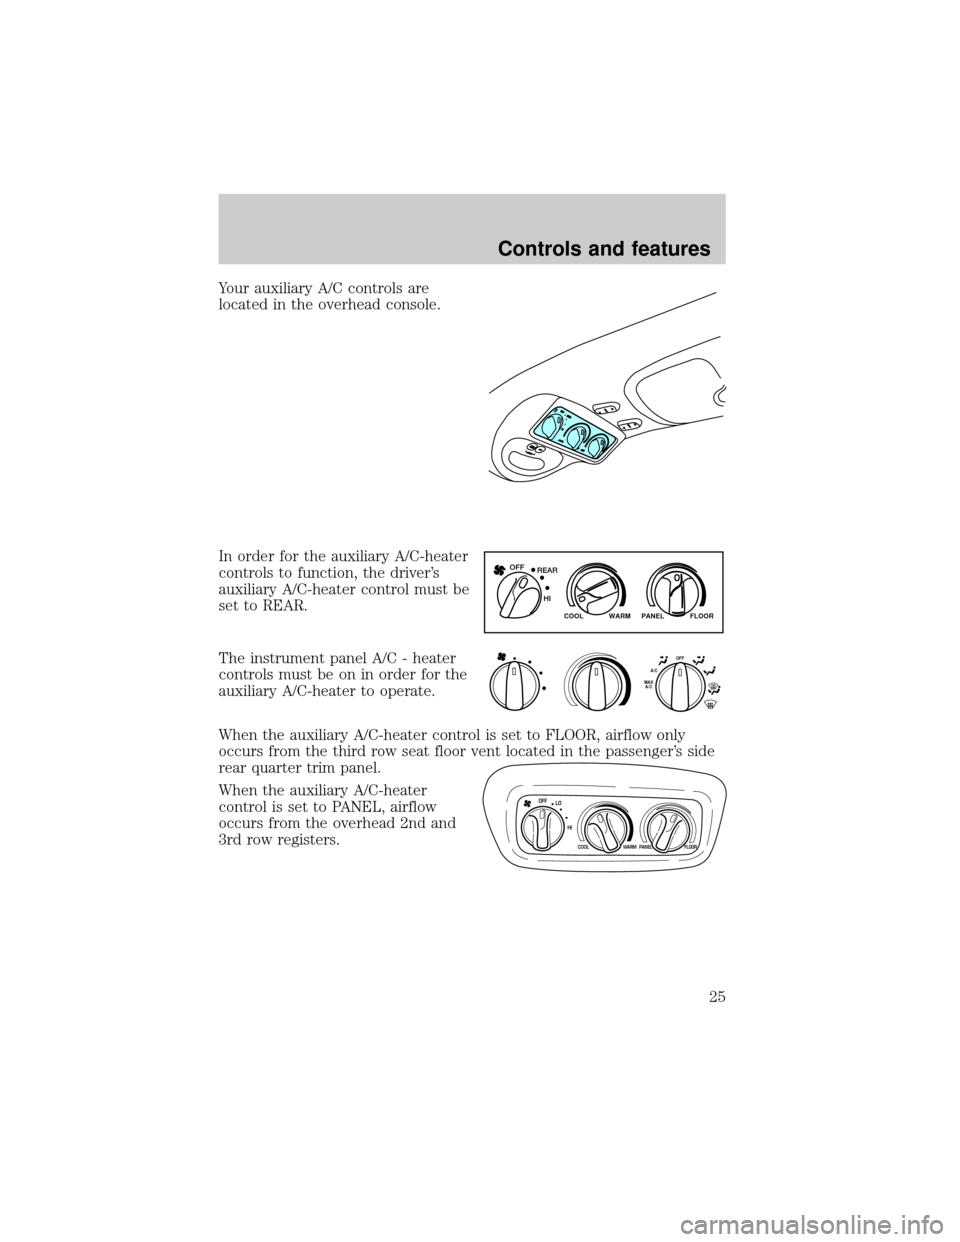
Your auxiliary A/C controls are
located in the overhead console.
In order for the auxiliary A/C-heater
controls to function, the driver's
auxiliary A/C-heater control must be
set to REAR.
The instrument panel A/C - heater
controls must be on in order for the
auxiliary A/C-heater to operate.
When the auxiliary A/C-heater control is set to FLOOR, airflow only
occurs from the third row seat floor vent located in the passenger's side
rear quarter trim panel.
When the auxiliary A/C-heater
control is set to PANEL, airflow
occurs from the overhead 2nd and
3rd row registers.
WARM PANEL FLOOR COOL
REAR OFF
HI
OFFA/CMAX
A/C
OFF
LO
HI
COOLWARM PANEL FLOOR
Controls and features
25
Page 62 of 232
Compass calibration adjustment
Perform this adjustment in an open area free from steel structures and
high voltage lines.
For optimum calibration, turn off all electrical accessories (heater/air
conditioning, wipers, etc.) and make sure all vehicle doors are shut.
1. Locate the trip computer located in the overhead console.
2. Start the vehicle.
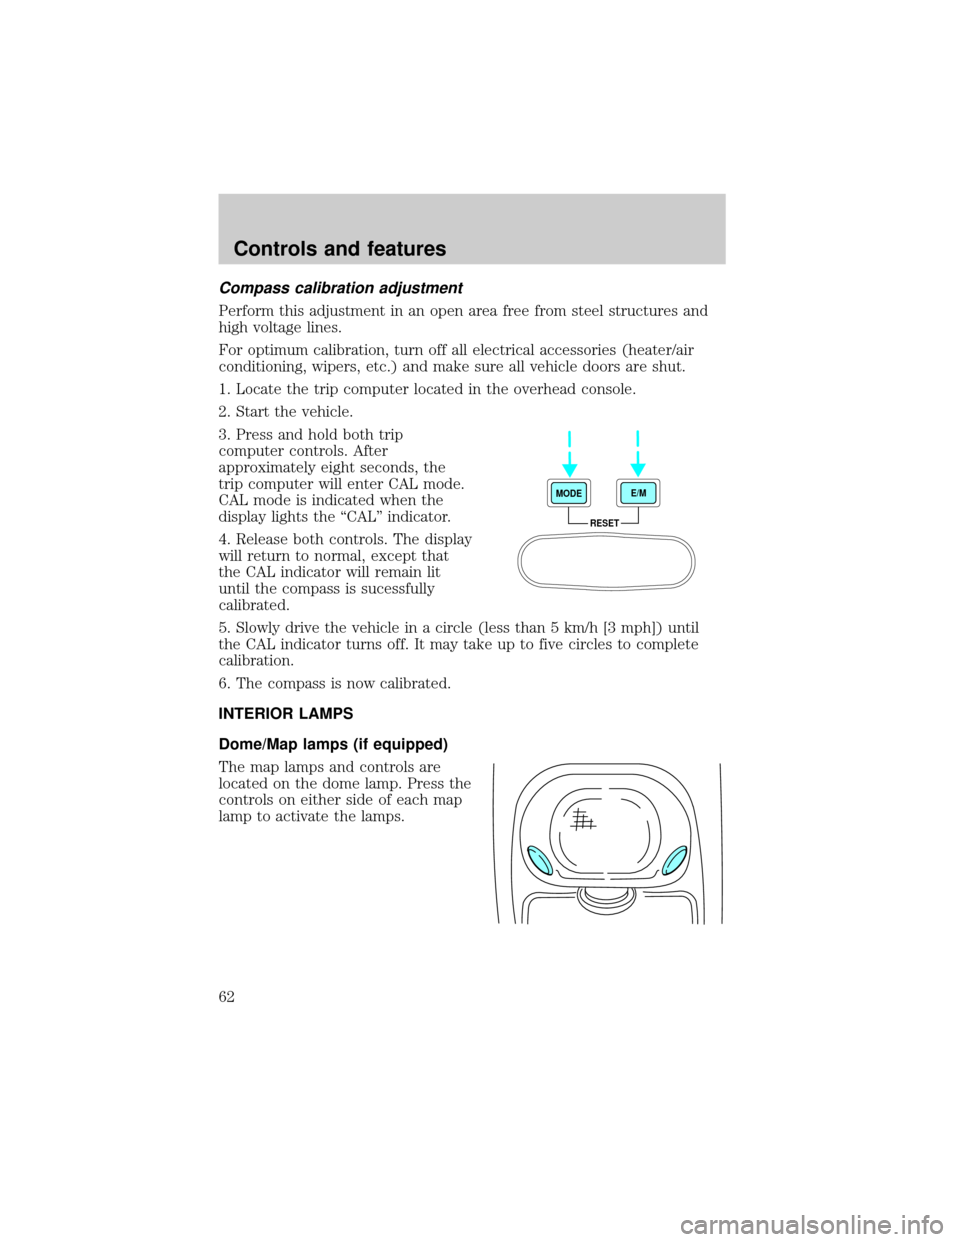
3. Press and hold both trip
computer controls. After
approximately eight seconds, the
trip computer will enter CAL mode.
CAL mode is indicated when the
display lights the ªCALº indicator.
4. Release both controls. The display
will return to normal, except that
the CAL indicator will remain lit
until the compass is sucessfully
calibrated.
5. Slowly drive the vehicle in a circle (less than 5 km/h [3 mph]) until
the CAL indicator turns off. It may take up to five circles to complete
calibration.
6. The compass is now calibrated.
INTERIOR LAMPS
Dome/Map lamps (if equipped)
The map lamps and controls are
located on the dome lamp. Press the
controls on either side of each map
lamp to activate the lamps.
RESET MODEE/M
Controls and features
62
Page 110 of 232
STARTING THE ENGINE
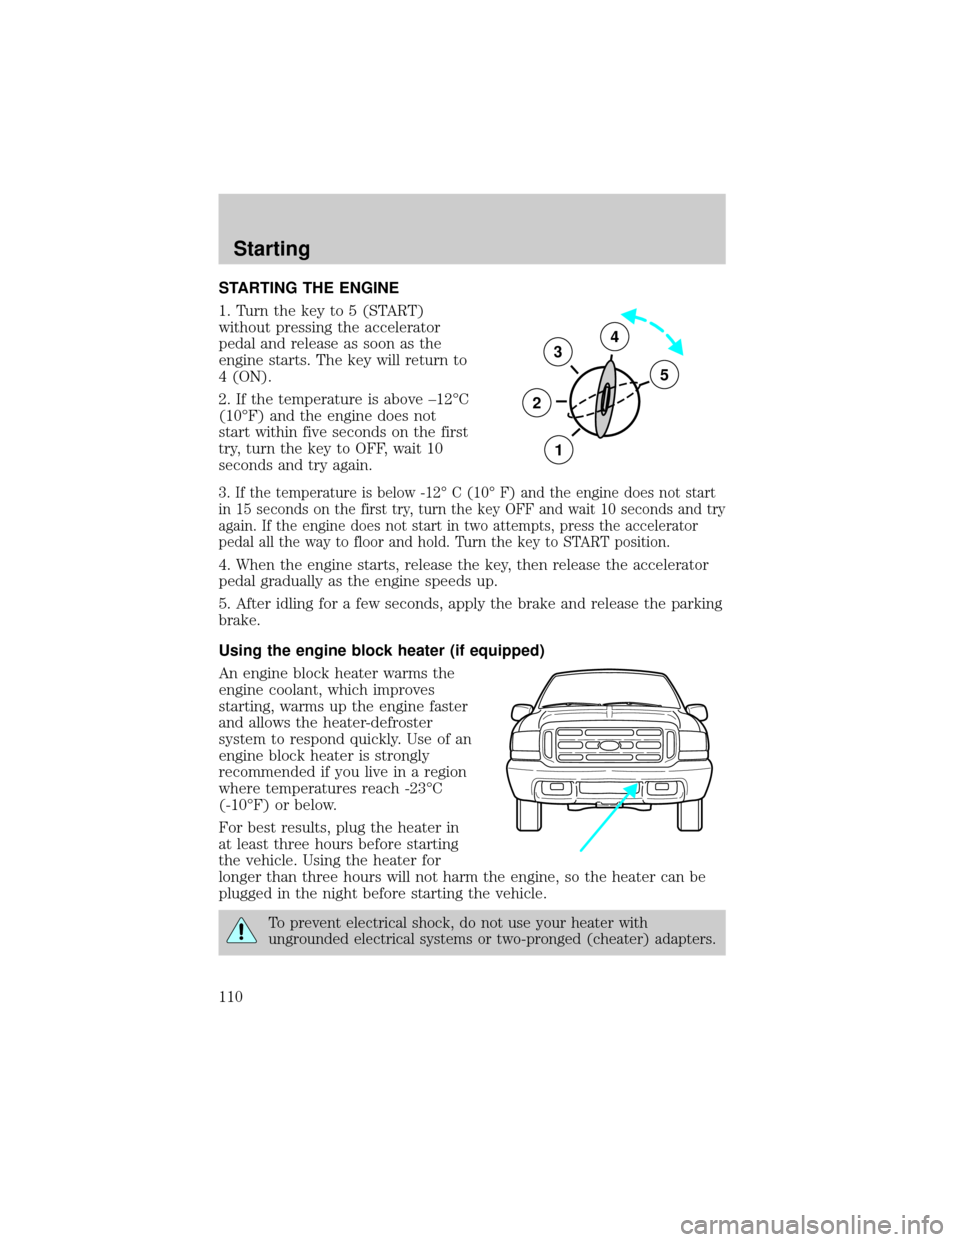
1. Turn the key to 5 (START)
without pressing the accelerator
pedal and release as soon as the
engine starts. The key will return to
4 (ON).
2. If the temperature is above ±12ÉC
(10ÉF) and the engine does not
start within five seconds on the first
try, turn the key to OFF, wait 10
seconds and try again.
3. If the temperature is below -12É C (10É F) and the engine does not start
in 15 seconds on the first try, turn the key OFF and wait 10 seconds and try
again. If the engine does not start in two attempts, press the accelerator
pedal all the way to floor and hold. Turn the key to START position.
4. When the engine starts, release the key, then release the accelerator
pedal gradually as the engine speeds up.
5. After idling for a few seconds, apply the brake and release the parking
brake.
Using the engine block heater (if equipped)
An engine block heater warms the
engine coolant, which improves
starting, warms up the engine faster
and allows the heater-defroster
system to respond quickly. Use of an
engine block heater is strongly
recommended if you live in a region
where temperatures reach -23ÉC
(-10ÉF) or below.
For best results, plug the heater in
at least three hours before starting
the vehicle. Using the heater for
longer than three hours will not harm the engine, so the heater can be
plugged in the night before starting the vehicle.
To prevent electrical shock, do not use your heater with
ungrounded electrical systems or two-pronged (cheater) adapters.
3
2
1
5
4
Starting
110
Page 142 of 232
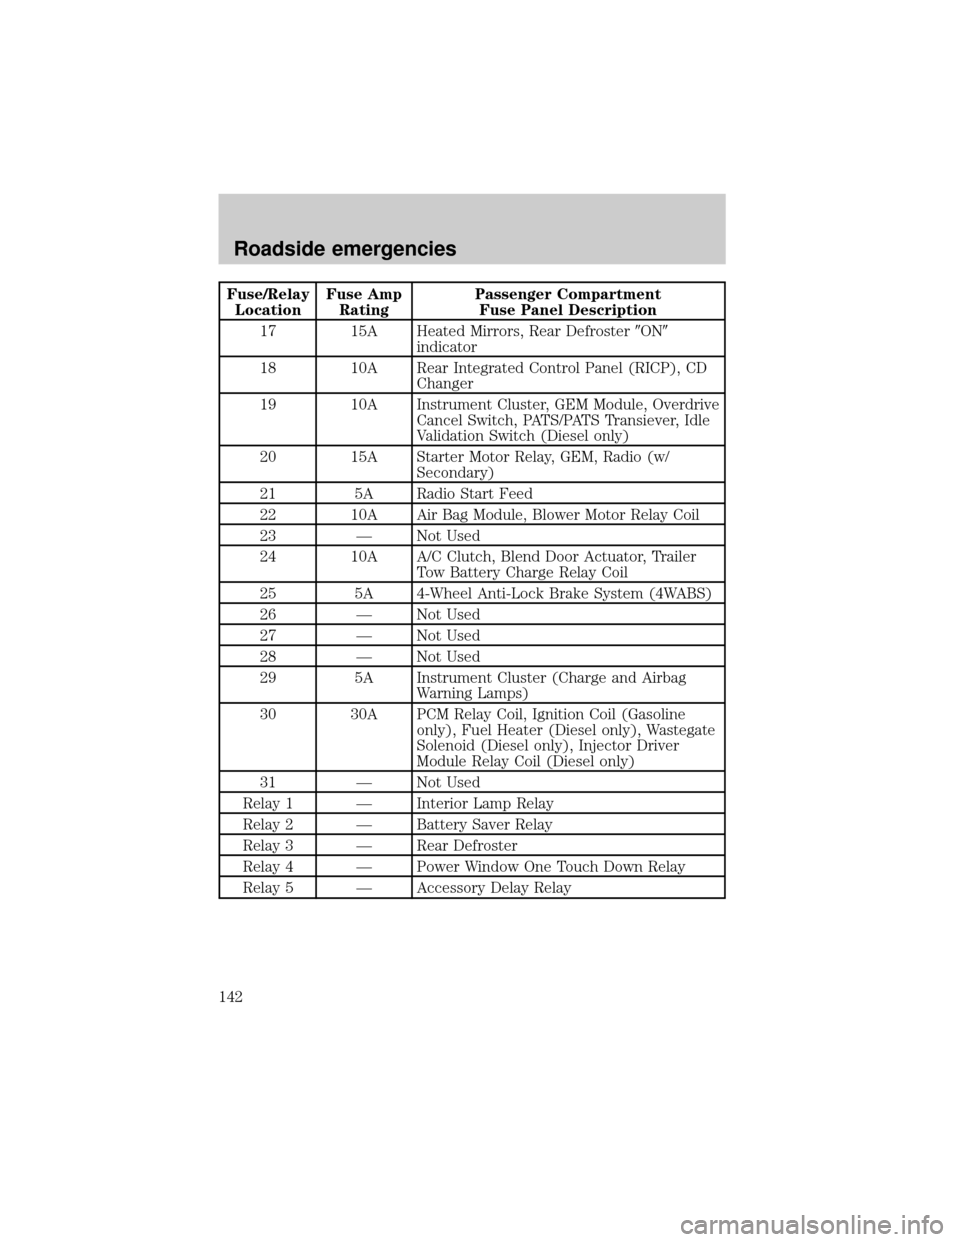
Fuse/Relay
LocationFuse Amp
RatingPassenger Compartment
Fuse Panel Description
17 15A Heated Mirrors, Rear Defroster9ON9
indicator
18 10A Rear Integrated Control Panel (RICP), CD
Changer
19 10A Instrument Cluster, GEM Module, Overdrive
Cancel Switch, PATS/PATS Transiever, Idle
Validation Switch (Diesel only)
20 15A Starter Motor Relay, GEM, Radio (w/
Secondary)
21 5A Radio Start Feed
22 10A Air Bag Module, Blower Motor Relay Coil
23 Ð Not Used
24 10A A/C Clutch, Blend Door Actuator, Trailer
Tow Battery Charge Relay Coil
25 5A 4-Wheel Anti-Lock Brake System (4WABS)
26 Ð Not Used
27 Ð Not Used
28 Ð Not Used
29 5A Instrument Cluster (Charge and Airbag
Warning Lamps)
30 30A PCM Relay Coil, Ignition Coil (Gasoline
only), Fuel Heater (Diesel only), Wastegate
Solenoid (Diesel only), Injector Driver
Module Relay Coil (Diesel only)
31 Ð Not Used
Relay 1 Ð Interior Lamp Relay
Relay 2 Ð Battery Saver Relay
Relay 3 Ð Rear Defroster
Relay 4 Ð Power Window One Touch Down Relay
Relay 5 Ð Accessory Delay Relay
Roadside emergencies
142
Page 152 of 232
Preparing your vehicle
When the battery is disconnected or a new battery is installed, the
transmission must relearn its adaptive strategy. As a result of this, the
transmission may shift firmly. This operation is considered normal and
will not effect function or durability of the transmission. Over time, the
adaptive learning process will fully update transmission operation to its
optimum shift feel.
1.Use only a 12±volt supply to start your vehicle.
2. Do not disconnect the battery of the disabled vehicle as this could
damage the vehicle's electrical system.
3. Park the booster vehicle close to the hood of the disabled vehicle
making sure the two vehiclesdo nottouch. Set the parking brake on
both vehicles and stay clear of the engine cooling fan and other moving
parts.
4. Check all battery terminals and remove any excessive corrosion before
you attach the battery cables. Ensure that vent caps are tight and level.
5. Turn the heater fan on in both vehicles to protect any electrical
surges. Turn all other accessories off.
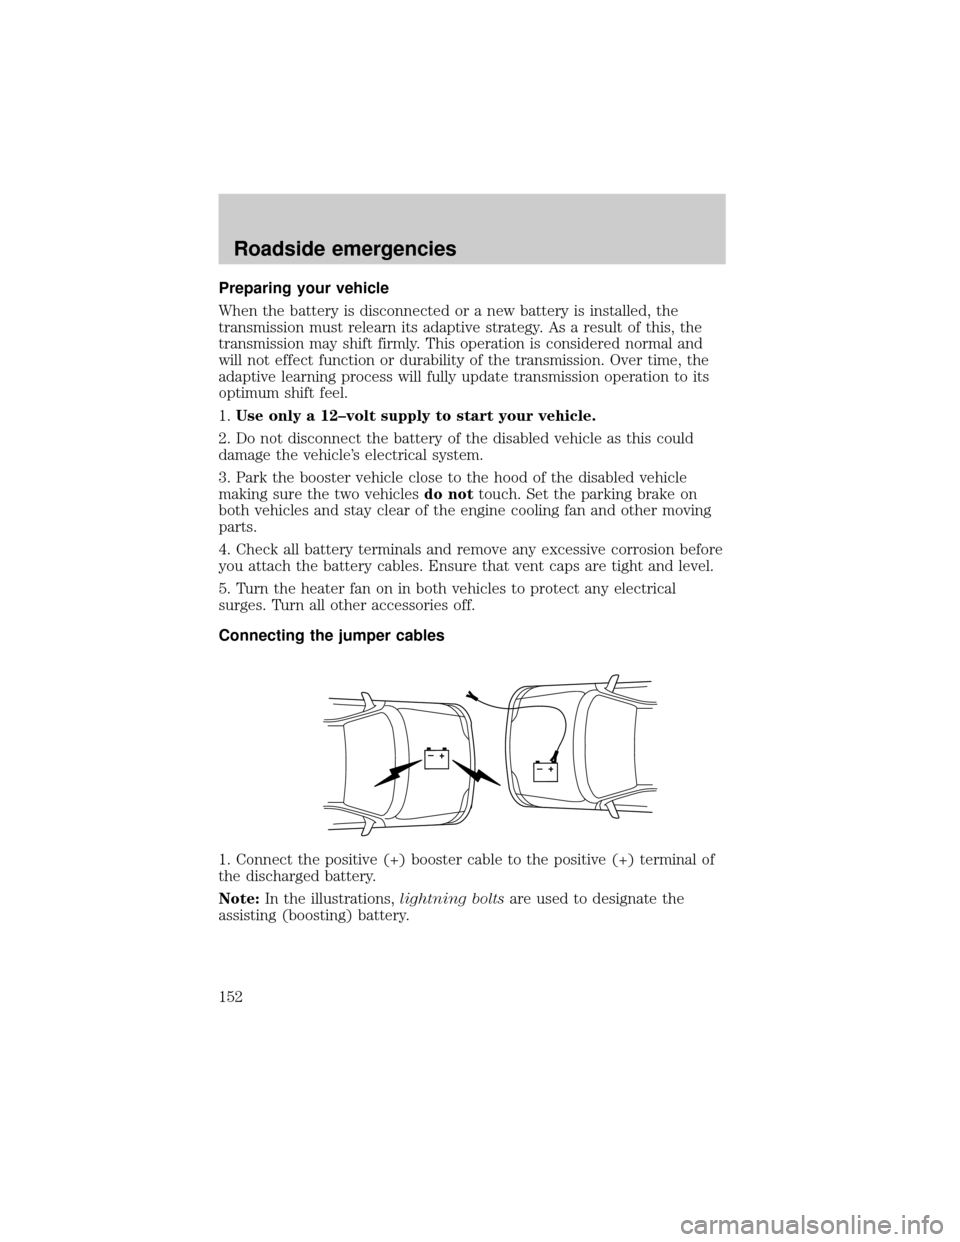
Connecting the jumper cables
1. Connect the positive (+) booster cable to the positive (+) terminal of
the discharged battery.
Note:In the illustrations,lightning boltsare used to designate the
assisting (boosting) battery.
+–+–
Roadside emergencies
152
Page 206 of 232

Service refill capacities are determined by filling the rear axle to the
bottom of the filler hole with the specified lubricant.
3Use Ford Premium Engine Coolant (green in color). DO NOT USE Ford
Extended Life Engine Coolant (orange in color). Refer toAdding engine
coolant, in the Maintenance and Care chapter.
4If equipped with auxiliary rear heater, add an additional 1.4 L (1.5
quarts).
5Ensure the correct automatic transmission fluid is used. Transmission
fluid requirements are indicated on the dipstick or on the dipstick
handle. Check the container to verify the fluid being added is of the
correct type. Refer to your scheduled maintenance guide to determine
the correct service interval.
Some transmission fluids may be labeled as dual usage, such as
MERCONtand MERCONtV. These dual usage fluids are not to be used
in an automatic transmission that requires use of the MERCONttype
fluid. However, these dual usage fluids may be used in transmissions that
require the MERCONtV type fluid.
MERCONtand MERCONtV type fluids are not interchangeable.
DO NOT mix MERCONtand MERCONtV. Use of a transmission
fluid that indicates dual usage (MERCONtand MERCONtV) in
an automatic transmission application requiring MERCONtmay
cause transmission damage. Use of any fluid other than the
recommended fluid may cause transmission damage.
6Indicates only approximate dry-fill capacity. Some applications may
vary based on cooler size and if equipped with an in-tank cooler. The
amount of transmission fluid and fluid level should be set by the
indication on the dipstick's normal operating range.
Capacities and specifications
206
Page 221 of 232

Comfort and convenience
Cargo organizers
Cargo shades
Cargo trays
Dash trim
Engine block heaters
Battery warmer/blanket
Cellular phone holder
Electrochromatic compass mirror
Electrochromatic compass mirror with temperature display
Heat storage system
Tire step
Travel equipment
Daytime running lights (DRL)
Factory luggage rack adaptors
Fog lights
Framed luggage covers
Heavy-duty battery
Running boards
Auto headlamp system with DRL
Spare tire soft storage cover
Seat back pack storage
Multi sport track rider cross bars
Multi sport track rider adaptors
Soft luggage cover
Speed control
Towing mirrors
Trailer hitch
Trailer hitch bars and balls
Trailer hitch wiring adaptor
Customer assistance
221
Page 225 of 232

A
Accessory delay ..........................53
Air bag supplemental
restraint system ..........................95
and child safety seats ..............97
description ................................95
disposal ......................................99
driver air bag ............................97
indicator light .....................11, 99
operation ...................................97
passenger air bag .....................97
Air cleaner filter .......177±178, 204
Air conditioning ..........................22
auxiliary heater and air
conditioner ................................24
Antifreeze
(see Engine coolant) ................165
Anti-lock brake system
(see Brakes) ......................112±113
Anti-theft system
warning light .............................13
Audio system (see Radio) .........27
Automatic transmission
driving an automatic
overdrive .................................116
fluid, adding ............................172
fluid, checking ........................172
fluid, refill capacities ..............204
fluid, specification ..................209
Auxiliary power point .................21
Axle
lubricant specifications ..207, 209
refill capacities ........................204
traction lok ..............................179B
Battery .......................................175
acid, treating emergencies .....175
charging system warning light...12
jumping a disabled battery ....151
maintenance-free ....................175
replacement, specifications ...204
servicing ..................................175
voltage gauge ............................17
Belt minder .................................91
Brakes ........................................112
anti-lock ...........................112±113
anti-lock brake system (ABS)
warning light .....................12, 113
brake warning light ..................11
fluid, checking and adding ....163
fluid, refill capacities ..............204
fluid, specifications .........207, 209
lubricant specifications ..207, 209
parking ....................................113
shift interlock ..........................115
Break-in period .............................3
C
Capacities for refilling fluids ....204
Cargo net .....................................73
CD changer .................................39
Certification Label ....................211
Child safety restraints ..............100
child safety belts ....................100
Child safety seats ......................101
attaching with tether straps ..105
in front seat ............................102
in rear seat ..............................102
Cleaning your vehicle ...............199
engine compartment ..............201
Index
225
Page 227 of 232

Engine block heater .................110
Engine oil ..................................160
checking and adding ..............160
dipstick ....................................160
filter, specifications ........162, 204
recommendations ...................162
refill capacities ........................204
specifications ..................207, 209
Exhaust fumes ..........................111
F
Fail safe cooling ........................170
Fluid capacities .........................204
Four-Wheel Drive vehicles..13, 119
control trac ...............................19
description ..............................121
driving off road .......................123
electronic shift ..........19, 120±121
indicator light ...................12, 120
preparing to drive your
vehicle .....................................115
Fuel ............................................185
calculating fuel economy .......189
cap ...........................................188
capacity ...................................204
choosing the right fuel ...........187
comparisons with EPA fuel
economy estimates .................192
detergent in fuel .....................188
filling your vehicle
with fuel ..................185, 188±189
filter, specifications ........189, 204
fuel pump shut-off switch .....137
gauge .........................................15
improving fuel economy ........189
low fuel warning light ................8
octane rating ...................187, 209
quality ......................................187
running out of fuel .................188safety information relating to
automotive fuels .....................185
Fuses ..................................138±139
G
Garage door opener ....................56
Gas cap (see Fuel cap) ............188
Gas mileage
(see Fuel economy) .................189
Gauges .........................................14
battery voltage gauge ...............17
engine coolant temperature
gauge .........................................15
engine oil pressure gauge ........17
fuel gauge ..................................15
odometer ...................................16
speedometer .............................15
tachometer ................................17
trip odometer ............................16
GAWR (Gross
Axle Weight Rating) .................125
calculating ...............................127
definition .................................125
driving with a heavy load ......125
location ....................................125
GVWR (Gross
Vehicle Weight Rating) .............125
calculating .......................125, 127
definition .................................125
driving with a heavy load ......125
location ....................................125
H
Hazard flashers .........................137
Head restraints ...........................77
Headlamps ...................................18
aiming ......................................199
Index
227