ECU FORD EXCURSION 2002 1.G Service Manual
[x] Cancel search | Manufacturer: FORD, Model Year: 2002, Model line: EXCURSION, Model: FORD EXCURSION 2002 1.GPages: 272, PDF Size: 5.06 MB
Page 220 of 272
20815.psp Ford O/G 2002 Excursion English 4th Print 2C3J-19A321-HB 04/24/2003 09:14:57 110 B
Working with the engine on
1. Set the parking brake and ensure the gearshift is securely latched in P
(Park).
2. Block the wheels to prevent the vehicle from moving unexpectedly.
Note:Do not start your engine with the air cleaner removed and do not
remove it while the engine is running.
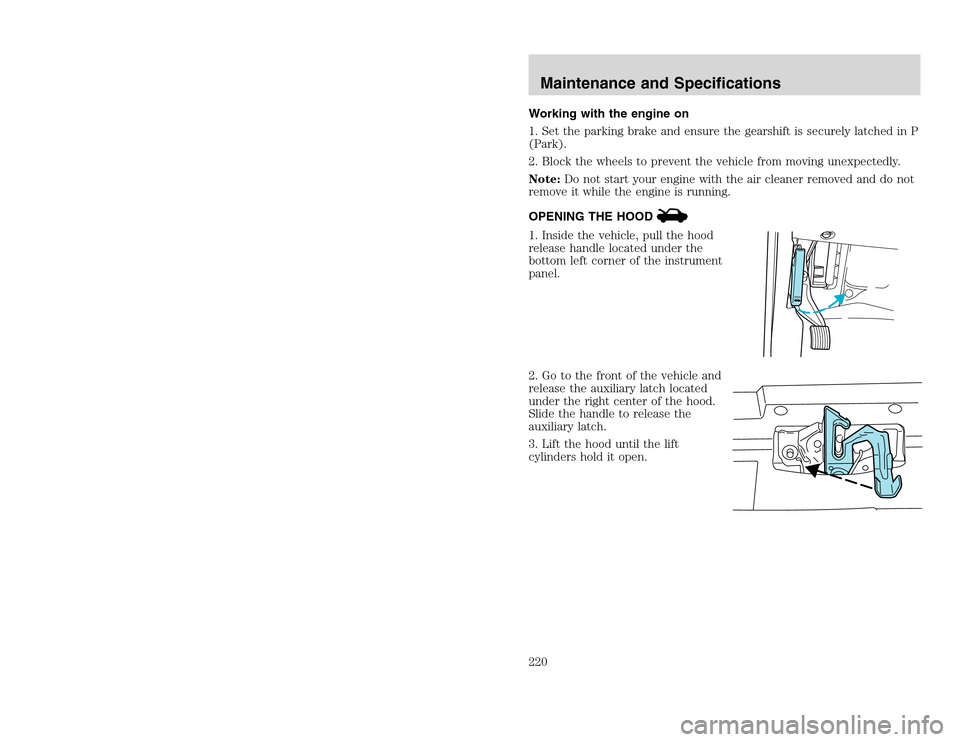
OPENING THE HOOD1. Inside the vehicle, pull the hood
release handle located under the
bottom left corner of the instrument
panel.
2. Go to the front of the vehicle and
release the auxiliary latch located
under the right center of the hood.
Slide the handle to release the
auxiliary latch.
3. Lift the hood until the lift
cylinders hold it open.
HOOD
Maintenance and Specifications220
Page 222 of 272
20815.psp Ford O/G 2002 Excursion English 4th Print 2C3J-19A321-HB 04/24/2003 09:14:57 111 B
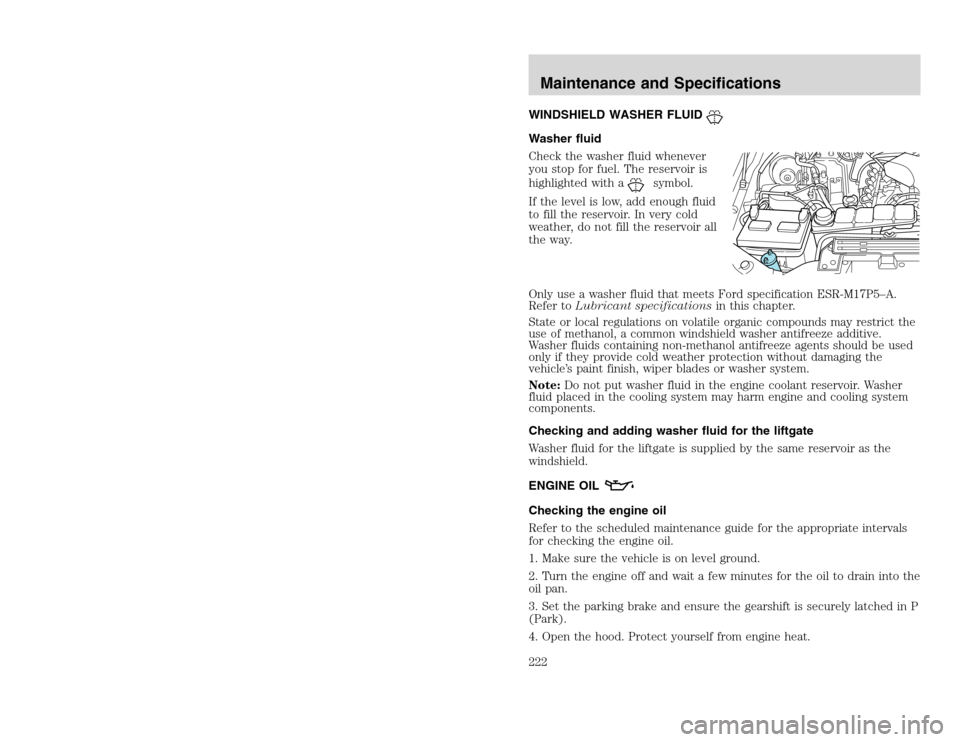
WINDSHIELD WASHER FLUIDWasher fluid
Check the washer fluid whenever
you stop for fuel. The reservoir is
highlighted with a
symbol.
If the level is low, add enough fluid
to fill the reservoir. In very cold
weather, do not fill the reservoir all
the way.
Only use a washer fluid that meets Ford specification ESR-M17P5–A.
Refer toLubricant specificationsin this chapter.
State or local regulations on volatile organic compounds may restrict the
use of methanol, a common windshield washer antifreeze additive.
Washer fluids containing non-methanol antifreeze agents should be used
only if they provide cold weather protection without damaging the
vehicle’s paint finish, wiper blades or washer system.
Note:Do not put washer fluid in the engine coolant reservoir. Washer
fluid placed in the cooling system may harm engine and cooling system
components.
Checking and adding washer fluid for the liftgate
Washer fluid for the liftgate is supplied by the same reservoir as the
windshield.
ENGINE OIL
Checking the engine oil
Refer to the scheduled maintenance guide for the appropriate intervals
for checking the engine oil.
1. Make sure the vehicle is on level ground.
2. Turn the engine off and wait a few minutes for the oil to drain into the
oil pan.
3. Set the parking brake and ensure the gearshift is securely latched in P
(Park).
4. Open the hood. Protect yourself from engine heat.Maintenance and Specifications222
Page 248 of 272
20815.psp Ford O/G 2002 Excursion English 4th Print 2C3J-19A321-HB 04/24/2003 09:14:57 124 B
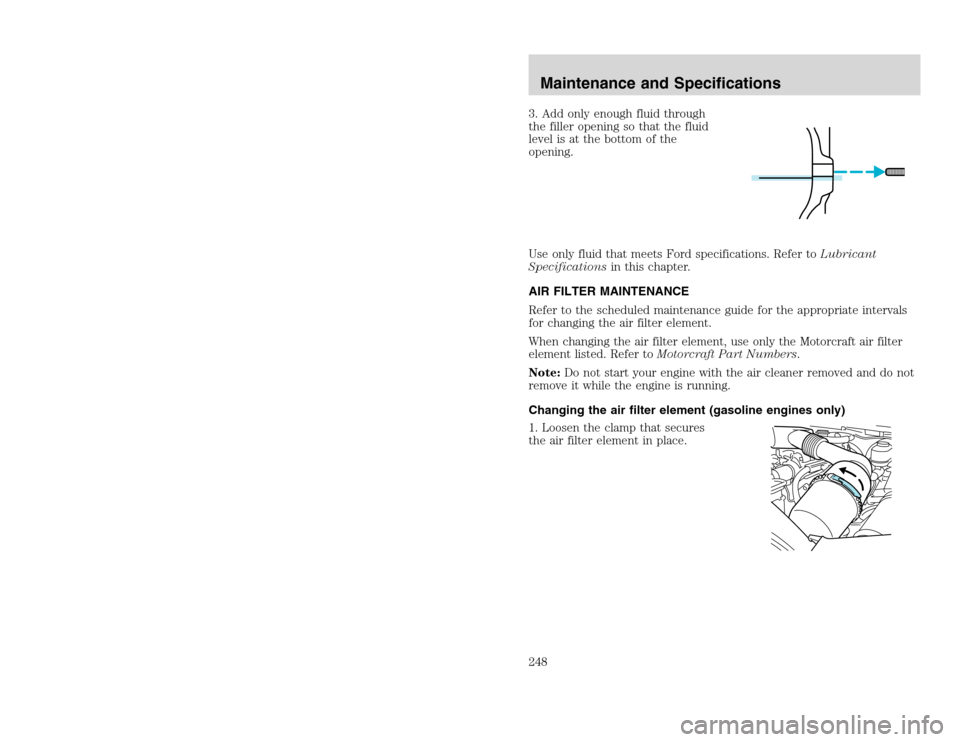
3. Add only enough fluid through
the filler opening so that the fluid
level is at the bottom of the
opening.
Use only fluid that meets Ford specifications. Refer toLubricant
Specificationsin this chapter.
AIR FILTER MAINTENANCE
Refer to the scheduled maintenance guide for the appropriate intervals
for changing the air filter element.
When changing the air filter element, use only the Motorcraft air filter
element listed. Refer toMotorcraft Part Numbers.
Note:Do not start your engine with the air cleaner removed and do not
remove it while the engine is running.
Changing the air filter element (gasoline engines only)
1. Loosen the clamp that secures
the air filter element in place.Maintenance and Specifications248
Page 249 of 272
20815.psp Ford O/G 2002 Excursion English 4th Print 2C3J-19A321-HB 04/24/2003 09:14:57 125 A
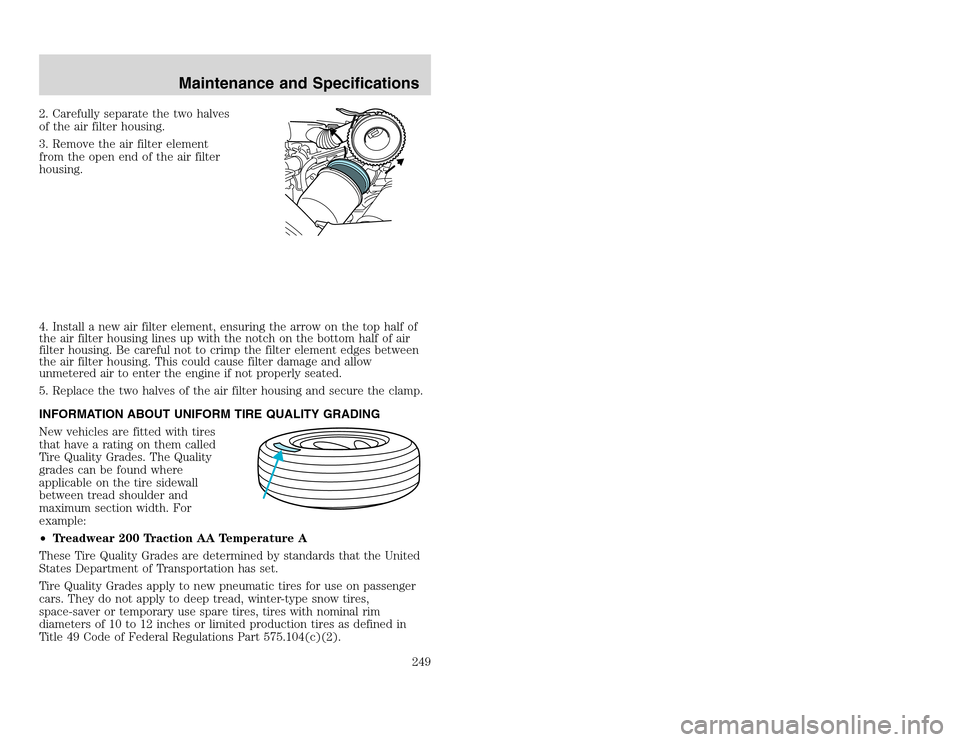
2. Carefully separate the two halves
of the air filter housing.
3. Remove the air filter element
from the open end of the air filter
housing.
4. Install a new air filter element, ensuring the arrow on the top half of
the air filter housing lines up with the notch on the bottom half of air
filter housing. Be careful not to crimp the filter element edges between
the air filter housing. This could cause filter damage and allow
unmetered air to enter the engine if not properly seated.
5. Replace the two halves of the air filter housing and secure the clamp.
INFORMATION ABOUT UNIFORM TIRE QUALITY GRADING
New vehicles are fitted with tires
that have a rating on them called
Tire Quality Grades. The Quality
grades can be found where
applicable on the tire sidewall
between tread shoulder and
maximum section width. For
example:
•Treadwear 200 Traction AA Temperature A
These Tire Quality Grades are determined by standards that the United
States Department of Transportation has set.
Tire Quality Grades apply to new pneumatic tires for use on passenger
cars. They do not apply to deep tread, winter-type snow tires,
space-saver or temporary use spare tires, tires with nominal rim
diameters of 10 to 12 inches or limited production tires as defined in
Title 49 Code of Federal Regulations Part 575.104(c)(2).
Maintenance and Specifications
249
Page 253 of 272
20815.psp Ford O/G 2002 Excursion English 4th Print 2C3J-19A321-HB 04/24/2003 09:14:57 127 A
Do not replace your tires with “high performance” tires or larger
size tires.Failure to follow these precautions may adversely affect the
handling of the vehicle and make it easier for the driver to lose
control and roll over.
Tires that are larger or smaller than your vehicle’s original tires may also
affect the accuracy of your speedometer.
SNOW TIRES AND CHAINSSnow tires must be the same size and grade as the tires you
currently have on your vehicle.
The tires on your vehicle have all weather treads to provide traction in
rain and snow. However, in some climates, you may need to use snow
tires and chains. If you need to use chains, it is recommended that steel
wheels (of the same size and specifications) be used as chains may chip
aluminum wheels.
Follow these guidelines when using snow tires and chains:
•Use only SAE Class S chains.
•Install chains securely, verifying that the chains do not touch any
wiring, brake lines or fuel lines.
•Drive cautiously. If you hear the chains rub or bang against your
vehicle, stop and re-tighten the chains. If this does not work, remove
the chains to prevent damage to your vehicle.
•If possible, avoid fully loading your vehicle.
•Remove the tire chains when they are no longer needed. Do not use
tire chains on dry roads.
•The suspension insulation and bumpers will help prevent vehicle
damage. Do not remove these components from your vehicle when
using snow tires and chains.
Maintenance and Specifications
253
Page 263 of 272
20815.psp Ford O/G 2002 Excursion English 4th Print 2C3J-19A321-HB 04/24/2003 09:14:57 132 A
FORD ACCESSORIES FOR YOUR VEHICLE
A wide selection of genuine Ford accessories are available for your
vehicle through your local authorized Ford, Lincoln, Mercury or Ford of
Canada dealer. These quality accessories have been specifically
engineered to fulfill your automotive needs; they are custom designed to
complement the style and aerodynamic appearance of your vehicle. In
addition, each accessory is made from high quality materials and meets
or exceeds Ford’s rigorous engineering and safety specifications. Ford
Motor Company will repair or replace any properly dealer-installed Ford
accessory found to be defective in factory-supplied materials or
workmanship during the warranty period, as well as any component
damaged by the defective accessory. The accessory will be warranted for
whichever provides you the greatest benefit:
•12 months or 20 000 km (12 000 miles) (whichever occurs first), or
•the remainder of your new vehicle limited warranty.
This means that genuine Ford accessories purchased along with your
new vehicle and installed by the dealer are covered for the full length of
your New Vehicle’s Limited Warranty — 3 years or 60 000 km (36 000
miles) (whichever occurs first). Contact your dealer for details and a
copy of the warranty.
Not all accessories are available for all models.
Vehicle Security
Styled wheel protector locks
Vehicle security systems
Underbody Lighting
Comfort and convenience
Cargo organizers
Cargo shades
Cargo trays
Cell phone holder
Dash trim
Engine block heaters
Battery warmer/blanket
Cellar phone holder
Rear door storage bins
Tire step
Accessories
263
Page 271 of 272
20815.psp Ford O/G 2002 Excursion English 4th Print 2C3J-19A321-HB 04/24/2003 09:14:57 136 A
replacing the batteries ...........108
Reverse sensing system ...........164
Roadside assistance ..................185
Roof rack ...................................103
S
Safety belts (see Safety
restraints) ............14, 128–131, 133
Safety defects, reporting ..........212
Safety restraints ........128–131, 133
belt minder .............................135
cleaning the safety belts ........139
extension assembly ................139
for adults .........................129–131
for children .....................144–145
lap belt ....................................134
warning light and
chime ...........................12, 14, 135
Safety seats for children ..........145
Seat belts (see Safety
restraints) ..................................128
Seats ..........................................117
child safety seats ....................145
memory seat ...........................118
SecuriLock passive anti-theft
system ................................113–115
Servicing your vehicle ..............219
Snowplowing .................................7
Spare tire (see Changing the
Tire) ...........................................192
Spark plugs,
specifications .............254, 259–260
Special notice
diesel-powered vehicles .............7
utility-type vehicles ....................7Specification chart,
lubricants ...........................257, 259
Speed control ..............................89
Speedometer ...............................18
Starting your vehicle ........152–154
jump starting ..........................197
Steering .....................................159
Steering wheel
controls ..........................82, 89, 93
tilting .........................................82
T
Tachometer .................................18
Tires ...........................192, 249–251
changing ..........................192–193
checking the pressure ............251
replacing ..................................252
rotating ....................................251
snow tires and chains ............253
tire grades ...............................250
treadwear ................................250
Towing .......................................180
recreational towing .................184
trailer towing ..........................180
wrecker ....................................202
Traction-lok rear axle ...............159
Transfer case
fluid checking .........................247
Transmission .............................160
fluid, checking and adding
(automatic) .............................245
fluid, refill capacities ..............254
lubricant
specifications ..................257, 259
Transmission control indicator
light ..............................................13
Trip odometer .............................18
Index
271