ECU FORD EXCURSION 2005 1.G Owner's Manual
[x] Cancel search | Manufacturer: FORD, Model Year: 2005, Model line: EXCURSION, Model: FORD EXCURSION 2005 1.GPages: 280, PDF Size: 2.76 MB
Page 104 of 280
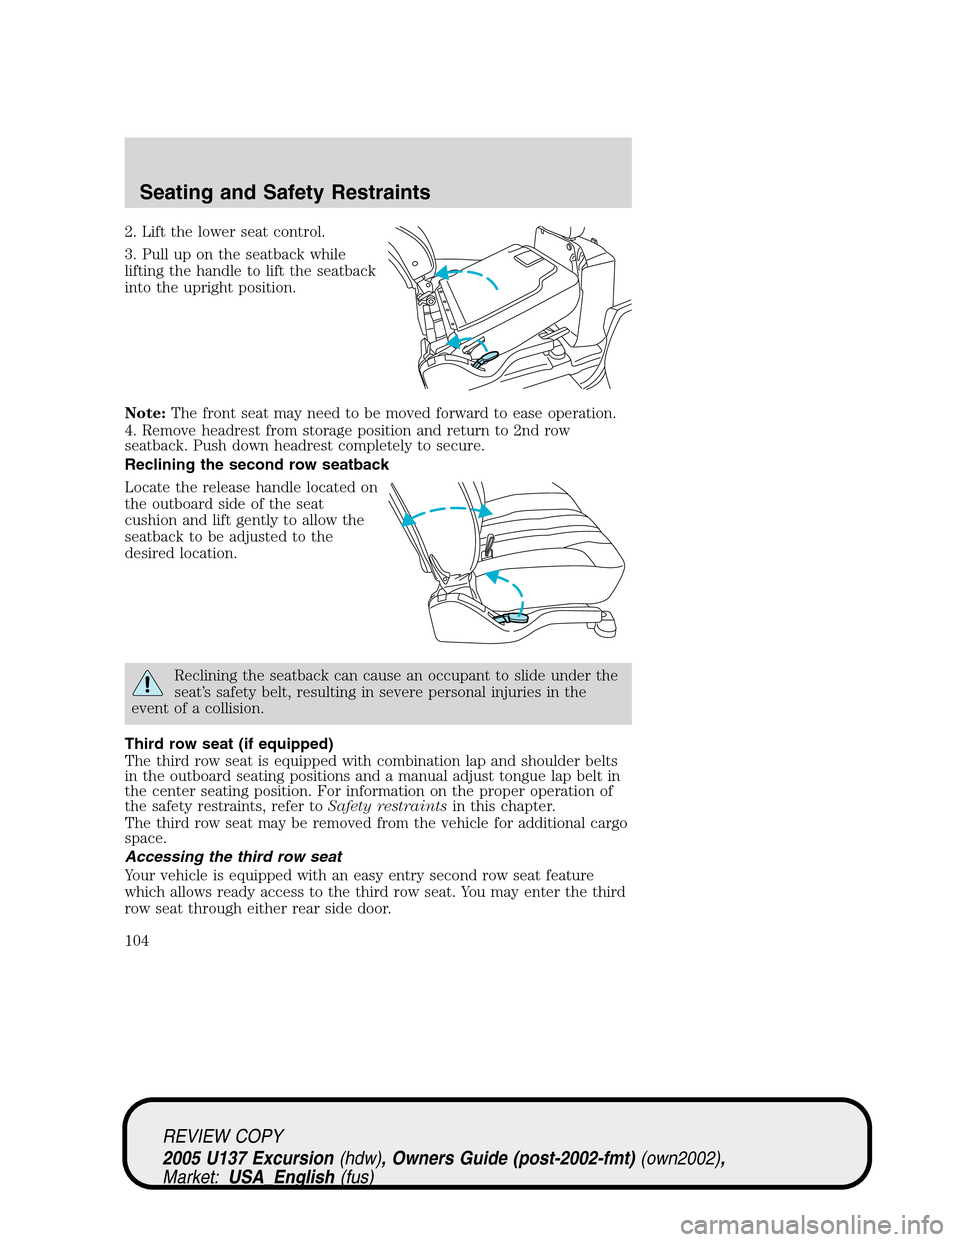
2. Lift the lower seat control.
3. Pull up on the seatback while
lifting the handle to lift the seatback
into the upright position.
Note:The front seat may need to be moved forward to ease operation.
4. Remove headrest from storage position and return to 2nd row
seatback. Push down headrest completely to secure.
Reclining the second row seatback
Locate the release handle located on
the outboard side of the seat
cushion and lift gently to allow the
seatback to be adjusted to the
desired location.
Reclining the seatback can cause an occupant to slide under the
seat’s safety belt, resulting in severe personal injuries in the
event of a collision.
Third row seat (if equipped)
The third row seat is equipped with combination lap and shoulder belts
in the outboard seating positions and a manual adjust tongue lap belt in
the center seating position. For information on the proper operation of
the safety restraints, refer toSafety restraintsin this chapter.
The third row seat may be removed from the vehicle for additional cargo
space.
Accessing the third row seat
Your vehicle is equipped with an easy entry second row seat feature
which allows ready access to the third row seat. You may enter the third
row seat through either rear side door.
REVIEW COPY
2005 U137 Excursion(hdw), Owners Guide (post-2002-fmt)(own2002),
Market:USA_English(fus)
Seating and Safety Restraints
104
Page 108 of 280
Always transport children 12 years old and under in the back
seat and always properly use appropriate child restraints.
Safety belts and seats can become hot in a vehicle that has been
closed up in sunny weather; they could burn a small child. Check
seat covers and buckles before you place a child anywhere near them.
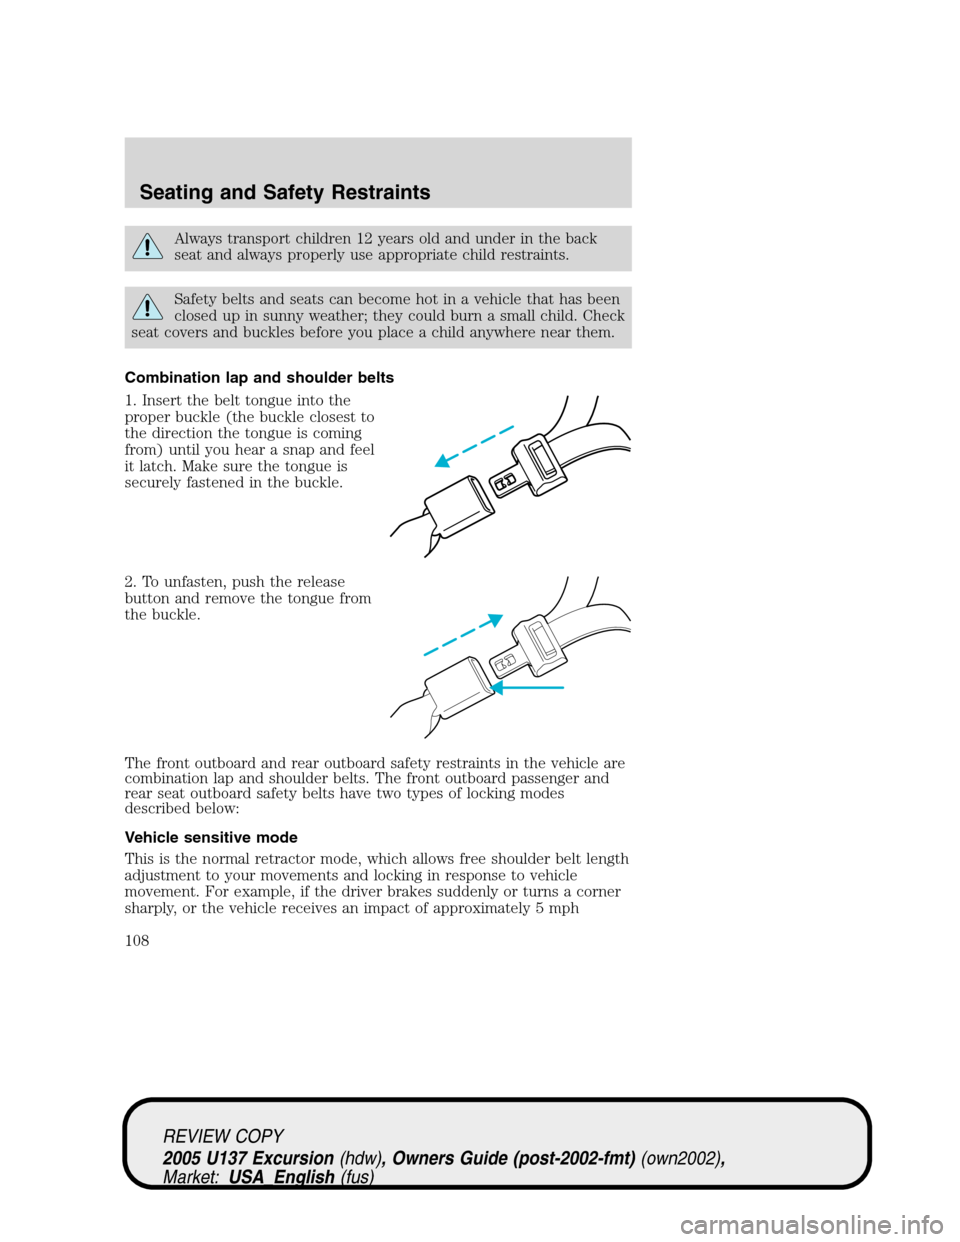
Combination lap and shoulder belts
1. Insert the belt tongue into the
proper buckle (the buckle closest to
the direction the tongue is coming
from) until you hear a snap and feel
it latch. Make sure the tongue is
securely fastened in the buckle.
2. To unfasten, push the release
button and remove the tongue from
the buckle.
The front outboard and rear outboard safety restraints in the vehicle are
combination lap and shoulder belts. The front outboard passenger and
rear seat outboard safety belts have two types of locking modes
described below:
Vehicle sensitive mode
This is the normal retractor mode, which allows free shoulder belt length
adjustment to your movements and locking in response to vehicle
movement. For example, if the driver brakes suddenly or turns a corner
sharply, or the vehicle receives an impact of approximately 5 mph
REVIEW COPY
2005 U137 Excursion(hdw), Owners Guide (post-2002-fmt)(own2002),
Market:USA_English(fus)
Seating and Safety Restraints
108
Page 125 of 280
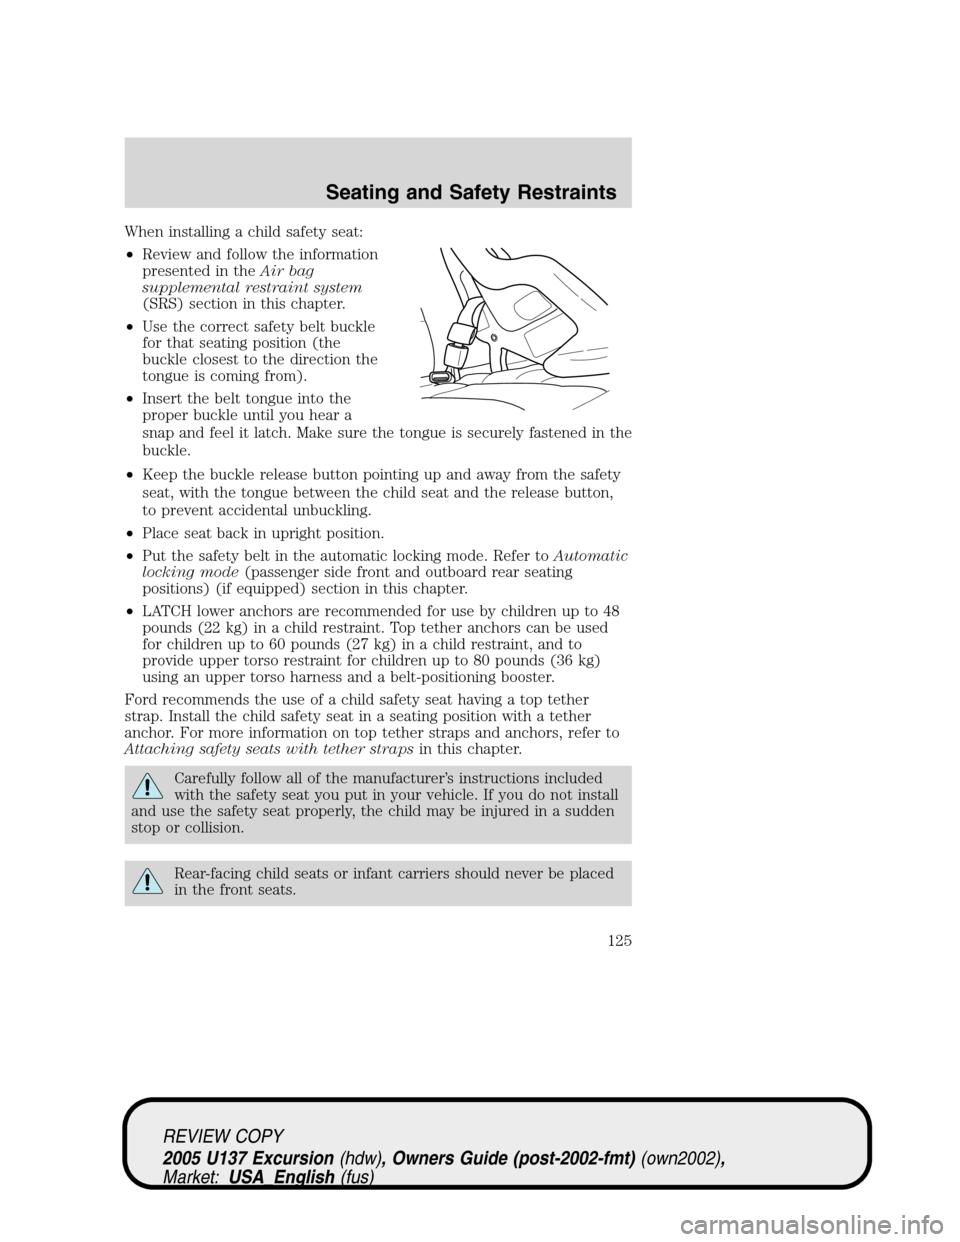
When installing a child safety seat:
•Review and follow the information
presented in theAir bag
supplemental restraint system
(SRS) section in this chapter.
•Use the correct safety belt buckle
for that seating position (the
buckle closest to the direction the
tongue is coming from).
•Insert the belt tongue into the
proper buckle until you hear a
snap and feel it latch. Make sure the tongue is securely fastened in the
buckle.
•Keep the buckle release button pointing up and away from the safety
seat, with the tongue between the child seat and the release button,
to prevent accidental unbuckling.
•Place seat back in upright position.
•Put the safety belt in the automatic locking mode. Refer toAutomatic
locking mode(passenger side front and outboard rear seating
positions) (if equipped) section in this chapter.
•LATCH lower anchors are recommended for use by children up to 48
pounds (22 kg) in a child restraint. Top tether anchors can be used
for children up to 60 pounds (27 kg) in a child restraint, and to
provide upper torso restraint for children up to 80 pounds (36 kg)
using an upper torso harness and a belt-positioning booster.
Ford recommends the use of a child safety seat having a top tether
strap. Install the child safety seat in a seating position with a tether
anchor. For more information on top tether straps and anchors, refer to
Attaching safety seats with tether strapsin this chapter.
Carefully follow all of the manufacturer’s instructions included
with the safety seat you put in your vehicle. If you do not install
and use the safety seat properly, the child may be injured in a sudden
stop or collision.
Rear-facing child seats or infant carriers should never be placed
in the front seats.
REVIEW COPY
2005 U137 Excursion(hdw), Owners Guide (post-2002-fmt)(own2002),
Market:USA_English(fus)
Seating and Safety Restraints
125
Page 127 of 280
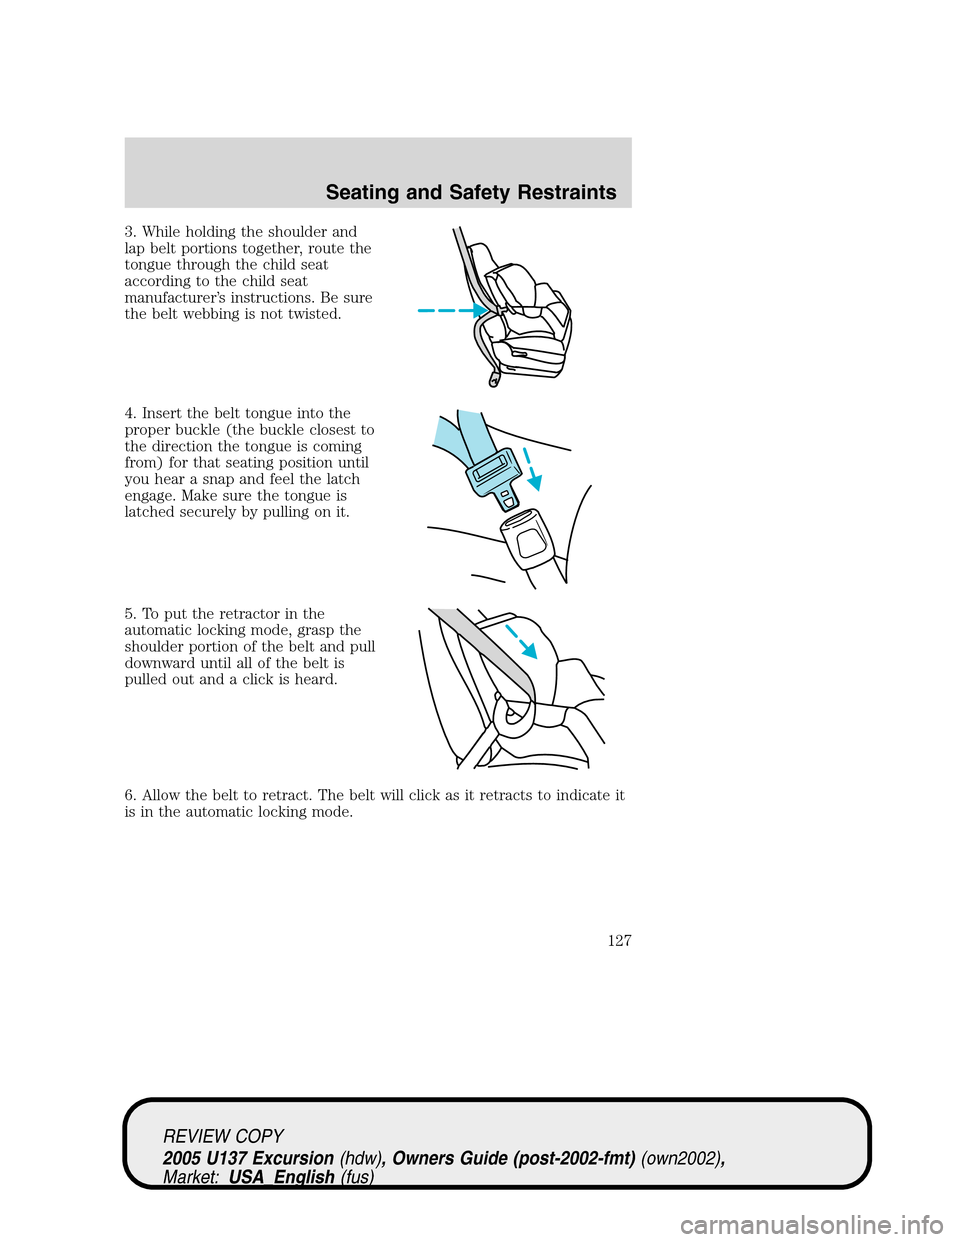
3. While holding the shoulder and
lap belt portions together, route the
tongue through the child seat
according to the child seat
manufacturer’s instructions. Be sure
the belt webbing is not twisted.
4. Insert the belt tongue into the
proper buckle (the buckle closest to
the direction the tongue is coming
from) for that seating position until
you hear a snap and feel the latch
engage. Make sure the tongue is
latched securely by pulling on it.
5. To put the retractor in the
automatic locking mode, grasp the
shoulder portion of the belt and pull
downward until all of the belt is
pulled out and a click is heard.
6. Allow the belt to retract. The belt will click as it retracts to indicate it
is in the automatic locking mode.
REVIEW COPY
2005 U137 Excursion(hdw), Owners Guide (post-2002-fmt)(own2002),
Market:USA_English(fus)
Seating and Safety Restraints
127
Page 128 of 280
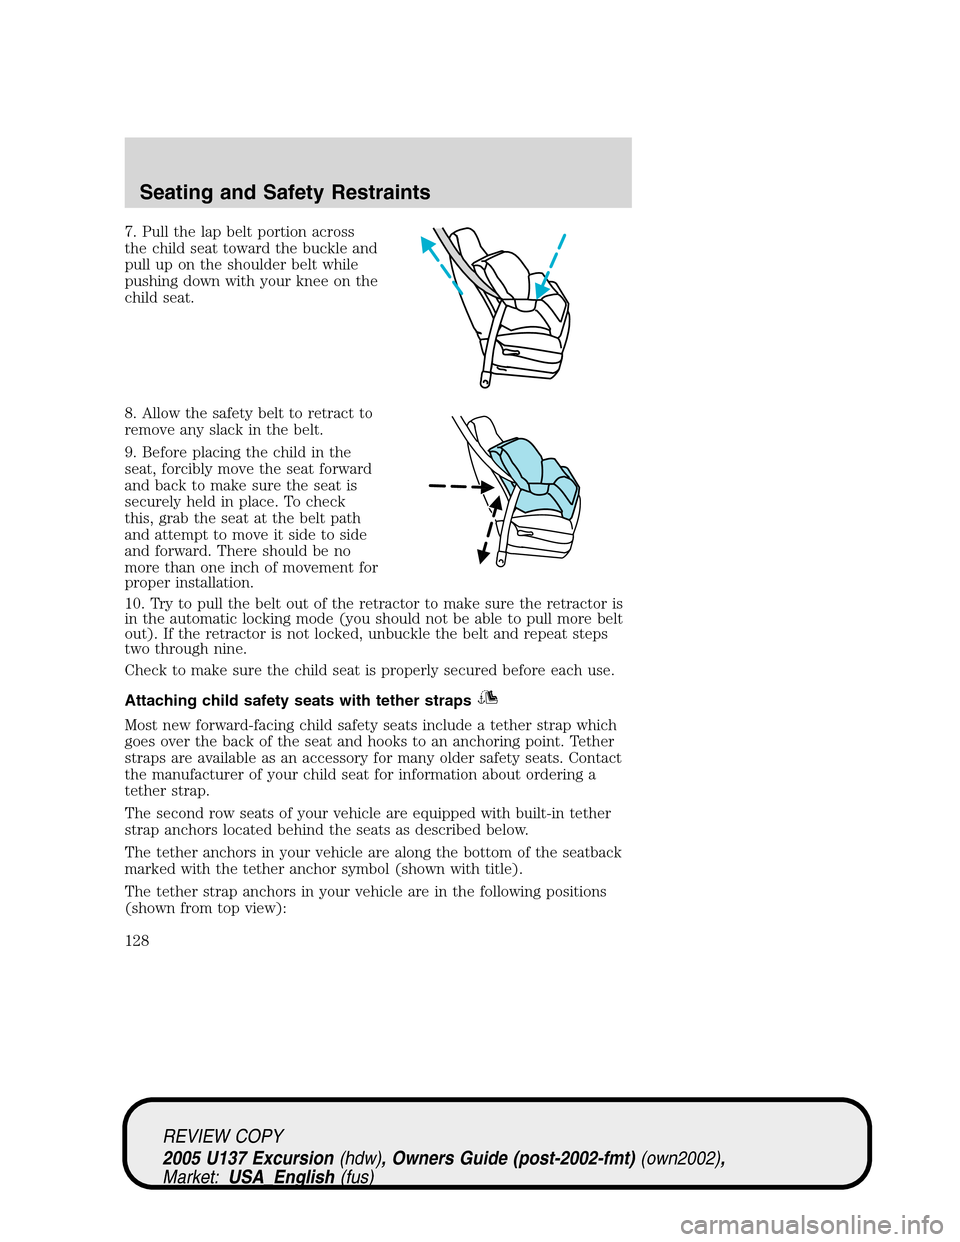
7. Pull the lap belt portion across
the child seat toward the buckle and
pull up on the shoulder belt while
pushing down with your knee on the
child seat.
8. Allow the safety belt to retract to
remove any slack in the belt.
9. Before placing the child in the
seat, forcibly move the seat forward
and back to make sure the seat is
securely held in place. To check
this, grab the seat at the belt path
and attempt to move it side to side
and forward. There should be no
more than one inch of movement for
proper installation.
10. Try to pull the belt out of the retractor to make sure the retractor is
in the automatic locking mode (you should not be able to pull more belt
out). If the retractor is not locked, unbuckle the belt and repeat steps
two through nine.
Check to make sure the child seat is properly secured before each use.
Attaching child safety seats with tether straps
Most new forward-facing child safety seats include a tether strap which
goes over the back of the seat and hooks to an anchoring point. Tether
straps are available as an accessory for many older safety seats. Contact
the manufacturer of your child seat for information about ordering a
tether strap.
The second row seats of your vehicle are equipped with built-in tether
strap anchors located behind the seats as described below.
The tether anchors in your vehicle are along the bottom of the seatback
marked with the tether anchor symbol (shown with title).
The tether strap anchors in your vehicle are in the following positions
(shown from top view):
REVIEW COPY
2005 U137 Excursion(hdw), Owners Guide (post-2002-fmt)(own2002),
Market:USA_English(fus)
Seating and Safety Restraints
128
Page 131 of 280
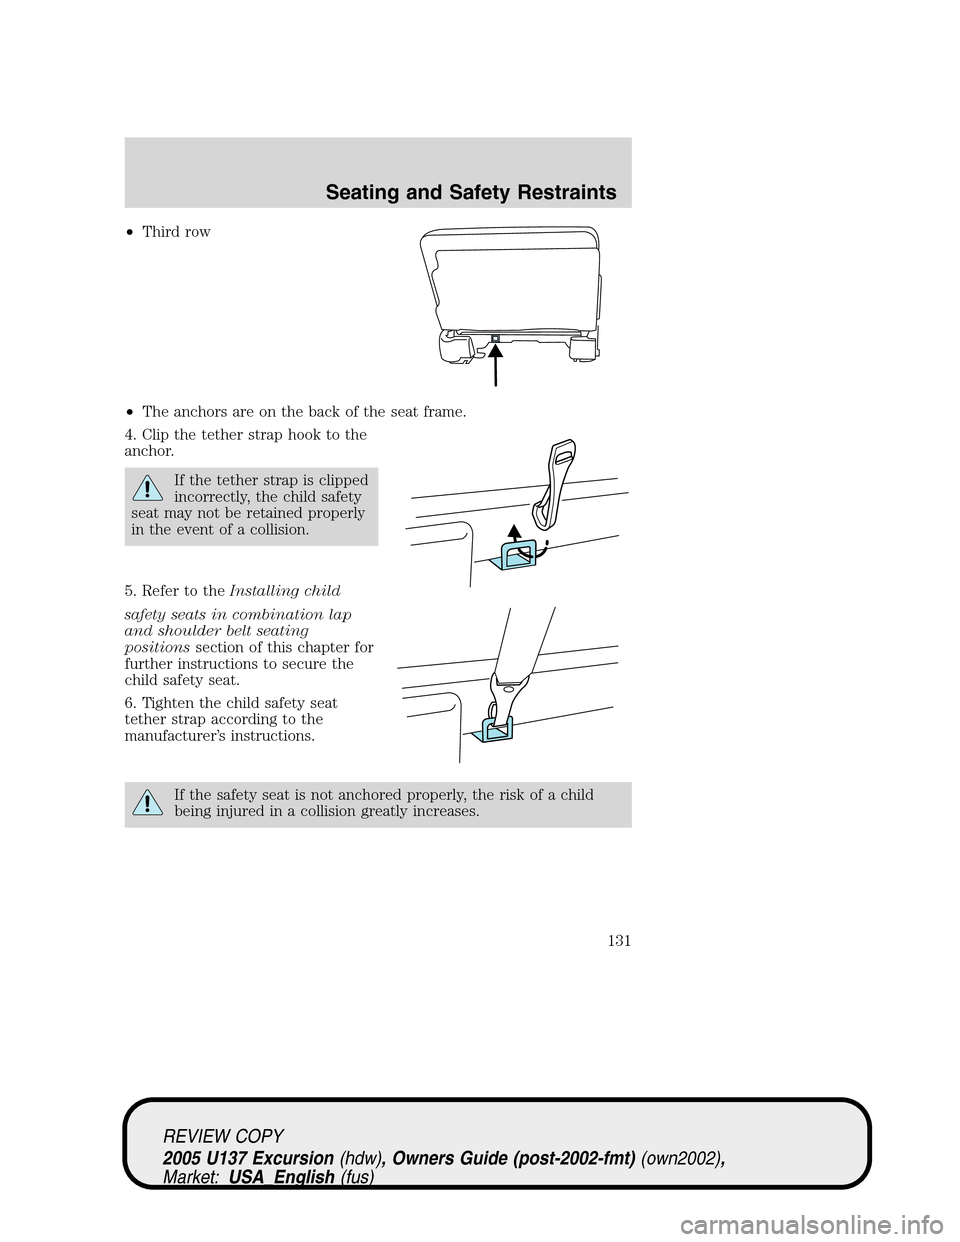
•Third row
•The anchors are on the back of the seat frame.
4. Clip the tether strap hook to the
anchor.
If the tether strap is clipped
incorrectly, the child safety
seat may not be retained properly
in the event of a collision.
5. Refer to theInstalling child
safety seats in combination lap
and shoulder belt seating
positionssection of this chapter for
further instructions to secure the
child safety seat.
6. Tighten the child safety seat
tether strap according to the
manufacturer’s instructions.
If the safety seat is not anchored properly, the risk of a child
being injured in a collision greatly increases.
REVIEW COPY
2005 U137 Excursion(hdw), Owners Guide (post-2002-fmt)(own2002),
Market:USA_English(fus)
Seating and Safety Restraints
131
Page 145 of 280
To lessen the risk of personal injury, do not put any part of your
body under the vehicle while changing a tire. Do not start the
engine when your vehicle is on the jack. The jack is only meant for
changing the tire.
•Never use the front or rear differential as a jacking point.
9. Remove the lug nuts with the lug wrench.
10. Replace the flat tire with the spare tire, making sure the valve stem
is facing outward. Reinstall the lug nuts until the wheel is snug against
the hub. Do not fully tighten the lug nuts until the wheel has been
lowered.
11. Lower the wheel by turning the jack handle counterclockwise.
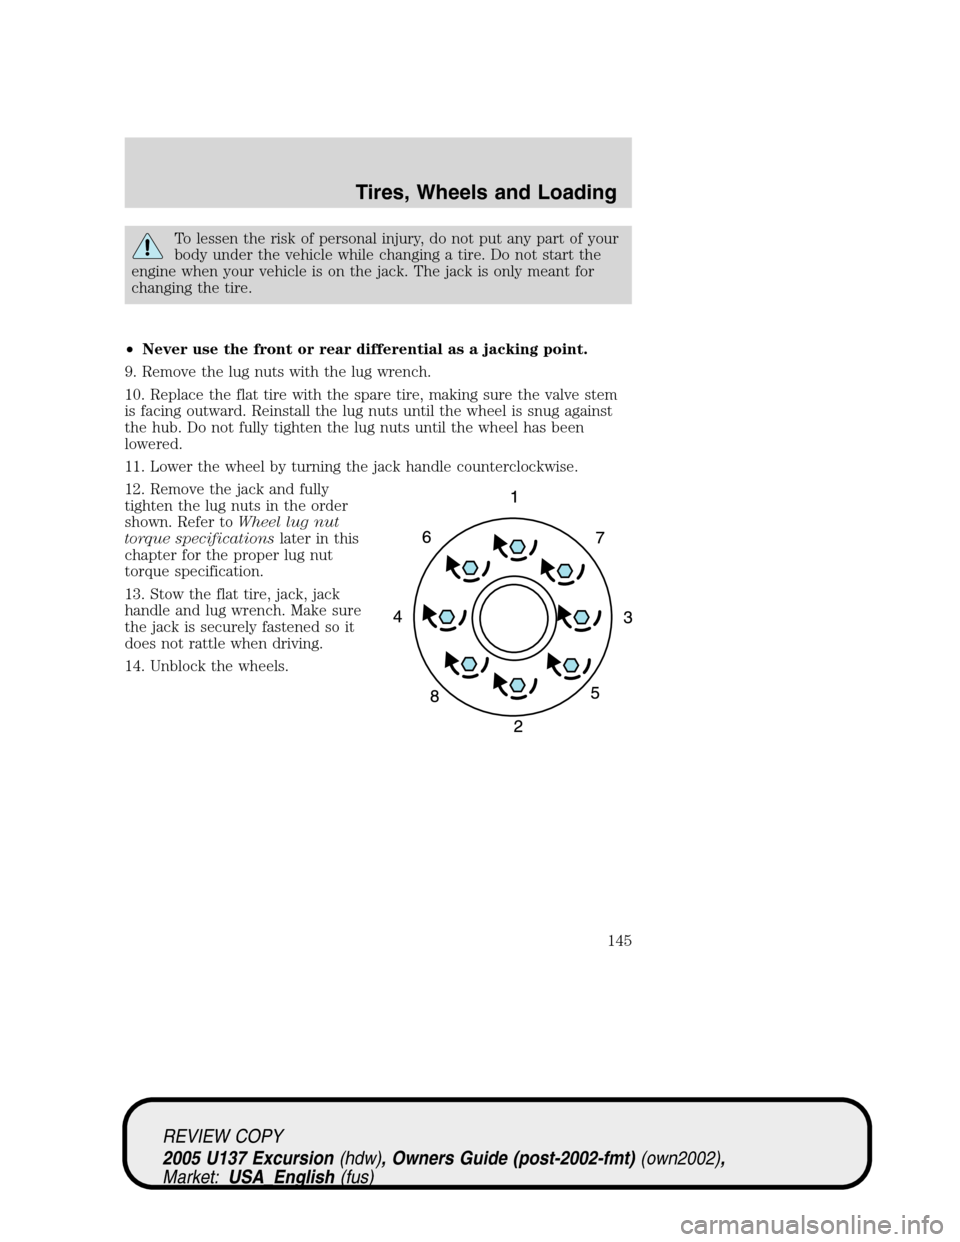
12. Remove the jack and fully
tighten the lug nuts in the order
shown. Refer toWheel lug nut
torque specificationslater in this
chapter for the proper lug nut
torque specification.
13. Stow the flat tire, jack, jack
handle and lug wrench. Make sure
the jack is securely fastened so it
does not rattle when driving.
14. Unblock the wheels.
REVIEW COPY
2005 U137 Excursion(hdw), Owners Guide (post-2002-fmt)(own2002),
Market:USA_English(fus)
Tires, Wheels and Loading
145
Page 156 of 280
SNOW TIRES AND CHAINS
Snow tires must be the same size and grade as the tires you
currently have on your vehicle.
The tires on your vehicle have all weather treads to provide traction in
rain and snow. However, in some climates, you may need to use snow
tires and chains. If you need to use chains, it is recommended that steel
wheels (of the same size and specifications) be used, as chains may chip
aluminum wheels.
Follow these guidelines when using snow tires and chains:
•Use only SAE Class S chains.
•Install chains securely, verifying that the chains do not touch any
wiring, brake lines or fuel lines.
•Drive cautiously. If you hear the chains rub or bang against your
vehicle, stop and re-tighten the chains. If this does not work, remove
the chains to prevent damage to your vehicle.
•If possible, avoid fully loading your vehicle.
•Remove the tire chains when they are no longer needed. Do not use
tire chains on dry roads.
•The suspension insulation and bumpers will help prevent vehicle
damage. Do not remove these components from your vehicle when
using snow tires and chains.
VEHICLE LOADING–WITH AND WITHOUT A TRAILER
This section will guide you in the proper loading of your vehicle and/or
trailer, to keep your loaded vehicle weight within its design rating
capability, with or without a trailer. Properly loading your vehicle will
provide maximum return of vehicle design performance. Before loading
your vehicle, familiarize yourself with the following terms for determining
your vehicle’s weight ratings, with or without a trailer, from the vehicle’s
Safety Certification Label and Tire Label:
Base Curb Weight–is the weight of the vehicle including a full tank of
fuel and all standard equipment. It does not include passengers, cargo, or
optional equipment.
REVIEW COPY
2005 U137 Excursion(hdw), Owners Guide (post-2002-fmt)(own2002),
Market:USA_English(fus)
Tires, Wheels and Loading
156
Page 174 of 280
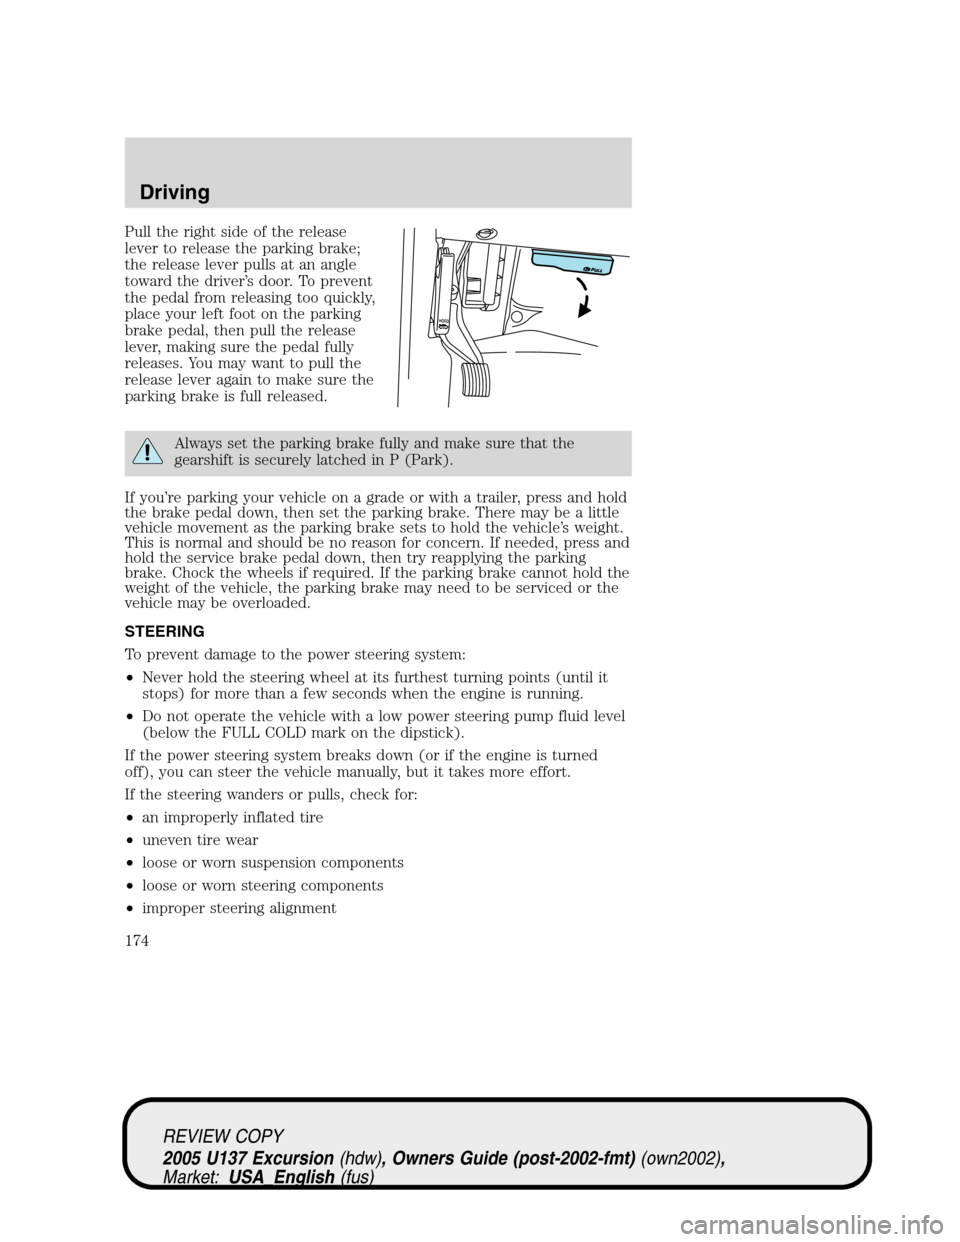
Pull the right side of the release
lever to release the parking brake;
the release lever pulls at an angle
toward the driver’s door. To prevent
the pedal from releasing too quickly,
place your left foot on the parking
brake pedal, then pull the release
lever, making sure the pedal fully
releases. You may want to pull the
release lever again to make sure the
parking brake is full released.
Always set the parking brake fully and make sure that the
gearshift is securely latched in P (Park).
If you’re parking your vehicle on a grade or with a trailer, press and hold
the brake pedal down, then set the parking brake. There may be a little
vehicle movement as the parking brake sets to hold the vehicle’s weight.
This is normal and should be no reason for concern. If needed, press and
hold the service brake pedal down, then try reapplying the parking
brake. Chock the wheels if required. If the parking brake cannot hold the
weight of the vehicle, the parking brake may need to be serviced or the
vehicle may be overloaded.
STEERING
To prevent damage to the power steering system:
•Never hold the steering wheel at its furthest turning points (until it
stops) for more than a few seconds when the engine is running.
•Do not operate the vehicle with a low power steering pump fluid level
(below the FULL COLD mark on the dipstick).
If the power steering system breaks down (or if the engine is turned
off), you can steer the vehicle manually, but it takes more effort.
If the steering wanders or pulls, check for:
•an improperly inflated tire
•uneven tire wear
•loose or worn suspension components
•loose or worn steering components
•improper steering alignment
HOOD
REVIEW COPY
2005 U137 Excursion(hdw), Owners Guide (post-2002-fmt)(own2002),
Market:USA_English(fus)
Driving
174
Page 177 of 280
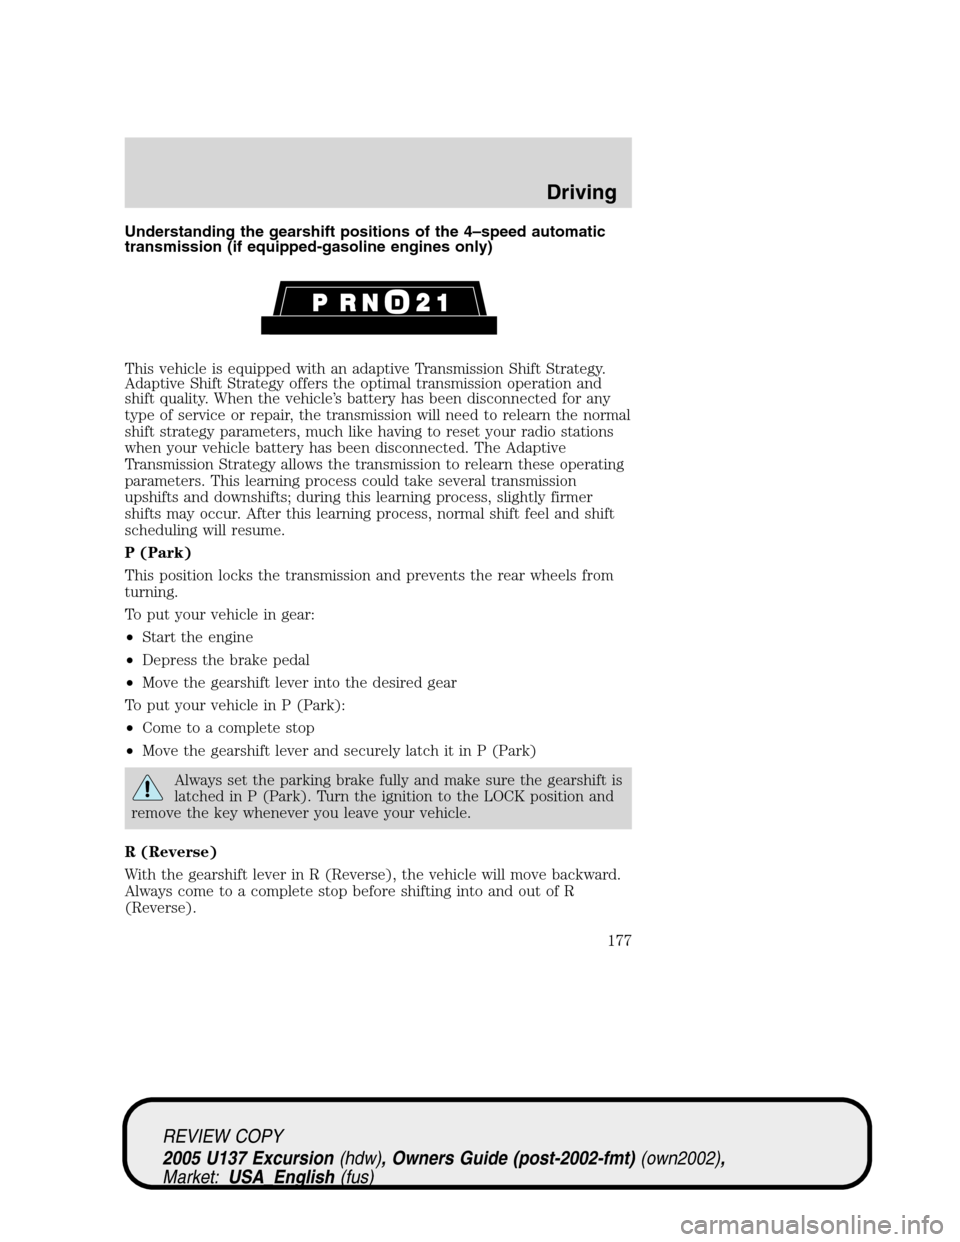
Understanding the gearshift positions of the 4–speed automatic
transmission (if equipped-gasoline engines only)
This vehicle is equipped with an adaptive Transmission Shift Strategy.
Adaptive Shift Strategy offers the optimal transmission operation and
shift quality. When the vehicle’s battery has been disconnected for any
type of service or repair, the transmission will need to relearn the normal
shift strategy parameters, much like having to reset your radio stations
when your vehicle battery has been disconnected. The Adaptive
Transmission Strategy allows the transmission to relearn these operating
parameters. This learning process could take several transmission
upshifts and downshifts; during this learning process, slightly firmer
shifts may occur. After this learning process, normal shift feel and shift
scheduling will resume.
P (Park)
This position locks the transmission and prevents the rear wheels from
turning.
To put your vehicle in gear:
•Start the engine
•Depress the brake pedal
•Move the gearshift lever into the desired gear
To put your vehicle in P (Park):
•Come to a complete stop
•Move the gearshift lever and securely latch it in P (Park)
Always set the parking brake fully and make sure the gearshift is
latched in P (Park). Turn the ignition to the LOCK position and
remove the key whenever you leave your vehicle.
R (Reverse)
With the gearshift lever in R (Reverse), the vehicle will move backward.
Always come to a complete stop before shifting into and out of R
(Reverse).
REVIEW COPY
2005 U137 Excursion(hdw), Owners Guide (post-2002-fmt)(own2002),
Market:USA_English(fus)
Driving
177