door lock FORD EXPEDITION 1998 1.G Owners Manual
[x] Cancel search | Manufacturer: FORD, Model Year: 1998, Model line: EXPEDITION, Model: FORD EXPEDITION 1998 1.GPages: 216, PDF Size: 1.51 MB
Page 13 of 216
Key-in-ignition warning chime
Sounds when the key is left in the
ignition in the OFF/LOCK or ACC
position and either front door is
opened.
Headlamps on warning chime
Sounds when the headlamps or
parking lamps are on, the ignition
is off (and the key is not in the
ignition) and either front door is
opened.
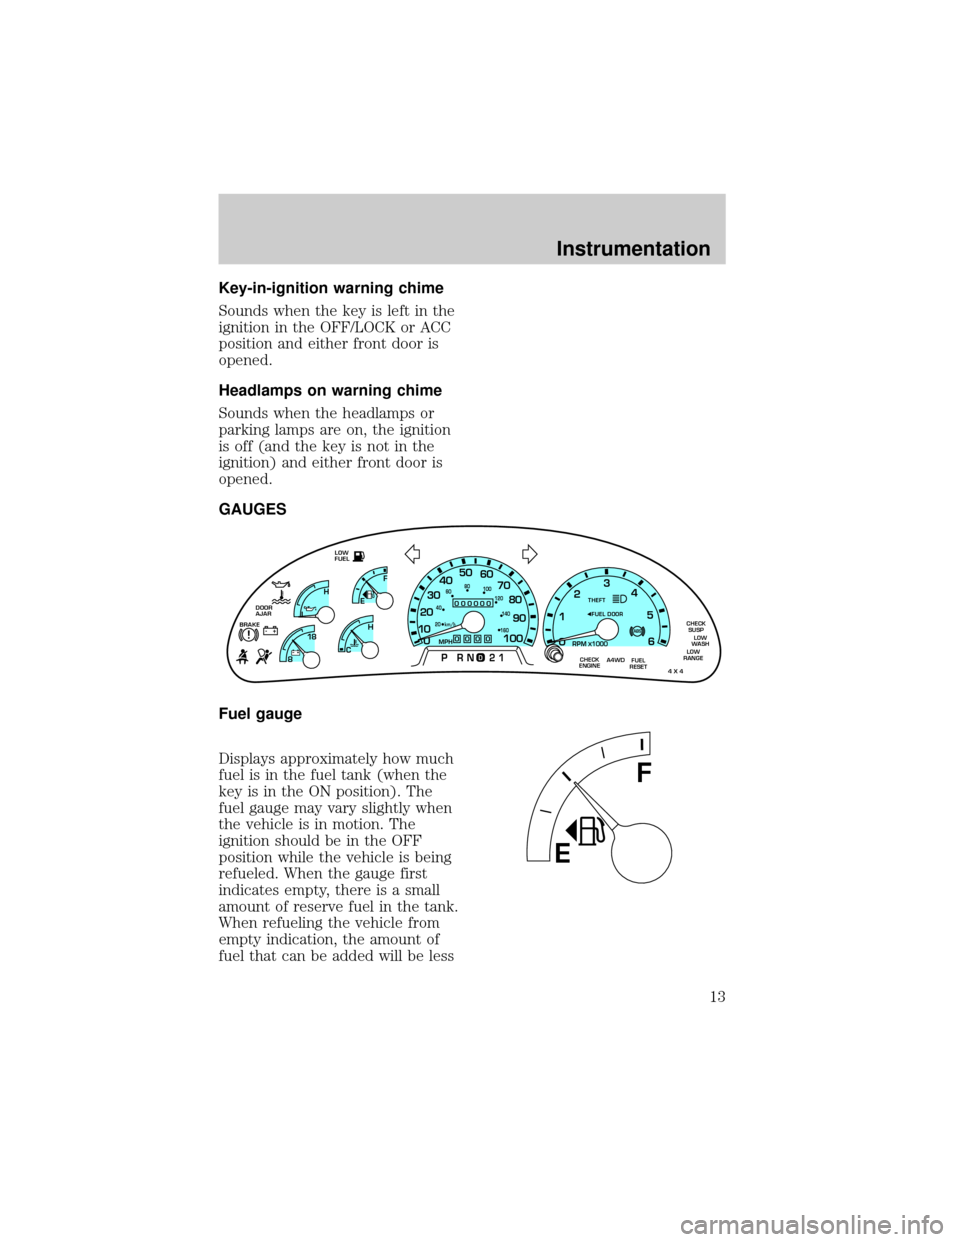
GAUGES
Fuel gauge
Displays approximately how much
fuel is in the fuel tank (when the
key is in the ON position). The
fuel gauge may vary slightly when
the vehicle is in motion. The
ignition should be in the OFF
position while the vehicle is being
refueled. When the gauge first
indicates empty, there is a small
amount of reserve fuel in the tank.
When refueling the vehicle from
empty indication, the amount of
fuel that can be added will be less
FUEL
RESET CHECK
ENGINELOW
RANGE
4 X 4
ABSBRAKE!+ -
THEFT
LOW
FUEL
DOOR
AJARLEF
H0
0000
RPM1000X
00000
MPH
20km/h 406080
100
120
140
160
0
0 123
5
6 4
PRN 21
1020304050
60
70
80
90
100
8C 18
H
D
CHECK
SUSP
LOW
WASH
A4WDFUEL DOOR
EF
Instrumentation
13
Page 48 of 216
Window lock
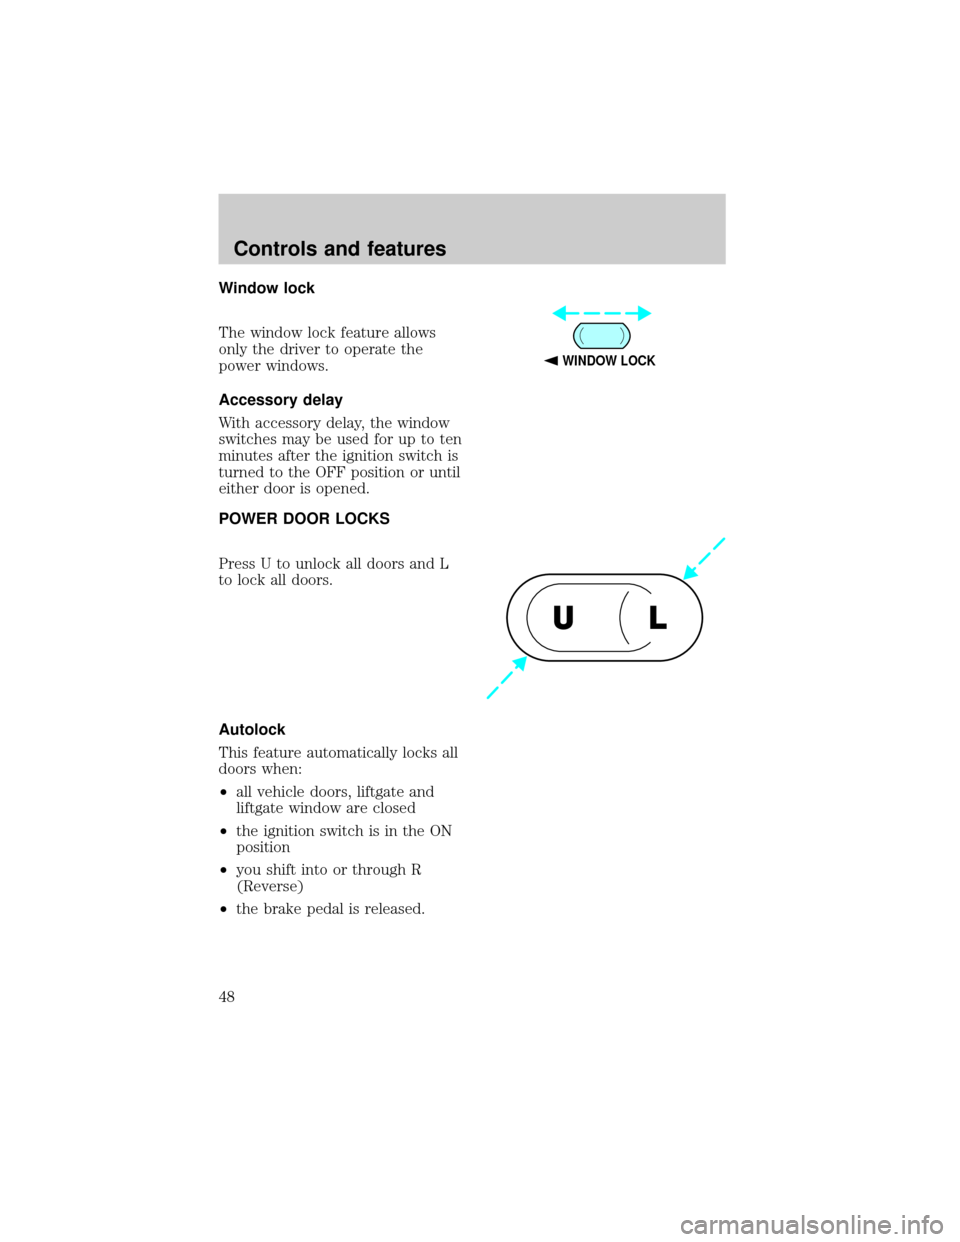
The window lock feature allows
only the driver to operate the
power windows.
Accessory delay
With accessory delay, the window
switches may be used for up to ten
minutes after the ignition switch is
turned to the OFF position or until
either door is opened.
POWER DOOR LOCKS
Press U to unlock all doors and L
to lock all doors.
Autolock
This feature automatically locks all
doors when:
²all vehicle doors, liftgate and
liftgate window are closed
²the ignition switch is in the ON
position
²you shift into or through R
(Reverse)
²the brake pedal is released.
WINDOW LOCK
UL
Controls and features
48
Page 49 of 216

Relock
The autolock feature repeats when:
²any door is opened and closed
²the brake pedal is released.
Deactivating/activating the
autolock feature
Before following the procedure,
make sure that the ignition is OFF
and all vehicle doors and the
liftgate window are closed.
You must complete steps 1-5
within 30 seconds or the
procedure will have to be
repeated. If the procedure needs
to be repeated, you must wait 30
seconds.
1. Turn the ignition key to ON.
2. Press the power door unlock
control three times.
3. Turn the ignition key from ON
to OFF.
4. Press the power door unlock
control three times.
5. Turn the ignition back to ON.
The horn will chirp.
6. Press the unlock control, then
press the lock control. The horn
will chirp once if autolock was
deactivated or twice (one short
and one long chirp) if autolock was
activated.
7. Turn the ignition to OFF. The
horn will chirp once to confirm the
procedure is complete.
Controls and features
49
Page 50 of 216
CHILDPROOF DOOR LOCKS
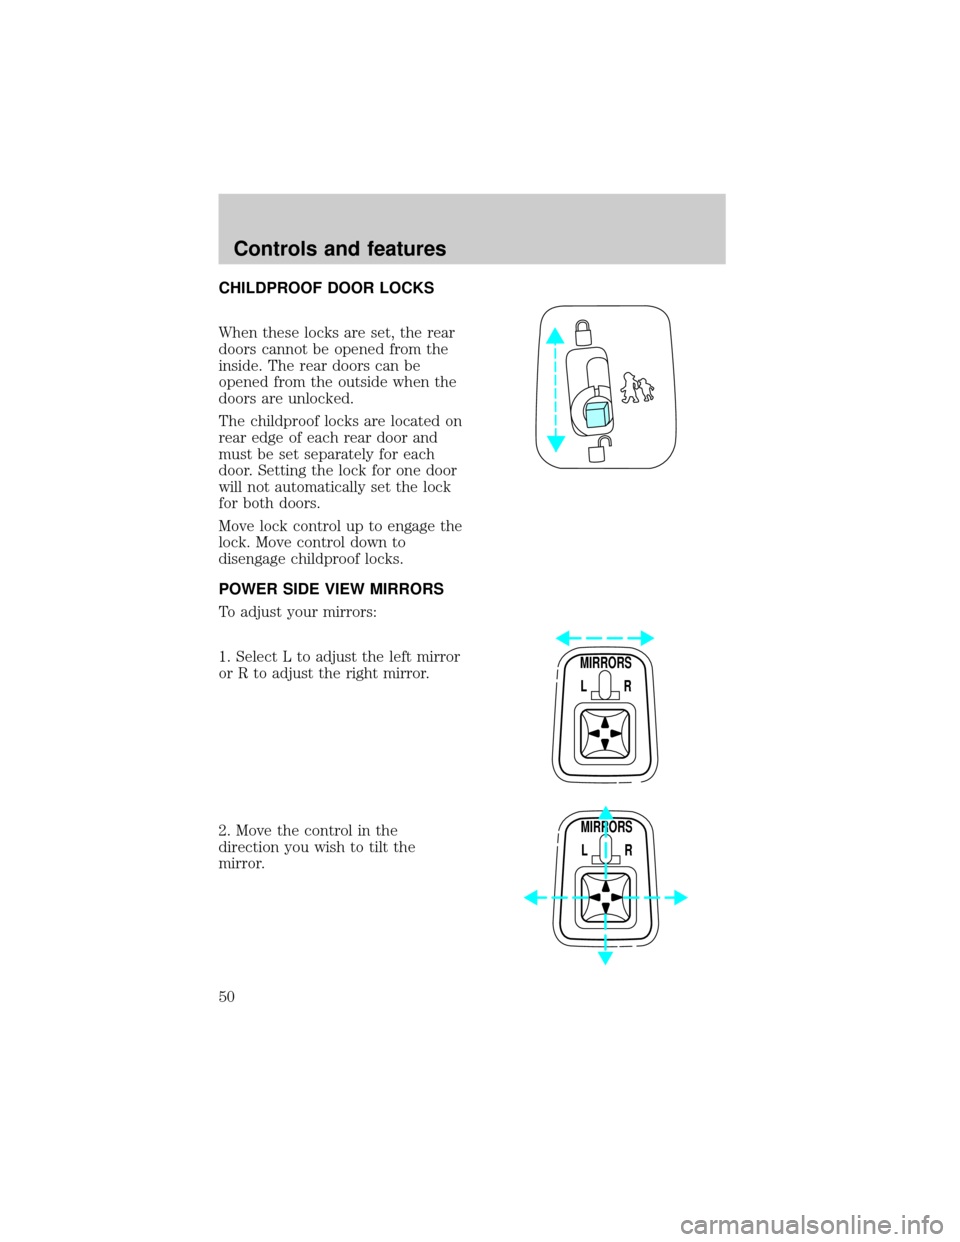
When these locks are set, the rear
doors cannot be opened from the
inside. The rear doors can be
opened from the outside when the
doors are unlocked.
The childproof locks are located on
rear edge of each rear door and
must be set separately for each
door. Setting the lock for one door
will not automatically set the lock
for both doors.
Move lock control up to engage the
lock. Move control down to
disengage childproof locks.
POWER SIDE VIEW MIRRORS
To adjust your mirrors:
1. Select L to adjust the left mirror
or R to adjust the right mirror.
2. Move the control in the
direction you wish to tilt the
mirror.
MIRRORS
L R
MIRRORS
L R
Controls and features
50
Page 53 of 216

POSITIVE RETENTION FLOOR
MAT (IF EQUIPPED)
Position the floor mat so that the
eyelet is over the pointed end of
the retention post and rotate
forward to lock in. Make sure that
the mat does not interfere with the
operation of the accelerator or the
brake pedal. To remove the floor
mat, reverse the installation
procedure.
LIFTGATE
To open the rear window, turn the
liftgate handle to the right.
To open the liftgate, turn the
liftgate handle to the left.
²Do not open the liftgate or
liftgate glass in a garage or
other enclosed area with a low
ceiling. If the liftgate glass is
raised and the liftgate is also
opened, both liftgate and glass
could be damaged against a low
ceiling.
²Do not leave the liftgate or
liftgate glass open while driving.
Doing so could cause serious
damage to the liftgate and its
components as well as allowing
carbon monoxide to enter the
vehicle.
DOORGLASS
Controls and features
53
Page 54 of 216
Make sure that the liftgate
door and/or window are
closed to prevent exhaust fumes
from being drawn into the
vehicle. This will also prevent
passengers and cargo from falling
out. If you must drive with the
liftgate door or window open,
keep the vents open so outside
air comes into the vehicle.
SECURILOCKYANTI-THEFT
SYSTEM
Your vehicle is equipped with a
coded-key anti-theft system. Only
the correct key will be able to start
your vehicle. If your keys are lost
or stolen, you must take your
vehicle to a Ford/Lincoln-Mercury
dealership for re-programming.
Programming additional keys
If you need additional keys
electronically coded for your
vehicle, spares can be purchased
(a maximum of 16 keys can be
programmed). To program a new
key, perform the following
procedure:
1. With the coded key in the
ignition, turn the ignition from ON
to OFF.
2. Within 15 seconds of turning
ignition off, insert the new coded
key into the ignition and turn it
from OFF to ON or START. If
successful, the THEFT indicator
Controls and features
54
Page 55 of 216

light will illuminate for two
seconds. Repeat procedure for all
new keys.
If key coding fails, the THEFT
indicator light will flash.
Coding failure can be caused by
any of the following:
²The new key was not inserted
into the ignition within 15
seconds.
²16 keys have already been
programmed.
²The new key does not have an
electronic code.
REMOTE ENTRY SYSTEM
The remote entry system allows
you to lock or unlock all vehicle
doors without a key.
The remote entry features only
operate with the ignition in the
OFF position.
Unlocking the doors
Press this control to unlock the
driver door. The interior lamps and
running board lamps (if equipped)
will illuminate.
Press the control a second time
within five seconds to unlock all
doors.
Controls and features
55
Page 56 of 216
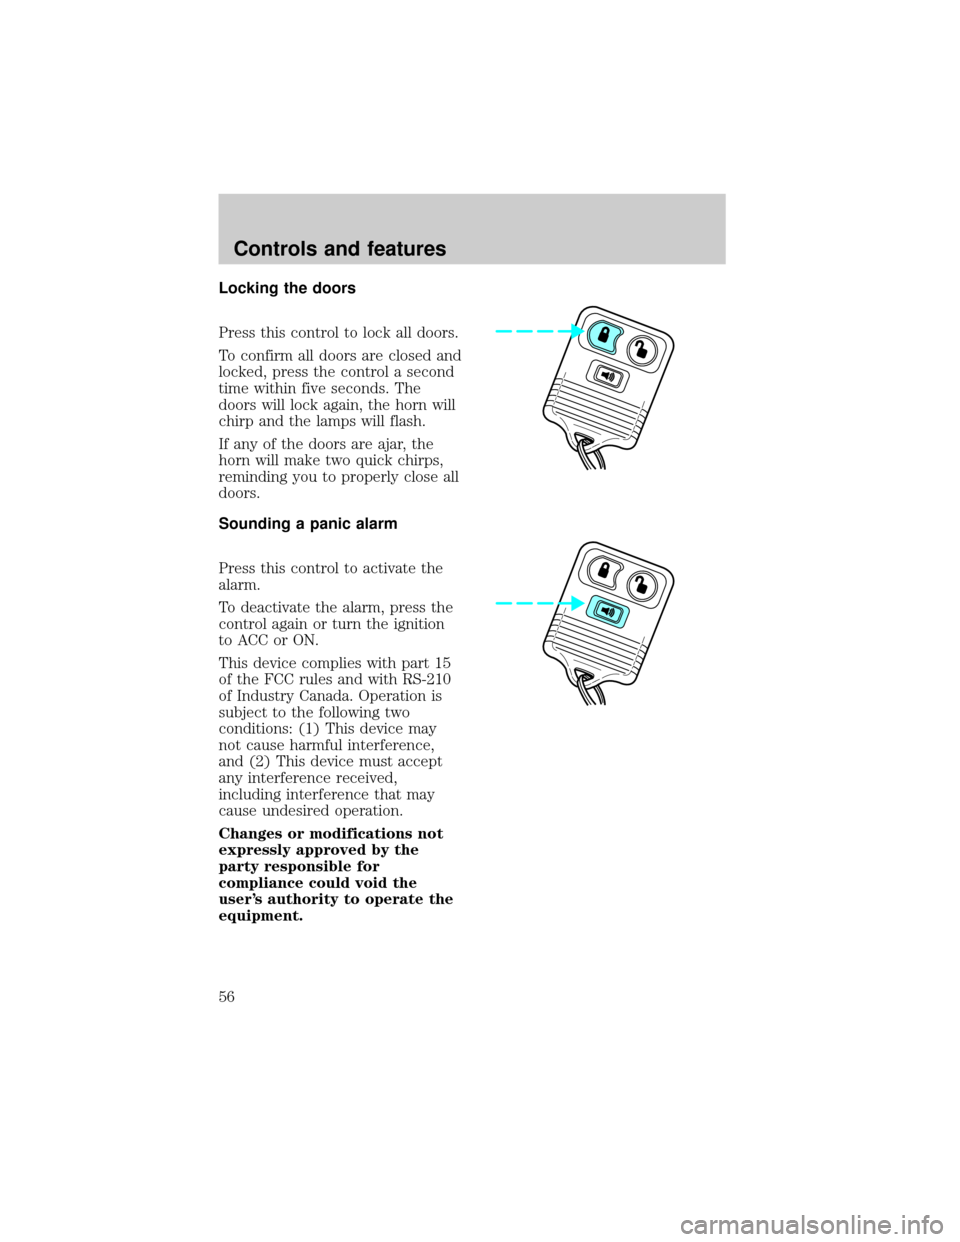
Locking the doors
Press this control to lock all doors.
To confirm all doors are closed and
locked, press the control a second
time within five seconds. The
doors will lock again, the horn will
chirp and the lamps will flash.
If any of the doors are ajar, the
horn will make two quick chirps,
reminding you to properly close all
doors.
Sounding a panic alarm
Press this control to activate the
alarm.
To deactivate the alarm, press the
control again or turn the ignition
to ACC or ON.
This device complies with part 15
of the FCC rules and with RS-210
of Industry Canada. Operation is
subject to the following two
conditions: (1) This device may
not cause harmful interference,
and (2) This device must accept
any interference received,
including interference that may
cause undesired operation.
Changes or modifications not
expressly approved by the
party responsible for
compliance could void the
user's authority to operate the
equipment.
Controls and features
56
Page 58 of 216

Replacing lost transmitters
Take all your vehicle's transmitters
to your dealer for reprogramming
if:
²a transmitter is lost or
²you want to purchase additional
transmitters (up to four may be
programmed).
To reprogram the transmitters,
place the key in the ignition and
switch from OFF to ON eight times
in rapid succession within 10
seconds. After doors lock/unlock,
press any button on all
transmitters (up to four). When
completed, switch the ignition to
OFF.
All transmitters must be
programmed at the same time.
Illuminated entry
The interior lamps and the running
board lights illuminate when the
remote entry system is used to
unlock the door(s) or sound the
personal alarm.
The system automatically turns off
after 25 seconds or when the
ignition is turned to the RUN
position. The dome lamp switch (if
equipped) mustnotbe set to the
OFF position for the illuminated
entry system to operate.
The inside lights will not turn off
if:
²they have been turned on with
the dimmer control or
Controls and features
58
Page 131 of 216
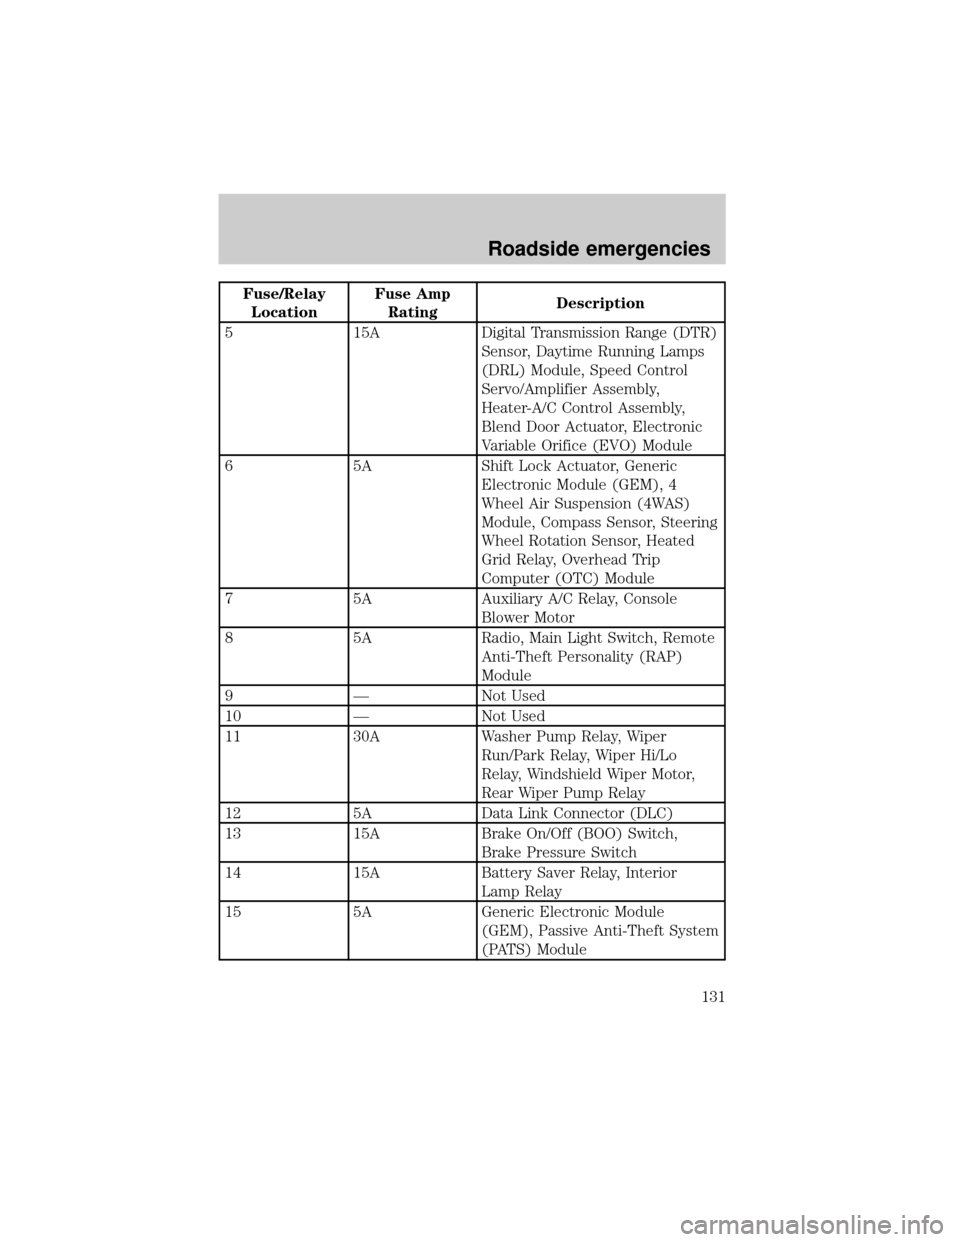
Fuse/Relay
LocationFuse Amp
RatingDescription
5 15A Digital Transmission Range (DTR)
Sensor, Daytime Running Lamps
(DRL) Module, Speed Control
Servo/Amplifier Assembly,
Heater-A/C Control Assembly,
Blend Door Actuator, Electronic
Variable Orifice (EVO) Module
6 5A Shift Lock Actuator, Generic
Electronic Module (GEM), 4
Wheel Air Suspension (4WAS)
Module, Compass Sensor, Steering
Wheel Rotation Sensor, Heated
Grid Relay, Overhead Trip
Computer (OTC) Module
7 5A Auxiliary A/C Relay, Console
Blower Motor
8 5A Radio, Main Light Switch, Remote
Anti-Theft Personality (RAP)
Module
9 Ð Not Used
10 Ð Not Used
11 30A Washer Pump Relay, Wiper
Run/Park Relay, Wiper Hi/Lo
Relay, Windshield Wiper Motor,
Rear Wiper Pump Relay
12 5A Data Link Connector (DLC)
13 15A Brake On/Off (BOO) Switch,
Brake Pressure Switch
14 15A Battery Saver Relay, Interior
Lamp Relay
15 5A Generic Electronic Module
(GEM), Passive Anti-Theft System
(PATS) Module
Roadside emergencies
131