check engine FORD EXPEDITION 1999 1.G User Guide
[x] Cancel search | Manufacturer: FORD, Model Year: 1999, Model line: EXPEDITION, Model: FORD EXPEDITION 1999 1.GPages: 216, PDF Size: 1.8 MB
Page 118 of 216
Once through water, always try the brakes. Wet brakes do not stop the
vehicle as effectively as dry brakes. Drying can be improved by moving
your vehicle slowly while applying light pressure on the brake pedal.
After driving through mud, clean off residue stuck to rotating driveshafts,
halfshafts and tires. Excess mud stuck on tires and rotating driveshafts
causes an imbalance that could damage drive components.
If the transmission, transfer case or front axle are submerged in water,
their fluids should be checked and changed, if necessary.
Water intrusion into the transmission may damage the
transmission.
If the rear axle is submerged in water, the rear axle lubricant should be
checked and changed, if necessary. The rear axle is filled with a
synthetic lubricant and does not normally require a lubricant change for
the life of the vehicle. Rear axle lubricant quantities should not need to
be checked unless a leak is suspected.
Driving on hilly or sloping terrain
When driving on a hill, avoid driving crosswise or turning on steep
slopes. You could lose traction and slip sideways. Drive straight up,
straight down or avoid the hill completely. Know the conditions on the
other side of a hill before driving over the crest.
When climbing a steep hill, start in a lower gear rather than downshifting
to a lower gear from a higher gear once the ascent has started. This
reduces strain on the engine and the possibility of stalling.
When descending a steep hill, avoid sudden braking. Shift to a lower gear
when added engine braking is desired.
When speed control is on and you are driving uphill, your vehicle speed
may drop considerably, especially if you are carrying a heavy load.
If vehicle speed drops more than 16 km/h (10 mph), the speed control
will cancel automatically. Resume speed with accelerator pedal.
If speed control cancels after climbing the hill, reset speed by pressing
and holding the SET ACCEL button (to resume speeds over 50 km/h
(30 mph).
Automatic transmission may shift frequently while driving up steep
grades. Eliminate frequent shifting by shifting out of
(Overdrive) into
D (Drive).
Driving
118
Page 126 of 216

Driving while you tow
Do not drive faster than 88 km/h (55 mph) when towing a trailer.
Speed control may shut off if you are towing on long, steep grades.
When towing a trailer:
²Use a lower gear when towing up or down steep hills. This will
eliminate excessive downshifting and upshifting for optimum fuel
economy and transmission cooling.
²Anticipate stops and brake gradually.
Exceeding the GCWR rating may cause internal transmission
damage and void your warranty coverage.
Servicing after towing
If you tow a trailer for long distances, your vehicle will require more
frequent service intervals. Refer to your Scheduled Maintenance guide
for more information.
Towing behind another vehicle
Do not tow your vehicle behind another vehicle, such as an RV.
Your vehicle cannot be flat-towed with all wheels on the ground.
Trailer towing tips
²Practice turning, stopping and backing up in an area before starting on
a trip to get the feel of the vehicle trailer combination. When turning,
make wider turns so the trailer wheels will clear curbs and other
obstacles.
²Allow more distance for stopping with a trailer attached.
²The trailer tongue weight should be 10% of the loaded trailer weight.
²After you have traveled 80 km (50 miles), thoroughly check your
hitch, electrical connections and trailer wheel lug nuts.
²When stopped in traffic for long periods of time in hot weather, place
the gearshift in P (Park) and increase idle speed. This aids engine
cooling and air conditioner efficiency.
²Vehicles with trailers should not be parked on a grade. If you must
park on a grade, place wheel chocks under the trailer's wheels.
Driving
126
Page 128 of 216
HAZARD FLASHER
Use only in an emergency to warn traffic of vehicle breakdown,
approaching danger, etc. The hazard flashers can be operated when the
ignition is off.
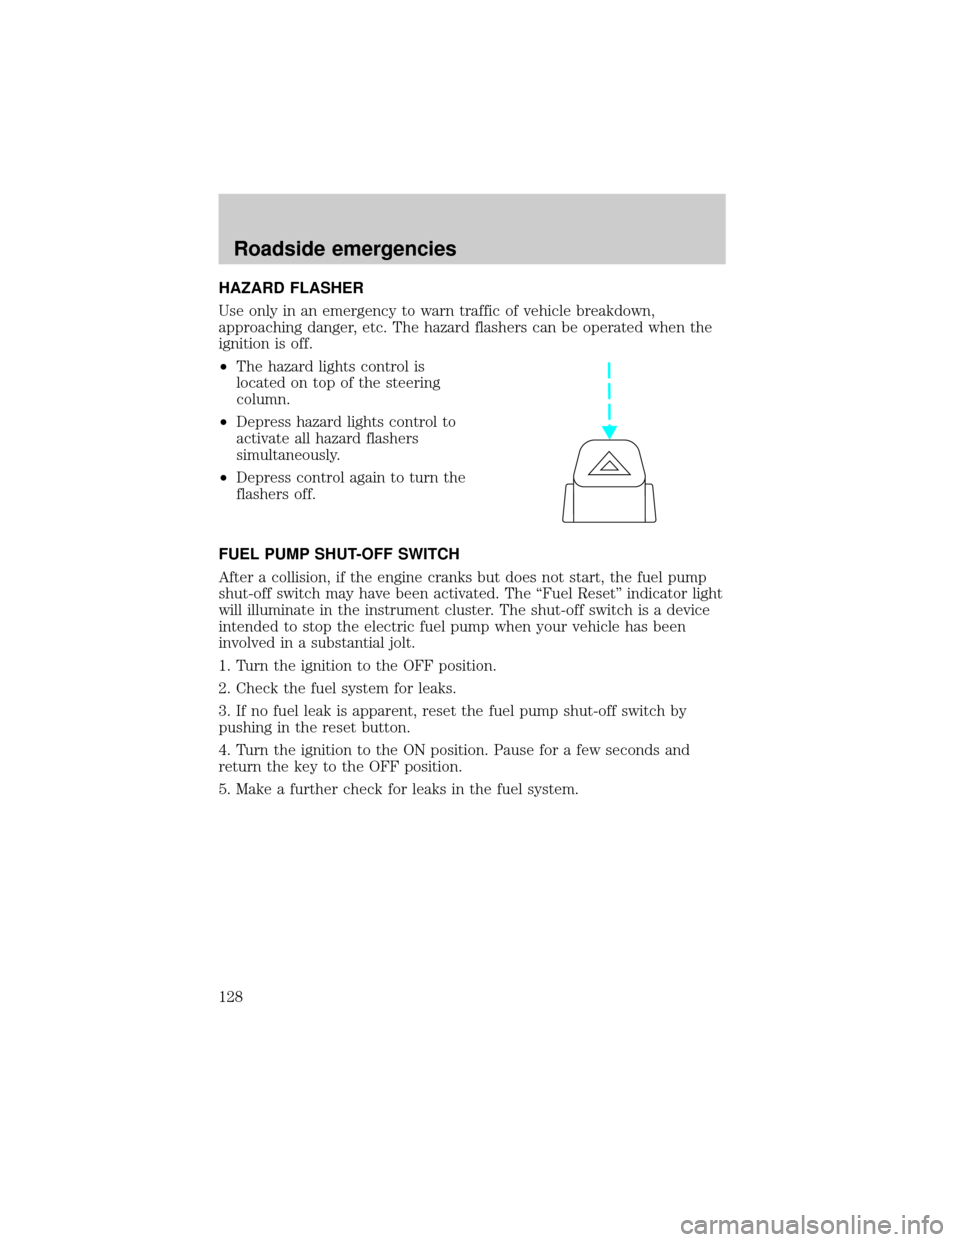
²The hazard lights control is
located on top of the steering
column.
²Depress hazard lights control to
activate all hazard flashers
simultaneously.
²Depress control again to turn the
flashers off.
FUEL PUMP SHUT-OFF SWITCH
After a collision, if the engine cranks but does not start, the fuel pump
shut-off switch may have been activated. The ªFuel Resetº indicator light
will illuminate in the instrument cluster. The shut-off switch is a device
intended to stop the electric fuel pump when your vehicle has been
involved in a substantial jolt.
1. Turn the ignition to the OFF position.
2. Check the fuel system for leaks.
3. If no fuel leak is apparent, reset the fuel pump shut-off switch by
pushing in the reset button.
4. Turn the ignition to the ON position. Pause for a few seconds and
return the key to the OFF position.
5. Make a further check for leaks in the fuel system.
Roadside emergencies
128
Page 142 of 216
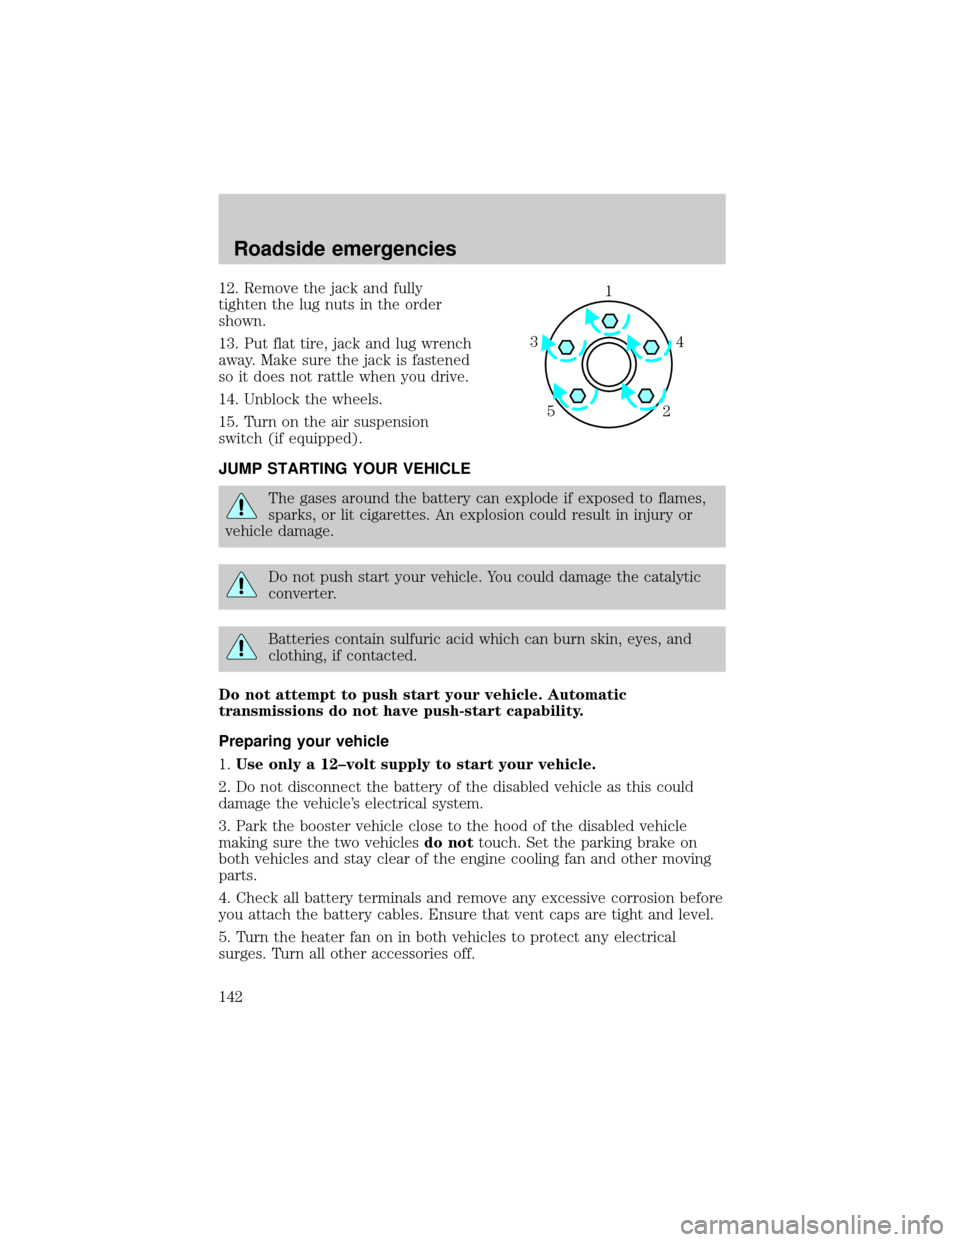
12. Remove the jack and fully
tighten the lug nuts in the order
shown.
13. Put flat tire, jack and lug wrench
away. Make sure the jack is fastened
so it does not rattle when you drive.
14. Unblock the wheels.
15. Turn on the air suspension
switch (if equipped).
JUMP STARTING YOUR VEHICLE
The gases around the battery can explode if exposed to flames,
sparks, or lit cigarettes. An explosion could result in injury or
vehicle damage.
Do not push start your vehicle. You could damage the catalytic
converter.
Batteries contain sulfuric acid which can burn skin, eyes, and
clothing, if contacted.
Do not attempt to push start your vehicle. Automatic
transmissions do not have push-start capability.
Preparing your vehicle
1.Use only a 12±volt supply to start your vehicle.
2. Do not disconnect the battery of the disabled vehicle as this could
damage the vehicle's electrical system.
3. Park the booster vehicle close to the hood of the disabled vehicle
making sure the two vehiclesdo nottouch. Set the parking brake on
both vehicles and stay clear of the engine cooling fan and other moving
parts.
4. Check all battery terminals and remove any excessive corrosion before
you attach the battery cables. Ensure that vent caps are tight and level.
5. Turn the heater fan on in both vehicles to protect any electrical
surges. Turn all other accessories off.
1
4 3
52
Roadside emergencies
142
Page 148 of 216

SERVICE RECOMMENDATIONS
To help you service your vehicle:
²We highlight do-it-yourself items in the engine compartment for easy
location.
²We provide a Scheduled Maintenance Guide which makes tracking
routine service easy.
If your vehicle requires professional service, your dealership can provide
necessary parts and service. Check your ªWarranty Guideº to find out
which parts and services are covered.
Use only recommended fuels, lubricants, fluids and service parts
conforming to specifications. Motorcraft parts are designed and built to
provide the best performance in your vehicle.
PRECAUTIONS WHEN SERVICING YOUR VEHICLE
Be especially careful when inspecting or servicing your vehicle.
²Do not work on a hot engine.
²When the engine is running, make sure that loose clothing, jewelry or
long hair does not get caught up in moving parts.
²Do not work on a vehicle with the engine running in an enclosed
space, unless you are sure you have enough ventilation.
²Keep all lit cigarettes, open flames and other lit material away from
the battery and all fuel related parts.
If you disconnect the battery, the engine must ªrelearnº its idle
conditions before your vehicle will drive properly, as explained inBattery
in this chapter.
Working with the engine off
1. Set the parking brake and ensure the gearshift is securely latched in P
(Park).
2. Turn off the engine and remove the key.
3. Block the wheels to prevent the vehicle from moving unexpectedly.
Working with the engine on
1. Set the parking brake and ensure the gearshift is securely latched in P
(Park).
2. Block the wheels to prevent the vehicle from moving unexpectedly.
Maintenance and care
148
Page 150 of 216
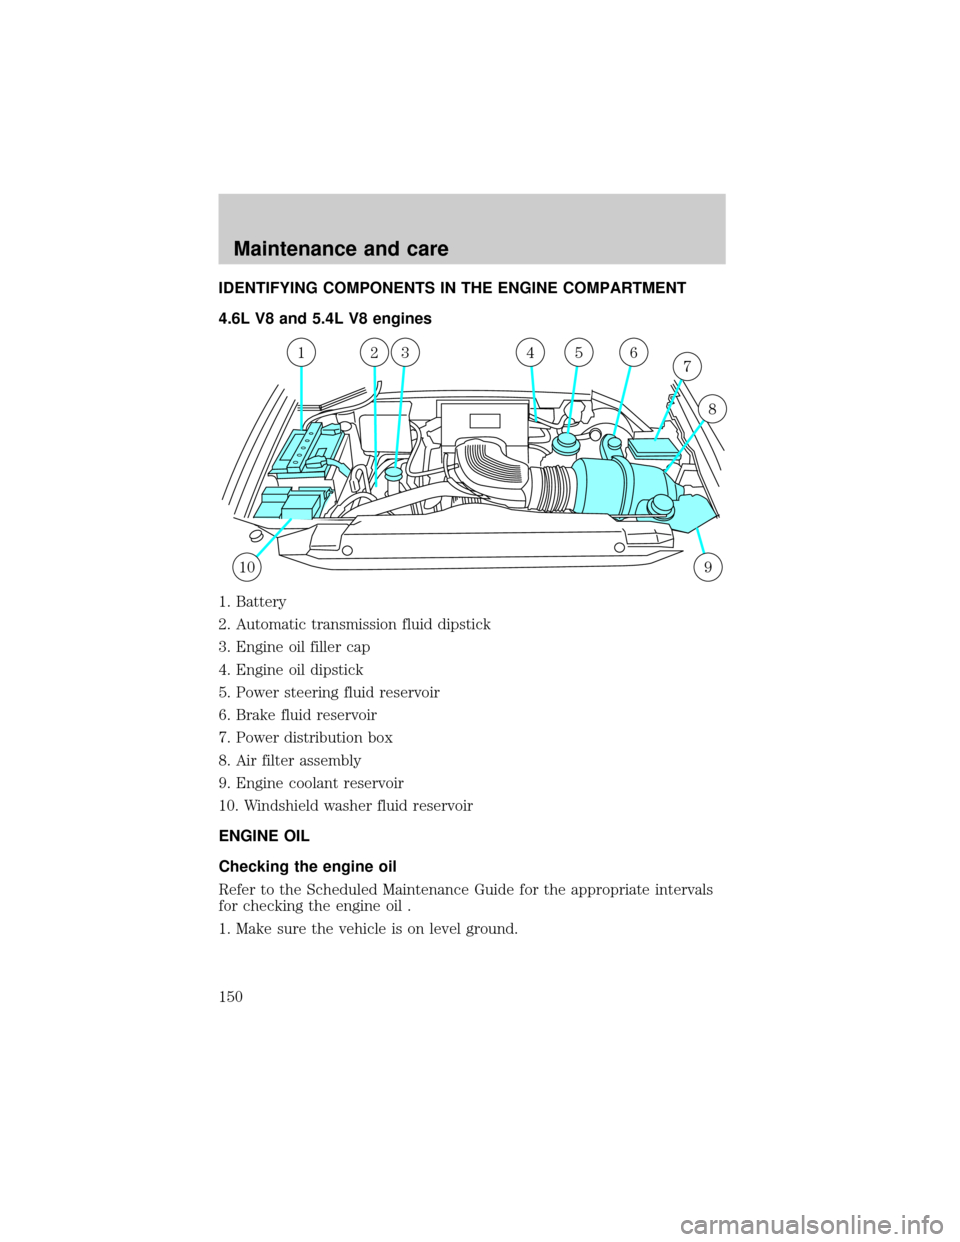
IDENTIFYING COMPONENTS IN THE ENGINE COMPARTMENT
4.6L V8 and 5.4L V8 engines
1. Battery
2. Automatic transmission fluid dipstick
3. Engine oil filler cap
4. Engine oil dipstick
5. Power steering fluid reservoir
6. Brake fluid reservoir
7. Power distribution box
8. Air filter assembly
9. Engine coolant reservoir
10. Windshield washer fluid reservoir
ENGINE OIL
Checking the engine oil
Refer to the Scheduled Maintenance Guide for the appropriate intervals
for checking the engine oil .
1. Make sure the vehicle is on level ground.
109
123456
8
7
Maintenance and care
150
Page 152 of 216
Adding engine oil
1. Check the engine oil. For instructions, refer toChecking the engine
oilin this chapter.
2. If the engine oil level is not within the MIN and MAX ranges, add only
certified engine oil of the recommended viscosity. Remove the engine oil
filler cap and use a funnel to pour the engine oil into the opening.
3. Recheck the engine oil level. Make sure the oil level is not above the
MAX mark on the dipstick.
Engine oil and filter recommendations
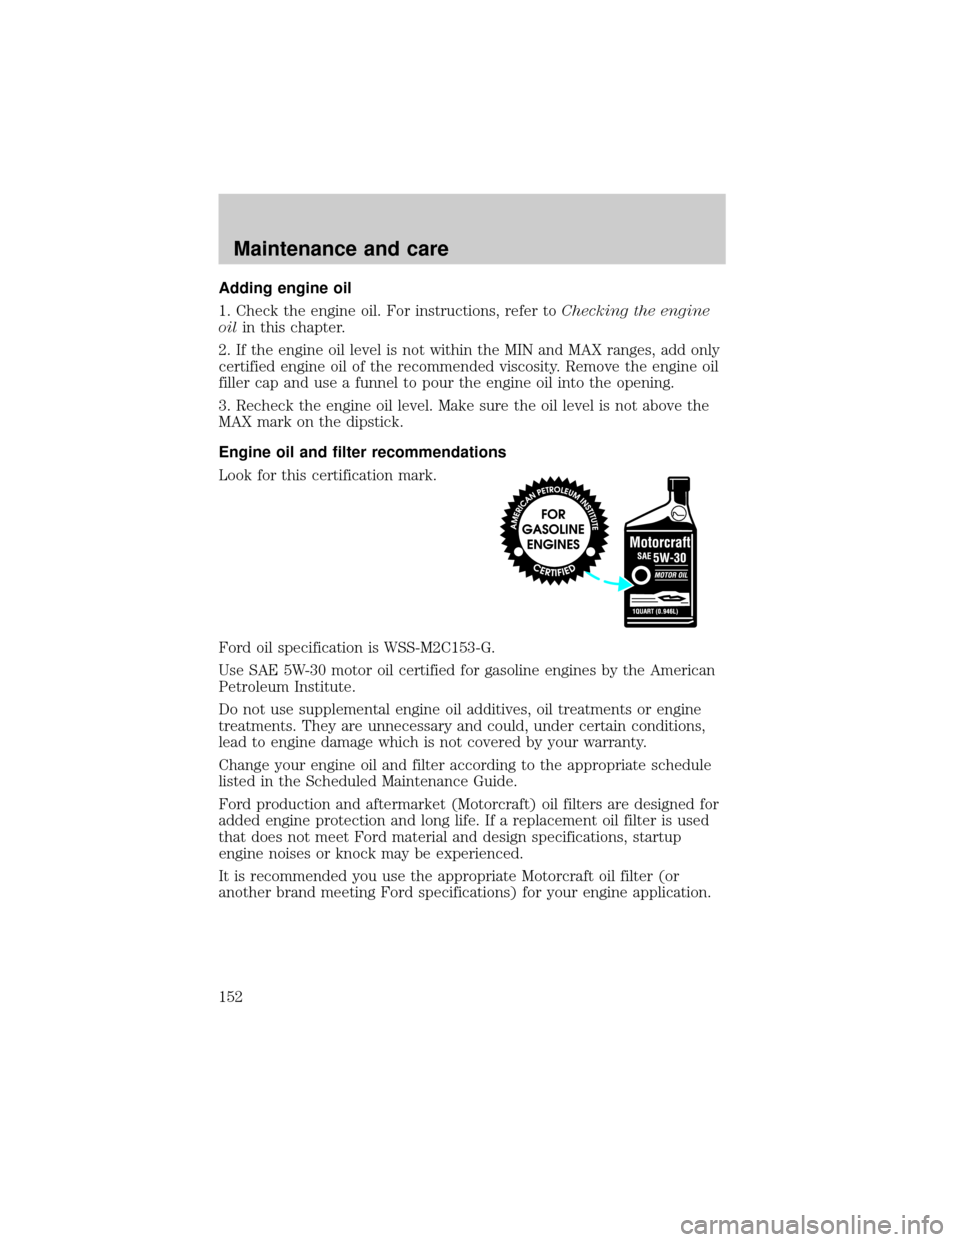
Look for this certification mark.
Ford oil specification is WSS-M2C153-G.
Use SAE 5W-30 motor oil certified for gasoline engines by the American
Petroleum Institute.
Do not use supplemental engine oil additives, oil treatments or engine
treatments. They are unnecessary and could, under certain conditions,
lead to engine damage which is not covered by your warranty.
Change your engine oil and filter according to the appropriate schedule
listed in the Scheduled Maintenance Guide.
Ford production and aftermarket (Motorcraft) oil filters are designed for
added engine protection and long life. If a replacement oil filter is used
that does not meet Ford material and design specifications, startup
engine noises or knock may be experienced.
It is recommended you use the appropriate Motorcraft oil filter (or
another brand meeting Ford specifications) for your engine application.
Maintenance and care
152
Page 154 of 216
WINDSHIELD WASHER FLUID
Checking and adding washer fluid
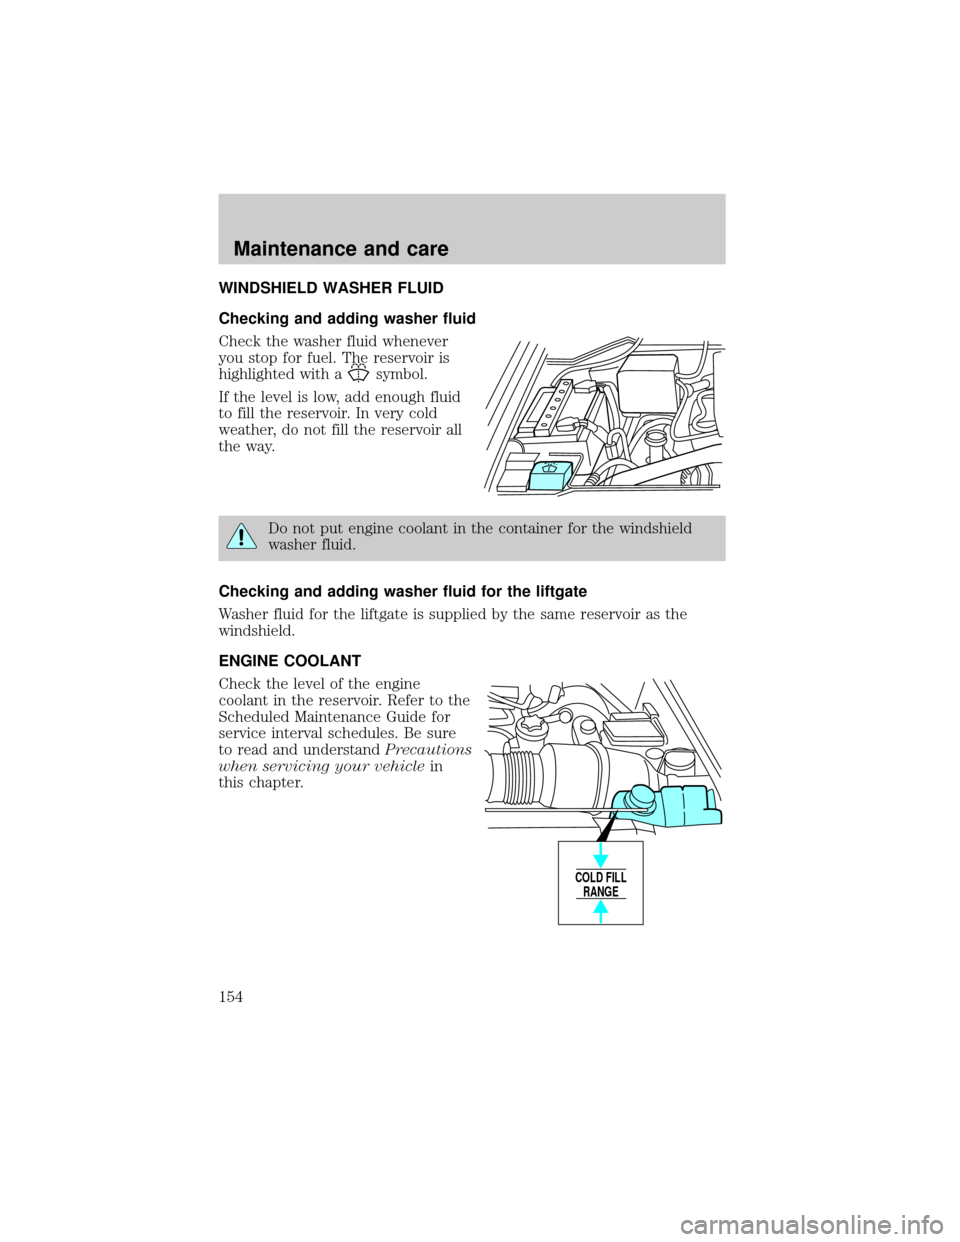
Check the washer fluid whenever
you stop for fuel. The reservoir is
highlighted with a
symbol.
If the level is low, add enough fluid
to fill the reservoir. In very cold
weather, do not fill the reservoir all
the way.
Do not put engine coolant in the container for the windshield
washer fluid.
Checking and adding washer fluid for the liftgate
Washer fluid for the liftgate is supplied by the same reservoir as the
windshield.
ENGINE COOLANT
Check the level of the engine
coolant in the reservoir. Refer to the
Scheduled Maintenance Guide for
service interval schedules. Be sure
to read and understandPrecautions
when servicing your vehiclein
this chapter.
COLD FILL
RANGE
Maintenance and care
154
Page 155 of 216
If the engine coolant has not been checked at the recommended interval,
the engine coolant reservoir may become empty. If this occurs, add
engine coolant to the reservoir. For more information on engine coolant
maintenance, refer toAdding engine coolantin this chapter.
Automotive fluids are not interchangeable; do not use engine coolant,
antifreeze or windshield washer fluid outside of its specified function and
vehicle location.
Adding engine coolant
Do not put engine coolant in the reservoir for the windshield
washer fluid.
Do not mix conventional green coolant, orange coolant or
recycled coolants together in your vehicle. Use only the type of
coolant with which your vehicle was originally equipped. If you
are unsure which type of coolant your vehicle requires, contact
your local dealer.
If sprayed on the windshield, engine coolant could make it difficult to see
through the windshield.
When the engine is cool, add a 50/50 mixture of engine coolant and
water to the engine coolant reservoir.
Plain water may be added in an emergency, but you MUST replace it
with a 50/50 mixture of coolant and distilled water as soon as possible.
Check the coolant level in the coolant reservoir the next few times you
drive the vehicle. If necessary, add enough of a 50/50 mixture of coolant
and water to bring the liquid level into the cold fill range on the
reservoir.
Never remove the coolant reservoir cap while the engine is
running or hot.
If you must remove the coolant reservoir cap, follow these steps to avoid
personal injury:
1. Before you remove the cap, turn the engine off and let it cool.
2. When the engine is cool, wrap a thick cloth around the cap. Slowly
turn cap counterclockwise until pressure begins to release.
3. Step back while the pressure releases.
Maintenance and care
155
Page 156 of 216
4. When you are sure that all the pressure has been released, use the
cloth to turn it counterclockwise and remove the cap.
Change your engine coolant according to the appropriate schedule listed
in the Scheduled Maintenance Guide.
Use Ford Premium Engine Coolant E2FZ-19549±AA (in Oregon,
F5FZ-19549±CC, in Canada, Motorcraft CXC-10) or an equivalent
premium engine coolant that meets Ford specification ESE-M97B44±A.
DO NOT USE Ford Extended Life Engine Coolant
F6AZ-19544±AA, meeting Ford specification WSS-M97B44±D
(orange in color). Do not add recycled coolant to your vehicle.
Do not use alcohol or methanol antifreeze or any engine coolants mixed
with alcohol or methanol antifreeze. Do not use supplemental coolant
additives in your vehicle. These additives may harm your engine cooling
system. The use of an improper coolant may void the warranty of your
vehicle's engine cooling system.
Recycled engine coolant
Ford Motor Company recommends that Ford and Lincoln-Mercury
dealers use recycled engine coolant produced by Ford-approved
processes.
Not all coolant recycling processes produce coolant which meets Ford
specification ESE-M97B44±A, and use of such coolant may harm engine
and cooling system components.
Always dispose of used automotive fluids in a responsible manner.
Follow your community's regulations and standards for recycling and
disposing of automotive fluids.
Coolant refill capacity
To find out how much fluid your vehicle's cooling system can hold, refer
toRefill capacitiesin theCapacities and specificationschapter.
Have your dealer check the engine cooling system for leaks if you have
to add more than 1.0 liter (1.0 quart) of engine coolant per month.
Severe winter climate
If you drive in extremely cold climates (less than ±36ÉC [±34ÉF]), it may
be necessary to increase the coolant concentration above 50%. Refer to
the chart on the coolant container to ensure the coolant concentration in
your vehicle is such that the coolant will not freeze at the temperature
Maintenance and care
156