belt FORD EXPEDITION 1999 1.G Owners Manual
[x] Cancel search | Manufacturer: FORD, Model Year: 1999, Model line: EXPEDITION, Model: FORD EXPEDITION 1999 1.GPages: 216, PDF Size: 1.8 MB
Page 8 of 216
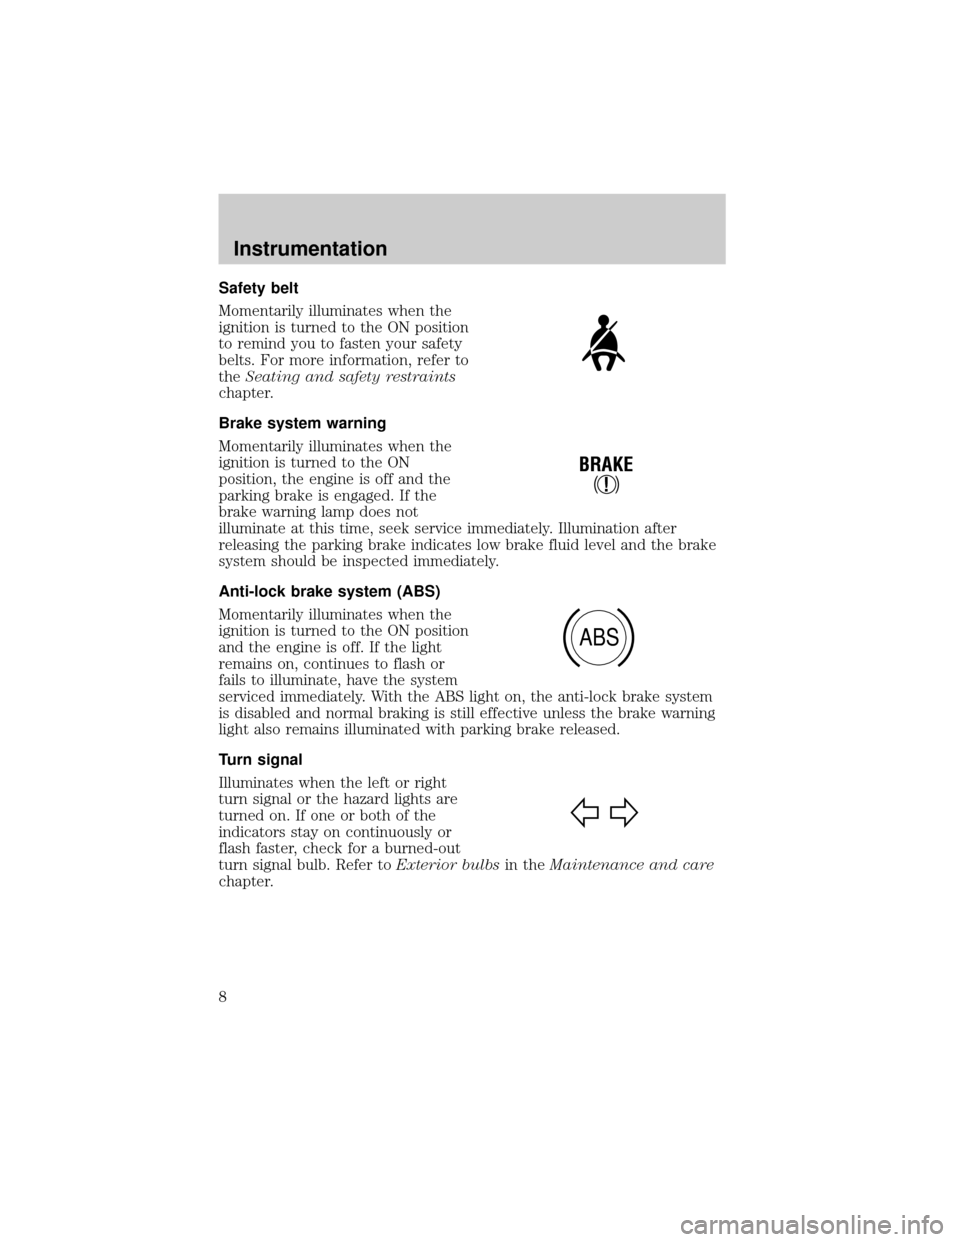
Safety belt
Momentarily illuminates when the
ignition is turned to the ON position
to remind you to fasten your safety
belts. For more information, refer to
theSeating and safety restraints
chapter.
Brake system warning
Momentarily illuminates when the
ignition is turned to the ON
position, the engine is off and the
parking brake is engaged. If the
brake warning lamp does not
illuminate at this time, seek service immediately. Illumination after
releasing the parking brake indicates low brake fluid level and the brake
system should be inspected immediately.
Anti-lock brake system (ABS)
Momentarily illuminates when the
ignition is turned to the ON position
and the engine is off. If the light
remains on, continues to flash or
fails to illuminate, have the system
serviced immediately. With the ABS light on, the anti-lock brake system
is disabled and normal braking is still effective unless the brake warning
light also remains illuminated with parking brake released.
Turn signal
Illuminates when the left or right
turn signal or the hazard lights are
turned on. If one or both of the
indicators stay on continuously or
flash faster, check for a burned-out
turn signal bulb. Refer toExterior bulbsin theMaintenance and care
chapter.
!
BRAKE
ABS
Instrumentation
8
Page 11 of 216
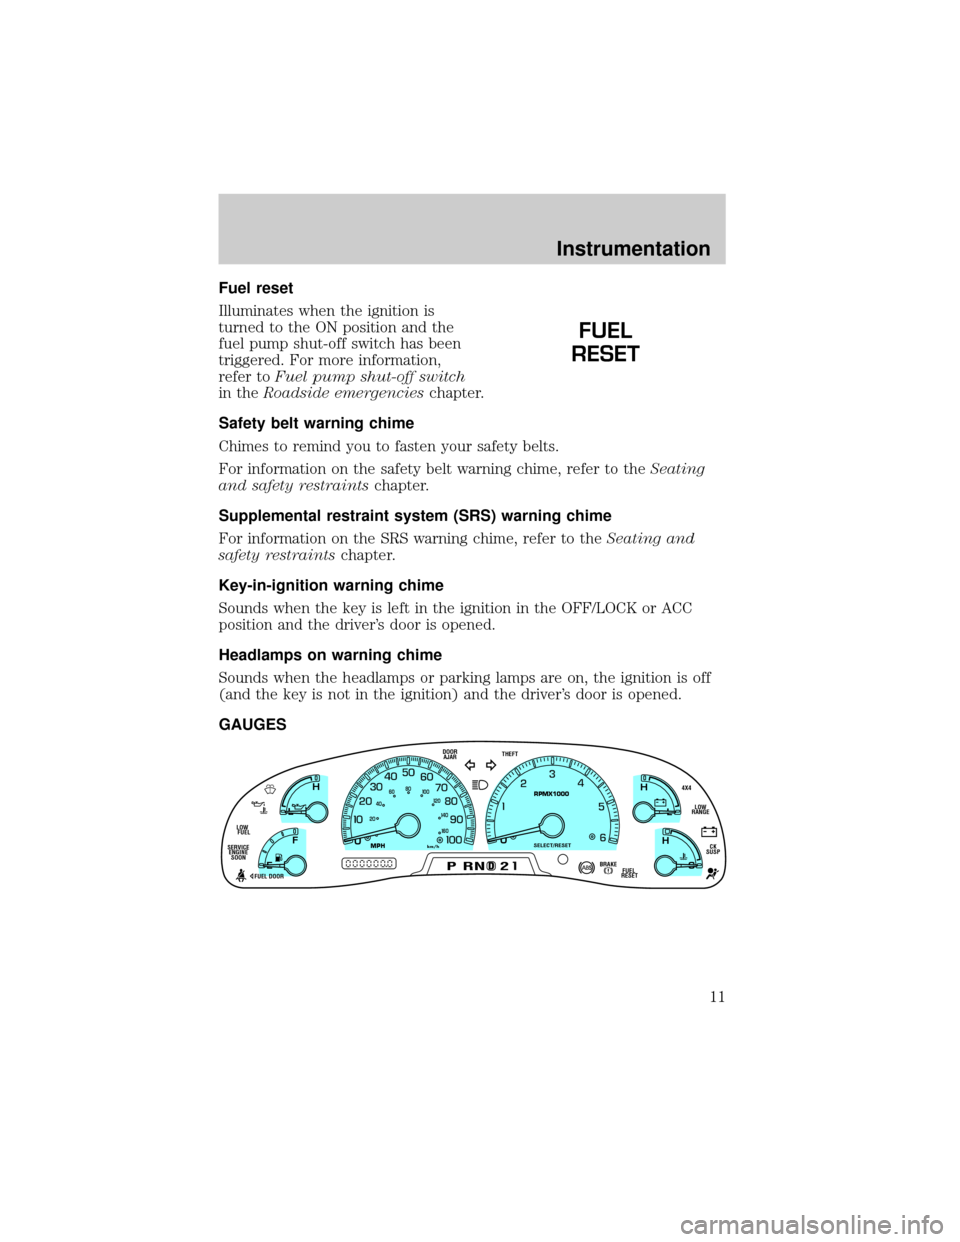
Fuel reset
Illuminates when the ignition is
turned to the ON position and the
fuel pump shut-off switch has been
triggered. For more information,
refer toFuel pump shut-off switch
in theRoadside emergencieschapter.
Safety belt warning chime
Chimes to remind you to fasten your safety belts.
For information on the safety belt warning chime, refer to theSeating
and safety restraintschapter.
Supplemental restraint system (SRS) warning chime
For information on the SRS warning chime, refer to theSeating and
safety restraintschapter.
Key-in-ignition warning chime
Sounds when the key is left in the ignition in the OFF/LOCK or ACC
position and the driver's door is opened.
Headlamps on warning chime
Sounds when the headlamps or parking lamps are on, the ignition is off
(and the key is not in the ignition) and the driver's door is opened.
GAUGES
FUEL
RESET
D
L
H
L
H
E
F
C
H
BRAKEPRND2FUEL
RESET DOOR
AJAR
SELECT/RESET
4X4
LOW
RANGE
CK
SUSP THEFT
FUEL DOOR SERVICE
ENGINE
SOONLOW
FUEL
0MPHRPMX1000km/h
20406080
00
20
40
60
Instrumentation
11
Page 75 of 216
Always drive and ride with your seatback upright and the lap
belt snug and low across the hips.
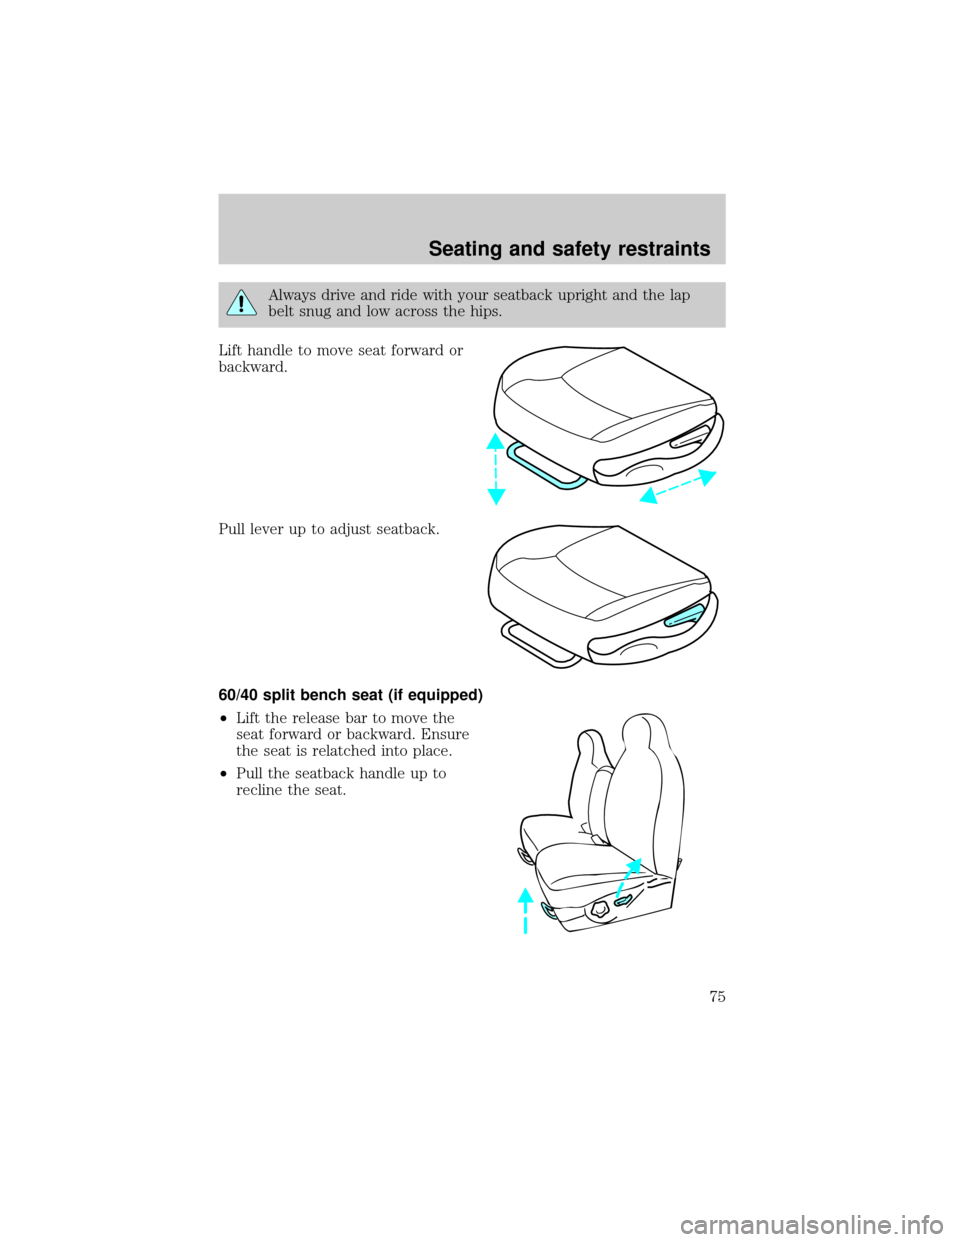
Lift handle to move seat forward or
backward.
Pull lever up to adjust seatback.
60/40 split bench seat (if equipped)
²Lift the release bar to move the
seat forward or backward. Ensure
the seat is relatched into place.
²Pull the seatback handle up to
recline the seat.
Seating and safety restraints
75
Page 76 of 216
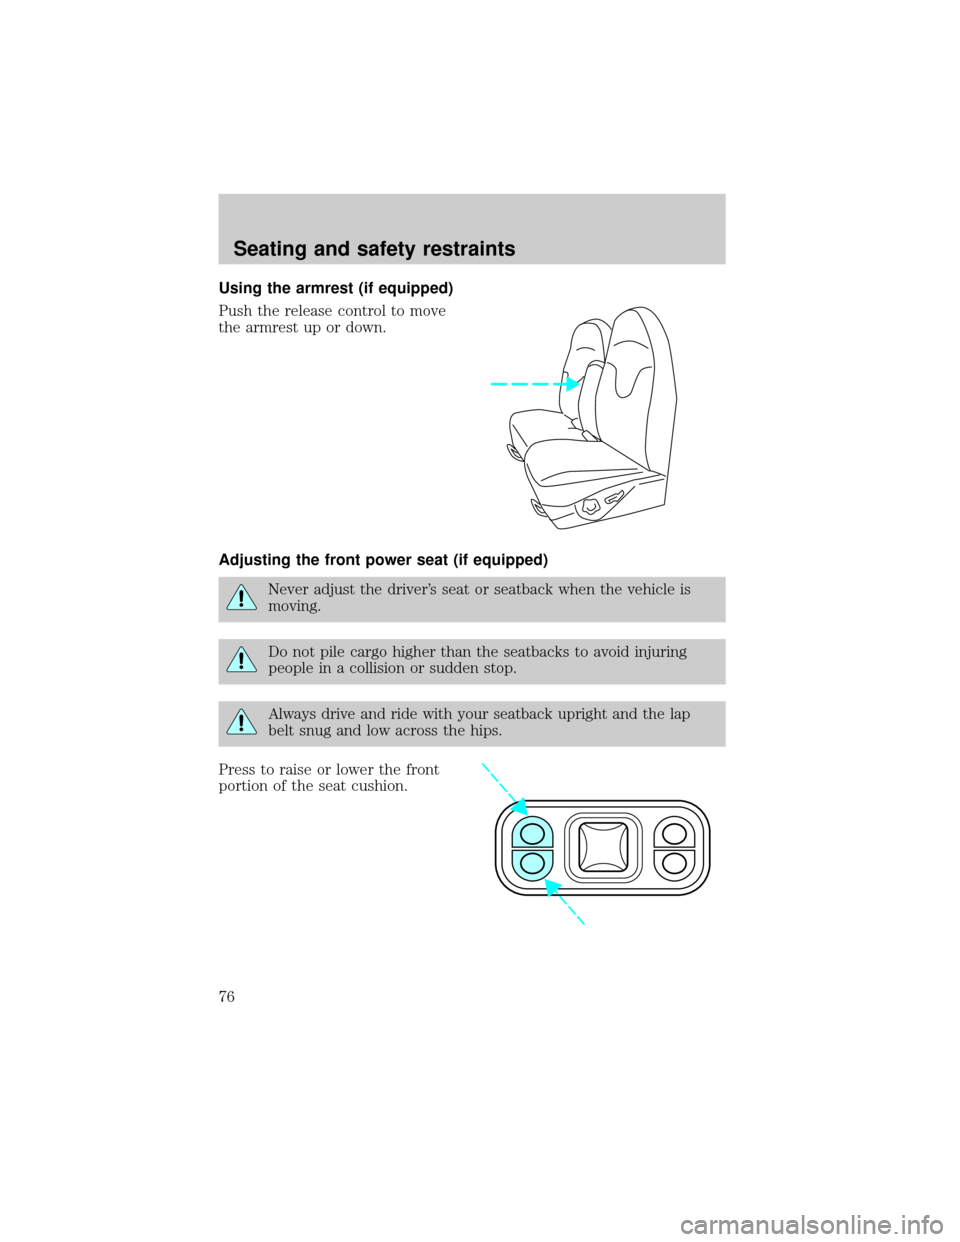
Using the armrest (if equipped)
Push the release control to move
the armrest up or down.
Adjusting the front power seat (if equipped)
Never adjust the driver's seat or seatback when the vehicle is
moving.
Do not pile cargo higher than the seatbacks to avoid injuring
people in a collision or sudden stop.
Always drive and ride with your seatback upright and the lap
belt snug and low across the hips.
Press to raise or lower the front
portion of the seat cushion.
Seating and safety restraints
76
Page 80 of 216
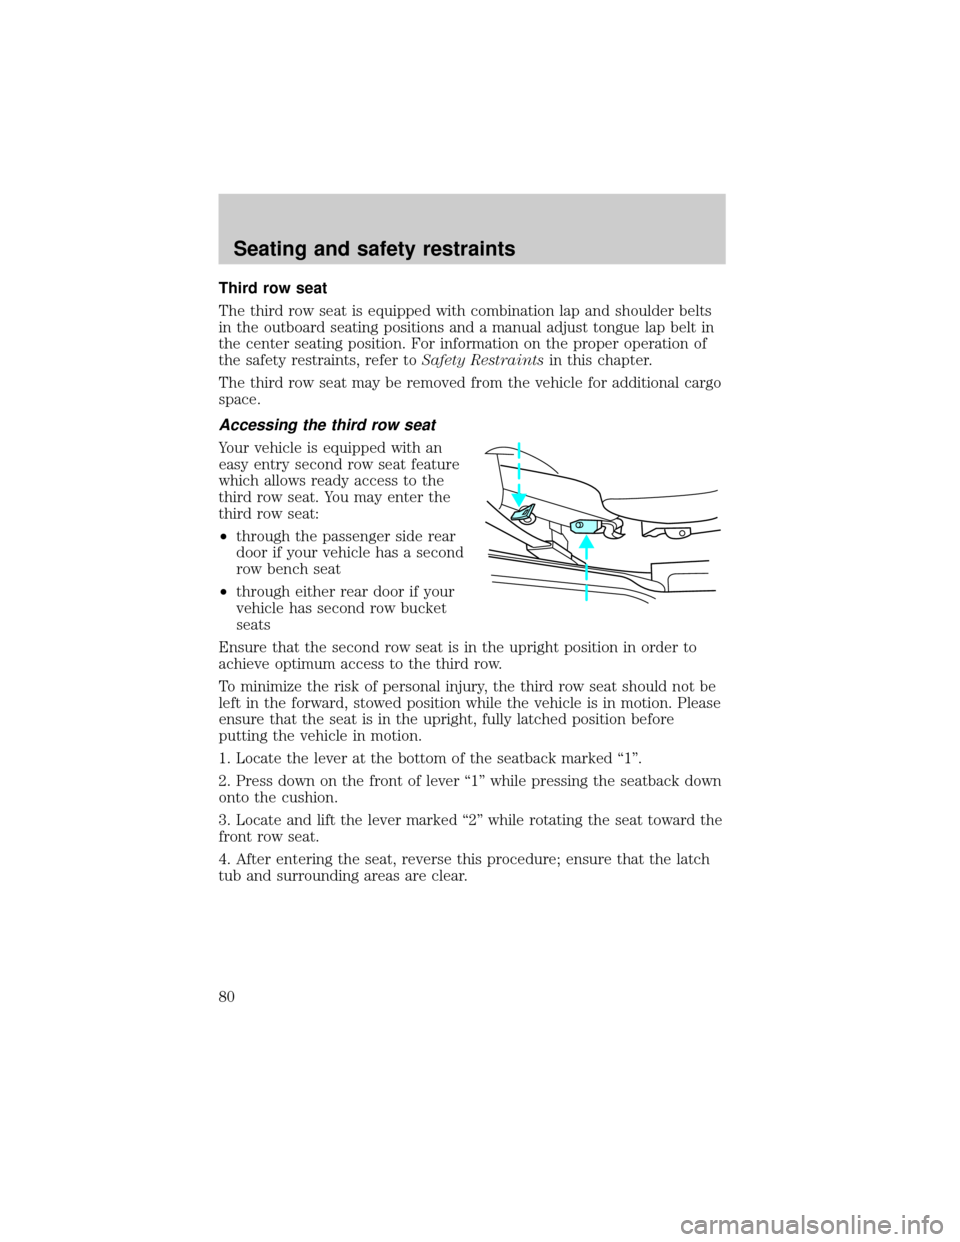
Third row seat
The third row seat is equipped with combination lap and shoulder belts
in the outboard seating positions and a manual adjust tongue lap belt in
the center seating position. For information on the proper operation of
the safety restraints, refer toSafety Restraintsin this chapter.
The third row seat may be removed from the vehicle for additional cargo
space.
Accessing the third row seat
Your vehicle is equipped with an
easy entry second row seat feature
which allows ready access to the
third row seat. You may enter the
third row seat:
²through the passenger side rear
door if your vehicle has a second
row bench seat
²through either rear door if your
vehicle has second row bucket
seats
Ensure that the second row seat is in the upright position in order to
achieve optimum access to the third row.
To minimize the risk of personal injury, the third row seat should not be
left in the forward, stowed position while the vehicle is in motion. Please
ensure that the seat is in the upright, fully latched position before
putting the vehicle in motion.
1. Locate the lever at the bottom of the seatback marked ª1º.
2. Press down on the front of lever ª1º while pressing the seatback down
onto the cushion.
3. Locate and lift the lever marked ª2º while rotating the seat toward the
front row seat.
4. After entering the seat, reverse this procedure; ensure that the latch
tub and surrounding areas are clear.
Seating and safety restraints
80
Page 81 of 216
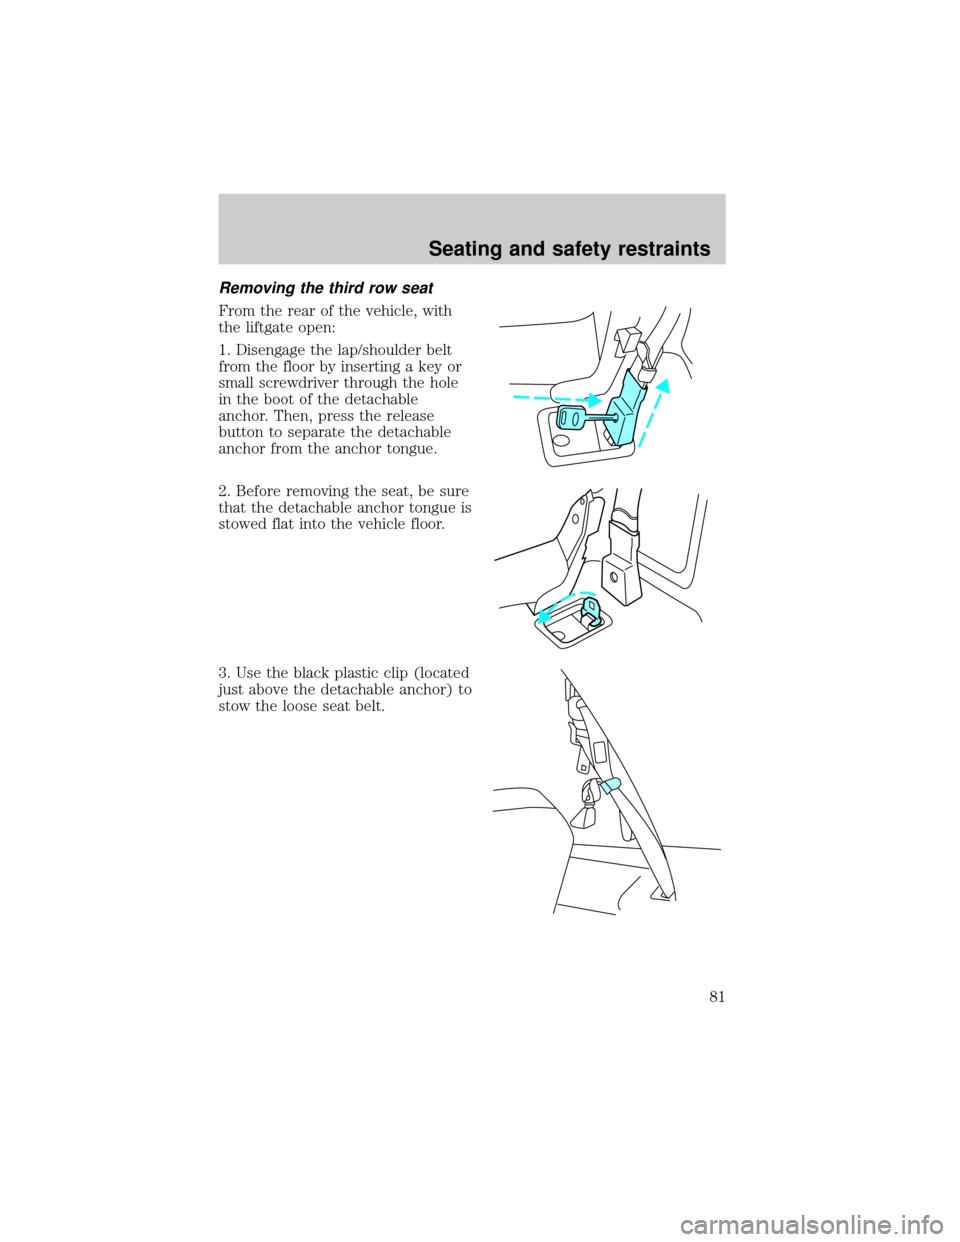
Removing the third row seat
From the rear of the vehicle, with
the liftgate open:
1. Disengage the lap/shoulder belt
from the floor by inserting a key or
small screwdriver through the hole
in the boot of the detachable
anchor. Then, press the release
button to separate the detachable
anchor from the anchor tongue.
2. Before removing the seat, be sure
that the detachable anchor tongue is
stowed flat into the vehicle floor.
3. Use the black plastic clip (located
just above the detachable anchor) to
stow the loose seat belt.
Seating and safety restraints
81
Page 82 of 216
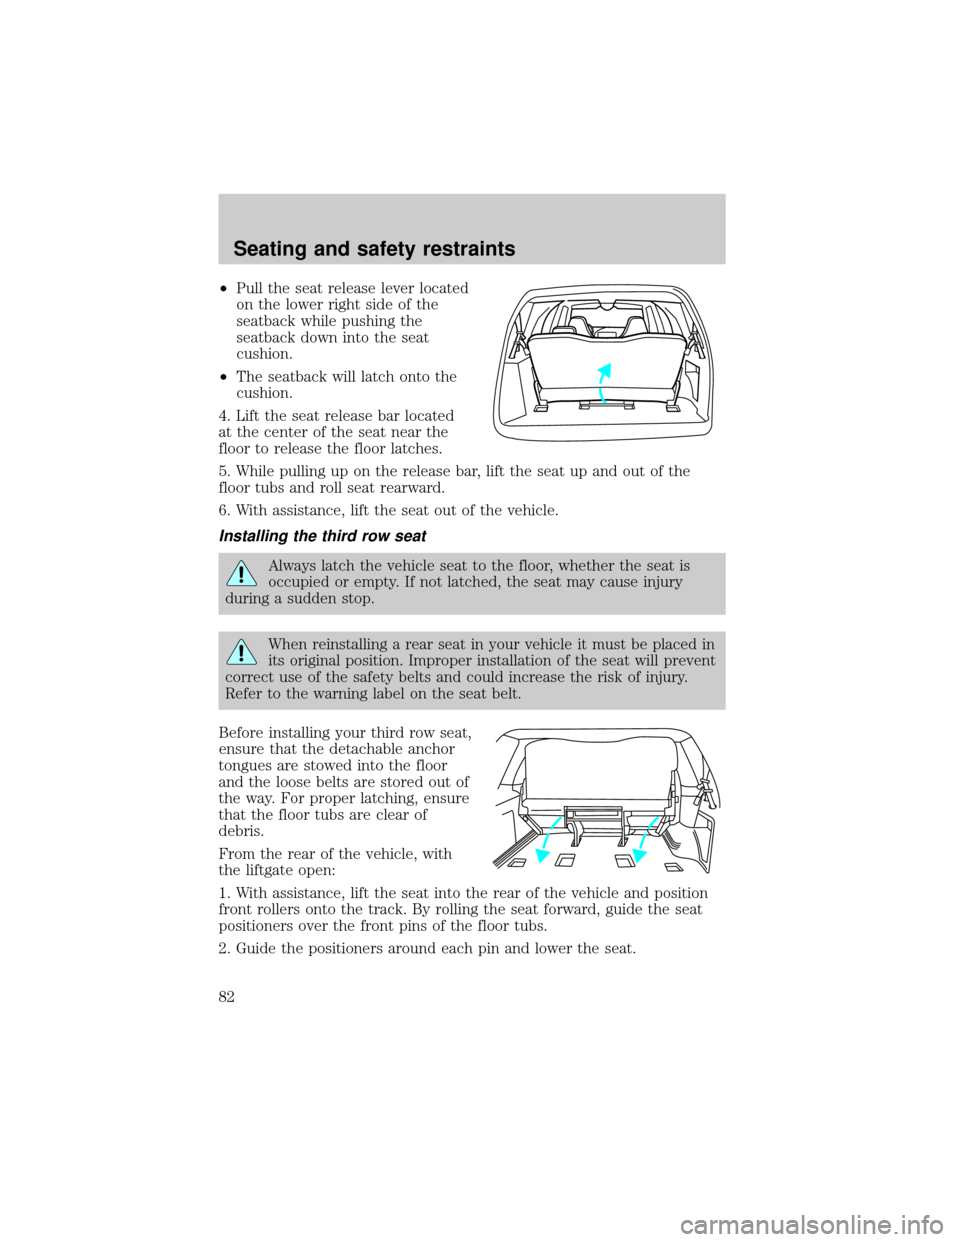
²Pull the seat release lever located
on the lower right side of the
seatback while pushing the
seatback down into the seat
cushion.
²The seatback will latch onto the
cushion.
4. Lift the seat release bar located
at the center of the seat near the
floor to release the floor latches.
5. While pulling up on the release bar, lift the seat up and out of the
floor tubs and roll seat rearward.
6. With assistance, lift the seat out of the vehicle.
Installing the third row seat
Always latch the vehicle seat to the floor, whether the seat is
occupied or empty. If not latched, the seat may cause injury
during a sudden stop.
When reinstalling a rear seat in your vehicle it must be placed in
its original position. Improper installation of the seat will prevent
correct use of the safety belts and could increase the risk of injury.
Refer to the warning label on the seat belt.
Before installing your third row seat,
ensure that the detachable anchor
tongues are stowed into the floor
and the loose belts are stored out of
the way. For proper latching, ensure
that the floor tubs are clear of
debris.
From the rear of the vehicle, with
the liftgate open:
1. With assistance, lift the seat into the rear of the vehicle and position
front rollers onto the track. By rolling the seat forward, guide the seat
positioners over the front pins of the floor tubs.
2. Guide the positioners around each pin and lower the seat.
Seating and safety restraints
82
Page 83 of 216
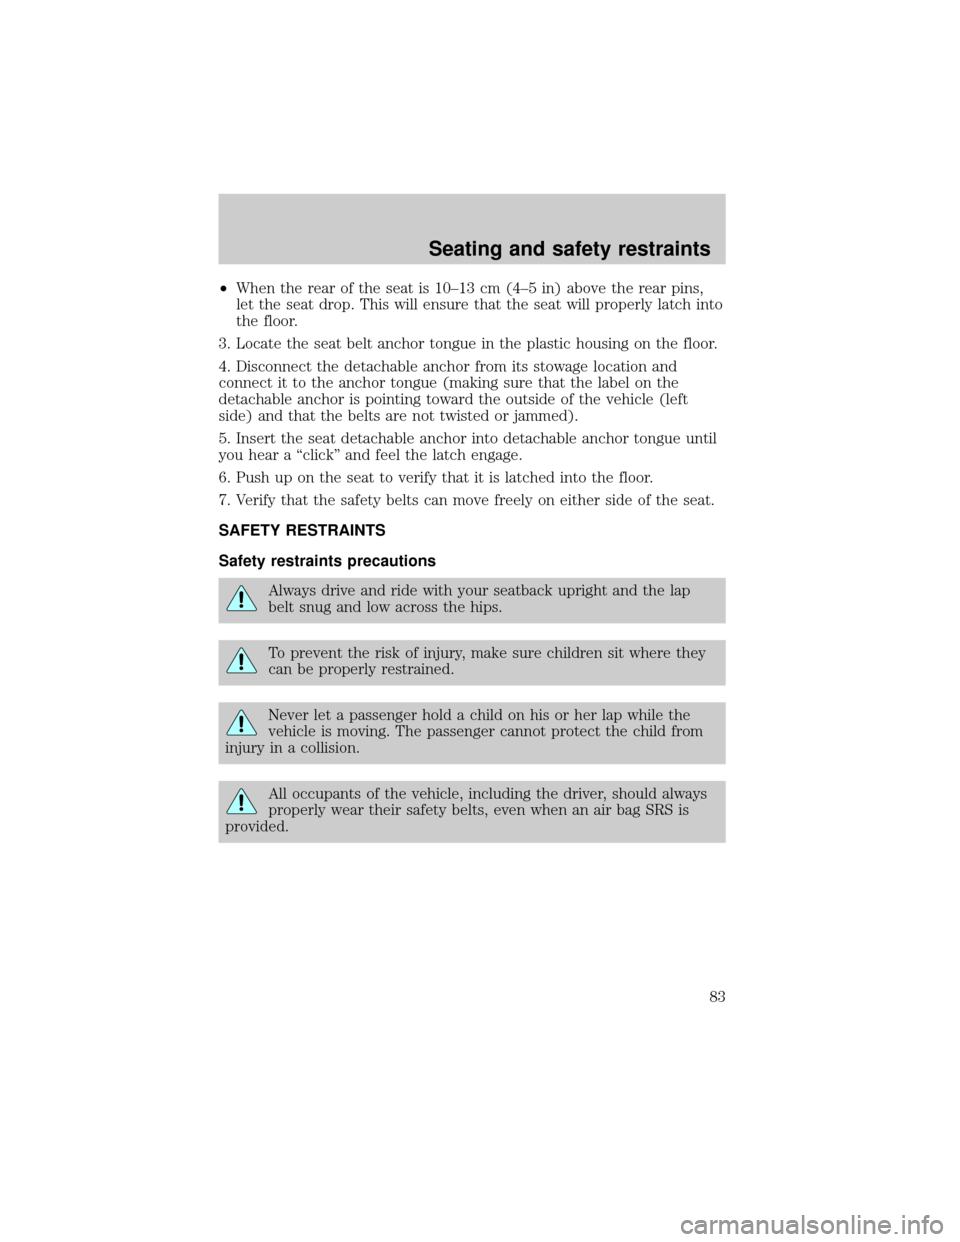
²When the rear of the seat is 10±13 cm (4±5 in) above the rear pins,
let the seat drop. This will ensure that the seat will properly latch into
the floor.
3. Locate the seat belt anchor tongue in the plastic housing on the floor.
4. Disconnect the detachable anchor from its stowage location and
connect it to the anchor tongue (making sure that the label on the
detachable anchor is pointing toward the outside of the vehicle (left
side) and that the belts are not twisted or jammed).
5. Insert the seat detachable anchor into detachable anchor tongue until
you hear a ªclickº and feel the latch engage.
6. Push up on the seat to verify that it is latched into the floor.
7. Verify that the safety belts can move freely on either side of the seat.
SAFETY RESTRAINTS
Safety restraints precautions
Always drive and ride with your seatback upright and the lap
belt snug and low across the hips.
To prevent the risk of injury, make sure children sit where they
can be properly restrained.
Never let a passenger hold a child on his or her lap while the
vehicle is moving. The passenger cannot protect the child from
injury in a collision.
All occupants of the vehicle, including the driver, should always
properly wear their safety belts, even when an air bag SRS is
provided.
Seating and safety restraints
83
Page 84 of 216
It is extremely dangerous to ride in a cargo area, inside or
outside of a vehicle. In a collision, people riding in these areas
are more likely to be seriously injured or killed. Do not allow people to
ride in any area of your vehicle that is not equipped with seats and
safety belts. Be sure everyone in your vehicle is in a seat and using a
safety belt properly.
Each seating position in your vehicle has a specific safety belt
assembly which is made up of one buckle and one tongue that
are designed to be used as a pair. 1) Use the shoulder belt on the
outside shoulder only. Never wear the shoulder belt under the arm. 2)
Never swing the safety belt around your neck over the inside shoulder.
3) Never use a single belt for more than one person.
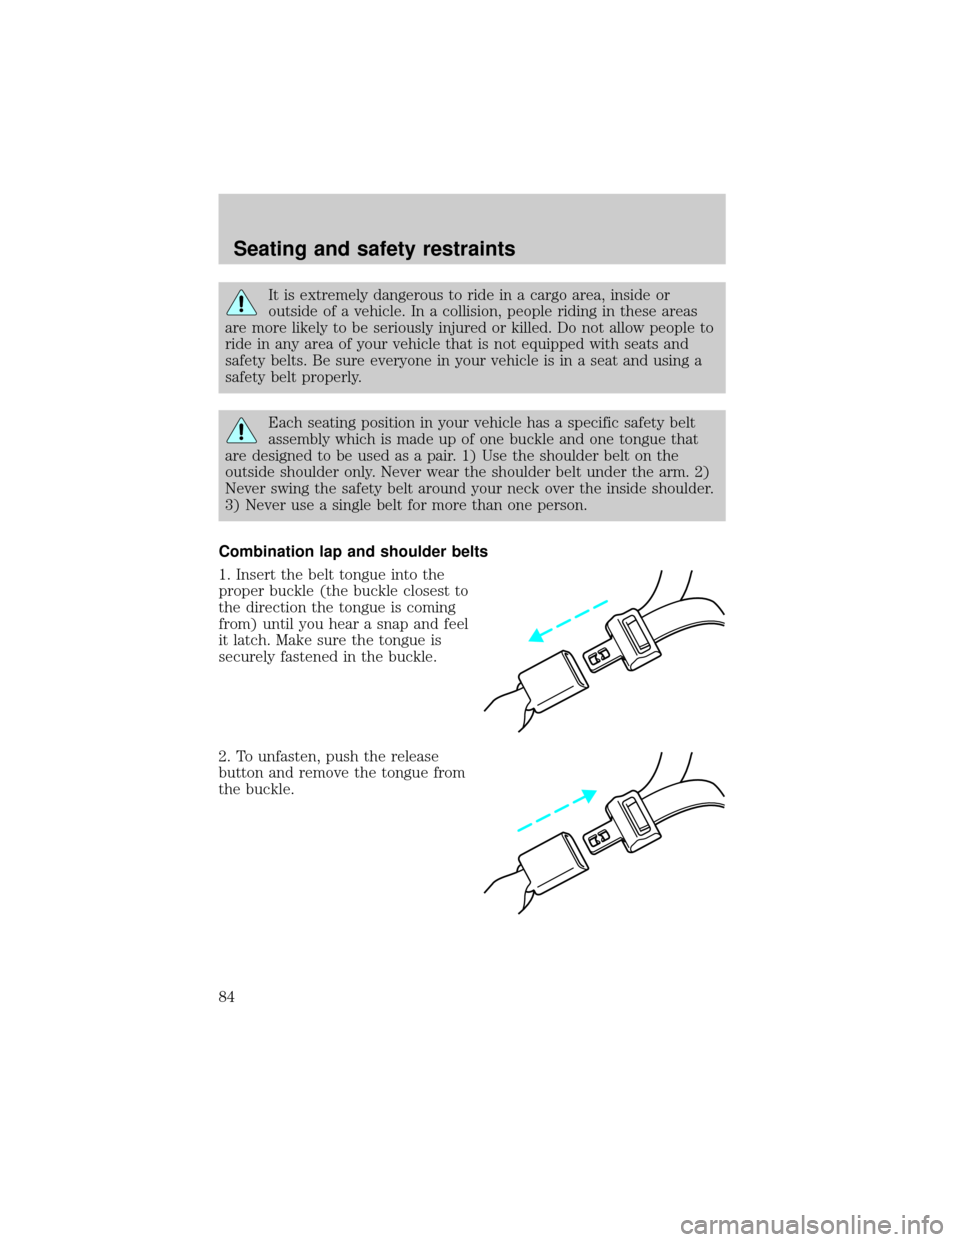
Combination lap and shoulder belts
1. Insert the belt tongue into the
proper buckle (the buckle closest to
the direction the tongue is coming
from) until you hear a snap and feel
it latch. Make sure the tongue is
securely fastened in the buckle.
2. To unfasten, push the release
button and remove the tongue from
the buckle.
Seating and safety restraints
84
Page 85 of 216
The front and rear outboard safety restraints in the vehicle are
combination lap and shoulder belts. The front and rear seat passenger
outboard safety belts have two types of locking modes described below:
Vehicle sensitive mode
The vehicle sensitive mode is the normal retractor mode, allowing free
shoulder belt length adjustment to your movements and locking in
response to vehicle movement. For example, if the driver brakes
suddenly or turns a corner sharply, or the vehicle receives an impact of
8 km/h (5 mph) or more, the combination safety belts will lock to help
reduce forward movement of the driver and passengers.
Automatic locking mode
In this mode, the shoulder belt is automatically pre-locked. The belt will
still retract to remove any slack in the shoulder belt.
The automatic locking mode is not available on the driver safety belt.
When to use the automatic locking mode
²When a tight lap/shoulder fit is desired.
²Anytimea child safety seat is installed in a passenger front or
outboard rear seating position (if equipped). Refer toSafety
Restraints for ChildrenorSafety Seats for Childrenlater in this
chapter.
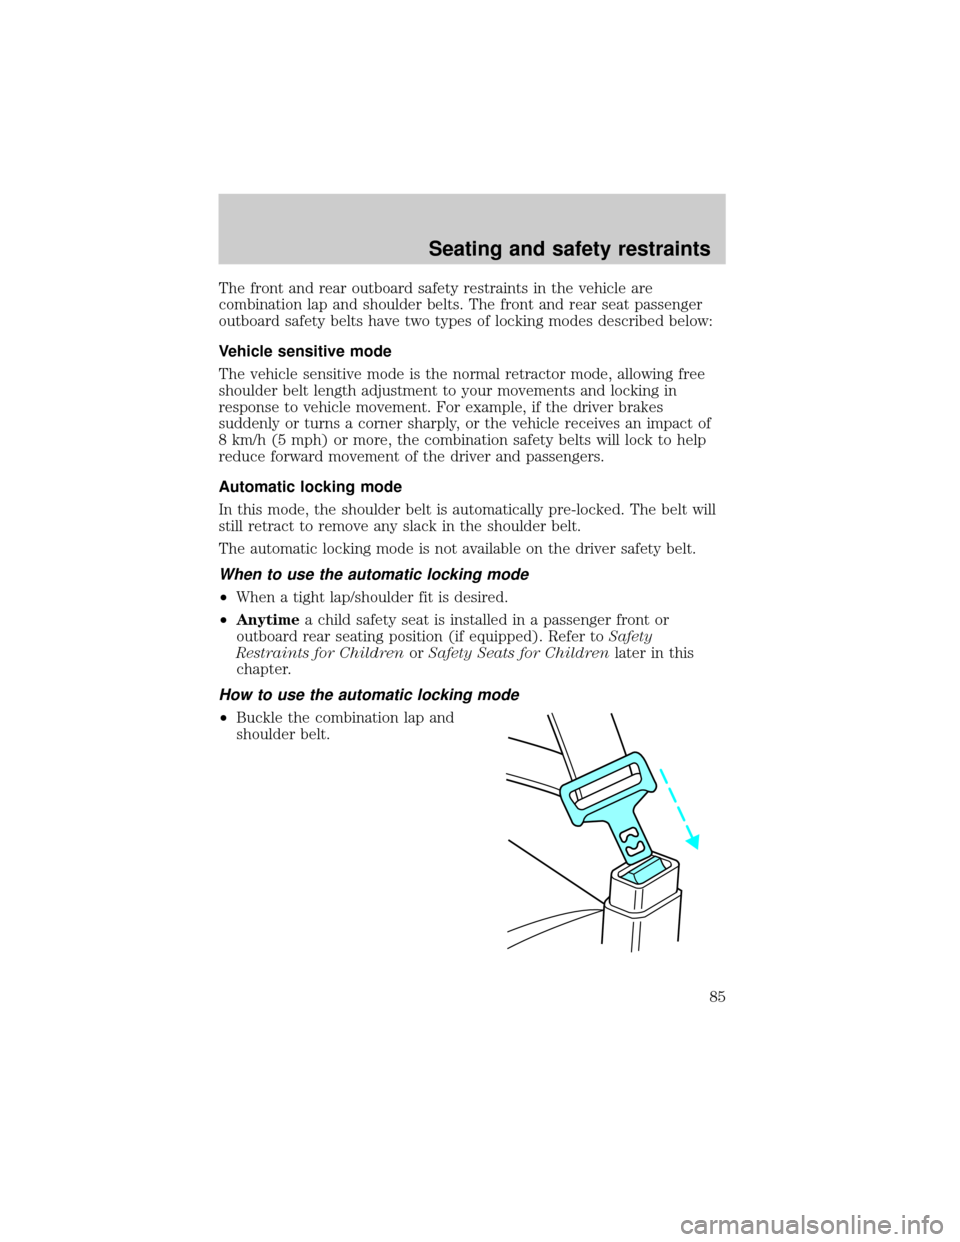
How to use the automatic locking mode
²Buckle the combination lap and
shoulder belt.
Seating and safety restraints
85