turn signal FORD EXPEDITION 2000 1.G Owners Manual
[x] Cancel search | Manufacturer: FORD, Model Year: 2000, Model line: EXPEDITION, Model: FORD EXPEDITION 2000 1.GPages: 256, PDF Size: 2.08 MB
Page 6 of 256
D
LHLH
EFCHBRAKEPRND2CRUISE DOOR
AJAR
SELECT/RESET
THEFT
FUEL DOOR
0MPHRPMX1000km/h
20406080
00
20
40
60
ON
OFFRES
SET
ACCEL
COAST
D
PEDALS
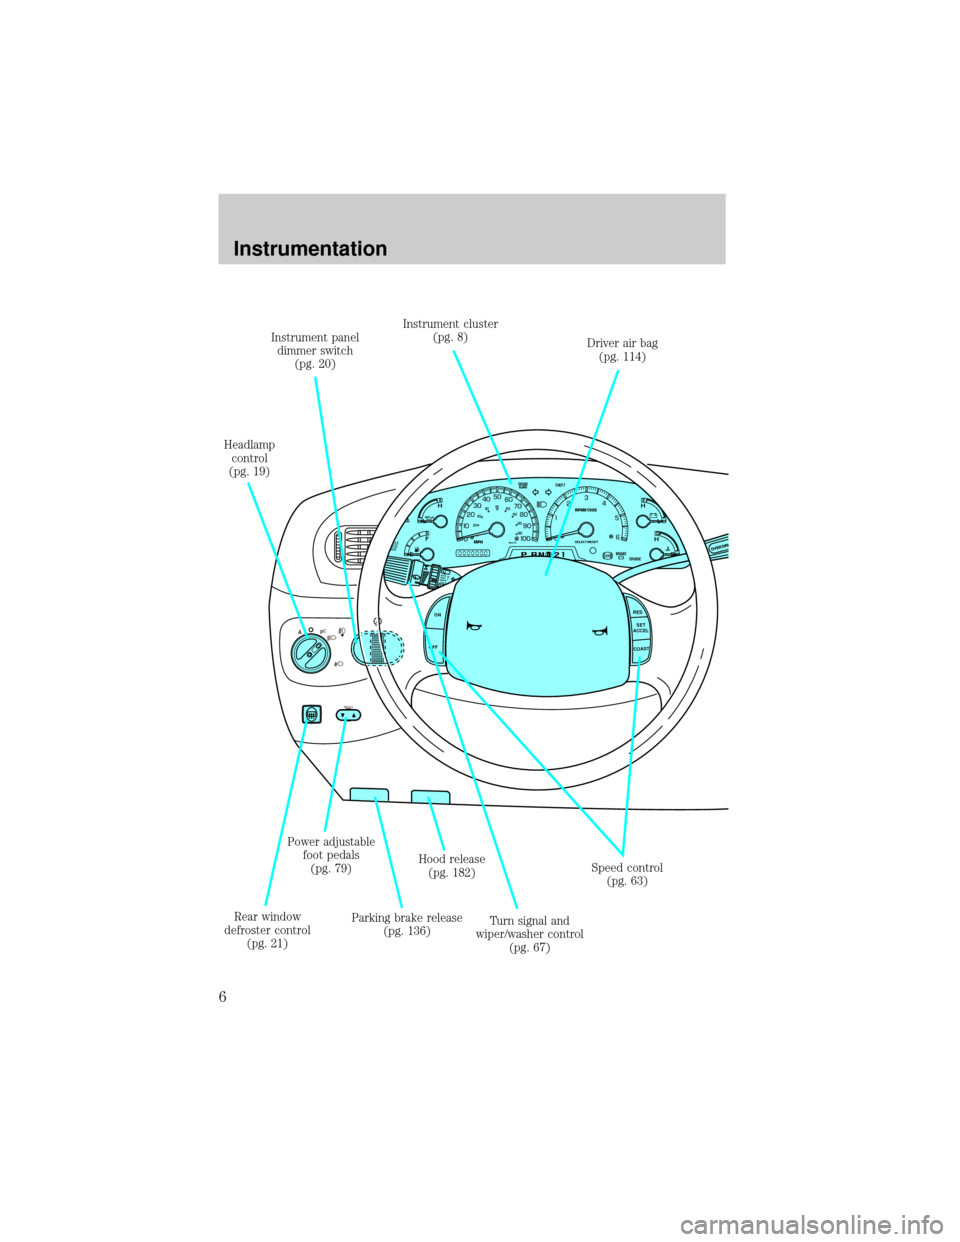
Headlamp
control
(pg. 19)
Turn signal and
wiper/washer control
(pg. 67) Rear window
defroster control
(pg. 21)Instrument cluster
(pg. 8)
Speed control
(pg. 63) Driver air bag
(pg. 114) Instrument panel
dimmer switch
(pg. 20)
Power adjustable
foot pedals
(pg. 79)
Parking brake release
(pg. 136)Hood release
(pg. 182)
Instrumentation
6
Page 10 of 256
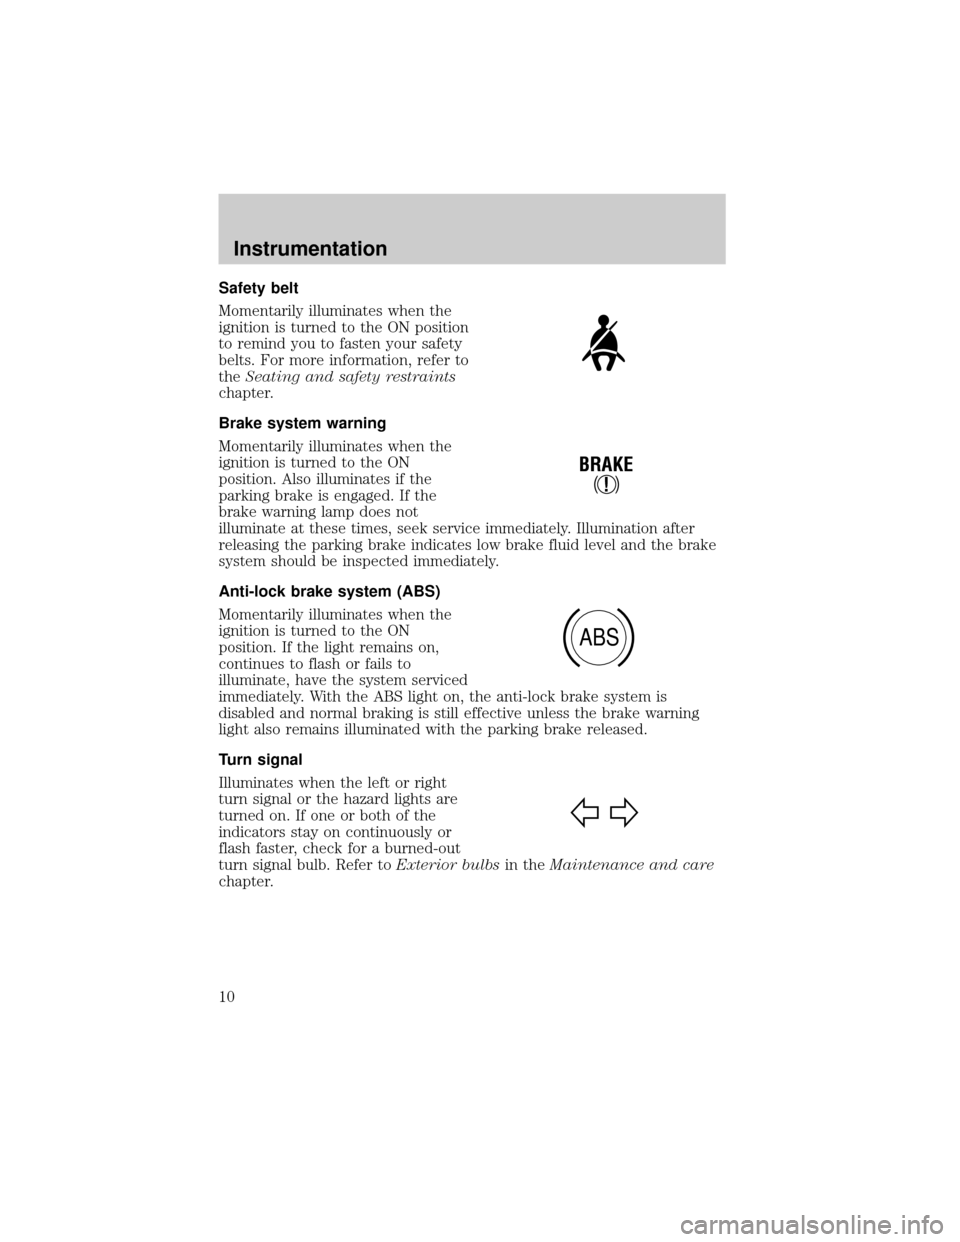
Safety belt
Momentarily illuminates when the
ignition is turned to the ON position
to remind you to fasten your safety
belts. For more information, refer to
theSeating and safety restraints
chapter.
Brake system warning
Momentarily illuminates when the
ignition is turned to the ON
position. Also illuminates if the
parking brake is engaged. If the
brake warning lamp does not
illuminate at these times, seek service immediately. Illumination after
releasing the parking brake indicates low brake fluid level and the brake
system should be inspected immediately.
Anti-lock brake system (ABS)
Momentarily illuminates when the
ignition is turned to the ON
position. If the light remains on,
continues to flash or fails to
illuminate, have the system serviced
immediately. With the ABS light on, the anti-lock brake system is
disabled and normal braking is still effective unless the brake warning
light also remains illuminated with the parking brake released.
Turn signal
Illuminates when the left or right
turn signal or the hazard lights are
turned on. If one or both of the
indicators stay on continuously or
flash faster, check for a burned-out
turn signal bulb. Refer toExterior bulbsin theMaintenance and care
chapter.
!
BRAKE
ABS
Instrumentation
10
Page 34 of 256
²Info
²Jazz
²Oldies
²R&B
²Religious
²Rock
²Soft
²To p 4 0
Show
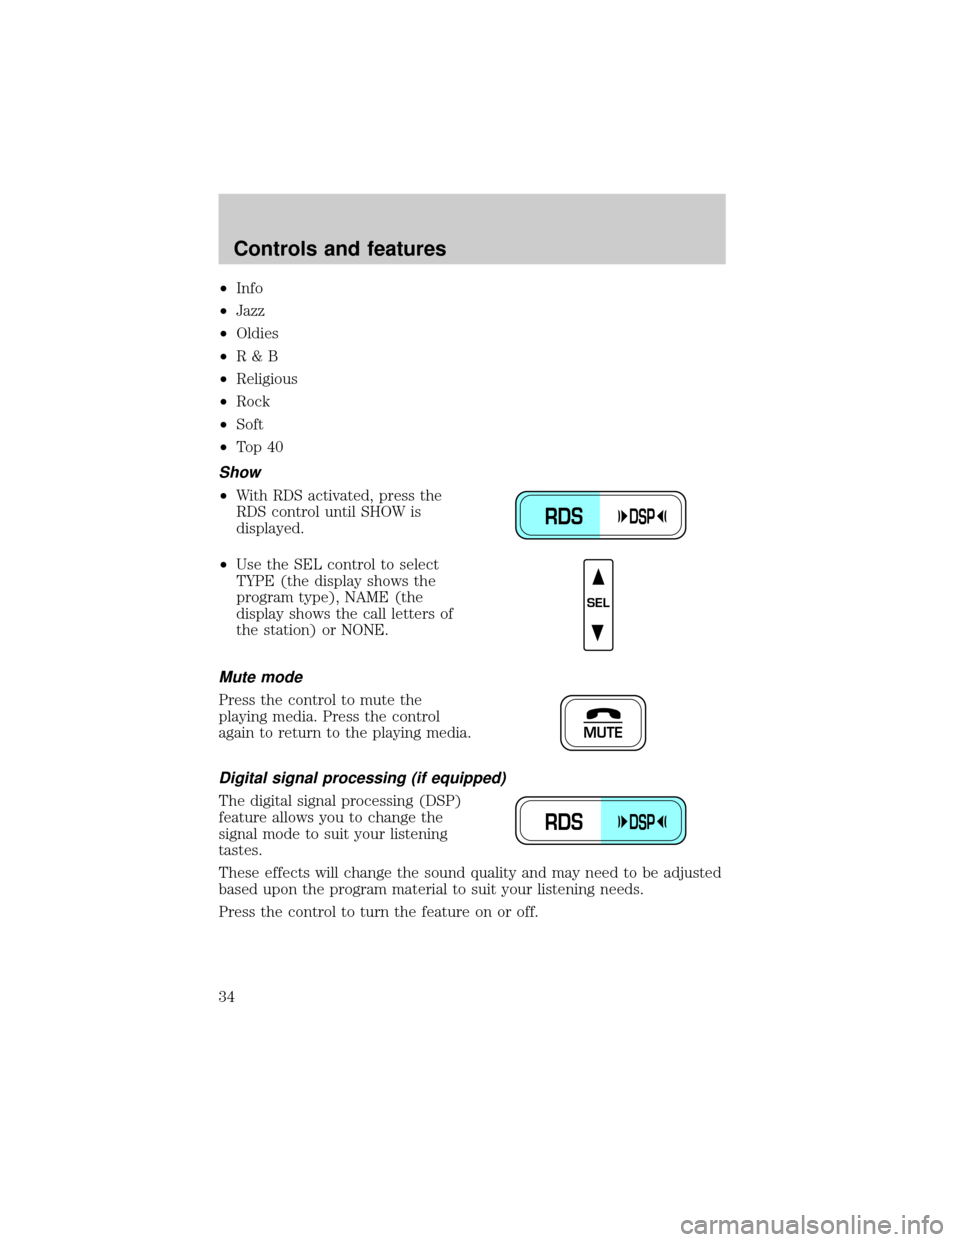
²With RDS activated, press the
RDS control until SHOW is
displayed.
²Use the SEL control to select
TYPE (the display shows the
program type), NAME (the
display shows the call letters of
the station) or NONE.
Mute mode
Press the control to mute the
playing media. Press the control
again to return to the playing media.
Digital signal processing (if equipped)
The digital signal processing (DSP)
feature allows you to change the
signal mode to suit your listening
tastes.
These effects will change the sound quality and may need to be adjusted
based upon the program material to suit your listening needs.
Press the control to turn the feature on or off.
RDSDSP
SEL
MUTE
RDSDSP
Controls and features
34
Page 50 of 256
Cleaning cassette player (if equipped)
Clean the tape player head with a cassette cleaning cartridge after 10 to
12 hours of play in order to maintain the best sound and operation.
Cassette and cassette player care
²Use only cassettes that are 90 minutes long or less.
²Do not expose tapes to direct sunlight, high humidity, extreme heat or
extreme cold. Allow tapes that may have been exposed to extreme
temperatures to reach a moderate temperature before playing.
²Tighten very loose tapes by inserting a finger or pencil into the hole
and turning the hub.
²Remove loose labels before inserting tapes.
²Do not leave tapes in the cassette player for a long time when not
being played.
Radio frequency information
The Federal Communications Commission (FCC) and the Canadian Radio
and Telecommunications Commission(CRTC) establish the frequencies
AM and FM stations may use for their broadcasts. Allowable frequencies
are:
AM 530, 540±1600, 1610 kHz
FM 87.7, 87.9±107.7, 107.9 MHz
Not all frequencies are used in a given area.
Radio reception factors
Three factors can affect radio reception:
²Distance/strength.The further an FM signal travels, the weaker it is.
The listenable range of the average FM station is approximately 40 km
(24 miles). This range can be affected by ªsignal modulation.º Signal
modulation is a process radio stations use to increase their
strength/volume relative to other stations.
²Terrain.Hills, mountains and tall buildings between your vehicle's
antenna and the radio station signal can cause FM reception problems.
Static can be caused on AM stations by power lines, electric fences,
traffic lights and thunderstorms. Moving away from an interfering
structure (out of its ªshadowº) returns your reception to normal.
Controls and features
50
Page 63 of 256
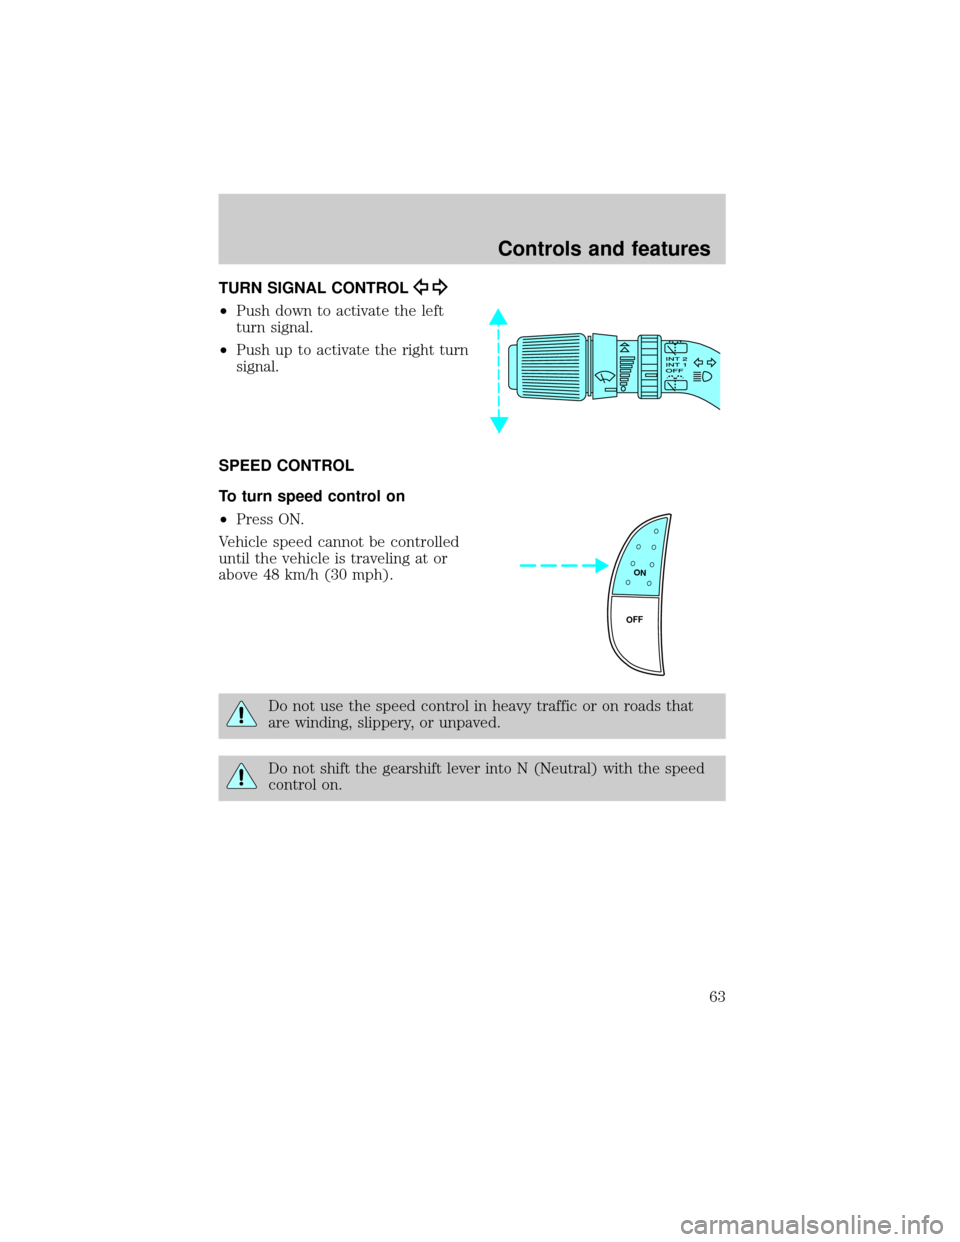
TURN SIGNAL CONTROL
²Push down to activate the left
turn signal.
²Push up to activate the right turn
signal.
SPEED CONTROL
To turn speed control on
²Press ON.
Vehicle speed cannot be controlled
until the vehicle is traveling at or
above 48 km/h (30 mph).
Do not use the speed control in heavy traffic or on roads that
are winding, slippery, or unpaved.
Do not shift the gearshift lever into N (Neutral) with the speed
control on.
ON
OFF
Controls and features
63
Page 80 of 256
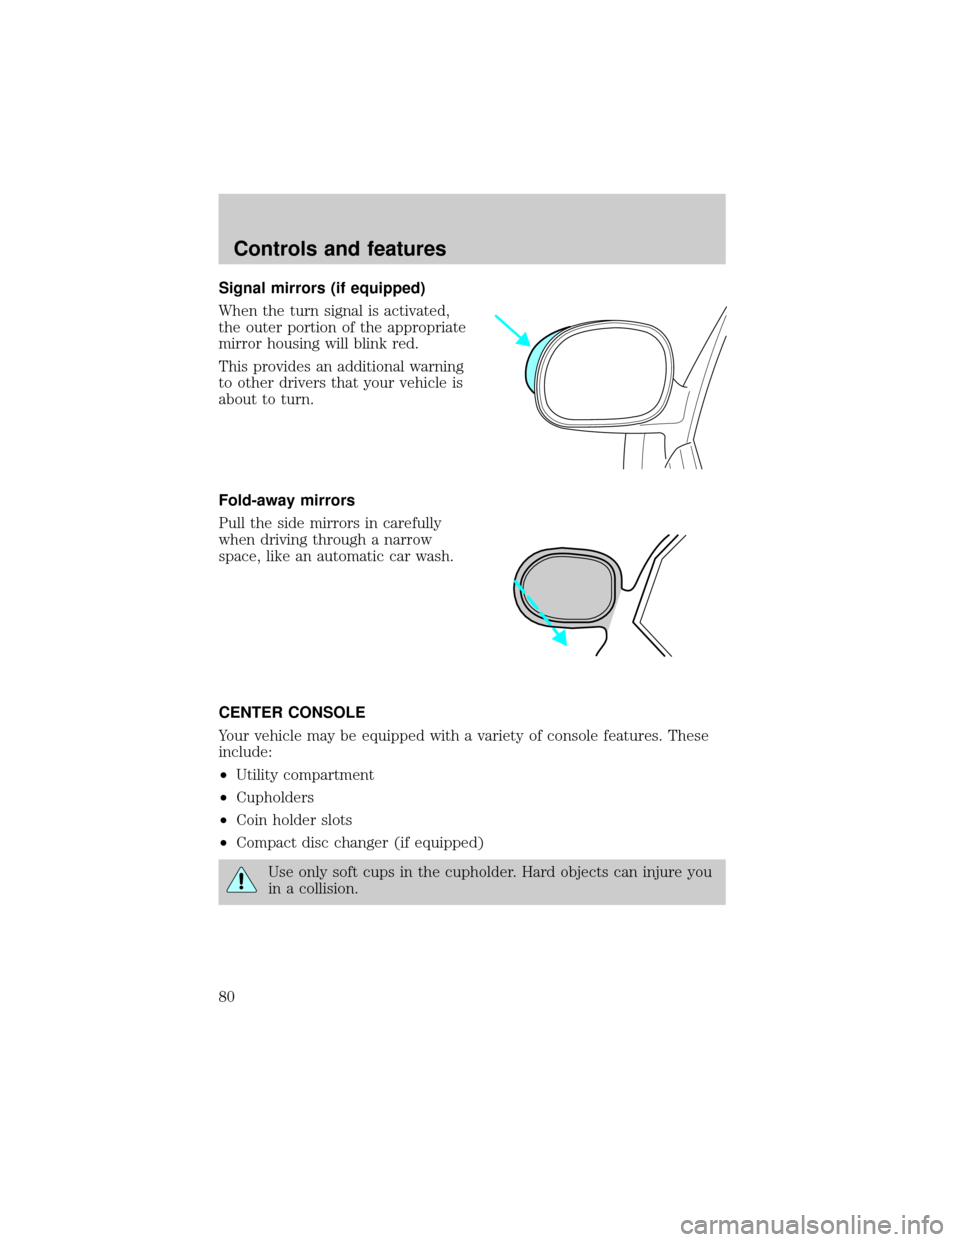
Signal mirrors (if equipped)
When the turn signal is activated,
the outer portion of the appropriate
mirror housing will blink red.
This provides an additional warning
to other drivers that your vehicle is
about to turn.
Fold-away mirrors
Pull the side mirrors in carefully
when driving through a narrow
space, like an automatic car wash.
CENTER CONSOLE
Your vehicle may be equipped with a variety of console features. These
include:
²Utility compartment
²Cupholders
²Coin holder slots
²Compact disc changer (if equipped)
Use only soft cups in the cupholder. Hard objects can injure you
in a collision.
Controls and features
80
Page 215 of 256
Readiness for Inspection/Maintenance (I/M) testing
In some localities, it may be a legal requirement to pass an I/M test of
the on-board diagnostics system. If your ªCheck Engine/Service Engine
Soonº light is on, refer to the description in theWarning Lights and
Chimessection of theInstrumentationchapter. Your vehicle may not
pass the I/M test with the ªCheck Engine/Service Engine Soonº light on.
If the vehicle's powertrain system or its battery has just been serviced,
the on-board diagnostics system is reset to a ªnot ready for I/M testº
condition. To ready the on-board diagnostics system for I/M testing, a
minimum of 30 minutes of city and highway driving is necessary as
described below:
²First, at least 10 minutes of driving on an expressway or highway.
²Next, at least 20 minutes driving in stop-and-go, city-type traffic with
at least four idle periods.
Allow the vehicle to sit for at least eight hours without starting the
engine. Then, start the engine and complete the above driving cycle. The
engine must warm up to its normal operating temperature. Once started,
do not turn off the engine until the above driving cycle is complete.
BULBS
Replacing exterior bulbs
Check the operation of the following lamps frequently:
²Headlamps
²Foglamps
²High-mount brakelamp
²Brakelamps
²Parking lamps
²Turn signals
²License plate lamp
²Tail lamps
²Back-up lamps
Do not remove lamp bulbs unless they can be replaced immediately with
new ones. If a bulb is removed for an extended period of time,
contaminants may enter the lamp housings and affect lamp performance.
Maintenance and care
215
Page 217 of 256
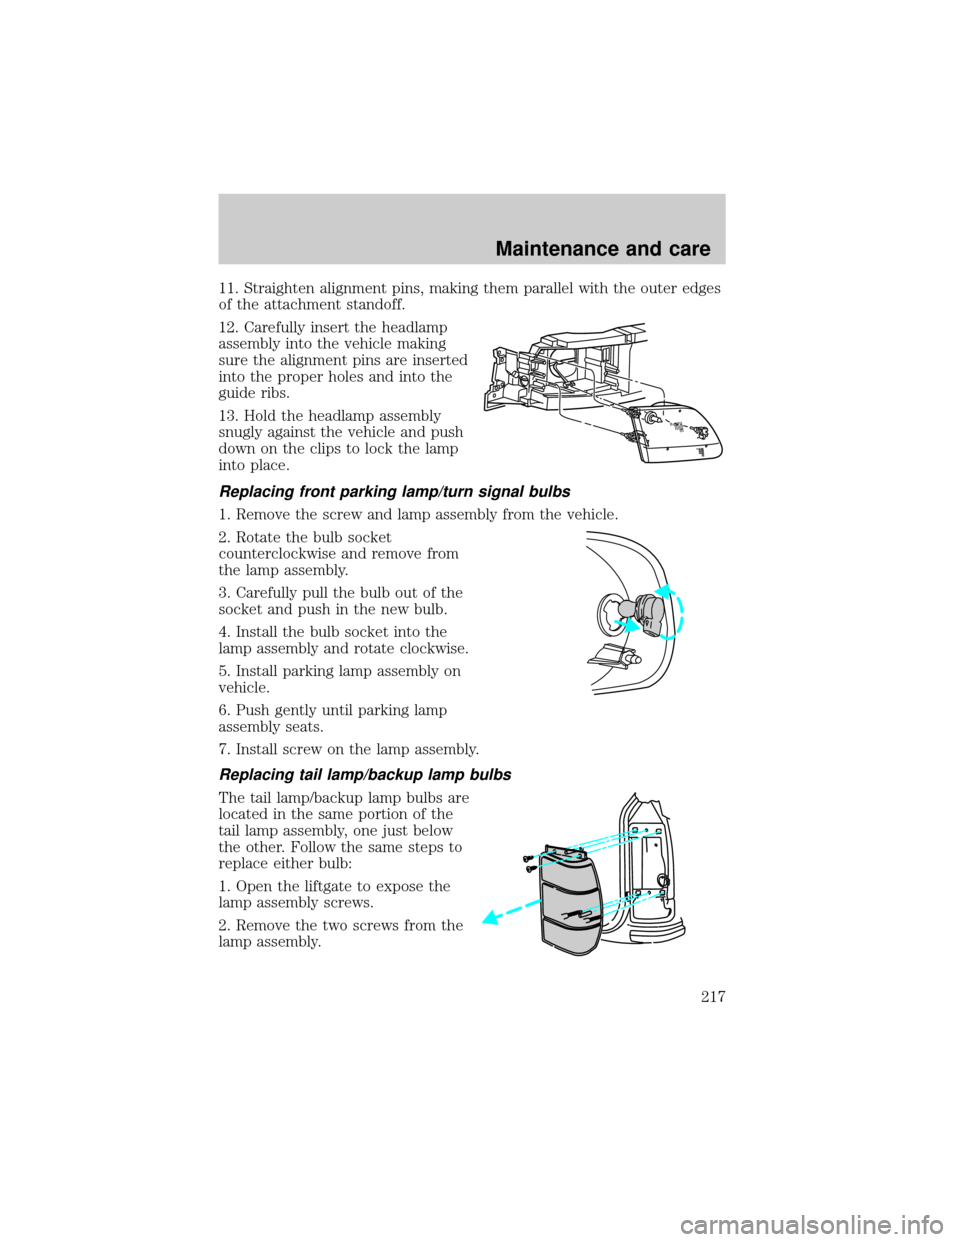
11. Straighten alignment pins, making them parallel with the outer edges
of the attachment standoff.
12. Carefully insert the headlamp
assembly into the vehicle making
sure the alignment pins are inserted
into the proper holes and into the
guide ribs.
13. Hold the headlamp assembly
snugly against the vehicle and push
down on the clips to lock the lamp
into place.
Replacing front parking lamp/turn signal bulbs
1. Remove the screw and lamp assembly from the vehicle.
2. Rotate the bulb socket
counterclockwise and remove from
the lamp assembly.
3. Carefully pull the bulb out of the
socket and push in the new bulb.
4. Install the bulb socket into the
lamp assembly and rotate clockwise.
5. Install parking lamp assembly on
vehicle.
6. Push gently until parking lamp
assembly seats.
7. Install screw on the lamp assembly.
Replacing tail lamp/backup lamp bulbs
The tail lamp/backup lamp bulbs are
located in the same portion of the
tail lamp assembly, one just below
the other. Follow the same steps to
replace either bulb:
1. Open the liftgate to expose the
lamp assembly screws.
2. Remove the two screws from the
lamp assembly.
Maintenance and care
217
Page 251 of 256

lighting up
panel and interior .....................20
location of components ..............8
Jump-starting your vehicle ......175
Keyless entry system
autolock .....................................89
locking and unlocking doors ....91
programming entry code .........90
Keys
key in ignition chime ...............13
positions of the ignition ...........62
Lamps
autolamp system .......................20
bulb replacement
specifications chart ................219
cargo lamps ...............................20
daytime running light ...............19
fog lamps ...................................20
headlamps .................................19
headlamps, flash to pass ..........19
instrument panel, dimming .....20
interior lamps ...............75,76,220
replacing
bulbs ............215,216,217,218,219
Lane change indicator
(see Turn signal) ........................63
Liftgate ........................................81
Lights, warning and indicator ......8
air bag ..........................................9
air suspension .........................139
anti-lock brakes (ABS) .....10,135
anti-theft ...................................11
brake ..........................................10
charging system ........................11
check coolant ............................11
cruise indicator .........................12
door ajar ....................................12
engine oil pressure ...................11
high beam .................................11
low fuel ........................................8
low washer fluid .......................12
safety belt .................................10service engine soon ....................8
turn signal indicator .................10
Load limits .................................149
GAWR ......................................149
GVWR ......................................149
trailer towing ..........................149
Loading instructions .................151
Locks
autolock .....................................89
childproof ..................................78
doors ..........................................78
Lubricant specifications ....229,232
Lumbar support, seats ...............92
Message center ......................17,71
english/metric button ...............17
menu button .............................17
Mirrors .........................................76
automatic dimming
rearview mirror .........................76
fold away ...................................80
heated ........................................79
programmable memory ............88
side view mirrors (power) .......79
Moon roof ....................................70
Motorcraft parts .................210,226
Octane rating ............................208
Odometer .....................................15
Oil (see Engine oil) ..................183
Overdrive .....................................68
Panic alarm feature, remote
entry system ................................85
Parking brake ............................136
Parts (see Motorcraft parts) ....226
Pedals (see Power
adjustable foot pedals) ...............21
Power adjustable foot pedals .....21
Power distribution box
(see Fuses) ...............................166
Power door locks ...................78,89
Power steering ...................137,138
fluid, checking and adding ....193
fluid, refill capacity ................226
Index
251
Page 252 of 256

fluid, specifications ..........229,232
Preparing to
drive your vehicle .....................140
Radio ............................................25
Relays .................................161,169
Remote entry system ............84,85
illuminated entry ......................88
locking/unlocking doors ...........85
panic alarm ...............................85
replacement/additional
transmitters ...............................87
replacing the batteries .............86
Reverse sensing system .............22
Roof rack ...................................158
Safety belts
(see Safety restraints) ........13,104
105,106,107,109
Safety defects, reporting ..........247
Safety
restraints .......104,105,106,107,109
belt minder .............................110
cleaning the
safety belts .......................113,225
extension assembly ................109
for adults ...................105,106,107
for children ......................121,122
lap belt ....................................108
warning light
and chime ...............10,13,109,110
Safety seats for children ..........123
Seat belts
(see Safety restraints) .............104
Seats ............................................92
child safety seats ....................123
cleaning ............................224,225
memory seat ........................88,96
SecuriLock passive
anti-theft system ....................82,83
Servicing your vehicle ..............181
Snowplowing .................................3
Spark plugs,
specifications ......................226,232Special notice ................................3
ambulance conversions ..............3
utility-type vehicles ....................3
Specification chart,
lubricants ............................229,232
Speed control ..............................63
Speedometer ...............................14
Starting your vehicle .........129,131
jump starting ..........................175
Steering
speed sensitive .......................138
Steering wheel
tilting .........................................67
Tachometer .................................16
Tires .............................169,202,203
changing ...........................169,171
checking the pressure ............203
replacing ..................................204
rotating ....................................203
snow tires and chains ............205
tire grades ...............................203
treadwear ................................202
Towing ................................152,203
recreational towing .................156
trailer towing ..........................152
wrecker ....................................180
Traction-lok rear axle ...............139
Transmission .............................141
fluid, checking and adding
(automatic) .............................194
fluid, refill capacities ..............226
lubricant specifications ...229,232
Trip odometer .............................15
Turn signal .............................10,63
Vehicle dimensions ...................232
Vehicle Identification
Number (VIN) ...........................234
Vehicle loading ..........................149
Ventilating your vehicle ...........133
Warning chimes ...........................13
Warning lights (see Lights) .........8
Washer fluid ..............................187
Index
252