display FORD EXPEDITION 2000 1.G Rear Seat Entertainment System Manual
[x] Cancel search | Manufacturer: FORD, Model Year: 2000, Model line: EXPEDITION, Model: FORD EXPEDITION 2000 1.GPages: 76, PDF Size: 0.58 MB
Page 1 of 76

To Operate
How to Play a Video Cassette Tape
Your system audio defaults to wireless
headphones. To play the system audio over
your vehicle's speakers:
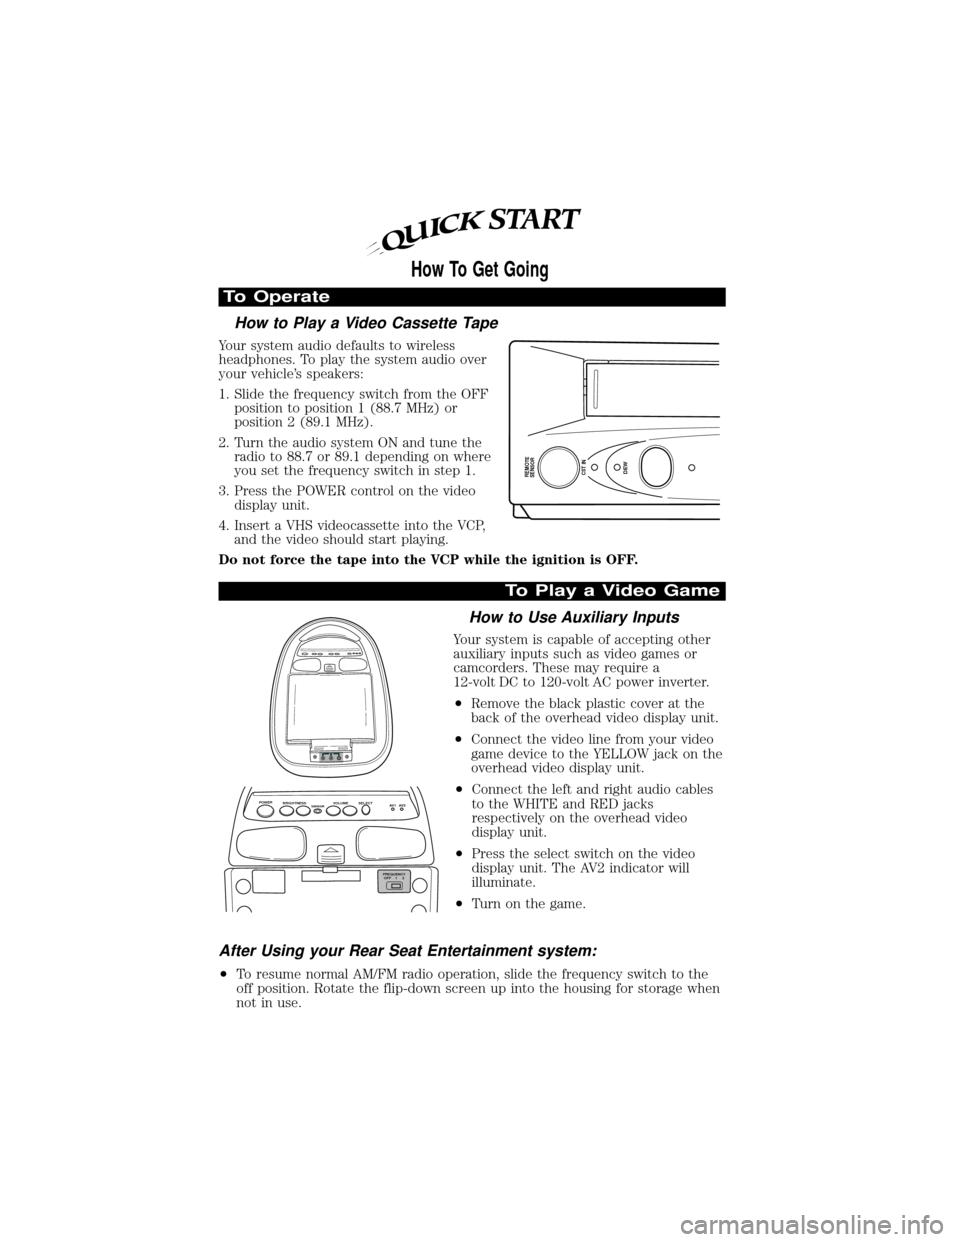
1. Slide the frequency switch from the OFF
position to position 1 (88.7 MHz) or
position 2 (89.1 MHz).
2. Turn the audio system ON and tune the
radio to 88.7 or 89.1 depending on where
you set the frequency switch in step 1.
3. Press the POWER control on the video
display unit.
4. Insert a VHS videocassette into the VCP,
and the video should start playing.
Do not force the tape into the VCP while the ignition is OFF.
To Play a Video Game
How to Use Auxiliary Inputs
Your system is capable of accepting other
auxiliary inputs such as video games or
camcorders. These may require a
12-volt DC to 120-volt AC power inverter.
²Remove the black plastic cover at the
back of the overhead video display unit.
²Connect the video line from your video
game device to the YELLOW jack on the
overhead video display unit.
²Connect the left and right audio cables
to the WHITE and RED jacks
respectively on the overhead video
display unit.
²Press the select switch on the video
display unit. The AV2 indicator will
illuminate.
²Turn on the game.
After Using your Rear Seat Entertainment system:
²To resume normal AM/FM radio operation, slide the frequency switch to the
off position. Rotate the flip-down screen up into the housing for storage when
not in use.
How To Get Going
REMOTE
SENSOR
CST INDEW
POWER
BRIGHTNESS VOLUMESENSORSELECT
FREQUENCY
OFF 1 2AV 1 AV 2
Page 4 of 76

Your Rear Seat Entertainment System (RSES) allows you to watch movie
rentals and your favorite home videocassettes. It also allows you to plug
in and play a variety of standard video games. Please review this user
manual to become familiar with the RSES features and controls as well
as the very important safety information.
SAFETY INFORMATION
Read all of the safety and operating instructions before operating the
system and retain for future reference.
Do not attempt to service, repair or modify the rear seat entertainment
system. See your Ford or Lincoln-Mercury dealer.
Do not insert foreign objects into the video cassette player (VCP) tape
cassette compartment.
The front glass on the liquid crystal display may break when hit
with a hard surface. If the glass breaks, do not touch the liquid
crystalline material. In case of contact with skin, wash immediately
with soap and water.
Do not expose the liquid crystal display to direct sunlight or
intensive ultraviolet rays for extensive periods of time.
Ultraviolet rays deteriorate the liquid crystal.
Driver should never operate any function of the VCP mounted in
the Floor Console when the vehicle is moving. Give full attention
to driving and the road. Pull off the road and park in a safe place to
insert or remove video tapes from the VCP. A remote control is
included in the system to allow rear seat occupants to operate the VCP
functions without distracting the driver.
Introduction
2
Page 12 of 76

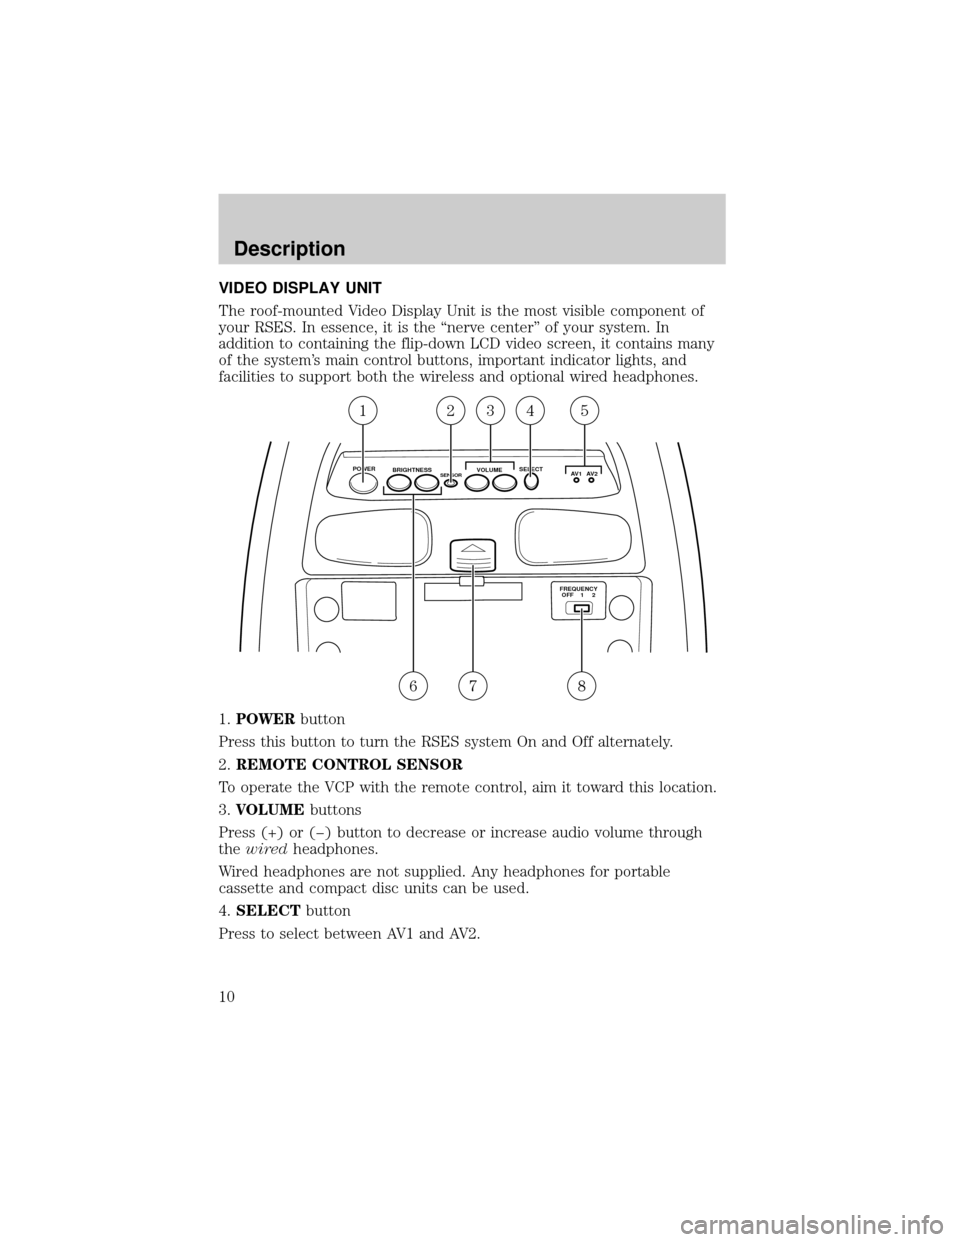
VIDEO DISPLAY UNIT
The roof-mounted Video Display Unit is the most visible component of
your RSES. In essence, it is the ªnerve centerº of your system. In
addition to containing the flip-down LCD video screen, it contains many
of the system's main control buttons, important indicator lights, and
facilities to support both the wireless and optional wired headphones.
1.POWERbutton
Press this button to turn the RSES system On and Off alternately.
2.REMOTE CONTROL SENSOR
To operate the VCP with the remote control, aim it toward this location.
3.VOLUMEbuttons
Press (+) or (þ) button to decrease or increase audio volume through
thewiredheadphones.
Wired headphones are not supplied. Any headphones for portable
cassette and compact disc units can be used.
4.SELECTbutton
Press to select between AV1 and AV2.
POWER
BRIGHTNESS VOLUMESENSORSELECT
FREQUENCY
OFF 1 2AV 1 AV 2
54321
876
Description
10
Page 16 of 76

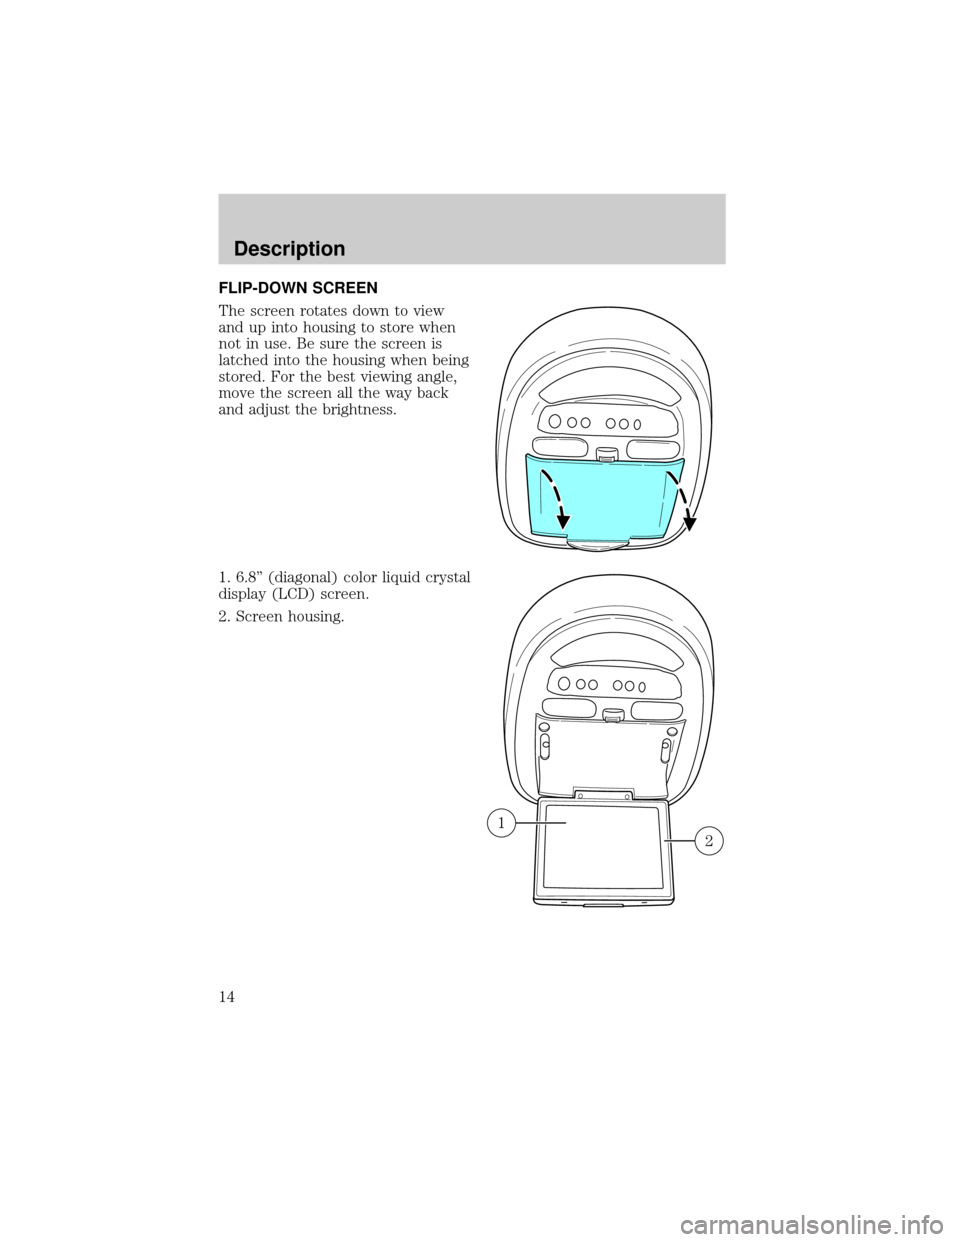
FLIP-DOWN SCREEN
The screen rotates down to view
and up into housing to store when
not in use. Be sure the screen is
latched into the housing when being
stored. For the best viewing angle,
move the screen all the way back
and adjust the brightness.
1. 6.8º (diagonal) color liquid crystal
display (LCD) screen.
2. Screen housing.
2
1
Description
14