CD player FORD EXPEDITION 2014 3.G Owners Manual
[x] Cancel search | Manufacturer: FORD, Model Year: 2014, Model line: EXPEDITION, Model: FORD EXPEDITION 2014 3.GPages: 519, PDF Size: 6.9 MB
Page 350 of 519
GENERAL INFORMATION
Radio Frequencies and Reception Factors
AM and FM frequencies are established by the Federal Communications
Commission (FCC) and the Canadian Radio and Telecommunications
Commission (CRTC). Those frequencies are:
AM: 530, 540–1700, 1710 kHz
FM: 87.9–107.7, 107.9 MHz
Radio reception factors
Distance and
strengthThe further you travel from an FM station,
the weaker the signal and the weaker the
reception.
TerrainHills, mountains, tall buildings, bridges,
tunnels, freeway overpasses, parking garages,
dense tree foliage and thunderstorms can
interfere with the reception.
Station overloadWhen you pass a ground-based broadcast
repeating tower, a stronger signal may
overtake a weaker one and result in the audio
system muting.
CD and CD Player Information
Note:CD units play commercially pressed 4.75-inch (12 centimeter)
audio compact discs only. Due to technical incompatibility, certain
recordable and re-recordable compact discs may not function correctly
when used in Ford CD players.
Note:Do not insert CDs with homemade paper (adhesive) labels into
the CD player as the label may peel and cause the CD to become
jammed. You should use a permanent felt tip marker rather than
adhesive labels on your homemade CDs. Ballpoint pens may damage
CDs. Please contact your authorized dealer for further information.
Note:Do not use any irregularly shaped discs or discs with a scratch
protection film attached.
Always handle discs by their edges only. Clean the disc with an approved
CD cleaner only. Wipe it from the center of the disc toward the edge.
Do not clean in a circular motion.
Do not expose discs to direct sunlight or heat sources for extended
periods.
Audio System349
2014 Expedition(exd)
Owners Guide gf, 1st Printing, June 2013
USA(fus)
Page 351 of 519
MP3 Track and Folder Structure
Audio systems capable of recognizing and playing MP3 individual tracks
and folder structures work as follows:
•There are two different modes for MP3 disc playback: MP3 track
mode (system default) and MP3 folder mode.
•MP3 track mode ignores any folder structure on the MP3 disc. The
player numbers each MP3 track on the disc (noted by the .mp3 file
extension) from T001 to a maximum of T255.Note:The maximum
number of playable MP3 files may be less depending on the structure
of the CD and exact model of radio present.
•MP3 folder mode represents a folder structure consisting of one level
of folders. The CD player numbers all MP3 tracks on the disc (noted
by the .mp3 file extension) and all folders containing MP3 files, from
F001 (folder) T001 (track) to F253 T255.
•Creating discs with only one level of folders helps with navigation
through the disc files.
If you are burning your own MP3 discs, it is important to understand
how the system reads the structures you create. While various files may
be present, (files with extensions other than mp3), only files with the
.mp3 extension are played; other files are ignored by the system. This
enables you to use the same MP3 disc for a variety of tasks on your work
computer, home computer and your in-vehicle system.
In track mode, the system displays and plays the structure as if it were
only one level deep (all .mp3 files play, regardless of being in a specific
folder). In folder mode, the system only plays the .mp3 files in the
current folder.
350Audio System
2014 Expedition(exd)
Owners Guide gf, 1st Printing, June 2013
USA(fus)
Page 359 of 519
Sirius Satellite Radio Service
Note:Sirius reserves the unrestricted right to change, rearrange, add or
delete programming including canceling, moving or adding particular
channels, and its prices, at any time, with or without notice to you. Ford
Motor Company shall not be responsible for any such programming
changes.
Sirius satellite radio is a
subscription-based satellite radio
service that broadcasts a variety of
music, sports, news, weather, traffic
and entertainment programming.
Your factory-installed Sirius satellite
radio system includes hardware and
a limited subscription term which begins on the date of sale or lease of
your vehicle. See an authorized dealer for availability.
For more information on extended subscription terms (a service fee is
required), the online media player and a complete list of Sirius satellite
radio channels, and other features, please visit www.siriusxm.com in the
United States, www.sirius.ca in Canada, or call Sirius at 1–888–539–7474.
Satellite Radio Electronic Serial Number (ESN)
You need your ESN to activate, modify or track your satellite radio
account. When in satellite radio mode, you can view this number by
pressingSIRIUSand memory preset 1 at the same time. To access your
ESN, press the bottom left corner of the touchscreen, thenSIRIUS>
Options.
358Audio System
2014 Expedition(exd)
Owners Guide gf, 1st Printing, June 2013
USA(fus)
Page 361 of 519
AUXILIARY INPUT JACK
WARNING:Driving while distracted can result in loss of vehicle
control, crash and injury. We strongly recommend that you use
extreme caution when using any device that may take your focus off
the road. Your primary responsibility is the safe operation of your
vehicle. We recommend against the use of any hand-held device while
driving and encourage the use of voice-operated systems when possible.
Make sure you are aware of all applicable local laws that may affect the
use of electronic devices while driving.
WARNING:For safety reasons, do not connect or adjust the
settings on your portable music player while your vehicle is
moving.
WARNING:Store the portable music player in a secure location,
such as the center console or the glove box, when your vehicle is
moving. Hard objects may become projectiles in a crash or sudden stop,
which may increase the risk of serious injury. The audio extension cable
must be long enough to allow the portable music player to be safely
stored while your vehicle is moving.
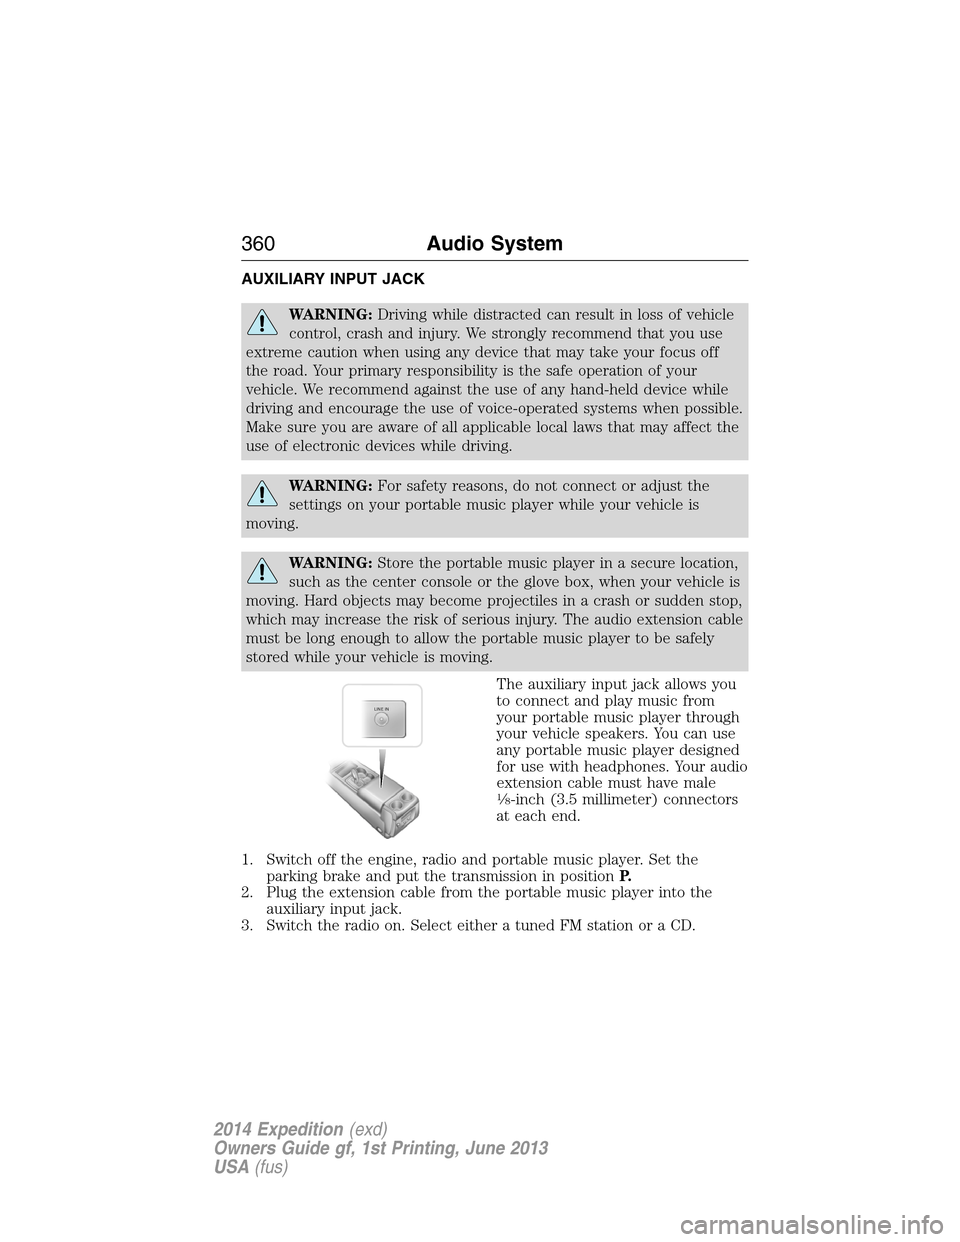
The auxiliary input jack allows you
to connect and play music from
your portable music player through
your vehicle speakers. You can use
any portable music player designed
for use with headphones. Your audio
extension cable must have male
1�8-inch (3.5 millimeter) connectors
at each end.
1. Switch off the engine, radio and portable music player. Set the
parking brake and put the transmission in positionP.
2. Plug the extension cable from the portable music player into the
auxiliary input jack.
3. Switch the radio on. Select either a tuned FM station or a CD.
LINE IN
360Audio System
2014 Expedition(exd)
Owners Guide gf, 1st Printing, June 2013
USA(fus)
Page 362 of 519
4. Adjust the volume as desired.
5. Switch your portable music player on and adjust its volume to half its
maximum level.
6. PressAUXuntilLINEorLINE INappears in the display. You
should hear music from your device even if it is low.
7. Adjust the volume on your portable music player until it reaches the
volume level of the FM station or CD. Do this by switching back and
forth between the AUX and FM or CD controls.
USB PORT (IF EQUIPPED)
WARNING:Driving while distracted can result in loss of vehicle
control, crash and injury. We strongly recommend that you use
extreme caution when using any device that may take your focus off
the road. Your primary responsibility is the safe operation of your
vehicle. We recommend against the use of any hand-held device while
driving and encourage the use of voice-operated systems when possible.
Make sure you are aware of all applicable local laws that may affect the
use of electronic devices while driving.
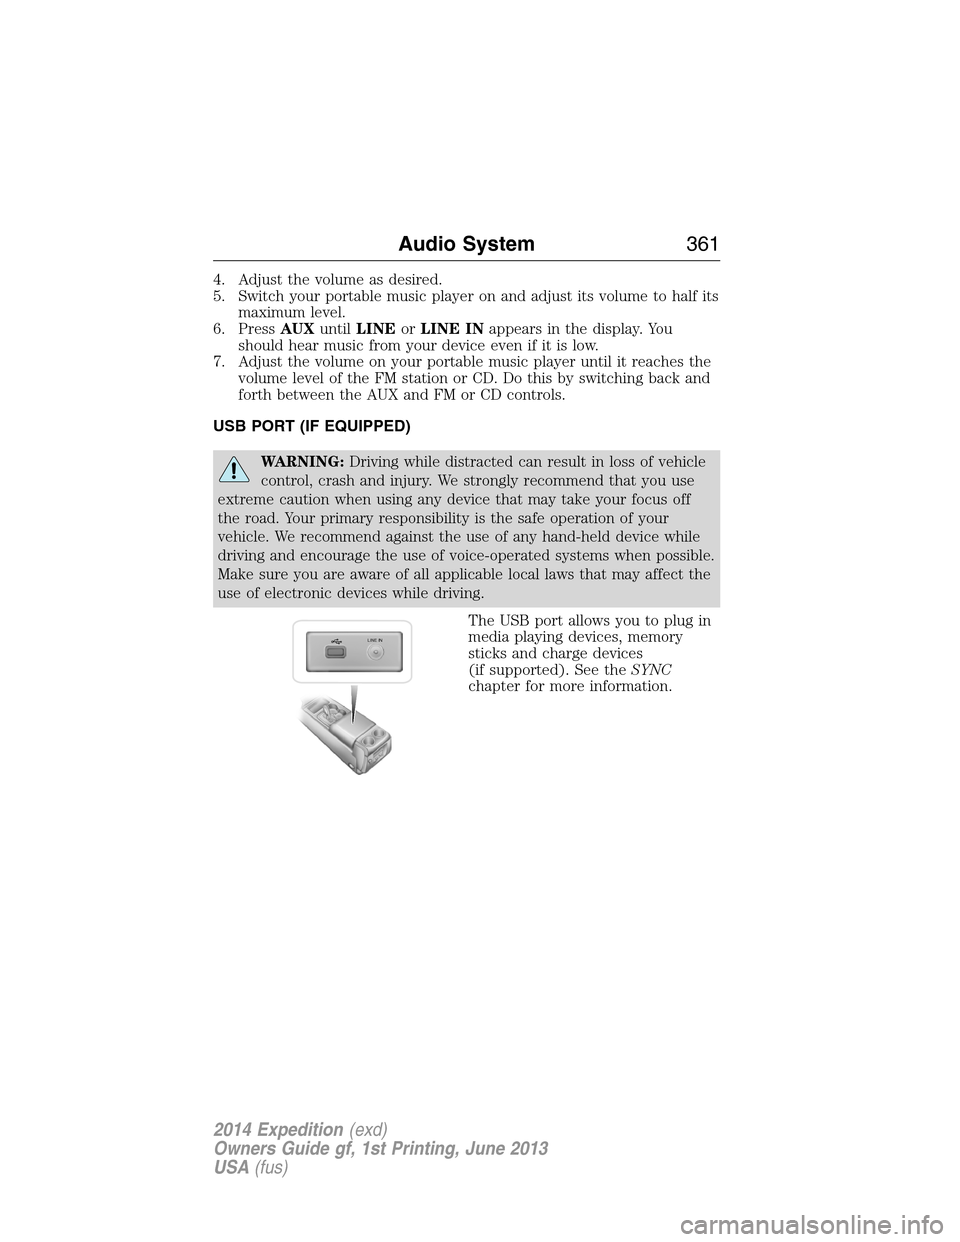
The USB port allows you to plug in
media playing devices, memory
sticks and charge devices
(if supported). See theSYNC
chapter for more information.
LINE IN
Audio System361
2014 Expedition(exd)
Owners Guide gf, 1st Printing, June 2013
USA(fus)
Page 363 of 519
REAR SEAT ENTERTAINMENT SYSTEM (IF EQUIPPED)
WARNING:Driving while distracted can result in loss of vehicle
control, crash and injury. We strongly recommend that you use
extreme caution when using any device that may take your focus off
the road. Your primary responsibility is the safe operation of your
vehicle. We recommend against the use of any hand-held device while
driving and encourage the use of voice-operated systems when possible.
Make sure you are aware of all applicable local laws that may affect the
use of electronic devices while driving.
Note:Make sure you run the engine while using the device. To avoid
discharging your vehicle battery:
•Do not use this device without the engine running.
•Turn off the device when your vehicle is not in use for long periods.
The system consists of the following features:
•Seven-inch color TFT-LCD panel (480x234) with 16:9 aspect
•Built-in, top-loading slot load DVD player
•Infrared transmitters for infrared wireless headphones
•Audio/Video source input (three RCA jacks)
•USB 2.0 (optional)
•One-eighth inch stereo headphone jack
•Forward remote sensor on the front panel
•Full-function remote control
•Five control buttons on the front panel: POWER, SOURCE, STOP,
PLAY and EJECT
•On-screen display control
•12V DC power input
•FM transmitter (may be optional)
Note:Do not touch the inner pins of the jacks on the front panel.
Electrostatic discharge may cause permanent damage to the device.
Your system plays the following types of discs:
•DVD-Video:DVD contains video.
•DVD +/- R:DVD contains video.
•CD-DA:CD contains musical or sound content only.
•CD-Video:CD contains movie only.
•CD-R/RW:CD contains audio files (such as a CD-R with MP3 files),
MPEG or JPEG files.
362Audio System
2014 Expedition(exd)
Owners Guide gf, 1st Printing, June 2013
USA(fus)
Page 365 of 519
Wired Headphones
You can use any standard stereo headphones by plugging them into the
1/8–inch (3.5 millimeter) headphone jack on each of the headrest DVD
systems. Remove and save the protective plastic cover to access the
jacks. Remember to replace the cover when the jacks are not in use.
A/V Input
You can connect an external audio/video device that uses common RCA
interface cables to the Ford DVD system, such as a video game device or
VCR. Connect the device RCA cables to the AV RCA INPUT jacks
according to color: yellow for video, red for right audio and white for left
audio. The signal from the external audio/video source overrides other
video sources for that monitor.
Wireless FM Transmitter
Your device has an internal FM transmitter. This allows you to listen to
the DVD player audio signal by tuning your vehicle FM radio to a radio
frequency that you select, then accessing the SOUND-AROUND feature
by using the remote control. SOUND-AROUND allows the user to choose
from a number of pre-programmed frequencies to play back the rear-seat
entertainment system audio over the radio. When you engage
SOUND-AROUND, as long as the DVD player is active, it adversely
affects the FM radio reception of other stations, especially neighboring
stations nearest to whichever station is in use for the DVD player.
Performance of SOUND-AROUND varies based on geographic location.
You may need to change the SOUND-AROUND frequency periodically
when travelling long distances. This helps maintain the best performance
when listening to DVD system content over the radio. Audio heard
through wireless headphones remains unaffected by SOUND-AROUND.
There may also be a reduction in AM radio performance as well. AM and
FM radio performance can be expected to return to normal when the
DVD system is turned off.
How to use the FM Transmitter
1. Switch on the system and place a disc in Monitor A.
2. Point the remote control at the monitor, and then press DVD A.
3. PressSOUND AROUND ON/OFFto turn FM transmission off and
on.
4. Select a radio frequency (88.3, 88.7, 89.1, 89.5, 89.9, and 90.3MHz)
by pressingSOUND AROUND SELECT.
5. Select a frequency, and then tune your radio to the corresponding
frequency. Try each station frequency until you achieve a clear audio
signal.
364Audio System
2014 Expedition(exd)
Owners Guide gf, 1st Printing, June 2013
USA(fus)
Page 366 of 519
Console Controls
Note:Do not use any solvents or cleaning materials when cleaning the
video device.
Note:Do not use any abrasive cleaners, which may scratch the screen.
Use only a lightly dampened lint free cloth to wipe the screen if it is
dirty.
Note:Lock the LCD screen in the fully closed position when not in use.
Note:Do not put pressure on the screen.
Note:Caution children against touching or scratching the screen, as it
may become dirty or damaged.
Note:Items marked with an
*are only available on systems with a DVD
player.
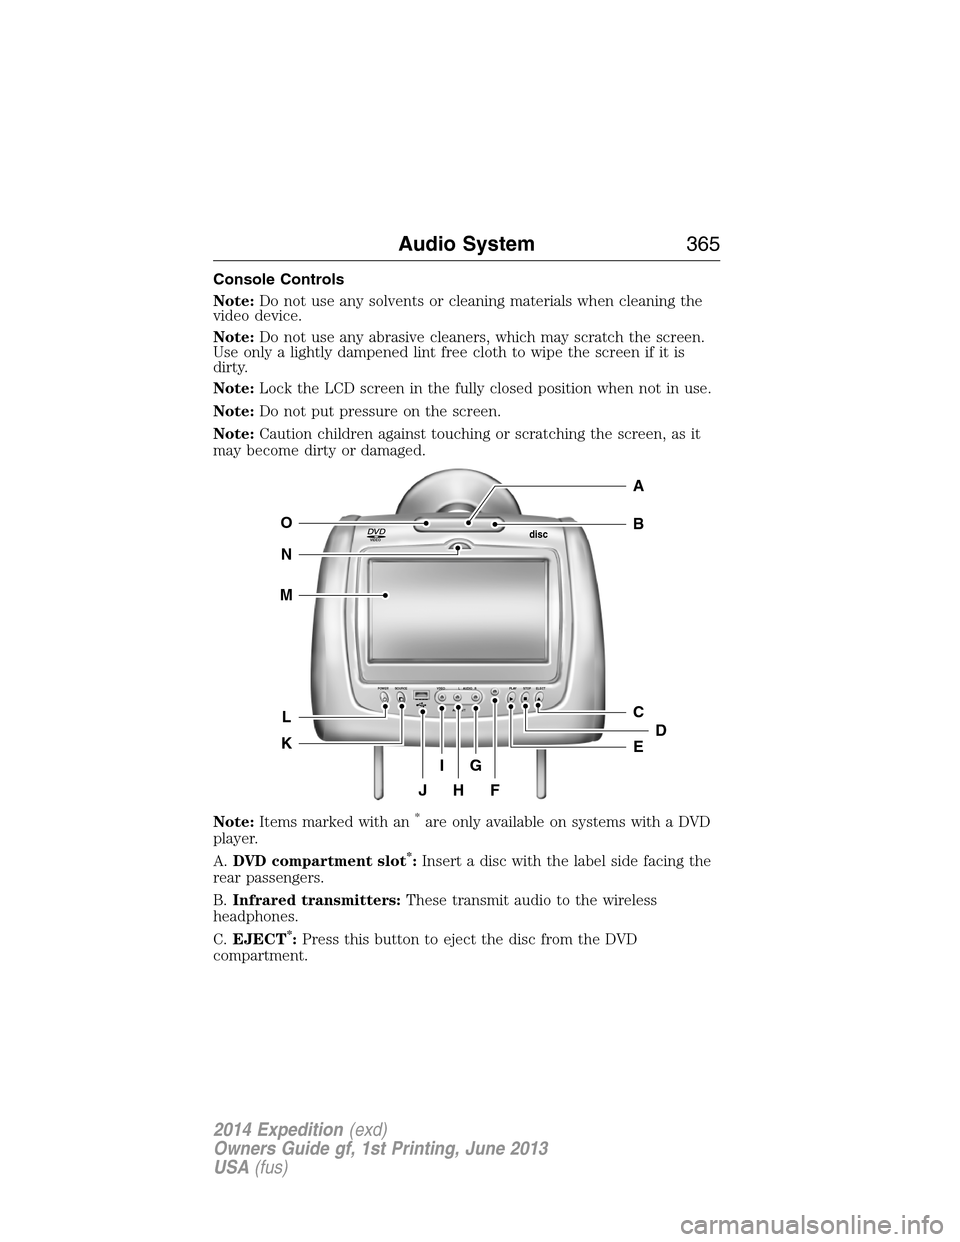
A.DVD compartment slot
*:Insert a disc with the label side facing the
rear passengers.
B.Infrared transmitters:These transmit audio to the wireless
headphones.
C.EJECT
*:Press this button to eject the disc from the DVD
compartment.
VIDEOdisc
POWER SOURCE VDEO L RAUDIO PLAY STOP ELECT
AV INPUT
HFJ
IG
C
B
A
E
DL
N
M
O
K
Audio System365
2014 Expedition(exd)
Owners Guide gf, 1st Printing, June 2013
USA(fus)
Page 367 of 519
D.STOP*:Press this button to stop playing the disc.
E.PLAY*:Press this button to play the disc.
F.Headphone jack:Plug in your wired headphones with a 1/8-inch
(3.5 millimeter) stereo connector plug to listen to audio from the
program.
G.Video input jack (red):Connect an RCA cable to this port.
H.Video input jack (white):Connect an RCA cable to this port.
I.Video input jack (yellow):Connect an RCA cable to this port.
J.USB port (optional):Listen to music or view images you stored on a
USB device such as a USB memory stick or a memory card reader.
K.SOURCE:Press this button to select Monitor A, Monitor B, AUX/TV
(if available), and AUX 2 (if available).
L.POWER:Press this button to turn the system off and on.
M.TFT LCD panel:Seven-inch TFT LCD panel.
N.Level lock and release latch:Use this latch to change the viewing
angle of the LCD panel or lock the panel into the secured position.
O.Infrared sensor - forward sensor eye:This allows the remote
control to navigate the on-screen display.
Remote Control
Note:The remote control uses infrared light to send commands to the
DVD player, just as many home video systems do. Just point the remote
control at the DVD player infrared window located above each screen in
order to control that DVD player. While you can connect a second device
such as a VCR through the auxiliary inputs, and view the playback on
the screen, you cannot control that device by aiming its remote control
at the Ford DVD player. The Ford DVD system remote control is the
only remote control you can use with the system. For example, if you
connect a VCR to the DVD system, you must point the VCR remote
control at the VCR to control it.
Installing the Battery
Before using your remote control, install the batteries as follows:
1. Turn the remote control face down. Press down on the ridged area of
the battery cover and slide it off.
2. Install two AAA batteries. Make sure you install the batteries
properly, with the + and – facing the correct way, as shown in the
battery compartment.
3. Slide the cover back until it clicks.
366Audio System
2014 Expedition(exd)
Owners Guide gf, 1st Printing, June 2013
USA(fus)
Page 369 of 519
5.SOUND AROUND ON/OFF*:Press this button to turn the FM
transmitter off and on.
6.MUTE:Press this button to turn off the sound sent to the headphones.
The screen displays that the sound is muted. Pressing the button again
restores sound to the previously set level. This feature is only
functional in DVD mode.
7.MENU:Press this button to go to the disc’s root menu.
8.CH + and CH -:
•In DVD mode, press these buttons to move the select bar to items
among the menu or file list.
•In TV mode, press these buttons to go to the next channel or
previous channel.
•In on-screen display mode, press these buttons to change the
setting of a selected item.
9.VOL + and VOL -:
•In DVD mode, press these buttons to move the select bar to items
to one of the items in the menu or file list.
•When not in on-screen display mode, press these buttons to change
the volume of the playing media.
10.ENTER:Press this button to select from the on-screen display, or
begin disc playback.
11.TITLE:Press this button to go to a disc’s title menu.
12.SUBTITLE:If a disc has subtitle options, press this button to display
the subtitle menu. Keep pressing the button until you reach your
desired option.
13.Numbers:Decimal numbers: 0 to 9.
14.CLR:Press this button to clear any numeric input from the number
keypad.
15.P L AY:Press this button to play a disc in the DVD player.
16.STOP:Press this button to stop the playing media.
•Pressing STOP once, then PLAY, resumes disc playback from where
it left off.
•Pressing STOP twice, then PLAY, resumes disc playback from the
beginning.
17.PAUSE:Press this button to pause the disc.
18.FR (Fast Rewind):Press this button to search the disc backward
continuously. There are five speed options to choose: 2X, 4X, 8X, 16X,
and 32X.
19.FF (Fast Forward):Press this button to search the disc forward
continuously. There are five speed options to choose: 2X, 4X, 8X, 16X,
and 32X.
20.SETUP:Press this button to navigate the Setup Menu. SeeHow to
use the DVD on-screen display (OSD) menufor more information.
368Audio System
2014 Expedition(exd)
Owners Guide gf, 1st Printing, June 2013
USA(fus)