remote start FORD EXPEDITION 2016 3.G User Guide
[x] Cancel search | Manufacturer: FORD, Model Year: 2016, Model line: EXPEDITION, Model: FORD EXPEDITION 2016 3.GPages: 421, PDF Size: 6.3 MB
Page 56 of 421
LOCKING AND UNLOCKING
You can use the power door lock control
or the remote control to lock and unlock
your vehicle.
Power Door Locks
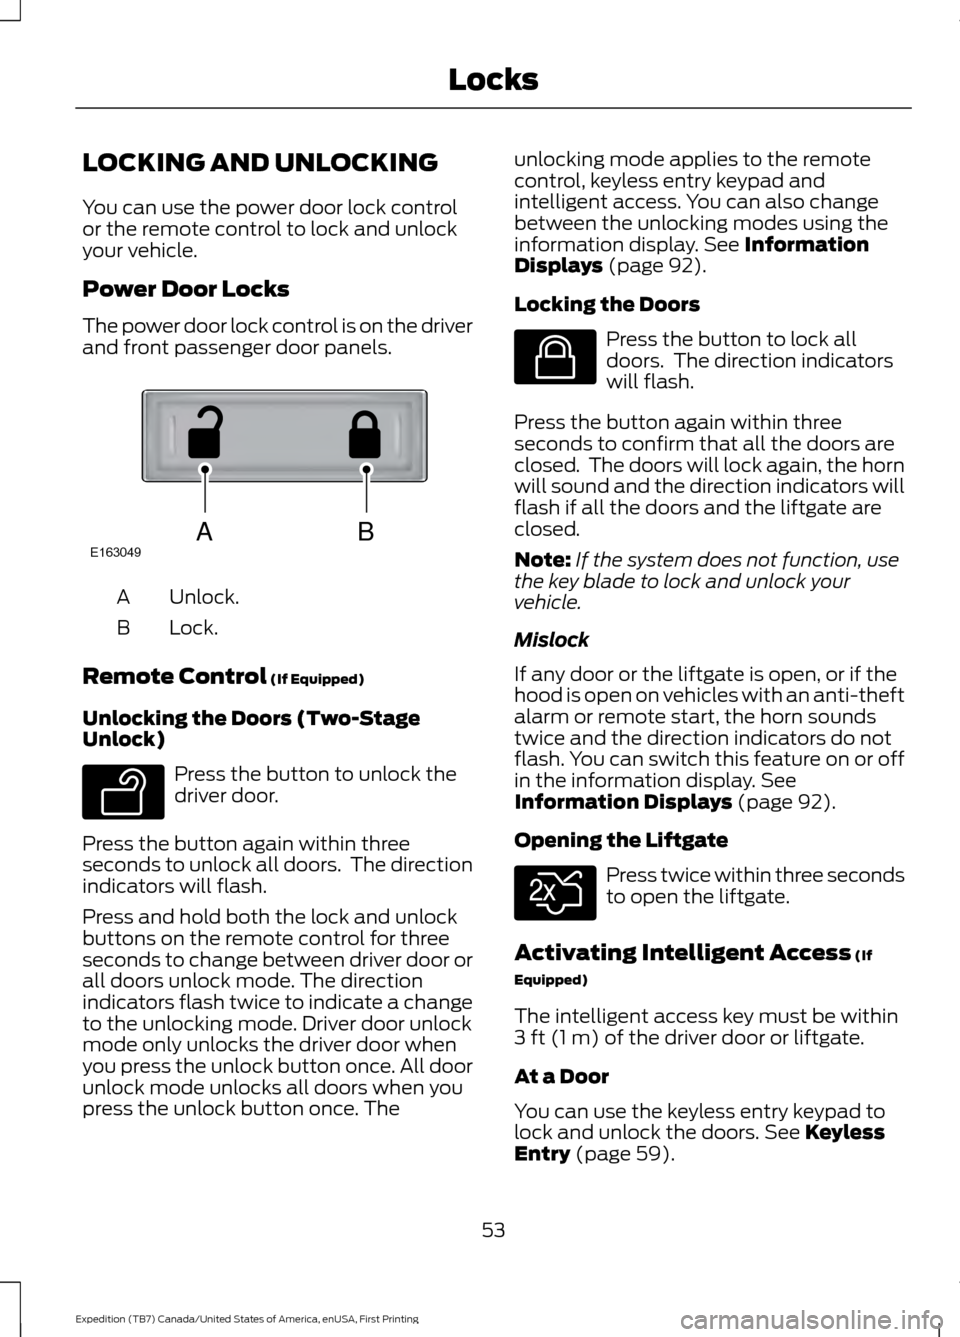
The power door lock control is on the driver
and front passenger door panels.
Unlock.
A
Lock.
B
Remote Control (If Equipped)
Unlocking the Doors (Two-Stage
Unlock) Press the button to unlock the
driver door.
Press the button again within three
seconds to unlock all doors. The direction
indicators will flash.
Press and hold both the lock and unlock
buttons on the remote control for three
seconds to change between driver door or
all doors unlock mode. The direction
indicators flash twice to indicate a change
to the unlocking mode. Driver door unlock
mode only unlocks the driver door when
you press the unlock button once. All door
unlock mode unlocks all doors when you
press the unlock button once. The unlocking mode applies to the remote
control, keyless entry keypad and
intelligent access. You can also change
between the unlocking modes using the
information display.
See Information
Displays (page 92).
Locking the Doors Press the button to lock all
doors. The direction indicators
will flash.
Press the button again within three
seconds to confirm that all the doors are
closed. The doors will lock again, the horn
will sound and the direction indicators will
flash if all the doors and the liftgate are
closed.
Note: If the system does not function, use
the key blade to lock and unlock your
vehicle.
Mislock
If any door or the liftgate is open, or if the
hood is open on vehicles with an anti-theft
alarm or remote start, the horn sounds
twice and the direction indicators do not
flash. You can switch this feature on or off
in the information display.
See
Information Displays (page 92).
Opening the Liftgate Press twice within three seconds
to open the liftgate.
Activating Intelligent Access
(If
Equipped)
The intelligent access key must be within
3 ft (1 m)
of the driver door or liftgate.
At a Door
You can use the keyless entry keypad to
lock and unlock the doors.
See Keyless
Entry (page 59).
53
Expedition (TB7) Canada/United States of America, enUSA, First Printing LocksABE163049 E138629 E138623 E138630
Page 65 of 421
PASSIVE ANTI-THEFT
SYSTEM
Note:
The system is not compatible with
non-Ford aftermarket remote start systems.
Use of these systems may result in vehicle
starting problems and a loss of security
protection.
Note: Metallic objects, electronic devices
or a second coded key on the same key
chain may cause vehicle starting problems
if they are too close to the key when starting
the engine. Prevent these objects from
touching the coded key while starting the
engine. Switch the ignition off, move all
objects on the key chain away from the
coded key and restart the engine if a
problem occurs.
Note: Do not leave a duplicate coded key
in the vehicle. Always take your keys and
lock all doors when leaving the vehicle.
SecuriLock®
The system is an engine immobilization
system. It is designed to help prevent the
engine from being started unless a coded
key programmed to your vehicle is used.
Using the wrong key may prevent the
engine from starting. A message may
appear in the information display.
If you are unable to start the engine with a
correctly coded key, a malfunction has
happened and a message may appear in
the information display.
Automatic Arming
The vehicle arms immediately after you
switch the ignition off.
Automatic Disarming
Switching the ignition on with a coded key
disarms the vehicle. Replacement Keys
Note:
Your vehicle comes equipped with
two integrated keyhead transmitters or two
intelligent access keys.
The integrated keyhead transmitter
functions as a programmed ignition key
that operates all the locks and starts the
vehicle, as well as a remote control.
The intelligent access key functions as a
programmed key that operates the driver
door lock and activates the intelligent
access with push button start system, as
well as a remote control.
If your programmed transmitters or
standard SecuriLock coded keys
(integrated keyhead transmitters only) are
lost or stolen and you do not have an extra
coded key, you will need to have your
vehicle towed to an authorized dealer. You
need to erase the key codes from your
vehicle and program new coded keys.
Store an extra programmed key away from
the vehicle in a safe place to help prevent
any inconveniences. See your authorized
dealer to purchase additional spare or
replacement keys.
Programming a Spare Integrated
Keyhead Transmitter
Note: You can program a maximum of eight
coded keys to your vehicle. All eight can be
integrated keyhead transmitters.
You can program your own integrated
keyhead transmitter or standard
SecuriLock coded keys to your vehicle. This
procedure will program both the engine
immobilizer keycode and the remote entry
portion of the remote control to your
vehicle
Only use integrated keyhead transmitters
or standard SecuriLock keys.
62
Expedition (TB7) Canada/United States of America, enUSA, First Printing Security
Page 66 of 421
You must have two previously
programmed coded keys and the new
unprogrammed key readily accessible. See
your authorized dealer to have the spare
key programmed if two previously
programmed coded keys are not available.
Read and understand the entire procedure
before you begin.
1.
Insert the first previously programmed
coded key into the ignition.
2. Switch the ignition from off to on. Keep
the ignition on for at least three
seconds, but no more than 10 seconds.
3. Switch the ignition off and remove the
first coded key from the ignition.
4. After three seconds but within 10 seconds of switching the ignition off,
insert the second previously coded key
into the ignition.
5. Switch the ignition from off to on. Keep
the ignition on for at least three
seconds, but no more than 10 seconds.
6. Switch the ignition off and remove the
second previously programmed coded
key from the ignition.
7. After three seconds but within 10 seconds of switching the ignition off
and removing the previously
programmed coded key, insert the new
unprogrammed key into the ignition.
8. Switch the ignition from off to on. Keep
the ignition on for at least six seconds.
9. Remove the newly programmed coded
key from the ignition.
If the key has been successfully
programmed it will start the engine and
operate the remote entry system (if the
new key is an integrated keyhead
transmitter).
If programming was not successful, wait
10 seconds and repeat Steps 1 through 8.
If you are still unsuccessful, take your
vehicle to your authorized dealer. Programming a Spare Intelligent
Access Key
See your authorized dealer to have
additional keys programmed to your
vehicle.
ANTI-THEFT ALARM
The system will warn you of an
unauthorized entry to your vehicle. It will
be triggered if any door, the luggage
compartment or the hood is opened
without using the key, remote control or
keyless entry keypad.
The direction indicators will flash and the
horn will sound if unauthorized entry is
attempted while the alarm is armed.
Take all remote controls to an authorized
dealer if there is any potential alarm
problem with your vehicle.
Arming the Alarm
The alarm is ready to arm when there is
not a key in your vehicle. Electronically lock
your vehicle to arm the alarm.
Disarming the Alarm
Disarm the alarm by any of the following
actions:
•
Unlock the doors or luggage
compartment with the remote control
or keyless entry keypad.
• Switch your vehicle on or start your
vehicle.
• Use a key in the driver door to unlock
your vehicle, then switch your vehicle
on within 12 seconds.
Note: Pressing the panic button on the
remote control will stop the horn and signal
indicators, but will not disarm the system.
63
Expedition (TB7) Canada/United States of America, enUSA, First Printing Security
Page 105 of 421
Blindspot - check enabled or uncheck disabled
Cross Traffic Alert - check enabled or uncheck disabled
Sport, Normal or Comfort
Driver Select
Suspension
Normal or Towing
DTE Calculation
Front Park Aid - check enabled or uncheck disabled
Rear Park Aid - check enabled or uncheck disabled
Easy Entry / Exit - check enabled or uncheck disabled
Vehicle
Advanced
Settings
Select time
interval
Autolamp Delay
Lighting
Autolock - check enabled or
uncheck disabled
Locks
Autounlock - check enabled or
uncheck disabledAll Doors or
Driver
Remote Unlock
Remaining Life XXX% - Hold OK
to reset
Oil Life
Enable or Disable switch
Power Liftgate
Auto, Off or Out
Pwr Running
Boards
Auto or Last
Setting
Climate Control
Remote Start
Auto or Off
Seats
5, 10 or 15
minutes
Duration
System - check enabled or
uncheck disabled
Courtesy Wipe - check enabled or
uncheck disabled
Wipers
Rain Sensing - check enabled or
uncheck disabled
102
Expedition (TB7) Canada/United States of America, enUSA, First Printing Information Displays
Page 113 of 421
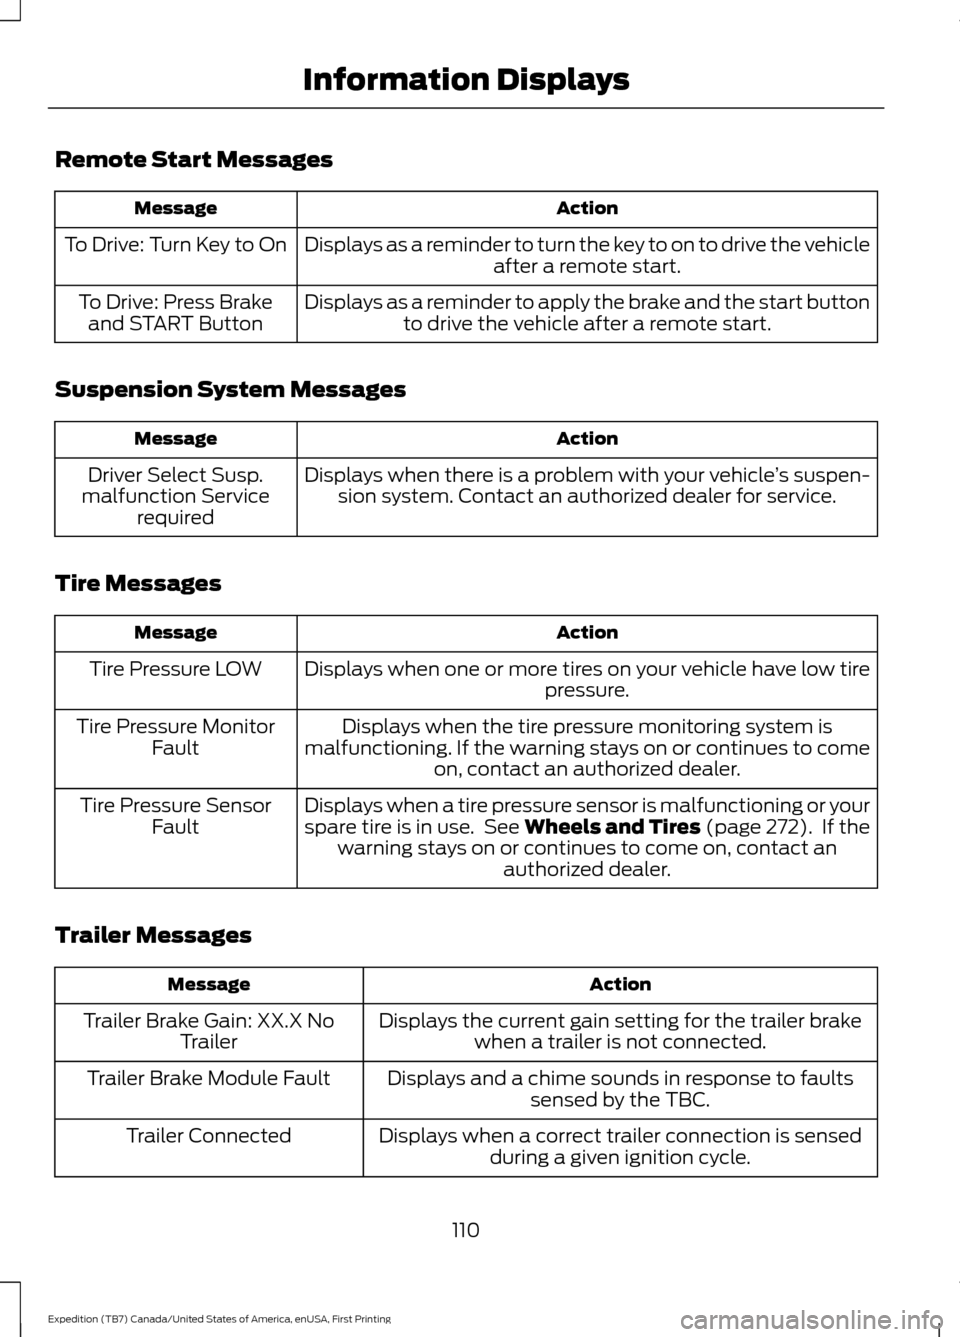
Remote Start Messages
Action
Message
Displays as a reminder to turn the key to on to drive the vehicle after a remote start.
To Drive: Turn Key to On
Displays as a reminder to apply the brake and the start buttonto drive the vehicle after a remote start.
To Drive: Press Brake
and START Button
Suspension System Messages Action
Message
Displays when there is a problem with your vehicle ’s suspen-
sion system. Contact an authorized dealer for service.
Driver Select Susp.
malfunction Service required
Tire Messages Action
Message
Displays when one or more tires on your vehicle have low tire pressure.
Tire Pressure LOW
Displays when the tire pressure monitoring system is
malfunctioning. If the warning stays on or continues to come on, contact an authorized dealer.
Tire Pressure Monitor
Fault
Displays when a tire pressure sensor is malfunctioning or your
spare tire is in use. See Wheels and Tires (page 272). If the
warning stays on or continues to come on, contact an authorized dealer.
Tire Pressure Sensor
Fault
Trailer Messages Action
Message
Displays the current gain setting for the trailer brakewhen a trailer is not connected.
Trailer Brake Gain: XX.X No
Trailer
Displays and a chime sounds in response to faultssensed by the TBC.
Trailer Brake Module Fault
Displays when a correct trailer connection is sensedduring a given ignition cycle.
Trailer Connected
110
Expedition (TB7) Canada/United States of America, enUSA, First Printing Information Displays
Page 124 of 421
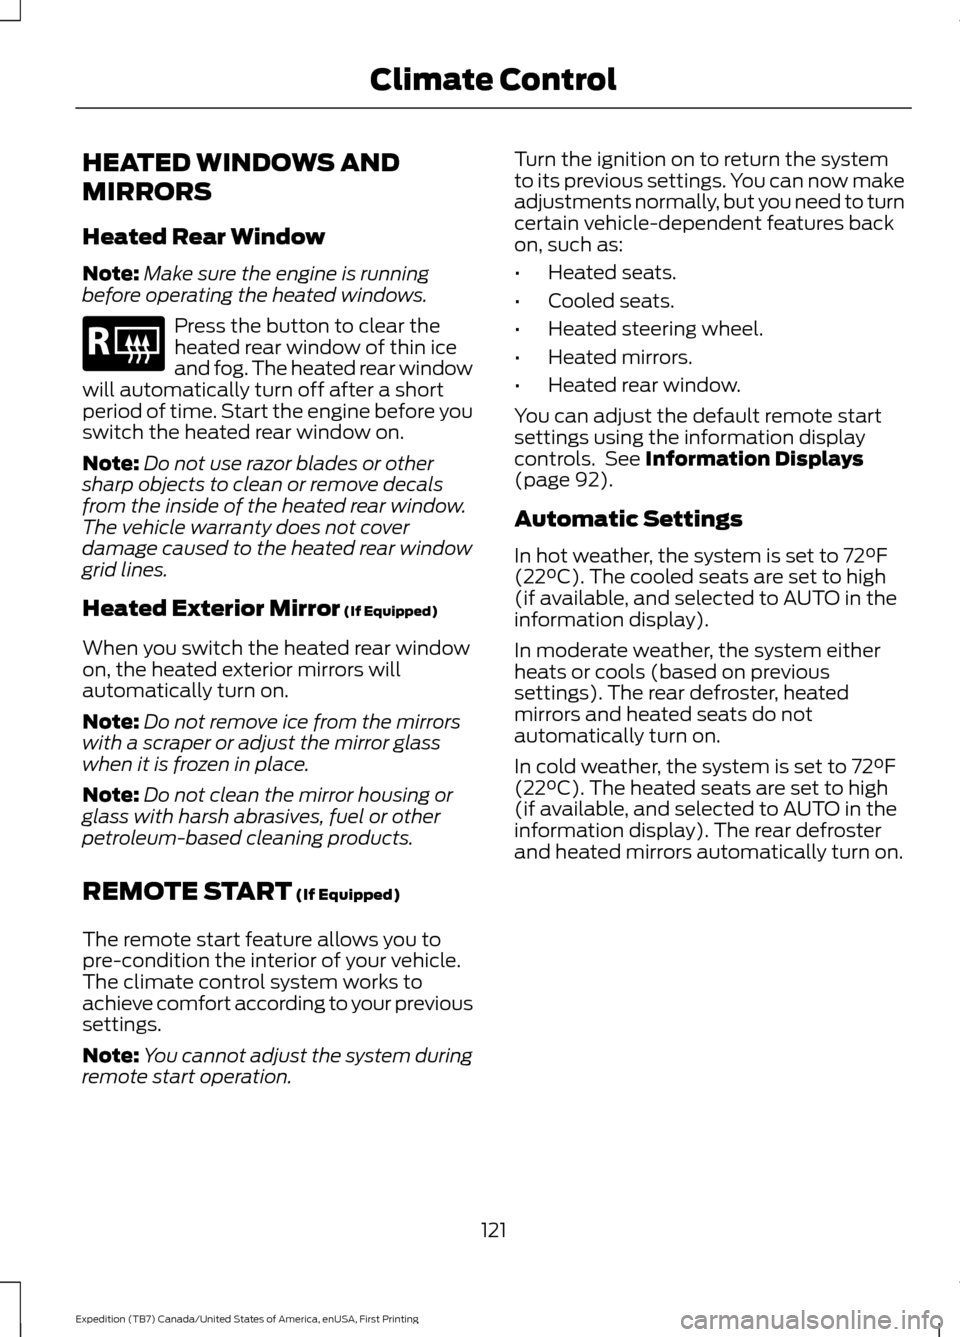
HEATED WINDOWS AND
MIRRORS
Heated Rear Window
Note:
Make sure the engine is running
before operating the heated windows. Press the button to clear the
heated rear window of thin ice
and fog. The heated rear window
will automatically turn off after a short
period of time. Start the engine before you
switch the heated rear window on.
Note: Do not use razor blades or other
sharp objects to clean or remove decals
from the inside of the heated rear window.
The vehicle warranty does not cover
damage caused to the heated rear window
grid lines.
Heated Exterior Mirror (If Equipped)
When you switch the heated rear window
on, the heated exterior mirrors will
automatically turn on.
Note: Do not remove ice from the mirrors
with a scraper or adjust the mirror glass
when it is frozen in place.
Note: Do not clean the mirror housing or
glass with harsh abrasives, fuel or other
petroleum-based cleaning products.
REMOTE START
(If Equipped)
The remote start feature allows you to
pre-condition the interior of your vehicle.
The climate control system works to
achieve comfort according to your previous
settings.
Note: You cannot adjust the system during
remote start operation. Turn the ignition on to return the system
to its previous settings. You can now make
adjustments normally, but you need to turn
certain vehicle-dependent features back
on, such as:
•
Heated seats.
• Cooled seats.
• Heated steering wheel.
• Heated mirrors.
• Heated rear window.
You can adjust the default remote start
settings using the information display
controls. See
Information Displays
(page 92).
Automatic Settings
In hot weather, the system is set to
72°F
(22°C). The cooled seats are set to high
(if available, and selected to AUTO in the
information display).
In moderate weather, the system either
heats or cools (based on previous
settings). The rear defroster, heated
mirrors and heated seats do not
automatically turn on.
In cold weather, the system is set to
72°F
(22°C). The heated seats are set to high
(if available, and selected to AUTO in the
information display). The rear defroster
and heated mirrors automatically turn on.
121
Expedition (TB7) Canada/United States of America, enUSA, First Printing Climate ControlE184884
Page 227 of 421
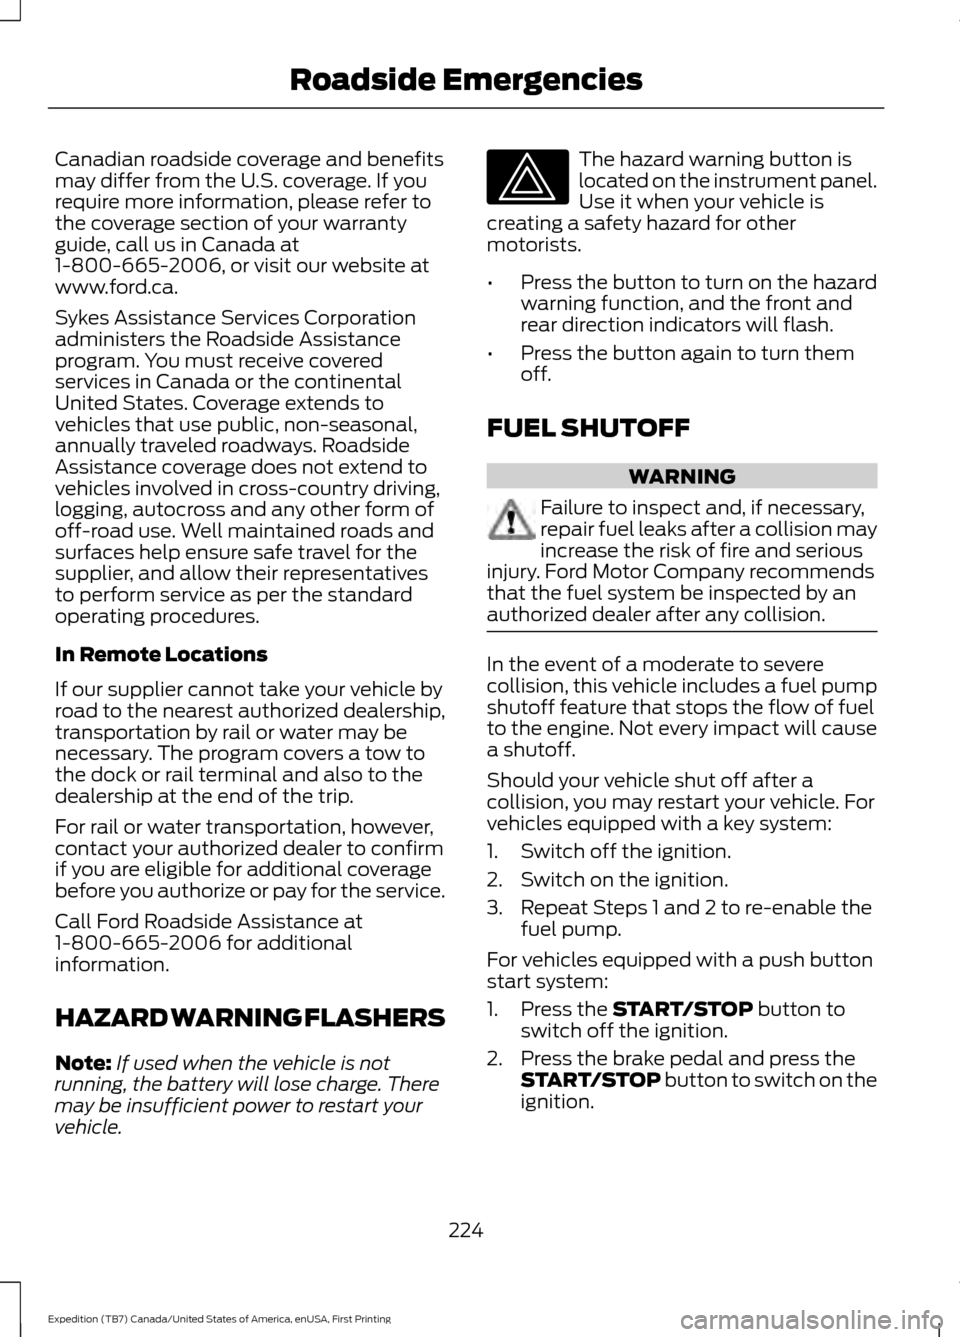
Canadian roadside coverage and benefits
may differ from the U.S. coverage. If you
require more information, please refer to
the coverage section of your warranty
guide, call us in Canada at
1-800-665-2006, or visit our website at
www.ford.ca.
Sykes Assistance Services Corporation
administers the Roadside Assistance
program. You must receive covered
services in Canada or the continental
United States. Coverage extends to
vehicles that use public, non-seasonal,
annually traveled roadways. Roadside
Assistance coverage does not extend to
vehicles involved in cross-country driving,
logging, autocross and any other form of
off-road use. Well maintained roads and
surfaces help ensure safe travel for the
supplier, and allow their representatives
to perform service as per the standard
operating procedures.
In Remote Locations
If our supplier cannot take your vehicle by
road to the nearest authorized dealership,
transportation by rail or water may be
necessary. The program covers a tow to
the dock or rail terminal and also to the
dealership at the end of the trip.
For rail or water transportation, however,
contact your authorized dealer to confirm
if you are eligible for additional coverage
before you authorize or pay for the service.
Call Ford Roadside Assistance at
1-800-665-2006 for additional
information.
HAZARD WARNING FLASHERS
Note:
If used when the vehicle is not
running, the battery will lose charge. There
may be insufficient power to restart your
vehicle. The hazard warning button is
located on the instrument panel.
Use it when your vehicle is
creating a safety hazard for other
motorists.
• Press the button to turn on the hazard
warning function, and the front and
rear direction indicators will flash.
• Press the button again to turn them
off.
FUEL SHUTOFF WARNING
Failure to inspect and, if necessary,
repair fuel leaks after a collision may
increase the risk of fire and serious
injury. Ford Motor Company recommends
that the fuel system be inspected by an
authorized dealer after any collision. In the event of a moderate to severe
collision, this vehicle includes a fuel pump
shutoff feature that stops the flow of fuel
to the engine. Not every impact will cause
a shutoff.
Should your vehicle shut off after a
collision, you may restart your vehicle. For
vehicles equipped with a key system:
1. Switch off the ignition.
2. Switch on the ignition.
3. Repeat Steps 1 and 2 to re-enable the
fuel pump.
For vehicles equipped with a push button
start system:
1. Press the START/STOP button to
switch off the ignition.
2. Press the brake pedal and press the START/STOP
button to switch on the
ignition.
224
Expedition (TB7) Canada/United States of America, enUSA, First Printing Roadside Emergencies
Page 371 of 421
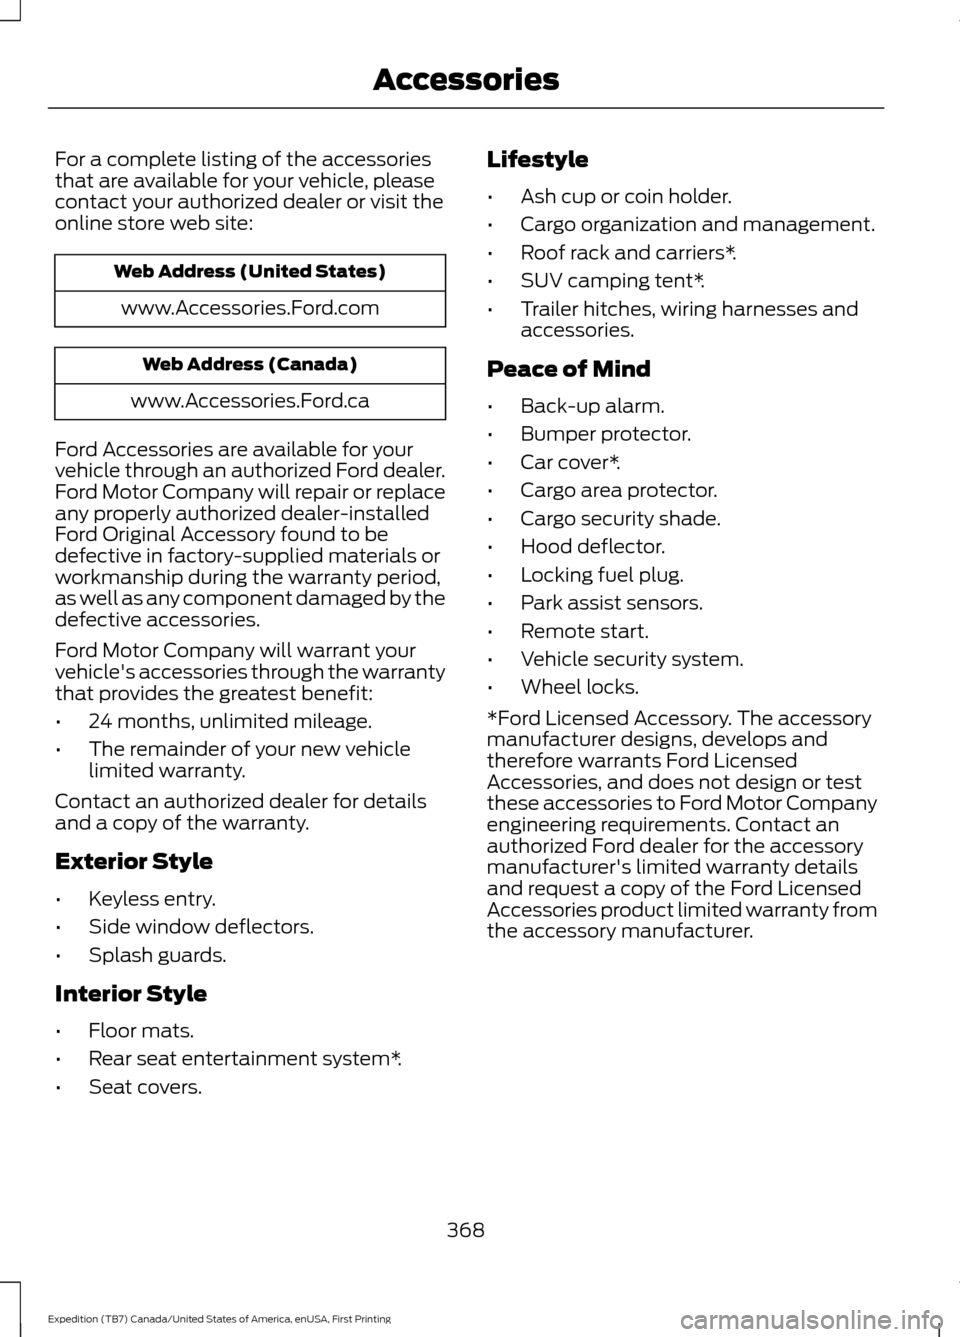
For a complete listing of the accessories
that are available for your vehicle, please
contact your authorized dealer or visit the
online store web site:
Web Address (United States)
www.Accessories.Ford.com Web Address (Canada)
www.Accessories.Ford.ca
Ford Accessories are available for your
vehicle through an authorized Ford dealer.
Ford Motor Company will repair or replace
any properly authorized dealer-installed
Ford Original Accessory found to be
defective in factory-supplied materials or
workmanship during the warranty period,
as well as any component damaged by the
defective accessories.
Ford Motor Company will warrant your
vehicle's accessories through the warranty
that provides the greatest benefit:
• 24 months, unlimited mileage.
• The remainder of your new vehicle
limited warranty.
Contact an authorized dealer for details
and a copy of the warranty.
Exterior Style
• Keyless entry.
• Side window deflectors.
• Splash guards.
Interior Style
• Floor mats.
• Rear seat entertainment system*.
• Seat covers. Lifestyle
•
Ash cup or coin holder.
• Cargo organization and management.
• Roof rack and carriers*.
• SUV camping tent*.
• Trailer hitches, wiring harnesses and
accessories.
Peace of Mind
• Back-up alarm.
• Bumper protector.
• Car cover*.
• Cargo area protector.
• Cargo security shade.
• Hood deflector.
• Locking fuel plug.
• Park assist sensors.
• Remote start.
• Vehicle security system.
• Wheel locks.
*Ford Licensed Accessory. The accessory
manufacturer designs, develops and
therefore warrants Ford Licensed
Accessories, and does not design or test
these accessories to Ford Motor Company
engineering requirements. Contact an
authorized Ford dealer for the accessory
manufacturer's limited warranty details
and request a copy of the Ford Licensed
Accessories product limited warranty from
the accessory manufacturer.
368
Expedition (TB7) Canada/United States of America, enUSA, First Printing Accessories
Page 414 of 421
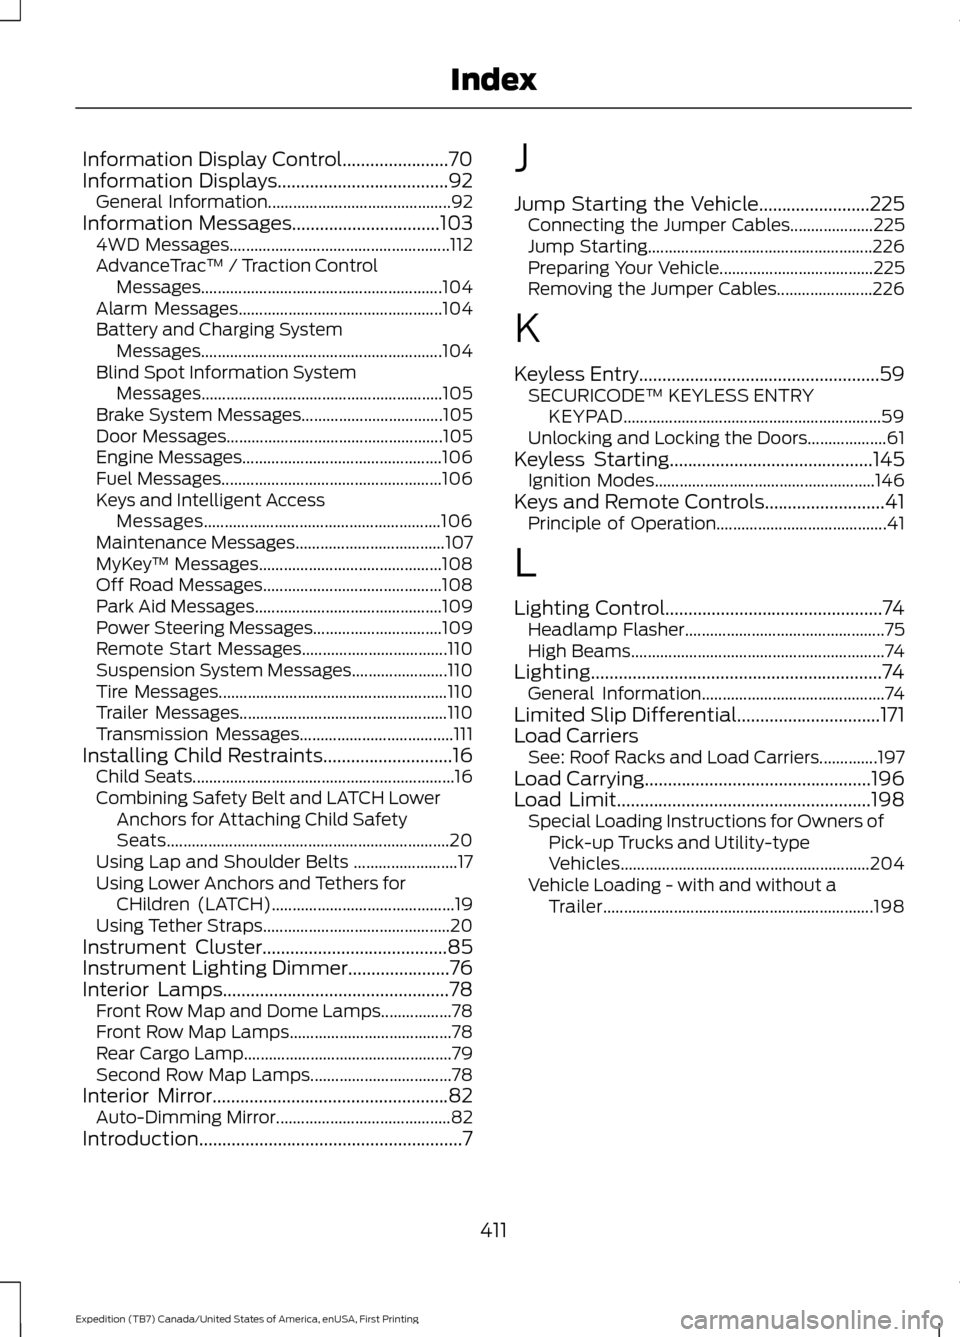
Information Display Control.......................70
Information Displays.....................................92
General Information............................................ 92
Information Messages................................103
4WD Messages..................................................... 112
AdvanceTrac ™ / Traction Control
Messages.......................................................... 104
Alarm Messages................................................. 104
Battery and Charging System Messages.......................................................... 104
Blind Spot Information System Messages.......................................................... 105
Brake System Messages.................................. 105
Door Messages.................................................... 105
Engine Messages................................................ 106
Fuel Messages..................................................... 106
Keys and Intelligent Access Messages......................................................... 106
Maintenance Messages.................................... 107
MyKey ™ Messages............................................ 108
Off Road Messages........................................... 108
Park Aid Messages............................................. 109
Power Steering Messages............................... 109
Remote Start Messages................................... 110
Suspension System Messages....................... 110
Tire Messages....................................................... 110
Trailer Messages.................................................. 110
Transmission Messages..................................... 111
Installing Child Restraints
............................16
Child Seats............................................................... 16
Combining Safety Belt and LATCH Lower Anchors for Attaching Child Safety
Seats.................................................................... 20
Using Lap and Shoulder Belts ......................... 17
Using Lower Anchors and Tethers for CHildren (LATCH)............................................ 19
Using Tether Straps............................................. 20
Instrument Cluster
........................................85
Instrument Lighting Dimmer......................76
Interior Lamps.................................................78
Front Row Map and Dome Lamps.................78
Front Row Map Lamps....................................... 78
Rear Cargo Lamp.................................................. 79
Second Row Map Lamps.................................. 78
Interior Mirror
...................................................82
Auto-Dimming Mirror.......................................... 82
Introduction.........................................................7 J
Jump Starting the Vehicle........................225
Connecting the Jumper Cables.................... 225
Jump Starting...................................................... 226
Preparing Your Vehicle..................................... 225
Removing the Jumper Cables....................... 226
K
Keyless Entry
....................................................59
SECURICODE™ KEYLESS ENTRY
KEYPAD
.............................................................. 59
Unlocking and Locking the Doors................... 61
Keyless Starting............................................145 Ignition Modes..................................................... 146
Keys and Remote Controls
..........................41
Principle of Operation......................................... 41
L
Lighting Control
...............................................74
Headlamp Flasher................................................ 75
High Beams............................................................. 74
Lighting...............................................................74 General Information............................................ 74
Limited Slip Differential...............................171
Load Carriers See: Roof Racks and Load Carriers..............197
Load Carrying
.................................................196
Load Limit.......................................................198
Special Loading Instructions for Owners of
Pick-up Trucks and Utility-type
Vehicles............................................................ 204
Vehicle Loading - with and without a Trailer................................................................. 198
411
Expedition (TB7) Canada/United States of America, enUSA, First Printing Index
Page 416 of 421
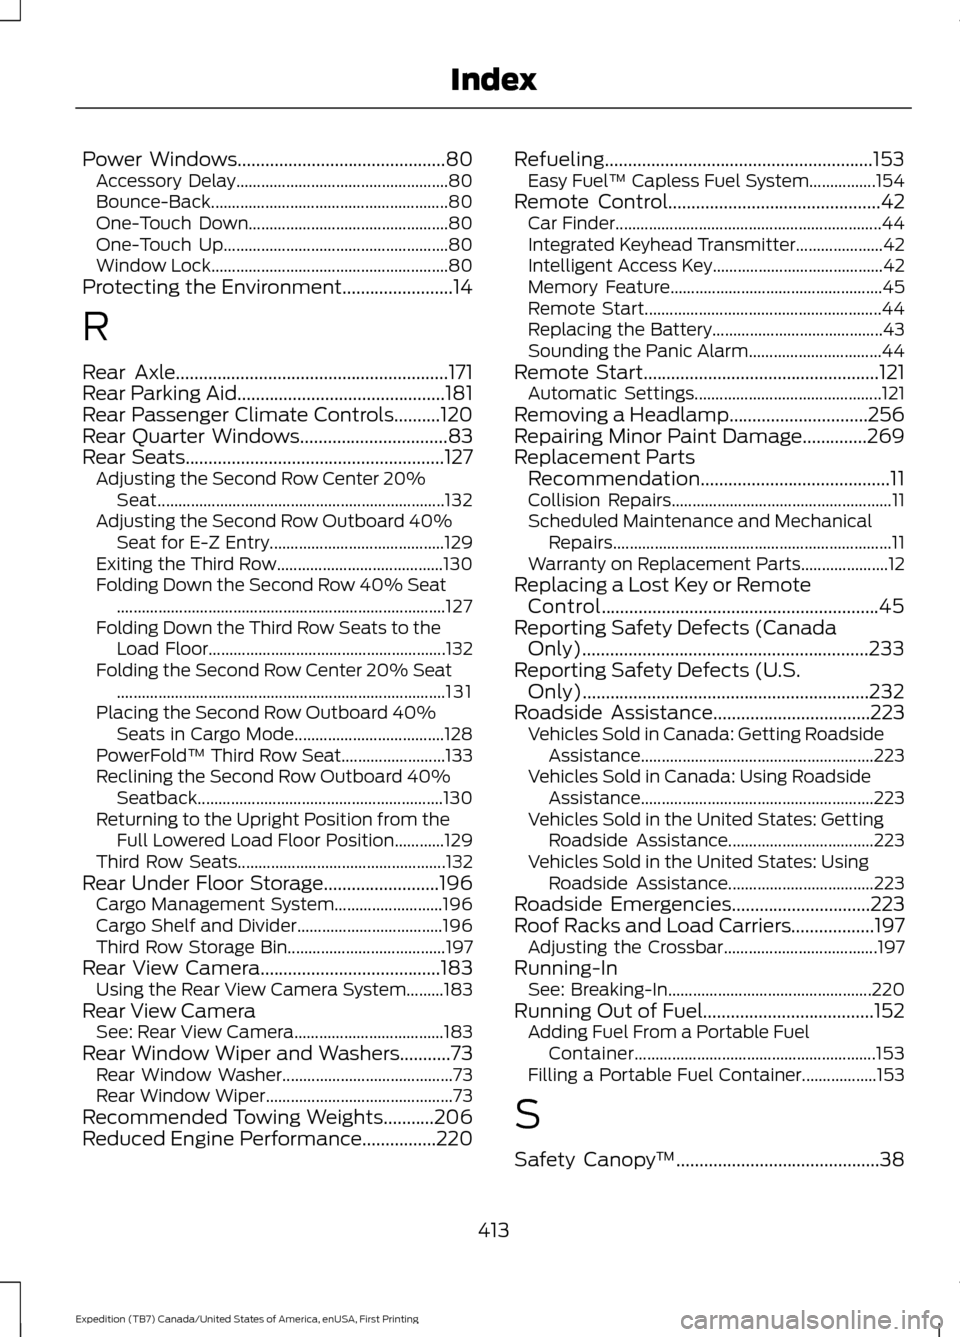
Power Windows.............................................80
Accessory Delay................................................... 80
Bounce-Back......................................................... 80
One-Touch Down................................................ 80
One-Touch Up...................................................... 80
Window Lock......................................................... 80
Protecting the Environment........................14
R
Rear Axle
...........................................................171
Rear Parking Aid.............................................181
Rear Passenger Climate Controls..........120
Rear Quarter Windows
................................83
Rear Seats........................................................127
Adjusting the Second Row Center 20%
Seat..................................................................... 132
Adjusting the Second Row Outboard 40% Seat for E-Z Entry.......................................... 129
Exiting the Third Row........................................ 130
Folding Down the Second Row 40% Seat ........................................................................\
....... 127
Folding Down the Third Row Seats to the Load Floor......................................................... 132
Folding the Second Row Center 20% Seat ........................................................................\
....... 131
Placing the Second Row Outboard 40% Seats in Cargo Mode.................................... 128
PowerFold™ Third Row Seat......................... 133
Reclining the Second Row Outboard 40% Seatback........................................................... 130
Returning to the Upright Position from the Full Lowered Load Floor Position............129
Third Row Seats.................................................. 132
Rear Under Floor Storage.........................196 Cargo Management System.......................... 196
Cargo Shelf and Divider................................... 196
Third Row Storage Bin...................................... 197
Rear View Camera.......................................183 Using the Rear View Camera System.........183
Rear View Camera See: Rear View Camera.................................... 183
Rear Window Wiper and Washers
...........73
Rear Window Washer......................................... 73
Rear Window Wiper............................................. 73
Recommended Towing Weights...........206
Reduced Engine Performance
................220 Refueling..........................................................153
Easy Fuel ™ Capless Fuel System................154
Remote Control
..............................................42
Car Finder................................................................ 44
Integrated Keyhead Transmitter..................... 42
Intelligent Access Key......................................... 42
Memory Feature................................................... 45
Remote Start......................................................... 44
Replacing the Battery......................................... 43
Sounding the Panic Alarm................................ 44
Remote Start
...................................................121
Automatic Settings............................................. 121
Removing a Headlamp..............................256
Repairing Minor Paint Damage..............269
Replacement Parts Recommendation.........................................11
Collision Repairs..................................................... 11
Scheduled Maintenance and Mechanical Repairs................................................................... 11
Warranty on Replacement Parts..................... 12
Replacing a Lost Key or Remote Control............................................................45
Reporting Safety Defects (Canada Only)..............................................................233
Reporting Safety Defects (U.S. Only)
..............................................................232
Roadside Assistance..................................223 Vehicles Sold in Canada: Getting Roadside
Assistance........................................................ 223
Vehicles Sold in Canada: Using Roadside Assistance........................................................ 223
Vehicles Sold in the United States: Getting Roadside Assistance................................... 223
Vehicles Sold in the United States: Using Roadside Assistance................................... 223
Roadside Emergencies
..............................223
Roof Racks and Load Carriers..................197 Adjusting the Crossbar..................................... 197
Running-In See: Breaking-In................................................. 220
Running Out of Fuel.....................................152 Adding Fuel From a Portable Fuel
Container.......................................................... 153
Filling a Portable Fuel Container.................. 153
S
Safety Canopy ™
............................................38
413
Expedition (TB7) Canada/United States of America, enUSA, First Printing Index