audio FORD EXPEDITION 2016 3.G Quick Reference Guide
[x] Cancel search | Manufacturer: FORD, Model Year: 2016, Model line: EXPEDITION, Model: FORD EXPEDITION 2016 3.GPages: 10, PDF Size: 3.01 MB
Page 2 of 10

page no. thre e
BASIC COMMANDS
• Main menu
• Go back
• Cancel
• List of commands
• Next page
• Previous page
• Help
NAVIGATION *
• Navigation list of commands
• Destination
• Find
• Show route
• Where am I?
• SiriusXM Traffic and Travel Link
list of commands
- Show
- Help
CLIMATE *
• Climate list of commands
• Climate set temperature
<# degrees>
PHONE
• Phone list of commands
• Pair phone
• Call
• Call
• Dial
• Listen to message
page no. two
Some services may not be available in your area. For more complete infor\
mation on SYNC, refer to your SYNC Supplement, visit the
website or call the toll-free number. For U.S. customers, visit owner.ford.com or call 1-800-392-3673 (select Option 1 or 2 for language, then Option 3). For Canadian customers, visit SyncMyRide.ca or call 1-800-565-3673 (select Option 1 or 2 for language, then Option\
3).
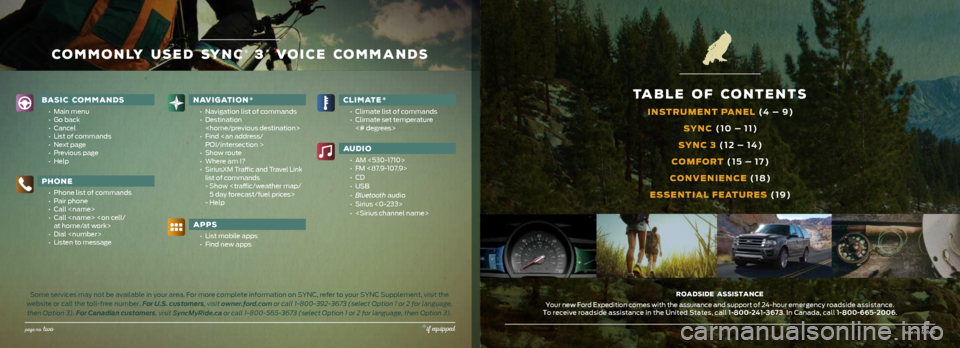
commonly used sync® 3* voice COMMANDS
TABLE OF CONTENTS
INSTRUMENT PANEL (4 – 9)SYNC (10 – 11)
SYNC 3 (12 – 14)
COMFORT (15 – 17)
CONVENIENCE (18)
ESSENTIAL FEATURES (19)
Roadside Assistance
Your new Ford Expedition comes with the assurance and support of 24-hour\
emergency roadside assistance.
To receive roadside assistance in the United States, call 1-800-241-3673. In Canada, call 1-800-665-2006.
APPS
• List mobile apps
• Find new apps
AUDIO
• AM <530-1710>
• FM <87.9-107.9>
• CD
• USB
• Bluetooth audio
• Sirius <0-233>
•
*if equipped
Page 5 of 10

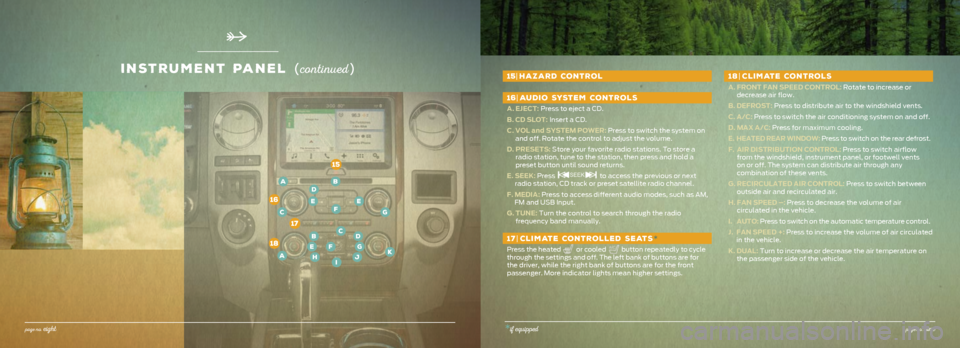
15| HAZARD CONTROL
16| AUDIO SYSTEM CONTROLS
A. EJECT: Press to eject a CD.
B. CD SLOT: Insert a CD.
C. VOL and SYSTEM POWER: Press to switch the system on
and off. Rotate the control to adjust the volume.
D. PRESETS: Store your favorite radio stations. To store a
radio station, tune to the station, then press and hold a
preset button until sound returns.
E. SEEK: Press
to access the previous or next
radio station, CD track or preset satellite radio channel.
F. MEDIA: Press to access different audio modes, such as AM,
FM and USB Input.
G. TUNE: Turn the control to search through the radio
frequency band manually.
17| CLIMATE CONTROLLED SEATS *
Press the heated or cooled button repeatedly to cycle
through the settings and off. The left bank of buttons are for
the driver, while the right bank of buttons are for the front
passenger. More indicator lights mean higher settings.
18| CLIMATE CONTROLS
A. FRONT FAN SPEED CONTROL: Rotate to increase or
decrease air flow.
B. DEFROST: Press to distribute air to the windshield vents.
C. A/C: Press to switch the air conditioning system on and off.
D. MAX A/C: Press for maximum cooling.
E. HEATED REAR WINDOW: Press to switch on the rear defrost.
F. AIR DISTRIBUTION CONTROL: Press to switch airflow
from the windshield, instrument panel, or footwell vents
on or off. The system can distribute air through any
combination of these vents.
G. RECIRCULATED AIR CONTROL: Press to switch between
outside air and recirculated air.
H. FAN SPEED –: Press to decrease the volume of air
circulated in the vehicle.
I. AUTO: Press to switch on the automatic temperature control.
J. FAN SPEED +: Press to increase the volume of air circulated
in the vehicle.
K. DUAL: Turn to increase or decrease the air temperature on
the passenger side of the vehicle.
inStrument panel (co ntinued )
15
16
18
17
AB
C
D
EFE
G
A
BCD
EFG
HIJK
page no. eight*if equippedpage no. nine
Page 7 of 10

SYNC® 3*
page no. twelve*if equipped
A Revo lutio nary Way to Co nnect with Yo ur Vehicle.
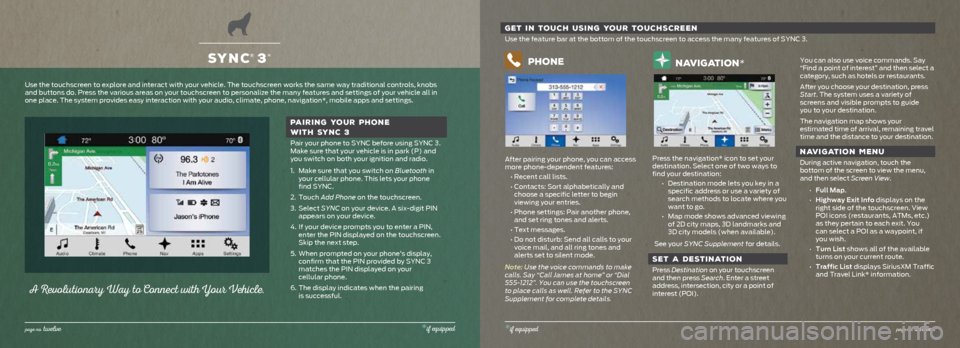
PAIRING YOUR PHONE
WITH SYNC 3
Pair your phone to SYNC before using SYNC 3.
Make sure that your vehicle is in park (P) and
you switch on both your ignition and radio.
1. Make sure that you switch on Bluetooth in
your cellular phone. This lets your phone
find SYNC.
2. Touch Add Phone on the touchscreen.
3. Select SYNC on your device. A six-digit PIN
appears on your device.
4. If your device prompts you to enter a PIN,
enter the PIN displayed on the touchscreen.
Skip the next step.
5. When prompted on your phone’s display,
confirm that the PIN provided by SYNC 3
matches the PIN displayed on your
cellular phone.
6. The display indicates when the pairing
is successful.
Use the touchscreen to explore and interact with your vehicle. The touch\
screen works the same way traditional controls, knobs
and buttons do. Press the various areas on your touchscreen to personali\
ze the many features and settings of your vehicle all in
one place. The system provides easy interaction with your audio, climate\
, phone, navigation*, mobile apps and settings.
GET IN TOUCH USING YOUR TOUCHSCREEN
Use the feature bar at the bottom of the touchscreen to access the many \
features of SYNC 3.
Phone
After pairing your phone, you can access
more phone-dependent features:
• Recent call lists.
• Contacts: Sort alphabetically and
choose a specific letter to begin
viewing your entries.
• Phone settings: Pair another phone,
and set ring tones and alerts.
• Text messages.
• Do not disturb: Send all calls to your
voice mail, and all ring tones and
alerts set to silent mode.
Note: Use the voice commands to make
calls. Say “Call James at home” or “Dial
555-1212”. You can use the touchscreen
to place calls as well. Refer to the SYNC
Supplement for complete details.
navigation*
Press the navigation* icon to set your
destination. Select one of two ways to
find your destination: • Destination mode lets you key in a
specific address or use a variety of
search methods to locate where you
want to go.
• Map mode shows advanced viewing
of 2D city maps, 3D landmarks and
3D city models (when available).
See your SYNC Supplement for details.
SET A DESTINATION
Press Destination on your touchscreen
and then press Search. Enter a street
address, intersection, city or a point of
interest (POI).
You can also use voice commands. Say
“Find a point of interest” and then select a
category, such as hotels or restaurants.
After you choose your destination, press
Start. The system uses a variety of
screens and visible prompts to guide
you to your destination.
The navigation map shows your
estimated time of arrival, remaining travel
time and the distance to your destination.
NAVIGATION MENU
During active navigation, touch the
bottom of the screen to view the menu,
and then select Screen View.
• Full Map.
• Highway Exit Info displays on the
right side of the touchscreen. View
POI icons (restaurants, ATMs, etc.)
as they pertain to each exit. You
can select a POI as a waypoint, if
you wish.
• Turn List shows all of the available
turns on your current route.
• Traffic List displays SiriusXM Traffic
and Travel Link* information.
*if equippedpage no. thirte en
Page 8 of 10

comfort
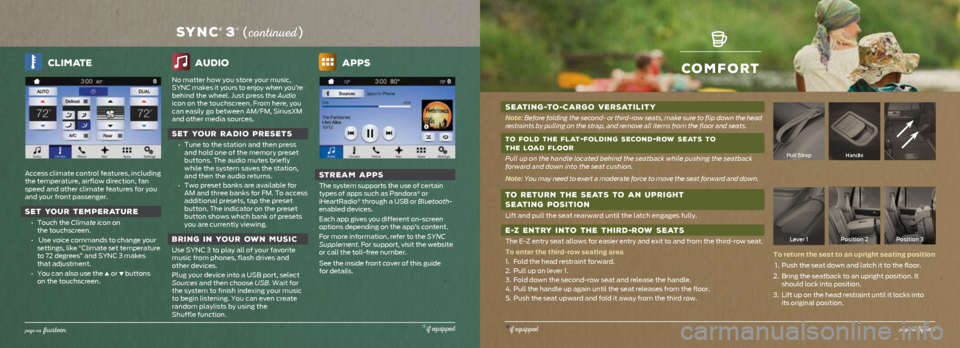
SEATING-TO -CARGO VERSATILITY
Note: Before folding the second- or third-row seats, make sure to flip down th\
e head
restraints by pulling on the strap, and remove all items from the floor \
and seats.
TO FOLD THE FLAT
-FOLDING SECOND-ROW SEATS TO
THE LOAD FLOOR
Pull up on the handle located behind the seatback while pushing the seat\
back
forward and down into the seat cushion.
Note: You may need to exert a moderate force to move the seat forward and dow\
n.
TO RETURN THE SEATS TO AN UPRIGHT
SEATING POSITION
Lift and pull the seat rearward until the latch engages fully.
E -Z ENTRY INTO THE THIRD -ROW SEATS
The E-Z entry seat allows for easier entry and exit to and from the thir\
d-row seat.
To enter the third-row seating area
1. Fold the head restraint forward.
2. Pull up on lever 1.
3. Fold down the second-row seat and release the handle.
4. Pull the handle up again until the seat releases from the floor.
5. Push the seat upward and fold it away from the third row.
Pull StrapHandle
Lever 1 Position 2 Position 3
To return the seat to an upright seating position
1. Push the seat down and latch it to the floor.
2. Bring the seatback to an upright position. It
should lock into position.
3. Lift up on the head restraint until it locks into
its original position.
*if equippedpage no. fifte en
Climate
Access climate control features, including
the temperature, airflow direction, fan
speed and other climate features for you
and your front passenger.
SET YOUR TEMPERATURE
• Touch the Climate icon on
the touchscreen.
• Use voice commands to change your
settings, like “Climate set temperature
to 72 degrees” and SYNC 3 makes
that adjustment.
• You can also use the
▲ or ▼ buttons
on the touchscreen.
audio
No matter how you store your music,
SYNC makes it yours to enjoy when you’re
behind the wheel. Just press the Audio
icon on the touchscreen. From here, you
can easily go between AM/FM, SiriusXM
and other media sources.
SET YOUR RADIO PRESETS
• Tune to the station and then press
and hold one of the memory preset
buttons. The audio mutes briefly
while the system saves the station,
and then the audio returns.
• Two preset banks are available for
AM and three banks for FM. To access
additional presets, tap the preset
button. The indicator on the preset
button shows which bank of presets
you are currently viewing.
BRING IN YOUR OWN MUSIC
Use SYNC 3 to play all of your favorite
music from phones, flash drives and
other devices.
Plug your device into a USB port, select
Sources and then choose USB. Wait for
the system to finish indexing your music
to begin listening. You can even create
random playlists by using the
Shuffle function.
Apps
STREAM APPS
The system supports the use of certain
types of apps such as Pandora® or
iHeartRadio® through a USB or Bluetooth-
enabled devices.
Each app gives you different on-screen
options depending on the app’s content.
For more information, refer to the SYNC
Supplement. For support, visit the website
or call the toll-free number.
See the inside front cover of this guide
for details.
SYNC® 3* ( co ntinued )
page no. fo urteen*if equipped