keyless entry FORD EXPEDITION 2018 Owners Manual
[x] Cancel search | Manufacturer: FORD, Model Year: 2018, Model line: EXPEDITION, Model: FORD EXPEDITION 2018Pages: 571, PDF Size: 25.8 MB
Page 4 of 571
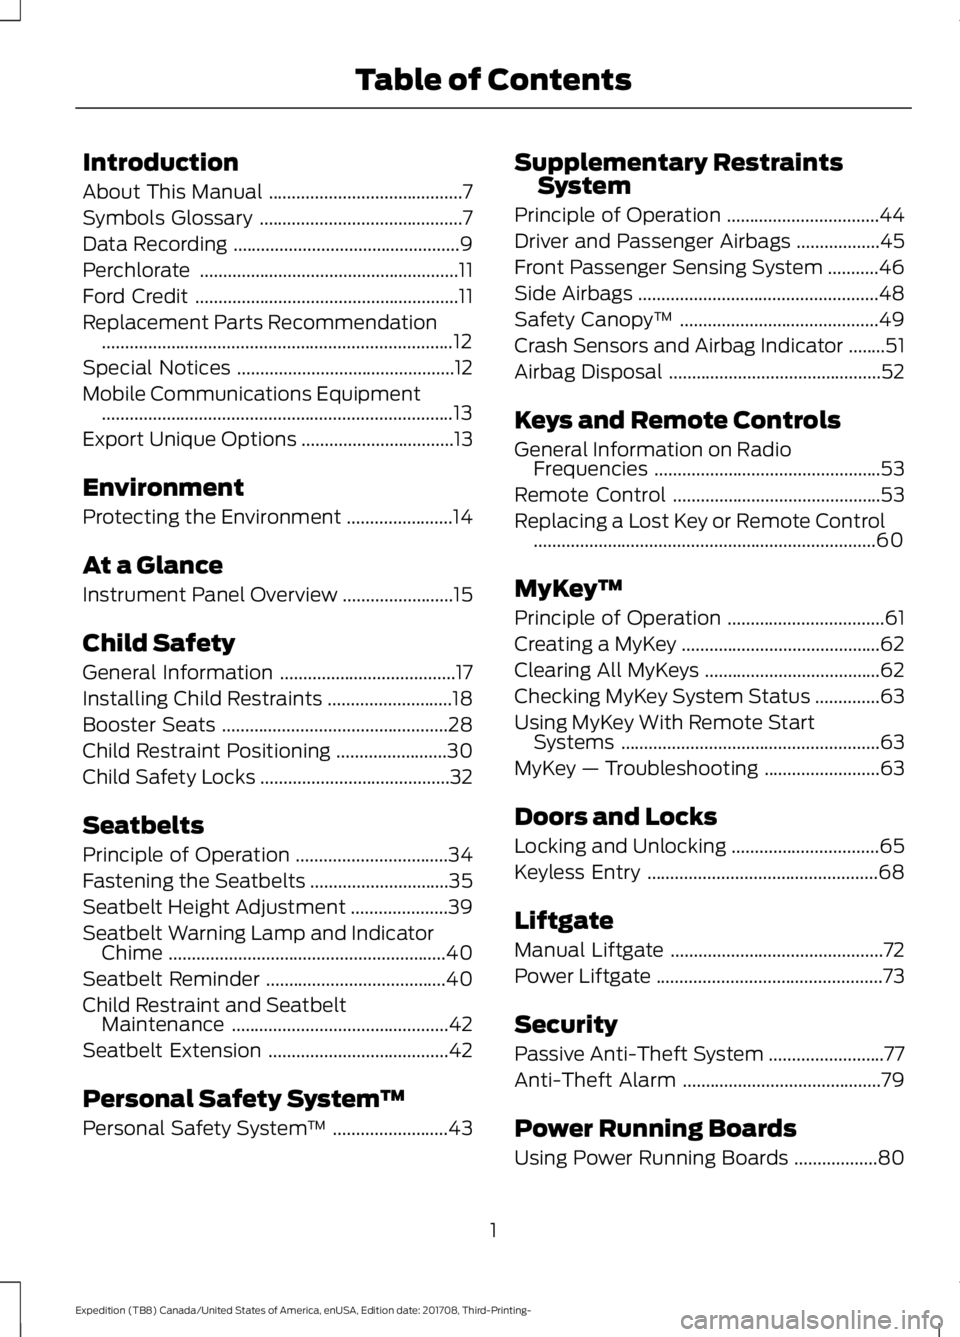
Introduction
About This Manual
..........................................7
Symbols Glossary ............................................
7
Data Recording .................................................
9
Perchlorate ........................................................
11
Ford Credit .........................................................
11
Replacement Parts Recommendation ........................................................................\
....
12
Special Notices ...............................................
12
Mobile Communications Equipment ........................................................................\
....
13
Export Unique Options .................................
13
Environment
Protecting the Environment .......................
14
At a Glance
Instrument Panel Overview ........................
15
Child Safety
General Information ......................................
17
Installing Child Restraints ...........................
18
Booster Seats .................................................
28
Child Restraint Positioning ........................
30
Child Safety Locks .........................................
32
Seatbelts
Principle of Operation .................................
34
Fastening the Seatbelts ..............................
35
Seatbelt Height Adjustment .....................
39
Seatbelt Warning Lamp and Indicator Chime ............................................................
40
Seatbelt Reminder .......................................
40
Child Restraint and Seatbelt Maintenance ...............................................
42
Seatbelt Extension .......................................
42
Personal Safety System ™
Personal Safety System ™.........................
43 Supplementary Restraints
System
Principle of Operation .................................
44
Driver and Passenger Airbags ..................
45
Front Passenger Sensing System ...........
46
Side Airbags ....................................................
48
Safety Canopy ™...........................................
49
Crash Sensors and Airbag Indicator ........
51
Airbag Disposal ..............................................
52
Keys and Remote Controls
General Information on Radio Frequencies .................................................
53
Remote Control .............................................
53
Replacing a Lost Key or Remote Control ........................................................................\
..
60
MyKey ™
Principle of Operation ..................................
61
Creating a MyKey ...........................................
62
Clearing All MyKeys ......................................
62
Checking MyKey System Status ..............
63
Using MyKey With Remote Start Systems ........................................................
63
MyKey — Troubleshooting .........................
63
Doors and Locks
Locking and Unlocking ................................
65
Keyless Entry ..................................................
68
Liftgate
Manual Liftgate ..............................................
72
Power Liftgate .................................................
73
Security
Passive Anti-Theft System .........................
77
Anti-Theft Alarm ...........................................
79
Power Running Boards
Using Power Running Boards ..................
80
1
Expedition (TB8) Canada/United States of America, enUSA, Edition date: 201708, Third-Printing- Table of Contents
Page 68 of 571
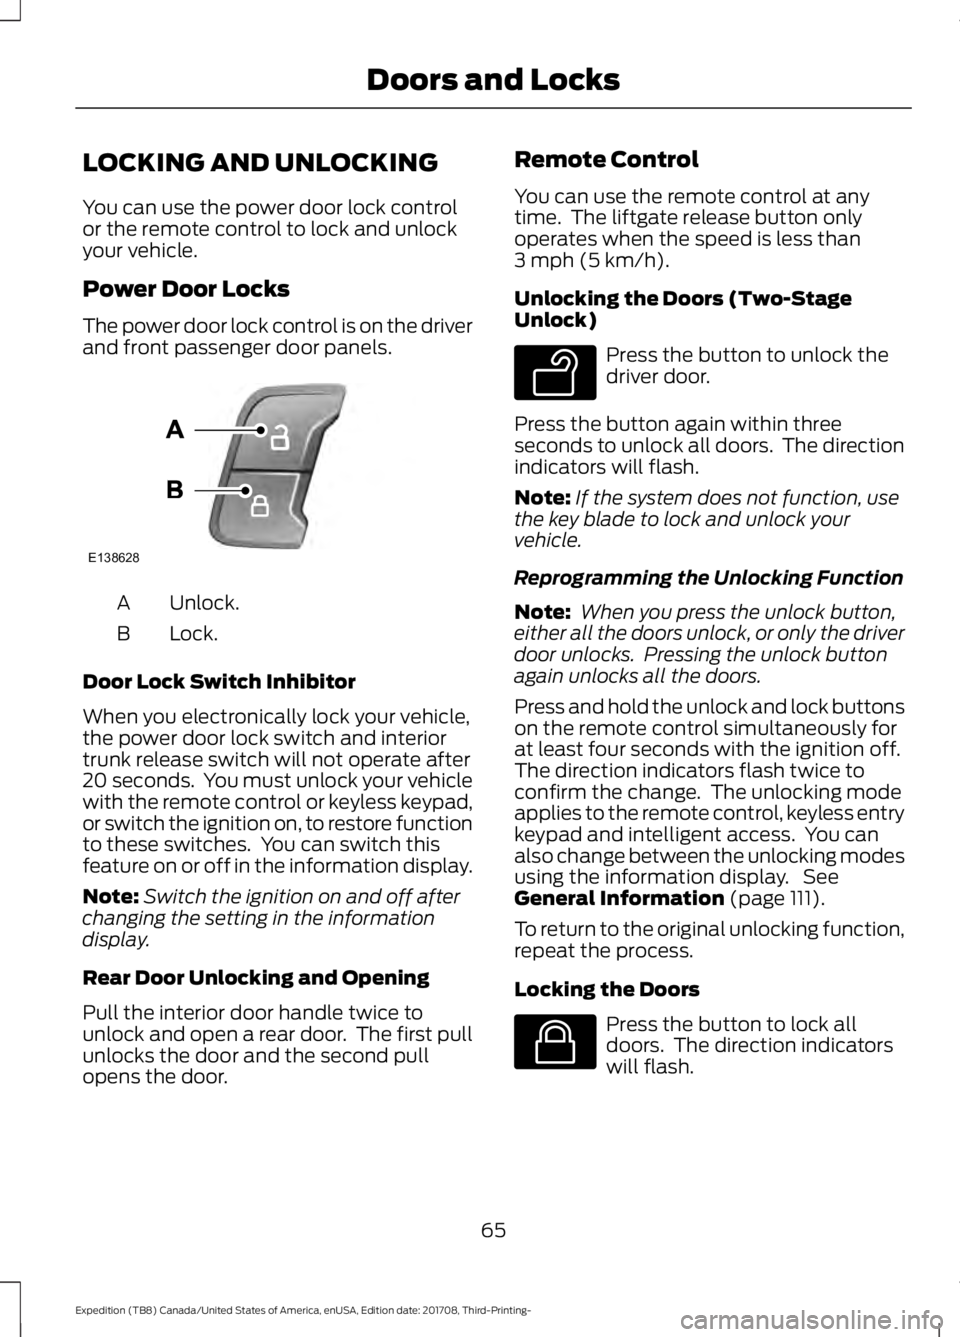
LOCKING AND UNLOCKING
You can use the power door lock control
or the remote control to lock and unlock
your vehicle.
Power Door Locks
The power door lock control is on the driver
and front passenger door panels.
Unlock.
A
Lock.
B
Door Lock Switch Inhibitor
When you electronically lock your vehicle,
the power door lock switch and interior
trunk release switch will not operate after
20 seconds. You must unlock your vehicle
with the remote control or keyless keypad,
or switch the ignition on, to restore function
to these switches. You can switch this
feature on or off in the information display.
Note: Switch the ignition on and off after
changing the setting in the information
display.
Rear Door Unlocking and Opening
Pull the interior door handle twice to
unlock and open a rear door. The first pull
unlocks the door and the second pull
opens the door. Remote Control
You can use the remote control at any
time. The liftgate release button only
operates when the speed is less than
3 mph (5 km/h).
Unlocking the Doors (Two-Stage
Unlock) Press the button to unlock the
driver door.
Press the button again within three
seconds to unlock all doors. The direction
indicators will flash.
Note: If the system does not function, use
the key blade to lock and unlock your
vehicle.
Reprogramming the Unlocking Function
Note: When you press the unlock button,
either all the doors unlock, or only the driver
door unlocks. Pressing the unlock button
again unlocks all the doors.
Press and hold the unlock and lock buttons
on the remote control simultaneously for
at least four seconds with the ignition off.
The direction indicators flash twice to
confirm the change. The unlocking mode
applies to the remote control, keyless entry
keypad and intelligent access. You can
also change between the unlocking modes
using the information display. See
General Information
(page 111).
To return to the original unlocking function,
repeat the process.
Locking the Doors Press the button to lock all
doors. The direction indicators
will flash.
65
Expedition (TB8) Canada/United States of America, enUSA, Edition date: 201708, Third-Printing- Doors and LocksE138628 E138629 E138623
Page 70 of 571
Smart Unlocks for Integrated
Keyhead Transmitter (If Equipped)
This helps to prevent you from locking
yourself out of your vehicle if the key is still
in the ignition.
When you open one of the front doors and
lock your vehicle with the power door lock
control, all doors lock then unlock and the
horn sounds twice if the key is still in the
ignition.
You can still lock your vehicle with the key
in the ignition by:
• Using the manual lock on the door.
• Locking the driver door with a key.
• Using the keyless entry keypad.
• Pressing the lock button on another
remote control.
Smart Unlocks for Intelligent
Access Keys
(If Equipped)
This helps to prevent you from locking your
key inside the passenger compartment or
rear cargo area.
When you electronically lock your vehicle
with any door open, the transmission is in
park (P) and the ignition is off, the system
searches for an intelligent access key
inside your vehicle after you close the last
door. If the system finds a key, all of the
doors will immediately unlock and the horn
will sound twice, indicating that a key is
inside.
You can override the smart unlock feature
and intentionally lock the intelligent access
key inside your vehicle. To do this, lock your vehicle after you have
closed all the doors by:
•
Using the keyless entry keypad.
• Pressing the lock button on another
intelligent access key.
• Touching the locking area on the front
of the door handle with another
intelligent access key in your hand.
When you open one of the front doors and
lock your vehicle using the power door lock
control, all doors lock then unlock if:
• The ignition is on.
• The ignition is off and the transmission
is not in park (P).
Locking and Unlocking the Doors
with the Key Blade
A key cylinder is located under the driver
side door handle. You can use your key
blade to manually lock and unlock the
driver side door. See Remote Control
(page 53).
Autolock
(If Equipped)
Autolock locks all the doors when:
• All doors are closed.
• The ignition is on.
• You shift into any gear putting your
vehicle in motion.
• Your vehicle reaches a speed greater
than
12 mph (20 km/h).
Autolock repeats when:
• You open then close any door while the
ignition is on and your vehicle speed is
9 mph (15 km/h)
or lower.
• Your vehicle reaches a speed greater
than
12 mph (20 km/h).
67
Expedition (TB8) Canada/United States of America, enUSA, Edition date: 201708, Third-Printing- Doors and Locks
Page 71 of 571
Autounlock
Autounlock unlocks all the doors when:
•
The ignition is on, all the doors are
closed, and your vehicle has been
moving at a speed greater than 12 mph
(20 km/h).
• Your vehicle comes to a stop and you
switch the ignition off, or to the
accessory position.
• You open the driver door within 10
minutes of switching the ignition off or
to accessory.
Note: The doors do not autounlock if you
electronically lock your vehicle after you
switch the ignition off and before you open
the driver door.
Enabling or Disabling Autounlock
You can enable or disable the autounlock
feature in the information display or an
authorized dealer can do it for you. See
General Information
(page 111).
Illuminated Entry
(If Equipped)
The interior lamps and some exterior
lamps illuminate when you unlock the
doors with the remote control.
The lamps turn off if:
• The ignition is on.
• You press the remote control lock
button.
• 25 seconds have elapsed.
The lamps do not turn off if:
• You turn them on with the lamp
control.
• Any door is open.
Illuminated Exit
The interior lamps and some exterior
lamps illuminate when all doors are closed
and you switch the ignition off. The lamps turn off if all the doors remain
closed and:
•
25 seconds have elapsed.
• You press the push button ignition
switch.
Battery Saver
If you leave the courtesy lamps, interior
lamps or headlamps on, the battery saver
shuts them off 10 minutes after you switch
the ignition off.
Battery Saver for Intelligent Access
Keys
If you leave the ignition switched on, it
shuts off when it detects a certain amount
of battery drain, or after 45 minutes.
KEYLESS ENTRY
SECURICODE™ KEYLESS ENTRY
KEYPAD
The keypad is near the driver window. It
illuminates when touched.
Note: If you enter your entry code too fast
on the keypad, the unlock function may not
work. Enter your entry code again more
slowly.
68
Expedition (TB8) Canada/United States of America, enUSA, Edition date: 201708, Third-Printing- Doors and Locks
Page 82 of 571
2. Insert the first programmed key in the
backup slot.
3. Press the push button ignition switch.
4. Wait five seconds and then press the push button ignition switch again.
5. Remove the intelligent access key.
6. Within 10 seconds, place a second programmed intelligent access key in
the backup slot and press the push
button ignition switch.
7. Wait five seconds and then press the push button ignition switch again.
8. Remove the intelligent access key.
9. Wait five seconds, then place the unprogrammed intelligent access key
in the backup slot and press the push
button ignition switch.
10. Once complete, the information cluster displays a message
confirming the key has been
programmed. The direction indicators
flash and the horn sounds.
Programming is now complete. Check that
the remote control functions operate and
your vehicle starts with the new intelligent
access key.
If programming was unsuccessful, wait 10
seconds and repeat steps 1 through 7. If it
still does not work, take your vehicle to an
authorized dealer.
ANTI-THEFT ALARM
The system will warn you of an
unauthorized entry to your vehicle. It will
be triggered if any door, the luggage
compartment or the hood is opened
without using the key, remote control or
keyless entry keypad.
The direction indicators will flash and the
horn will sound if unauthorized entry is
attempted while the alarm is armed. Take all remote controls to an authorized
dealer if there is any potential alarm
problem with your vehicle.
Arming the Alarm
The alarm is ready to arm when there is
not a key in your vehicle. Electronically lock
your vehicle to arm the alarm.
Disarming the Alarm
Disarm the alarm by any of the following
actions:
•
Unlock the doors or luggage
compartment with the remote control
or keyless entry keypad.
• Switch your vehicle on or start your
vehicle.
• Use a key in the driver door to unlock
your vehicle, then switch your vehicle
on within 12 seconds.
Note: Pressing the panic button on the
remote control will stop the horn and signal
indicators, but will not disarm the system.
79
Expedition (TB8) Canada/United States of America, enUSA, Edition date: 201708, Third-Printing- Security
Page 100 of 571
GLOBAL OPENING AND
CLOSING
You can also operate the power windows
with the ignition off using the global
opening and global closing function.
Note:
Global opening will only operate for
a short period of time after you have
unlocked your vehicle using the remote
control.
Note: Global closing will only operate if you
have set the memory correctly for each
window. See Power Windows (page 96).
Global Opening
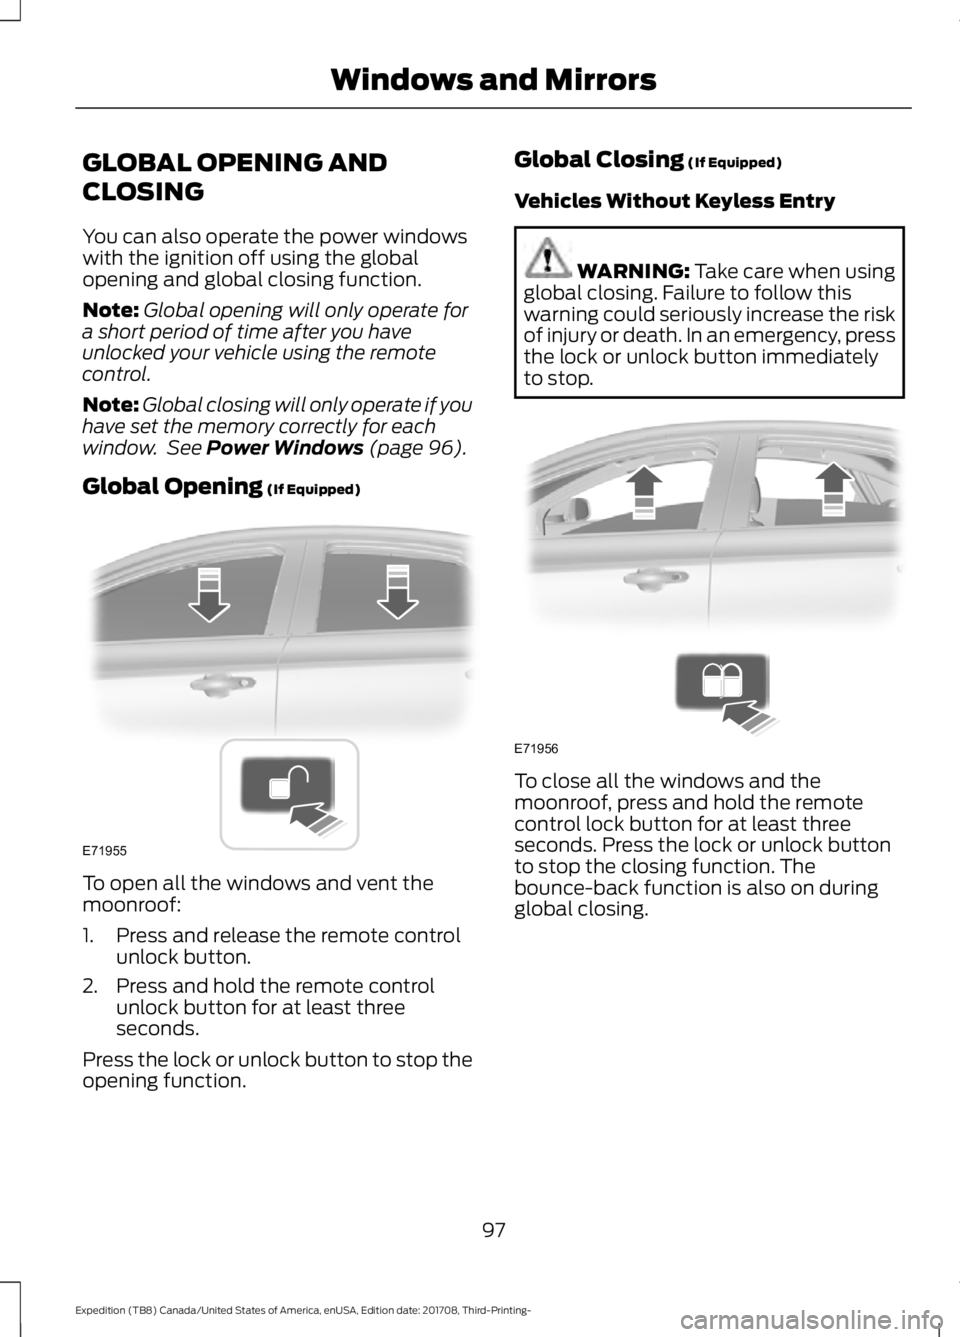
(If Equipped) To open all the windows and vent the
moonroof:
1. Press and release the remote control
unlock button.
2. Press and hold the remote control unlock button for at least three
seconds.
Press the lock or unlock button to stop the
opening function. Global Closing
(If Equipped)
Vehicles Without Keyless Entry WARNING:
Take care when using
global closing. Failure to follow this
warning could seriously increase the risk
of injury or death. In an emergency, press
the lock or unlock button immediately
to stop. To close all the windows and the
moonroof, press and hold the remote
control lock button for at least three
seconds. Press the lock or unlock button
to stop the closing function. The
bounce-back function is also on during
global closing.
97
Expedition (TB8) Canada/United States of America, enUSA, Edition date: 201708, Third-Printing- Windows and MirrorsE71955 E71956
Page 101 of 571
Vehicles With Keyless Entry
WARNING: Take care when using
global closing. In an emergency, touch a
door handle lock sensor to stop.
Note: Global closing can be switched on
using the driver ’s door handle. Global
opening and closing can also be switched
on using the buttons on the passive key.
To close all the windows and the
moonroof, press and hold the driver ’s door
handle for at least three seconds. The
bounce-back function is also on during
global closing.
EXTERIOR MIRRORS
Power Exterior Mirrors WARNING:
Do not adjust the
mirrors when your vehicle is moving. This
could result in the loss of control of your
vehicle, serious personal injury or death.
Note: Do not use an ice scraper on the
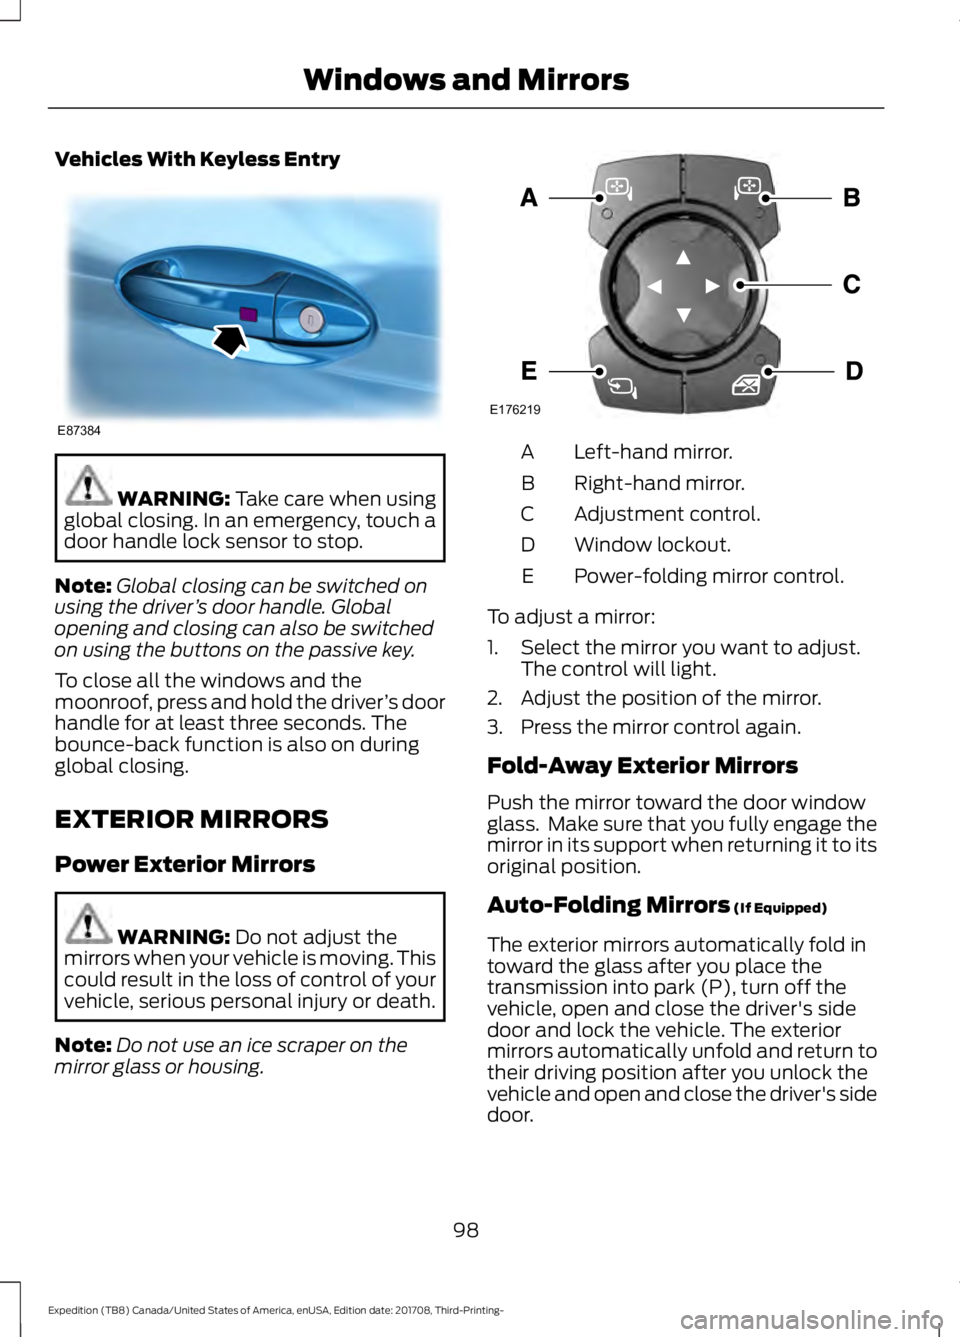
mirror glass or housing. Left-hand mirror.
A
Right-hand mirror.
B
Adjustment control.
C
Window lockout.
D
Power-folding mirror control.
E
To adjust a mirror:
1. Select the mirror you want to adjust. The control will light.
2. Adjust the position of the mirror.
3. Press the mirror control again.
Fold-Away Exterior Mirrors
Push the mirror toward the door window
glass. Make sure that you fully engage the
mirror in its support when returning it to its
original position.
Auto-Folding Mirrors
(If Equipped)
The exterior mirrors automatically fold in
toward the glass after you place the
transmission into park (P), turn off the
vehicle, open and close the driver's side
door and lock the vehicle. The exterior
mirrors automatically unfold and return to
their driving position after you unlock the
vehicle and open and close the driver's side
door.
98
Expedition (TB8) Canada/United States of America, enUSA, Edition date: 201708, Third-Printing- Windows and MirrorsE87384 E176219
Page 165 of 571
Folds the right-hand third-row
seat.
C
Folds the left-hand second-row
seat.
D
Folds the second-row bench
center seat or both second-row
captain chair seats.
E
Folds the right-hand second-row
seat.
F
To return the second-row seat backrest to
the original position, rotate the seat
backrest up until it latches in the upright
position. The seat backrest clicks when it
is locked into position.
To return the third-row seat backrest to
the original position, press the
corresponding control again.
If the power rear seat is disabled after 10
minutes, you can enable the seat by:
• Opening any door.
• Pressing the unlock button on the key
fob.
• Pressing any keyless entry keypad
button.
• Switching the ignition on.
Folding Down the Rear Seats to the
Load Floor WARNING: To prevent possible
damage to the seat or seatbelts, make
sure that the seatbelts are not fastened
before folding the seatback. WARNING:
Do not place cargo or
any objects behind the seatback before
returning it to the original position.
The third-row seats have obstacle
detection that prevents the seats from
folding or returning if they are obstructed. Power Recline WARNING:
Do not recline a rear
seat on which a child restraint is
installed. Failure to follow this instruction
could reduce the effectiveness of the
child restraint.
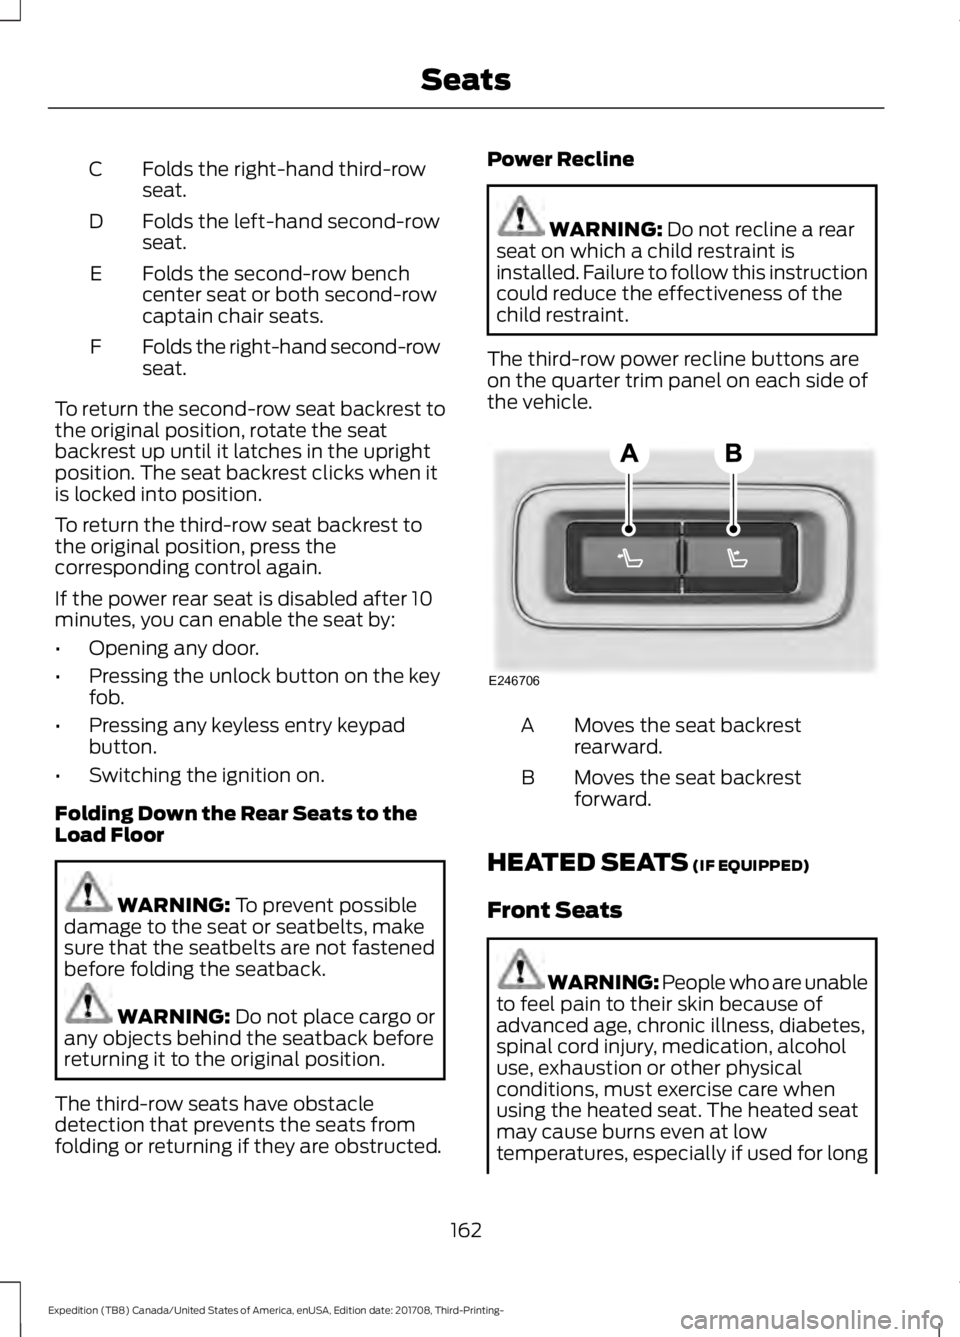
The third-row power recline buttons are
on the quarter trim panel on each side of
the vehicle. Moves the seat backrest
rearward.
A
Moves the seat backrest
forward.
B
HEATED SEATS
(IF EQUIPPED)
Front Seats WARNING: People who are unable
to feel pain to their skin because of
advanced age, chronic illness, diabetes,
spinal cord injury, medication, alcohol
use, exhaustion or other physical
conditions, must exercise care when
using the heated seat. The heated seat
may cause burns even at low
temperatures, especially if used for long
162
Expedition (TB8) Canada/United States of America, enUSA, Edition date: 201708, Third-Printing- SeatsE246706
Page 298 of 571
4.
Once the transmission is in neutral (N)
or stay in neutral mode, switch the
engine off but leave the ignition in the
on position. The information display
shows a Transmission Not in Park
message.
Note: If your vehicle has intelligent access,
you can keep your vehicle on while switching
the engine off by pressing the
START/STOP
button two times slowly
without pressing the brake pedal.
5. Press and hold the brake pedal.
6. Enable neutral tow through the information display by selecting
Settings
from the menu. See General
Information (page 111).
7. Then select
Advanced Settings.
8. Then select
Vehicle.
9. Then select
Neutral Tow.
10. Press and hold the
OK button until
the information display confirms
neutral tow is enabled.
Note: If completed successfully, the
information display shows
Neutral Tow
Enabled Leave Transmission in Neutral.
This indicates that your vehicle is safe to
tow with all wheels on the ground.
Note: If you do not see the message in the
display, you must perform the procedure
again from the beginning.
Note: You may hear an audible noise as the
transfer case shifts into its neutral position.
This is normal.
11. Leave the transmission in neutral (N).
If your vehicle has intelligent access,
press the engine
START/STOP
button once without pressing the
brake pedal to switch the ignition off.
You do not need to leave your keys in
the vehicle. You can lock and unlock
your vehicle as you normally do. If
your vehicle has a physical ignition
key, turn the ignition as far as it can
go toward the off position. It does not turn to the off position when the
transmission is in neutral (N). You
must leave the key in the ignition
when towing. To lock and unlock your
vehicle, use the keyless entry keypad
or an extra set of keys.
12. Release the brake pedal. WARNING:
Do not disconnect the
battery during recreational towing. It
prevents the transfer case from shifting
properly and may cause the vehicle to
roll, even if the transmission is in park
(P). WARNING:
Shifting the transfer
case to its neutral position for
recreational towing may cause the
vehicle to roll, even if the transmission is
in park (P). It may injure the driver and
others. Make sure you press the foot
brake and the vehicle is in a secure, safe
position when you shift to neutral (N).
Note: Failing to put the transfer case in its
neutral position may damage vehicle
components.
Note: You can check four-wheel-down
towing status at any time by opening the
driver door or turning the ignition to the
accessory or on position and verifying the
message displays in the cluster.
Exiting Four-wheel-down Towing
To exit four-wheel-down towing and return
the transfer case to its
2H position:
1. With your vehicle still properly secured
to the tow vehicle, start the engine.
2. After starting your vehicle, switch the engine off but leave the key in the on
position.
295
Expedition (TB8) Canada/United States of America, enUSA, Edition date: 201708, Third-Printing- Towing
Page 497 of 571
For a complete listing of the accessories
that are available for your vehicle, please
contact your authorized dealer or visit the
online store web site:
Web Address (United States)
www.Accessories.Ford.com Web Address (Canada)
www.Accessories.Ford.ca
Ford Motor Company will repair or replace
any properly authorized dealer-installed
Ford Original Accessory found to be
defective in factory-supplied materials or
workmanship during the warranty period,
as well as any component damaged by the
defective accessories. Ford Accessories
are available for your vehicle through an
authorized Ford dealer.
Ford Motor Company will warranty your
Ford Original Accessory through the
warranty that provides the greatest
benefit:
• 24 months, unlimited mileage.
• The remainder of your new vehicle
limited warranty.
Contact an authorized dealer for details
and a copy of the warranty.
Exterior Style
• Keyless entry.
• Side window deflectors*.
• Sill plates.
• Splash guards.
Interior Style
• Floor liners.
• Rear seat entertainment system*.
• Seat covers. Lifestyle
•
Ash cup or coin holder.
• Cargo organization and management.
• Interior light kit.
• In-vehicle safe*.
• Roof rack and carriers*.
• SUV camping tent*.
• Tablet holder.
• Trailer hitches, wiring harnesses and
accessories.
Peace of Mind
• Back-up alarm.
• Bumper protector.
• Car cover*.
• Cargo area protector.
• Cargo security shade.
• Hood deflector.
• Park assist sensors.
• Remote start.
• Roadside assistance kit*.
• Vehicle security system.
• Wheel locks.
*Ford Licensed Accessory. The accessory
manufacturer designs, develops and
therefore warrants Ford Licensed
Accessories, and does not design or test
these accessories to Ford Motor Company
engineering requirements. Contact an
authorized Ford dealer for the accessory
manufacturer's limited warranty details
and request a copy of the Ford Licensed
Accessories product limited warranty from
the accessory manufacturer.
494
Expedition (TB8) Canada/United States of America, enUSA, Edition date: 201708, Third-Printing- Accessories