check engine light FORD EXPEDITION 2021 Owners Manual
[x] Cancel search | Manufacturer: FORD, Model Year: 2021, Model line: EXPEDITION, Model: FORD EXPEDITION 2021Pages: 574, PDF Size: 8.33 MB
Page 13 of 574
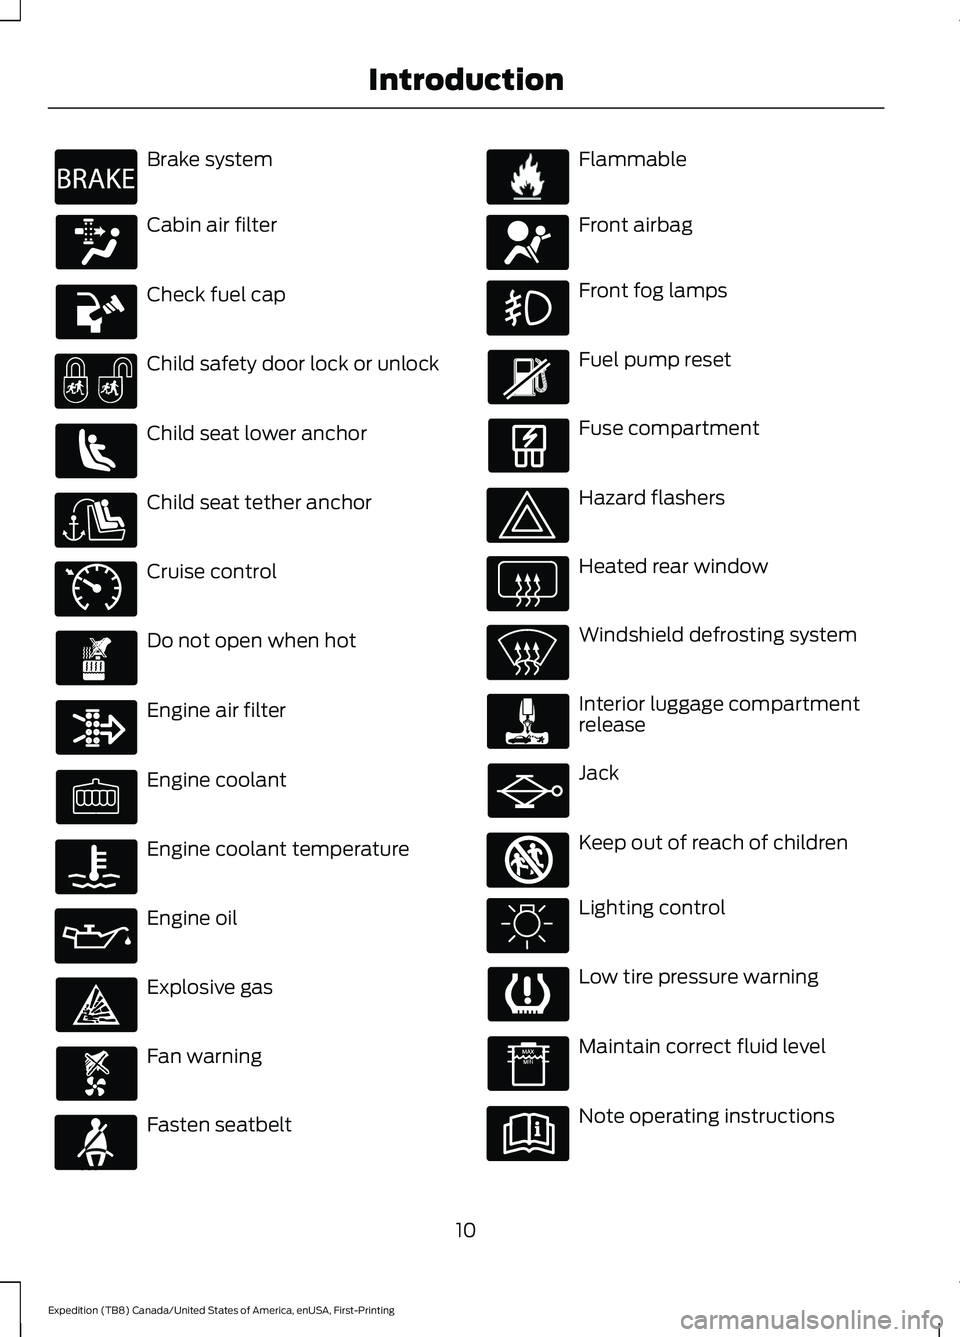
Brake system
Cabin air filter
Check fuel cap
Child safety door lock or unlock
Child seat lower anchor
Child seat tether anchor
Cruise control
Do not open when hot
Engine air filter
Engine coolant
Engine coolant temperature
Engine oil
Explosive gas
Fan warning
Fasten seatbelt Flammable
Front airbag
Front fog lamps
Fuel pump reset
Fuse compartment
Hazard flashers
Heated rear window
Windshield defrosting system
Interior luggage compartment
release
Jack
Keep out of reach of children
Lighting control
Low tire pressure warning
Maintain correct fluid level
Note operating instructions
10
Expedition (TB8) Canada/United States of America, enUSA, First-Printing IntroductionE270480 E71340 E71880 E231160 E67017 E161353
Page 115 of 574
Engine Oil Pressure Gauge
Indicates engine oil pressure. At normal
operating temperature, the level indicator
is in the normal range. If the pressure gauge
falls below the normal range, stop your
vehicle, switch off the engine and check
the engine oil level. Add oil if needed. If the
oil level is correct, have your vehicle
checked as soon as possible.
Engine Coolant Temperature
Gauge
WARNING: Do not remove the
coolant reservoir cap when the engine is
on or the cooling system is hot. Wait 10
minutes for the cooling system to cool
down. Cover the coolant reservoir cap
with a thick cloth to prevent the
possibility of scalding and slowly remove
the cap. Failure to follow this instruction
could result in personal injury.
Indicates engine coolant temperature. At
normal operating temperature, the level
indicator is in the normal range. If the
engine coolant temperature exceeds the
normal range, stop your vehicle as soon as
possible, switch off the engine and let the
engine cool.
Fuel Gauge
The fuel gauge indicates about how much
fuel is in the fuel tank.
The arrow adjacent to the fuel pump
symbol indicates on which side of your
vehicle the fuel filler door is located.
Note: The fuel gauge may vary slightly
when your vehicle is moving or on a slope. Low Fuel Reminder
A low fuel level reminder displays and
sounds when the distance to empty
reaches
75 mi (120 km) to empty for
MyKey, and at 50 mi (80 km), 25 mi
(40 km), 10 mi (20 km) and 0 mi (0 km)
for all vehicle keys.
Note: The low fuel reminder can appear at
different fuel gauge positions depending on
fuel economy conditions. This variation is
normal.
Distance to Empty
Indicates the approximate distance your
vehicle can travel on the fuel remaining in
the tank. Changes in your driving pattern
can cause the value to not only decrease,
but also increase or stay constant for
periods of time.
Configurable Gauge
Transmission Fluid Temperature Gauge
Indicates transmission fluid temperature.
At normal operating temperature, the level
indicator is in the normal range. If the
transmission fluid temperature exceeds
the normal range, stop your vehicle as soon
as possible and verify the airflow is not
restricted by snow or debris blocking
airflow through the grille.
Special operating conditions such as
snowplowing, towing, or off-road use may
cause higher than normal operating
temperatures.
To lower the transmission temperature
into the normal range, alter the severity of
your driving conditions. Operating the
transmission for extended periods with the
gauge in the higher than normal area may
cause internal transmission damage. If the
gauge continues to show high
temperatures, have your vehicle checked
as soon as possible.
112
Expedition (TB8) Canada/United States of America, enUSA, First-Printing Instrument Cluster
Page 117 of 574
Engine Oil Pressure Gauge
Indicates engine oil pressure. At normal
operating temperature, the level indicator
is in the normal range. If the pressure gauge
falls below the normal range, stop your
vehicle, switch off the engine and check
the engine oil level. Add oil if needed. If the
oil level is correct, have your vehicle
checked by an authorized dealer.
Engine Coolant Temperature
Gauge
WARNING: Do not remove the
coolant reservoir cap when the engine is
on or the cooling system is hot. Wait 10
minutes for the cooling system to cool
down. Cover the coolant reservoir cap
with a thick cloth to prevent the
possibility of scalding and slowly remove
the cap. Failure to follow this instruction
could result in personal injury.
Indicates engine coolant temperature. At
normal operating temperature, the level
indicator is in the normal range. If the
engine coolant temperature exceeds the
normal range, stop your vehicle as soon as
possible, switch off the engine and let the
engine cool.
Fuel Gauge
The fuel gauge indicates about how much
fuel is in the fuel tank.
The arrow adjacent to the fuel pump
symbol indicates on which side of your
vehicle the fuel filler door is located.
Note: The fuel gauge may vary slightly
when your vehicle is moving or on a slope. Low Fuel Reminder
A low fuel level reminder displays and
sounds when the distance to empty
reaches
75 mi (120 km) to empty for
MyKey, and at 50 mi (80 km), 25 mi
(40 km), 10 mi (20 km) and 0 mi (0 km)
for all vehicle keys.
Note: The low fuel reminder can appear at
different fuel gauge positions depending on
fuel economy conditions. This variation is
normal.
Distance to Empty
Indicates the approximate distance your
vehicle can travel on the fuel remaining in
the tank. Changes in driving pattern can
cause the value to not only decrease but
also increase or stay constant for periods
of time.
Configurable Gauge
Transmission Fluid Temperature Gauge
Indicates transmission fluid temperature.
At normal operating temperature, the level
indicator is in the normal range. If the
transmission fluid temperature exceeds
the normal range, stop your vehicle as soon
as possible and verify the airflow is not
restricted by snow or debris blocking
airflow through the grille.
Special operating conditions such as
snowplowing, towing, or off-road use may
cause higher than normal operating
temperatures.
To lower the transmission temperature
into the normal range, alter the severity of
your driving conditions. Operating the
transmission for extended periods with the
gauge in the higher than normal area may
cause internal transmission damage. If the
gauge continues to show high
temperatures, see an authorized dealer.
114
Expedition (TB8) Canada/United States of America, enUSA, First-Printing Instrument Cluster
Page 121 of 574
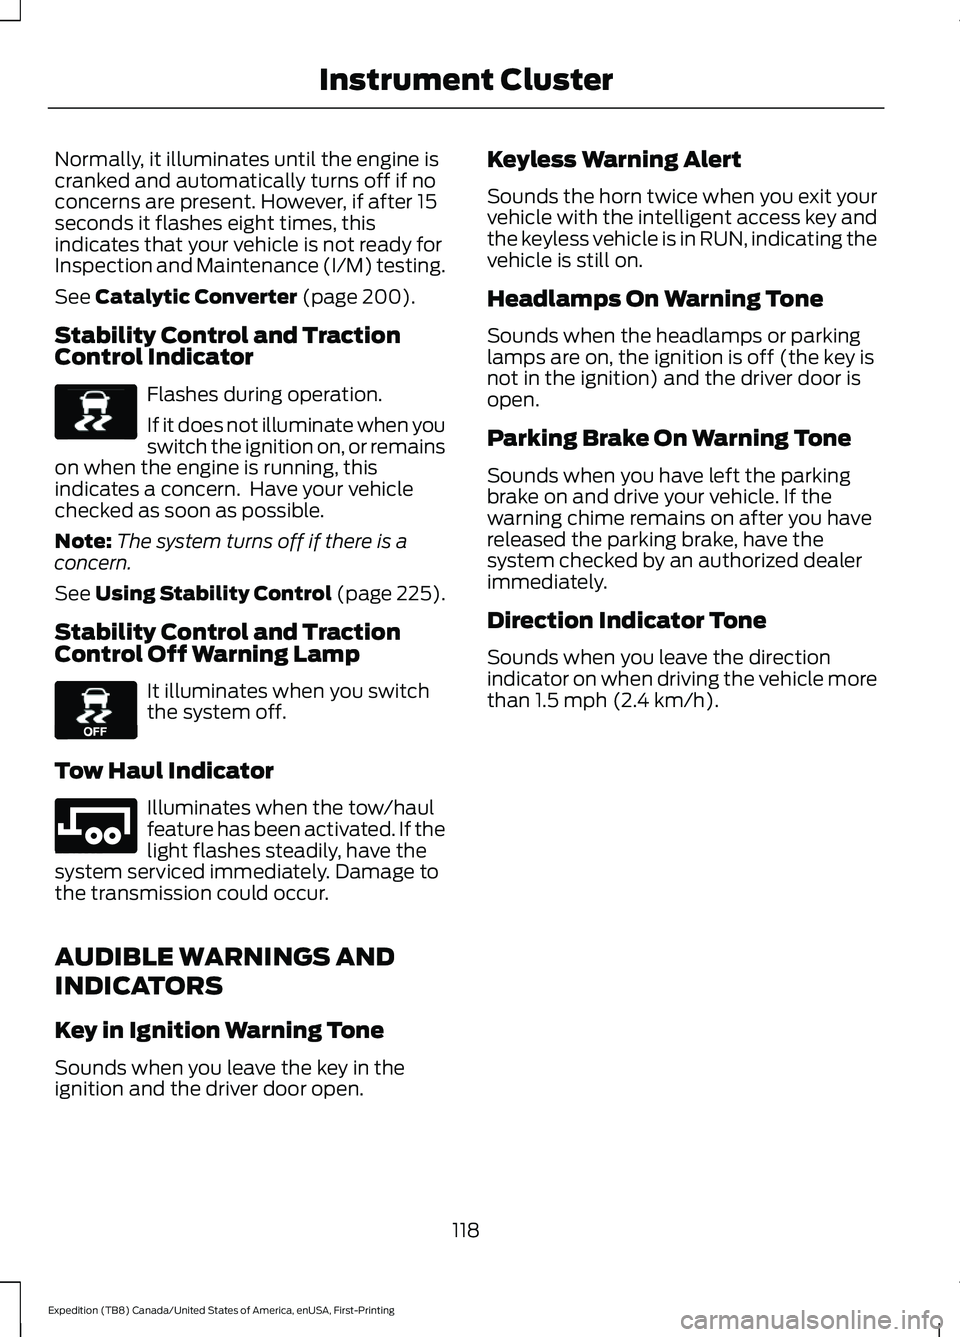
Normally, it illuminates until the engine is
cranked and automatically turns off if no
concerns are present. However, if after 15
seconds it flashes eight times, this
indicates that your vehicle is not ready for
Inspection and Maintenance (I/M) testing.
See Catalytic Converter (page 200).
Stability Control and Traction
Control Indicator Flashes during operation.
If it does not illuminate when you
switch the ignition on, or remains
on when the engine is running, this
indicates a concern. Have your vehicle
checked as soon as possible.
Note: The system turns off if there is a
concern.
See
Using Stability Control (page 225).
Stability Control and Traction
Control Off Warning Lamp It illuminates when you switch
the system off.
Tow Haul Indicator Illuminates when the tow/haul
feature has been activated. If the
light flashes steadily, have the
system serviced immediately. Damage to
the transmission could occur.
AUDIBLE WARNINGS AND
INDICATORS
Key in Ignition Warning Tone
Sounds when you leave the key in the
ignition and the driver door open. Keyless Warning Alert
Sounds the horn twice when you exit your
vehicle with the intelligent access key and
the keyless vehicle is in RUN, indicating the
vehicle is still on.
Headlamps On Warning Tone
Sounds when the headlamps or parking
lamps are on, the ignition is off (the key is
not in the ignition) and the driver door is
open.
Parking Brake On Warning Tone
Sounds when you have left the parking
brake on and drive your vehicle. If the
warning chime remains on after you have
released the parking brake, have the
system checked by an authorized dealer
immediately.
Direction Indicator Tone
Sounds when you leave the direction
indicator on when driving the vehicle more
than
1.5 mph (2.4 km/h).
118
Expedition (TB8) Canada/United States of America, enUSA, First-Printing Instrument ClusterE138639 E130458 E246592
Page 130 of 574
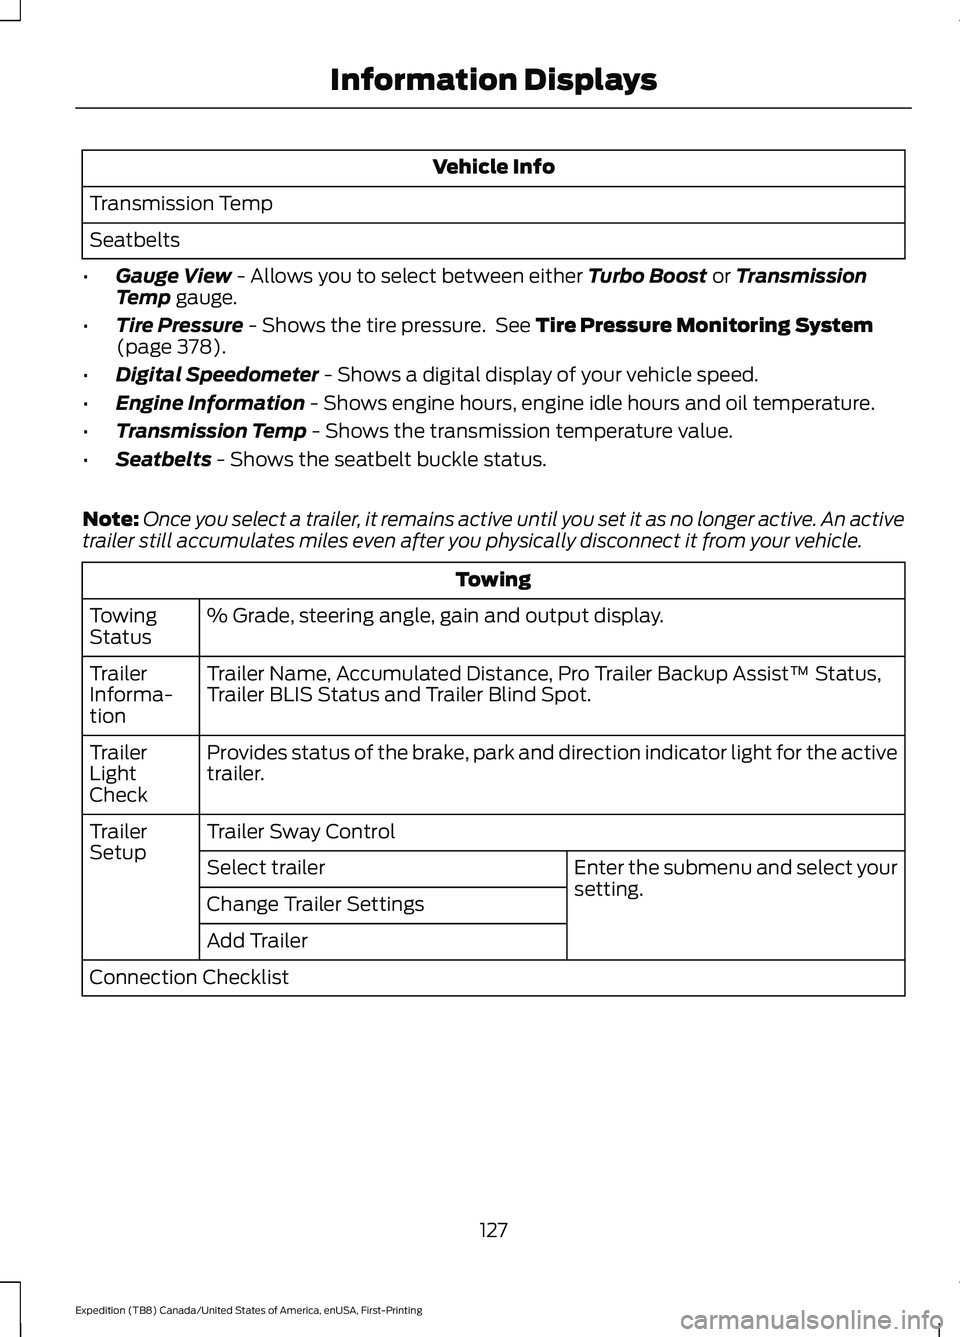
Vehicle Info
Transmission Temp
Seatbelts
• Gauge View - Allows you to select between either Turbo Boost or Transmission
Temp gauge.
• Tire Pressure
- Shows the tire pressure. See Tire Pressure Monitoring System
(page 378).
• Digital Speedometer
- Shows a digital display of your vehicle speed.
• Engine Information
- Shows engine hours, engine idle hours and oil temperature.
• Transmission Temp
- Shows the transmission temperature value.
• Seatbelts
- Shows the seatbelt buckle status.
Note: Once you select a trailer, it remains active until you set it as no longer active. An active
trailer still accumulates miles even after you physically disconnect it from your vehicle. Towing
% Grade, steering angle, gain and output display.
Towing
Status
Trailer Name, Accumulated Distance, Pro Trailer Backup Assist™ Status,
Trailer BLIS Status and Trailer Blind Spot.
Trailer
Informa-
tion
Provides status of the brake, park and direction indicator light for the active
trailer.
Trailer
Light
Check
Trailer Sway Control
Trailer
Setup
Enter the submenu and select your
setting.
Select trailer
Change Trailer Settings
Add Trailer
Connection Checklist
127
Expedition (TB8) Canada/United States of America, enUSA, First-Printing Information Displays
Page 187 of 574
Note:
A valid passive key must be located
inside your vehicle to switch the ignition on
and start your vehicle.
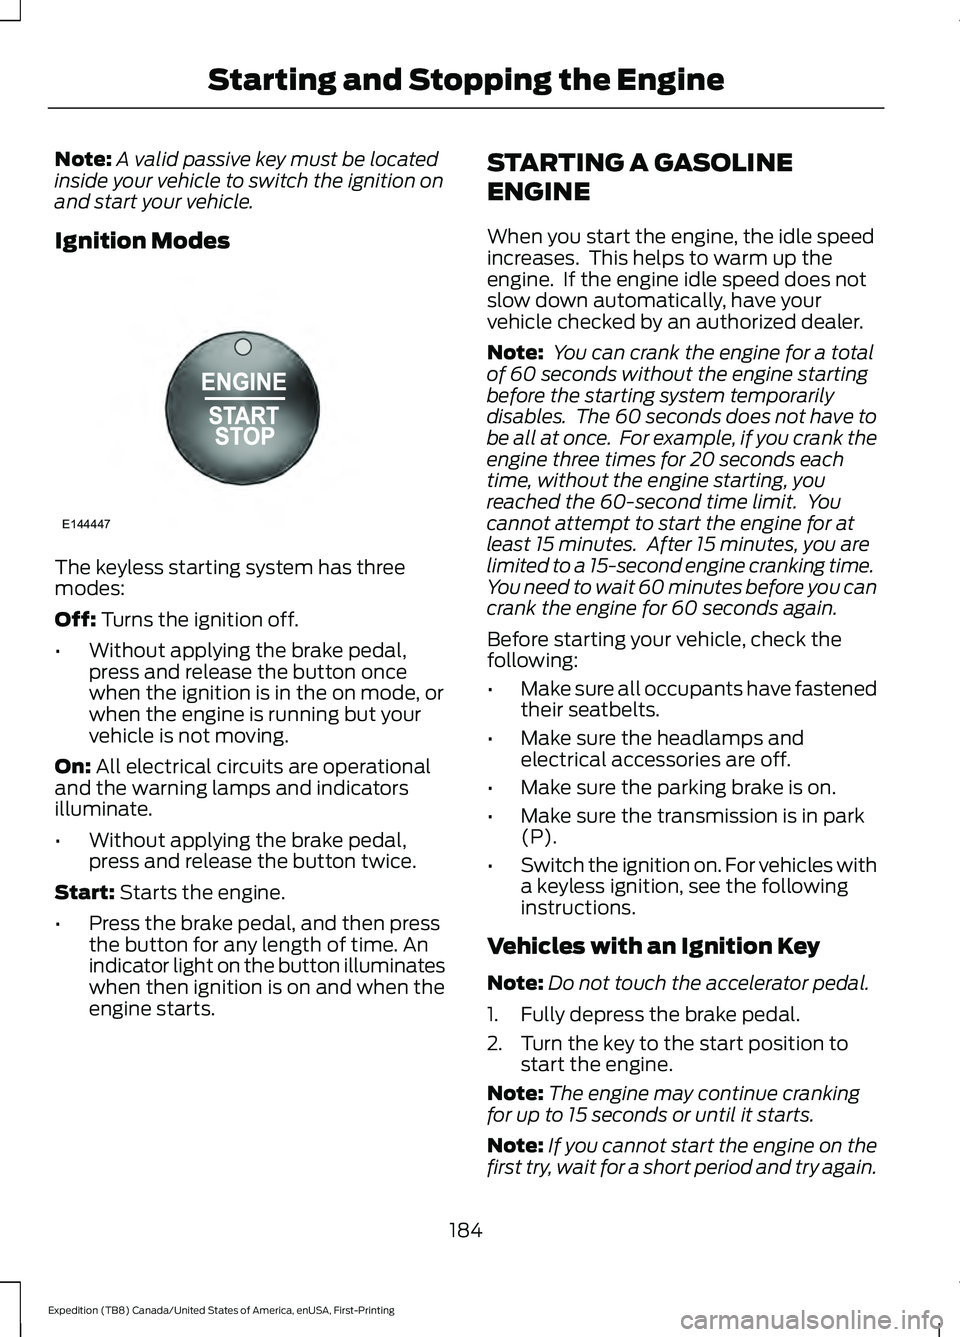
Ignition Modes The keyless starting system has three
modes:
Off: Turns the ignition off.
• Without applying the brake pedal,
press and release the button once
when the ignition is in the on mode, or
when the engine is running but your
vehicle is not moving.
On:
All electrical circuits are operational
and the warning lamps and indicators
illuminate.
• Without applying the brake pedal,
press and release the button twice.
Start:
Starts the engine.
• Press the brake pedal, and then press
the button for any length of time. An
indicator light on the button illuminates
when then ignition is on and when the
engine starts. STARTING A GASOLINE
ENGINE
When you start the engine, the idle speed
increases. This helps to warm up the
engine. If the engine idle speed does not
slow down automatically, have your
vehicle checked by an authorized dealer.
Note:
You can crank the engine for a total
of 60 seconds without the engine starting
before the starting system temporarily
disables. The 60 seconds does not have to
be all at once. For example, if you crank the
engine three times for 20 seconds each
time, without the engine starting, you
reached the 60-second time limit. You
cannot attempt to start the engine for at
least 15 minutes. After 15 minutes, you are
limited to a 15-second engine cranking time.
You need to wait 60 minutes before you can
crank the engine for 60 seconds again.
Before starting your vehicle, check the
following:
• Make sure all occupants have fastened
their seatbelts.
• Make sure the headlamps and
electrical accessories are off.
• Make sure the parking brake is on.
• Make sure the transmission is in park
(P).
• Switch the ignition on. For vehicles with
a keyless ignition, see the following
instructions.
Vehicles with an Ignition Key
Note: Do not touch the accelerator pedal.
1. Fully depress the brake pedal.
2. Turn the key to the start position to start the engine.
Note: The engine may continue cranking
for up to 15 seconds or until it starts.
Note: If you cannot start the engine on the
first try, wait for a short period and try again.
184
Expedition (TB8) Canada/United States of America, enUSA, First-Printing Starting and Stopping the EngineE144447
Page 200 of 574
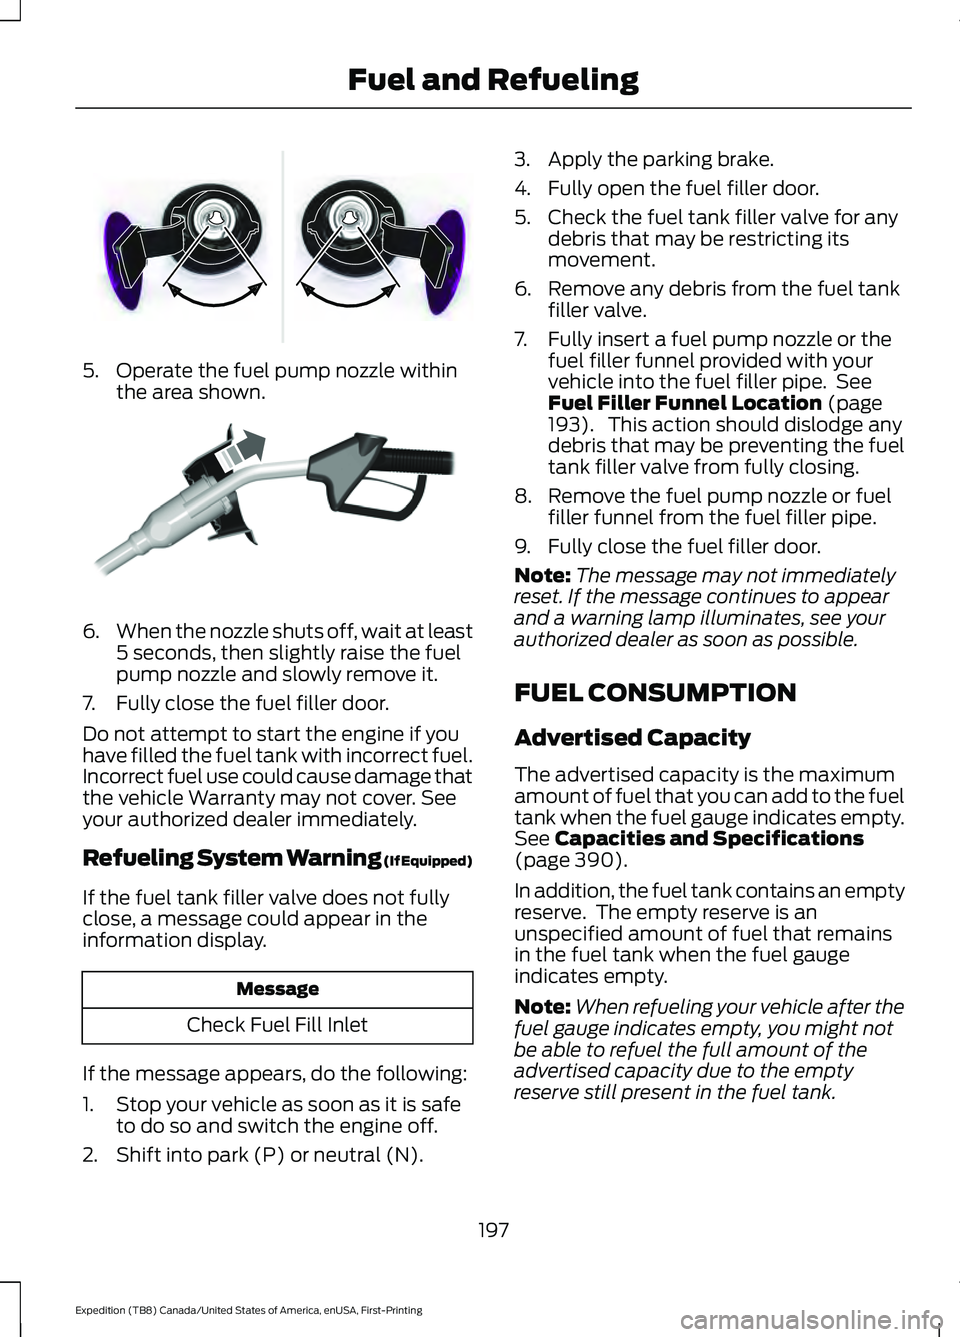
5. Operate the fuel pump nozzle within
the area shown. 6.
When the nozzle shuts off, wait at least
5 seconds, then slightly raise the fuel
pump nozzle and slowly remove it.
7. Fully close the fuel filler door.
Do not attempt to start the engine if you
have filled the fuel tank with incorrect fuel.
Incorrect fuel use could cause damage that
the vehicle Warranty may not cover. See
your authorized dealer immediately.
Refueling System Warning (If Equipped)
If the fuel tank filler valve does not fully
close, a message could appear in the
information display. Message
Check Fuel Fill Inlet
If the message appears, do the following:
1. Stop your vehicle as soon as it is safe to do so and switch the engine off.
2. Shift into park (P) or neutral (N). 3. Apply the parking brake.
4. Fully open the fuel filler door.
5. Check the fuel tank filler valve for any
debris that may be restricting its
movement.
6. Remove any debris from the fuel tank filler valve.
7. Fully insert a fuel pump nozzle or the fuel filler funnel provided with your
vehicle into the fuel filler pipe. See
Fuel Filler Funnel Location (page
193). This action should dislodge any
debris that may be preventing the fuel
tank filler valve from fully closing.
8. Remove the fuel pump nozzle or fuel filler funnel from the fuel filler pipe.
9. Fully close the fuel filler door.
Note: The message may not immediately
reset. If the message continues to appear
and a warning lamp illuminates, see your
authorized dealer as soon as possible.
FUEL CONSUMPTION
Advertised Capacity
The advertised capacity is the maximum
amount of fuel that you can add to the fuel
tank when the fuel gauge indicates empty.
See
Capacities and Specifications
(page 390).
In addition, the fuel tank contains an empty
reserve. The empty reserve is an
unspecified amount of fuel that remains
in the fuel tank when the fuel gauge
indicates empty.
Note: When refueling your vehicle after the
fuel gauge indicates empty, you might not
be able to refuel the full amount of the
advertised capacity due to the empty
reserve still present in the fuel tank.
197
Expedition (TB8) Canada/United States of America, enUSA, First-Printing Fuel and RefuelingE337395 E119081
Page 202 of 574
EMISSION LAW
WARNING: Do not remove or alter
the original equipment floor covering or
insulation between it and the metal floor
of the vehicle. The floor covering and
insulation protect occupants of the
vehicle from the engine and exhaust
system heat and noise. On vehicles with
no original equipment floor covering
insulation, do not carry passengers in a
manner that permits prolonged skin
contact with the metal floor. Failure to
follow these instructions may result in
fire or personal injury.
U.S. federal laws and certain state laws
prohibit removing or rendering inoperative
emission control system components.
Similar federal or provincial laws may
apply in Canada. We do not approve of any
vehicle modification without first
determining applicable laws. Tampering with emissions
control systems including
related sensors or the Diesel
Exhaust Fluid system can result in reduced
engine power and the illumination of the
service engine soon light. Tampering With a Noise Control
System
Federal laws prohibit the following acts:
•
Removal or rendering inoperative by
any person other than for purposes of
maintenance.
• Repair or replacement of any device or
element of the design incorporated into
a new vehicle for the purpose of noise
control prior to its sale or delivery to
the ultimate purchaser or while it is in
use.
• The use of the vehicle after any person
removes or renders inoperative any
device or element of the design.
The U.S. Environmental Protection Agency
may presume to constitute tampering as
follows:
• Removal of hood blanket, fender apron
absorbers, fender apron barriers,
underbody noise shields or acoustically
absorptive material.
• Tampering or rendering inoperative the
engine speed governor, to allow engine
speed to exceed manufacturer
specifications.
If the engine does not start, runs rough,
experiences a decrease in engine
performance, experiences excess fuel
consumption or produces excessive
exhaust smoke, check for the following:
• A plugged or disconnected air inlet
system hose.
• A plugged engine air filter element.
• Water in the fuel filter and water
separator.
• A clogged fuel filter.
• Contaminated fuel.
• Air in the fuel system, due to loose
connections.
• An open or pinched sensor hose.
• Incorrect engine oil level.
199
Expedition (TB8) Canada/United States of America, enUSA, First-Printing Engine Emission Control
Page 213 of 574
USING FOUR-WHEEL DRIVE
Note:
Please review important information
regarding the safe operation of this type of
vehicle. See General Information (page
361).
Note: Do not use 4H or 4L mode on dry,
hard surfaced roads. Doing so can produce
excessive noise, increase tire wear and could
damage drive components. Using 4H and
4L mode is only intended for consistently
slippery or loose surfaces. Use of 4L mode
on these surfaces may produce some noise,
such as occasional clunks, but does not
damage drive components.
Note: If 4L mode is selected when your
vehicle is moving above
3 mph (5 km/h),
the four-wheel drive system does not
perform a shift. This is normal and should
be no reason for concern.
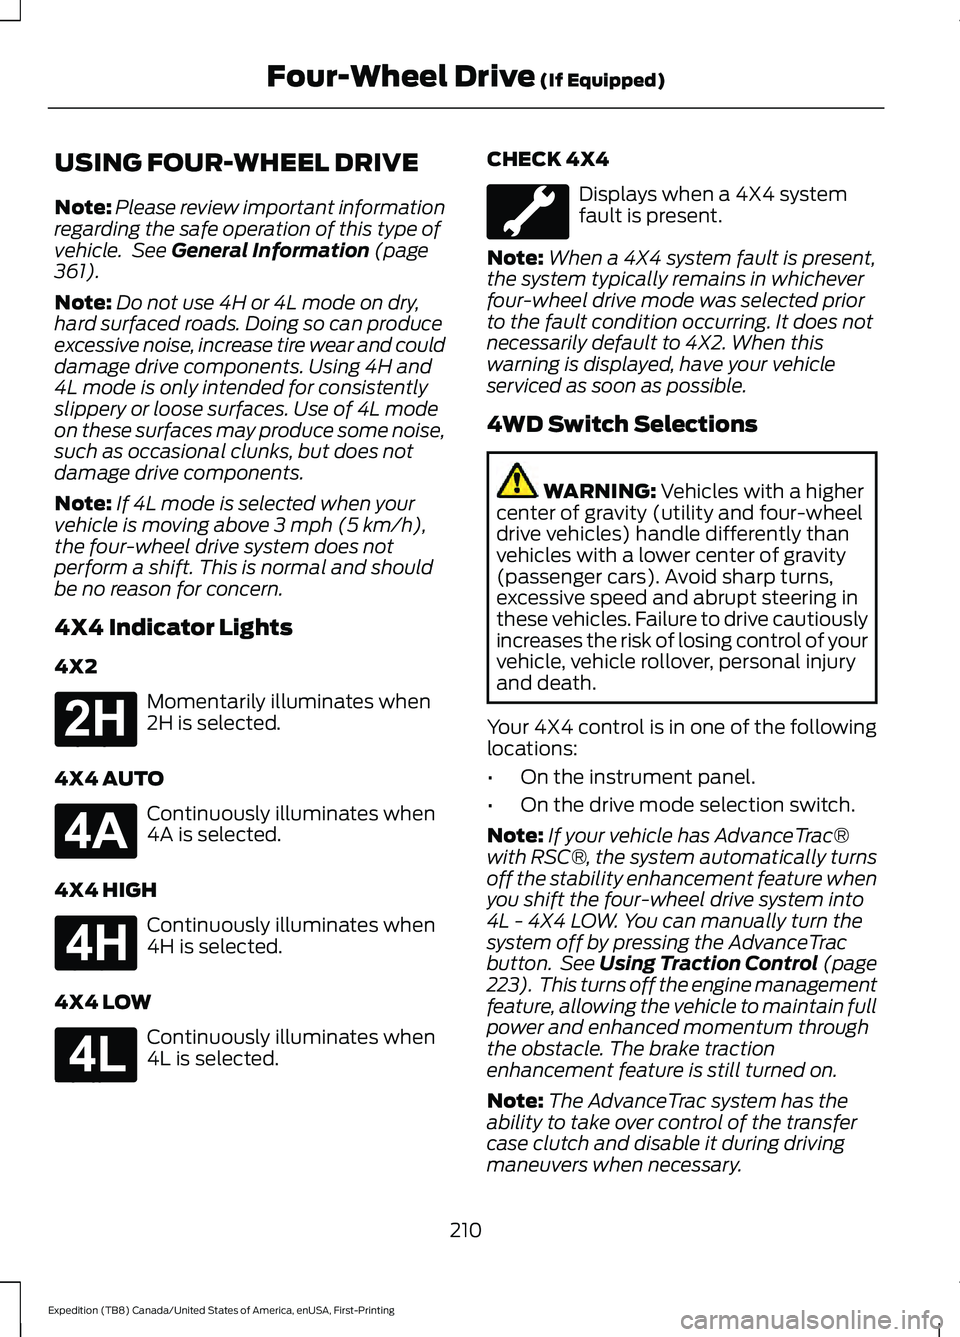
4X4 Indicator Lights
4X2 Momentarily illuminates when
2H is selected.
4X4 AUTO Continuously illuminates when
4A is selected.
4X4 HIGH Continuously illuminates when
4H is selected.
4X4 LOW Continuously illuminates when
4L is selected. CHECK 4X4 Displays when a 4X4 system
fault is present.
Note: When a 4X4 system fault is present,
the system typically remains in whichever
four-wheel drive mode was selected prior
to the fault condition occurring. It does not
necessarily default to 4X2. When this
warning is displayed, have your vehicle
serviced as soon as possible.
4WD Switch Selections WARNING:
Vehicles with a higher
center of gravity (utility and four-wheel
drive vehicles) handle differently than
vehicles with a lower center of gravity
(passenger cars). Avoid sharp turns,
excessive speed and abrupt steering in
these vehicles. Failure to drive cautiously
increases the risk of losing control of your
vehicle, vehicle rollover, personal injury
and death.
Your 4X4 control is in one of the following
locations:
• On the instrument panel.
• On the drive mode selection switch.
Note: If your vehicle has AdvanceTrac®
with RSC®, the system automatically turns
off the stability enhancement feature when
you shift the four-wheel drive system into
4L - 4X4 LOW. You can manually turn the
system off by pressing the AdvanceTrac
button. See
Using Traction Control (page
223). This turns off the engine management
feature, allowing the vehicle to maintain full
power and enhanced momentum through
the obstacle. The brake traction
enhancement feature is still turned on.
Note: The AdvanceTrac system has the
ability to take over control of the transfer
case clutch and disable it during driving
maneuvers when necessary.
210
Expedition (TB8) Canada/United States of America, enUSA, First-Printing Four-Wheel Drive
(If Equipped)E181778 E181781 E181779 E181780
Page 217 of 574
It may be less risky to strike small objects,
such as freeway reflectors, with minor
damage to your vehicle rather than
attempt a sudden return to the road which
could cause your vehicle to slide sideways
out of control or roll over. Remember, your
safety and the safety of others should be
your primary concern.
Emergency Maneuvers
In an unavoidable emergency where a
sudden sharp turn must be made,
remember to avoid over-driving your
vehicle, for example, turn the steering
wheel only as rapidly and as far as required
to avoid the emergency. Excessive steering
can result in loss of vehicle control. Apply
smooth pressure to the accelerator pedal
or brake pedal when changes in vehicle
speed are required. Avoid abrupt steering,
acceleration and braking. This could result
in an increased risk of vehicle roll over, loss
of vehicle control and personal injury. Use
all of the available road surface to bring
your vehicle to a safe direction of travel.
In the event of an emergency stop, avoid
skidding the tires and do not attempt any
sharp steering wheel movements.
If your vehicle goes from one type of
surface to another, such as, from concrete
to gravel, there is a change in the way your
vehicle responds to a maneuver, for
example, steering, acceleration or braking.
Sand
When driving over sand, try to keep all four
wheels on the most solid area of the trail.
Avoid reducing the tire pressures but shift
to a lower gear and drive steadily through
the terrain. Apply the accelerator slowly
and avoid excessive wheel slip.
When driving at slow speeds in deep sand
under high outside temperatures, use a low
gear when possible. Low gear operation
maximizes the engine and transmission
cooling capability.
Avoid driving at excessive speeds, this
causes vehicle momentum to work against
you and your vehicle could become stuck
to the point that assistance may be
required from another vehicle. Remember,
you may be able to back out the way you
came if you proceed with caution.
Mud and Water
Mud
Be cautious of sudden changes in vehicle
speed or direction when you are driving in
mud. Even four-wheel drive vehicles can
lose traction in slick mud. If your vehicle
does slide, steer in the direction of the slide
until you regain control of your vehicle.
After driving through mud, clean off residue
stuck to rotating driveshafts and tires.
Excess mud stuck on tires and rotating
driveshafts can cause an imbalance that
could damage drive components.
Water
If you must drive through high water, drive
slowly. Traction or brake capability could
be limited.
When driving through water, determine the
depth and avoid water higher than the
bottom of the hubs. If the ignition system
gets wet, your vehicle may stall.
Once through water, always try the brakes.
Wet brakes do not stop your vehicle as
effectively as dry brakes. Drying improves
by applying light pressure to the brake
pedal when slowly moving.
Note:
Driving through deep water could
damage the transmission. If the front or rear
axle is submerged in water, the axle
lubricant and power transfer unit lubricant
should be checked and changed if
necessary.
214
Expedition (TB8) Canada/United States of America, enUSA, First-Printing Four-Wheel Drive (If Equipped)