automatic transmission FORD EXPEDITION EL 2016 Owners Manual
[x] Cancel search | Manufacturer: FORD, Model Year: 2016, Model line: EXPEDITION EL, Model: FORD EXPEDITION EL 2016Pages: 421, PDF Size: 7.39 MB
Page 6 of 421
Starting and Stopping theEngine
General Information....................................145
Ignition Switch...............................................145
Keyless Starting............................................145
Starting a Gasoline Engine.......................146
Engine Block Heater....................................149
Fuel and Refueling
Safety Precautions........................................151
Fuel Quality.....................................................152
Fuel Filler Funnel Location........................152
Running Out of Fuel.....................................152
Refueling..........................................................153
Fuel Consumption........................................155
Emission Control System..........................156
Transmission
Automatic Transmission...........................159
Four-Wheel Drive
Using Four-Wheel Drive.............................164
Rear Axle
Limited Slip Differential...............................171
Brakes
General Information.....................................172
Hints on Driving With Anti-LockBrakes............................................................172
Parking Brake..................................................173
Hill Start Assist..............................................173
Traction Control
Principle of Operation.................................175
Using Traction Control................................175
Stability Control
Principle of Operation.................................176
Using Stability Control................................177
Terrain Response
Using Hill Descent Control........................179
Parking Aids
Principle of Operation..................................181
Rear Parking Aid.............................................181
Front Parking Aid..........................................182
Rear View Camera.......................................183
Cruise Control
Principle of Operation................................186
Using Cruise Control...................................186
Driving Aids
Blind Spot Information System..............188
Cross Traffic Alert........................................190
Steering............................................................193
Drive Control..................................................194
Self-Leveling Suspension.........................195
Load Carrying
Rear Under Floor Storage.........................196
Roof Racks and Load Carriers..................197
Load Limit.......................................................198
Towing
Towing a Trailer............................................205
Trailer Sway Control...................................206
Recommended Towing Weights...........206
Essential Towing Checks..........................208
Towing Points.................................................215
Transporting the Vehicle............................216
Towing the Vehicle on Four Wheels.......217
Driving Hints
Breaking-In.....................................................220
Reduced Engine Performance................220
3
Expedition (TB7) Canada/United States of America, enUSA, First Printing
Table of Contents
Page 7 of 421
Economical Driving.....................................220
Driving Through Water................................221
Floor Mats........................................................221
Roadside Emergencies
Roadside Assistance..................................223
Hazard Warning Flashers..........................224
Fuel Shutoff...................................................224
Jump Starting the Vehicle........................225
Customer Assistance
Getting the Services You Need...............228
In California (U.S. Only).............................229
The Better Business Bureau (BBB) AutoLine Program (U.S. Only).....................230
Utilizing the Mediation/ArbitrationProgram (Canada Only).......................230
Getting Assistance Outside the U.S. andCanada.........................................................231
Ordering Additional Owner'sLiterature.....................................................232
Reporting Safety Defects (U.S.Only).............................................................232
Reporting Safety Defects (CanadaOnly).............................................................233
Fuses
Fuse Specification Chart..........................234
Changing a Fuse...........................................242
Maintenance
General Information...................................243
Opening and Closing the Hood..............243
Under Hood Overview - 3.5LEcoboost™................................................244
Engine Oil Dipstick......................................245
Engine Oil Check..........................................245
Oil Change Indicator Reset......................246
Engine Coolant Check................................247
Automatic Transmission FluidCheck...........................................................250
Transfer Case Fluid Check.........................251
Brake Fluid Check.........................................251
Washer Fluid Check....................................252
Fuel Filter........................................................252
Changing the 12V Battery.........................252
Checking the Wiper Blades.....................254
Changing the Wiper Blades.....................255
Adjusting the Headlamps.........................255
Removing a Headlamp..............................256
Changing a Bulb...........................................257
Bulb Specification Chart..........................260
Changing the Engine Air Filter.................262
Vehicle Care
General Information...................................264
Cleaning Products.......................................264
Cleaning the Exterior..................................264
Waxing.............................................................265
Cleaning the Engine....................................265
Cleaning the Windows and WiperBlades..........................................................266
Cleaning the Interior...................................266
Cleaning the Instrument Panel andInstrument Cluster Lens........................267
Cleaning Leather Seats.............................267
Repairing Minor Paint Damage..............269
Cleaning the Alloy Wheels.......................269
Vehicle Storage............................................269
Wheels and Tires
General Information....................................272
Tire Care..........................................................275
Using Snow Chains....................................290
Tire Pressure Monitoring System..........290
Changing a Road Wheel...........................296
Technical Specifications............................301
Capacities and Specific-ations
Engine Specifications................................303
4
Expedition (TB7) Canada/United States of America, enUSA, First Printing
Table of Contents
Page 47 of 421
4. Insert a new battery with the + facingdownward. Press the battery down tomake sure it is fully in the housing.
5. Reinstall the battery housing coveronto the transmitter and install the keyblade.
Car Finder
Press the button twice withinthree seconds.
The horn sounds and the directionindicators flash. We recommend you usethis method to locate your vehicle, ratherthan using the panic alarm.
Note:If any door or the liftgate is open, orif the hood is open on vehicles with ananti-theft alarm or remote start, the hornwill sound twice and the direction indicatorswill not flash.
Sounding the Panic Alarm
Press the button to sound thepanic alarm. Press the buttonagain or switch the ignition on toturn it off.
Note:The panic alarm only operates whenthe ignition is off.
Remote Start (If Equipped)
WARNING
To avoid exhaust fumes, do not useremote start if your vehicle is parkedindoors or in areas that are not wellventilated.
Note:Do not use remote start if your fuellevel is low.
The remote start button is on thetransmitter.
This feature allows you to start yourvehicle from the outside. The transmitterhas an extended operating range.
Vehicles with automatic climate controlcan be configured to operate when thevehicle is remote started. See AutomaticClimate Control (page 116).
Many states and provinces haverestrictions for the use of remote start.Check your local and state or provinciallaws for specific requirements regardingremote start systems.
The remote start system does not work ifany of the following occur:
•The ignition is on.
•The anti-theft alarm triggers.
•You switch off the feature.
•The hood is open.
•The transmission is not in park (P).
•The battery voltage is below theminimum operating voltage.
•The service engine soon indicator wason the last time your vehicle wasdriven.
Remote Starting your Vehicle
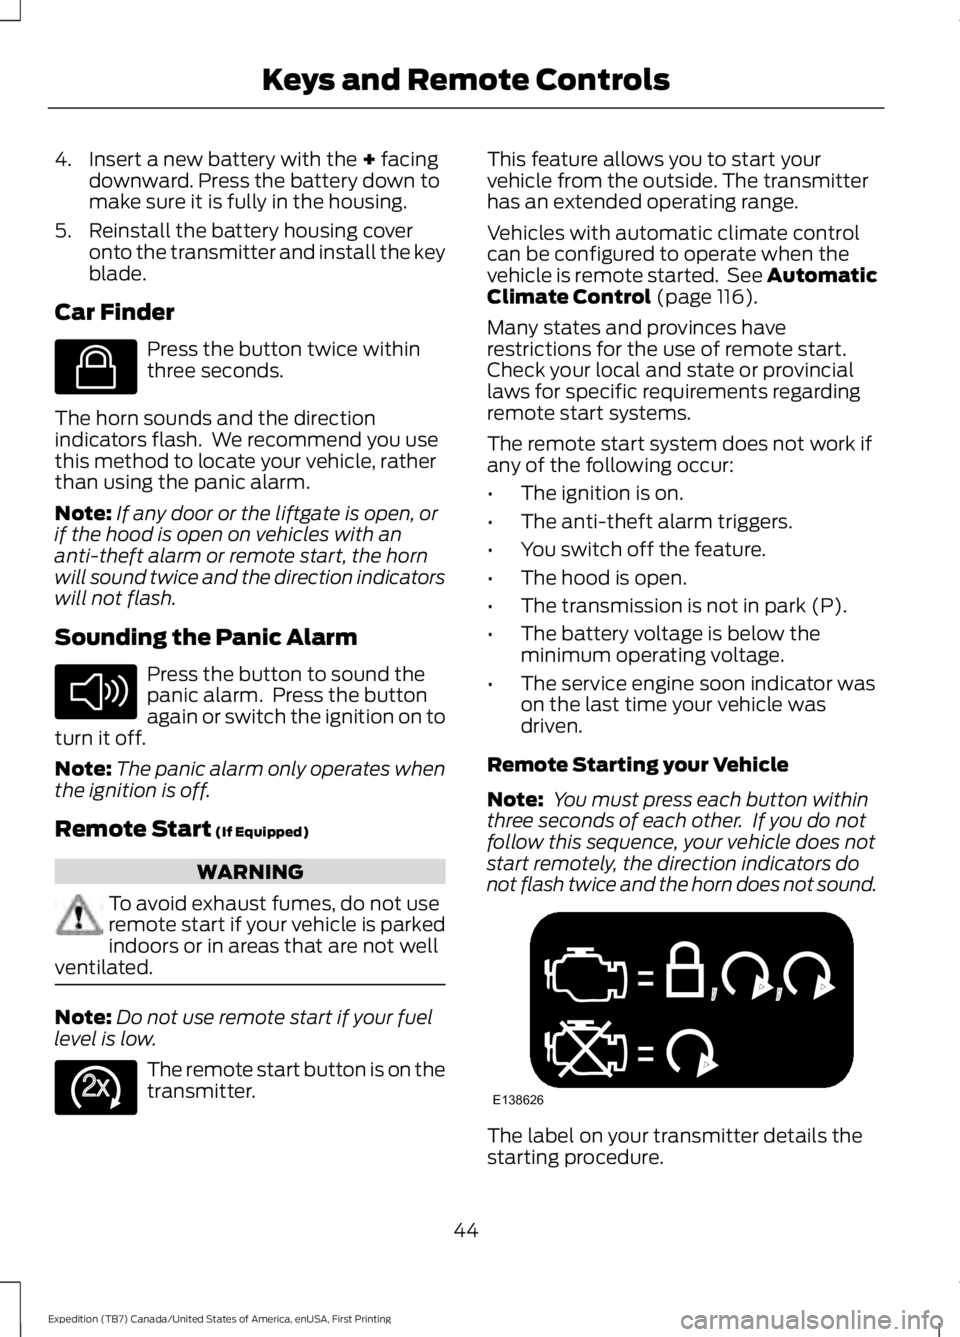
Note: You must press each button withinthree seconds of each other. If you do notfollow this sequence, your vehicle does notstart remotely, the direction indicators donot flash twice and the horn does not sound.
The label on your transmitter details thestarting procedure.
44
Expedition (TB7) Canada/United States of America, enUSA, First Printing
Keys and Remote ControlsE138623 E138624 E138625 E138626
Page 57 of 421
At the Liftgate
The liftgate unlocks and opensautomatically when you press the liftgaterelease button.
Smart Unlocks for IntegratedKeyhead Transmitter (If Equipped)
This helps to prevent you from lockingyourself out of your vehicle if the key is stillin the ignition.
When you open one of the front doors andlock your vehicle with the power door lockcontrol, all the doors will lock then unlockand the horn will sound twice if the key isstill in the ignition.
Your can still lock your vehicle with the keyin the ignition by:
•Using the manual lock on the door.
•Locking the driver door with a key.
•Using the keyless entry keypad.
•Pressing the lock button on anotherremote control.
Smart Unlocks for IntelligentAccess Keys (If Equipped)
This helps to prevent you from locking yourkey inside the passenger compartment orrear cargo area.
When you electronically lock your vehiclewith any door open, the transmission is inpark (P) and the ignition is off, the systemsearches for an intelligent access keyinside your vehicle after you close the lastdoor. If the system finds a key, all of thedoors will immediately unlock and the hornwill sound twice, indicating that a key isinside.
You can override the smart unlock featureand intentionally lock the intelligent accesskey inside your vehicle.
To do this, lock your vehicle after you haveclosed all the doors by:
•Using the keyless entry keypad.
•Pressing the lock button on anotherintelligent access key.
When you open one of the front doors andlock your vehicle using the power door lockcontrol, all doors will lock then unlock if:
•The ignition is on.
•The ignition is off and the transmissionis not in park (P).
Auto Relock
If you press the unlock button on theremote control and do not open a doorwithin 45 seconds, your vehicle will lockand the alarm will arm. You can switch thisfeature on or off in the information display.See Information Displays (page 92).
Autolock
Autolock locks all the doors when all of thefollowing occur:
•All doors are closed.
•The ignition is on.
•You shift into any gear putting yourvehicle in motion.
•Your vehicle's speed is greater than12 mph (20 km/h).
Autolock repeats when:
•You open then close any door while theignition is on and your vehicle's speedis less than 9 mph (15 km/h).
•Your vehicle's speed is greater than12 mph (20 km/h).
Enabling or Disabling
To enable or disable the autolock feature,contact an authorized dealer.
54
Expedition (TB7) Canada/United States of America, enUSA, First Printing
Locks
Page 79 of 421
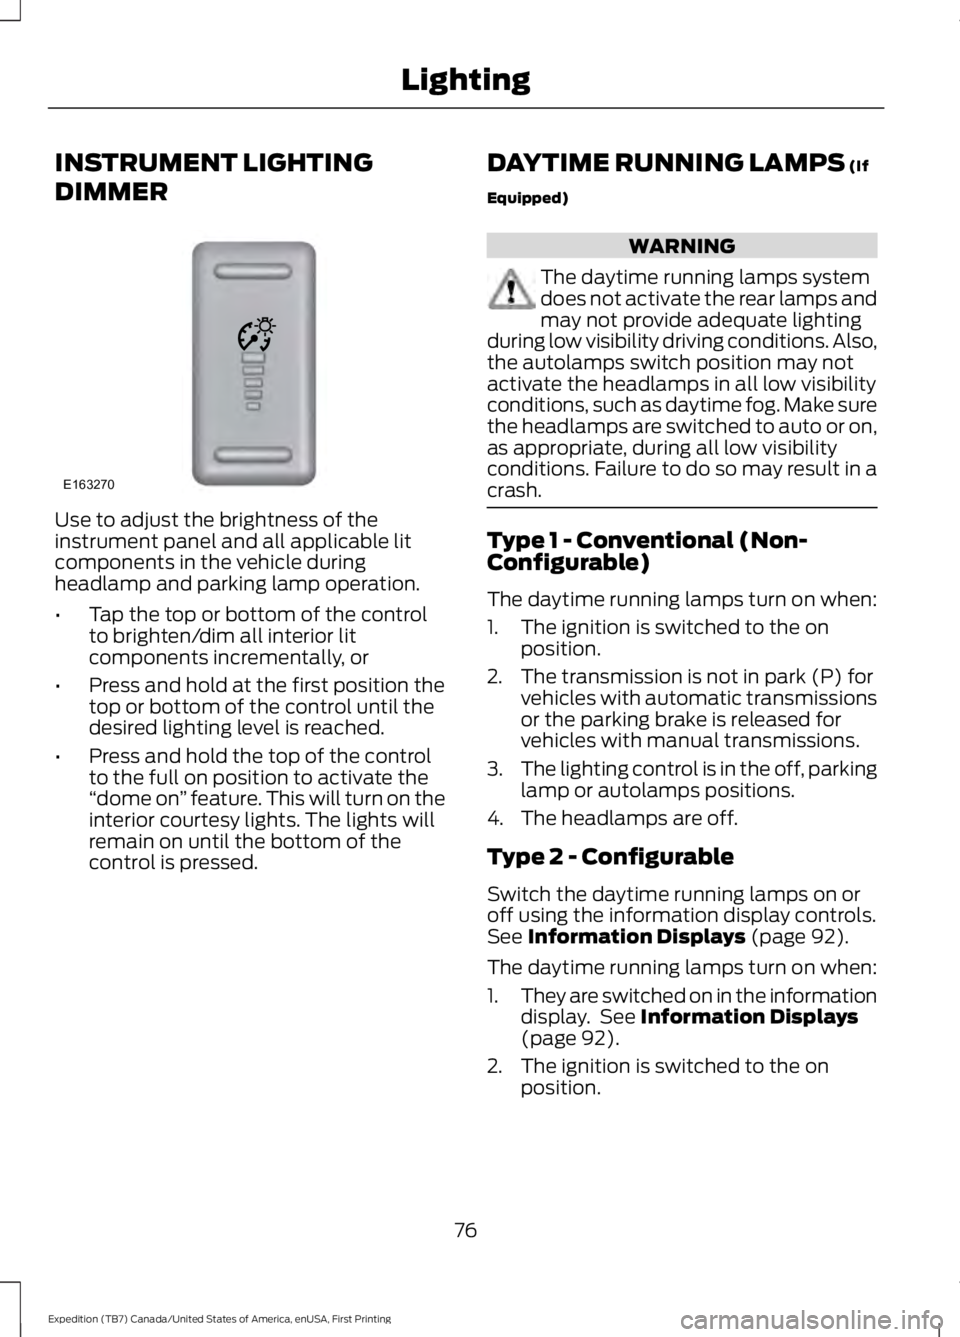
INSTRUMENT LIGHTING
DIMMER
Use to adjust the brightness of theinstrument panel and all applicable litcomponents in the vehicle duringheadlamp and parking lamp operation.
•Tap the top or bottom of the controlto brighten/dim all interior litcomponents incrementally, or
•Press and hold at the first position thetop or bottom of the control until thedesired lighting level is reached.
•Press and hold the top of the controlto the full on position to activate the“dome on” feature. This will turn on theinterior courtesy lights. The lights willremain on until the bottom of thecontrol is pressed.
DAYTIME RUNNING LAMPS (If
Equipped)
WARNING
The daytime running lamps systemdoes not activate the rear lamps andmay not provide adequate lightingduring low visibility driving conditions. Also,the autolamps switch position may notactivate the headlamps in all low visibilityconditions, such as daytime fog. Make surethe headlamps are switched to auto or on,as appropriate, during all low visibilityconditions. Failure to do so may result in acrash.
Type 1 - Conventional (Non-Configurable)
The daytime running lamps turn on when:
1. The ignition is switched to the onposition.
2. The transmission is not in park (P) forvehicles with automatic transmissionsor the parking brake is released forvehicles with manual transmissions.
3.The lighting control is in the off, parkinglamp or autolamps positions.
4. The headlamps are off.
Type 2 - Configurable
Switch the daytime running lamps on oroff using the information display controls.See Information Displays (page 92).
The daytime running lamps turn on when:
1.They are switched on in the informationdisplay. See Information Displays(page 92).
2. The ignition is switched to the onposition.
76
Expedition (TB7) Canada/United States of America, enUSA, First Printing
LightingE163270
Page 80 of 421
3. The transmission is not in park (P) forvehicles with automatic transmissionsor the parking brake is released forvehicles with manual transmissions.
4.The lighting control is in the autolampsposition.
5. The headlamps are off.
The other lighting control switch positionsdo not activate the daytime running lamps,and you can use them to temporarilyoverride autolamp control.
When switched off in the informationdisplay, the daytime running lamps are offin all lighting control switch positions.
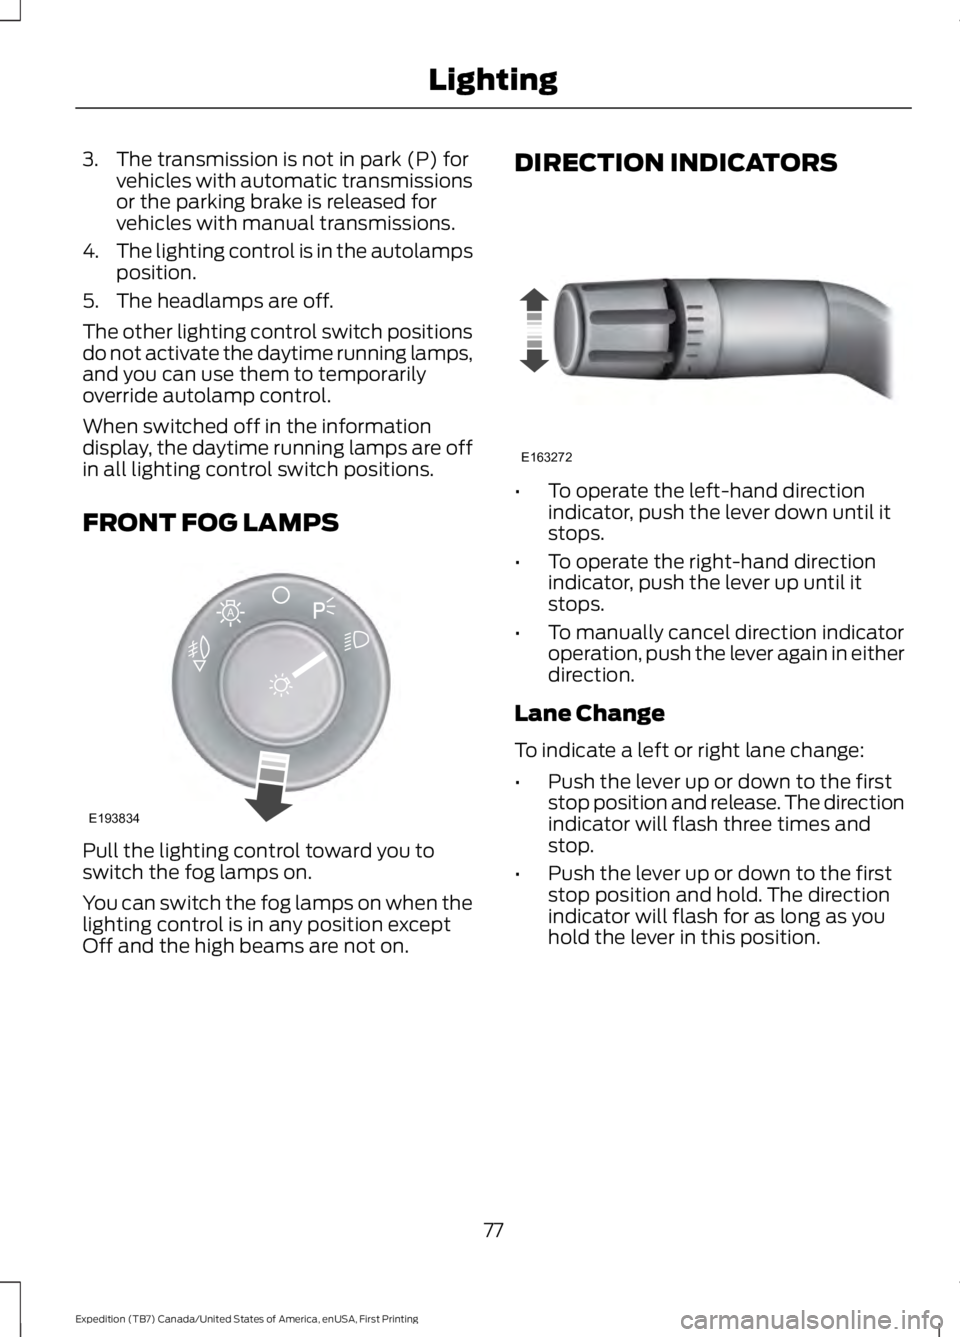
FRONT FOG LAMPS
Pull the lighting control toward you toswitch the fog lamps on.
You can switch the fog lamps on when thelighting control is in any position exceptOff and the high beams are not on.
DIRECTION INDICATORS
•To operate the left-hand directionindicator, push the lever down until itstops.
•To operate the right-hand directionindicator, push the lever up until itstops.
•To manually cancel direction indicatoroperation, push the lever again in eitherdirection.
Lane Change
To indicate a left or right lane change:
•Push the lever up or down to the firststop position and release. The directionindicator will flash three times andstop.
•Push the lever up or down to the firststop position and hold. The directionindicator will flash for as long as youhold the lever in this position.
77
Expedition (TB7) Canada/United States of America, enUSA, First Printing
LightingE193834
A E163272
Page 93 of 421
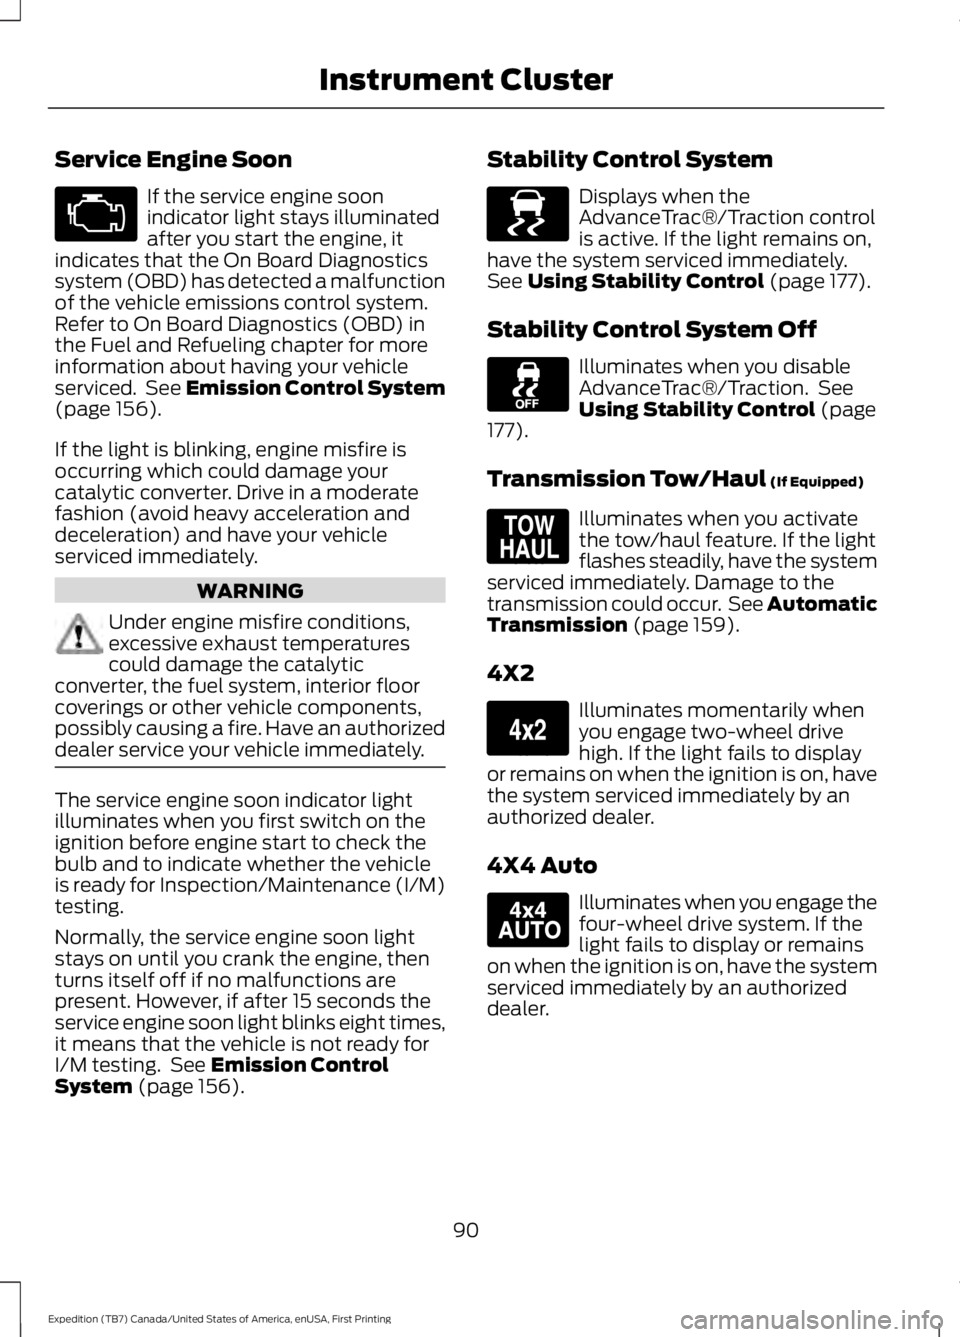
Service Engine Soon
If the service engine soonindicator light stays illuminatedafter you start the engine, itindicates that the On Board Diagnosticssystem (OBD) has detected a malfunctionof the vehicle emissions control system.Refer to On Board Diagnostics (OBD) inthe Fuel and Refueling chapter for moreinformation about having your vehicleserviced. See Emission Control System(page 156).
If the light is blinking, engine misfire isoccurring which could damage yourcatalytic converter. Drive in a moderatefashion (avoid heavy acceleration anddeceleration) and have your vehicleserviced immediately.
WARNING
Under engine misfire conditions,excessive exhaust temperaturescould damage the catalyticconverter, the fuel system, interior floorcoverings or other vehicle components,possibly causing a fire. Have an authorizeddealer service your vehicle immediately.
The service engine soon indicator lightilluminates when you first switch on theignition before engine start to check thebulb and to indicate whether the vehicleis ready for Inspection/Maintenance (I/M)testing.
Normally, the service engine soon lightstays on until you crank the engine, thenturns itself off if no malfunctions arepresent. However, if after 15 seconds theservice engine soon light blinks eight times,it means that the vehicle is not ready forI/M testing. See Emission ControlSystem (page 156).
Stability Control System
Displays when theAdvanceTrac®/Traction controlis active. If the light remains on,have the system serviced immediately.See Using Stability Control (page 177).
Stability Control System Off
Illuminates when you disableAdvanceTrac®/Traction. SeeUsing Stability Control (page177).
Transmission Tow/Haul (If Equipped)
Illuminates when you activatethe tow/haul feature. If the lightflashes steadily, have the systemserviced immediately. Damage to thetransmission could occur. See AutomaticTransmission (page 159).
4X2
Illuminates momentarily whenyou engage two-wheel drivehigh. If the light fails to displayor remains on when the ignition is on, havethe system serviced immediately by anauthorized dealer.
4X4 Auto
Illuminates when you engage thefour-wheel drive system. If thelight fails to display or remainson when the ignition is on, have the systemserviced immediately by an authorizeddealer.
90
Expedition (TB7) Canada/United States of America, enUSA, First Printing
Instrument Cluster E138639 E161509 E163173 E166922
Page 129 of 421
2. Continue pressing the control until itreaches the end of the seat track.
3.Continue pressing the control for abouttwo seconds. You will feel the seatbounce back slightly.
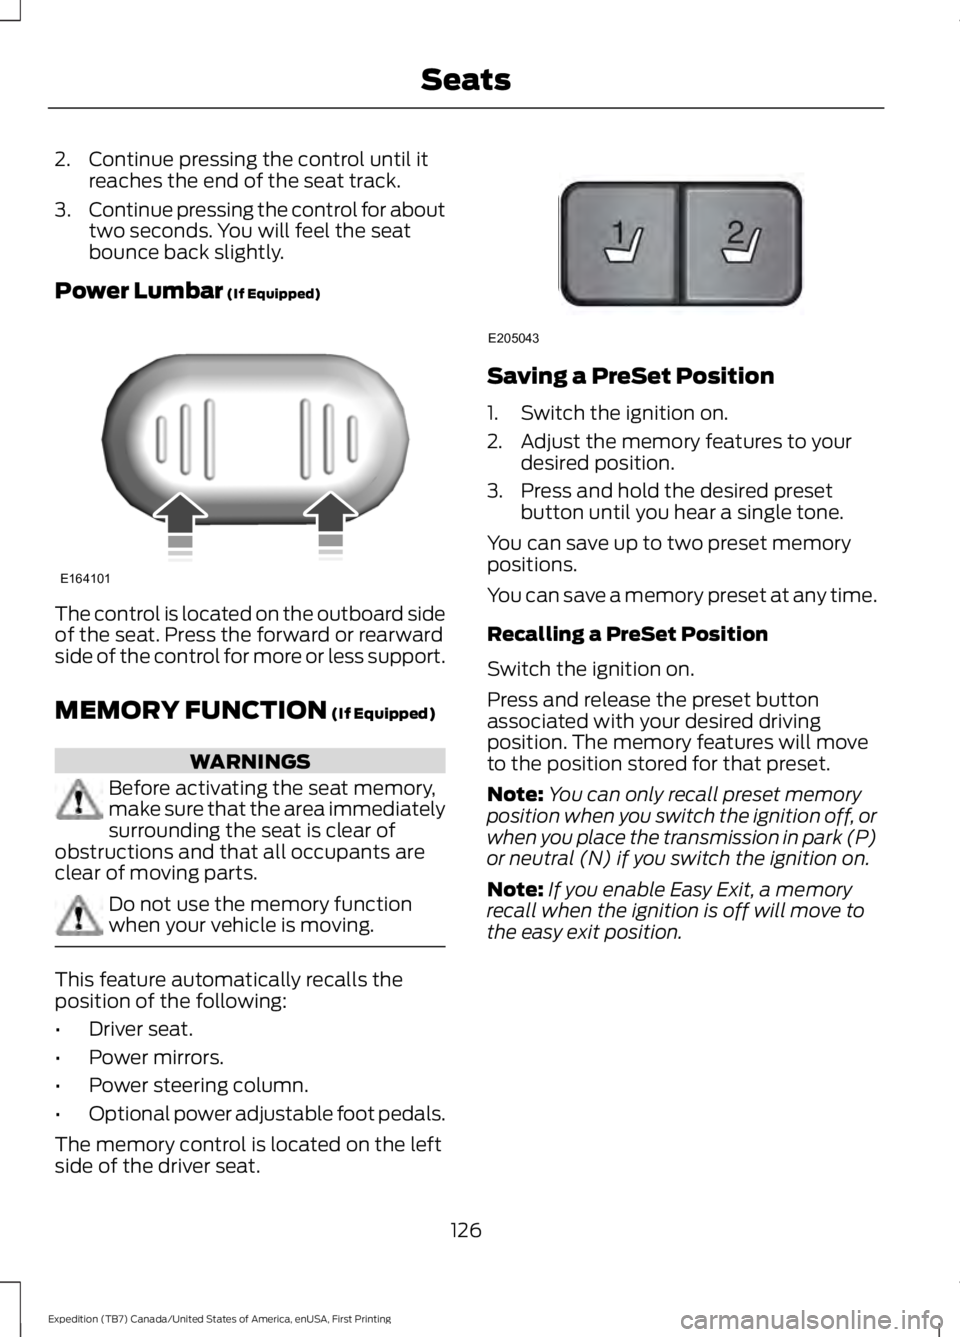
Power Lumbar (If Equipped)
The control is located on the outboard sideof the seat. Press the forward or rearwardside of the control for more or less support.
MEMORY FUNCTION (If Equipped)
WARNINGS
Before activating the seat memory,make sure that the area immediatelysurrounding the seat is clear ofobstructions and that all occupants areclear of moving parts.
Do not use the memory functionwhen your vehicle is moving.
This feature automatically recalls theposition of the following:
•Driver seat.
•Power mirrors.
•Power steering column.
•Optional power adjustable foot pedals.
The memory control is located on the leftside of the driver seat.
Saving a PreSet Position
1. Switch the ignition on.
2. Adjust the memory features to yourdesired position.
3. Press and hold the desired presetbutton until you hear a single tone.
You can save up to two preset memorypositions.
You can save a memory preset at any time.
Recalling a PreSet Position
Switch the ignition on.
Press and release the preset buttonassociated with your desired drivingposition. The memory features will moveto the position stored for that preset.
Note:You can only recall preset memoryposition when you switch the ignition off, orwhen you place the transmission in park (P)or neutral (N) if you switch the ignition on.
Note:If you enable Easy Exit, a memoryrecall when the ignition is off will move tothe easy exit position.
126
Expedition (TB7) Canada/United States of America, enUSA, First Printing
SeatsE164101 21
E205043
Page 130 of 421
You can also recall a preset memoryposition by:
•Pressing the unlock button on yourremote control if it is linked to a presetposition.
•Unlocking the intelligent driver doorhandle if a linked key fob is present.
•Entering a personal entry code on theSecuricode keypad. See Locks (page53).
Note:Using a linked key fob to recall yourmemory position when the ignition is offmoves the seat and steering column to theEasy Entry position.
Note:Pressing any active memory featurecontrol - power seat, mirror (or steeringcolumn switch) (or any memory button)during a memory recall cancels theoperation.
Linking a PreSet Position to yourRemote Control or Intelligent AccessKey Fob
Your vehicle can save the preset memorypositions for up to two remote controls.
1.With the ignition on, move the memorypositions to the desired positions.
2. Press and hold the desired presetbutton for about five seconds. A tonewill sound after about two seconds.Continue holding until a second toneis heard.
3. Within three seconds, press the lockbutton on the remote control you arelinking.
To unlink a remote control, follow thesame procedure – except in step 3, pressthe unlock button on the remote control.
Note:If more than one linked remotecontrol or intelligent access key is in range,the memory function moves to the settingsof the first key to initiate a memory recall.
Easy Entry and Exit Feature (If
Equipped)
This feature adjusts the position of the seatand steering column to allow easier exitand entry to the vehicle.
The driver seat automatically moves 2inches (5 centimeters) rearward when thetransmission is in park (P) and you removethe key from the ignition or you switch theignition off.
The driver seat returns to the previousposition when you put the key in theignition or switch the ignition on.
You can enable or disable this feature inthe information display. See InformationDisplays (page 92).
REAR SEATS
Folding Down the Second Row40% Seat
WARNINGS
Use caution when folding theseatback to the flat back position asthe system will move forward whenyou lift the release handle.
Before returning the seatback to itsoriginal position, make sure thatcargo or any objects are not trappedbehind the seatback. After returning theseatback to its original position, pull on theseatback to make sure that it has fullylatched. An unlatched seat may becomedangerous in the event of a sudden stopor crash.
Make sure that the head restraint is in thedown position and no objects such asbooks, purses or briefcases are on the floorin front of the second row seats beforefolding them down.
127
Expedition (TB7) Canada/United States of America, enUSA, First Printing
Seats
Page 149 of 421
Ignition Modes
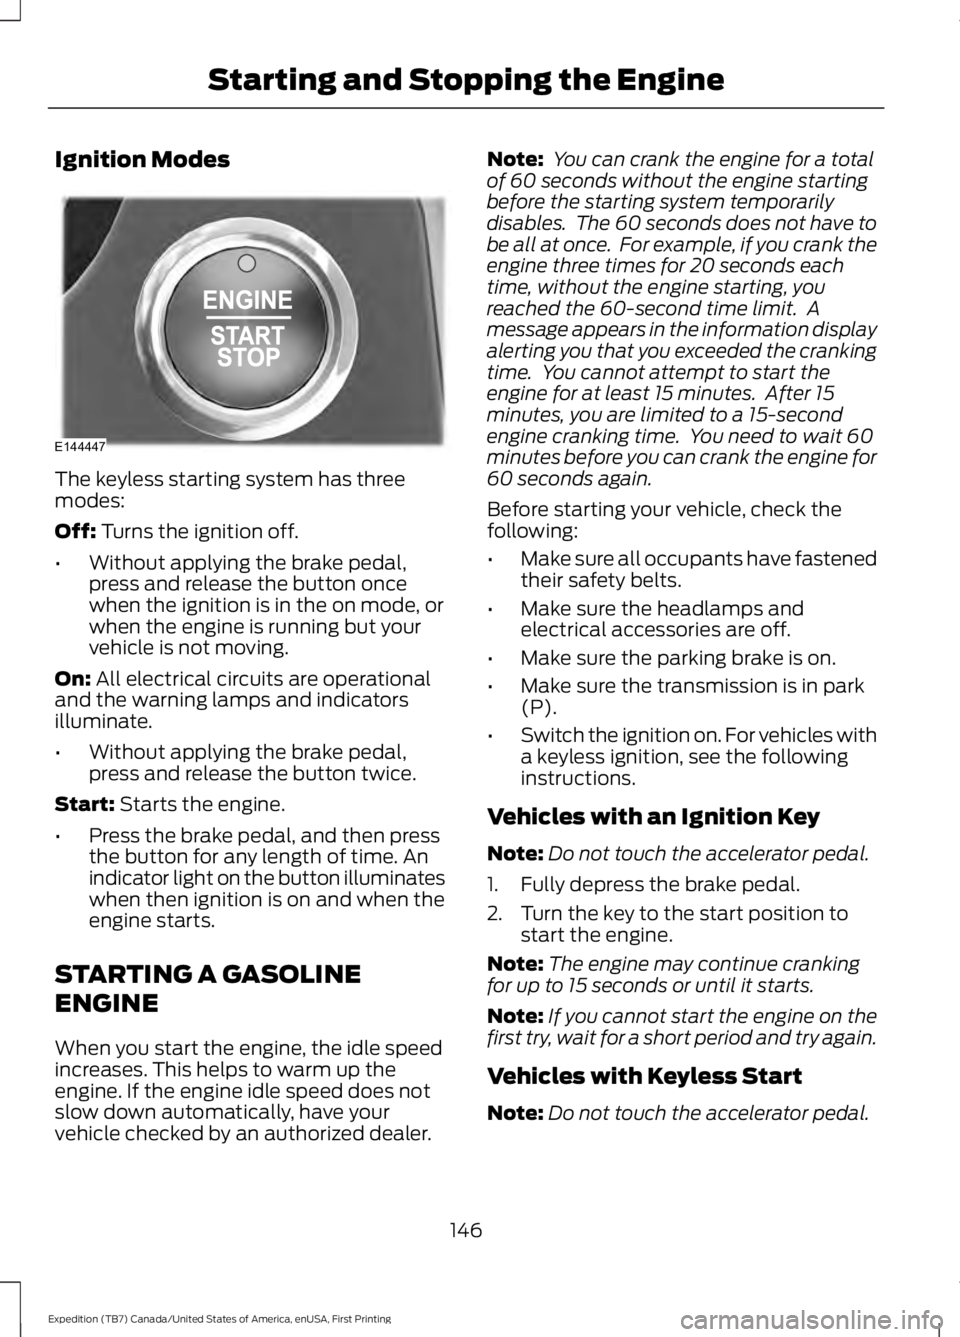
The keyless starting system has threemodes:
Off: Turns the ignition off.
•Without applying the brake pedal,press and release the button oncewhen the ignition is in the on mode, orwhen the engine is running but yourvehicle is not moving.
On: All electrical circuits are operationaland the warning lamps and indicatorsilluminate.
•Without applying the brake pedal,press and release the button twice.
Start: Starts the engine.
•Press the brake pedal, and then pressthe button for any length of time. Anindicator light on the button illuminateswhen then ignition is on and when theengine starts.
STARTING A GASOLINE
ENGINE
When you start the engine, the idle speedincreases. This helps to warm up theengine. If the engine idle speed does notslow down automatically, have yourvehicle checked by an authorized dealer.
Note: You can crank the engine for a totalof 60 seconds without the engine startingbefore the starting system temporarilydisables. The 60 seconds does not have tobe all at once. For example, if you crank theengine three times for 20 seconds eachtime, without the engine starting, youreached the 60-second time limit. Amessage appears in the information displayalerting you that you exceeded the crankingtime. You cannot attempt to start theengine for at least 15 minutes. After 15minutes, you are limited to a 15-secondengine cranking time. You need to wait 60minutes before you can crank the engine for60 seconds again.
Before starting your vehicle, check thefollowing:
•Make sure all occupants have fastenedtheir safety belts.
•Make sure the headlamps andelectrical accessories are off.
•Make sure the parking brake is on.
•Make sure the transmission is in park(P).
•Switch the ignition on. For vehicles witha keyless ignition, see the followinginstructions.
Vehicles with an Ignition Key
Note:Do not touch the accelerator pedal.
1. Fully depress the brake pedal.
2. Turn the key to the start position tostart the engine.
Note:The engine may continue crankingfor up to 15 seconds or until it starts.
Note:If you cannot start the engine on thefirst try, wait for a short period and try again.
Vehicles with Keyless Start
Note:Do not touch the accelerator pedal.
146
Expedition (TB7) Canada/United States of America, enUSA, First Printing
Starting and Stopping the EngineE144447