child restraint FORD EXPLORER 1998 2.G User Guide
[x] Cancel search | Manufacturer: FORD, Model Year: 1998, Model line: EXPLORER, Model: FORD EXPLORER 1998 2.GPages: 210, PDF Size: 1.65 MB
Page 91 of 210
10. Try to pull the belt out of the retractor to make sure the retractor is
in the automatic locking mode (you should not be able to pull more belt
out). If the retractor is not locked, unbuckle the belt and repeat steps
two through nine.
Check to make sure the child seat is properly secured before each use.
Attaching safety seats with tether straps
Some manufacturers make safety seats that include a tether strap that
goes over the back of the vehicle seat and attaches to an anchoring
point. Other manufacturers offer the tether strap as an accessory.
Contact the manufacturer of your child safety seat for information about
ordering a tether strap.
Tether anchorage hardware
A tethered seat can be installed in the front seat. Put the tether strap
over the seatback and attach it to a anchor bracket.
An anchor bracket can be installed on the rear edge of the front seat
cushion.
The provision (attaching hole) is provided in the rear edge of the front
passenger seat cushion frame. The anchorbracket must be installed using
the instructions provided with the kit.
Tether anchorage hardware kits (part number 613D74) including
instructions, may be obtained at no charge from any Ford or
Lincoln-Mercury dealer.
Tighten the anchor according to specifications. Otherwise, the
safety seat may not be properly secured and the child may be
injured in a sudden stop or collision.
BUILT-IN CHILD SEATS
Built-in child safety seat (if equipped)
The rear seat may include a built-in child seat. This child seat conforms
to all Federal and local motor vehicle safety standard. Read the labels
located on the child seat cushion and shoulder belt for information on
the built-in child seat.
Seating and safety restraints
91
Page 92 of 210
Use the built-in child seatonlyif the child is at least 9 months old,
weighs 9±29 kg (20±60 lb) and the child's shoulders (top) are below the
shoulder harness slots in the built-in child seat.
Children not meeting these requirements should be secured in an
approved aftermarket seat. Refer toChildren and infant or child
safety seatsin this chapter.
Placing your child in the built-in child seat
Failure to follow all of the instructions on the use of this child
restraint system can result in your child striking the vehicle's
interior during a sudden stop or crash.
The second row seatback must be fully locked before operating
the child restraint system. Check the position of the seatback
release lever.
Never use the Built-In Child Seat as a booster cushion with the
adult safety belts. A child using the adult belts could slide
forward and out from under the safety belts.
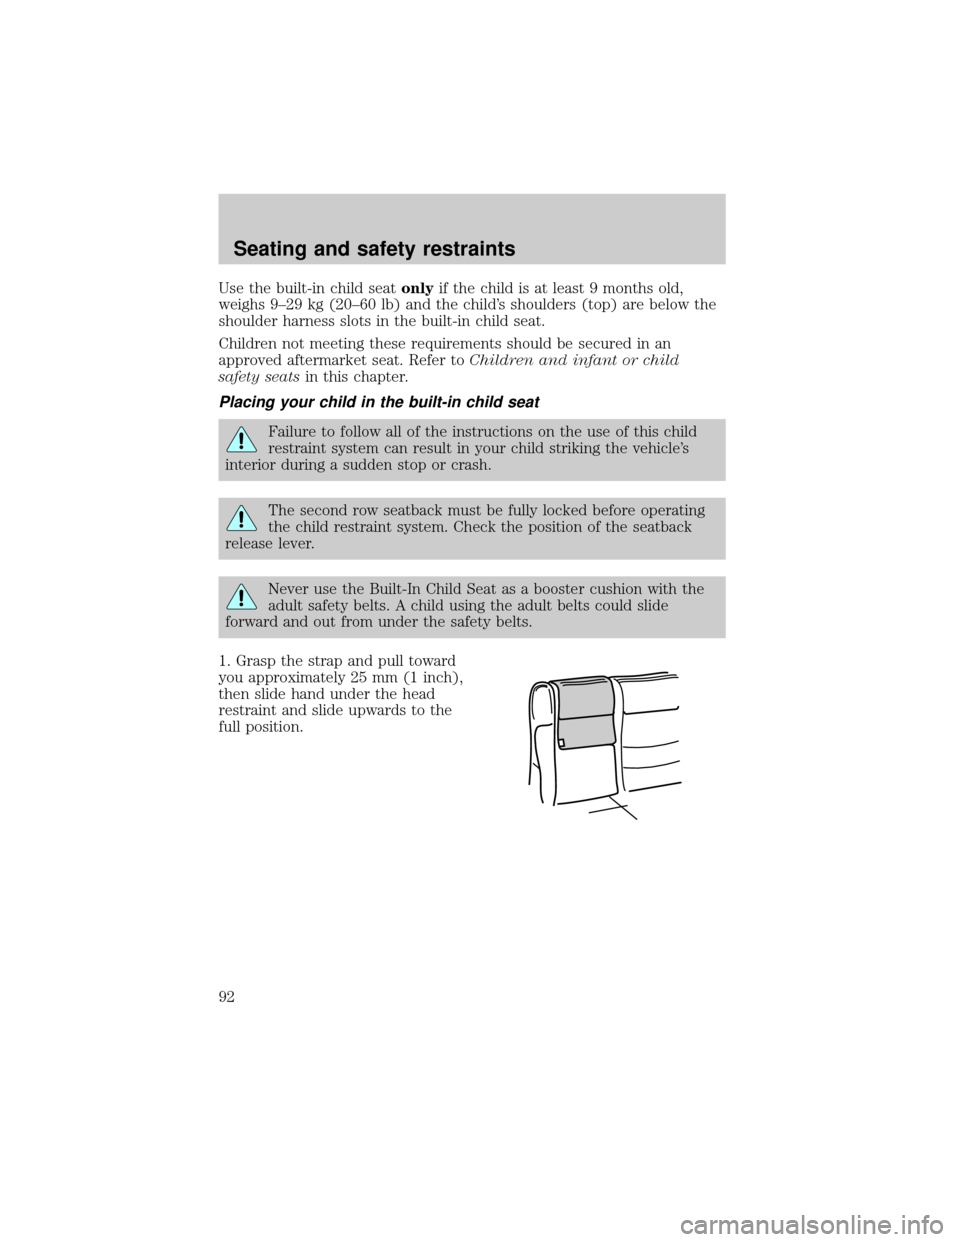
1. Grasp the strap and pull toward
you approximately 25 mm (1 inch),
then slide hand under the head
restraint and slide upwards to the
full position.
Seating and safety restraints
92
Page 93 of 210
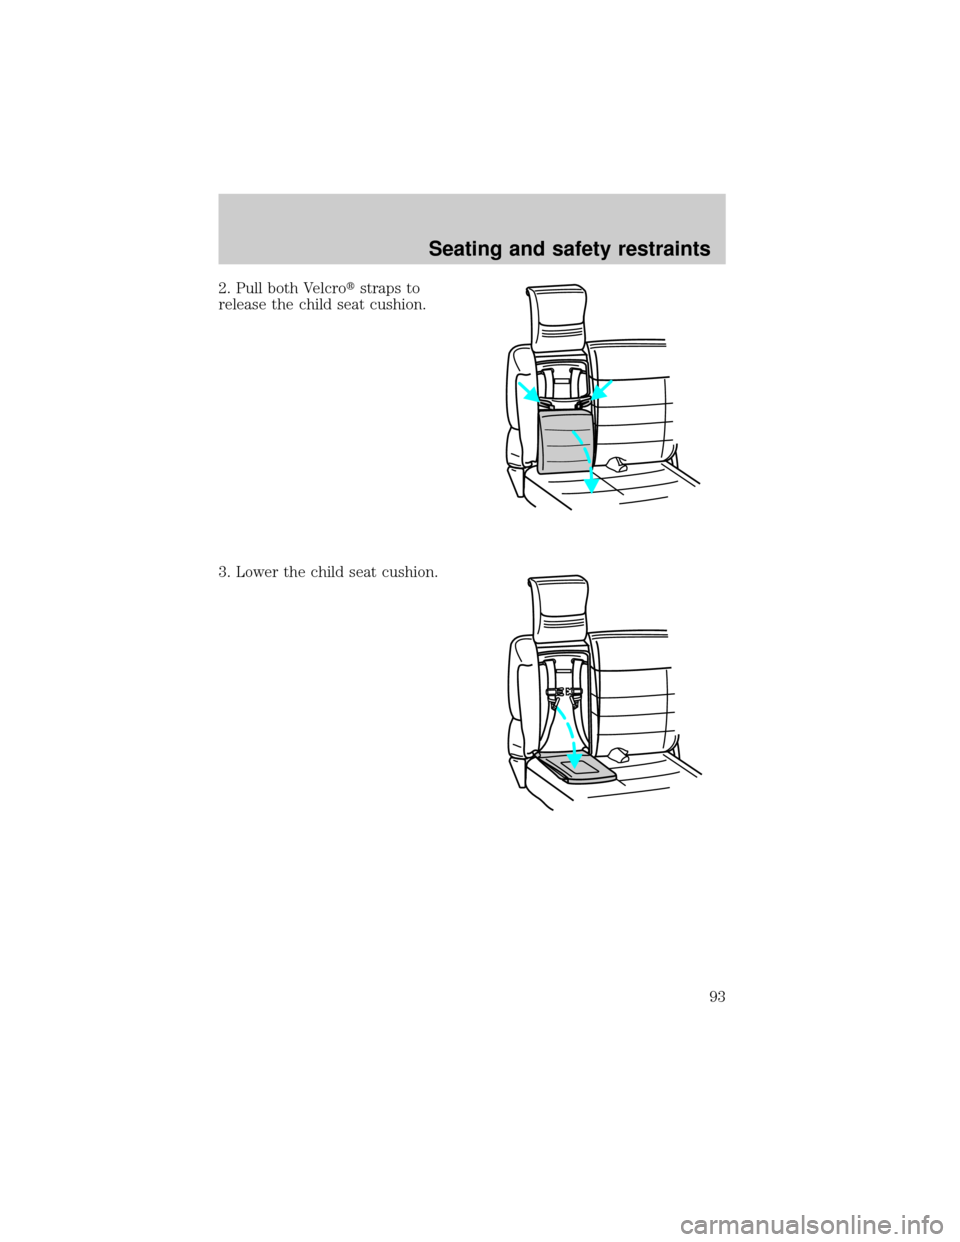
2. Pull both Velcrotstraps to
release the child seat cushion.
3. Lower the child seat cushion.
Seating and safety restraints
93
Page 94 of 210

4. Unfold the cushion protector flap
onto adult seat cushion
5. If connected, disconnect the chest clip and buckles.
6. Place the child in the seat and
position the left shoulder belt over
the child's left shoulder first, then
place the right shoulder belt over
the child's right shoulder.
Seating and safety restraints
94
Page 95 of 210
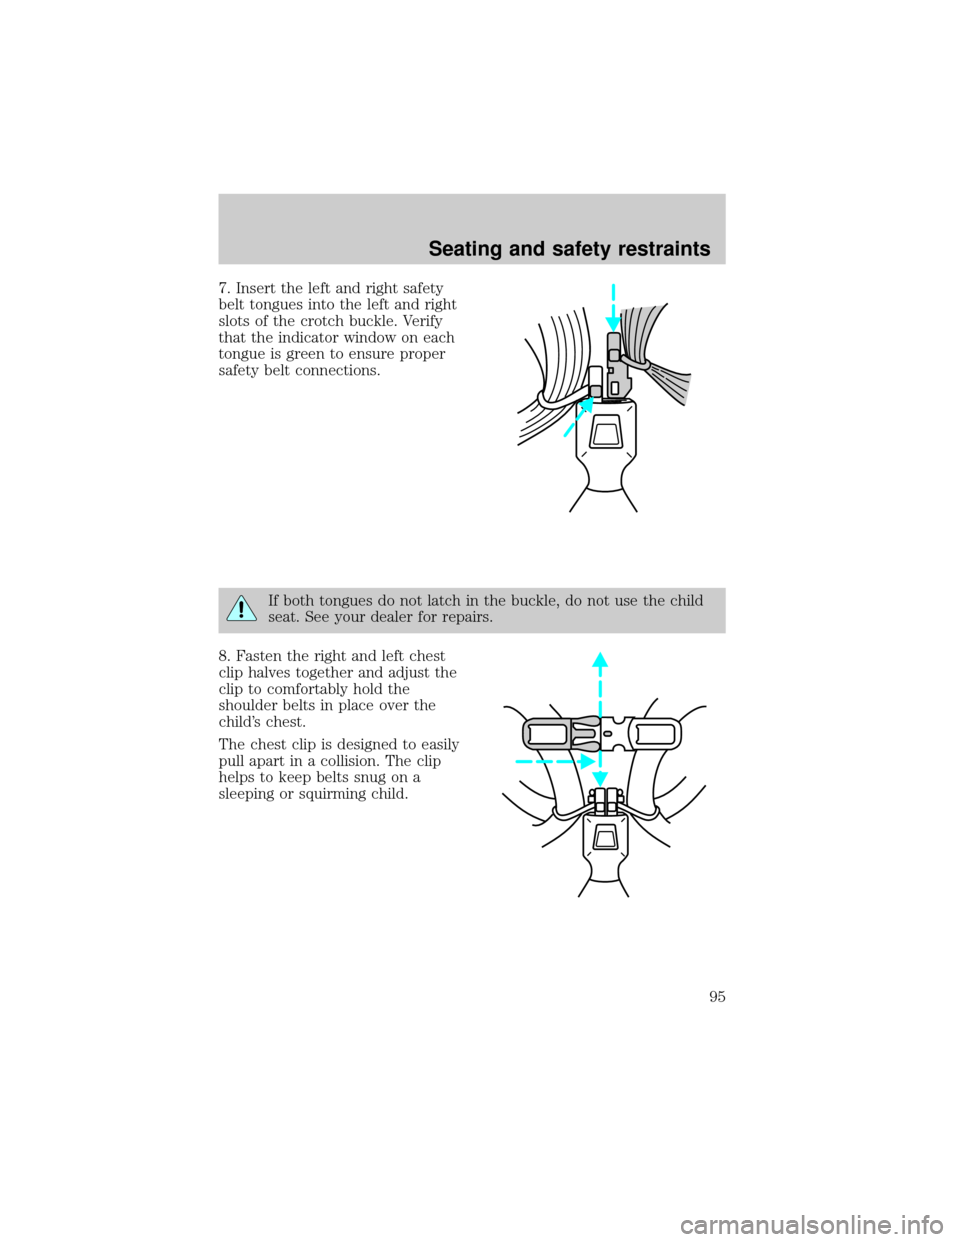
7. Insert the left and right safety
belt tongues into the left and right
slots of the crotch buckle. Verify
that the indicator window on each
tongue is green to ensure proper
safety belt connections.
If both tongues do not latch in the buckle, do not use the child
seat. See your dealer for repairs.
8. Fasten the right and left chest
clip halves together and adjust the
clip to comfortably hold the
shoulder belts in place over the
child's chest.
The chest clip is designed to easily
pull apart in a collision. The clip
helps to keep belts snug on a
sleeping or squirming child.
Seating and safety restraints
95
Page 96 of 210

9. Pull on the safety belt tongues to
ensure that they are both securely
latched. If they are not properly
latched, repeat steps seven and
eight.
If necessary, the shoulder belt may be put in automatic locking mode
(ALR) to limit the child's movement in the seat. The ALR mode should
be used if the child is sleeping or attempting to get out of the seat.
If not placed in ALR mode, the child seat shoulder belts are in vehicle
sensitive (emergency locking) mode, which allow some movement of the
shoulder belts (like adult shoulder belts).
In emergency locking mode, the shoulder belts of the child seat will lock
in response to hard braking, hard cornering or if your vehicle is involved
in a collision with an impact of 8 km/h (5 m.p.h.) or more.
Activating the automatic locking mode (ALR) on the built-in child
safety seat
1. Fully extend the right shoulder belt.
2. Allow the belts to tighten snugly against the child's shoulders.
Deactivating the automatic locking mode (ALR) on the built-in
child safety seat
1. Disconnect the chest clip and remove the left and right safety belt
tongues from the crotch buckle.
2. Allow the shoulder belts to fully retract.
Seating and safety restraints
96
Page 97 of 210
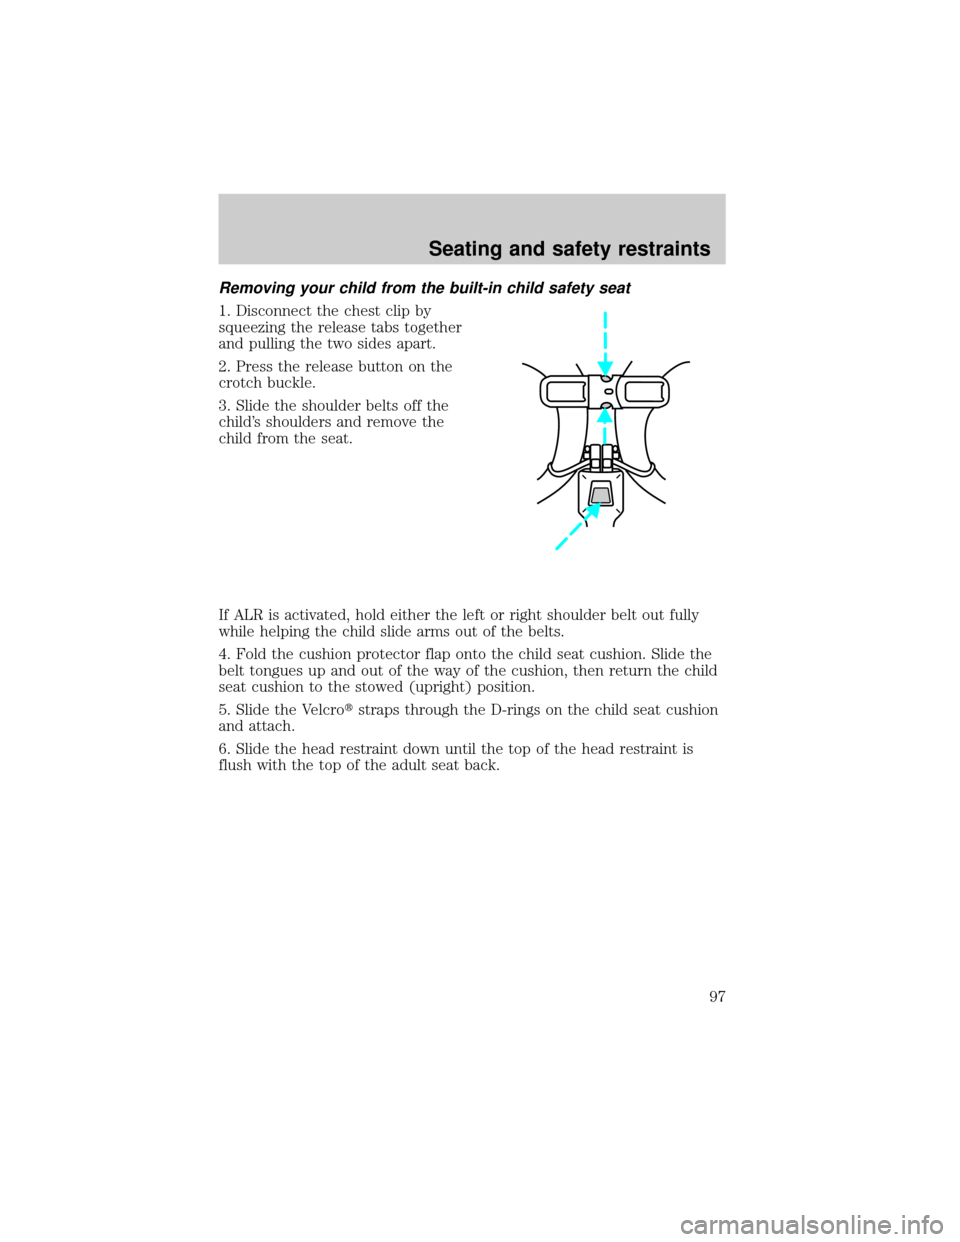
Removing your child from the built-in child safety seat
1. Disconnect the chest clip by
squeezing the release tabs together
and pulling the two sides apart.
2. Press the release button on the
crotch buckle.
3. Slide the shoulder belts off the
child's shoulders and remove the
child from the seat.
If ALR is activated, hold either the left or right shoulder belt out fully
while helping the child slide arms out of the belts.
4. Fold the cushion protector flap onto the child seat cushion. Slide the
belt tongues up and out of the way of the cushion, then return the child
seat cushion to the stowed (upright) position.
5. Slide the Velcrotstraps through the D-rings on the child seat cushion
and attach.
6. Slide the head restraint down until the top of the head restraint is
flush with the top of the adult seat back.
Seating and safety restraints
97
Page 98 of 210
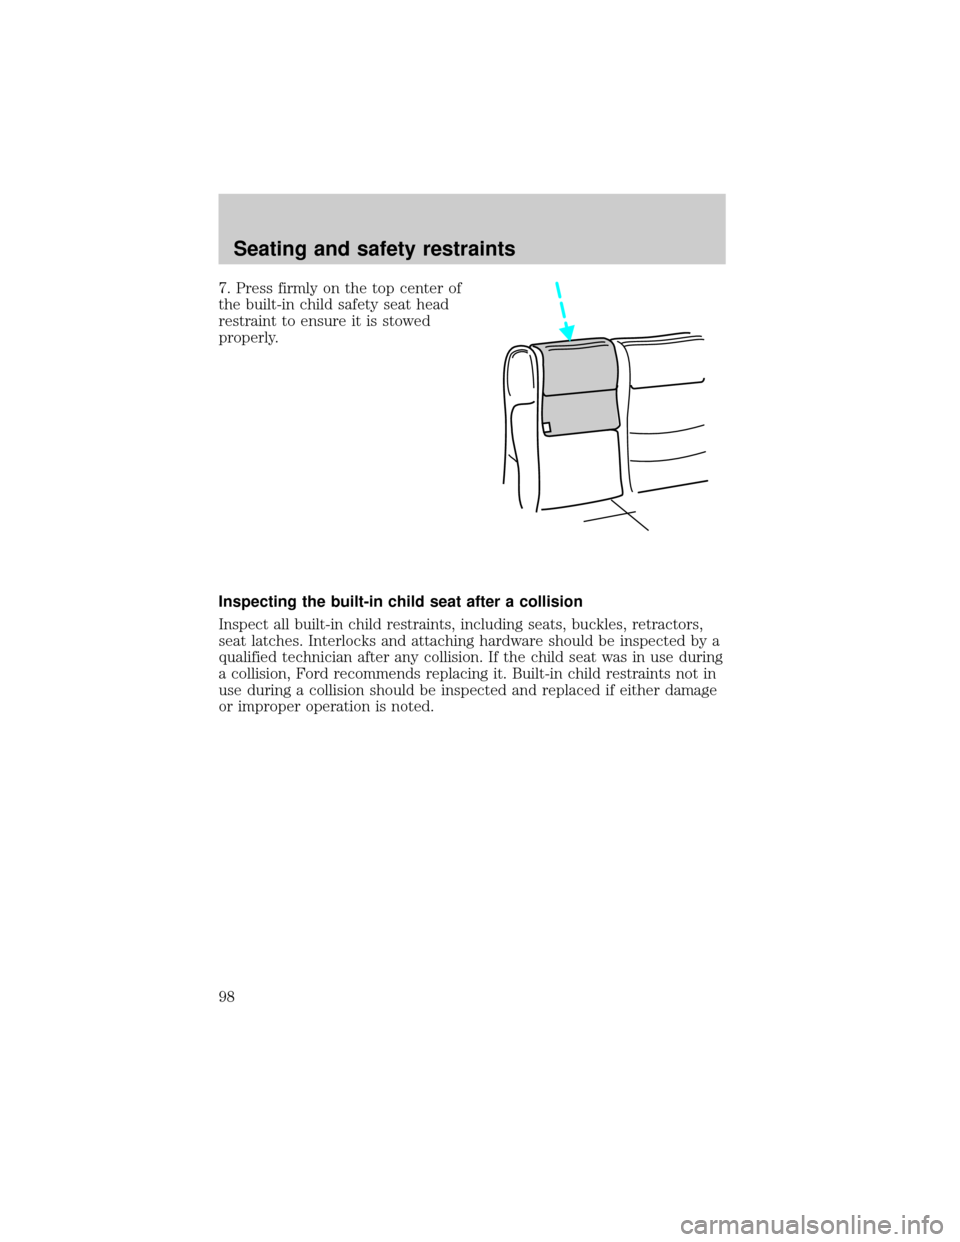
7. Press firmly on the top center of
the built-in child safety seat head
restraint to ensure it is stowed
properly.
Inspecting the built-in child seat after a collision
Inspect all built-in child restraints, including seats, buckles, retractors,
seat latches. Interlocks and attaching hardware should be inspected by a
qualified technician after any collision. If the child seat was in use during
a collision, Ford recommends replacing it. Built-in child restraints not in
use during a collision should be inspected and replaced if either damage
or improper operation is noted.
Seating and safety restraints
98
Page 195 of 210
Check the safety belt system periodically to make sure there are no
nicks, wear or cuts. If your vehicle has been involved in an accident,
refer to theSafety belt maintenancesection in theSeating and safety
restraintschapter.
Cleaning the built-in child seat (if equipped)
Clean with mild soap and water. Do not use household cleaning products
because they may weaken the safety belt webbing or damage the vinyl
parts of the seat.
The child seat liner is removable and may be machine-washed and air
dried.
Underbody
Flush the complete underside of vehicle frequently. Keep body drain
holes unplugged. Inspect for road damage.
Cleaning leather seats (if equipped)
For routine cleaning, wipe the surface with a soft, damp cloth. For more
thorough cleaning, wipe the surface with a mild soap.
If the leather cannot be completely cleaned using a mild soap and water
solution, the leather may be cleaned using a commercially available
cleaning product ``Tanners Preserve Leather Cleaner'' and a 3M ``Type T''
scrubbing pad by using the following steps;
The type of scrubbing pad is very critical because the common 3M
``Scotch Brite'' green pad is too aggressive and will damage the
leather surface
²Spray a small amount of the leather cleaner on the pad and rub the
area to be cleaned with the pad using a circular motion. Only clean 1/4
of the area at a time. For heavily soiled areas, spray the cleaner
directly onto the leather (two squirts should be adequate) and rub
with the pad. Repeat if necessary.
²Use a soft, damp cloth to remove the loosened dirt and foam.
²Dry with a soft cloth.
Do not use household cleaners, glass cleaner, alcohol solutions or
cleaner intended for vinyl, rubber or plastics. These products can
damage the leather.
In some instances, color or dye transfer can occur when wet
clothing (wool, denim, leathers or other non-colorfast garments)
Maintenance and care
195
Page 206 of 210
Air bag supplemental
restraint system ........................82
and child safety seats ..............83
description ................................82
disposal ......................................86
indicator light ...........................85
passenger air bag .....................84
Air conditioning
manual heating and air
conditioning system ............23,25
Air suspension
description ..............................106
All wheel drive (AWD) .............121
Ambulance packages ....................3
Anti-lock brake system (ABS)
description ..............................104
Anti-theft system ........................67
Autolamp system (see
Headlamps) .................................48
Automatic dimming mirror ...48,49
Battery .......................................175
voltage gauge ............................14
Brake fluid
checking and adding ..............164
Brakes ........................................104
anti-lock ...................................104
anti-lock brake system (ABS)
warning light ...........................104
fluid, checking and adding ....164
Brake-shift interlock .................107
Break-in period .............................2
Bulbs, replacing ........................186
headlamps ...............................187
specifications ..........................188
Cargo cover .................................57
Changing a tire .........................144
Child safety seats ........................87
built-in child seat ......91,92,96,97
Childproof locks ..........................52
Chime
headlamps on ............................11
Cleaning your vehicle ...............191built-in child seat ...................195
engine compartment ..............192
fabric ........................................194
instrument panel ....................194
plastic parts ............................194
safety belts ..............................194
tail lamps .................................194
washing ....................................191
waxing .....................................192
wheels ......................................194
windows ..................................196
woodtone trim ........................196
Climate control system
automatic temperature
control .........26,27,28,29,30,31,32
Clutch
fluid ..........................................165
Compass, electronic ...............45,46
calibration .................................48
set zone adjustment .................47
Console, description ...................54
Control trac 4WD system .........116
Controls ..................................53,54
Cupholder (s) .............................55
Defrost
rear window ..............................34
Driving under special
conditions .........................120,122
high water ........................120,123
slippery roads ....120,121,123,124
Emission control system ..........185
Engine ........................................202
service points ............158,159,160
Engine block heater .................102
Engine coolant
checking and adding .......166,167
disposal ....................................168
refill capacities ........................168
Engine oil ...........................160,163
changing oil and oil filter .......163
checking and adding .......160,162
Exhaust fumes ..........................103
Index
206