wipers FORD EXPLORER 2006 4.G Owners Manual
[x] Cancel search | Manufacturer: FORD, Model Year: 2006, Model line: EXPLORER, Model: FORD EXPLORER 2006 4.GPages: 328, PDF Size: 3.59 MB
Page 52 of 328

MULTI-FUNCTION LEVER
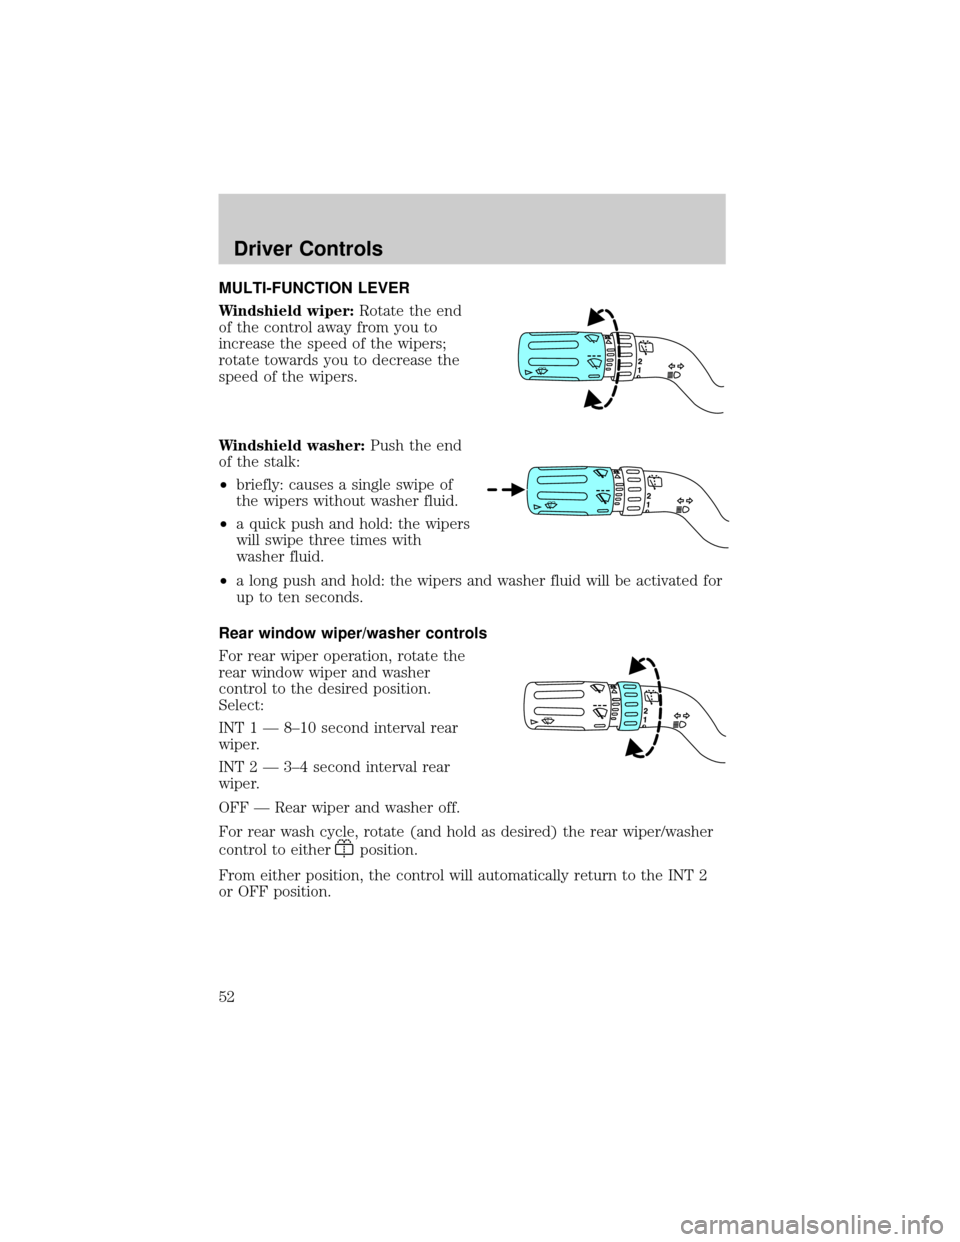
Windshield wiper:Rotate the end
of the control away from you to
increase the speed of the wipers;
rotate towards you to decrease the
speed of the wipers.
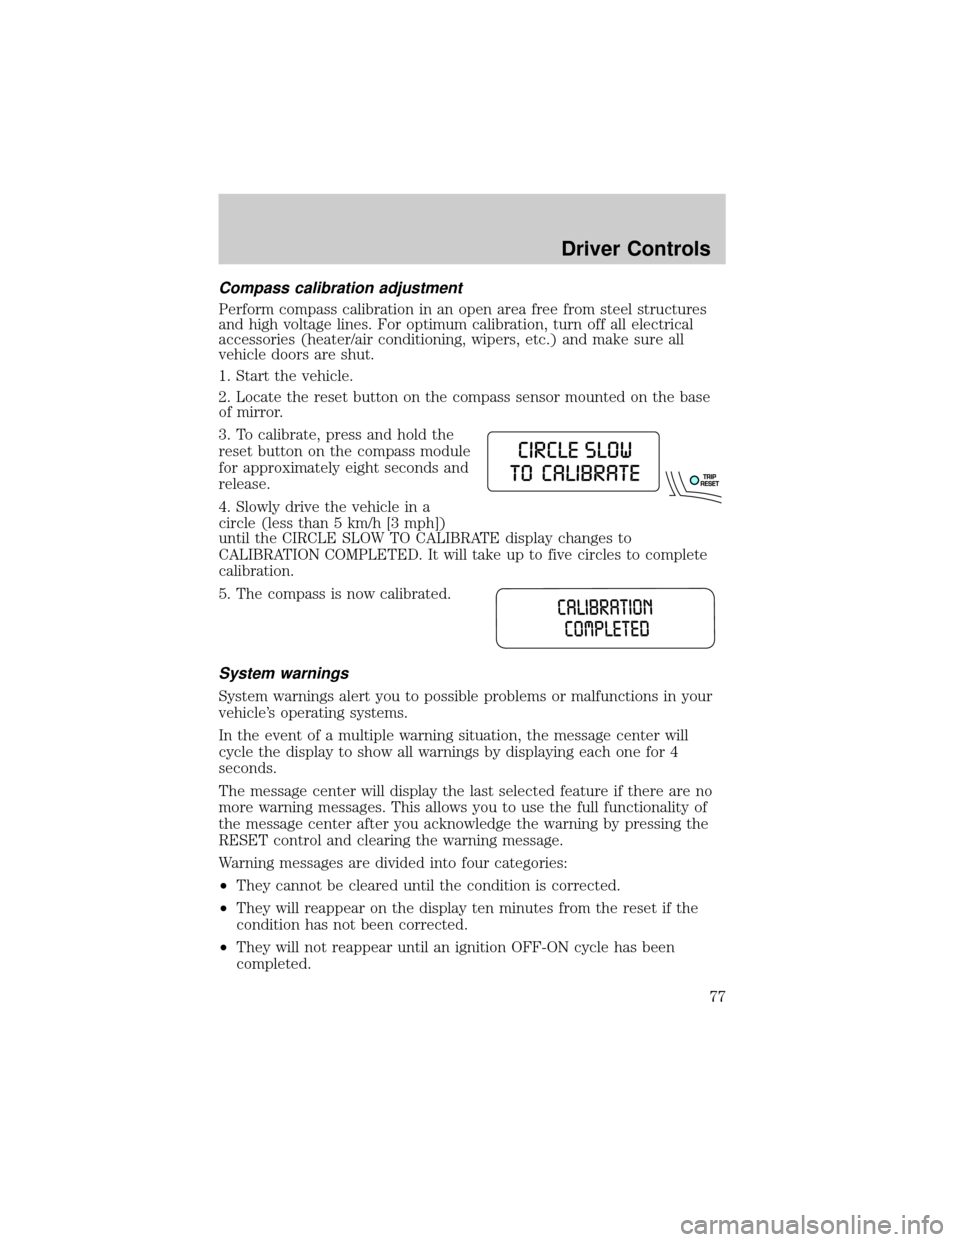
Windshield washer:Push the end
of the stalk:
²briefly: causes a single swipe of
the wipers without washer fluid.
²a quick push and hold: the wipers
will swipe three times with
washer fluid.
²a long push and hold: the wipers and washer fluid will be activated for
up to ten seconds.
Rear window wiper/washer controls
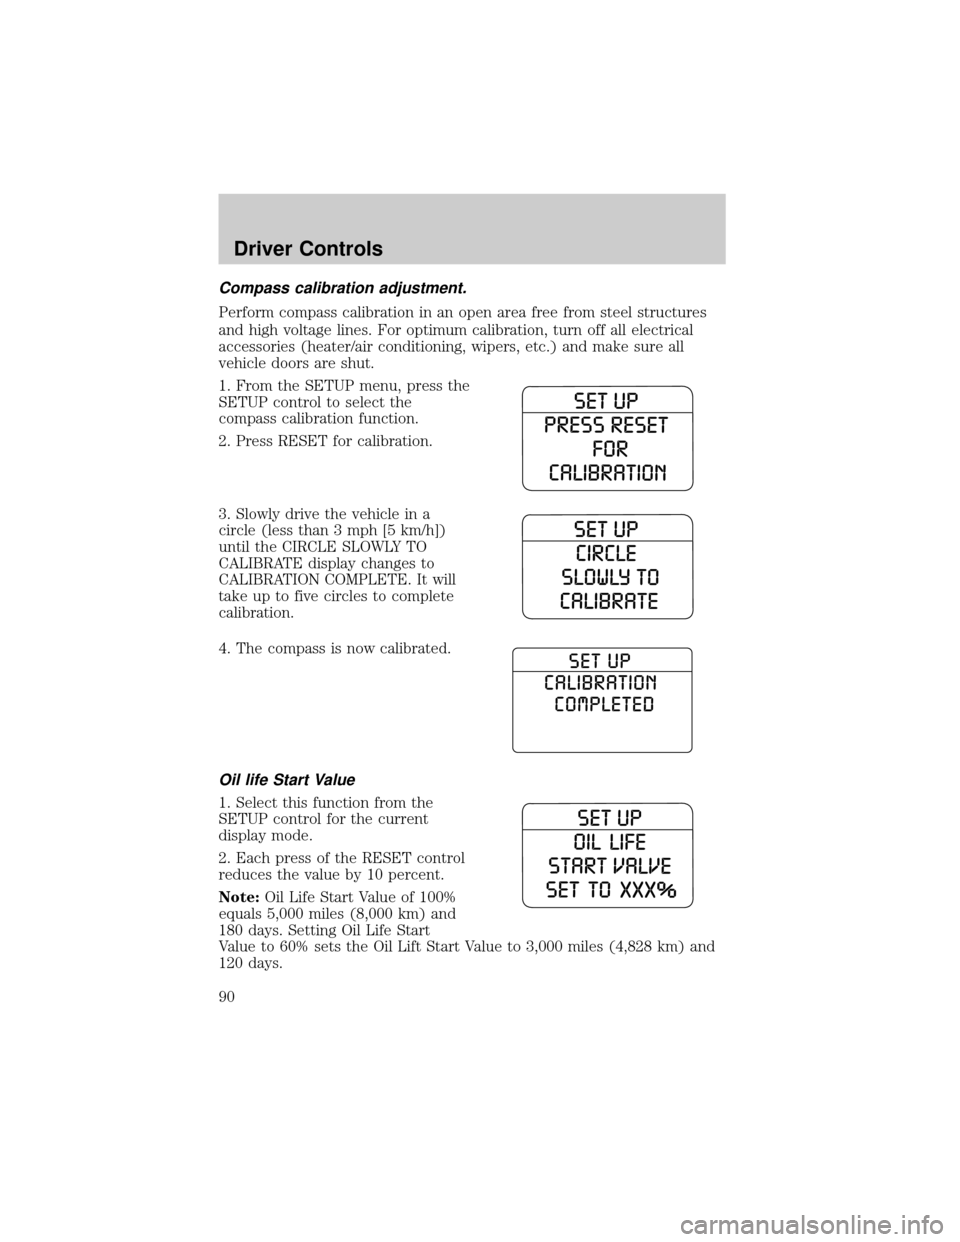
For rear wiper operation, rotate the
rear window wiper and washer
control to the desired position.
Select:
INT 1 Ð 8±10 second interval rear
wiper.
INT 2 Ð 3±4 second interval rear
wiper.
OFF Ð Rear wiper and washer off.
For rear wash cycle, rotate (and hold as desired) the rear wiper/washer
control to either
position.
From either position, the control will automatically return to the INT 2
or OFF position.
Driver Controls
52
Page 77 of 328

Compass calibration adjustment
Perform compass calibration in an open area free from steel structures
and high voltage lines. For optimum calibration, turn off all electrical
accessories (heater/air conditioning, wipers, etc.) and make sure all
vehicle doors are shut.
1. Start the vehicle.
2. Locate the reset button on the compass sensor mounted on the base
of mirror.
3. To calibrate, press and hold the
reset button on the compass module
for approximately eight seconds and
release.
4. Slowly drive the vehicle in a
circle (less than 5 km/h [3 mph])
until the CIRCLE SLOW TO CALIBRATE display changes to
CALIBRATION COMPLETED. It will take up to five circles to complete
calibration.
5. The compass is now calibrated.
System warnings
System warnings alert you to possible problems or malfunctions in your
vehicle's operating systems.
In the event of a multiple warning situation, the message center will
cycle the display to show all warnings by displaying each one for 4
seconds.
The message center will display the last selected feature if there are no
more warning messages. This allows you to use the full functionality of
the message center after you acknowledge the warning by pressing the
RESET control and clearing the warning message.
Warning messages are divided into four categories:
²They cannot be cleared until the condition is corrected.
²They will reappear on the display ten minutes from the reset if the
condition has not been corrected.
²They will not reappear until an ignition OFF-ON cycle has been
completed.
Driver Controls
77
Page 90 of 328

Compass calibration adjustment.
Perform compass calibration in an open area free from steel structures
and high voltage lines. For optimum calibration, turn off all electrical
accessories (heater/air conditioning, wipers, etc.) and make sure all
vehicle doors are shut.
1. From the SETUP menu, press the
SETUP control to select the
compass calibration function.
2. Press RESET for calibration.
3. Slowly drive the vehicle in a
circle (less than 3 mph [5 km/h])
until the CIRCLE SLOWLY TO
CALIBRATE display changes to
CALIBRATION COMPLETE. It will
take up to five circles to complete
calibration.
4. The compass is now calibrated.
Oil life Start Value
1. Select this function from the
SETUP control for the current
display mode.
2. Each press of the RESET control
reduces the value by 10 percent.
Note:Oil Life Start Value of 100%
equals 5,000 miles (8,000 km) and
180 days. Setting Oil Life Start
Value to 60% sets the Oil Lift Start Value to 3,000 miles (4,828 km) and
120 days.
Driver Controls
90
Page 272 of 328

PLASTIC (NON-PAINTED) EXTERIOR PARTS
Use only approved products to clean plastic parts. These products are
available from your authorized dealer.
²For routine cleaning, use Motorcraft Detail Wash (ZC-3±A).
²If tar or grease spots are present, use Motorcraft Bug and Tar
Remover (ZC-42).
²For plastic headlamp lenses, use Motorcraft Ultra Clear Spray Glass
Cleaner (ZC-23).
WINDOWS AND WIPER BLADES
The windshield, rear and side windows and the wiper blades should be
cleaned regularly. If the wipers do not wipe properly, substances on the
vehicle's glass or the wiper blades may be the cause. These may include
hot wax treatments used by commercial car washes, water repellant
coatings, tree sap, or other organic contamination; these contaminants
may cause squeaking or chatter noise from the blades, and streaking and
smearing of the windshield. To clean these items, follow these tips:
²The windshield, rear windows and side windows may be cleaned with
a non-abrasive cleaner such as Motorcraft Ultra-Clear Spray Glass
Cleaner (ZC-23), available from your authorized dealer.
²The wiper blades can be cleaned with isopropyl (rubbing) alcohol or
Motorcraft Premium Windshield Washer Concentrate (ZC-32±A),
available from your authorized dealer. This washer fluid contains
special solution in addition to alcohol which helps to remove the hot
wax deposited on the wiper blade and windshield from automated car
wash facilities. Be sure to replace wiper blades when they appear
worn or do not function properly.
²Do not use abrasives, as they may cause scratches.
²Do not use fuel, kerosene, or paint thinner to clean any parts.
Do not use sharp objects, such as a razor blade, to clean the
inside of the rear window or to remove decals, as it may cause
damage to the rear window defroster's heated grid lines.
INSTRUMENT PANEL AND CLUSTER LENS
Clean the instrument panel with a damp cloth, then with a clean, dry
cloth, or use Motorcraft Dash & Vinyl Cleaner (ZC-38-A).
²Avoid cleaners or polish that increase the gloss of the upper portion of
the instrument panel. The dull finish in this area helps protect the
driver from undesirable windshield reflection.
Cleaning
272
Page 281 of 328

CHANGING THE WIPER BLADES
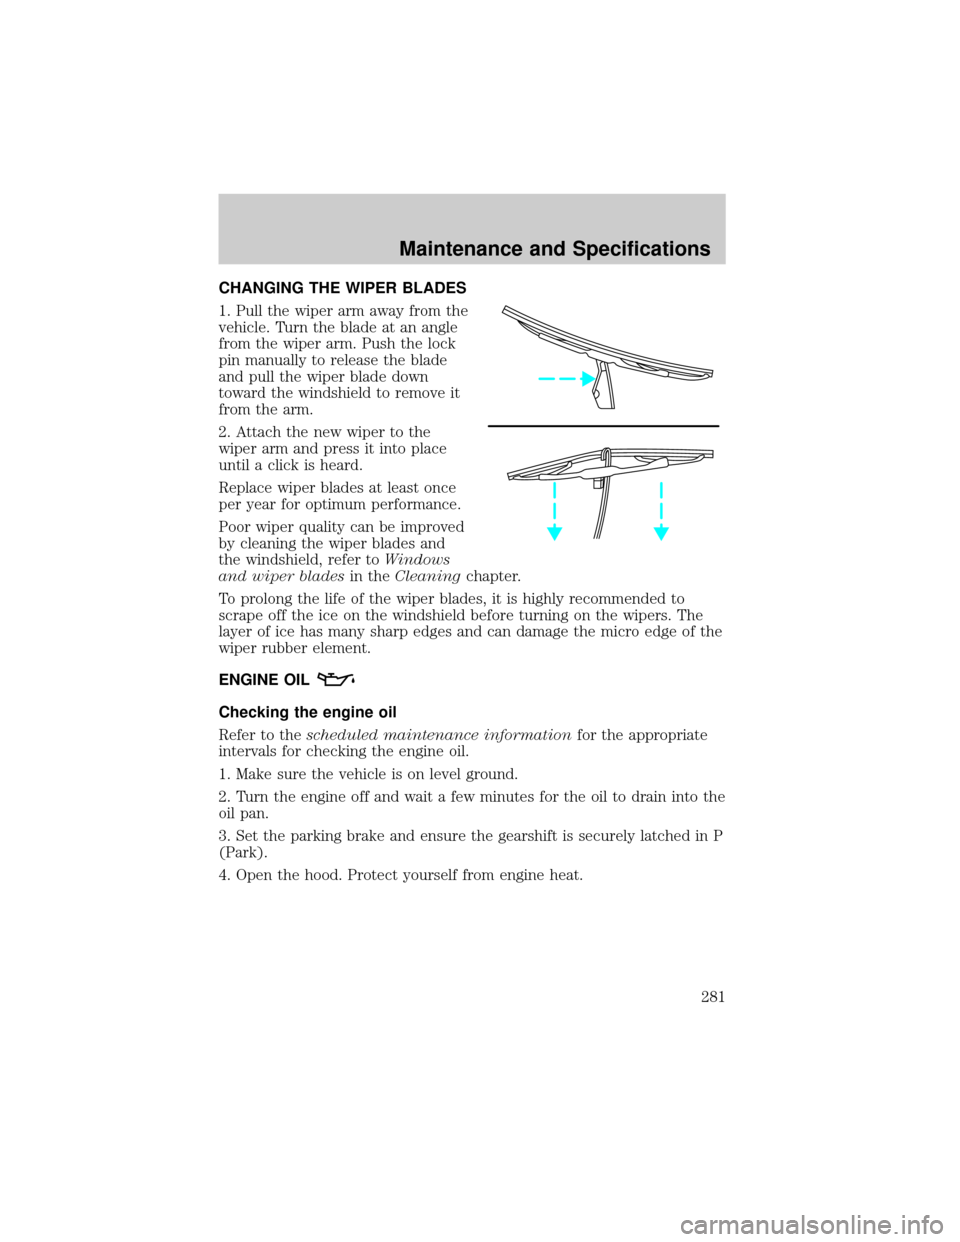
1. Pull the wiper arm away from the
vehicle. Turn the blade at an angle
from the wiper arm. Push the lock
pin manually to release the blade
and pull the wiper blade down
toward the windshield to remove it
from the arm.
2. Attach the new wiper to the
wiper arm and press it into place
until a click is heard.
Replace wiper blades at least once
per year for optimum performance.
Poor wiper quality can be improved
by cleaning the wiper blades and
the windshield, refer toWindows
and wiper bladesin theCleaningchapter.
To prolong the life of the wiper blades, it is highly recommended to
scrape off the ice on the windshield before turning on the wipers. The
layer of ice has many sharp edges and can damage the micro edge of the
wiper rubber element.
ENGINE OIL
Checking the engine oil
Refer to thescheduled maintenance informationfor the appropriate
intervals for checking the engine oil.
1. Make sure the vehicle is on level ground.
2. Turn the engine off and wait a few minutes for the oil to drain into the
oil pan.
3. Set the parking brake and ensure the gearshift is securely latched in P
(Park).
4. Open the hood. Protect yourself from engine heat.
Maintenance and Specifications
281
Page 325 of 328

Tires ...........................172±174, 246
alignment ................................184
care ..........................................181
changing ..........................246, 252
checking the pressure ............177
inspecting and inflating .........175
label .........................................181
replacing ..........................183, 252
rotating ....................................185
safety practices .......................184
sidewall information ...............177
snow tires and chains ............192
spare tire .................247, 249, 251
terminology .............................174
tire grades ...............................173
treadwear ........................173, 182
Towing .......................................199
recreational towing .................205
trailer towing ..........................199
wrecker ....................................261
Transfer case
fluid checking .........................306
Transmission .............................217
brake-shift interlock (BSI) ....217
fluid, checking and adding
(automatic) .............................305
fluid, refill capacities ..............308lubricant specifications ..310, 313
Trunk .........................................102
Turn signal ..................................45
V
Vehicle dimensions ...................313
Vehicle Identification Number
(VIN) ..........................................315
Vehicle loading ..........................192
Ventilating your vehicle ...........209
W
Warning lights (see Lights) .......12
Washer fluid ..............................280
Water, Driving through .............234
Windows
power .........................................57
rear wiper/washer .....................53
Windshield washer fluid and
wipers ..........................................52
checking and adding fluid .....280
liftgate reservoir .....................280
replacing wiper blades ...........281
Wrecker towing .........................261
Index
325