lug FORD EXPLORER 2014 5.G User Guide
[x] Cancel search | Manufacturer: FORD, Model Year: 2014, Model line: EXPLORER, Model: FORD EXPLORER 2014 5.GPages: 586, PDF Size: 9.07 MB
Page 274 of 586
WARNING:Do not exceed the GVWR or the GAWR specified on
the Safety Compliance Certification Label.
WARNING:Do not use replacement tires with lower load
carrying capacities than the original tires because they may lower
the vehicle’s GVWR and GAWR limitations. Replacement tires with a
higher limit than the original tires do not increase the GVWR and
GAWR limitations.
WARNING:Exceeding any vehicle weight rating limitation could
result in serious damage to the vehicle and/or personal injury.
Steps for determining the correct load limit:
1. Locate the statement “The combined weight of occupants and cargo
should never exceed XXX kg or XXX lb.” on your vehicle’s placard.
2. Determine the combined weight of the driver and passengers that will
be riding in your vehicle.
3. Subtract the combined weight of the driver and passengers from
XXX kg or XXX lb.
4. The resulting figure equals the available amount of cargo and luggage
load capacity. For example, if the “XXX” amount equals 1,400 lb. and
there will be five 150 lb. passengers in your vehicle, the amount of
available cargo and luggage load capacity is 650 lb. (1400-750 (5 x 150)
= 650 lb.).
5. Determine the combined weight of luggage and cargo being loaded on
the vehicle. That weight may not safely exceed the available cargo and
luggage load capacity calculated in Step 4.
6. If your vehicle will be towing a trailer, load from your trailer will be
transferred to your vehicle. Consult this manual to determine how this
reduces the available cargo and luggage load capacity of your vehicle.
The following gives you a few examples on how to calculate the available
amount of cargo and luggage load capacity:
•Suppose your vehicle has a 1400 lb. (635 kg) cargo and luggage
capacity. You decide to go golfing. Is there enough load capacity to
carry you, 4 of your friends and all the golf bags? You and four friends
average 220 lb. (99 kg) each and the golf bags weigh approximately
30 lb. (13.5 kg) each. The calculation would be: 1400 - (5 x 220) - (5
Load Carrying273
2014 Explorer(exp)
Owners Guide gf, 1st Printing, April 2013
USA(fus)
Page 275 of 586

x 30) = 1400 - 1100 - 150 = 150 lb. Yes, you have enough load
capacity in your vehicle to transport four friends and your golf bags.
In metric units, the calculation would be: 635 kg - (5 x 99 kg) - (5 x
13.5 kg) = 635 - 495 - 67.5 = 72.5 kg.
•Suppose your vehicle has a 1400 lb. (635 kg) cargo and luggage
capacity. You and one of your friends decide to pick up cement from
the local home improvement store to finish that patio you have been
planning for the past 2 years. Measuring the inside of the vehicle with
the rear seat folded down, you have room for 12-100 lb. (45 kg) bags
of cement. Do you have enough load capacity to transport the cement
to your home? If you and your friend each weigh 220 lb. (99 kg), the
calculation would be: 1400 - (2 x 220) - (12 x 100) = 1400 - 440 -
1200 = - 240 lb. No, you do not have enough cargo capacity to carry
that much weight. In metric units, the calculation would be: 635 kg -
(2 x 99 kg) - (12 x 45 kg) = 635 - 198 - 540 = -103 kg. You will need
to reduce the load weight by at least 240 lb. (104 kg). If you remove
3-100 lb. (45 kg) cement bags, then the load calculation would be:
1400 - (2 x 220) - (9 x 100) = 1400 - 440 - 900 = 60 lb. Now you have
the load capacity to transport the cement and your friend home. In
metric units, the calculation would be: 635 kg - (2 x 99 kg) - (9 x
45 kg) = 635 - 198 - 405 = 32 kg.
The above calculations also assume that the loads are positioned in your
vehicle in a manner that does not overload the Front or the Rear Gross
Axle Weight Rating specified for your vehicle on the Safety Compliance
Certification Label. The label shall be affixed to either the door hinge
pillar, door-latch post, or the door edge that meets the door-latch post,
next to the driver’s seating position.
Special Loading Instructions for Owners of Pick-up Trucks and
Utility-type Vehicles
WARNING:Loaded vehicles may handle differently than
unloaded vehicles. Extra precautions, such as slower speeds and
increased stopping distance, should be taken when driving a heavily
loaded vehicle.
Your vehicle can haul more cargo and people than most passenger cars.
Depending upon the type and placement of the load, hauling cargo and
people may raise the center of gravity of the vehicle.
274Load Carrying
2014 Explorer(exp)
Owners Guide gf, 1st Printing, April 2013
USA(fus)
Page 282 of 586
When Towing a Trailer
•Do not drive faster than 70 mph (113 km/h) during the first 500 miles
(800 kilometers).
•Do not make full-throttle starts.
•Check your hitch, electrical connections and trailer wheel lug nuts
thoroughly after you have traveled 50 miles (80 kilometers).
•When stopped in congested or heavy traffic during hot weather, place
the gearshift in positionPto aid engine and transmission cooling and
to help A/C performance.
•Turn off the speed control with heavy loads or in hilly terrain. The
speed control may turn off automatically when you are towing on
long, steep grades.
•Shift to a lower gear when driving down a long or steep hill. Do not
apply the brakes continuously, as they may overheat and become less
effective.
•Use the Grade Assist or Tow/Haul feature when towing. These
provide engine braking and help eliminate excessive transmission
shifting for optimum fuel economy and transmission cooling.
•Allow more distance for stopping with a trailer attached. Anticipate
stops and brake gradually.
•Avoid parking on a grade. However, if you must park on a grade:
1. Turn the steering wheel to point your vehicle tires away from
traffic flow.
2. Set your vehicle parking brake.
3. Place the automatic transmission in positionP.
4. Place wheel chocks in front and back of the trailer wheels.
(Chocks not included with vehicle.)
Launching or Retrieving a Boat or Personal Watercraft (PWC)
Note:Disconnect the wiring to the trailerbeforebacking the trailer into
the water.
Note:Reconnect the wiring to the trailerafterremoving the trailer from
the water.
When backing down a ramp during boat launching or retrieval:
•Do not allow the static water level to rise above the bottom edge of
the rear bumper.
•Do not allow waves to break higher than 6 inches (15 centimeters)
above the bottom edge of the rear bumper.
Towing281
2014 Explorer(exp)
Owners Guide gf, 1st Printing, April 2013
USA(fus)
Page 347 of 586
•Spray Motorcraft® Engine Shampoo and Degreaser on all parts that
require cleaning and pressure rinse clean. In Canada, use Motorcraft®
Engine Shampoo.
•Never wash or rinse the engine while it is hot or running; water in the
running engine may cause internal damage.
•Never wash or rinse any ignition coil, spark plug wire or spark plug
well, or the area in and around these locations.
•Cover the battery, power distribution box, and air filter assembly to
prevent water damage when cleaning the engine.
CLEANING THE WINDOWS AND WIPER BLADES
The windows and wiper blades should be cleaned regularly. If the wipers
do not wipe properly, substances on the vehicle’s glass or the wiper
blades may cause squeaking or chatter noise from the blades, and
streaking and smearing of the windshield. To clean these items, follow
these tips:
•The windows may be cleaned with a non-abrasive cleaner such as
Motorcraft® Ultra-Clear Spray Glass Cleaner.
•The wiper blades can be cleaned with isopropyl (rubbing) alcohol or
Motorcraft Premium Windshield Washer Concentrates in the U.S., or
Motorcraft Premium Quality Windshield Washer Fluid in Canada.
Replace your wiper blades when they appear worn or do not function
properly.
•Do not use abrasive materials, as they may cause scratches.
•Do not use fuel, kerosene, or paint thinner to clean any parts.
If you cannot remove those streaks after cleaning with the glass cleaner
or if the wipers chatter and move in a jerky motion, clean the outer
surface of the windshield and the wiper blades using a sponge or soft
cloth with a neutral detergent or mild-abrasive cleaning solution. After
cleaning, rinse the windshield and wiper blades with clean water. The
windshield is clean if beads do not form when you rinse the windshield
with water.
Note:Do not use sharp objects, such as a razor blade, to clean the
inside of the rear window or to remove decals, as it may cause damage
to the rear window defroster’s heated grid lines.
346Vehicle Care
2014 Explorer(exp)
Owners Guide gf, 1st Printing, April 2013
USA(fus)
Page 381 of 586
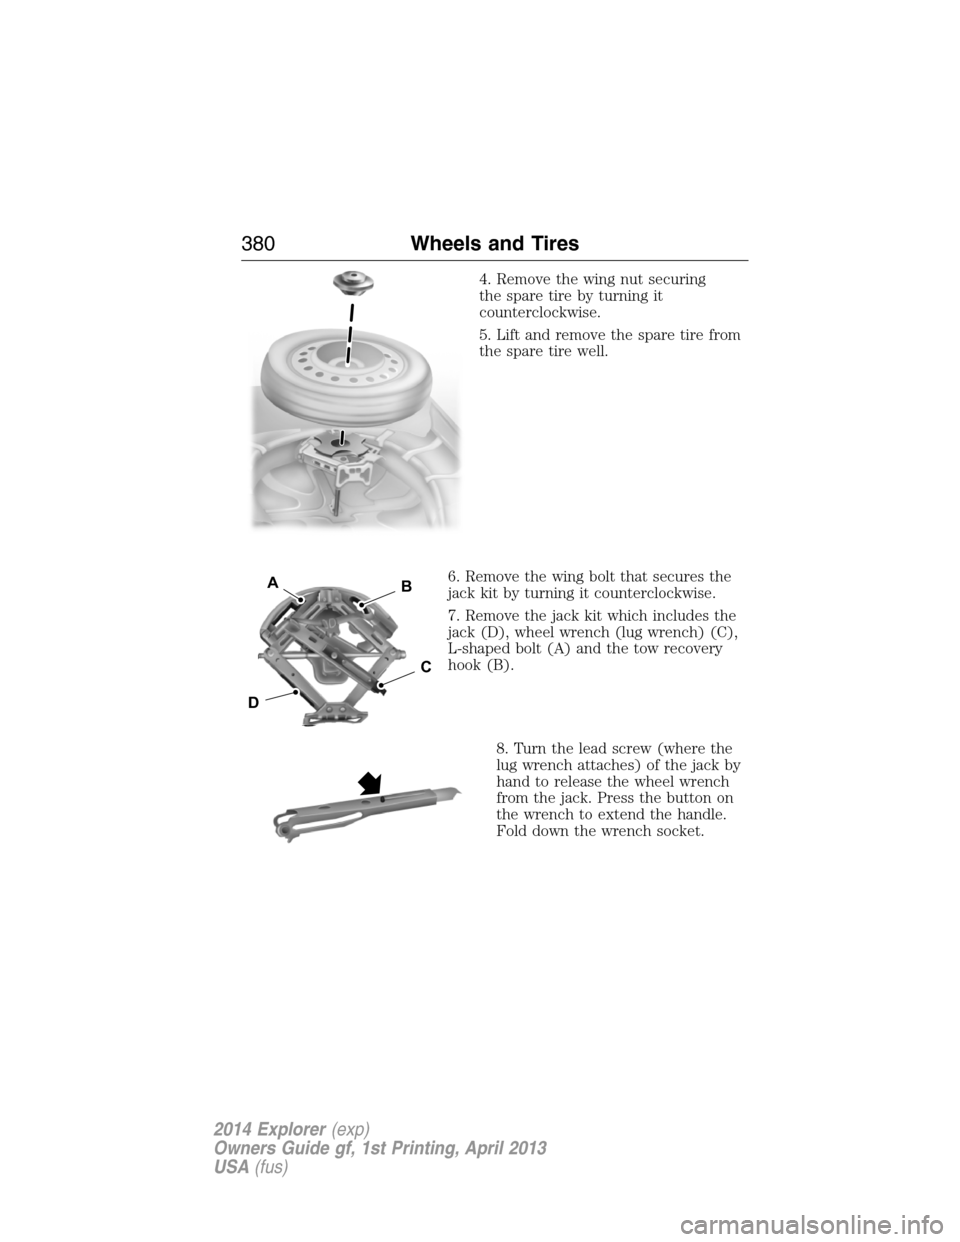
4. Remove the wing nut securing
the spare tire by turning it
counterclockwise.
5. Lift and remove the spare tire from
the spare tire well.
6. Remove the wing bolt that secures the
jack kit by turning it counterclockwise.
7. Remove the jack kit which includes the
jack (D), wheel wrench (lug wrench) (C),
L-shaped bolt (A) and the tow recovery
hook (B).
8. Turn the lead screw (where the
lug wrench attaches) of the jack by
hand to release the wheel wrench
from the jack. Press the button on
the wrench to extend the handle.
Fold down the wrench socket.
D
B
C
A
380Wheels and Tires
2014 Explorer(exp)
Owners Guide gf, 1st Printing, April 2013
USA(fus)
Page 382 of 586
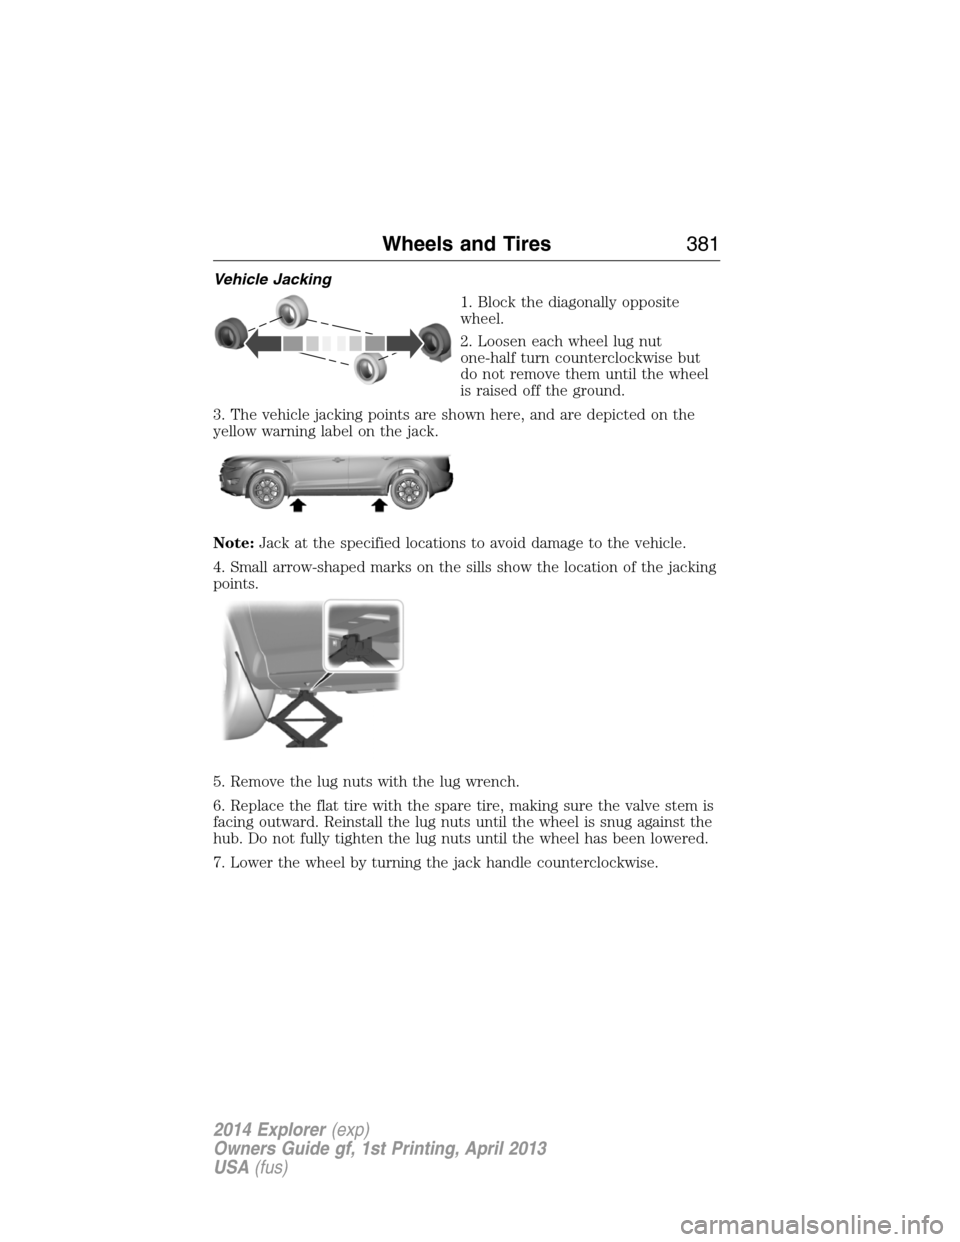
Vehicle Jacking
1. Block the diagonally opposite
wheel.
2. Loosen each wheel lug nut
one-half turn counterclockwise but
do not remove them until the wheel
is raised off the ground.
3. The vehicle jacking points are shown here, and are depicted on the
yellow warning label on the jack.
Note:Jack at the specified locations to avoid damage to the vehicle.
4. Small arrow-shaped marks on the sills show the location of the jacking
points.
5. Remove the lug nuts with the lug wrench.
6. Replace the flat tire with the spare tire, making sure the valve stem is
facing outward. Reinstall the lug nuts until the wheel is snug against the
hub. Do not fully tighten the lug nuts until the wheel has been lowered.
7. Lower the wheel by turning the jack handle counterclockwise.
Wheels and Tires381
2014 Explorer(exp)
Owners Guide gf, 1st Printing, April 2013
USA(fus)
Page 383 of 586
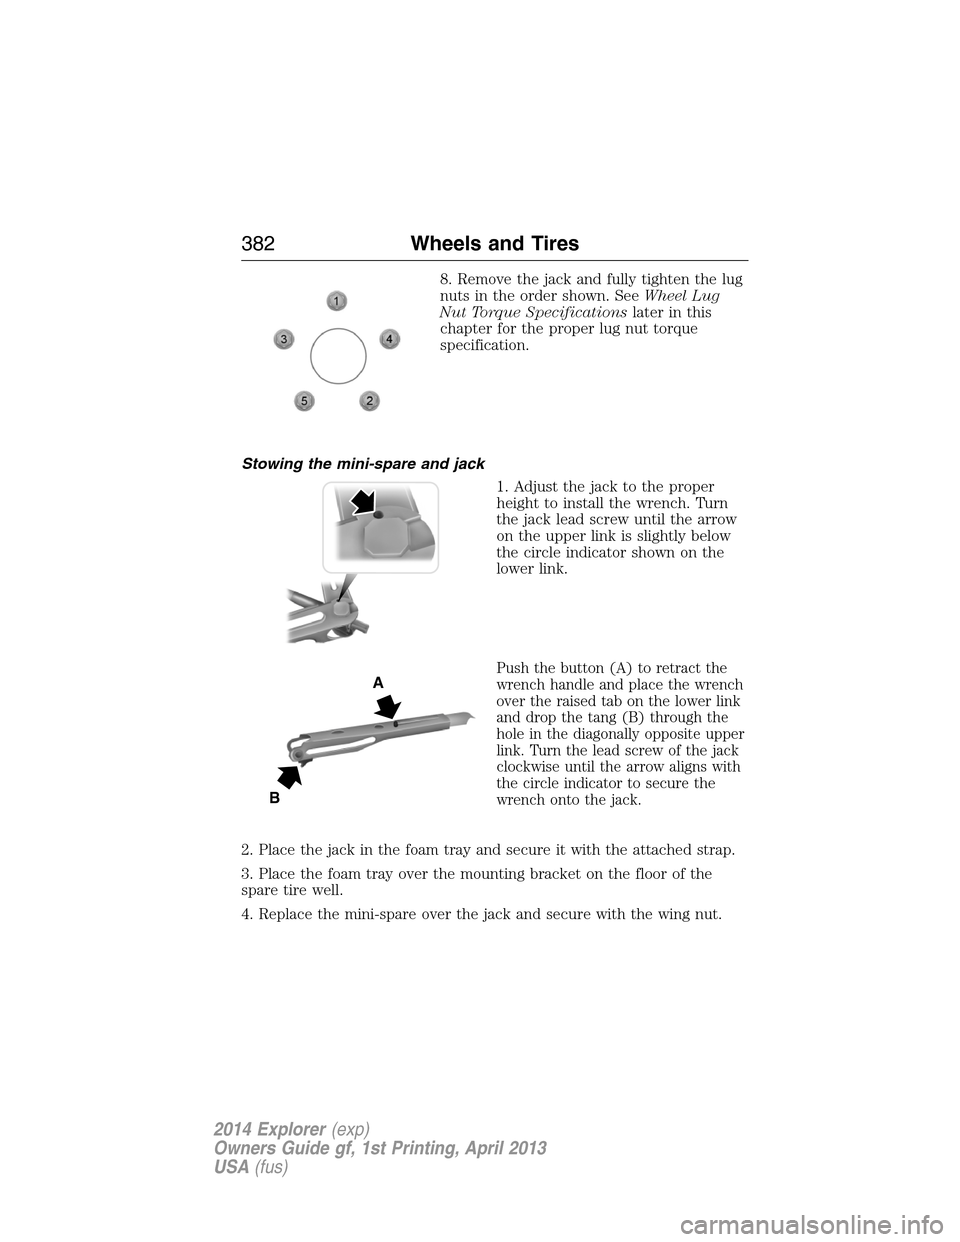
8. Remove the jack and fully tighten the lug
nuts in the order shown. SeeWheel Lug
Nut Torque Specificationslater in this
chapter for the proper lug nut torque
specification.
Stowing the mini-spare and jack
1. Adjust the jack to the proper
height to install the wrench. Turn
the jack lead screw until the arrow
on the upper link is slightly below
the circle indicator shown on the
lower link.
Push the button (A) to retract the
wrench handle and place the wrench
over the raised tab on the lower link
and drop the tang (B) through the
hole in the diagonally opposite upper
link. Turn the lead screw of the jack
clockwise until the arrow aligns with
the circle indicator to secure the
wrench onto the jack.
2. Place the jack in the foam tray and secure it with the attached strap.
3. Place the foam tray over the mounting bracket on the floor of the
spare tire well.
4. Replace the mini-spare over the jack and secure with the wing nut.
A
B
382Wheels and Tires
2014 Explorer(exp)
Owners Guide gf, 1st Printing, April 2013
USA(fus)
Page 384 of 586
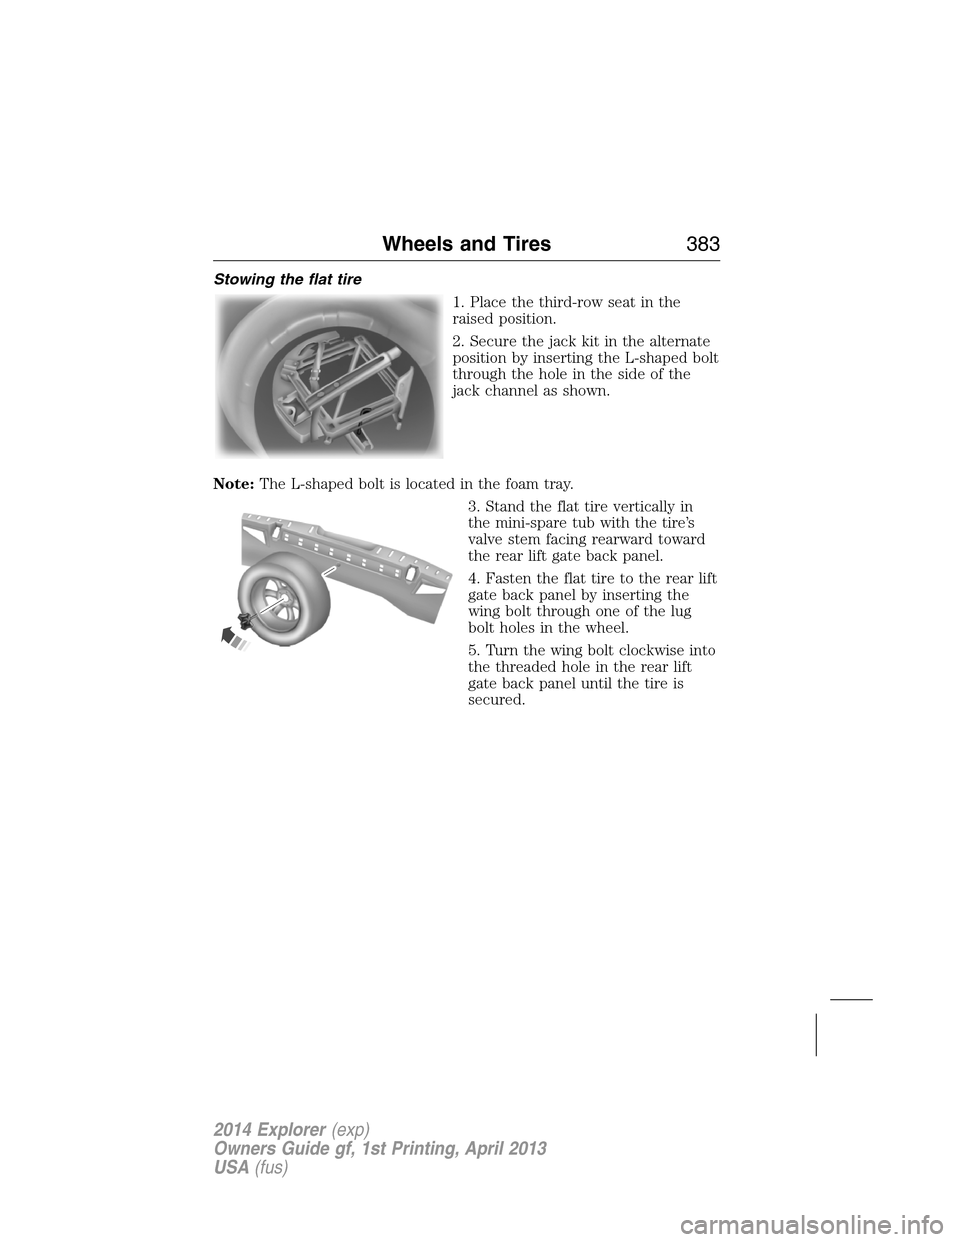
Stowing the flat tire
1. Place the third-row seat in the
raised position.
2. Secure the jack kit in the alternate
position by inserting the L-shaped bolt
through the hole in the side of the
jack channel as shown.
Note:The L-shaped bolt is located in the foam tray.
3. Stand the flat tire vertically in
the mini-spare tub with the tire’s
valve stem facing rearward toward
the rear lift gate back panel.
4. Fasten the flat tire to the rear lift
gate back panel by inserting the
wing bolt through one of the lug
bolt holes in the wheel.
5. Turn the wing bolt clockwise into
the threaded hole in the rear lift
gate back panel until the tire is
secured.
Wheels and Tires383
2014 Explorer(exp)
Owners Guide gf, 1st Printing, April 2013
USA(fus)
Page 385 of 586
TECHNICAL SPECIFICATIONS
Wheel Lug Nut Torque Specifications
WARNING:When a wheel is installed, always remove any
corrosion, dirt or foreign materials present on the mounting
surfaces of the wheel or the surface of the wheel hub, brake drum or
brake disc that contacts the wheel. Make sure that any fasteners that
attach the rotor to the hub are secured so they do not interfere with
the mounting surfaces of the wheel. Installing wheels without correct
metal-to-metal contact at the wheel mounting surfaces can cause the
wheel nuts to loosen and the wheel to come off while your vehicle is in
motion, resulting in loss of control.
Retighten the lug nuts to the specified torque within 100 miles
(160 kilometers) after any wheel disturbance (such as rotation, flat tire,
wheel removal).
Lug nut socket
size/Bolt sizeWheel lug nut torque*
ft-lb N•m
12x 20 100 135
* Torque specifications are for nut and bolt threads free of dirt and
rust. Use only Ford recommended replacement fasteners.
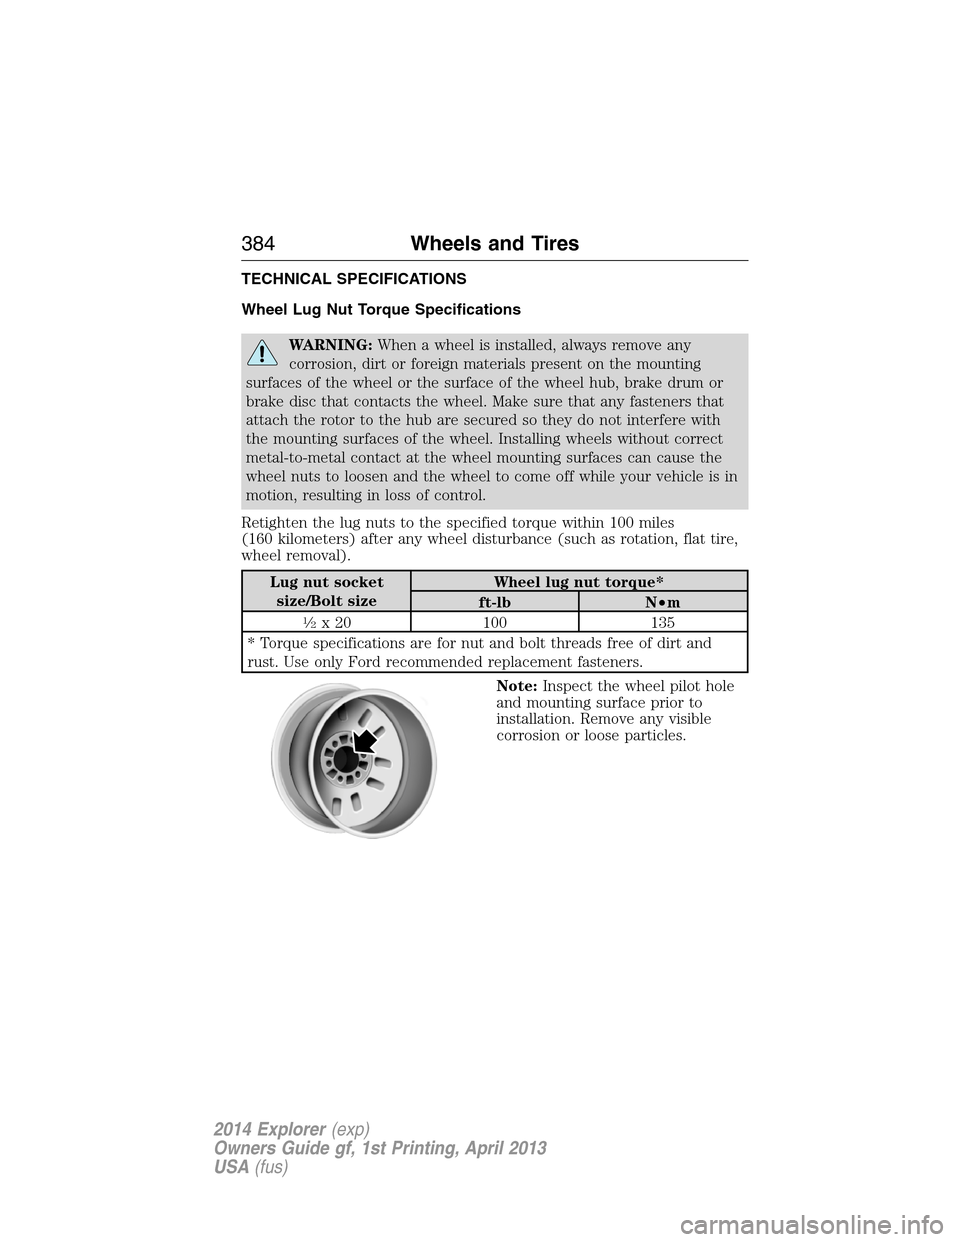
Note:Inspect the wheel pilot hole
and mounting surface prior to
installation. Remove any visible
corrosion or loose particles.
384Wheels and Tires
2014 Explorer(exp)
Owners Guide gf, 1st Printing, April 2013
USA(fus)
Page 386 of 586
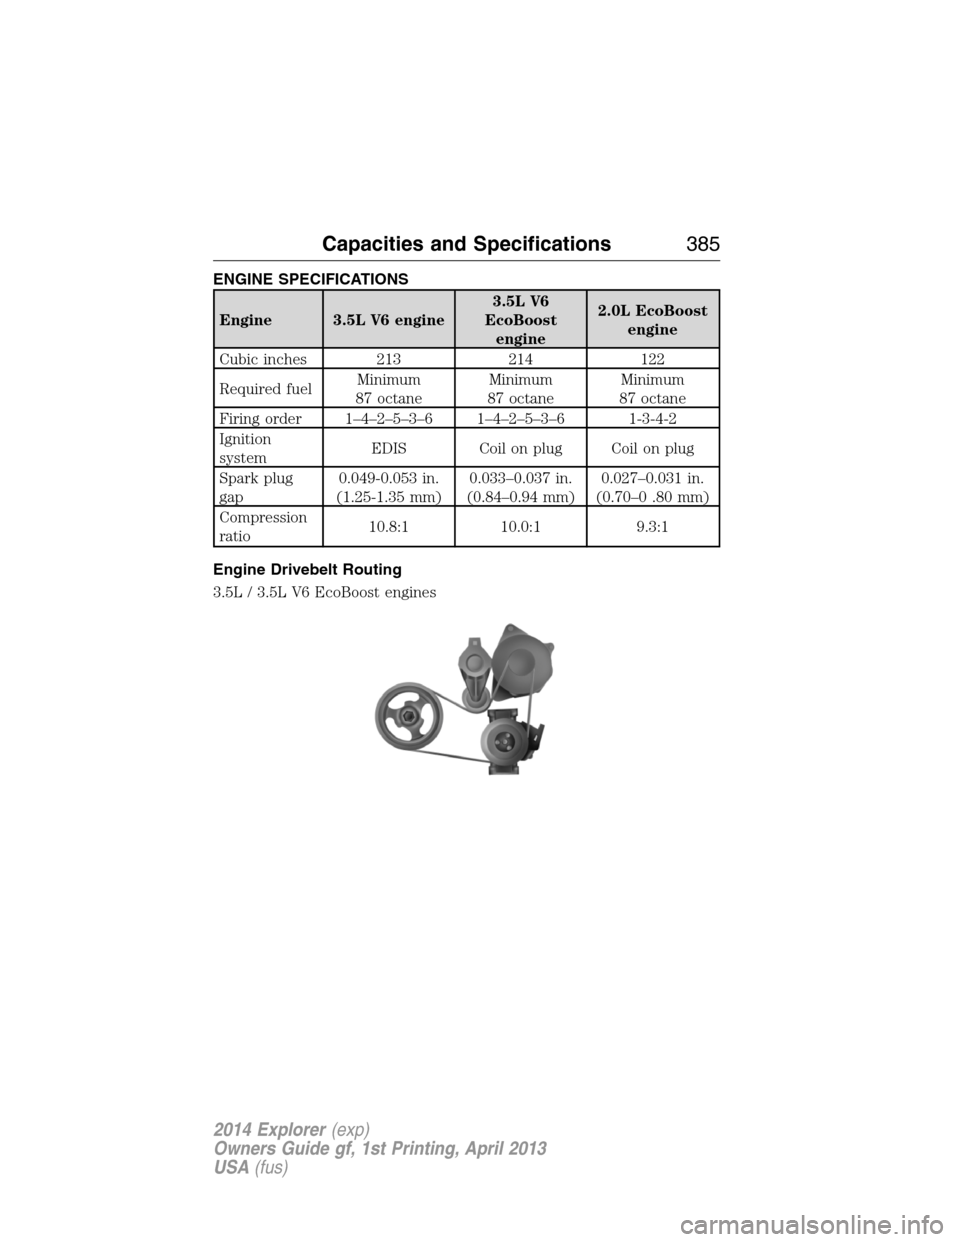
ENGINE SPECIFICATIONS
Engine 3.5L V6 engine3.5L V6
EcoBoost
engine2.0L EcoBoost
engine
Cubic inches 213 214 122
Required fuelMinimum
87 octaneMinimum
87 octaneMinimum
87 octane
Firing order 1–4–2–5–3–6 1–4–2–5–3–6 1-3-4-2
Ignition
systemEDIS Coil on plug Coil on plug
Spark plug
gap0.049-0.053 in.
(1.25-1.35 mm)0.033–0.037 in.
(0.84–0.94 mm)0.027–0.031 in.
(0.70–0 .80 mm)
Compression
ratio10.8:1 10.0:1 9.3:1
Engine Drivebelt Routing
3.5L / 3.5L V6 EcoBoost engines
Capacities and Specifications385
2014 Explorer(exp)
Owners Guide gf, 1st Printing, April 2013
USA(fus)