change time FORD EXPLORER 2015 5.G User Guide
[x] Cancel search | Manufacturer: FORD, Model Year: 2015, Model line: EXPLORER, Model: FORD EXPLORER 2015 5.GPages: 596, PDF Size: 6.32 MB
Page 144 of 596
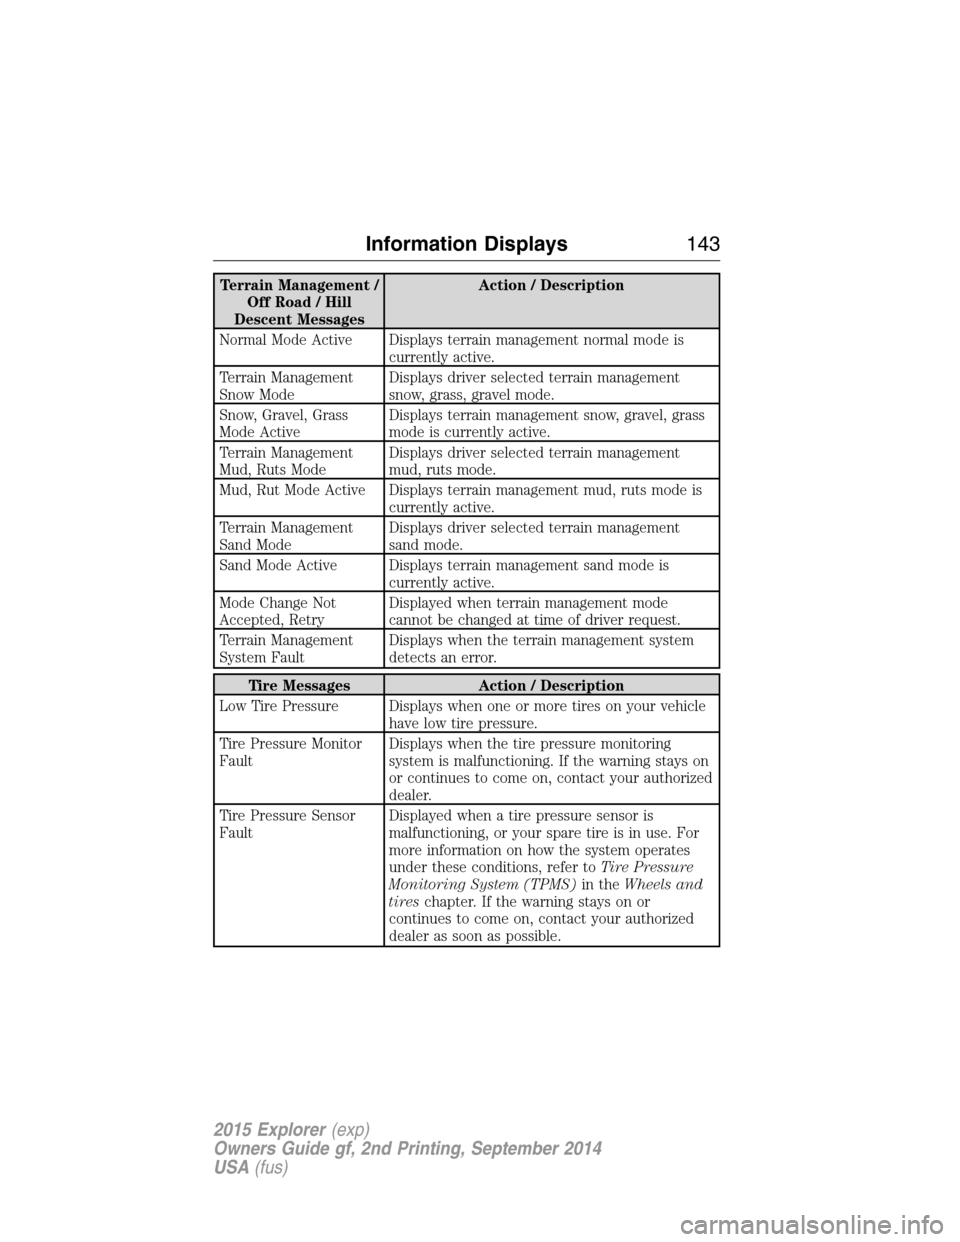
Terrain Management /
Off Road / Hill
Descent MessagesAction / Description
Normal Mode Active Displays terrain management normal mode is
currently active.
Terrain Management
Snow ModeDisplays driver selected terrain management
snow, grass, gravel mode.
Snow, Gravel, Grass
Mode ActiveDisplays terrain management snow, gravel, grass
mode is currently active.
Terrain Management
Mud, Ruts ModeDisplays driver selected terrain management
mud, ruts mode.
Mud, Rut Mode Active Displays terrain management mud, ruts mode is
currently active.
Terrain Management
Sand ModeDisplays driver selected terrain management
sand mode.
Sand Mode Active Displays terrain management sand mode is
currently active.
Mode Change Not
Accepted, RetryDisplayed when terrain management mode
cannot be changed at time of driver request.
Terrain Management
System FaultDisplays when the terrain management system
detects an error.
Tire Messages Action / Description
Low Tire Pressure Displays when one or more tires on your vehicle
have low tire pressure.
Tire Pressure Monitor
FaultDisplays when the tire pressure monitoring
system is malfunctioning. If the warning stays on
or continues to come on, contact your authorized
dealer.
Tire Pressure Sensor
FaultDisplayed when a tire pressure sensor is
malfunctioning, or your spare tire is in use. For
more information on how the system operates
under these conditions, refer toTire Pressure
Monitoring System (TPMS)in theWheels and
tireschapter. If the warning stays on or
continues to come on, contact your authorized
dealer as soon as possible.
Information Displays143
2015 Explorer(exp)
Owners Guide gf, 2nd Printing, September 2014
USA(fus)
Page 181 of 596
Programming HomeLink to a Genie Intellicode 2 garage door opener
Note:The Genie Intellicode 2 transmitter must already be programmed
to operate with the garage door opener.
Programing the transmitters
To program HomeLink to the transmitter you must first put the
transmitter into programming mode. To do this:
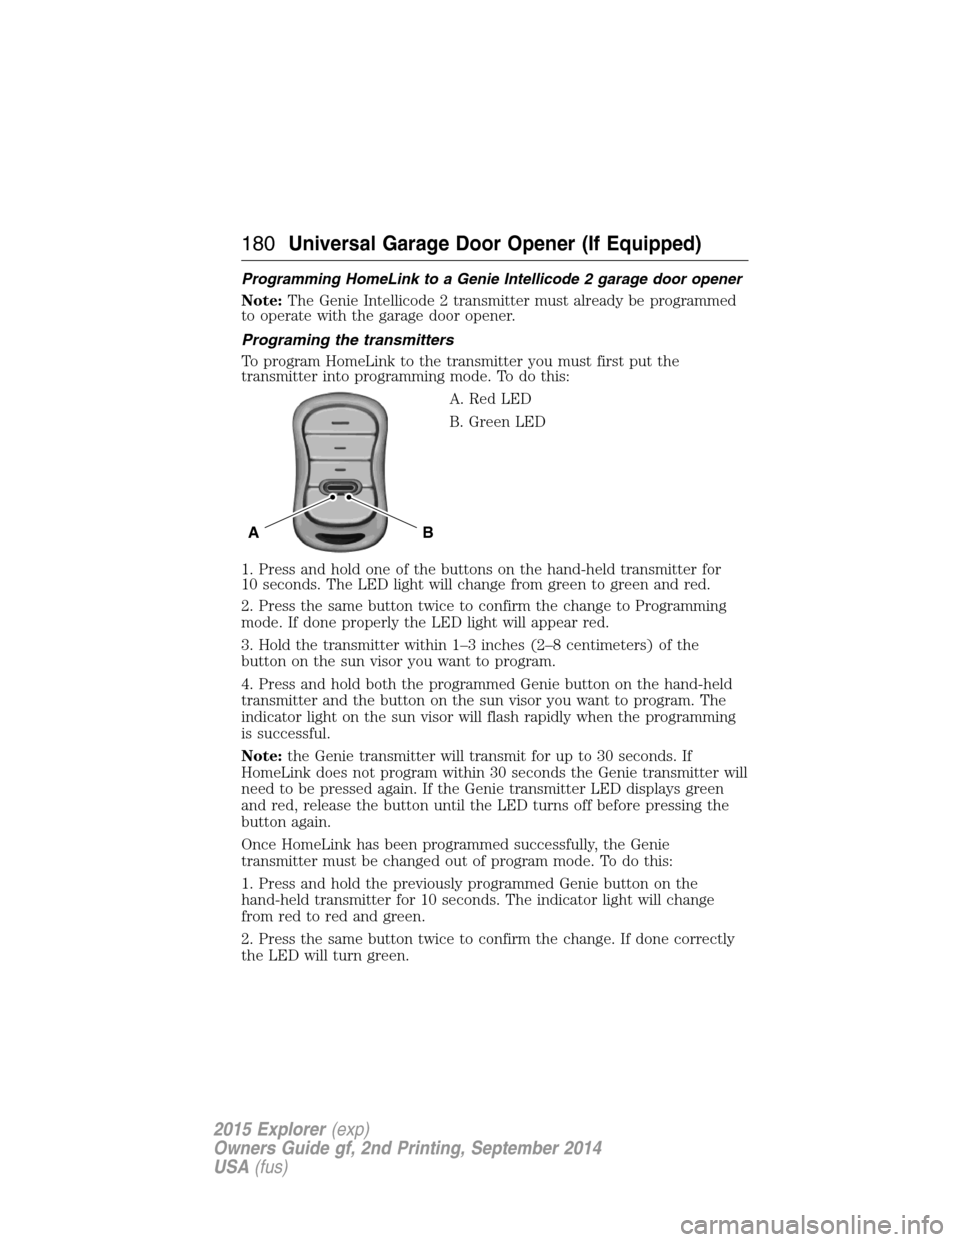
A. Red LED
B. Green LED
1. Press and hold one of the buttons on the hand-held transmitter for
10 seconds. The LED light will change from green to green and red.
2. Press the same button twice to confirm the change to Programming
mode. If done properly the LED light will appear red.
3. Hold the transmitter within 1–3 inches (2–8 centimeters) of the
button on the sun visor you want to program.
4. Press and hold both the programmed Genie button on the hand-held
transmitter and the button on the sun visor you want to program. The
indicator light on the sun visor will flash rapidly when the programming
is successful.
Note:the Genie transmitter will transmit for up to 30 seconds. If
HomeLink does not program within 30 seconds the Genie transmitter will
need to be pressed again. If the Genie transmitter LED displays green
and red, release the button until the LED turns off before pressing the
button again.
Once HomeLink has been programmed successfully, the Genie
transmitter must be changed out of program mode. To do this:
1. Press and hold the previously programmed Genie button on the
hand-held transmitter for 10 seconds. The indicator light will change
from red to red and green.
2. Press the same button twice to confirm the change. If done correctly
the LED will turn green.
BA
180Universal Garage Door Opener (If Equipped)
2015 Explorer(exp)
Owners Guide gf, 2nd Printing, September 2014
USA(fus)
Page 182 of 596
Programming HomeLink to the Genie Intellicode garage door
opener motor
Note:You may need a ladder to access the garage door opener motor.
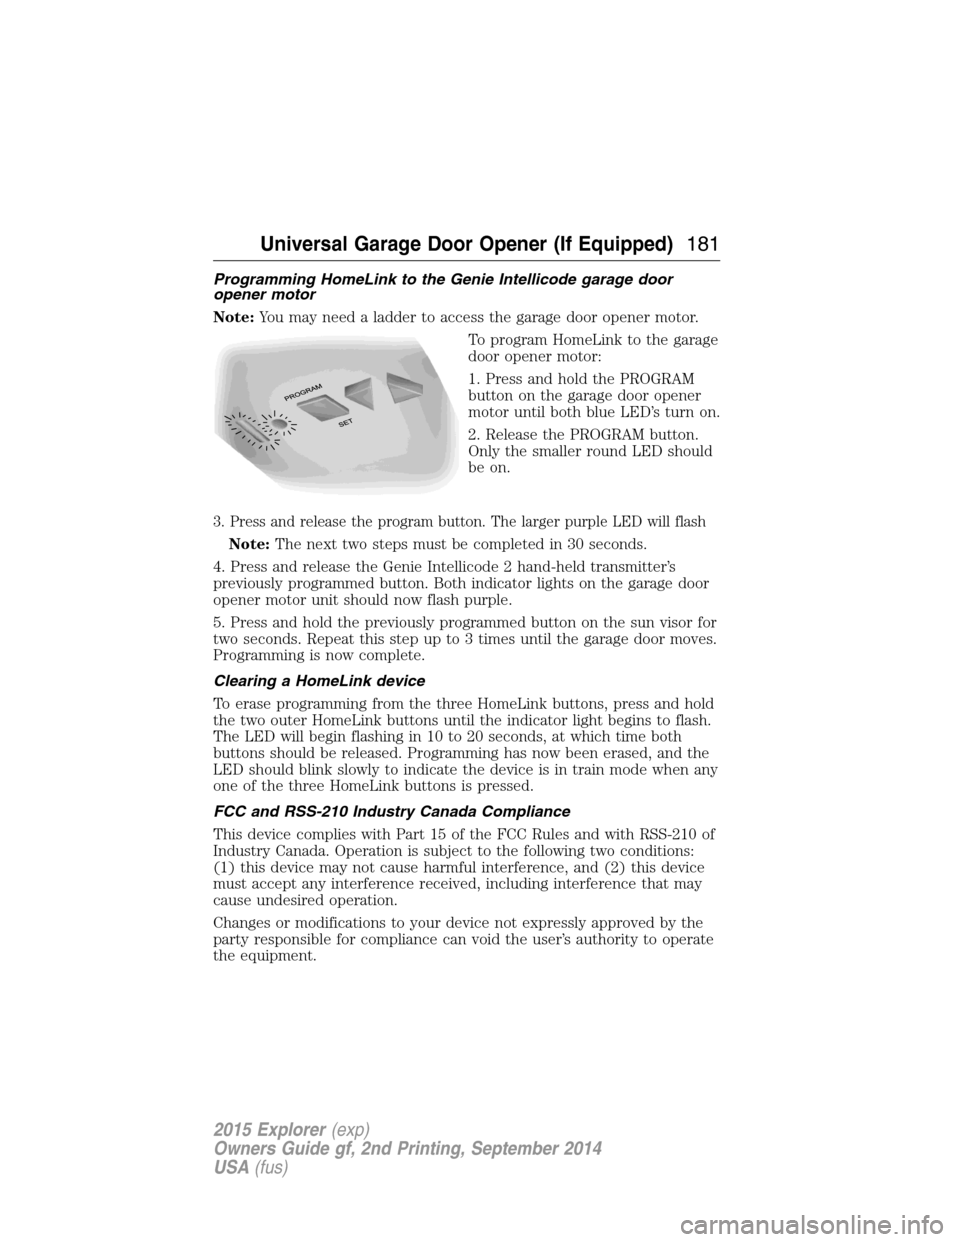
To program HomeLink to the garage
door opener motor:
1. Press and hold the PROGRAM
button on the garage door opener
motor until both blue LED’s turn on.
2. Release the PROGRAM button.
Only the smaller round LED should
be on.
3. Press and release the program button. The larger purple LED will flash
Note:The next two steps must be completed in 30 seconds.
4. Press and release the Genie Intellicode 2 hand-held transmitter’s
previously programmed button. Both indicator lights on the garage door
opener motor unit should now flash purple.
5. Press and hold the previously programmed button on the sun visor for
two seconds. Repeat this step up to 3 times until the garage door moves.
Programming is now complete.
Clearing a HomeLink device
To erase programming from the three HomeLink buttons, press and hold
the two outer HomeLink buttons until the indicator light begins to flash.
The LED will begin flashing in 10 to 20 seconds, at which time both
buttons should be released. Programming has now been erased, and the
LED should blink slowly to indicate the device is in train mode when any
one of the three HomeLink buttons is pressed.
FCC and RSS-210 Industry Canada Compliance
This device complies with Part 15 of the FCC Rules and with RSS-210 of
Industry Canada. Operation is subject to the following two conditions:
(1) this device may not cause harmful interference, and (2) this device
must accept any interference received, including interference that may
cause undesired operation.
Changes or modifications to your device not expressly approved by the
party responsible for compliance can void the user’s authority to operate
the equipment.
Universal Garage Door Opener (If Equipped)181
2015 Explorer(exp)
Owners Guide gf, 2nd Printing, September 2014
USA(fus)
Page 214 of 596
How Utility Vehicles Differ from Other Vehicles
Truck and utility vehicles can differ from some other vehicles. Your
vehicle may be higher to allow it to travel over rough terrain without
getting hung up or damaging underbody components.
The differences that make your vehicle so versatile also make it handle
differently than an ordinary passenger car.
Maintain steering wheel control at all times, especially in rough terrain.
Since sudden changes in terrain can result in abrupt steering wheel
motion, make sure you grip the steering wheel from the outside. Do not
grip the spokes.
Drive cautiously to avoid vehicle damage from concealed objects such as
rocks and stumps.
You should either know the terrain or examine maps of the area before
driving. Map out your route before driving in the area. To maintain
steering and braking control of your vehicle, you must have all four
wheels on the ground and they must be rolling, not sliding or spinning.
Driving In Special Conditions With Four-Wheel Drive (4WD)
Note:4WD vehicles are specially equipped for driving on sand, snow,
mud and rough terrain and have operating characteristics that are
somewhat different from conventional vehicles, both on and off the road.
Truck and utility vehicles can differ from some other vehicles. Your
vehicle may be higher to allow it to travel over rough terrain without
getting hung up or damaging underbody components. The differences
that make your vehicle so versatile also make it handle differently than
an ordinary passenger car. Maintain steering wheel control at all times,
especially in rough terrain. Since sudden changes in terrain can result in
abrupt steering wheel motion, make sure you grip the steering wheel
from the outside. Drive cautiously to avoid vehicle damage from
concealed objects such as rocks and stumps. You should either know the
terrain or examine maps of the area before driving. Map out your route
before driving in the area. To maintain steering and braking control of
your vehicle, you must have all four wheels on the ground and they must
be rolling, not sliding or spinning.
Basic Operating Principles in Special Conditions
•Drive slower in strong crosswinds which can affect the normal steering
characteristics of your vehicle.
•Be extremely careful when driving on pavement made slippery by
loose sand, water, gravel, snow or ice.
Four-Wheel Drive (If Equipped)213
2015 Explorer(exp)
Owners Guide gf, 2nd Printing, September 2014
USA(fus)
Page 227 of 596
If the system becomes inoperable, selecting some modes may not be
possible and a message is displayed. If it becomes inoperable due to a
system malfunction, all of the mode indicators on the control turn off
and one of the following messages appears in the information display:
TERRAIN MANAGEMENT SYSTEM FAULT:Cycling the key may
clear the fault. If key cycling does not work, have the system serviced by
an authorized dealer.
MODE CHANGE NOT ACCEPTED, RETRY:A mode change cannot
be made at the time of driver request. Try the mode change again.
HILL DESCENT CONTROL™ (IF EQUIPPED)
WARNING:Hill descent control cannot control descent in all
surface conditions and circumstances, such as ice or extremely
steep grades. Hill descent control is a driver assist system and cannot
substitute for good judgment by the driver. Failure to do so may result
in loss of vehicle control, crash or serious injury.
WARNING:Hill descent control does not provide hill hold at
zero mph (0 km/h). When stopped, the parking brake must be
applied and/or the vehicle must be placed in P (Park) or it may roll
away.
Hill descent control allows the driver to set and maintain vehicle speed
while descending steep grades in various surface conditions.
Hill descent control can maintain vehicle speeds on downhill grades
between 3 mph (5 km/h) and 20 mph (32 km/h). Above 20 mph
(32 km/h), the system remains armed, but descent speed cannot be set
or maintained.
Hill descent control requires a cooling down interval after a period of
sustained use. The amount of time that the feature can remain active
before cooling varies with conditions. The system will provide a warning
in the message center and a chime will sound when the system is about
to disengage for cooling. At this time, manually apply the brakes as
needed to maintain descent speed.
226Terrain Response
2015 Explorer(exp)
Owners Guide gf, 2nd Printing, September 2014
USA(fus)
Page 231 of 596
ACTIVE PARK ASSIST (IF EQUIPPED)
WARNING:This system is designed to be a supplementary park
aid. It may not work in all conditions and is not intended to
replace the driver’s attention and judgment. The driver is responsible
for avoiding hazards and maintaining a safe distance and speed, even
when the system is in use.
Note:The driver is always responsible for controlling the vehicle,
supervising the system and intervening if required.
The system detects an available parallel parking space and automatically
steers the vehicle into the space (hands-free) while you control the
accelerator, gearshift and brakes. The system visually and/or audibly
instructs the driver to park the vehicle.
The system may not function correctly if something passes between the
front bumper and the parking space (i.e. a pedestrian or cyclist) or if the
edge of the neighboring parked vehicle is high from the ground (i.e. a
bus, tow truck or flatbed truck).
Note:The sensors may not detect objects in heavy rain or other
conditions that cause disruptive reflections.
Note:The sensors may not detect objects with surfaces that absorb
ultrasonic waves.
Note:After a tire change the system will go through a relearning
procedure. During this time the system performance may deteriorate.
The system should not be used if:
•a foreign object (i.e. bike rack or trailer) is attached to the front or
rear of the vehicle or at another location close to the sensors.
•an overhanging object (i.e. surfboard) is attached to the roof.
•the front bumper or side sensors are damaged (i.e. in a collision) or
obstructed by a foreign object (i.e. front bumper cover).
•a mini-spare tire is in use.
230Parking Aids
2015 Explorer(exp)
Owners Guide gf, 2nd Printing, September 2014
USA(fus)
Page 235 of 596
![FORD EXPLORER 2015 5.G User Guide The system does not position the vehicle where I want in the
space
The vehicle is rolling in the opposite direction of the transmission (i.e.
rolling forward when R [Reverse] is selected)
The transmis FORD EXPLORER 2015 5.G User Guide The system does not position the vehicle where I want in the
space
The vehicle is rolling in the opposite direction of the transmission (i.e.
rolling forward when R [Reverse] is selected)
The transmis](/img/11/4947/w960_4947-234.png)
The system does not position the vehicle where I want in the
space
The vehicle is rolling in the opposite direction of the transmission (i.e.
rolling forward when R [Reverse] is selected)
The transmission is in R (Reverse); the vehicle must be moving
forward to detect a parking space
An irregular curb along the parking space prevents the system from
aligning the vehicle properly
Vehicles or objects bordering the space may not be positioned correctly
The vehicle was pulled too far past the parking space. The system
performs best when you drive the same distance past the parking
space
The tires may not be installed or maintained correctly (i.e. not inflated
correctly, improper size, or of different sizes)
A repair or alteration has changed detection capabilities
A parked vehicle has a high attachment (i.e. salt sprayer, snowplow,
moving truck bed, etc.)
The parking space length or position of parked objects changed after
your vehicle passed
The temperature around your vehicle changes quickly (i.e. driving from
a heated garage into the cold, or after leaving a car wash)
REAR VIEW CAMERA SYSTEM (IF EQUIPPED)
WARNING:The rear view camera system is a reverse aid
supplement device that still requires the driver to use it in
conjunction with the interior and exterior mirrors for maximum
coverage.
WARNING:Objects that are close to either corner of the
bumper or under the bumper, might not be seen on the screen
due to the limited coverage of the camera system.
WARNING:Back up as slow as possible since higher speeds
might limit your reaction time to stop the vehicle.
234Parking Aids
2015 Explorer(exp)
Owners Guide gf, 2nd Printing, September 2014
USA(fus)
Page 245 of 596
When you are overriding the system, the green indicator light
illuminates and the follow vehicle does not show in the
information display. The system will resume operation when
you release the accelerator pedal. The vehicle speed will decrease to the
set speed, or a lower speed if following a slower vehicle.
Changing the Set Speed
There are three ways to change the set speed:
•Accelerate or brake to the desired speed and pressSETupward and
release.
•Increase or decrease the speed by holdingSETupward or downward
until the desired set speed is shown on the information display. The
vehicle speed will gradually change to the selected speed.
•Increase or decrease the speed in increments of 1 mph (2 km/h) by
briefly pressingSETupward or downward.
The system may apply the brakes to slow your vehicle down to the new
set speed. The set speed will display continuously in the information
display while the system is active.
Resuming the Set Speed
Note:Resume should only be used if you are aware of the set speed and
intend to return to it.
Press and releaseRES. Your vehicle will return to the previously set
speed. The set speed will display continuously in the information display
while the system is active.
Low Speed Automatic Cancellation
The system is not functional at vehicle speeds below 16 mph (26 km/h).
An audible alarm sounds and the automatic braking released if your
vehicle drops below this speed.
Hilly Condition Usage
Note:An audible alarm sounds and the system shuts down if it is
applying brakes for an extended period of time. This allows the brakes to
cool down. The system will function normally again when the brakes
have cooled down.
You should select a lower gear position when the system is active in
situations such as prolonged downhill driving on steep grades, for
example driving in mountainous areas. Your vehicle needs additional
244Cruise Control
2015 Explorer(exp)
Owners Guide gf, 2nd Printing, September 2014
USA(fus)
Page 248 of 596
Cause Action
The surface of the radar in the
grille is dirty or obstructed in
some way.Clean the grille surface in front of
the radar or remove the object
causing the obstruction.
The surface of the radar in the
grille is clean but the message
remains in the display.Wait a short time. It may take
several minutes for the radar to
detect that it is no longer
obstructed.
Heavy rain or snow is interfering
with the radar signals.Do not use the system in these
conditions because it may not
detect any vehicle ahead.
Swirling water, or snow or ice on
the surface of the road may
interfere with the radar signals.Do not use system in these
conditions because it may not
detect any vehicle ahead.
You are in a desert or remote area
with no other vehicles and no
roadside objects.Wait a short time or switch to
normal cruise control.
Due to the nature of radar technology, it is possible to get a blockage
warning and not be blocked. This can happen, for example, when driving
in sparse rural or desert environments. A false blocked condition will
either self-clear or clear after a key cycle.
Switching to Normal Cruise Control
WARNING:Normal cruise control will not brake due to slower
vehicles. Always be aware of which mode is selected and apply
the brakes when necessary.
You can manually change from adaptive cruise control to normal cruise
control through the information display.
The cruise control indicator light will replace the adaptive
cruise control indicator light if normal cruise control is selected.
The gap setting will not be displayed, the system will not
automatically respond to lead vehicles and automatic braking will not be
activated. The system will default to adaptive cruise control when the
engine is started.
Cruise Control247
2015 Explorer(exp)
Owners Guide gf, 2nd Printing, September 2014
USA(fus)
Page 250 of 596
System Display
When active the system will run automatically in the background and
only issue a warning if required. You can view the status at any time
using the information display. Refer to theInformation Displays
chapter.
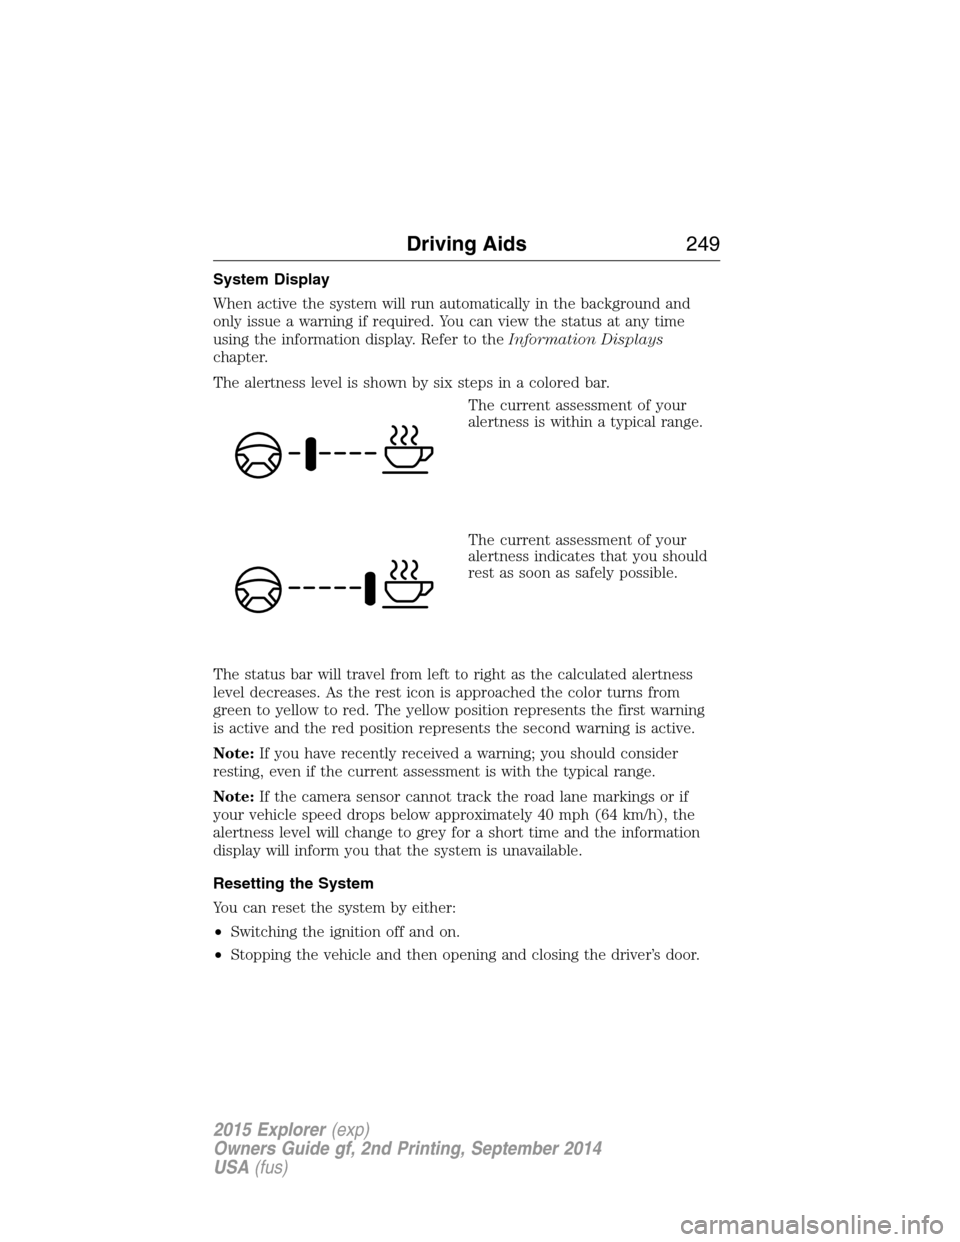
The alertness level is shown by six steps in a colored bar.
The current assessment of your
alertness is within a typical range.
The current assessment of your
alertness indicates that you should
rest as soon as safely possible.
The status bar will travel from left to right as the calculated alertness
level decreases. As the rest icon is approached the color turns from
green to yellow to red. The yellow position represents the first warning
is active and the red position represents the second warning is active.
Note:If you have recently received a warning; you should consider
resting, even if the current assessment is with the typical range.
Note:If the camera sensor cannot track the road lane markings or if
your vehicle speed drops below approximately 40 mph (64 km/h), the
alertness level will change to grey for a short time and the information
display will inform you that the system is unavailable.
Resetting the System
You can reset the system by either:
•Switching the ignition off and on.
•Stopping the vehicle and then opening and closing the driver’s door.
Driving Aids249
2015 Explorer(exp)
Owners Guide gf, 2nd Printing, September 2014
USA(fus)