parking brake FORD EXPLORER 2016 5.G Owners Manual
[x] Cancel search | Manufacturer: FORD, Model Year: 2016, Model line: EXPLORER, Model: FORD EXPLORER 2016 5.GPages: 541, PDF Size: 6.51 MB
Page 6 of 541
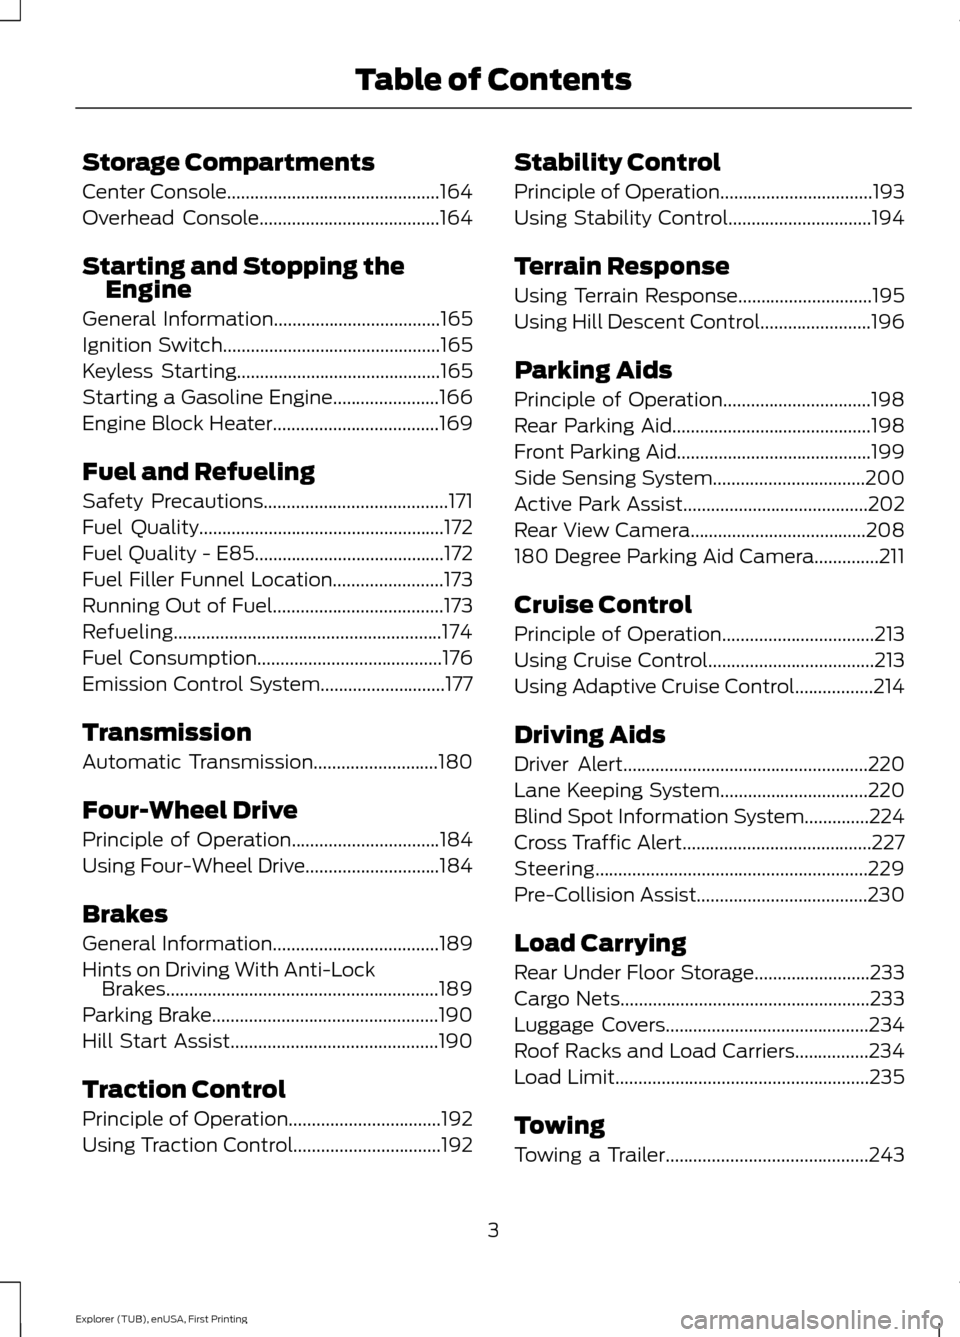
Storage Compartments
Center Console..............................................164
Overhead Console.......................................164
Starting and Stopping the Engine
General Information
....................................165
Ignition Switch
...............................................165
Keyless Starting............................................165
Starting a Gasoline Engine.......................166
Engine Block Heater....................................169
Fuel and Refueling
Safety Precautions
........................................171
Fuel Quality.....................................................172
Fuel Quality - E85.........................................172
Fuel Filler Funnel Location........................173
Running Out of Fuel
.....................................173
Refueling..........................................................174
Fuel Consumption
........................................176
Emission Control System...........................177
Transmission
Automatic Transmission...........................180
Four-Wheel Drive
Principle of Operation
................................184
Using Four-Wheel Drive.............................184
Brakes
General Information
....................................189
Hints on Driving With Anti-Lock Brakes...........................................................189
Parking Brake.................................................190
Hill Start Assist.............................................190
Traction Control
Principle of Operation.................................192
Using Traction Control................................192 Stability Control
Principle of Operation.................................193
Using Stability Control...............................194
Terrain Response
Using Terrain Response.............................195
Using Hill Descent Control........................196
Parking Aids
Principle of Operation................................198
Rear Parking Aid
...........................................198
Front Parking Aid..........................................199
Side Sensing System.................................200
Active Park Assist
........................................202
Rear View Camera
......................................208
180 Degree Parking Aid Camera..............211
Cruise Control
Principle of Operation.................................213
Using Cruise Control....................................213
Using Adaptive Cruise Control.................214
Driving Aids
Driver Alert
.....................................................220
Lane Keeping System
................................220
Blind Spot Information System..............224
Cross Traffic Alert.........................................227
Steering...........................................................229
Pre-Collision Assist.....................................230
Load Carrying
Rear Under Floor Storage.........................233
Cargo Nets
......................................................233
Luggage Covers
............................................234
Roof Racks and Load Carriers................234
Load Limit.......................................................235
Towing
Towing a Trailer
............................................243
3
Explorer (TUB), enUSA, First Printing Table of Contents
Page 12 of 541
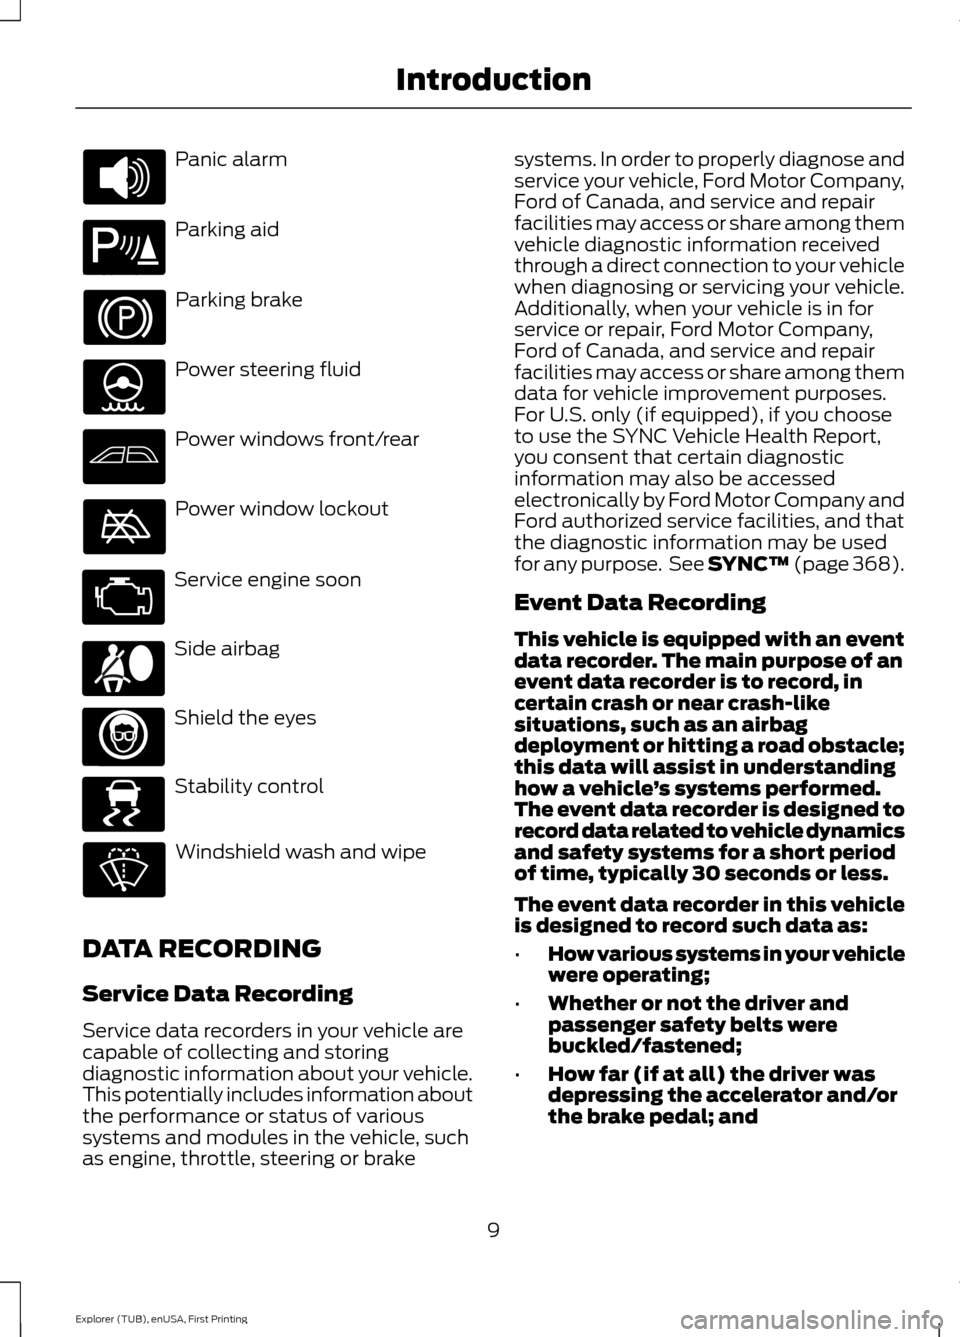
Panic alarm
Parking aid
Parking brake
Power steering fluid
Power windows front/rear
Power window lockout
Service engine soon
Side airbag
Shield the eyes
Stability control
Windshield wash and wipe
DATA RECORDING
Service Data Recording
Service data recorders in your vehicle are
capable of collecting and storing
diagnostic information about your vehicle.
This potentially includes information about
the performance or status of various
systems and modules in the vehicle, such
as engine, throttle, steering or brake systems. In order to properly diagnose and
service your vehicle, Ford Motor Company,
Ford of Canada, and service and repair
facilities may access or share among them
vehicle diagnostic information received
through a direct connection to your vehicle
when diagnosing or servicing your vehicle.
Additionally, when your vehicle is in for
service or repair, Ford Motor Company,
Ford of Canada, and service and repair
facilities may access or share among them
data for vehicle improvement purposes.
For U.S. only (if equipped), if you choose
to use the SYNC Vehicle Health Report,
you consent that certain diagnostic
information may also be accessed
electronically by Ford Motor Company and
Ford authorized service facilities, and that
the diagnostic information may be used
for any purpose. See SYNC™ (page 368).
Event Data Recording
This vehicle is equipped with an event
data recorder. The main purpose of an
event data recorder is to record, in
certain crash or near crash-like
situations, such as an airbag
deployment or hitting a road obstacle;
this data will assist in understanding
how a vehicle
’s systems performed.
The event data recorder is designed to
record data related to vehicle dynamics
and safety systems for a short period
of time, typically 30 seconds or less.
The event data recorder in this vehicle
is designed to record such data as:
• How various systems in your vehicle
were operating;
• Whether or not the driver and
passenger safety belts were
buckled/fastened;
• How far (if at all) the driver was
depressing the accelerator and/or
the brake pedal; and
9
Explorer (TUB), enUSA, First Printing Introduction E139213 E167012 E138639
Page 41 of 541
Deactivating and Activating the
Belt-Minder Feature
WARNING
While the system allows you to
switch this feature off, the intent of
the system is to remind you to wear
your safety belt to improve your chance to
survive an accident. We recommend you
leave the system switched on for yourself
and others who may use the vehicle. Note:
The driver and front passenger
warnings switch on and off independently.
When you perform this procedure for one
seating position, do not buckle the other
position as this will terminate the process.
Read Steps 1–4 thoroughly before
proceeding with the programming
procedure.
Before following the procedure, make sure
that:
• The parking brake is set.
• The transmission is in park (P) or
neutral (N).
• The ignition is off.
• The driver and front passenger safety
belts are unbuckled.
1. Switch the ignition on. Do not start the
vehicle.
2. Wait until the safety belt warning light turns off (about 1 minute). After Step
2, wait an additional 5 seconds before
proceeding with Step 3. Once you start
Step 3, you must complete the
procedure within 20 seconds.
3. For the seating position you are switching off, buckle then unbuckle the
safety belt three times at a moderate
speed, ending in the unbuckled state.
After Step 3, the safety belt warning
light turns on. 4. While the safety belt warning light is
on, buckle and then unbuckle the
safety belt. After Step 4, the safety belt
warning light flashes for confirmation.
• This will switch the feature off for that
seating position if it is currently on.
• This will switch the feature on for that
seating position if it is currently off.
CHILD RESTRAINT AND
SAFETY BELT MAINTENANCE
Inspect the vehicle safety belts and child
safety seat systems periodically to make
sure they work properly and are not
damaged. Inspect the vehicle and child
seat safety belts to make sure there are no
nicks, tears or cuts. Replace if necessary.
All vehicle safety belt assemblies, including
retractors, buckles, front safety belt buckle
assemblies, buckle support assemblies
(slide bar-if equipped), shoulder belt
height adjusters (if equipped), shoulder
belt guide on seat back (if equipped), rear
inflatable safety belts (if equipped), child
safety seat LATCH and tether anchors, and
attaching hardware, should be inspected
after a crash. Read the child restraint
manufacturer's instructions for additional
inspection and maintenance information
specific to the child restraint.
We recommend that all safety belt
assemblies in use in vehicles involved in a
crash be replaced. However, if the crash
was minor and an authorized dealer finds
that the belts do not show damage and
continue to operate properly, they do not
need to be replaced. Safety belt
assemblies not in use during a crash should
also be inspected and replaced if either
damage or improper operation is noted.
Properly care for safety belts. See
Cleaning the Interior (page 302).
38
Explorer (TUB), enUSA, First Printing Safety Belts
Page 56 of 541
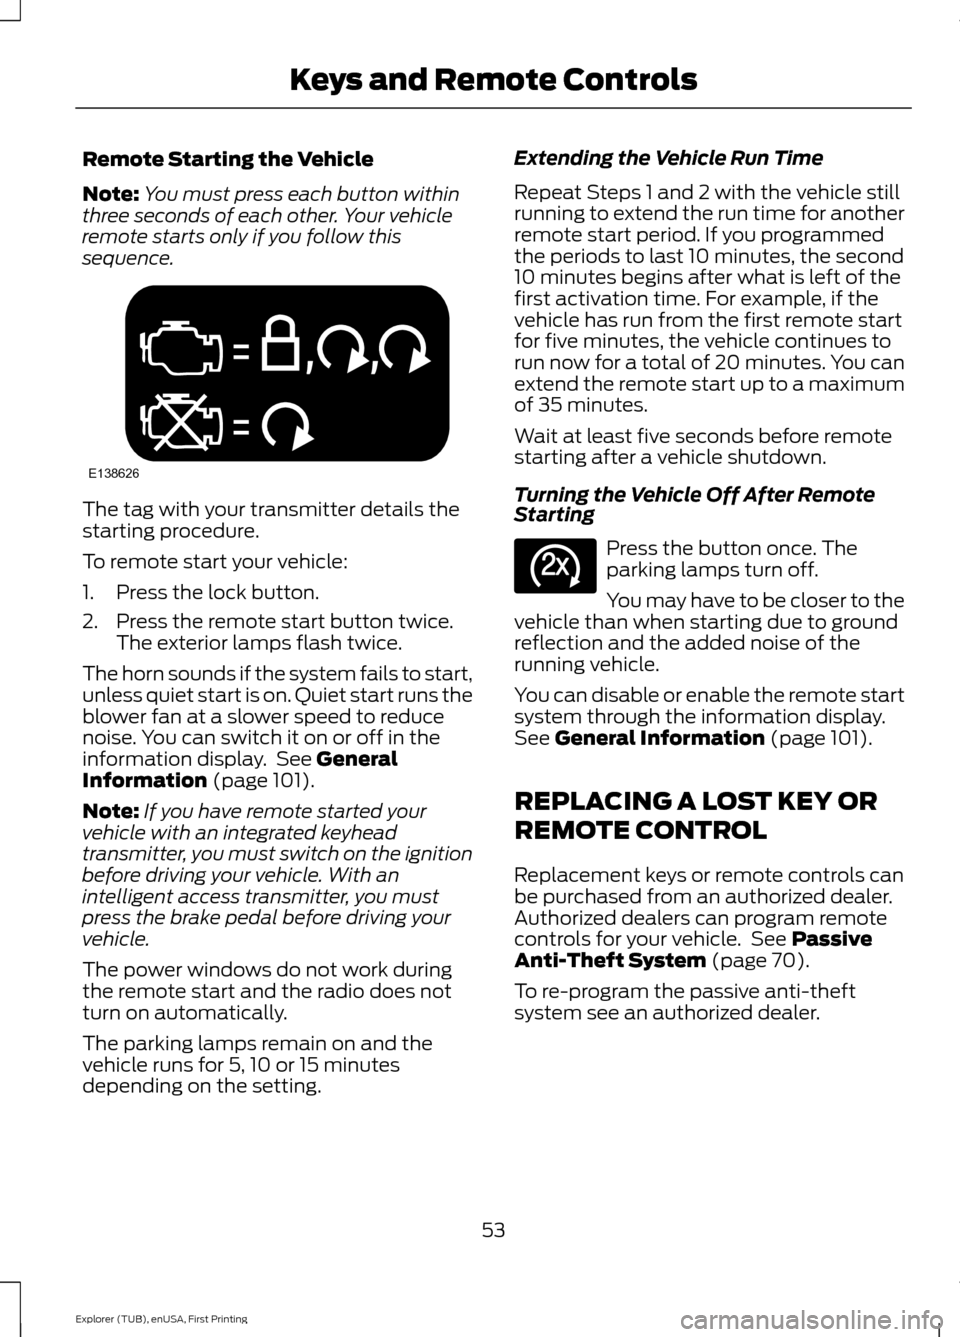
Remote Starting the Vehicle
Note:
You must press each button within
three seconds of each other. Your vehicle
remote starts only if you follow this
sequence. The tag with your transmitter details the
starting procedure.
To remote start your vehicle:
1. Press the lock button.
2. Press the remote start button twice.
The exterior lamps flash twice.
The horn sounds if the system fails to start,
unless quiet start is on. Quiet start runs the
blower fan at a slower speed to reduce
noise. You can switch it on or off in the
information display. See General
Information (page 101).
Note: If you have remote started your
vehicle with an integrated keyhead
transmitter, you must switch on the ignition
before driving your vehicle. With an
intelligent access transmitter, you must
press the brake pedal before driving your
vehicle.
The power windows do not work during
the remote start and the radio does not
turn on automatically.
The parking lamps remain on and the
vehicle runs for 5, 10 or 15 minutes
depending on the setting. Extending the Vehicle Run Time
Repeat Steps 1 and 2 with the vehicle still
running to extend the run time for another
remote start period. If you programmed
the periods to last 10 minutes, the second
10 minutes begins after what is left of the
first activation time. For example, if the
vehicle has run from the first remote start
for five minutes, the vehicle continues to
run now for a total of 20 minutes. You can
extend the remote start up to a maximum
of 35 minutes.
Wait at least five seconds before remote
starting after a vehicle shutdown.
Turning the Vehicle Off After Remote
Starting
Press the button once. The
parking lamps turn off.
You may have to be closer to the
vehicle than when starting due to ground
reflection and the added noise of the
running vehicle.
You can disable or enable the remote start
system through the information display.
See
General Information (page 101).
REPLACING A LOST KEY OR
REMOTE CONTROL
Replacement keys or remote controls can
be purchased from an authorized dealer.
Authorized dealers can program remote
controls for your vehicle. See
Passive
Anti-Theft System (page 70).
To re-program the passive anti-theft
system see an authorized dealer.
53
Explorer (TUB), enUSA, First Printing Keys and Remote ControlsE138626 E138625
Page 86 of 541
Type 1 - Conventional (Non-
Configurable)
The daytime running lamps turn on when:
1. The ignition is switched to the on
position.
2. The transmission is not in park (P) for vehicles with automatic transmissions
or the parking brake is released for
vehicles with manual transmissions.
3. The lighting control is in the off, parking
lamp or autolamps positions.
Type 2 - Configurable
Switch the daytime running lamps on or
off using the information display controls.
See Information Displays (page 101).
The daytime running lamps turn on when:
1. They are switched on in the information
display. See
Information Displays
(page 101).
2. The ignition is switched to the on position.
3. The transmission is not in park (P) for vehicles with automatic transmissions
or the parking brake is released for
vehicles with manual transmissions.
4. The lighting control is in the autolamps
position.
5. The lighting control sensor detects daylight, and the headlamps or parking
lamps are off.
The other lighting control switch positions
do not activate the daytime running lamps,
and you can use them to temporarily
override autolamp control.
When switched off in the information
display, the daytime running lamps are off
in all lighting control switch positions. AUTOMATIC HIGH BEAM
CONTROL
(If Equipped)
The system automatically turns on the high
beams if it is dark enough and no other
traffic is present. When it detects the
headlights of an approaching vehicle, the
tail lamps of the preceding vehicle or street
lighting, the system turns off the high
beams before they distract other drivers.
The low beams remain on.
Note: If it appears that automatic high
beam is not functioning properly, check the
windshield in front of the camera for a
blockage. A clear view of the road is required
for proper system operation. Make sure that
authorized personnel repair any windshield
damage in the area of the camera's field of
view.
Note: If the system detects a blockage such
as bird droppings, bug splatter, snow or ice,
and you do not observe changes, the system
may go into low beam mode until you clear
the blockage. A message may also appear
in the information display noting the front
camera is blocked.
Note: Typical road dust, dirt and water
spots do not affect the performance of the
automatic high beam control. However, in
cold or inclement weather conditions, you
may notice a decrease in the availability of
the automatic high beam control, especially
at start up. If you want to change the beam
state independently of the system, you may
switch the high beams on or off using the
lighting control switch. Automatic high
beam control resumes when conditions are
correct.
Note: Using much larger tires or equipping
vehicle accessories such as snowplows can
modify your vehicle's ride height and
degrade automatic high beam control
performance.
83
Explorer (TUB), enUSA, First Printing Lighting
Page 100 of 541
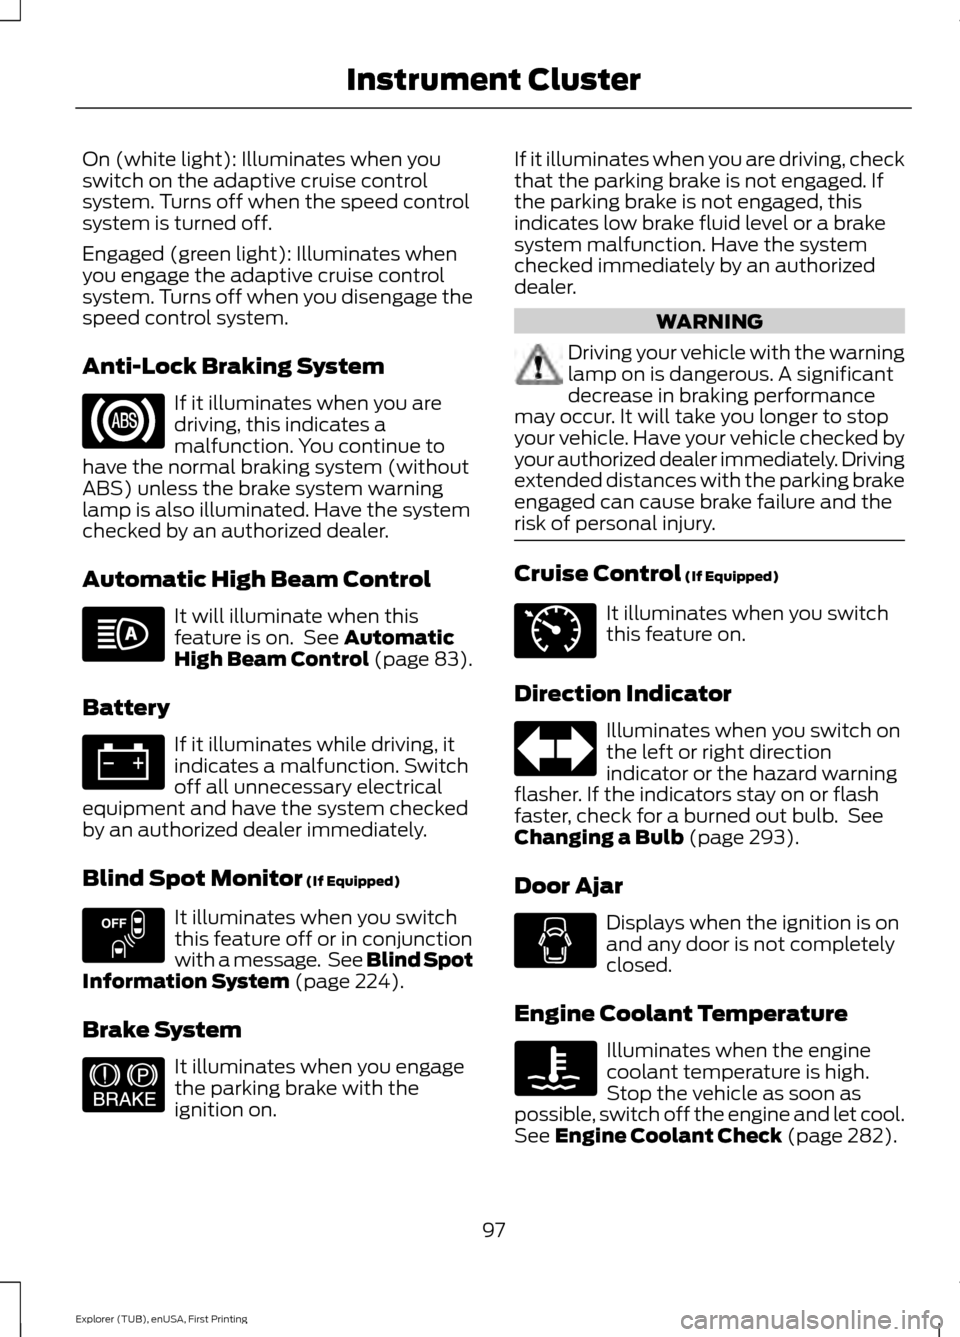
On (white light): Illuminates when you
switch on the adaptive cruise control
system. Turns off when the speed control
system is turned off.
Engaged (green light): Illuminates when
you engage the adaptive cruise control
system. Turns off when you disengage the
speed control system.
Anti-Lock Braking System
If it illuminates when you are
driving, this indicates a
malfunction. You continue to
have the normal braking system (without
ABS) unless the brake system warning
lamp is also illuminated. Have the system
checked by an authorized dealer.
Automatic High Beam Control It will illuminate when this
feature is on. See Automatic
High Beam Control (page 83).
Battery If it illuminates while driving, it
indicates a malfunction. Switch
off all unnecessary electrical
equipment and have the system checked
by an authorized dealer immediately.
Blind Spot Monitor
(If Equipped) It illuminates when you switch
this feature off or in conjunction
with a message. See Blind Spot
Information System
(page 224).
Brake System It illuminates when you engage
the parking brake with the
ignition on. If it illuminates when you are driving, check
that the parking brake is not engaged. If
the parking brake is not engaged, this
indicates low brake fluid level or a brake
system malfunction. Have the system
checked immediately by an authorized
dealer. WARNING
Driving your vehicle with the warning
lamp on is dangerous. A significant
decrease in braking performance
may occur. It will take you longer to stop
your vehicle. Have your vehicle checked by
your authorized dealer immediately. Driving
extended distances with the parking brake
engaged can cause brake failure and the
risk of personal injury. Cruise Control
(If Equipped)
It illuminates when you switch
this feature on.
Direction Indicator Illuminates when you switch on
the left or right direction
indicator or the hazard warning
flasher. If the indicators stay on or flash
faster, check for a burned out bulb. See
Changing a Bulb
(page 293).
Door Ajar Displays when the ignition is on
and any door is not completely
closed.
Engine Coolant Temperature Illuminates when the engine
coolant temperature is high.
Stop the vehicle as soon as
possible, switch off the engine and let cool.
See
Engine Coolant Check (page 282).
97
Explorer (TUB), enUSA, First Printing Instrument Cluster E151262 E144522 E71340
Page 103 of 541
AUDIBLE WARNINGS AND
INDICATORS
Key in Ignition Warning Chime
Sounds when you open the driver's door
and you have left the key in the ignition.
Engine On Warning Chime
A warning chime will sound when any door
is opened if the vehicle exceeds a relatively
low speed.
Keyless Warning Alert (If Equipped)
Sounds the horn twice when you exit the
vehicle and the keyless vehicle is in RUN,
indicating the vehicle is still on.
Headlamps On Warning Chime
Sounds when you remove the key from the
ignition and open the driver's door and you
have left the headlamps or parking lamps
on.
Parking Brake On Warning Chime
Sounds when you have left the parking
brake on and drive your vehicle. If the
warning chime remains on after you have
released the parking brake, have the
system checked by your authorized dealer
immediately.
Automatic Transmission Warning
Chime
Sounds when you have not moved the
transmission selector lever to position
P.
A message will be shown in the display.
100
Explorer (TUB), enUSA, First Printing Instrument Cluster
Page 122 of 541
Brake System
Action
Message
The brake fluid level is low. Check the brake system immedi-ately. See Brake Fluid Check (page 288).
Brake Fluid Level LOW
The brake system needs servicing. Stop the vehicle in a safeplace. Contact an authorized dealer.
Check Brake System
The parking brake is set, the engine is running and you drive
your vehicle more than 3 mph (5 km/h). If the warning stays
on after you release the parking brake, contact an authorized dealer as soon as possible.
Park Brake Engaged
Collision Warning System Action
Message
There is a system malfunction with the collision warning
system. The system is disabled. Contact an authorized dealer as soon as possible.
Collision Warning
Malfunction
The collision warning system radar is blocked because of poorradar visibility due to bad weather or ice/mud/water in frontof the radar. Driver can typically clean the sensor to resolve. Contact an authorized dealer as soon as possible.
Collision Warning Not
Available Sensor
Blocked See Manual
There is a system malfunction with the collision warning
system. The system is disabled. Contact an authorized dealer as soon as possible.
Collision Warning Not
Available
Doors and Locks Action
Message
The driver door is not completely closed.
Driver Door Ajar
The passenger door is not completely closed.
Passenger Door Ajar
The rear left door is not completely closed.
Rear Left Door Ajar
The rear right door is not completely closed.
Rear Right Door Ajar
The liftgate is not completely closed.
Liftgate Ajar
119
Explorer (TUB), enUSA, First Printing Information Displays
Page 127 of 541
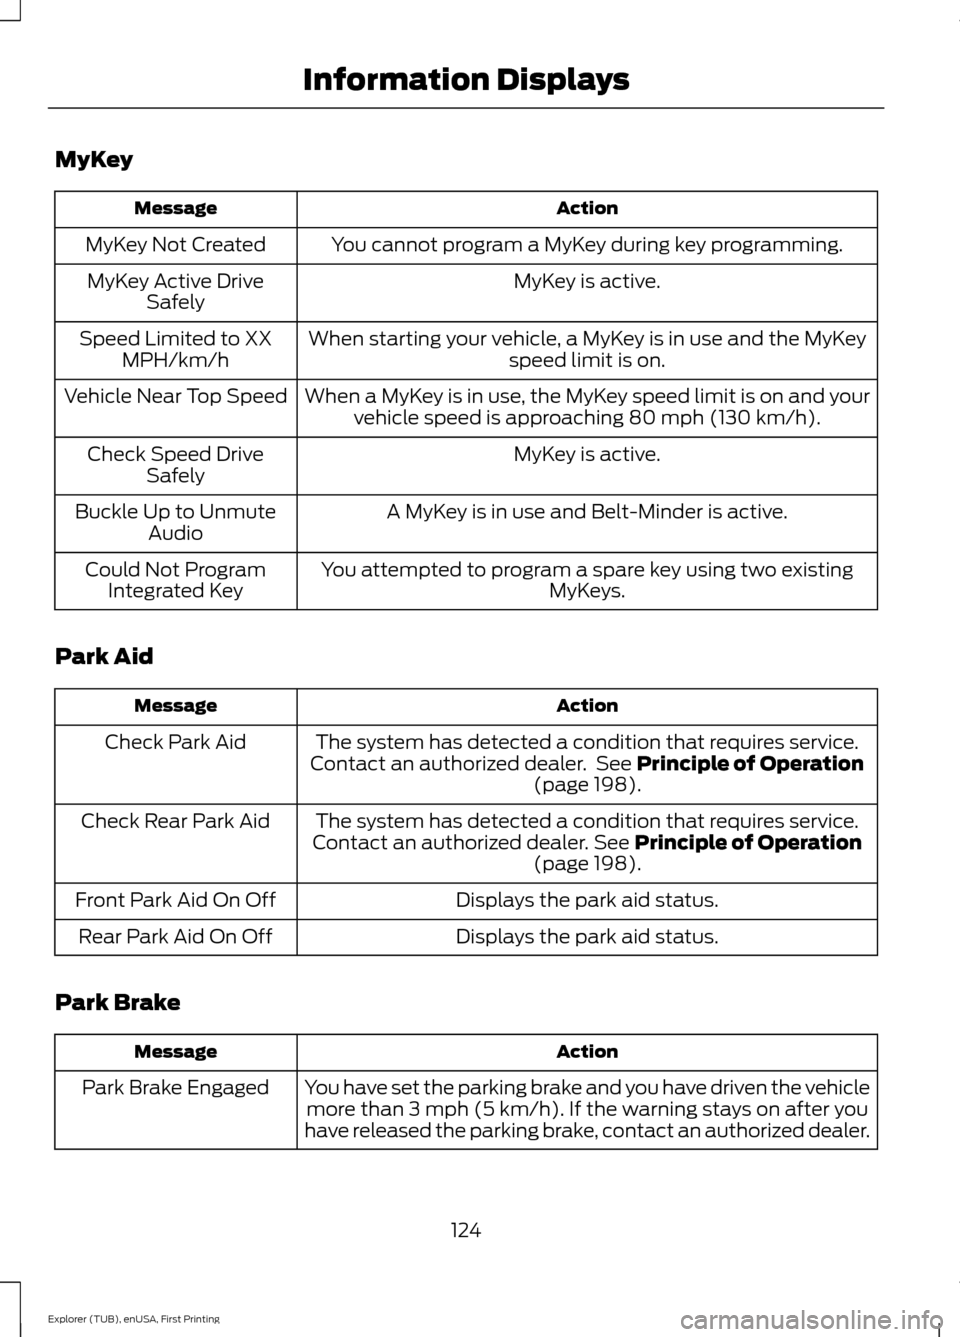
MyKey
Action
Message
You cannot program a MyKey during key programming.
MyKey Not Created
MyKey is active.
MyKey Active Drive
Safely
When starting your vehicle, a MyKey is in use and the MyKey speed limit is on.
Speed Limited to XX
MPH/km/h
When a MyKey is in use, the MyKey speed limit is on and yourvehicle speed is approaching 80 mph (130 km/h).
Vehicle Near Top Speed
MyKey is active.
Check Speed Drive
Safely
A MyKey is in use and Belt-Minder is active.
Buckle Up to Unmute
Audio
You attempted to program a spare key using two existing MyKeys.
Could Not Program
Integrated Key
Park Aid Action
Message
The system has detected a condition that requires service.
Contact an authorized dealer. See Principle of Operation
(page 198).
Check Park Aid
The system has detected a condition that requires service.
Contact an authorized dealer.
See Principle of Operation
(page 198).
Check Rear Park Aid
Displays the park aid status.
Front Park Aid On Off
Displays the park aid status.
Rear Park Aid On Off
Park Brake Action
Message
You have set the parking brake and you have driven the vehiclemore than 3 mph (5 km/h). If the warning stays on after you
have released the parking brake, contact an authorized dealer.
Park Brake Engaged
124
Explorer (TUB), enUSA, First Printing Information Displays
Page 169 of 541
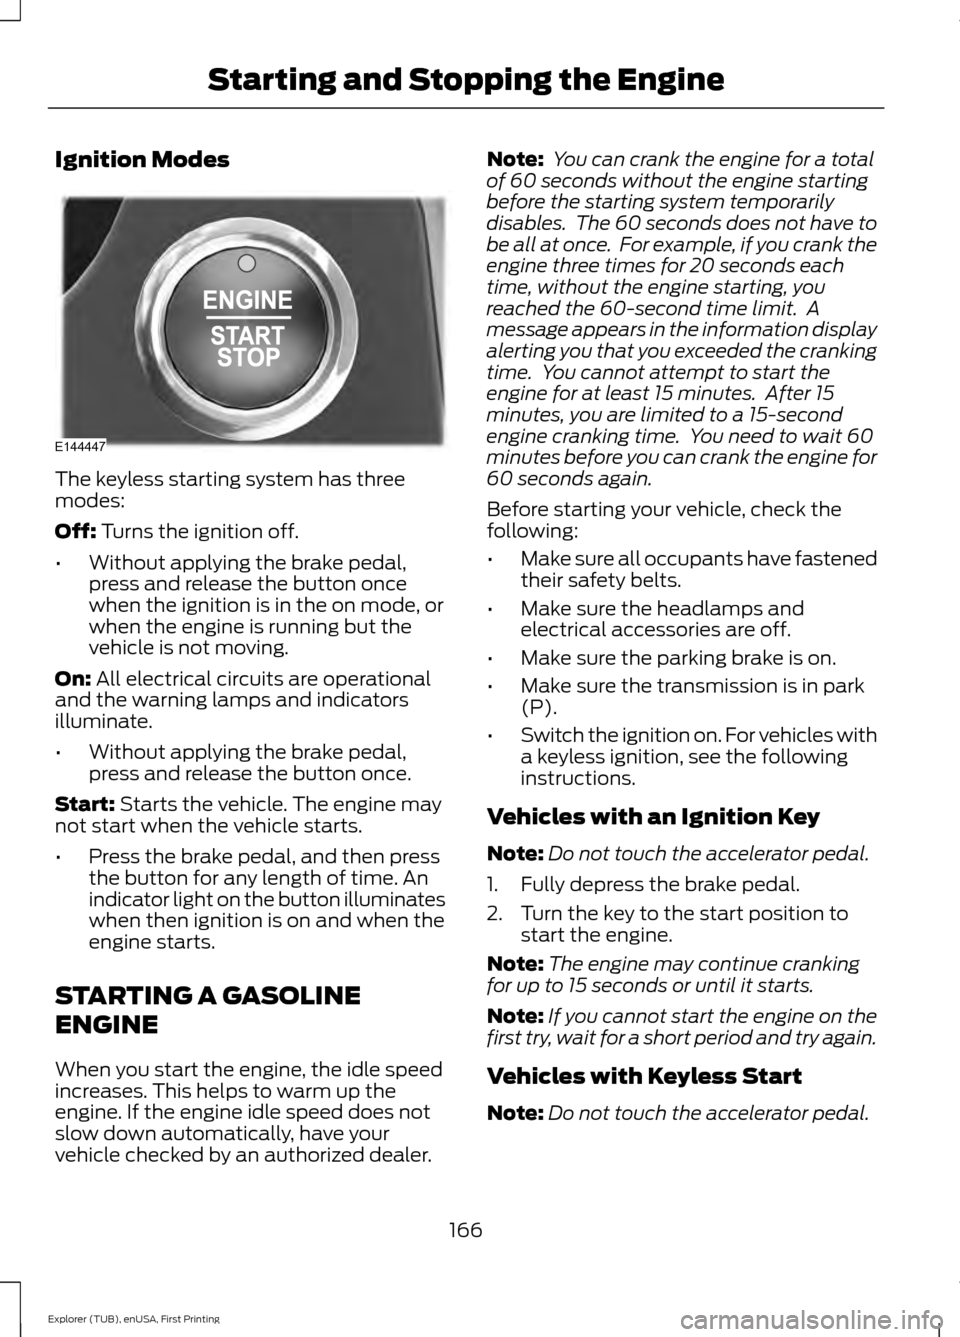
Ignition Modes
The keyless starting system has three
modes:
Off: Turns the ignition off.
• Without applying the brake pedal,
press and release the button once
when the ignition is in the on mode, or
when the engine is running but the
vehicle is not moving.
On:
All electrical circuits are operational
and the warning lamps and indicators
illuminate.
• Without applying the brake pedal,
press and release the button once.
Start:
Starts the vehicle. The engine may
not start when the vehicle starts.
• Press the brake pedal, and then press
the button for any length of time. An
indicator light on the button illuminates
when then ignition is on and when the
engine starts.
STARTING A GASOLINE
ENGINE
When you start the engine, the idle speed
increases. This helps to warm up the
engine. If the engine idle speed does not
slow down automatically, have your
vehicle checked by an authorized dealer. Note:
You can crank the engine for a total
of 60 seconds without the engine starting
before the starting system temporarily
disables. The 60 seconds does not have to
be all at once. For example, if you crank the
engine three times for 20 seconds each
time, without the engine starting, you
reached the 60-second time limit. A
message appears in the information display
alerting you that you exceeded the cranking
time. You cannot attempt to start the
engine for at least 15 minutes. After 15
minutes, you are limited to a 15-second
engine cranking time. You need to wait 60
minutes before you can crank the engine for
60 seconds again.
Before starting your vehicle, check the
following:
• Make sure all occupants have fastened
their safety belts.
• Make sure the headlamps and
electrical accessories are off.
• Make sure the parking brake is on.
• Make sure the transmission is in park
(P).
• Switch the ignition on. For vehicles with
a keyless ignition, see the following
instructions.
Vehicles with an Ignition Key
Note: Do not touch the accelerator pedal.
1. Fully depress the brake pedal.
2. Turn the key to the start position to start the engine.
Note: The engine may continue cranking
for up to 15 seconds or until it starts.
Note: If you cannot start the engine on the
first try, wait for a short period and try again.
Vehicles with Keyless Start
Note: Do not touch the accelerator pedal.
166
Explorer (TUB), enUSA, First Printing Starting and Stopping the EngineE144447