ECO mode FORD EXPLORER 2017 5.G User Guide
[x] Cancel search | Manufacturer: FORD, Model Year: 2017, Model line: EXPLORER, Model: FORD EXPLORER 2017 5.GPages: 541, PDF Size: 6.81 MB
Page 62 of 541
LOCKING AND UNLOCKING
You can use the power door lock control
or the remote control to lock and unlock
your vehicle.
Power Door Locks
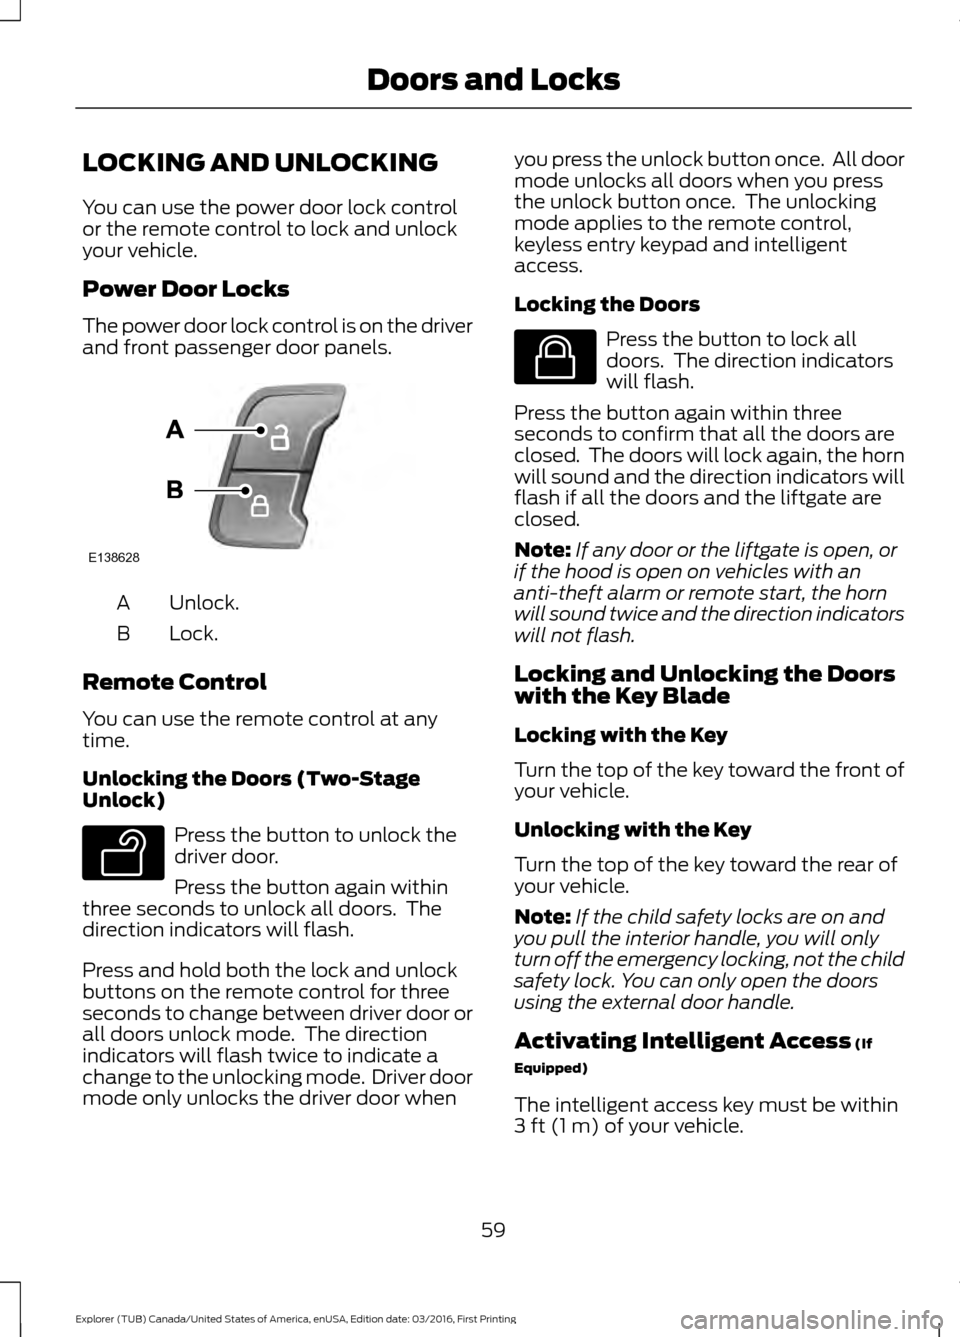
The power door lock control is on the driver
and front passenger door panels.
Unlock.
A
Lock.
B
Remote Control
You can use the remote control at any
time.
Unlocking the Doors (Two-Stage
Unlock) Press the button to unlock the
driver door.
Press the button again within
three seconds to unlock all doors. The
direction indicators will flash.
Press and hold both the lock and unlock
buttons on the remote control for three
seconds to change between driver door or
all doors unlock mode. The direction
indicators will flash twice to indicate a
change to the unlocking mode. Driver door
mode only unlocks the driver door when you press the unlock button once. All door
mode unlocks all doors when you press
the unlock button once. The unlocking
mode applies to the remote control,
keyless entry keypad and intelligent
access.
Locking the Doors
Press the button to lock all
doors. The direction indicators
will flash.
Press the button again within three
seconds to confirm that all the doors are
closed. The doors will lock again, the horn
will sound and the direction indicators will
flash if all the doors and the liftgate are
closed.
Note: If any door or the liftgate is open, or
if the hood is open on vehicles with an
anti-theft alarm or remote start, the horn
will sound twice and the direction indicators
will not flash.
Locking and Unlocking the Doors
with the Key Blade
Locking with the Key
Turn the top of the key toward the front of
your vehicle.
Unlocking with the Key
Turn the top of the key toward the rear of
your vehicle.
Note: If the child safety locks are on and
you pull the interior handle, you will only
turn off the emergency locking, not the child
safety lock. You can only open the doors
using the external door handle.
Activating Intelligent Access (If
Equipped)
The intelligent access key must be within
3 ft (1 m)
of your vehicle.
59
Explorer (TUB) Canada/United States of America, enUSA, Edition date: 03/2016, First Printing Doors and LocksE138628 E138629 E138623
Page 70 of 541
Recalling Memory Positions (If
Equipped)
The programmed entry codes recall driver
memory positions as follows:
•
Entry code 1 recalls driver 1 memory
positions.
• Entry code 2 recalls driver 2 memory
positions.
• Entry code 3 recalls driver 3 memory
positions.
Note: Personal entry codes 4 and 5 will not
recall memory positions.
Erasing a Personal Code
1. Enter the factory-set five-digit code.
2. Press and release 1·2 on the keypad
within five seconds.
3. Press and hold
1·2 for two seconds.
You must do this within five seconds
of completing step 2.
All personal codes erase and only the
factory-set five-digit code works.
Anti-Scan Feature
The keypad goes into an anti-scan mode
if you enter the wrong code seven times.
This mode turns off the keypad for one
minute and the keypad lamp flashes.
The anti-scan feature turns off after any
of the following occur:
• One minute of keypad inactivity.
• You press the unlock button on the
remote control.
• You switch your vehicle on.
• You unlock the vehicle using intelligent
access. Locking and Unlocking the Doors
Locking All Doors
Press and hold 7·8 and 9·0 on the keypad
simultaneously with the driver door closed.
You do not need to enter a code first.
Unlocking All Doors
Enter the factory-set code or your personal
code, then press 3·4 on the keypad within
five seconds.
Unlocking Only the Driver Door
Enter the factory-set or your personal
five-digit code. You must press each
number within five seconds of each other.
The interior lamps illuminate.
Note:
All doors unlock if the two-stage
unlocking feature is turned off. See Locking
and Unlocking (page 59).
67
Explorer (TUB) Canada/United States of America, enUSA, Edition date: 03/2016, First Printing Doors and Locks
Page 82 of 541
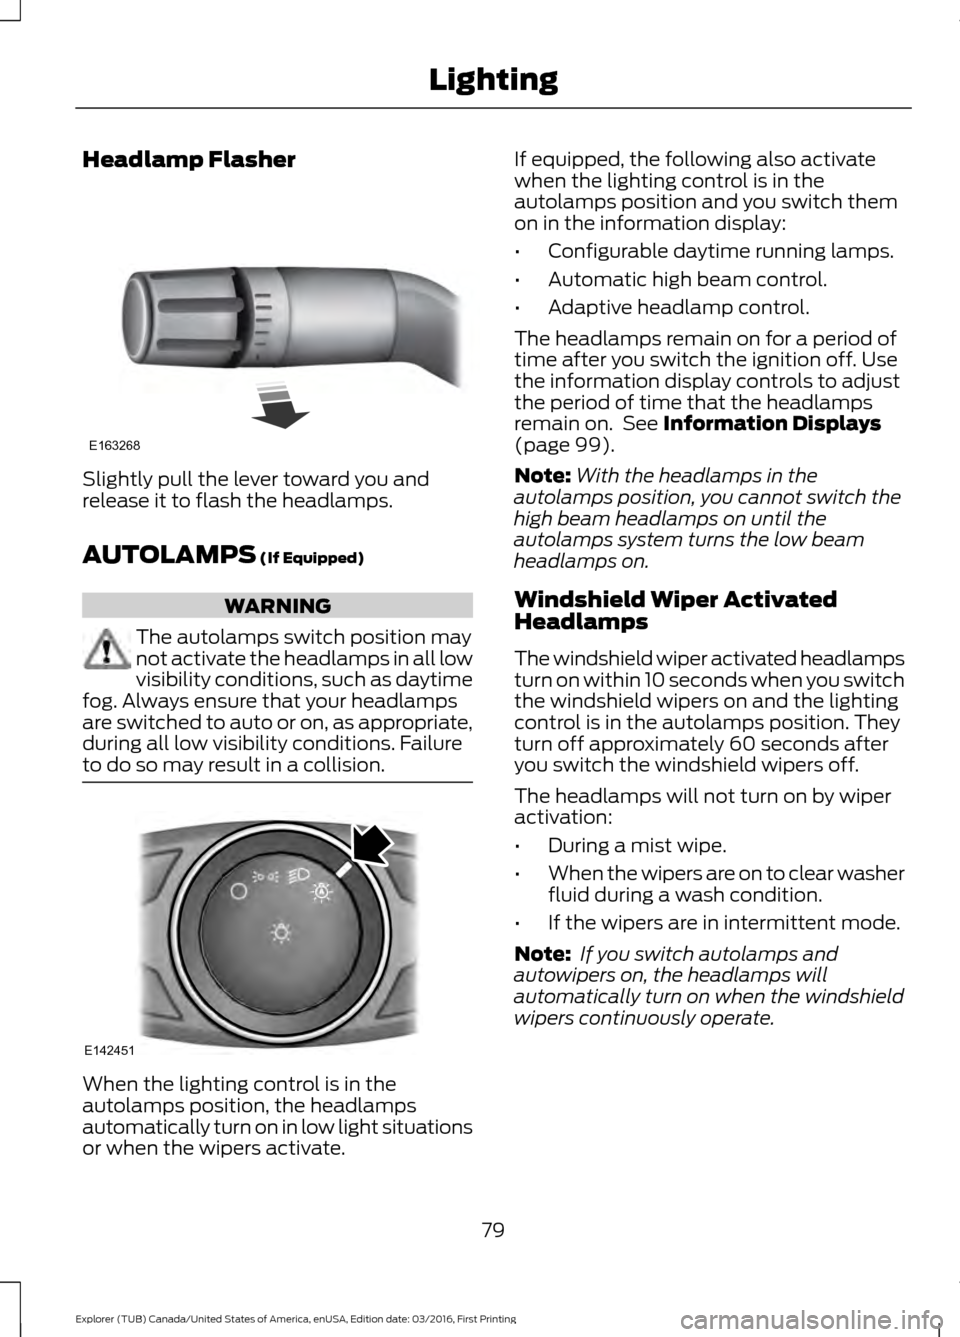
Headlamp Flasher
Slightly pull the lever toward you and
release it to flash the headlamps.
AUTOLAMPS (If Equipped)
WARNING
The autolamps switch position may
not activate the headlamps in all low
visibility conditions, such as daytime
fog. Always ensure that your headlamps
are switched to auto or on, as appropriate,
during all low visibility conditions. Failure
to do so may result in a collision. When the lighting control is in the
autolamps position, the headlamps
automatically turn on in low light situations
or when the wipers activate. If equipped, the following also activate
when the lighting control is in the
autolamps position and you switch them
on in the information display:
•
Configurable daytime running lamps.
• Automatic high beam control.
• Adaptive headlamp control.
The headlamps remain on for a period of
time after you switch the ignition off. Use
the information display controls to adjust
the period of time that the headlamps
remain on. See
Information Displays
(page 99).
Note: With the headlamps in the
autolamps position, you cannot switch the
high beam headlamps on until the
autolamps system turns the low beam
headlamps on.
Windshield Wiper Activated
Headlamps
The windshield wiper activated headlamps
turn on within 10 seconds when you switch
the windshield wipers on and the lighting
control is in the autolamps position. They
turn off approximately 60 seconds after
you switch the windshield wipers off.
The headlamps will not turn on by wiper
activation:
• During a mist wipe.
• When the wipers are on to clear washer
fluid during a wash condition.
• If the wipers are in intermittent mode.
Note: If you switch autolamps and
autowipers on, the headlamps will
automatically turn on when the windshield
wipers continuously operate.
79
Explorer (TUB) Canada/United States of America, enUSA, Edition date: 03/2016, First Printing LightingE163268 E142451
Page 97 of 541
Engine Coolant Temperature
Gauge
Shows the temperature of the engine
coolant. At normal operating temperature,
the needle will remain in the center section.
If the needle enters the red section, the
engine is overheating. Stop the engine,
switch the ignition off and determine the
cause once the engine has cooled down.
Note:
Do not restart the engine until the
cause of the overheating has been resolved. WARNING
Never remove the coolant reservoir
cap while the engine is running or hot.
Fuel Gauge
Note:
The fuel gauge may vary slightly
when your vehicle is moving or on a gradient.
Switch the ignition on. The fuel gauge will
indicate approximately how much fuel is
left in the fuel tank. The arrow adjacent to
the fuel pump symbol indicates on which
side of your vehicle the fuel filler door is
located.
The needle should move toward F when
you refuel your vehicle. If the needle points
to E after adding fuel, this indicates your
vehicle needs service soon.
After refueling some variability in needle
position is normal:
• It may take a short time for the needle
to reach full after leaving the gas
station. This is normal and depends
upon the slope of pavement at the gas
station.
• The fuel amount dispensed into the
tank is a little less or more than the
gauge indicated. This is normal and
depends upon the slope of pavement
at the gas station. •
If the gas station nozzle shuts off
before the tank is full, try a different
gas pump nozzle.
• There is a small reserve left in the tank
when the fuel gauge reaches empty.
Low Fuel Reminder
A low fuel reminder triggers when the
distance to empty reaches 75 miles (120
km), 50 miles (80 km), 25 miles (40 km),
10 miles (20 km) and 0 miles (0 km) .
Variations:
Note: The low fuel warning and
distance-to-empty warning can appear at
different fuel gauge positions depending on
fuel economy conditions. This variation is
normal.
WARNING LAMPS AND
INDICATORS
The following warning lamps and
indicators alert you to a vehicle condition
that may become serious. Some lamps
illuminate when you start your vehicle to
make sure they work. If any lamps remain
on after starting your vehicle, refer to the
respective system warning lamp for further
information.
Note: Some warning indicators appear in
the information display and function the
same as a warning lamp, but do not display
when you start your vehicle.
Adaptive Cruise Control (If Equipped) The speed control system
indicator light changes color to
indicate what mode the system
is in. See Using Adaptive Cruise Control
(page
210).
94
Explorer (TUB) Canada/United States of America, enUSA, Edition date: 03/2016, First Printing Instrument ClusterE144524
Page 100 of 541
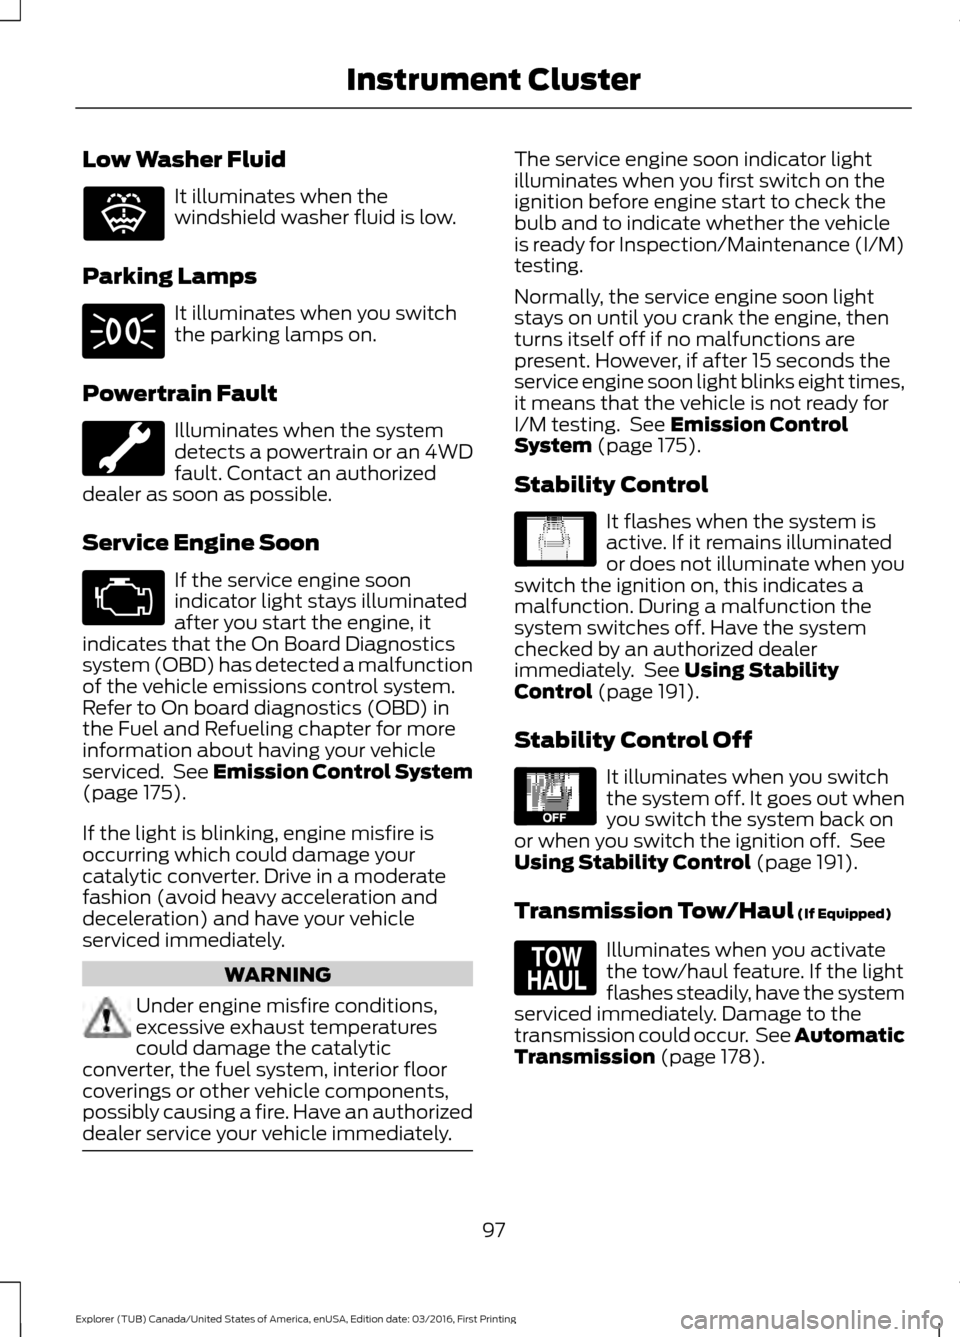
Low Washer Fluid
It illuminates when the
windshield washer fluid is low.
Parking Lamps It illuminates when you switch
the parking lamps on.
Powertrain Fault Illuminates when the system
detects a powertrain or an 4WD
fault. Contact an authorized
dealer as soon as possible.
Service Engine Soon If the service engine soon
indicator light stays illuminated
after you start the engine, it
indicates that the On Board Diagnostics
system (OBD) has detected a malfunction
of the vehicle emissions control system.
Refer to On board diagnostics (OBD) in
the Fuel and Refueling chapter for more
information about having your vehicle
serviced. See Emission Control System
(page 175).
If the light is blinking, engine misfire is
occurring which could damage your
catalytic converter. Drive in a moderate
fashion (avoid heavy acceleration and
deceleration) and have your vehicle
serviced immediately. WARNING
Under engine misfire conditions,
excessive exhaust temperatures
could damage the catalytic
converter, the fuel system, interior floor
coverings or other vehicle components,
possibly causing a fire. Have an authorized
dealer service your vehicle immediately. The service engine soon indicator light
illuminates when you first switch on the
ignition before engine start to check the
bulb and to indicate whether the vehicle
is ready for Inspection/Maintenance (I/M)
testing.
Normally, the service engine soon light
stays on until you crank the engine, then
turns itself off if no malfunctions are
present. However, if after 15 seconds the
service engine soon light blinks eight times,
it means that the vehicle is not ready for
I/M testing. See
Emission Control
System (page 175).
Stability Control It flashes when the system is
active. If it remains illuminated
or does not illuminate when you
switch the ignition on, this indicates a
malfunction. During a malfunction the
system switches off. Have the system
checked by an authorized dealer
immediately. See
Using Stability
Control (page 191).
Stability Control Off It illuminates when you switch
the system off. It goes out when
you switch the system back on
or when you switch the ignition off. See
Using Stability Control
(page 191).
Transmission Tow/Haul
(If Equipped) Illuminates when you activate
the tow/haul feature. If the light
flashes steadily, have the system
serviced immediately. Damage to the
transmission could occur. See
Automatic
Transmission (page 178).
97
Explorer (TUB) Canada/United States of America, enUSA, Edition date: 03/2016, First Printing Instrument ClusterE132353 E138639 E130458 E161509
Page 104 of 541
•
Distance to Empty - Shows the
approximate distance your vehicle can
travel before running out of fuel.
• Instantaneous Fuel Economy - Shows
a visual graph of your instantaneous
fuel economy along with your Avg MPG
since the function was last reset.
• Average MPG — Shows the average
fuel economy since last reset.
• Fuel History - Shows a bar chart of your
fuel history.
• All Values — Shows all fuel economy
values (DTE, Inst Fuel Econ, Avg Fuel). Note:
You can reset your average fuel
economy by pressing and holding the OK
button on the left hand steering wheel
controls.
Driver Assist
In this mode, you can configure different
driver setting choices.
Note: Some options may appear slightly
different or not at all if the items are
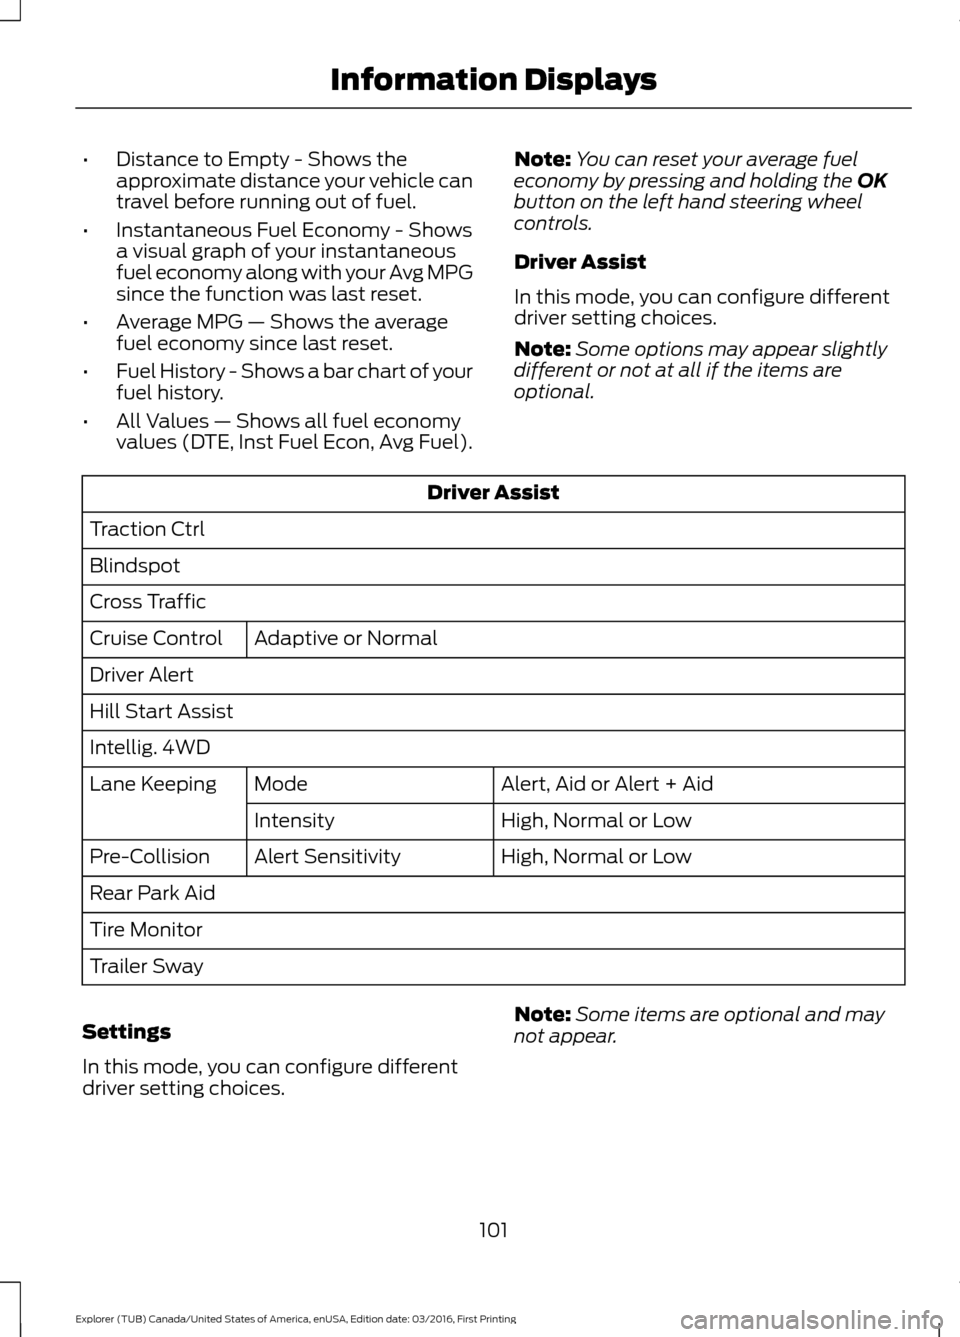
optional. Driver Assist
Traction Ctrl
Blindspot
Cross Traffic Adaptive
or Normal
Cruise Control
Driver Alert
Hill Start Assist
Intellig. 4WD
Alert
, Aid or Alert + Aid
Mode
Lane Keeping
High
, Normal or Low
Intensity
High
, Normal or Low
Alert Sensitivity
Pre-Collision
Rear Park Aid
Tire Monitor
Trailer Sway
Settings
In this mode, you can configure different
driver setting choices. Note:
Some items are optional and may
not appear.
101
Explorer (TUB) Canada/United States of America, enUSA, Edition date: 03/2016, First Printing Information Displays
Page 107 of 541
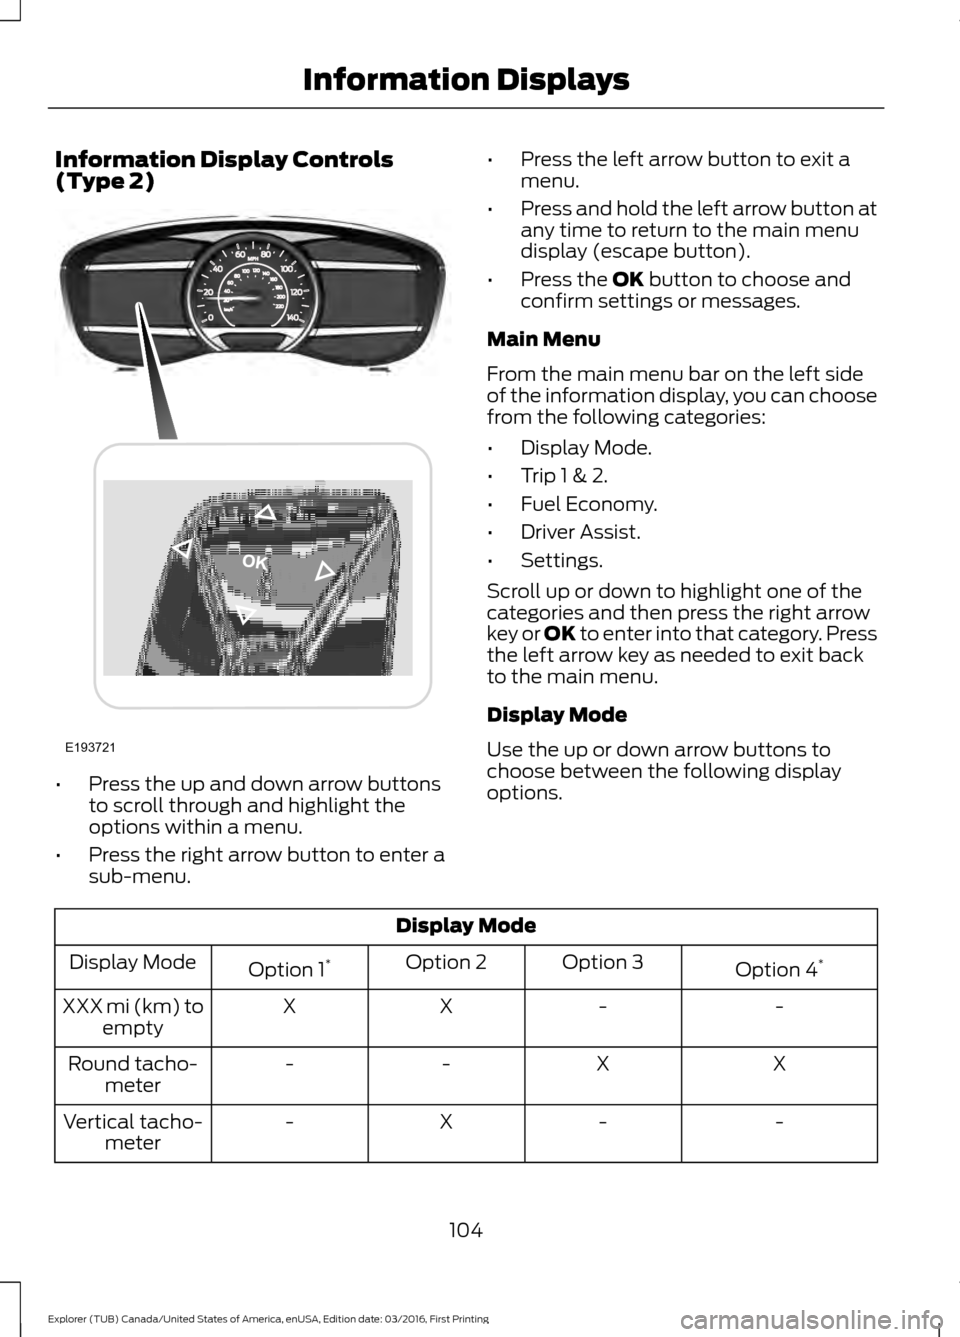
Information Display Controls
(Type 2)
•
Press the up and down arrow buttons
to scroll through and highlight the
options within a menu.
• Press the right arrow button to enter a
sub-menu. •
Press the left arrow button to exit a
menu.
• Press and hold the left arrow button at
any time to return to the main menu
display (escape button).
• Press the OK button to choose and
confirm settings or messages.
Main Menu
From the main menu bar on the left side
of the information display, you can choose
from the following categories:
• Display Mode.
• Trip 1 & 2.
• Fuel Economy.
• Driver Assist.
• Settings.
Scroll up or down to highlight one of the
categories and then press the right arrow
key or OK to enter into that category. Press
the left arrow key as needed to exit back
to the main menu.
Display Mode
Use the up or down arrow buttons to
choose between the following display
options. Display Mode
Option 4*
Option 3
Option 2
Option 1 *
Display Mode
-
-
X
X
XXX mi (km) to
empty
X
X
-
-
Round tacho-
meter
-
-
X
-
Vertical tacho-
meter
104
Explorer (TUB) Canada/United States of America, enUSA, Edition date: 03/2016, First Printing Information DisplaysE193721
Page 108 of 541
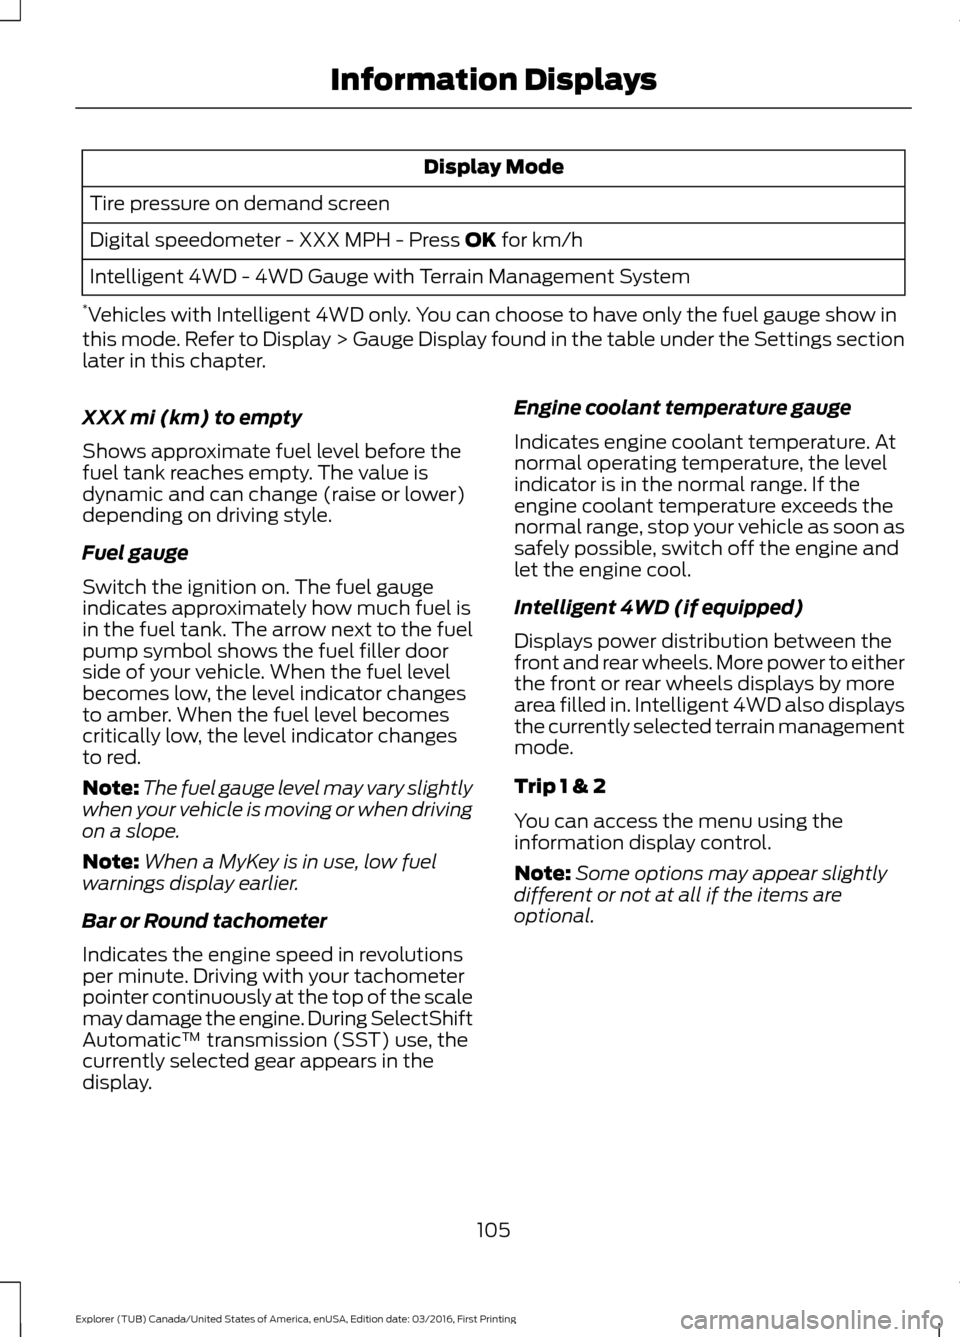
Display Mode
Tire pressure on demand screen
Digital speedometer - XXX MPH - Press OK for km/h
Intelligent 4WD - 4WD Gauge with Terrain Management System
* Vehicles with Intelligent 4WD only. You can choose to have only the fuel gauge show in
this mode. Refer to Display > Gauge Display found in the table under the Settings section
later in this chapter.
XXX mi (km) to empty
Shows approximate fuel level before the
fuel tank reaches empty. The value is
dynamic and can change (raise or lower)
depending on driving style.
Fuel gauge
Switch the ignition on. The fuel gauge
indicates approximately how much fuel is
in the fuel tank. The arrow next to the fuel
pump symbol shows the fuel filler door
side of your vehicle. When the fuel level
becomes low, the level indicator changes
to amber. When the fuel level becomes
critically low, the level indicator changes
to red.
Note: The fuel gauge level may vary slightly
when your vehicle is moving or when driving
on a slope.
Note: When a MyKey is in use, low fuel
warnings display earlier.
Bar or Round tachometer
Indicates the engine speed in revolutions
per minute. Driving with your tachometer
pointer continuously at the top of the scale
may damage the engine. During SelectShift
Automatic ™ transmission (SST) use, the
currently selected gear appears in the
display. Engine coolant temperature gauge
Indicates engine coolant temperature. At
normal operating temperature, the level
indicator is in the normal range. If the
engine coolant temperature exceeds the
normal range, stop your vehicle as soon as
safely possible, switch off the engine and
let the engine cool.
Intelligent 4WD (if equipped)
Displays power distribution between the
front and rear wheels. More power to either
the front or rear wheels displays by more
area filled in. Intelligent 4WD also displays
the currently selected terrain management
mode.
Trip 1 & 2
You can access the menu using the
information display control.
Note:
Some options may appear slightly
different or not at all if the items are
optional.
105
Explorer (TUB) Canada/United States of America, enUSA, Edition date: 03/2016, First Printing Information Displays
Page 109 of 541
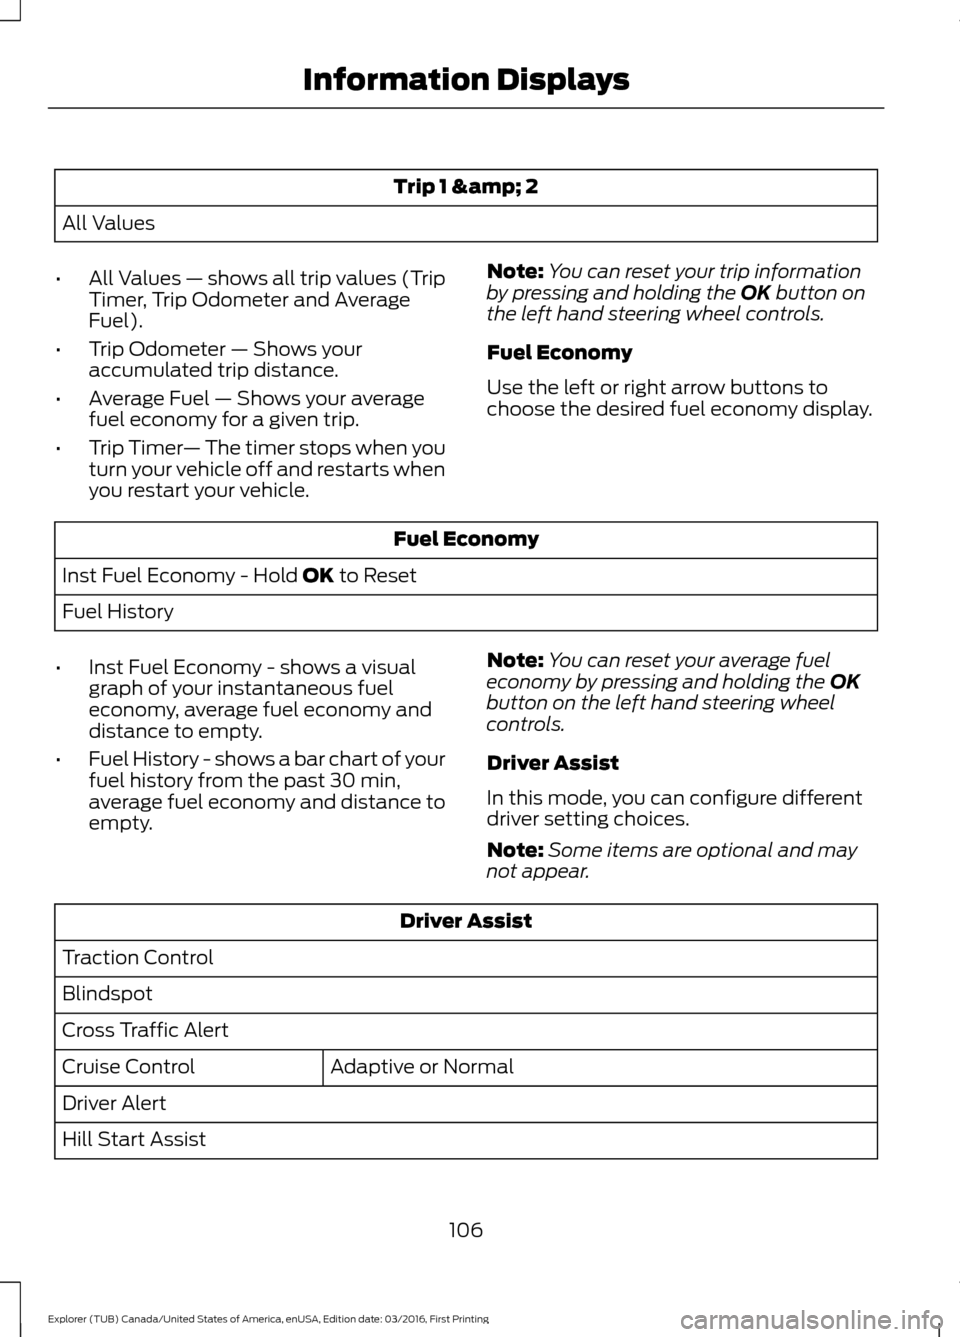
Trip 1 & 2
All Values
• All Values — shows all trip values (Trip
Timer, Trip Odometer and Average
Fuel).
• Trip Odometer — Shows your
accumulated trip distance.
• Average Fuel — Shows your average
fuel economy for a given trip.
• Trip Timer — The timer stops when you
turn your vehicle off and restarts when
you restart your vehicle. Note:
You can reset your trip information
by pressing and holding the OK button on
the left hand steering wheel controls.
Fuel Economy
Use the left or right arrow buttons to
choose the desired fuel economy display. Fuel Economy
Inst Fuel Economy - Hold
OK to Reset
Fuel History
• Inst Fuel Economy - shows a visual
graph of your instantaneous fuel
economy, average fuel economy and
distance to empty.
• Fuel History - shows a bar chart of your
fuel history from the past 30 min,
average fuel economy and distance to
empty. Note:
You can reset your average fuel
economy by pressing and holding the
OK
button on the left hand steering wheel
controls.
Driver Assist
In this mode, you can configure different
driver setting choices.
Note: Some items are optional and may
not appear. Driver Assist
Traction Control
Blindspot
Cross Traffic Alert Adaptive
or Normal
Cruise Control
Driver Alert
Hill Start Assist
106
Explorer (TUB) Canada/United States of America, enUSA, Edition date: 03/2016, First Printing Information Displays
Page 110 of 541
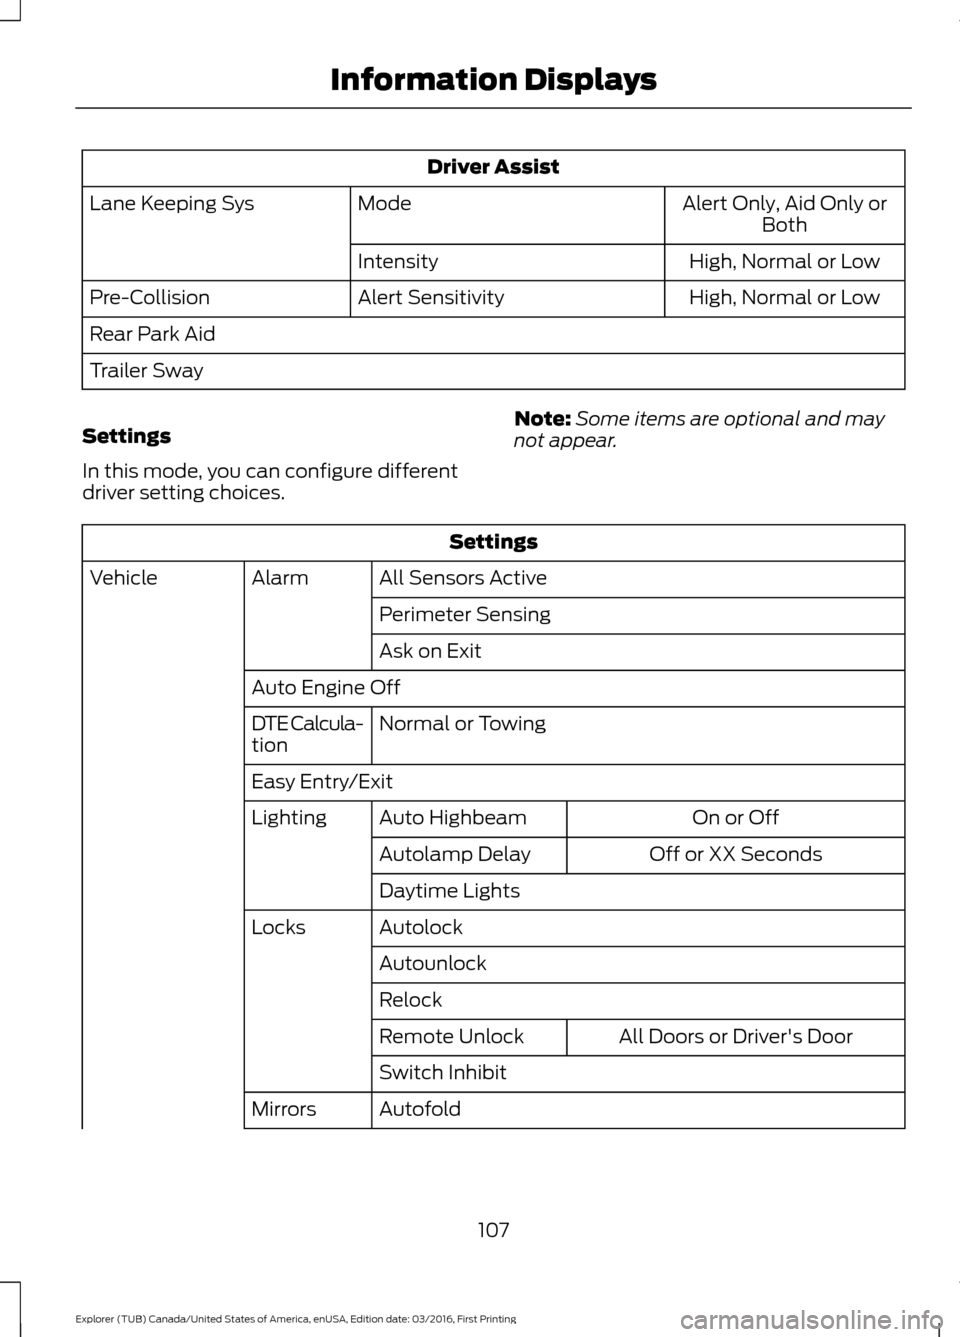
Driver Assist
Alert Only, Aid Only or
Both
Mode
Lane Keeping Sys
High
, Normal or Low
Intensity
High, Normal or Low
Alert Sensitivity
Pre-Collision
Rear Park Aid
Trailer Sway
Settings
In this mode, you can configure different
driver setting choices. Note:
Some items are optional and may
not appear. Settings
All Sensors Active
Alarm
Vehicle
Perimeter Sensing
Ask on Exit
Auto Engine Off Normal
or Towing
DTE Calcula-
tion
Easy Entry/Exit
On or Off
Auto Highbeam
Lighting
Off or XX Seconds
Autolamp Delay
Daytime Lights
Autolock
Locks
Autounlock
Relock All Doors
or Driver's Door
Remote Unlock
Switch Inhibit
Autofold
Mirrors
107
Explorer (TUB) Canada/United States of America, enUSA, Edition date: 03/2016, First Printing Information Displays