FORD EXPLORER 2021 Owners Manual
Manufacturer: FORD, Model Year: 2021, Model line: EXPLORER, Model: FORD EXPLORER 2021Pages: 577, PDF Size: 9.79 MB
Page 321 of 577
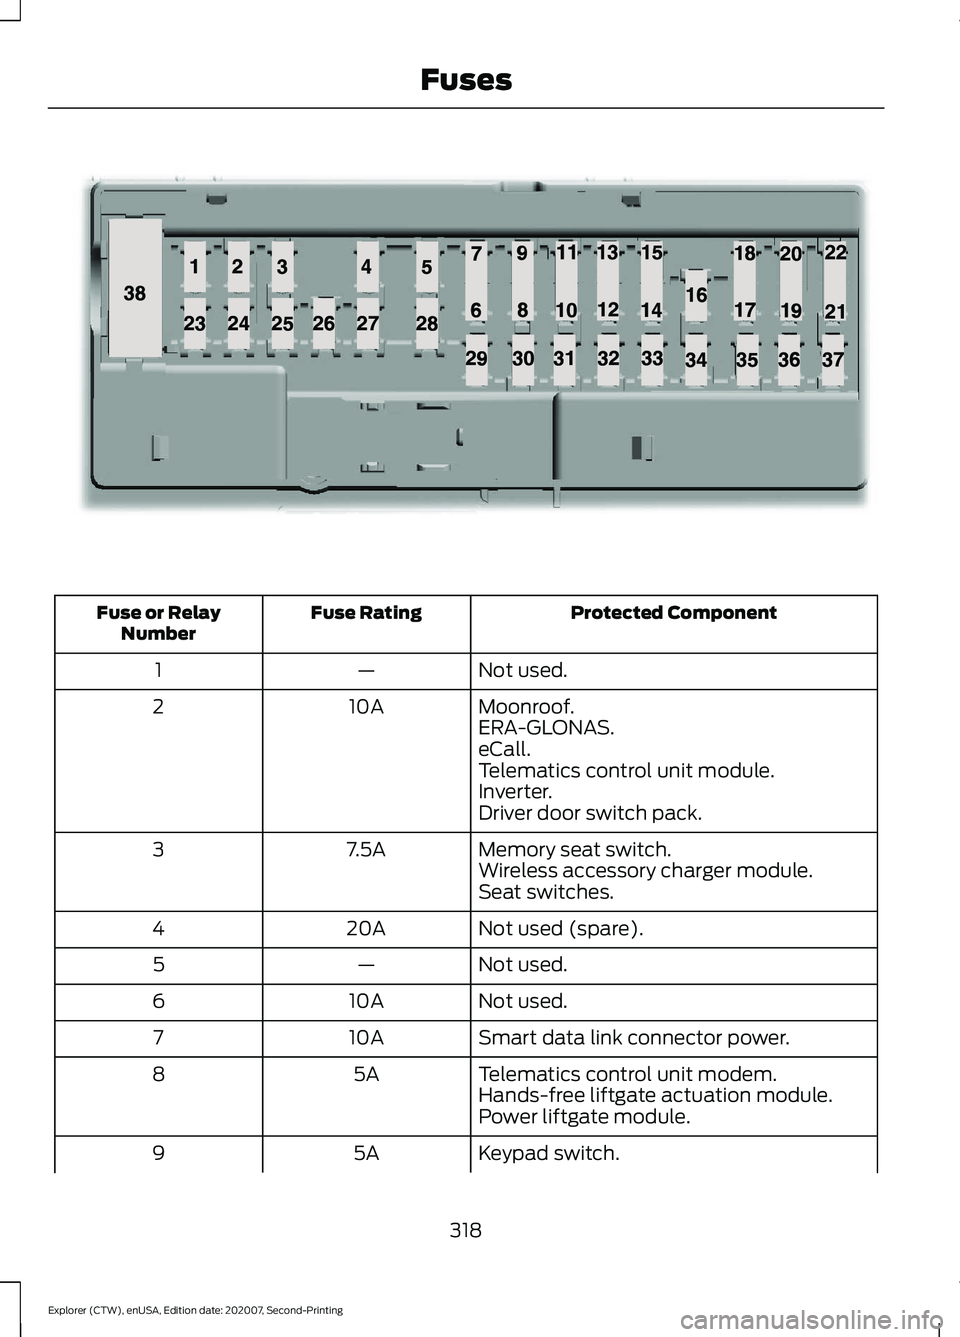
Protected Component
Fuse Rating
Fuse or Relay
Number
Not used.
—
1
Moonroof.
10A
2
ERA-GLONAS.
eCall.
Telematics control unit module.
Inverter.
Driver door switch pack.
Memory seat switch.
7.5A
3
Wireless accessory charger module.
Seat switches.
Not used (spare).
20A
4
Not used.
—
5
Not used.
10A
6
Smart data link connector power.
10A
7
Telematics control unit modem.
5A
8
Hands-free liftgate actuation module.
Power liftgate module.
Keypad switch.
5A
9
318
Explorer (CTW), enUSA, Edition date: 202007, Second-Printing FusesE145984
Page 322 of 577
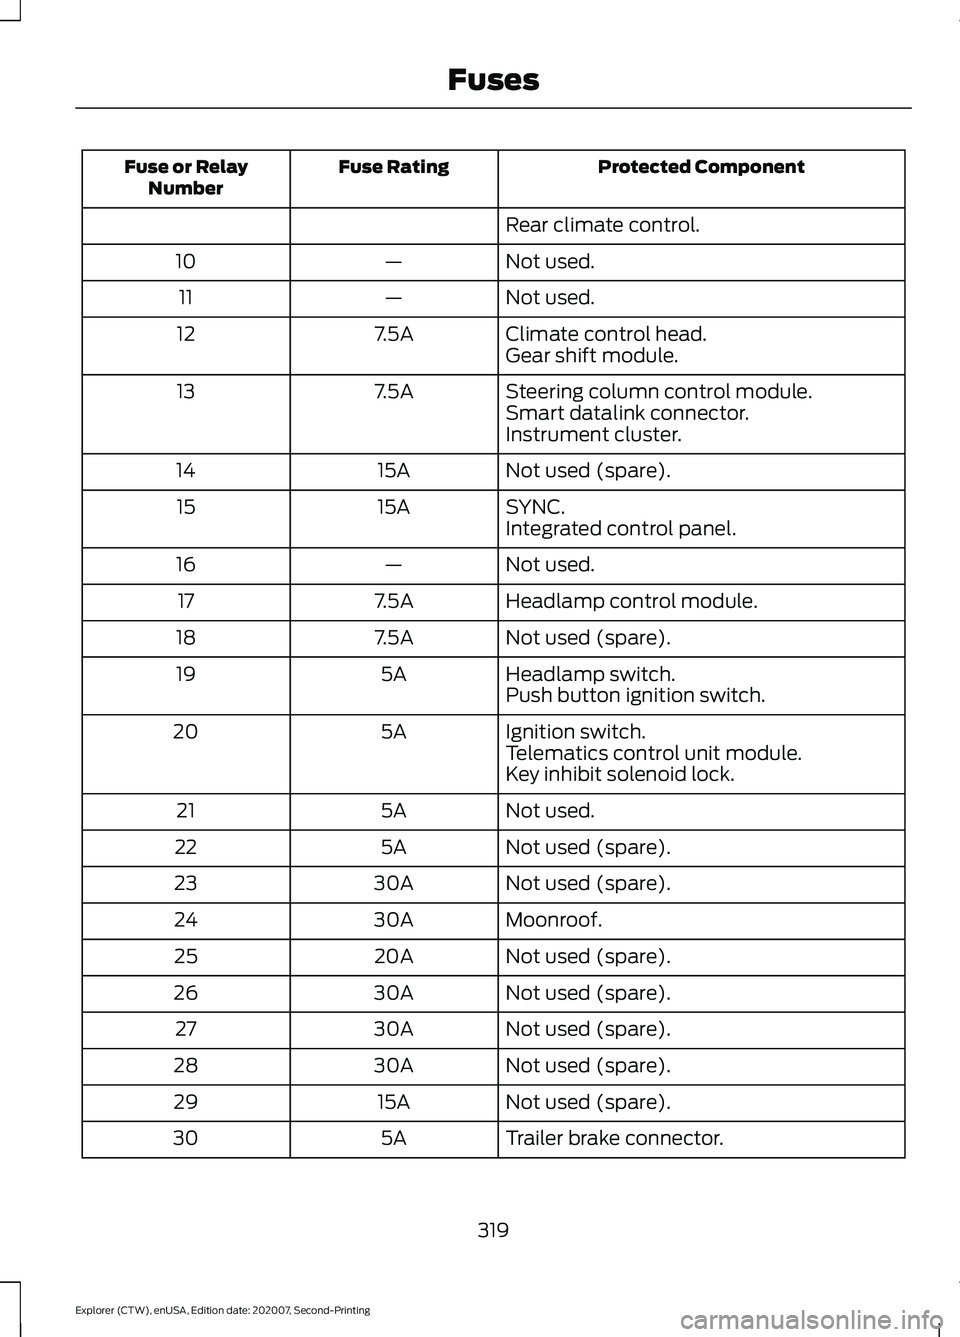
Protected Component
Fuse Rating
Fuse or Relay
Number
Rear climate control.
Not used.
—
10
Not used.
—
11
Climate control head.
7.5A
12
Gear shift module.
Steering column control module.
7.5A
13
Smart datalink connector.
Instrument cluster.
Not used (spare).
15A
14
SYNC.
15A
15
Integrated control panel.
Not used.
—
16
Headlamp control module.
7.5A
17
Not used (spare).
7.5A
18
Headlamp switch.
5A
19
Push button ignition switch.
Ignition switch.
5A
20
Telematics control unit module.
Key inhibit solenoid lock.
Not used.
5A
21
Not used (spare).
5A
22
Not used (spare).
30A
23
Moonroof.
30A
24
Not used (spare).
20A
25
Not used (spare).
30A
26
Not used (spare).
30A
27
Not used (spare).
30A
28
Not used (spare).
15A
29
Trailer brake connector.
5A
30
319
Explorer (CTW), enUSA, Edition date: 202007, Second-Printing Fuses
Page 323 of 577
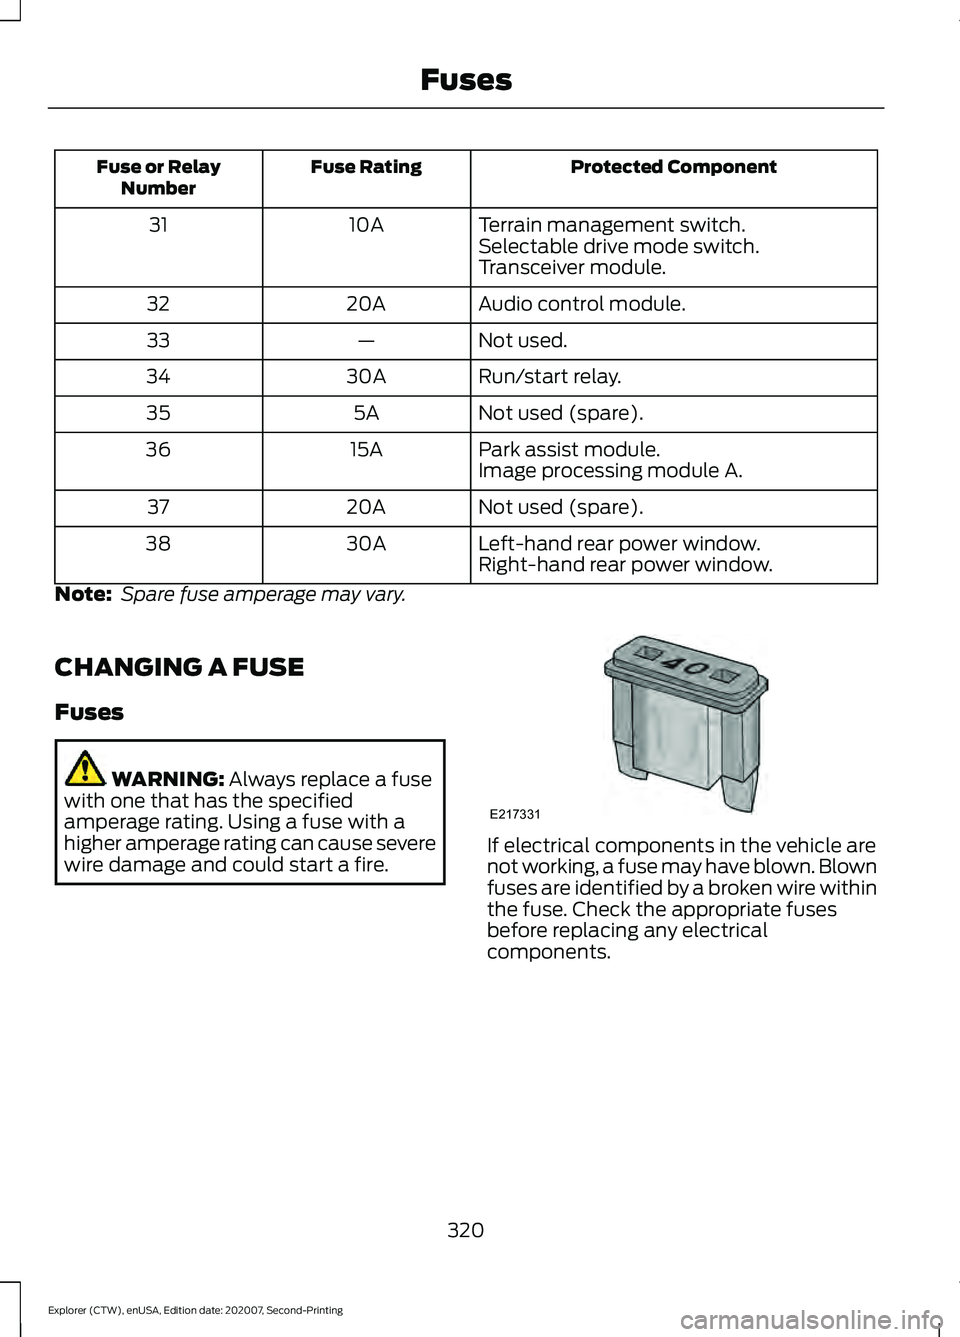
Protected Component
Fuse Rating
Fuse or Relay
Number
Terrain management switch.
10A
31
Selectable drive mode switch.
Transceiver module.
Audio control module.
20A
32
Not used.
—
33
Run/start relay.
30A
34
Not used (spare).
5A
35
Park assist module.
15A
36
Image processing module A.
Not used (spare).
20A
37
Left-hand rear power window.
30A
38
Right-hand rear power window.
Note: Spare fuse amperage may vary.
CHANGING A FUSE
Fuses WARNING: Always replace a fuse
with one that has the specified
amperage rating. Using a fuse with a
higher amperage rating can cause severe
wire damage and could start a fire. If electrical components in the vehicle are
not working, a fuse may have blown. Blown
fuses are identified by a broken wire within
the fuse. Check the appropriate fuses
before replacing any electrical
components.
320
Explorer (CTW), enUSA, Edition date: 202007, Second-Printing FusesE217331
Page 324 of 577
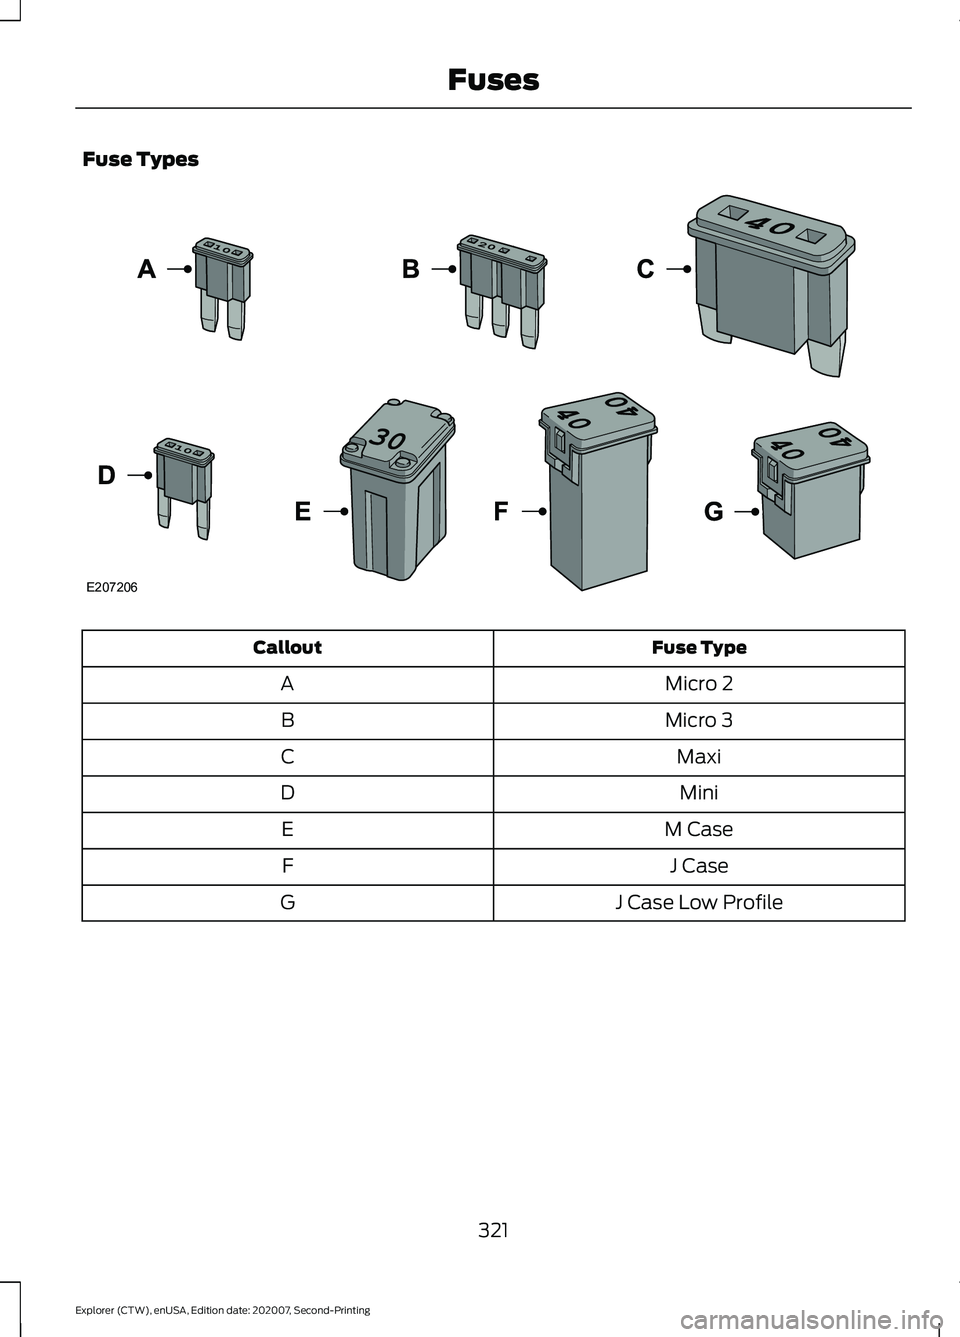
Fuse Types
Fuse Type
Callout
Micro 2
A
Micro 3
B
Maxi
C
Mini
D
M Case
E
J Case
F
J Case Low Profile
G
321
Explorer (CTW), enUSA, Edition date: 202007, Second-Printing FusesE207206
Page 325 of 577
GENERAL INFORMATION
Have your vehicle serviced regularly to help
maintain its roadworthiness and resale
value. There is a large network of
authorized dealers that are there to help
you with their professional servicing
expertise. We believe that their specially
trained technicians are best qualified to
service your vehicle properly and expertly.
They are supported by a wide range of
highly specialized tools developed
specifically for servicing your vehicle.
If your vehicle requires professional service,
an authorized dealer can provide the
necessary parts and service. Check your
warranty information to find out which
parts and services are covered.
Use only recommended fuels, lubricants,
fluids and service parts conforming to
specifications. Motorcraft® parts are
designed and built to provide the best
performance in your vehicle.
Precautions
•
Do not work on a hot engine.
• Make sure that nothing gets caught in
moving parts.
• Do not work on a vehicle with the
engine running in an enclosed space,
unless you are sure you have enough
ventilation.
• Keep all open flames and other burning
material (such as cigarettes) away
from the battery and all fuel related
parts.
Working with the Engine Off
1. Set the parking brake and shift the transmission to park (P).
2. Switch off the engine.
3. Block the wheels. Working with the Engine On WARNING: To reduce the risk of
vehicle damage and personal burn
injuries, do not start your engine with the
air cleaner removed and do not remove
it while the engine is running.
1. Set the parking brake and shift the transmission to park (P).
2. Block the wheels.
OPENING AND CLOSING THE
HOOD
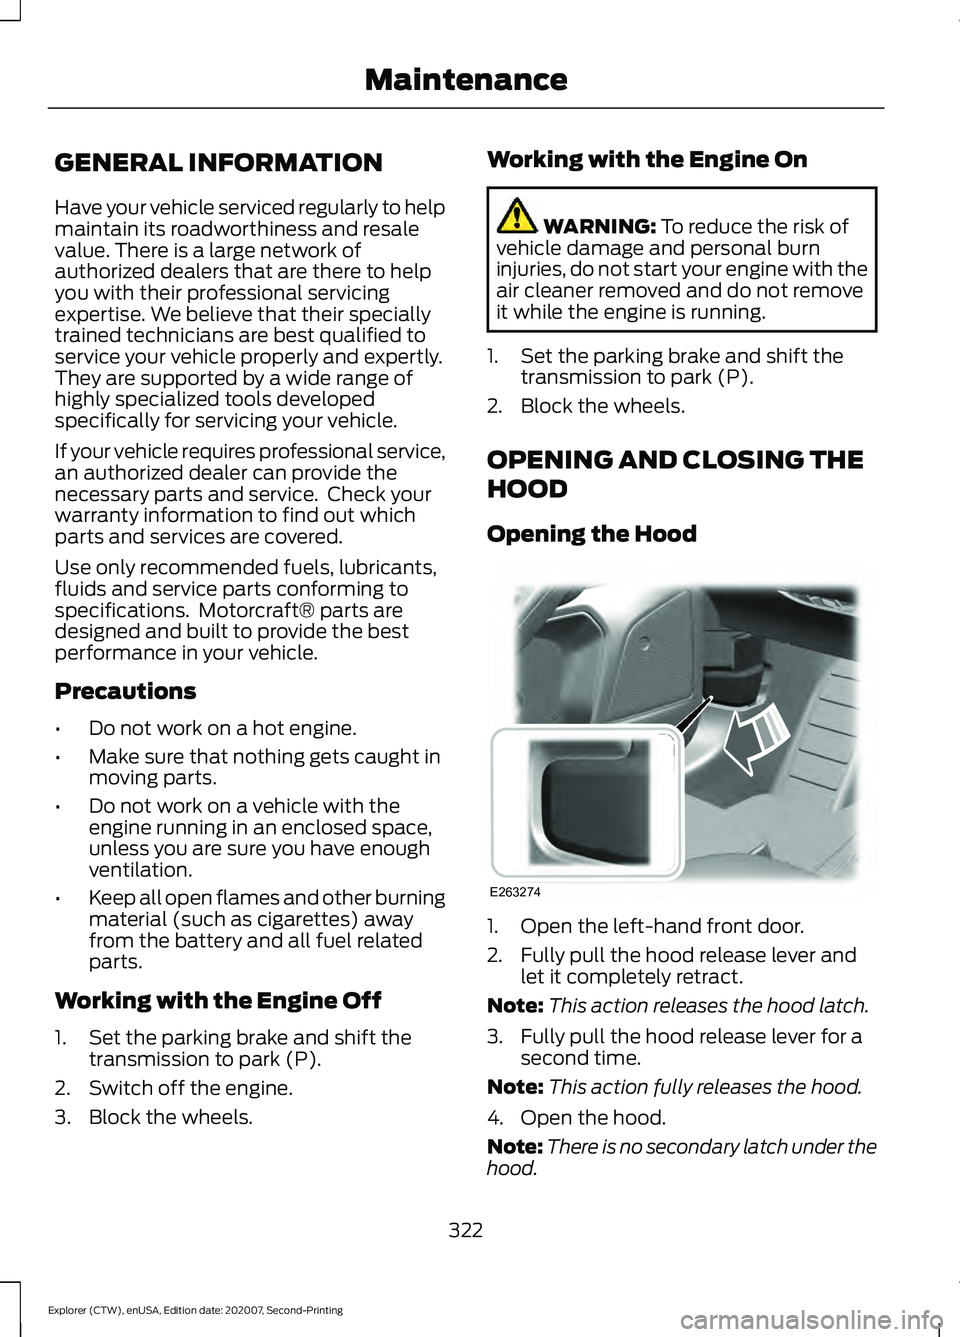
Opening the Hood 1. Open the left-hand front door.
2. Fully pull the hood release lever and
let it completely retract.
Note: This action releases the hood latch.
3. Fully pull the hood release lever for a second time.
Note: This action fully releases the hood.
4. Open the hood.
Note: There is no secondary latch under the
hood.
322
Explorer (CTW), enUSA, Edition date: 202007, Second-Printing MaintenanceE263274
Page 326 of 577
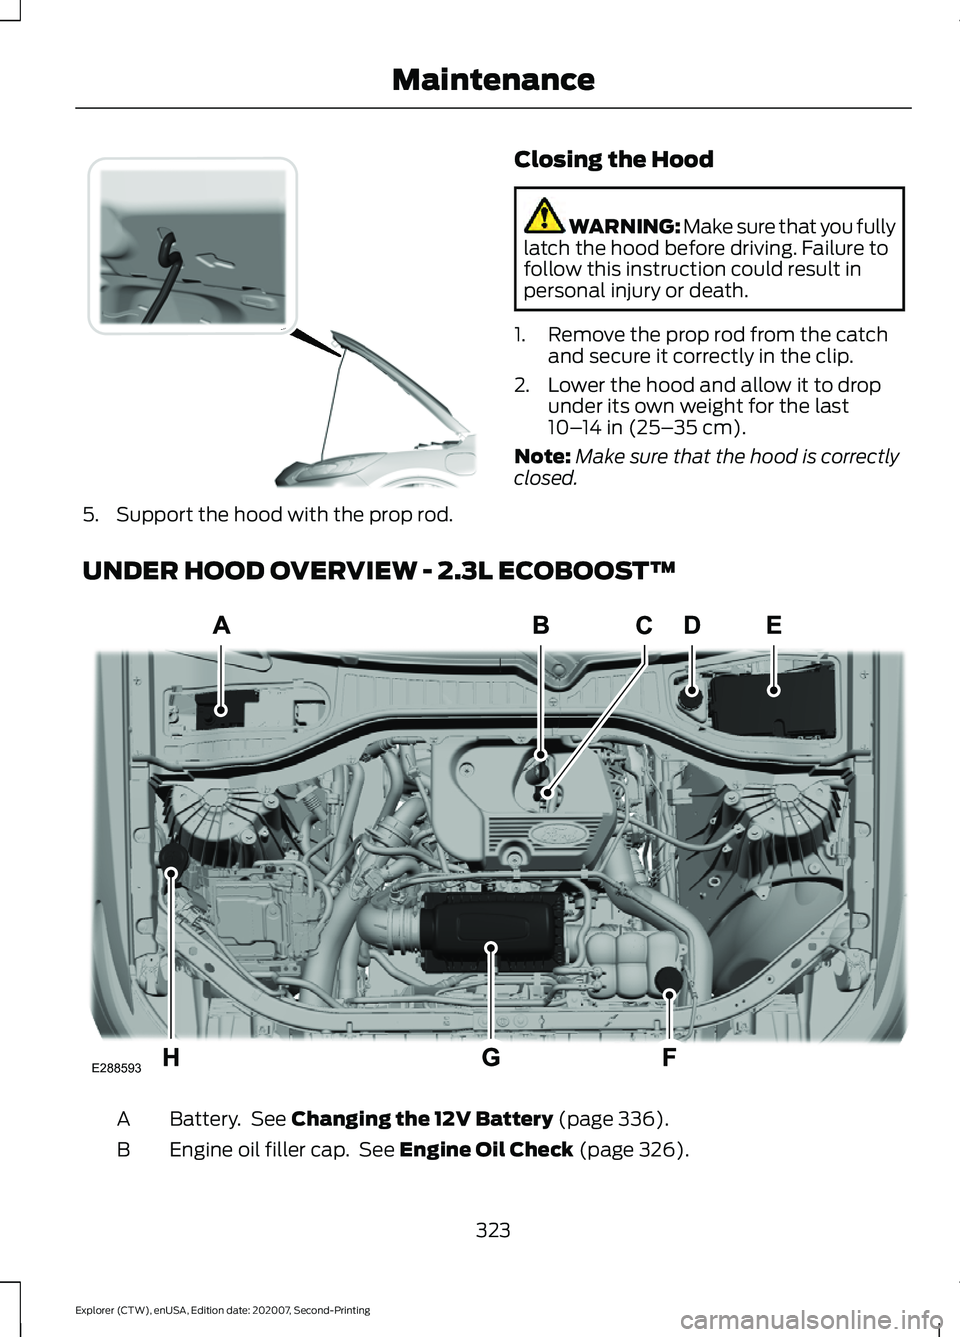
5. Support the hood with the prop rod.
Closing the Hood WARNING: Make sure that you fully
latch the hood before driving. Failure to
follow this instruction could result in
personal injury or death.
1. Remove the prop rod from the catch and secure it correctly in the clip.
2. Lower the hood and allow it to drop under its own weight for the last
10– 14 in (25– 35 cm)
.
Note: Make sure that the hood is correctly
closed.
UNDER HOOD OVERVIEW - 2.3L ECOBOOST™ Battery. See
Changing the 12V Battery (page 336).
A
Engine oil filler cap. See
Engine Oil Check (page 326).
B
323
Explorer (CTW), enUSA, Edition date: 202007, Second-Printing MaintenanceE318379 E288593
Page 327 of 577
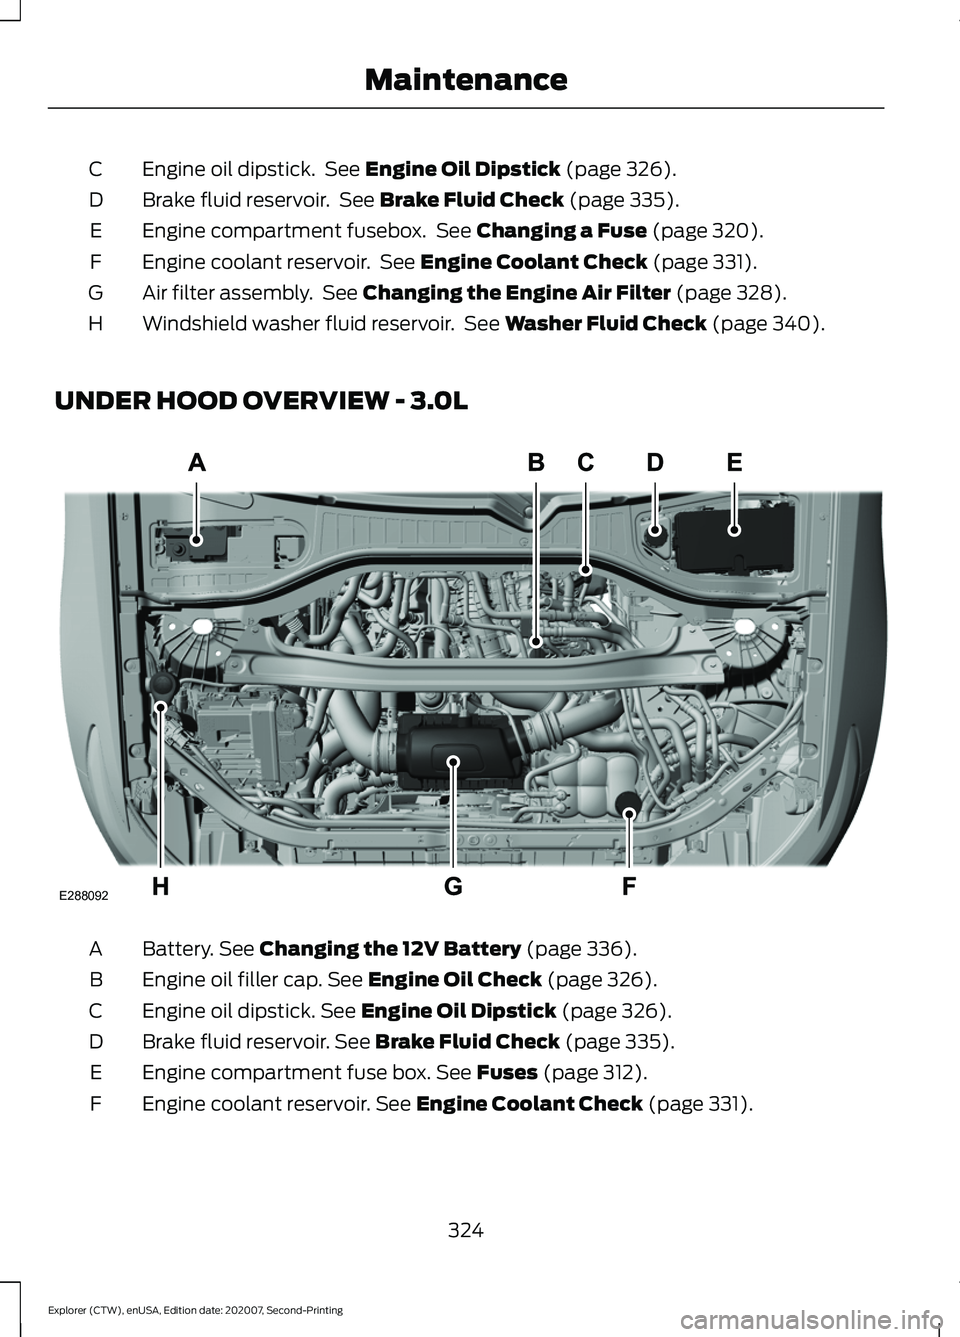
Engine oil dipstick. See Engine Oil Dipstick (page 326).
C
Brake fluid reservoir. See
Brake Fluid Check (page 335).
D
Engine compartment fusebox. See
Changing a Fuse (page 320).
E
Engine coolant reservoir. See
Engine Coolant Check (page 331).
F
Air filter assembly. See
Changing the Engine Air Filter (page 328).
G
Windshield washer fluid reservoir. See
Washer Fluid Check (page 340).
H
UNDER HOOD OVERVIEW - 3.0L Battery.
See Changing the 12V Battery (page 336).
A
Engine oil filler cap.
See Engine Oil Check (page 326).
B
Engine oil dipstick.
See Engine Oil Dipstick (page 326).
C
Brake fluid reservoir.
See Brake Fluid Check (page 335).
D
Engine compartment fuse box.
See Fuses (page 312).
E
Engine coolant reservoir.
See Engine Coolant Check (page 331).
F
324
Explorer (CTW), enUSA, Edition date: 202007, Second-Printing MaintenanceE288092
Page 328 of 577
Air filter assembly. See Changing the Engine Air Filter (page 329).
G
Washer fluid reservoir. See
Washer Fluid Check (page 340).
H
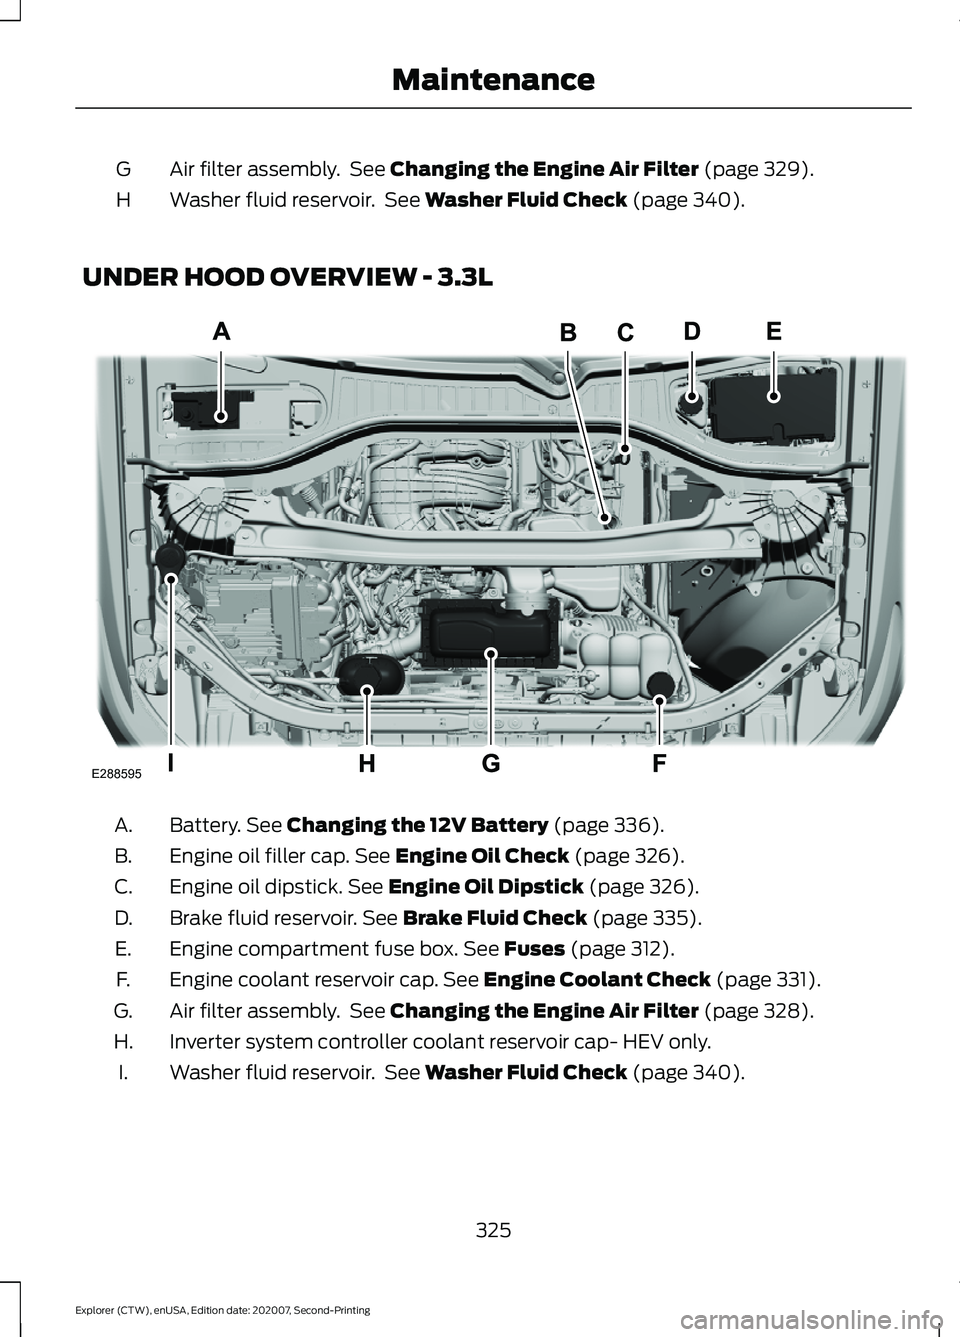
UNDER HOOD OVERVIEW - 3.3L Battery.
See Changing the 12V Battery (page 336).
A.
Engine oil filler cap.
See Engine Oil Check (page 326).
B.
Engine oil dipstick.
See Engine Oil Dipstick (page 326).
C.
Brake fluid reservoir.
See Brake Fluid Check (page 335).
D.
Engine compartment fuse box.
See Fuses (page 312).
E.
Engine coolant reservoir cap.
See Engine Coolant Check (page 331).
F.
Air filter assembly. See
Changing the Engine Air Filter (page 328).
G.
Inverter system controller coolant reservoir cap- HEV only.
H.
Washer fluid reservoir. See
Washer Fluid Check (page 340).
I.
325
Explorer (CTW), enUSA, Edition date: 202007, Second-Printing MaintenanceE288595
Page 329 of 577
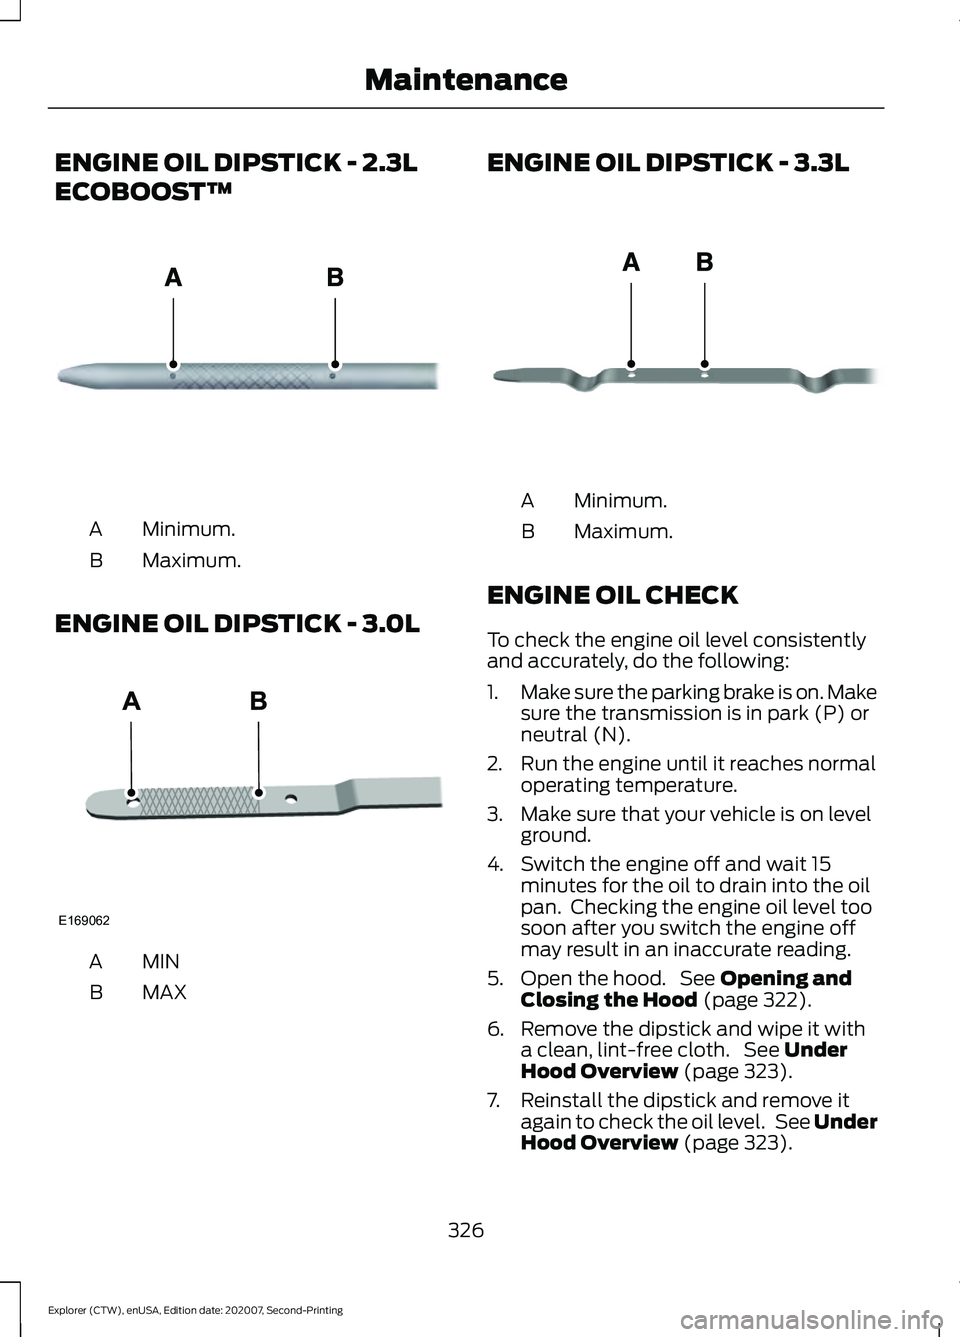
ENGINE OIL DIPSTICK - 2.3L
ECOBOOST™
Minimum.
A
Maximum.
B
ENGINE OIL DIPSTICK - 3.0L MINA
MAX
B ENGINE OIL DIPSTICK - 3.3L
Minimum.
A
Maximum.
B
ENGINE OIL CHECK
To check the engine oil level consistently
and accurately, do the following:
1. Make sure the parking brake is on. Make
sure the transmission is in park (P) or
neutral (N).
2. Run the engine until it reaches normal operating temperature.
3. Make sure that your vehicle is on level ground.
4. Switch the engine off and wait 15 minutes for the oil to drain into the oil
pan. Checking the engine oil level too
soon after you switch the engine off
may result in an inaccurate reading.
5. Open the hood. See Opening and
Closing the Hood (page 322).
6. Remove the dipstick and wipe it with a clean, lint-free cloth. See
Under
Hood Overview (page 323).
7. Reinstall the dipstick and remove it again to check the oil level. See Under
Hood Overview
(page 323).
326
Explorer (CTW), enUSA, Edition date: 202007, Second-Printing MaintenanceE161560 E169062 E146429
Page 330 of 577
8.
Make sure that the oil level is between
the maximum and minimum marks. If
the oil level is at the minimum mark,
add oil immediately. See Capacities
and Specifications (page 391).
9. If the oil level is correct, replace the dipstick and make sure it is fully seated.
Note: Do not remove the dipstick when the
engine is running.
Note: If the oil level is between the
maximum and minimum marks, the oil level
is acceptable. Do not add oil.
Note: The oil consumption of new engines
reaches its normal level after approximately
3,000 mi (5,000 km)
.
Adding Engine Oil WARNING: Do not remove the filler
cap when the engine is running.
Do not use supplemental engine oil
additives because they are unnecessary
and could lead to engine damage that may
not be covered by the vehicle Warranty. Only use oils certified for gasoline engines
by the American Petroleum Institute (API).
An oil with this trademark symbol
conforms to the current engine and
emission system protection standards and
fuel economy requirements of the
International Lubricants Specification
Advisory Committee (ILSAC).
To top up the engine oil level do the
following:
1. Clean the area surrounding the engine
oil filler cap before you remove it.
2. Remove the engine oil filler cap. See Under Hood Overview
(page 323).
Turn it counterclockwise and remove
it.
3. Add engine oil that meets our specifications. See
Capacities and
Specifications (page 391). You may
have to use a funnel to pour the engine
oil into the opening.
4. Recheck the oil level.
5. If the oil level is correct, replace the dipstick and make sure it is fully seated.
6. Replace the engine oil filler cap. Turn it clockwise until you feel a strong
resistance.
Note: Do not add oil further than the
maximum mark. Oil levels above the
maximum mark may cause engine damage.
Note: Make sure you install the oil filler cap
correctly.
Note: Soak up any spillage with an
absorbent cloth immediately.
OIL CHANGE INDICATOR
RESET
Use the information display controls on
the steering wheel to reset the oil change
indicator.
327
Explorer (CTW), enUSA, Edition date: 202007, Second-Printing MaintenanceE142732