clock FORD F-150 2021 Owner's Manual
[x] Cancel search | Manufacturer: FORD, Model Year: 2021, Model line: F-150, Model: FORD F-150 2021Pages: 796, PDF Size: 13.89 MB
Page 572 of 796
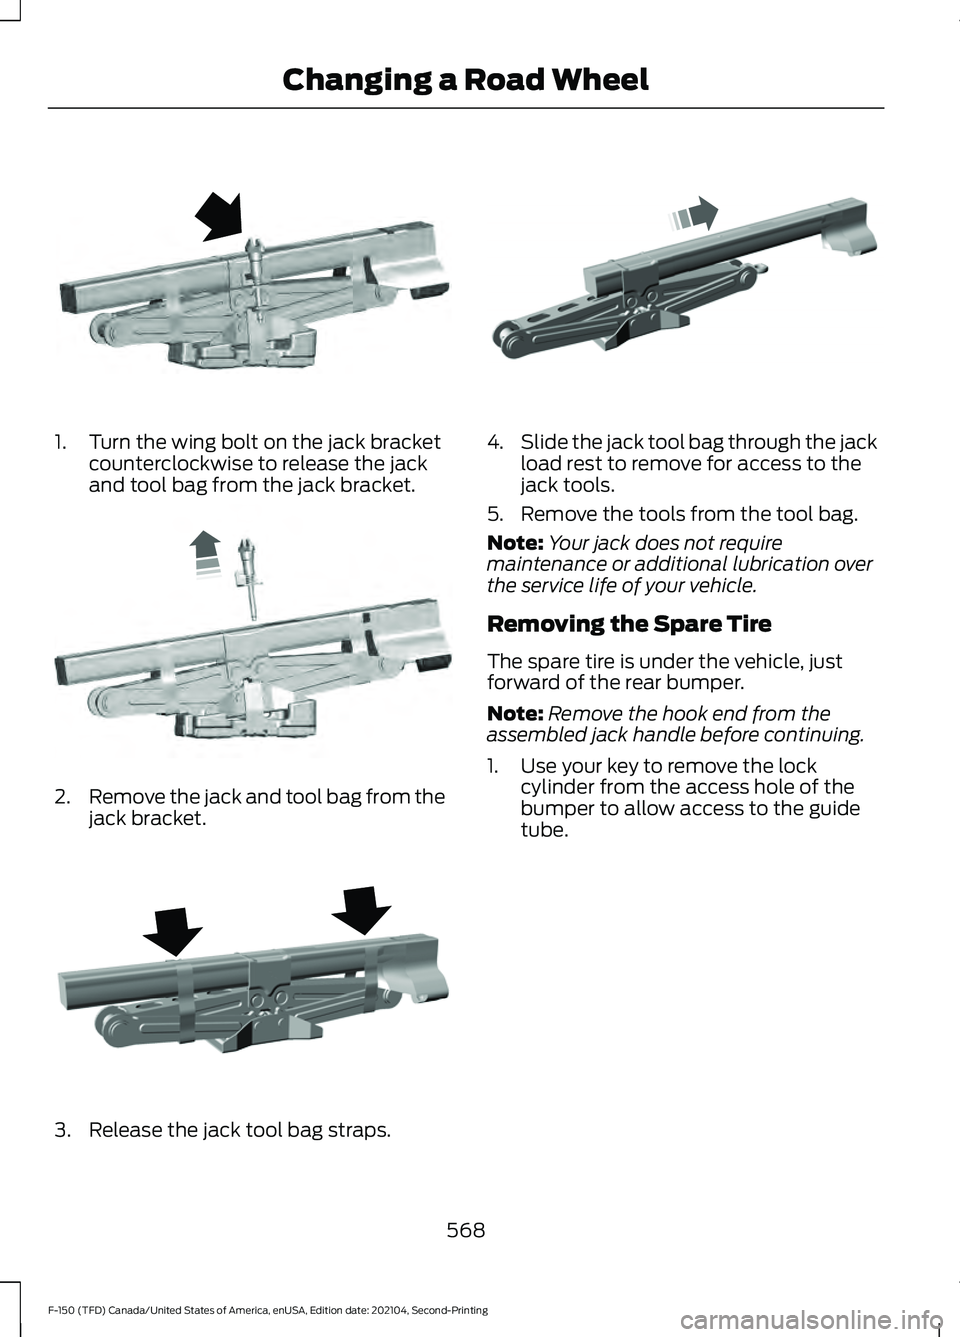
1. Turn the wing bolt on the jack bracket
counterclockwise to release the jack
and tool bag from the jack bracket. 2.
Remove the jack and tool bag from the
jack bracket. 3. Release the jack tool bag straps. 4.
Slide the jack tool bag through the jack
load rest to remove for access to the
jack tools.
5. Remove the tools from the tool bag.
Note: Your jack does not require
maintenance or additional lubrication over
the service life of your vehicle.
Removing the Spare Tire
The spare tire is under the vehicle, just
forward of the rear bumper.
Note: Remove the hook end from the
assembled jack handle before continuing.
1. Use your key to remove the lock cylinder from the access hole of the
bumper to allow access to the guide
tube.
568
F-150 (TFD) Canada/United States of America, enUSA, Edition date: 202104, Second-Printing Changing a Road WheelE323384 E327650 E323386 E327651
Page 573 of 796
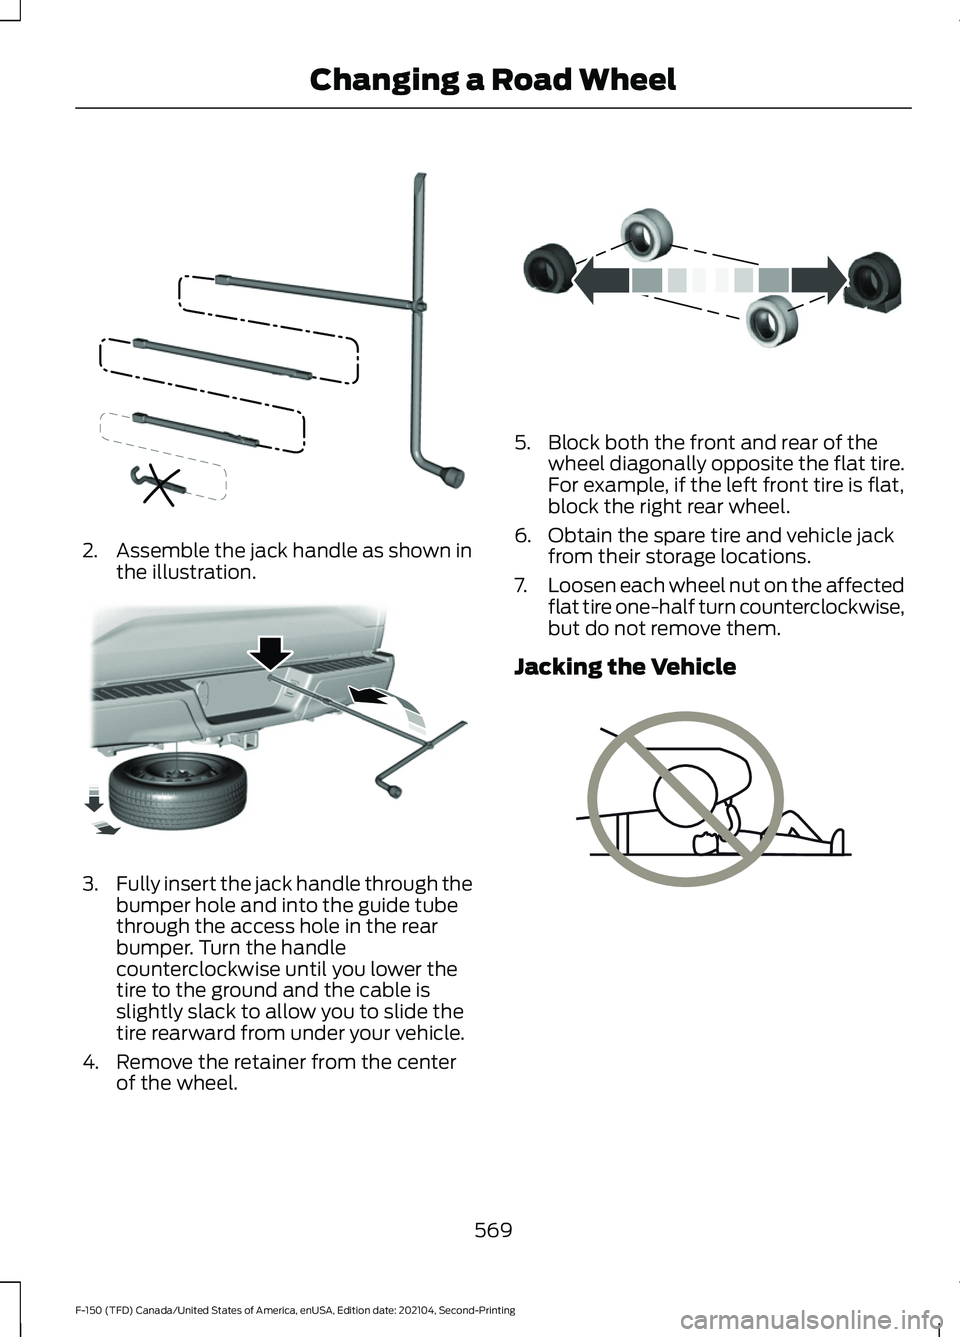
2. Assemble the jack handle as shown in
the illustration. 3.
Fully insert the jack handle through the
bumper hole and into the guide tube
through the access hole in the rear
bumper. Turn the handle
counterclockwise until you lower the
tire to the ground and the cable is
slightly slack to allow you to slide the
tire rearward from under your vehicle.
4. Remove the retainer from the center of the wheel. 5. Block both the front and rear of the
wheel diagonally opposite the flat tire.
For example, if the left front tire is flat,
block the right rear wheel.
6. Obtain the spare tire and vehicle jack from their storage locations.
7. Loosen each wheel nut on the affected
flat tire one-half turn counterclockwise,
but do not remove them.
Jacking the Vehicle 569
F-150 (TFD) Canada/United States of America, enUSA, Edition date: 202104, Second-Printing Changing a Road WheelE188735 E184020 E175447 E166722
Page 574 of 796
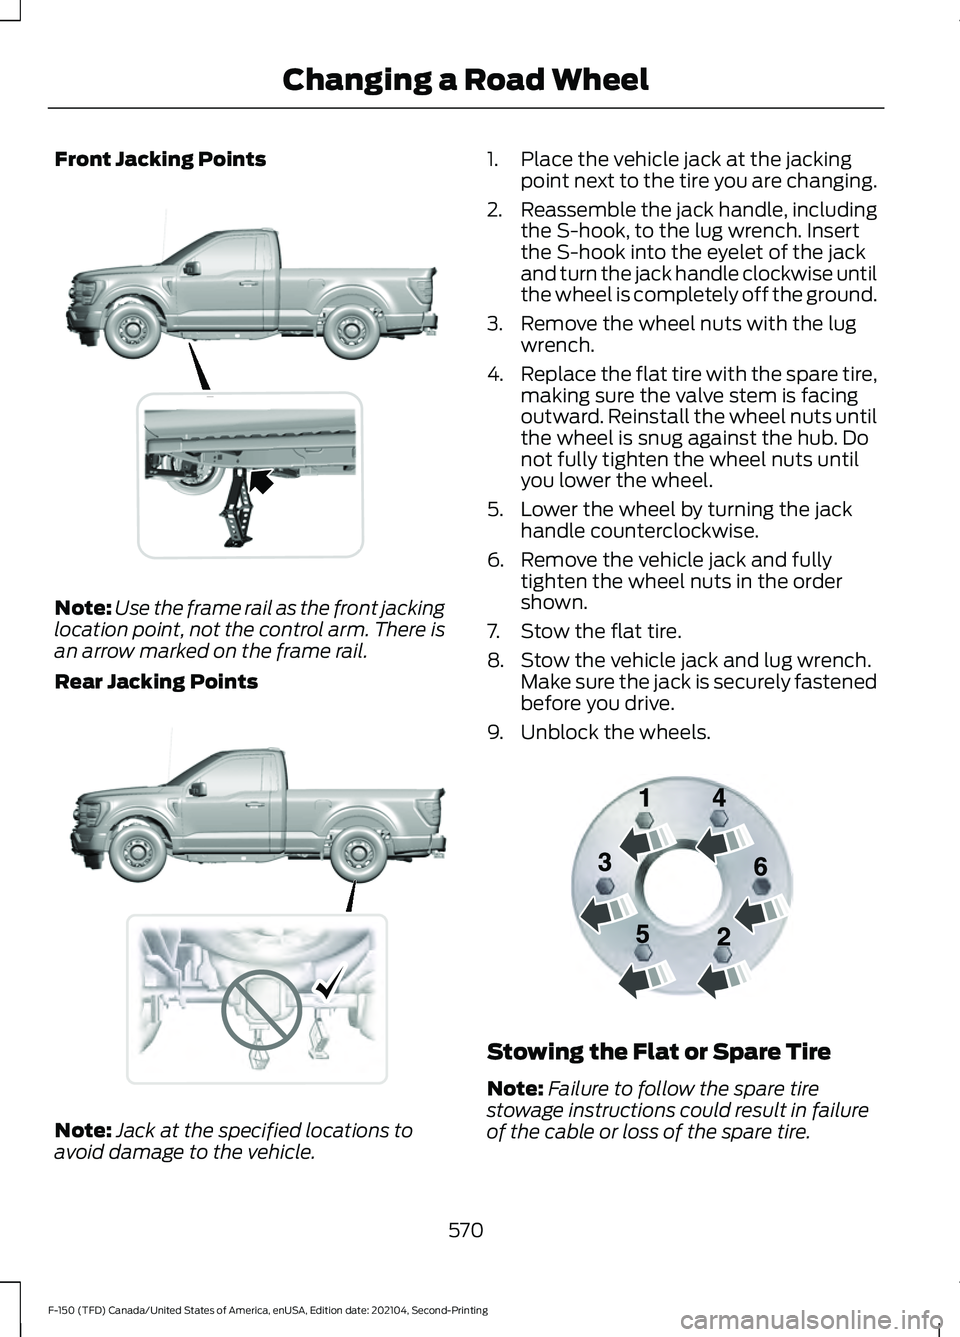
Front Jacking Points
Note:
Use the frame rail as the front jacking
location point, not the control arm. There is
an arrow marked on the frame rail.
Rear Jacking Points Note:
Jack at the specified locations to
avoid damage to the vehicle. 1. Place the vehicle jack at the jacking
point next to the tire you are changing.
2. Reassemble the jack handle, including
the S-hook, to the lug wrench. Insert
the S-hook into the eyelet of the jack
and turn the jack handle clockwise until
the wheel is completely off the ground.
3. Remove the wheel nuts with the lug wrench.
4. Replace the flat tire with the spare tire,
making sure the valve stem is facing
outward. Reinstall the wheel nuts until
the wheel is snug against the hub. Do
not fully tighten the wheel nuts until
you lower the wheel.
5. Lower the wheel by turning the jack handle counterclockwise.
6. Remove the vehicle jack and fully tighten the wheel nuts in the order
shown.
7. Stow the flat tire.
8. Stow the vehicle jack and lug wrench. Make sure the jack is securely fastened
before you drive.
9. Unblock the wheels. Stowing the Flat or Spare Tire
Note:
Failure to follow the spare tire
stowage instructions could result in failure
of the cable or loss of the spare tire.
570
F-150 (TFD) Canada/United States of America, enUSA, Edition date: 202104, Second-Printing Changing a Road Wheel E327652 E323397 E166719
Page 575 of 796
1. Lay the tire on the ground with the
valve stem facing up.
2. Slide the wheel partially under the vehicle and install the retainer through
the wheel center. Pull on the cable to
align the components at the end of the
cable.
3. Turn the jack handle clockwise until you raise the tire to its stowed position
underneath the vehicle. The effort to
turn the jack handle increases
significantly and the spare tire carrier
ratchets or slips when you raise the tire
to the maximum tightness. Tighten to
the point where the ratchet or slip
occurs a minimum of three times, as
indicated by an audible click each time.
The spare tire carrier does not allow
you to overtighten. If the spare tire
carrier ratchets or slips with little effort,
have your vehicle checked as soon as
possible.
4. Check that the tire lies flat against the frame and you properly tighten it. Try
to push or pull, then turn the tire to be
sure it does not move. Loosen and
retighten, if necessary. Failure to
properly stow the spare tire could
result in failure of the winch cable and
loss of the tire.
5. Repeat this tightness check procedure
when servicing the spare tire pressure,
every six months, as per your scheduled
maintenance information, or at any
time that the spare tire gets disturbed
through service of other components.
6. If removed, install the spare tire lock into the bumper drive tube with the
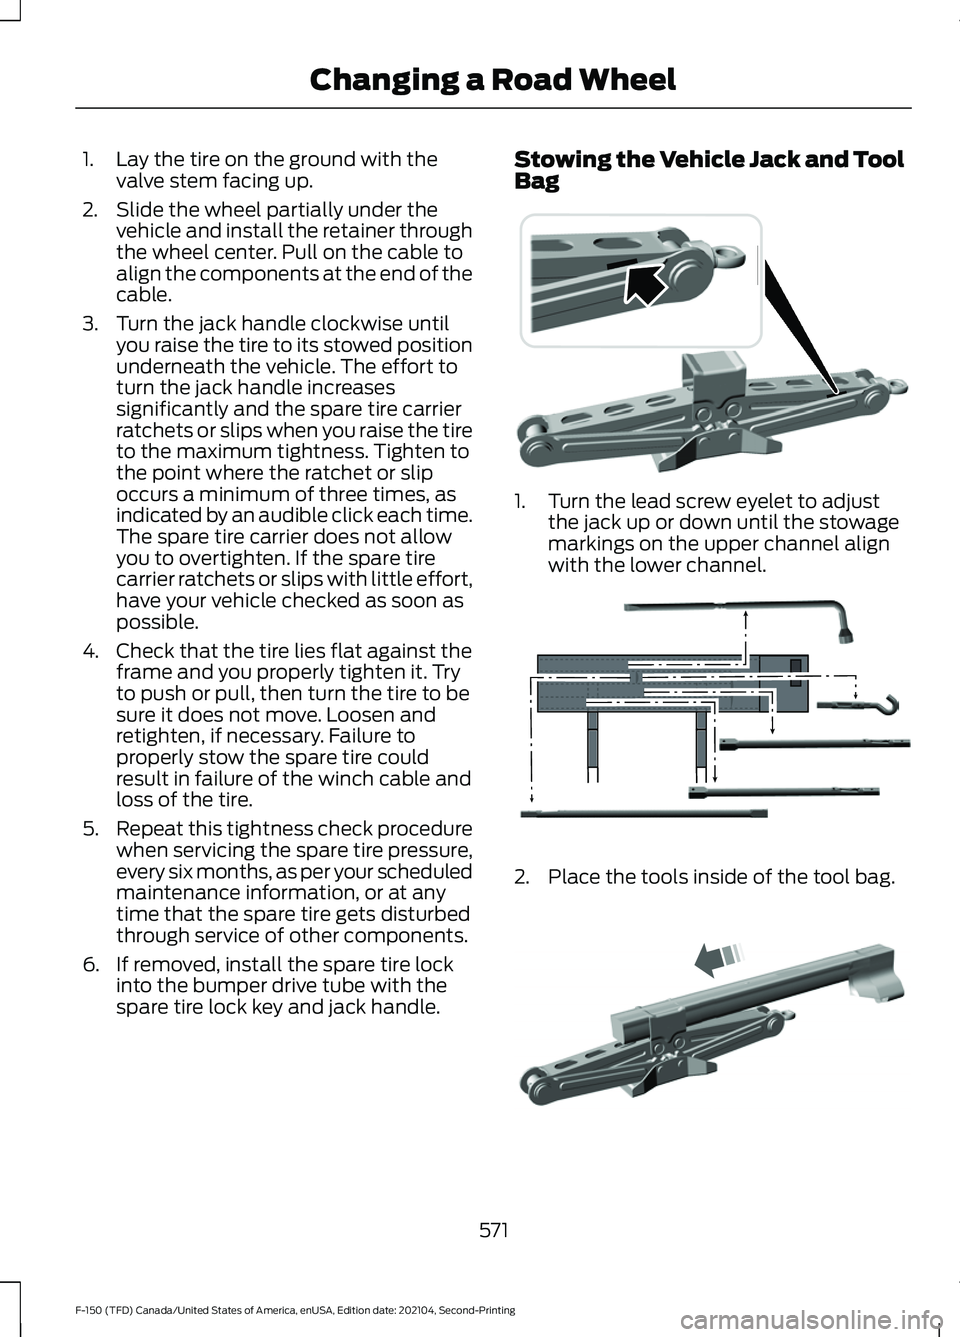
spare tire lock key and jack handle. Stowing the Vehicle Jack and Tool
Bag
1. Turn the lead screw eyelet to adjust
the jack up or down until the stowage
markings on the upper channel align
with the lower channel. 2. Place the tools inside of the tool bag.
571
F-150 (TFD) Canada/United States of America, enUSA, Edition date: 202104, Second-Printing Changing a Road Wheel E323394 E323393 E327653
Page 576 of 796
3.
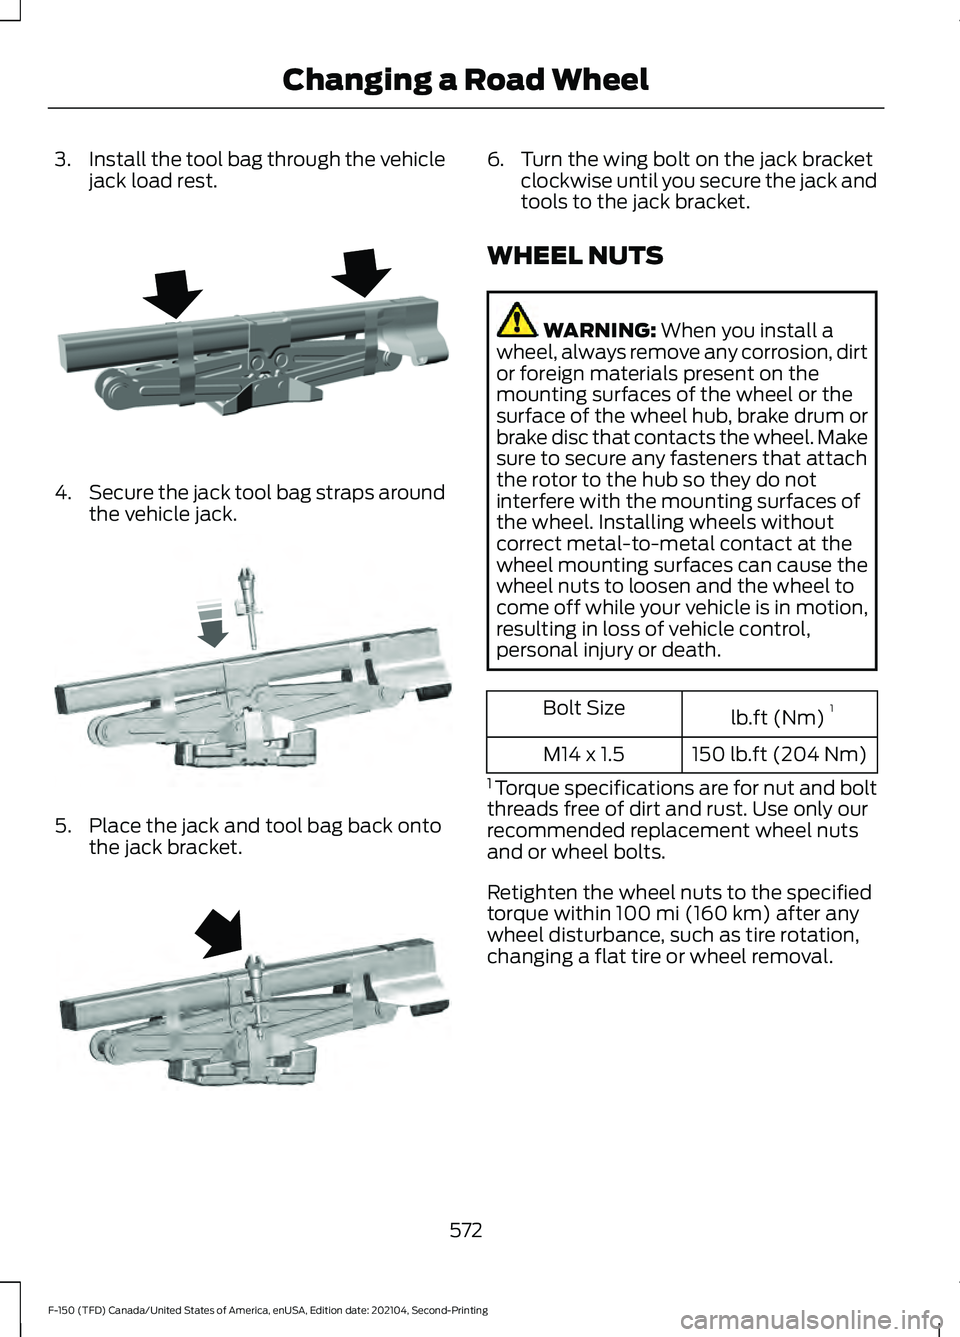
Install the tool bag through the vehicle
jack load rest. 4.
Secure the jack tool bag straps around
the vehicle jack. 5. Place the jack and tool bag back onto
the jack bracket. 6. Turn the wing bolt on the jack bracket
clockwise until you secure the jack and
tools to the jack bracket.
WHEEL NUTS WARNING: When you install a
wheel, always remove any corrosion, dirt
or foreign materials present on the
mounting surfaces of the wheel or the
surface of the wheel hub, brake drum or
brake disc that contacts the wheel. Make
sure to secure any fasteners that attach
the rotor to the hub so they do not
interfere with the mounting surfaces of
the wheel. Installing wheels without
correct metal-to-metal contact at the
wheel mounting surfaces can cause the
wheel nuts to loosen and the wheel to
come off while your vehicle is in motion,
resulting in loss of vehicle control,
personal injury or death. lb.ft (Nm)
1
Bolt Size
150 lb.ft (204 Nm)
M14 x 1.5
1 Torque specifications are for nut and bolt
threads free of dirt and rust. Use only our
recommended replacement wheel nuts
and or wheel bolts.
Retighten the wheel nuts to the specified
torque within
100 mi (160 km) after any
wheel disturbance, such as tire rotation,
changing a flat tire or wheel removal.
572
F-150 (TFD) Canada/United States of America, enUSA, Edition date: 202104, Second-Printing Changing a Road WheelE323386 E327654 E323384
Page 632 of 796
Occupancy Mode (If Equipped)
1. Press
Settings on the touchscreen.
2. Press
Sound Settings.
3. Press
Occupancy Mode.
4. Press a setting.
Sound Mode
(If Equipped)
1. Press
Settings on the touchscreen.
2. Press
Sound Settings.
3. Press
Sound Mode.
4. Press a setting.
SETTING THE CLOCK AND
DATE
1. Press
Settings on the touchscreen.
2. Press
Clock Settings.
3. Set the time.
Note: The
AM and PM options are not
available if 24-hour mode is on.
Switching Automatic Time
Updates On and Off
1. Press
Settings on the touchscreen.
2. Press
Clock Settings.
3. Switch
Automatic time zone update
on or off.
AM/FM RADIO
AM/FM RADIO LIMITATIONS
The further you travel from an AM or FM
station, the weaker the signal and the
weaker the reception. Hills, mountains, tall buildings, bridges,
tunnels, freeway overpasses, parking
garages, dense tree foliage and
thunderstorms can interfere with the
reception.
When you pass a ground-based broadcast
repeating tower, a stronger signal may
overtake a weaker one and result in the
audio system muting.
SELECTING A RADIO STATION
Manually Selecting a Radio
Station
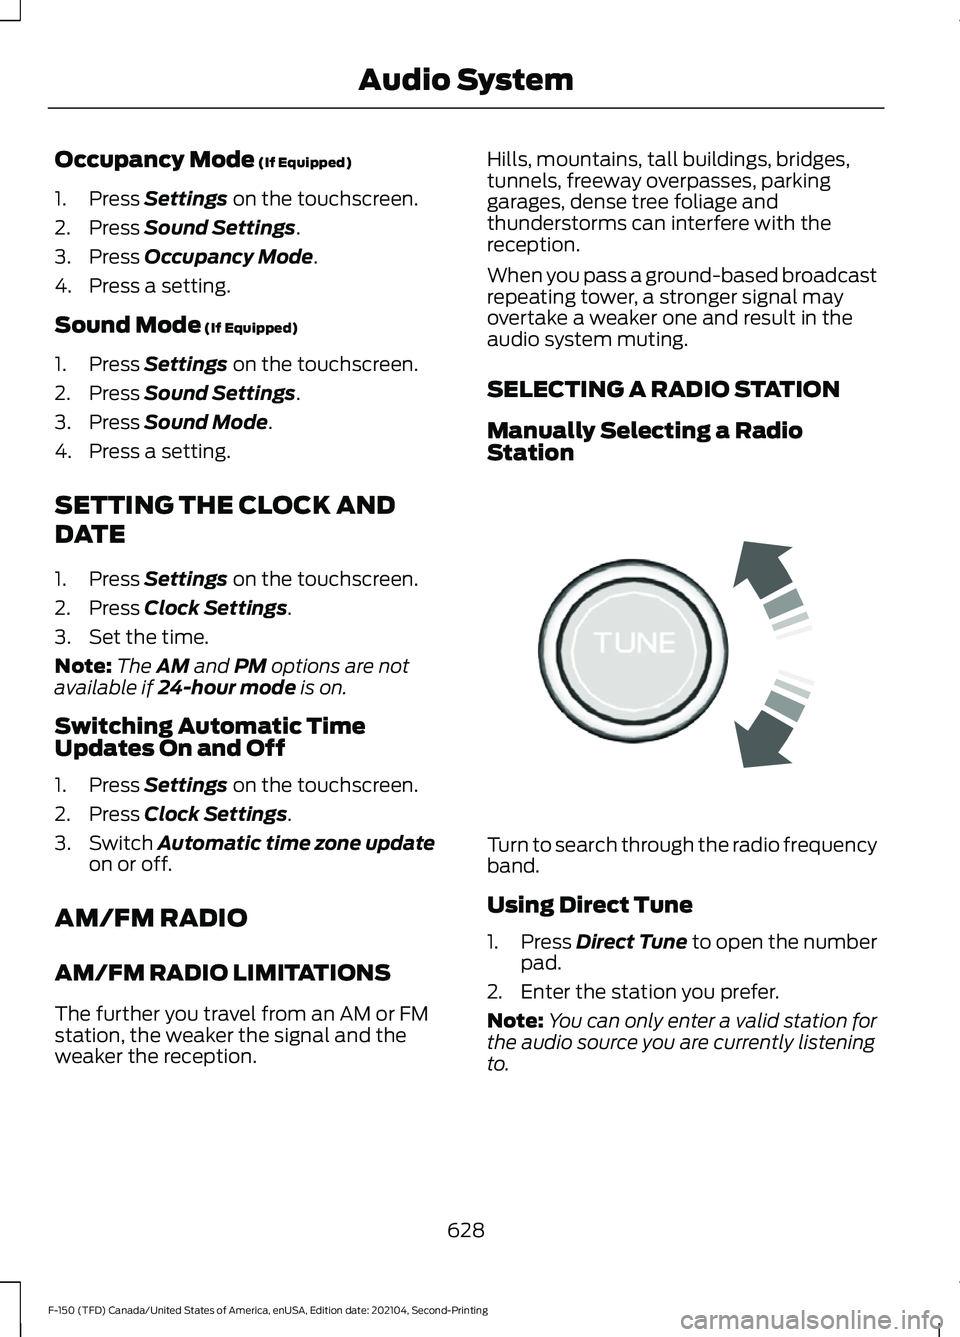
Turn to search through the radio frequency
band.
Using Direct Tune
1.
Press
Direct Tune to open the number
pad.
2. Enter the station you prefer.
Note: You can only enter a valid station for
the audio source you are currently listening
to.
628
F-150 (TFD) Canada/United States of America, enUSA, Edition date: 202104, Second-Printing Audio SystemE270235
Page 790 of 796

Setting the Adaptive Cruise Control
Speed............................................................355
Setting the Blower Motor Speed............187
Setting the Clock and Date.....................628
Setting the Cruise Control Speed.........350
Setting the Hill Descent Speed..............330
Setting the Speed Sign Recognition Speed Tolerance
........................................410
Setting the Speed Sign Recognition Speed Warning..........................................410
Setting the Temperature............................187
Setting the Trail Control Speed - Raptor...........................................................324
Setting the Wake Word
............................640
Setting Up the Trailer Backup Assistance for a Conventional Trailer......................446
Applying the Trailer Reversing Aid Sticker............................................................... 448
Calibrating the System................................... 449
Configuring the Trailer..................................... 446
Trailer Sensor Installation.............................. 448
Setting Up Trailer Reverse Guidance for a Conventional Trailer.............................459
Applying the Trailer Reverse Aid Sticker................................................................ 461
Calibrating the System.................................... 462
Configuring the Trailer..................................... 459
Trailer Sensor Installation............................... 461
Shifting Your Vehicle Into Gear - Police Responder...................................................283
Shifting Your Vehicle Into Gear - Raptor...........................................................282
Shifting Your Vehicle Into Gear...............282
Side Parking Aid...........................................336 Locating the Side Parking Aid
Sensors............................................................. 337
Side Parking Aid Audible Warnings.............337
Side Parking Aid Limitations......................... 336
What is the Side Parking Aid......................... 336
Sitting in the Correct Position
..................195
Smart Hitch Limitations............................442
Smart Hitch
...................................................442
Snow Plowing Precautions......................479
Snow Plowing...............................................479
Snowplow Mode................................................ 481
Snowplow Mode
..........................................481
Switching Snowplow Mode On and
Off....................................................................... 481What Is Snowplow Mode................................
481
Sounding the Panic Alarm
...........................91
Special Operating Conditions Scheduled Maintenance - Diesel..............................670
Special Operating Conditions Scheduled Maintenance - Gasoline.........................675
Special Operating Conditions Scheduled Maintenance - Raptor
.............................678
Speed Control See: Cruise Control........................................... 350
Speedometer...................................................171
Speed Sign Recognition Indicators....................................................409
Speed Sign Recognition Limitations.................................................409
Speed Sign Recognition Precautions................................................409
Speed Sign Recognition...........................409 Speed Sign Recognition –
Troubleshooting............................................. 410
Speed Sign Recognition – Troubleshooting
........................................410
Speed Sign Recognition – Frequently Asked
Questions.......................................................... 411
Speed Sign Recognition – Information Messages.......................................................... 410
Stability Control Indicator........................323
Stability Control
............................................321
Starter Switch See: Ignition Switch.......................................... 236
Starting and Stopping the Engine – Precautions.................................................236
Starting and Stopping the Engine.........236 Automatic Engine Stop - Vehicles With:
Keyless Entry and Push Button
Start................................................................... 243
Engine Block Heater......................................... 240
Police Engine Idle - Police Responder....................................................... 242
Starting and Stopping the Engine – Troubleshooting............................................ 244
Starting the Engine............................................ 237
Stopping the Engine.......................................... 241
Starting and Stopping the Engine – Troubleshooting........................................244
Starting and Stopping the Engine – Frequently Asked Questions....................246
786
F-150 (TFD) Canada/United States of America, enUSA, Edition date: 202104, Second-Printing Index