stop start FORD F-350 2020 Owner's Manual
[x] Cancel search | Manufacturer: FORD, Model Year: 2020, Model line: F-350, Model: FORD F-350 2020Pages: 631, PDF Size: 9.62 MB
Page 188 of 631
WARNING: Do not remove the fuel
pump nozzle from its fully inserted
position when refueling. WARNING: When refueling always
shut the engine off and never allow
sparks or open flames near the fuel tank
filler valve. Never smoke or use a cell
phone while refueling. Fuel vapor is
extremely hazardous under certain
conditions. Avoid inhaling excess fumes. WARNING: Stop refueling after the
fuel pump nozzle automatically shuts
off for the second time. Failure to follow
this will fill the expansion space in the
fuel tank and could lead to fuel
overflowing. WARNING: The fuel system may
be under pressure. If you hear a hissing
sound near the fuel filler inlet, do not
refuel until the sound stops. Otherwise,
fuel may spray out, which could cause
serious personal injury.
Note: If you must replace the fuel filler cap,
replace it with a fuel filler cap designed for
your vehicle. The vehicle warranty may be
void for any damage to the fuel tank or fuel
system if you do not use the correct genuine
Ford or Motorcraft® fuel filler cap.
Fueling Tips
If air is allowed to enter the fuel system the
engine automatically purges any trapped
air. To purge the air sooner: prior to engine
start, prime the system by turning the key
to on for 30 seconds then to off. Repeat
this several times. The engine may run
rough and produce white smoke while air
is in the system. This is normal.
Use only clean, approved containers that
prevent the entry of dirt or water whenever
you store diesel fuel. Diesel fuel must not be stored in a
galvanized container. The fuel can dissolve
the zinc in the galvanized container. The
zinc then remains in the fuel. If you run the
contaminated fuel through the engine, the
zinc can deposit in the fuel injectors
causing expensive-to-repair damage.
Diesel fuel dispensing nozzle fill rate
Your vehicle has a fuel fill pipe that is able
to accept fuel up to
20 gal (76 L) per
minute from a 1.2 in (30 mm)
fuel-dispensing nozzle. Pumping fuel at
greater flow rates may result in premature
nozzle shut-off or spit back.
Truck stops have pumps and nozzles
designed for larger, heavy-duty trucks.
When refueling at truck stops: if the nozzle
shuts off repeatedly when refueling, wait
5– 10 seconds; then use a slower rate of
flow, do not depress the nozzle trigger as
far.
Refueling
When fueling your vehicle do the following:
1. Fully open the fuel tank filler door and remove the fuel tank filler cap.
Carefully turn the filler cap
counterclockwise until it spins off.
185
Super Duty (TFE), enUSA, Edition date: 201909, Third-Printing- Fuel and Refueling
Page 194 of 631
Readiness for Inspection and
Maintenance (I/M) Testing
Some state and provincial and local
governments may have
Inspection/Maintenance (I/M) programs
to inspect the emission control equipment
on your vehicle. Failure to pass this
inspection could prevent you from getting
a vehicle registration.
If the service engine soon
indicator is on or the bulb does
not work, your vehicle may need
service. See On-Board Diagnostics.
Your vehicle may not pass the I/M test if
the service engine soon indicator is on or
not working properly, for example, the bulb
does not work, or if the OBD-II system has
determined that some of the emission
control systems have not been properly
checked. In this case, the vehicle is not
ready for I/M testing.
If you have just serviced the vehicle ’s
engine or transmission or the battery has
recently run down or you have replaced it,
the OBD-II system may indicate that the
vehicle is not ready for I/M testing. To
determine if the vehicle is ready for I/M
testing, turn the ignition key to the on
position for 15 seconds without cranking
the engine. If the service engine soon
indicator blinks eight times, it means that
the vehicle is not ready for I/M testing; if
the service engine soon indicator stays on
solid, it means that your vehicle is ready
for I/M testing.
The OBD-II system checks the emission
control system during normal driving. A
complete check may take several days.
If the vehicle is not ready for I/M testing,
you can perform the following driving cycle
consisting of mixed city and highway
driving: 1. 15 minutes of steady driving on an
expressway or highway followed by 20
minutes of stop-and-go driving with at
least four 30-second idle periods.
2. Allow your vehicle to sit for at least eight hours with the ignition off. Then,
start the vehicle and complete the
above driving cycle. The vehicle must
warm up to its normal operating
temperature. Once started, do not turn
off the vehicle until the above driving
cycle is complete.
If the vehicle is still not ready for I/M
testing, you need to repeat the above
driving cycle.
SELECTIVE CATALYTIC
REDUCTANT SYSTEM - DIESEL
Your vehicle may have a selective catalytic
reduction system. The system helps reduce
emission levels of oxides of nitrogen from
the exhaust system. The system
automatically injects diesel exhaust fluid
into the exhaust system to enable correct
selective catalytic reduction system
function.
Note: Selective catalytic reduction systems
are not fitted to vehicles in markets where
only high-sulfur diesel fuel is available.
Diesel Exhaust Fluid Level
In order for the system to operate correctly
you must maintain the diesel exhaust fluid
level.
A warning message appears in the
information display when the diesel
exhaust fluid level is low. If a warning
message appears, refill the diesel exhaust
fluid tank as soon as possible. See
Information Messages (page 120).
191
Super Duty (TFE), enUSA, Edition date: 201909, Third-Printing- Engine Emission Control
Page 197 of 631
becomes limited to engine idle only once
stopped. In these conditions, be cautious
where you stop your vehicle because you
may not be able to drive long distances
or maintain highway speeds until you
refill or replace the diesel exhaust fluid.
WARNING: Tampering with or
disabling the selective catalytic
reduction system results in severe
vehicle performance limitation including
eventual speed limiting to
5 mph
(8 km/h).
The information display shows a series of
messages about the amount of diesel
exhaust fluid available. A systems check
displays messages indicating the amount
of diesel exhaust fluid available or displays
a warning message indicating the
approximate distance remaining as the
fluid in the diesel exhaust fluid tank nears
empty. See
Information Messages
(page 120). As the diesel exhaust fluid level
nears empty, the warning
symbol displays and a series of
tones and messages starting at
500 mi
(800 km) remaining before diesel exhaust
fluid is depleted. The warning symbol and
messages continue until you refill the
diesel exhaust fluid tank. Continued driving without refilling results
in the following actions as required by the
California Air Resources Board (CARB) and
the U.S. Environmental Protection Agency
(EPA):
•
Within a preset distance to empty,
speed is limited upon vehicle restart.
Prior to this occurring a message
appears in the information display.
• Further vehicle operation without
refilling the diesel exhaust fluid tank
causes the engine to enter an idle-only
condition. This only occurs upon vehicle
refueling or at an extended idle. A
message indicates the required actions
to resume normal operation. It is
required to add a minimum of
1.0 gal
(3.8 L) of diesel exhaust fluid to the
tank to exit the idle-only condition, but
your vehicle is still in the speed-limiting
mode until you refill the tank
completely.
Note: For either vehicle speed limiting or
idle-only condition, normal vehicle operation
resumes when you refill the diesel exhaust
fluid tank.
Note: When filling the diesel exhaust fluid
tank from empty, there may be a short delay
before detecting the increased level of fluid.
The increased level detection must occur
before your vehicle returns to full power.
Diesel Exhaust Fluid Guidelines
and Information
• Use only diesel exhaust fluid that
carries the American Petroleum
Institute (API) certified diesel exhaust
fluid trademark or ISO 22241.
• Do not put diesel exhaust fluid in the
diesel fuel tank.
• Do not overfill the diesel exhaust fluid
tank.
• Diesel exhaust fluid is corrosive.
• Do not re-use the diesel exhaust fluid
container once it is emptied.
194
Super Duty (TFE), enUSA, Edition date: 201909, Third-Printing- Engine Emission ControlE163176
Page 204 of 631
AUTOMATIC TRANSMISSION
WARNING: Apply the parking
brake, shift into park (P), switch the
ignition off and remove the key before
you leave your vehicle. Failure to follow
this instruction could result in personal
injury or death. WARNING:
When your vehicle is
stationary, keep the brake pedal fully
pressed when shifting gears. Failure to
follow this instruction could result in
personal injury, death or property
damage.
Note: You may not be able to shift out of
park (P) unless the intelligent access key is
inside your vehicle.
Understanding the Shift Positions
of Your Automatic Transmission
(If Equipped)
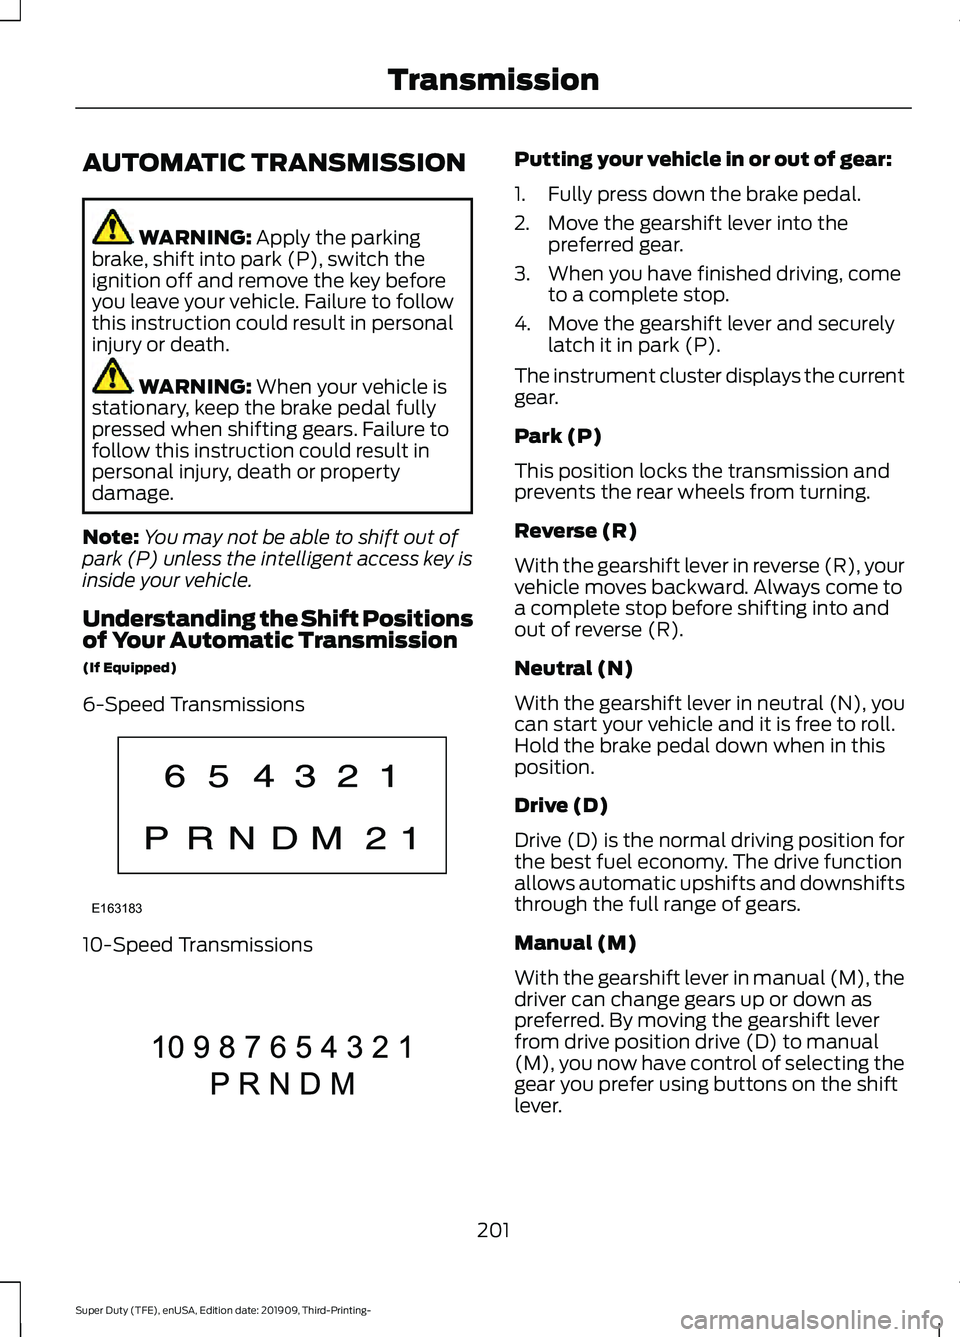
6-Speed Transmissions 10-Speed Transmissions Putting your vehicle in or out of gear:
1. Fully press down the brake pedal.
2. Move the gearshift lever into the
preferred gear.
3. When you have finished driving, come to a complete stop.
4. Move the gearshift lever and securely latch it in park (P).
The instrument cluster displays the current
gear.
Park (P)
This position locks the transmission and
prevents the rear wheels from turning.
Reverse (R)
With the gearshift lever in reverse (R), your
vehicle moves backward. Always come to
a complete stop before shifting into and
out of reverse (R).
Neutral (N)
With the gearshift lever in neutral (N), you
can start your vehicle and it is free to roll.
Hold the brake pedal down when in this
position.
Drive (D)
Drive (D) is the normal driving position for
the best fuel economy. The drive function
allows automatic upshifts and downshifts
through the full range of gears.
Manual (M)
With the gearshift lever in manual (M), the
driver can change gears up or down as
preferred. By moving the gearshift lever
from drive position drive (D) to manual
(M), you now have control of selecting the
gear you prefer using buttons on the shift
lever.
201
Super Duty (TFE), enUSA, Edition date: 201909, Third-Printing- TransmissionE163183 E308145
Page 207 of 631

Upshifts when Accelerating (Recommended for Best Fuel Economy) 10-Speed
36 mph (58 km/h)
34 mph (55 km/h)
7 - 8
45 mph (72 km/h)
44 mph (71 km/h)
8 - 9
49 mph (79 km/h)
47 mph (76 km/h)
9 - 10
Automatic Transmission Adaptive
Learning
This feature's design is to increase
durability and provide consistent shift feel
over the life of your vehicle. A new vehicle
or transmission may have firm shifts, soft
shifts or both. This operation is normal and
does not affect function or durability of the
transmission. Over time, the adaptive
learning process fully updates transmission
operation. Additionally, whenever you
disconnect the battery or install a new
battery, the system must relearn the
strategy.
For F350, F450, F550 and F600
Chassis Cab Vehicles
Your transmission could reduce the load
on the engine when the vehicle stops, and
the gear selector is in drive (D) to reduce
fuel consumption and emissions. The
transmission resumes operation when you
release the brake. This feature activates
when the transmission is sufficiently
warmed, and the vehicle is on a level slope.
Brake-Shift Interlock WARNING: When doing this
procedure, you need to take the
transmission out of park (P) which
means your vehicle can roll freely. To
avoid unwanted vehicle movement,
always fully apply the parking brake prior
to doing this procedure. Use wheels
chocks if appropriate. WARNING:
If the parking brake is
fully released, but the brake warning
lamp remains illuminated, the brakes
may not be working properly. Have your
vehicle checked as soon as possible.
Note: Do not drive your vehicle until you
verify that the brake lamps are working.
Your vehicle comes with brake-shift
interlock that prevents the gearshift lever
from moving from park (P) when you
switch the ignition on but have not pressed
the brake pedal.
If you cannot move the gearshift lever out
of the park (P) position when the ignition
is on and the brake pedal pressed, a
malfunction could have occurred. It is
possible that a fuse has blown, or your
vehicle ’s brake lamps are not operating
properly. See
Fuse Specification Chart
(page 329).
If you do not have a blown fuse and the
brake lamps are working properly, the
following procedure allows you to move
the gearshift lever from park (P):
1. Apply the parking brake. Switch the ignition key to 1 - 0, then remove the
key.
See Starting and Stopping the
Engine (page 168).
2. Move the steering column to the full down and full rearward position,
toward the driver seat.
3. Remove the gearshift lever boot.
204
Super Duty (TFE), enUSA, Edition date: 201909, Third-Printing- Transmission
Page 208 of 631
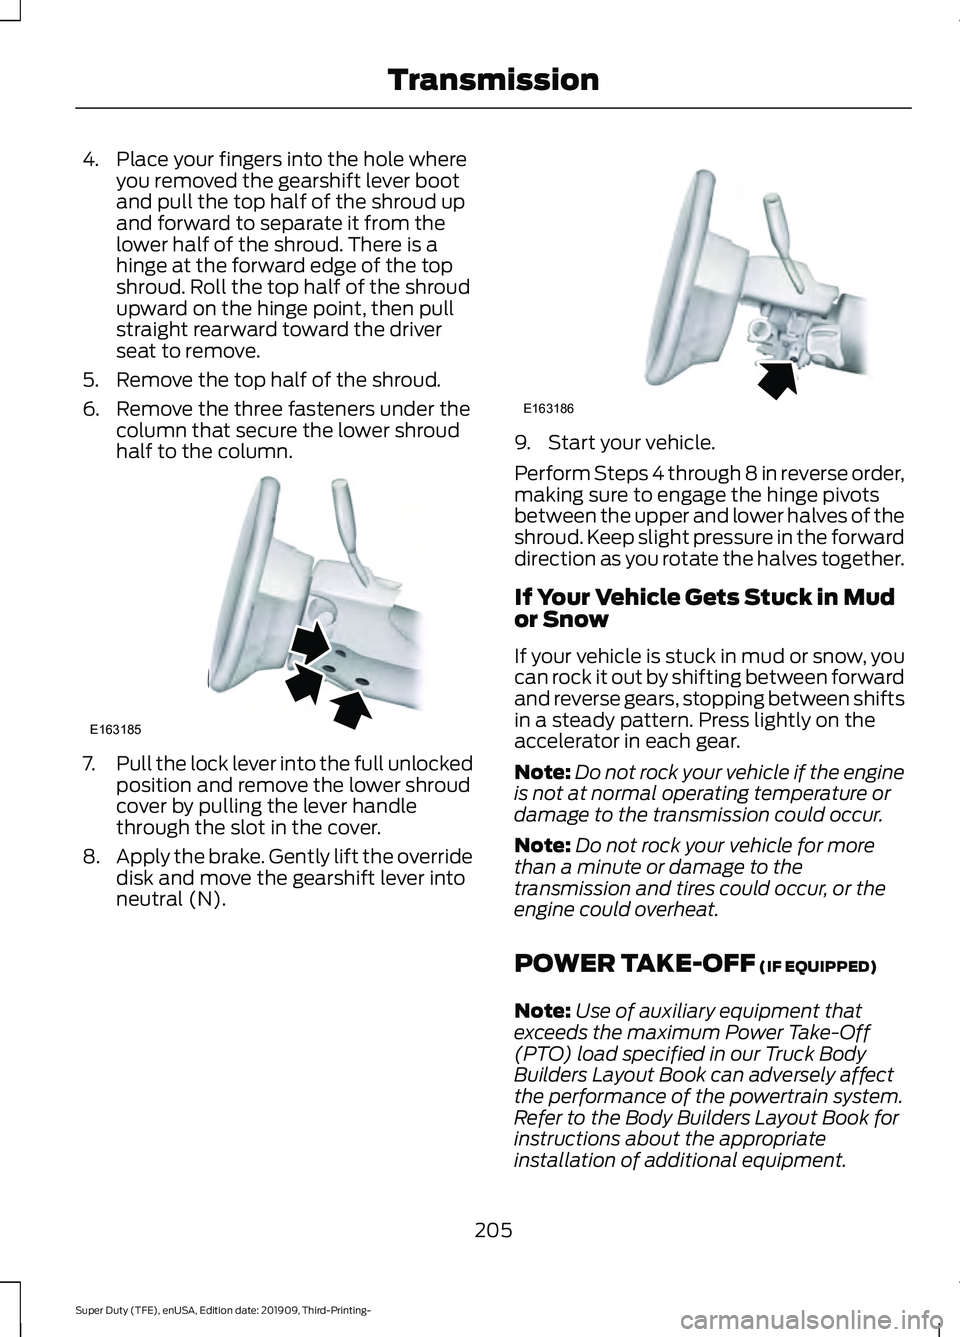
4. Place your fingers into the hole where
you removed the gearshift lever boot
and pull the top half of the shroud up
and forward to separate it from the
lower half of the shroud. There is a
hinge at the forward edge of the top
shroud. Roll the top half of the shroud
upward on the hinge point, then pull
straight rearward toward the driver
seat to remove.
5. Remove the top half of the shroud.
6. Remove the three fasteners under the column that secure the lower shroud
half to the column. 7.
Pull the lock lever into the full unlocked
position and remove the lower shroud
cover by pulling the lever handle
through the slot in the cover.
8. Apply the brake. Gently lift the override
disk and move the gearshift lever into
neutral (N). 9. Start your vehicle.
Perform Steps 4 through 8 in reverse order,
making sure to engage the hinge pivots
between the upper and lower halves of the
shroud. Keep slight pressure in the forward
direction as you rotate the halves together.
If Your Vehicle Gets Stuck in Mud
or Snow
If your vehicle is stuck in mud or snow, you
can rock it out by shifting between forward
and reverse gears, stopping between shifts
in a steady pattern. Press lightly on the
accelerator in each gear.
Note:
Do not rock your vehicle if the engine
is not at normal operating temperature or
damage to the transmission could occur.
Note: Do not rock your vehicle for more
than a minute or damage to the
transmission and tires could occur, or the
engine could overheat.
POWER TAKE-OFF (IF EQUIPPED)
Note: Use of auxiliary equipment that
exceeds the maximum Power Take-Off
(PTO) load specified in our Truck Body
Builders Layout Book can adversely affect
the performance of the powertrain system.
Refer to the Body Builders Layout Book for
instructions about the appropriate
installation of additional equipment.
205
Super Duty (TFE), enUSA, Edition date: 201909, Third-Printing- TransmissionE163185 E163186
Page 215 of 631
After driving through mud, clean off residue
stuck to rotating driveshafts and tires.
Excess mud stuck on tires and rotating
driveshafts can cause an imbalance that
could damage drive components.
Water
If you must drive through high water, drive
slowly. Traction or brake capability may
be limited.
When driving through water, determine the
depth and avoid water higher than the
bottom of the hubs. If the ignition system
gets wet, your vehicle may stall.
Once through water, always try the brakes.
Wet brakes do not stop your vehicle as
effectively as dry brakes. Drying can be
improved by applying light pressure to the
brake pedal while moving slowly.
Note:
Driving through deep water may
damage the transmission. If the front or rear
axle is submerged in water, the axle
lubricant and power transfer unit lubricant
should be checked and changed if
necessary.
Driving on Hilly or Sloping Terrain
Although natural obstacles may make it
necessary to travel diagonally up or down
a hill or steep incline, you should always
try to drive straight up or straight down.
Note: Avoid turning on steep slopes or
hills. A danger lies in losing traction, slipping
sideways and possible vehicle roll over.
Whenever driving on a hill, determine
beforehand the route you will use. Do not
drive over the crest of a hill without seeing
what conditions are on the other side. Do
not drive in reverse over a hill without the
aid of an observer.
When climbing a steep slope or hill, start
in a lower gear rather than downshifting to
a lower gear from a higher gear once the
ascent has started. This reduces strain on
the engine and the possibility of stalling. If your vehicle stalls, do not try to turn
around because this could cause vehicle
roll over. It is better to reverse back to a
safe location.
Apply just enough power to the wheels to
climb the hill. Too much power will cause
the tires to slip, spin or lose traction,
resulting in loss of vehicle control.
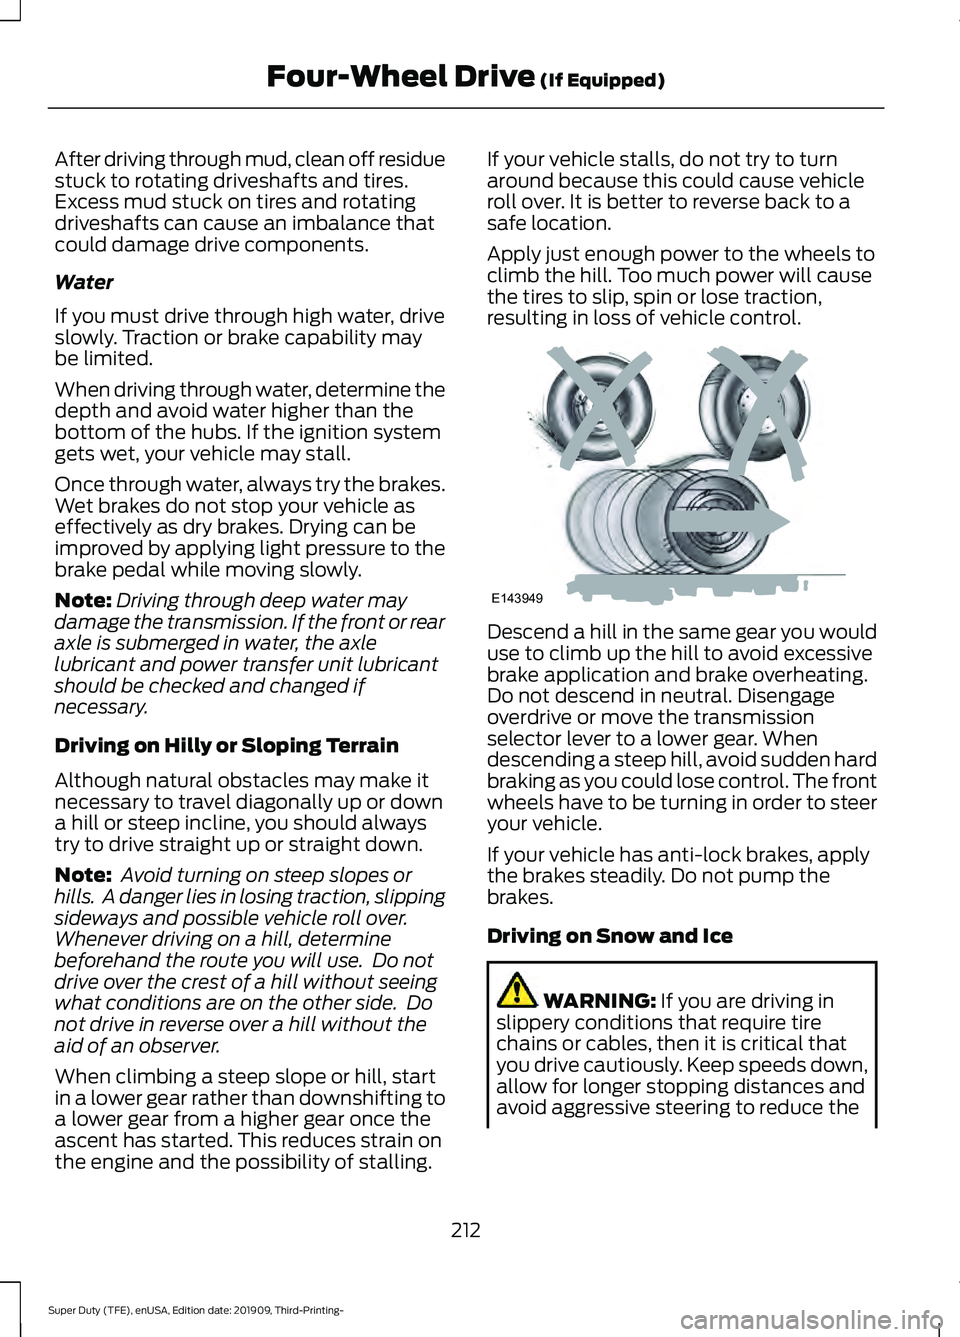
Descend a hill in the same gear you would
use to climb up the hill to avoid excessive
brake application and brake overheating.
Do not descend in neutral. Disengage
overdrive or move the transmission
selector lever to a lower gear. When
descending a steep hill, avoid sudden hard
braking as you could lose control. The front
wheels have to be turning in order to steer
your vehicle.
If your vehicle has anti-lock brakes, apply
the brakes steadily. Do not pump the
brakes.
Driving on Snow and Ice
WARNING: If you are driving in
slippery conditions that require tire
chains or cables, then it is critical that
you drive cautiously. Keep speeds down,
allow for longer stopping distances and
avoid aggressive steering to reduce the
212
Super Duty (TFE), enUSA, Edition date: 201909, Third-Printing- Four-Wheel Drive
(If Equipped)E143949
Page 216 of 631
chances of a loss of vehicle control
which can lead to serious injury or death.
If the rear end of your vehicle slides while
cornering, steer in the direction of the
slide until you regain control of your
vehicle.
Note: Excessive tire slippage can cause
transmission damage.
Four-wheel drive vehicles have advantages
over two-wheel drive vehicles in snow and
ice but can skid like any other vehicle.
Should you start to slide while driving on
snowy or icy roads, turn the steering wheel
in the direction of the slide until you regain
control.
Avoid sudden applications of power and
quick changes of direction on snow and
ice. Apply the accelerator slowly and
steadily when starting from a full stop.
Avoid sudden braking. Although a
four-wheel drive vehicle may accelerate
better than a two-wheel drive vehicle in
snow and ice, it will not stop any faster as
braking occurs at all four wheels. Do not
become overconfident as to road
conditions.
Make sure you allow sufficient distance
between you and other vehicles for
stopping. Drive slower than usual and
consider using one of the lower gears. In
emergency stopping situations, apply the
brake steadily. Do not pump the brake
pedal. See Hints on Driving With
Anti-Lock Brakes (page 219).
If Your Vehicle Gets Stuck in Mud or
Snow WARNING:
Do not spin the wheels
at over 34 mph (55 km/h). The tires may
fail and injure a passenger or bystander. If your vehicle gets stuck in mud or snow,
it may be rocked out by shifting between
forward and reverse gears, stopping
between shifts in a steady pattern. Press
lightly on the accelerator in each gear.
Note:
Do not rock your vehicle if the engine
is not at normal operating temperature,
damage to the transmission may occur.
Note: Do not rock your vehicle for more
than a minute, damage to the transmission
and tires may occur or the engine may
overheat.
Parking WARNING:
If the parking brake is
fully released, but the brake warning
lamp remains illuminated, the brakes
may not be working properly. Have your
vehicle checked as soon as possible. WARNING:
Apply the parking
brake, shift into park (P), switch the
ignition off and remove the key before
you leave your vehicle. Failure to follow
this instruction could result in personal
injury or death.
On some four-wheel drive vehicles, when
the transfer case is in the neutral (N)
position, the engine and transmission are
disconnected from the rest of the driveline.
Therefore, the vehicle is free to roll even if
the automatic transmission is in park (P)
or the manual transmission is in gear. Do
not leave the vehicle unattended with the
transfer case in the neutral (N) position.
Always set the parking brake fully and turn
off the ignition when leaving the vehicle.
213
Super Duty (TFE), enUSA, Edition date: 201909, Third-Printing- Four-Wheel Drive
(If Equipped)
Page 220 of 631
GENERAL INFORMATION
Note:
Occasional brake noise is normal. If
a metal-to-metal, continuous grinding or
continuous squeal sound is present, the
brake linings may be worn-out. Have the
system checked by an authorized dealer. If
your vehicle has continuous vibration or
shudder in the steering wheel while braking,
have it checked by an authorized dealer.
Note: Brake dust may accumulate on the
wheels, even under normal driving
conditions. Some dust is inevitable as the
brakes wear and does not contribute to
brake noise.
Wet brakes result in reduced braking
efficiency. Gently press the brake pedal a
few times when driving from a car wash or
standing water to dry the brakes.
Brake Over Accelerator
In the event the accelerator pedal
becomes stuck or entrapped, apply steady
and firm pressure to the brake pedal to
slow the vehicle and reduce engine power.
If you experience this condition, apply the
brakes and bring your vehicle to a safe
stop. Shift the transmission to park (P),
switch the engine off and apply the parking
brake. Inspect the accelerator pedal for
any interference. If none are found and the
condition persists, have your vehicle towed
to the nearest authorized dealer.
Brake Assist
Brake assist detects when you brake
rapidly by measuring the rate at which you
press the brake pedal. It provides
maximum braking efficiency as long as you
press the pedal, and can reduce stopping
distances in critical situations. Anti-lock Brake System
This system helps you maintain steering
control during emergency stops by keeping
the brakes from locking. This lamp momentarily
illuminates when you switch the
ignition on. If the light does not
illuminate during start up, remains on or
flashes, the system may be disabled. Have
the system checked by an authorized
dealer. If the anti-lock brake system is
disabled, normal braking is still effective.
See Warning Lamps and Indicators
(page 104).
Note: Indicators vary depending on region. If the lamp remains illuminated
after you release the parking
brake, have the system checked
by an authorized dealer.
It also illuminates momentarily
when you switch the ignition on
to confirm the lamp is functional. If it does
not illuminate when you switch the ignition
on, or begins to flash at any time, have the
system checked by an authorized dealer.
Diesel Engine Exhaust Braking
(If
Equipped) WARNING:
Do not use tow/haul
when the road surface is slippery. Failure
to follow this instruction could result in
the loss of control of your vehicle. WARNING:
Do not use diesel
engine exhaust braking when the road
surface is slippery. Failure to follow this
instruction could result in the loss of
control of your vehicle.
217
Super Duty (TFE), enUSA, Edition date: 201909, Third-Printing- Brakes E270480
Page 260 of 631
The electronic torque overlay steering
system adds supplemental steering assist
to the hydraulic gear when needed,
dependent on vehicle conditions such as
vehicle speed, steering wheel angle, and
steering wheel torque. The hydraulic
steering system provides the majority of
steering assistance. The electronic torque
overlay enables features such as pro trailer
backup assistance and lane departure
warning.
If your vehicle loses electrical power while
you are driving, your vehicle loses electric
power steering assistance. The steering
system still operates, and you can steer
your vehicle with hydraulic assist. Steering
your vehicle with only hydraulic assist
requires more effort.
Extreme continuous steering may increase
the effort required for you to steer your
vehicle. This increased effort prevents
overheating and permanent damage to
the steering system. You do not lose the
ability to steer your vehicle manually.
Typical steering and driving maneuvers
allow the system to cool and return to
normal operation.
Adaptive Learning (If Equipped)
The electronic power steering system
adaptive learning helps correct road
irregularities and improves overall handling
and steering feel. It communicates with
the brake system to help operate
advanced stability control and accident
avoidance systems. Whenever the battery
is disconnected or a new battery installed,
you must drive your vehicle a short
distance before the system relearns the
strategy and reactivates all systems. Adaptive Steering
(If Equipped)
Note: The adaptive steering system has
diagnostic checks that continuously monitor
the system. If the system detects a fault, a
message displays in the information display.
If a red warning message displays, stop your
vehicle as soon as it is safe to do so. The
message may clear if the fault is no longer
present. If an adaptive steering system
warning message appears each time you
start your vehicle, have the system checked
as soon as possible.
The adaptive steering system continually
changes the steering ratio with changes to
vehicle speed, optimizing the steering
response in all conditions. The system also
changes when you switch on the
transmission tow/haul feature. When you
select the tow/haul button, the adaptive
steering system reduces vehicle sensitivity
to steering inputs at higher vehicle speeds,
while maintaining the ease of parking and
maneuverability at low speeds.
Note: The adaptive steering system is
designed with a locking device. With the
lock engaged, the adaptive steering system
remains mechanically locked at a fixed
steering ratio. You may also notice a click
when you switch the vehicle on or after you
switch it off, as the lock disengages or
engages.
Note: If your vehicle loses electrical power
or detects a fault when you are driving, the
system automatically shuts down and you
retain normal steering function with a fixed
steering ratio. During this time it is possible
that the steering wheel may not be straight
when the vehicle is driving straight ahead.
In addition, the driver may notice that the
steering wheel angle required to steer the
vehicle may be different.
257
Super Duty (TFE), enUSA, Edition date: 201909, Third-Printing- Driving Aids