heating FORD F-450 2021 Owners Manual
[x] Cancel search | Manufacturer: FORD, Model Year: 2021, Model line: F-450, Model: FORD F-450 2021Pages: 666, PDF Size: 11.3 MB
Page 86 of 666
Touch the button to switch the
heated steering wheel on and
off.
Note: You can use the heated steering
wheel only when the engine is running.
Note: The system uses a sensor and is
designed to control the temperature of the
steering wheel and to prevent it from
overheating.
Note: In warm temperatures, the steering
wheel quickly reaches its maximum
temperature and the system reduces the
current to the heating element. This could
cause you to think that the system has
stopped working but it has not. This is
normal.
HORN Press on the center of the
steering wheel near the horn icon
to activate the horn.
83
Super Duty (TFE) Canada/United States of America, enUSA, Edition date: 202008, Third-Printing- Steering Wheel E270945
Page 101 of 666
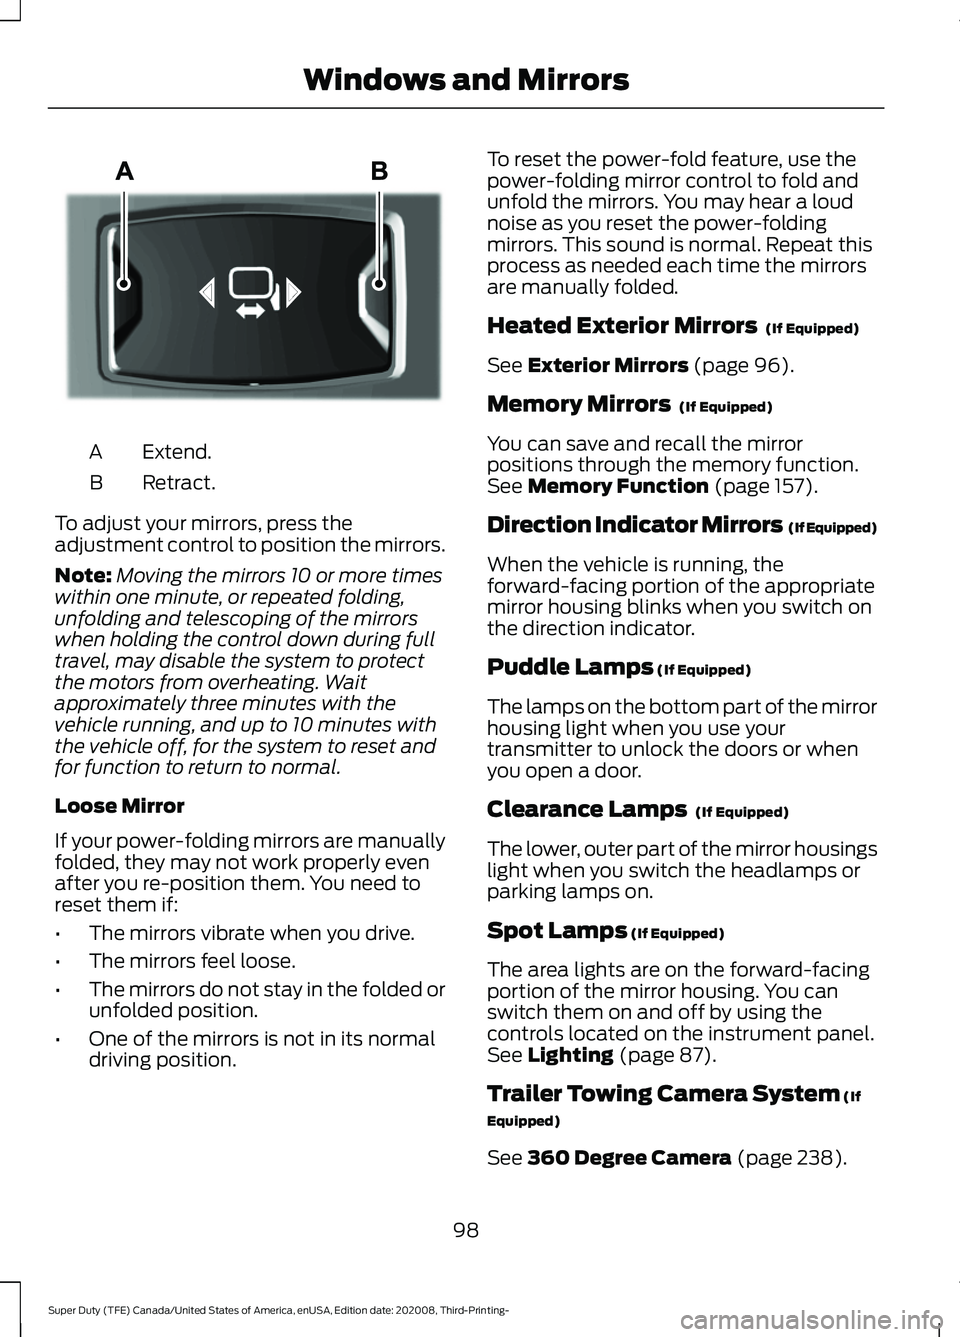
Extend.
A
Retract.
B
To adjust your mirrors, press the
adjustment control to position the mirrors.
Note: Moving the mirrors 10 or more times
within one minute, or repeated folding,
unfolding and telescoping of the mirrors
when holding the control down during full
travel, may disable the system to protect
the motors from overheating. Wait
approximately three minutes with the
vehicle running, and up to 10 minutes with
the vehicle off, for the system to reset and
for function to return to normal.
Loose Mirror
If your power-folding mirrors are manually
folded, they may not work properly even
after you re-position them. You need to
reset them if:
• The mirrors vibrate when you drive.
• The mirrors feel loose.
• The mirrors do not stay in the folded or
unfolded position.
• One of the mirrors is not in its normal
driving position. To reset the power-fold feature, use the
power-folding mirror control to fold and
unfold the mirrors. You may hear a loud
noise as you reset the power-folding
mirrors. This sound is normal. Repeat this
process as needed each time the mirrors
are manually folded.
Heated Exterior Mirrors (If Equipped)
See
Exterior Mirrors (page 96).
Memory Mirrors
(If Equipped)
You can save and recall the mirror
positions through the memory function.
See
Memory Function (page 157).
Direction Indicator Mirrors (If Equipped)
When the vehicle is running, the
forward-facing portion of the appropriate
mirror housing blinks when you switch on
the direction indicator.
Puddle Lamps
(If Equipped)
The lamps on the bottom part of the mirror
housing light when you use your
transmitter to unlock the doors or when
you open a door.
Clearance Lamps
(If Equipped)
The lower, outer part of the mirror housings
light when you switch the headlamps or
parking lamps on.
Spot Lamps
(If Equipped)
The area lights are on the forward-facing
portion of the mirror housing. You can
switch them on and off by using the
controls located on the instrument panel.
See
Lighting (page 87).
Trailer Towing Camera System
(If
Equipped)
See
360 Degree Camera (page 238).
98
Super Duty (TFE) Canada/United States of America, enUSA, Edition date: 202008, Third-Printing- Windows and MirrorsE218902
Page 149 of 666
Switching Dual Mode On and Off
Press the button.
CLIMATE CONTROL –
TROUBLESHOOTING
Climate Control – Frequently
Asked Questions
Why is the volume of air to the rear
passenger compartment limited ? Objects may obstruct the air direction
to the rear passenger compartment.
Make sure objects have not been
placed under the front seats.
Why is the volume of air from the air
vents reduced? The air intake area at the base of the
windshield could be obstructed. Make
sure the air intake area is free from any
snow, ice or leaves.
What are the recommended settings
for heating the interior? Auto mode on and instrument panel
and side air vents fully open.
How can I quickly heat the interior? Select the highest blower motor
speed, highest temperature and direct
the air to the footwell air vents.
What are the recommended settings
for cooling the interior? Auto mode on.
How can I quickly cool the interior? Switch maximum cooling on, switch
recirculated air on and drive with the
windows open until you feel cold air
through the air vents. How can I reduce the humidity build-up
inside my vehicle?
Do not drive with the system off or
with recirculated air on.
How can I defog the side windows? Switch maximum defrost on.
How can I defog or clear the windshield
of thin ice? Switch maximum defrost on.
Why do I feel air from the footwell air
vents regardless of the air
distribution? This is normal operation. You may feel
a small amount of air from the
footwell air vents regardless of the air
distribution.
What happens if I switch auto mode on
when the outside temperature and
in-vehicle temperature is high? The system temporarily selects
recirculated air to maximize cooling.
What happens if I switch auto mode on
when the outside temperature is low
and the engine is cold? Air is directed to the windshield and
the outer instrument panel air vents.
146
Super Duty (TFE) Canada/United States of America, enUSA, Edition date: 202008, Third-Printing- Climate Control - Vehicles With: Automatic Temperature
ControlE265280
Page 152 of 666
CLIMATE CONTROL –
TROUBLESHOOTING
Climate Control – Frequently
Asked Questions
Why is the volume of air to the rear
passenger compartment limited?
Objects may obstruct the air direction
to the rear passenger compartment.
Make sure objects have not been
placed under the front seats.
Why is the volume of air from the air
vents reduced? The air intake area at the base of the
windshield could be obstructed. Make
sure the air intake area is free from any
snow, ice or leaves.
What are the recommended settings
for heating the interior? A medium blower motor speed
selected and the air directed to the
footwell and windshield air vents.
How can I quickly heat the interior? Select the highest blower motor
speed, highest temperature and direct
the air to the footwell air vents.
What are the recommended settings
for cooling the interior? Air conditioning on, a medium blower
motor speed selected and air directed
to the footwell and windshield air
vents.
How can I quickly cool the interior? Switch maximum cooling on, switch
recirculated air on and drive with the
windows open until you feel cold air
through the air vents. How can I reduce the humidity build-up
inside my vehicle?
Do not drive with the system off or
with recirculated air on.
How can I defog the side windows? Switch maximum defrost on.
How can I defog or clear the windshield
of thin ice? Switch maximum defrost on.
Why do I feel air from the footwell air
vents regardless of the air
distribution? This is normal operation. You may feel
a small amount of air from the
footwell air vents regardless of the air
distribution.
149
Super Duty (TFE) Canada/United States of America, enUSA, Edition date: 202008, Third-Printing- Climate Control - Vehicles With: Manual Temperature Control
Page 163 of 666
Use your vehicle key to lock the storage
space. See Keys and Remote Controls
(page 55).
HEATED SEATS
(IF EQUIPPED) WARNING: People who are unable
to feel pain to their skin because of
advanced age, chronic illness, diabetes,
spinal cord injury, medication, alcohol
use, exhaustion or other physical
conditions, must exercise care when
using the heated seat. The heated seat
may cause burns even at low
temperatures, especially if used for long
periods of time. Do not place anything
on the seat that insulates against heat,
such as a blanket or cushion. This may
cause the heated seat to overheat. Do
not puncture the seat with pins, needles
or other pointed objects. This may
damage the heating element which may
cause the heated seat to overheat. An
overheated seat may cause serious
personal injury.
Do not do the following:
• Place heavy objects on the seat.
• Operate the heated seat if water or any
other liquid spills on the seat. Allow the
seat to dry thoroughly.
Note: The engine must be running to use
this feature. Press the heated seat symbol to cycle
through the various heat settings and off.
More indicator lights indicate warmer
settings.
Note:
The heated seats may remain on
after you remote start your vehicle, based
on your remote start settings. The heated
seats may also turn on when you start your
vehicle if they were on when you switched
your vehicle off.
Rear Heated Seats
(If Equipped) WARNING: People who are unable
to feel pain to their skin because of
advanced age, chronic illness, diabetes,
spinal cord injury, medication, alcohol
use, exhaustion or other physical
conditions, must exercise care when
using the heated seat. The heated seat
may cause burns even at low
temperatures, especially if used for long
periods of time. Do not place anything
on the seat that insulates against heat,
such as a blanket or cushion. This may
cause the heated seat to overheat. Do
not puncture the seat with pins, needles
or other pointed objects. This may
damage the heating element which may
cause the heated seat to overheat. An
overheated seat may cause serious
personal injury.
Do not do the following:
• Place heavy objects on the seat.
• Operate the heated seat if water or any
other liquid spills on the seat. Allow the
seat to dry thoroughly.
Note: The engine must be running to use
this feature.
The rear seat heat controls are on the rear
of the center console.
160
Super Duty (TFE) Canada/United States of America, enUSA, Edition date: 202008, Third-Printing- SeatsE146322
Page 164 of 666
Press the heated seat symbol to cycle
through the various heat settings and off.
More indicator lights indicate warmer
settings.
The heated seat module resets at every
ignition run cycle. While the ignition is in
the on position, press the heated seat
switch to enable heating mode. When
activated, they turn off automatically when
you switch off the engine.
VENTILATED SEATS (IF EQUIPPED)
Note: The ventilated seats may remain on
after you remote start your vehicle, based
on your remote start settings. The ventilated
seats may also turn on when you start your
vehicle if they were on when you switched
your vehicle off.
Do not do the following:
• Spill liquid on the front seats. This may
cause the air vent holes to become
blocked and not work properly.
• Place cargo or objects under the seats.
They may block the air intake causing
the air vents to not work properly.
The engine must be running to use this
feature. Press this symbol to cycle through the
various ventilation settings and off. More
indicator lights indicate higher fan speeds.
If the engine falls below 350 RPM while
the ventilated seats are on, the feature
turns itself off. You need to reactivate it.
Note:
To improve comfort, use the
ventilated seats along with the vehicle ’s air
conditioning system.
161
Super Duty (TFE) Canada/United States of America, enUSA, Edition date: 202008, Third-Printing- SeatsE146322 E224689
Page 169 of 666
3.
Press and hold the function button you
want to program for 2 seconds, then
release. Repeat this step. Depending
on your brand of garage door opener,
you may need to repeat this sequence
a third time.
Gate Operator / Canadian
Programming
Canadian radio-frequency laws require
transmitter signals to “time-out” (or quit)
after several seconds of transmission –
which may not be long enough for
HomeLink to pick up the signal during
programming. Similar to this Canadian law,
some U.S. gate operators are designed to
“time-out” in the same manner.
Note: If programming a garage door opener
or gate operator, it is advised to unplug the
device during the “cycling” process to
prevent possible overheating.
1. Press and release, every two seconds,
your hand-held transmitter until the
HomeLink indicator light changes to a
rapidly blinking or continuously on light.
2. Release the hand-held transmitter button.
3. Continue programing HomeLink. See In-Vehicle Programming, Step 4.
Erasing the Function Button Codes
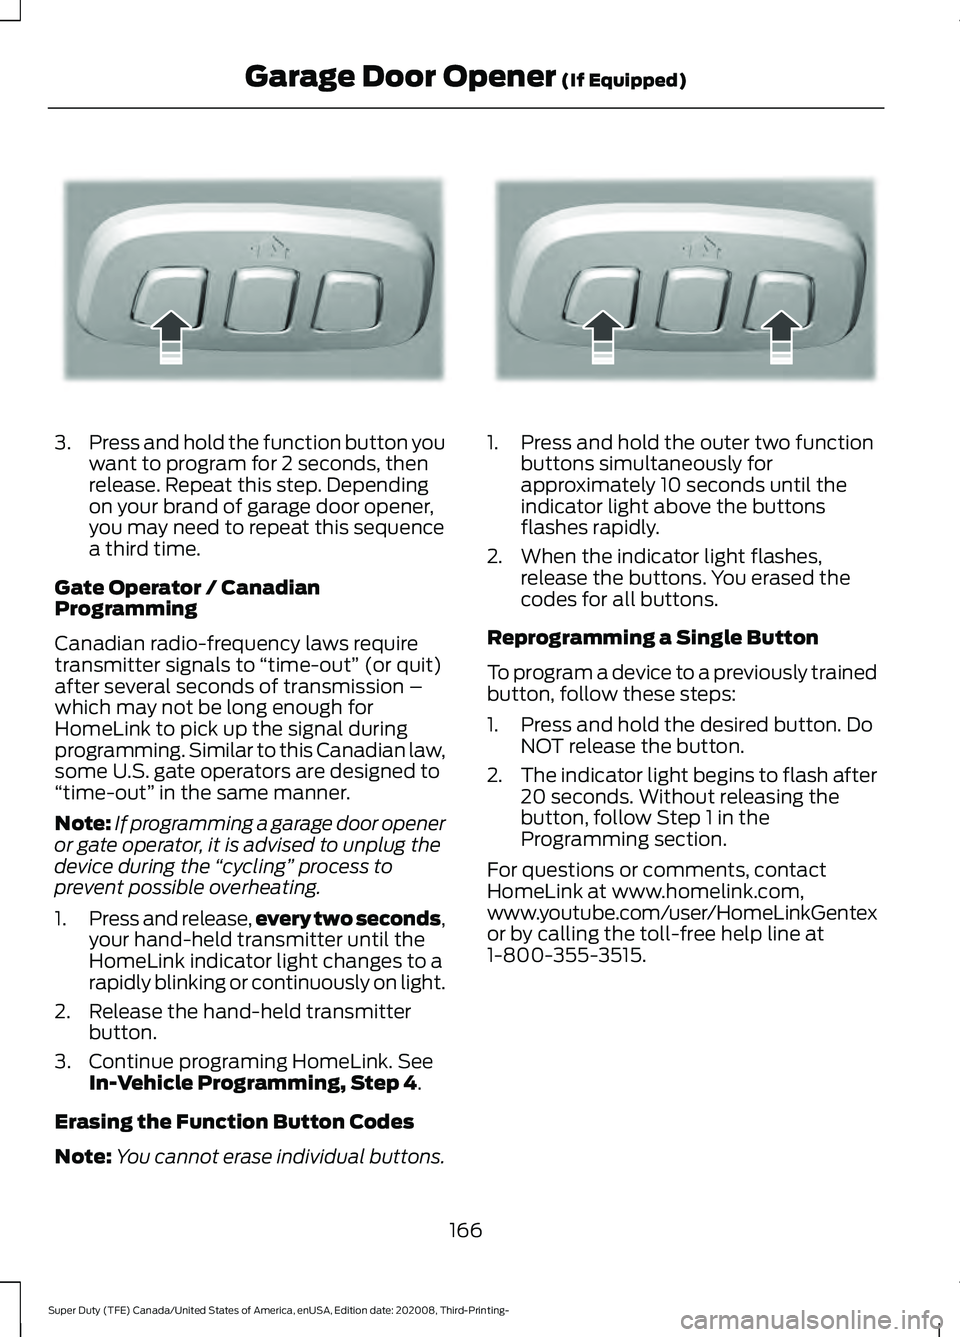
Note: You cannot erase individual buttons. 1. Press and hold the outer two function
buttons simultaneously for
approximately 10 seconds until the
indicator light above the buttons
flashes rapidly.
2. When the indicator light flashes, release the buttons. You erased the
codes for all buttons.
Reprogramming a Single Button
To program a device to a previously trained
button, follow these steps:
1. Press and hold the desired button. Do NOT release the button.
2. The indicator light begins to flash after
20 seconds. Without releasing the
button, follow Step 1 in the
Programming section.
For questions or comments, contact
HomeLink at www.homelink.com,
www.youtube.com/user/HomeLinkGentex
or by calling the toll-free help line at
1-800-355-3515.
166
Super Duty (TFE) Canada/United States of America, enUSA, Edition date: 202008, Third-Printing- Garage Door Opener
(If Equipped)E188212 E188213
Page 190 of 666
FUEL QUALITY - DIESEL
Fuel Requirements - Choosing The
Right Fuel: Vehicles Operated
Where Ultra Low Sulfur Diesel Fuel
Is Required (United
States/Canada/Puerto Rico/U.S.
Virgin Islands And Other Locales)
Note:
Your warranty will not cover damage
caused by using an improper type of fuel or
fuel additive.
Note: Do not blend used engine oil with
diesel fuel under any circumstances.
Blending used oil with the fuel will
significantly increase your vehicle ’s exhaust
emissions and reduce engine life due to
increased internal wear.
We recommend Top Tier diesel fuel where
available to help minimize engine deposits
and maintain optimal vehicle and engine
performance. For additional information,
refer to www.toptiergas.com.
You should use Ultra-Low Sulfur Diesel
fuel (also known as ULSD) designated as
number 1-D or 2-D with a maximum of
15-ppm sulfur in your diesel vehicle. You
may operate your vehicle on diesel fuels
containing up to 20% biodiesel, also
known as B20. These fuels should meet
the ASTM D975 diesel or the ASTM D7467
B6-B20 biodiesel industry specifications.
Outside of North America, use fuels
meeting EN590 or equivalent local market
standard. Using low sulfur diesel fuel
(16-500 ppm) or high sulfur
diesel fuel (greater than 500
ppm) in your diesel engine will cause
certain emission components to
malfunction which may also cause the
service engine soon light to illuminate
indicating an emissions-related concern. Diesel fuel is adjusted seasonally for cold
temperature. For best results at
temperatures below 19°F (-7°C), we
recommended using a diesel fuel which
has been seasonally adjusted for the
ambient conditions.
Fuel Requirements - Choosing The
Right Fuel: Vehicles Operated
Where Ultra Low Sulfur Diesel Fuel
Is Not Required
For the engine to operate reliably on
low-sulfur or high-sulfur diesel fuel, the
engine must be a factory built high-sulfur
engine (available as a dealer order option
for select markets) or an ultra low sulfur
diesel fuel configured engine that has been
retrofitted for high-sulfur diesel fuel using
Ford Motor Company dealer service parts.
Failure to use retrofit components other
than those available through your
authorized dealer will result in coolant
system damage, engine overheating,
selective catalyst reduction system or
diesel particulate filter damage and
possible base engine damage.
Use only a diesel engine configured for use
with high sulfur diesel fuel in markets with
diesel fuel that has sulfur content greater
than 15 ppm. Using low sulfur diesel fuel
(16–500 ppm) or high sulfur diesel fuel
(greater than 500 ppm) in a diesel engine
designed to use only Ultra Low Sulfur
Diesel fuel may result in damage to engine
emission control devices and the
aftertreatment system, potentially
rendering the vehicle inoperable.
Vehicles with engines configured for use
with high sulfur diesel fuel are only
available for sale in countries where ultra
low sulfur diesel fuel is generally not
available or mandated by the government.
Vehicles originally sold in a ultra low sulfur
diesel fuel market that are subsequently
187
Super Duty (TFE) Canada/United States of America, enUSA, Edition date: 202008, Third-Printing- Fuel and Refueling
Page 191 of 666
exported to non- ultra low sulfur diesel fuel
markets will need to be retrofitted at the
customer
’s expense using Ford authorized
dealer service parts in order to be reliably
operated on non- ultra low sulfur diesel
fuel.
Biodiesel WARNING: Do not mix diesel with
gasoline, gasohol or alcohol. This could
cause an explosion.
Note: Do not use home heating oil,
agricultural fuel, raw fats and oils, waste
cooking greases, biodiesel greater than 20%
or any diesel not intended for highway use.
Damage to the fuel injection system, engine
and exhaust catalyst, and diesel particulate
filter can occur if you use an improper fuel.
Red dye is used to identify fuels intended
for agricultural and non-highway use.
You may operate your vehicle on diesel
fuels containing up to 20% biodiesel, also
known as B20.
Biodiesel fuel is a chemically converted
product from renewable fuel sources, such
as vegetable oils, animal fats and waste
cooking greases.
To help achieve acceptable engine
performance and durability when using
biodiesel in your vehicle:
• Confirm the biodiesel content of the
fuel to be B20 (20% biodiesel) or less
• Only use biodiesel fuel of good quality
that complies with industry standards
• Follow the recommended service
maintenance intervals
See General
Maintenance Information (page 565). •
Do not store biodiesel fuel in the fuel
tank for more than 1 month
• Consider changing brands or reducing
biodiesel content if you have cold
temperature fuel gelling issues or a
frequent LOW FUEL PRESSURE
message appearing
Use of biodiesel in concentrations greater
than 20% may cause damage to your
vehicle, including engine and/or exhaust
after-treatment hardware (exhaust
catalyst and particulate filter) failures.
Concentrations greater than 20% can also
cause fuel filter restrictions that may result
in a lack of power or damage to fuel
system components, including fuel pump
and fuel injector failures.
We recommend SAE 5W-40 oil for fuels
with greater than 5% biodiesel (B5). For
more information about oil change
intervals and other maintenance when
operating on biodiesel
See Special
Operating Conditions Scheduled
Maintenance
(page 574).
Look for a label on the fuel pump to
confirm the amount of biodiesel contained
in a diesel fuel. Biodiesel content is often
indicated with the letter B followed by the
percent of biodiesel in the fuel. For
example, B20 indicates a fuel containing
20% biodiesel. Ask the service station
attendant to confirm the biodiesel content
of a diesel fuel if you do not see a label on
the fuel pump.
Biodiesel fuels degrade more easily than
diesel fuels not containing biodiesel and
should not be stored in the fuel tank for
more than 1 month. If you plan to park or
store your vehicle for more than 1 month,
then you should empty your vehicle fuel
tank of biodiesel fuel. You should fill the
tank with a pure petroleum-based diesel
fuel and run your vehicle for a minimum of
30 minutes.
188
Super Duty (TFE) Canada/United States of America, enUSA, Edition date: 202008, Third-Printing- Fuel and Refueling
Page 202 of 666
Only use diesel exhaust fluid that is
certified by the American Petroleum
Institute (API). Non-certified diesel exhaust
fluid use can cause damage not covered
by the vehicle Warranty.
Note:
Do not put diesel exhaust fluid in the
fuel tank. This can cause damage not
covered by the vehicle Warranty.
You can purchase diesel exhaust fluid at
an authorized dealer, most highway truck
stops or you can contact roadside
assistance for help in finding a retailer that
sells diesel exhaust fluid. In addition, there
is a government website to help you find
the nearest location to purchase diesel
exhaust fluid:
http://www.discoverdef.com.
Filling the Diesel Exhaust Fluid Tank
Using a Fuel Station Pump
Filling the diesel exhaust fluid tank using
a nozzle is similar to fuel fill. The nozzle
shuts off automatically when the tank is
full. Do not continue to fill the tank as this
could cause spilling or overflow, potentially
damaging the tank.
Filling the Diesel Exhaust Fluid Tank
Using a Container
The following procedure applies to
Motorcraft diesel exhaust fluid or similar
fluid containers. Always follow the
manufacturer's instructions.
1. Remove the diesel exhaust fluid container cap. Place the spout on to
the container and tighten it until you
feel a strong resistance.
2. Remove the diesel exhaust fluid tank filler cap.
3. Insert the spout in to the filler neck until
the seal on the spout seats on to the
filler neck. Pour the fluid in to the tank.
When the tank is full the fluid stops
flowing automatically. 4. Return the container to the vertical
position slightly below the diesel
exhaust fluid filler neck. Allow any fluid
remaining in the spout to drain back in
to the container.
5. Remove the spout from the diesel exhaust fluid filler neck. Replace the
diesel exhaust fluid tank cap.
6. Remove the spout from the diesel exhaust fluid container and replace the
cap.
Note: If there is diesel exhaust fluid left in
the container retain it for later use. The
spout is re-useable. Wash the spout with
clean water prior to storage. Do not use the
diesel exhaust fluid spout with any other
fluid.
Filling the Diesel Exhaust Fluid Tank in
Cold Climates
Diesel exhaust fluid may freeze if the
ambient temperature is below 12°F (-11°C).
Your vehicle has a preheating system
which allows diesel exhaust fluid to
operate below 12°F (-11°C). If you do not
use your vehicle for an extended period
when the ambient temperature is below
12°F (-11°C)
, the fluid in the tank may
freeze. If the tank is overfilled and the fluid
freezes it may damage the tank. This is not
covered by the vehicle warranty.
Diesel Exhaust Fluid Warning
Messages and Vehicle Operations WARNING:
Diesel exhaust fluid
must be refilled when low or replaced
when contaminated or your vehicle
speed becomes limited to
50 mph
(80 km/h). In these conditions, drive with
caution and refill diesel exhaust fluid
immediately. If the diesel exhaust fluid
becomes empty or contaminated and
fluid is not replaced, your vehicle
199
Super Duty (TFE) Canada/United States of America, enUSA, Edition date: 202008, Third-Printing- Engine Emission Control