traction control FORD F-450 2022 User Guide
[x] Cancel search | Manufacturer: FORD, Model Year: 2022, Model line: F-450, Model: FORD F-450 2022Pages: 740, PDF Size: 12.6 MB
Page 254 of 740
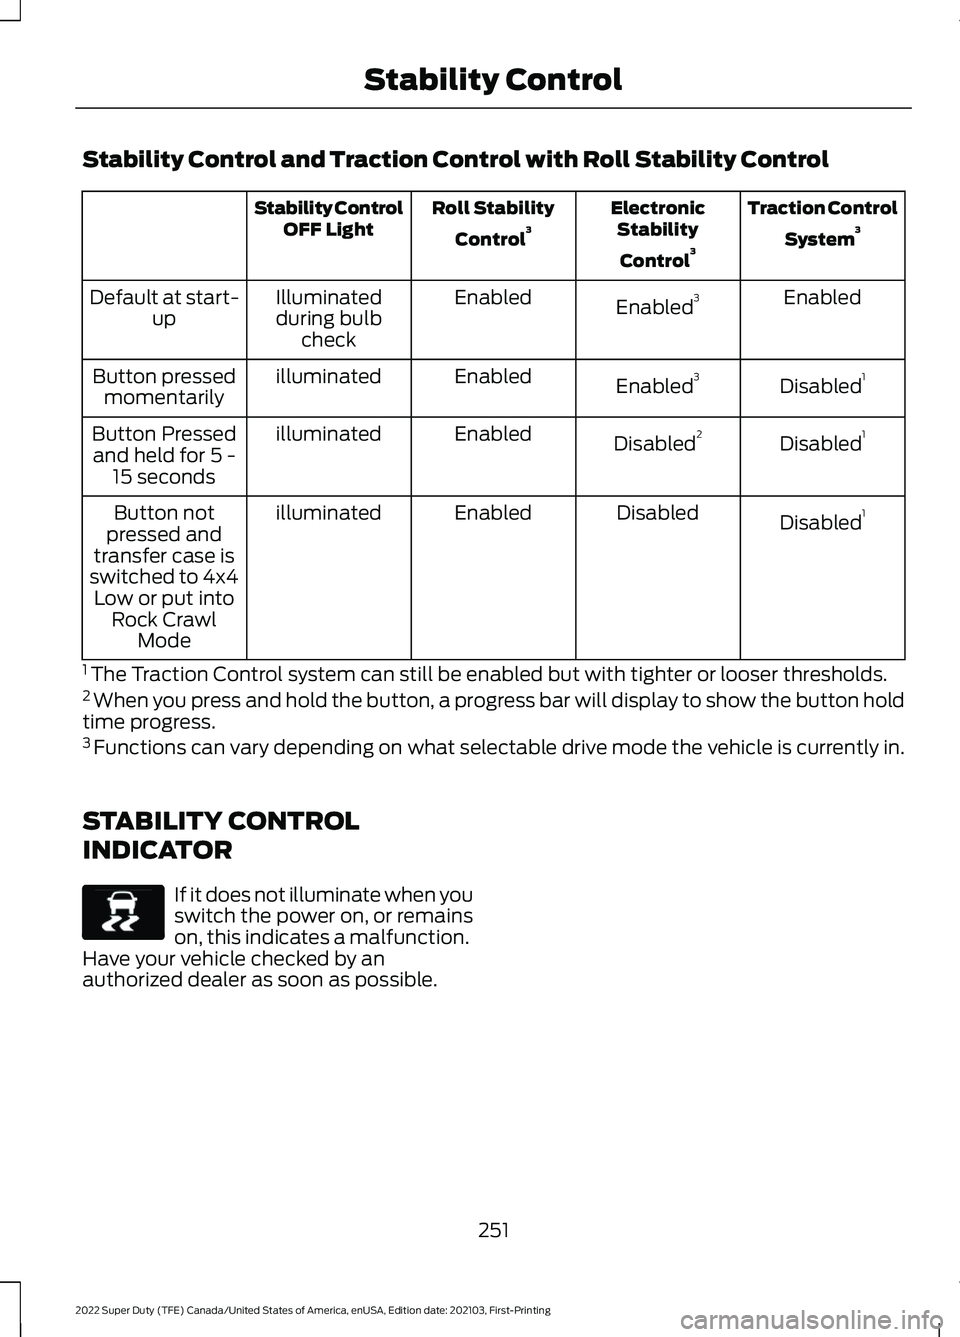
Stability Control and Traction Control with Roll Stability Control
Traction Control
System 3
Electronic
Stability
Control 3
Roll Stability
Control 3
Stability Control
OFF Light
Enabled
Enabled 3
Enabled
Illuminated
during bulb check
Default at start-
up
Disabled1
Enabled 3
Enabled
illuminated
Button pressed
momentarily
Disabled1
Disabled 2
Enabled
illuminated
Button Pressed
and held for 5 - 15 seconds
Disabled1
Disabled
Enabled
illuminated
Button not
pressed and
transfer case is
switched to 4x4 Low or put into Rock Crawl Mode
1 The Traction Control system can still be enabled but with tighter or looser thresholds.
2 When you press and hold the button, a progress bar will display to show the button hold
time progress.
3 Functions can vary depending on what selectable drive mode the vehicle is currently in.
STABILITY CONTROL
INDICATOR If it does not illuminate when you
switch the power on, or remains
on, this indicates a malfunction.
Have your vehicle checked by an
authorized dealer as soon as possible.
251
2022 Super Duty (TFE) Canada/United States of America, enUSA, Edition date: 202103, First-Printing Stability ControlE138639
Page 255 of 740
WHAT IS TRAIL CONTROL
WARNING: The system does not
control speed in low traction conditions
or extremely steep slopes. The system
is designed to be an aid and does not
relieve you of your responsibility to drive
with due care and attention. Failure to
follow this instruction could result in
personal injury.
Trail control lets you focus on steering
during low-speed and off-road use by
controlling your vehicle's acceleration and
braking to maintain the speed that you set.
You may hear a noise from the anti-lock
brake system pump motor when you use
the system. This is normal.
SWITCHING TRAIL CONTROL
ON AND OFF Press the button.
The system switches off if you press the
button again or exceed 40 mph (64 km/h).
SETTING THE TRAIL CONTROL
SPEED
Note: The buttons are located on the
steering wheel. Drive to your preferred speed. Press button to increase the set
current speed.
Press button to decrease the set
current speed.
Note: The indicator changes color.
You can adjust the set speed in small or
large increments. Press the toggle button
upward or downward once to adjust the
set speed in small increments. Press and
hold the toggle button upward or
downward to adjust the set speed in large
increments.
You can also adjust the set speed by
braking.
Note: Pressing the brake pedal does not
switch off the system.
CANCELING THE SET SPEED Press the button.
TRAIL CONTROL INDICATORS 252
2022 Super Duty (TFE) Canada/United States of America, enUSA, Edition date: 202103, First-Printing Trail Control
(If Equipped)E332910 E265298 E272858
Page 257 of 740
WHAT IS HILL DESCENT
CONTROL
Hill descent control allows the driver to set
and maintain vehicle speed while
descending steep slopes in various surface
conditions.
HOW DOES HILL DESCENT
CONTROL WORK
Hill descent control can maintain vehicle
speeds on downhill slopes between
2
– 20 mph (3– 32 km/h). Above 20 mph
(32 km/h), the system remains on but the
descent speed cannot be set or
maintained.
Note: The system does not function below
2 mph (3 km/h)
.
The system requires a cool down interval
after a period of sustained use. Hill descent
control provides a warning in the message
center and a tone sounds when the system
is about to disengage for cooling. At this
time, manually apply the brakes as needed
to maintain descent speed.
Note: The amount of time that the system
can remain active before cooling varies with
conditions.
HILL DESCENT CONTROL
PRECAUTIONS WARNING:
The system does not
control speed in low traction conditions
or extremely steep slopes. The system
is designed to be an aid and does not
relieve you of your responsibility to drive
with due care and attention. Failure to
follow this instruction could result in
personal injury. WARNING:
Hill descent control
cannot control descent in all surface
conditions and circumstances, such as
ice or extremely steep grades. Hill
descent control is a driver assist system
and cannot substitute for good judgment
by the driver. Failure to do so may result
in loss of vehicle control, crash or serious
injury. WARNING:
The system does not
replace the parking brake. When you
leave your vehicle, always apply the
parking brake and shift the transmission
into park (P) for automatic transmission
or first gear for manual transmission.
SWITCHING HILL DESCENT
CONTROL ON AND OFF Press the button on the
instrument panel. A light
illuminates and a tone sounds
when the system is active.
SETTING THE HILL DESCENT
SPEED
To increase or decrease the descent speed,
press the accelerator or brake pedal, or use
the SET
+ and SET - buttons on the
steering wheel. Once you reach the
preferred speed remove your feet from the
pedals.
HILL DESCENT CONTROL
INDICATOR Illuminates when you switch hill
descent control on.
254
2022 Super Duty (TFE) Canada/United States of America, enUSA, Edition date: 202103, First-Printing Hill Descent Control
(If Equipped)E163171 E163171
Page 278 of 740
Optimal system performance requires a
clear view of the road by the windshield
camera.
Optimal performance may not occur if:
•
The camera is blocked.
• There is poor visibility or lighting
conditions.
• There are bad weather conditions.
SWITCHING ADAPTIVE
CRUISE CONTROL ON AND OFF
The cruise controls are on the steering
wheel.
Switching Adaptive Cruise Control
On Press and release the button.
The indicator, current gap setting
and set speed appear in the
instrument cluster display.
Switching Adaptive Cruise Control
Off Press and release the button
when the system is in standby
mode or switch the ignition off.
Note: When you switch the system off, the
set speed and gap setting clears.
ADAPTIVE CRUISE CONTROL
AUTOMATIC CANCELLATION
The system is not functional at vehicle
speeds below 12 mph (20 km/h). The
information display indicates low engine
speed, an audible alarm sounds and the
automatic braking releases if the vehicle
drops below this speed. The system may cancel if:
•
The tires lose traction.
• You apply the parking brake.
The system may deactivate or prevent
activating when requested if:
• The vehicle has a blocked sensor.
• The brake temperature is too high.
• There is a failure in the system or a
related system.
Note: If the engine speed drops too low, an
audible warning sounds and a message
appears in the information display.
Automatic braking releases.
SETTING THE ADAPTIVE
CRUISE CONTROL SPEED
Drive to the speed you prefer. Press the Set+ or Set- buttons
to set the current speed.
Take your foot off the accelerator pedal.
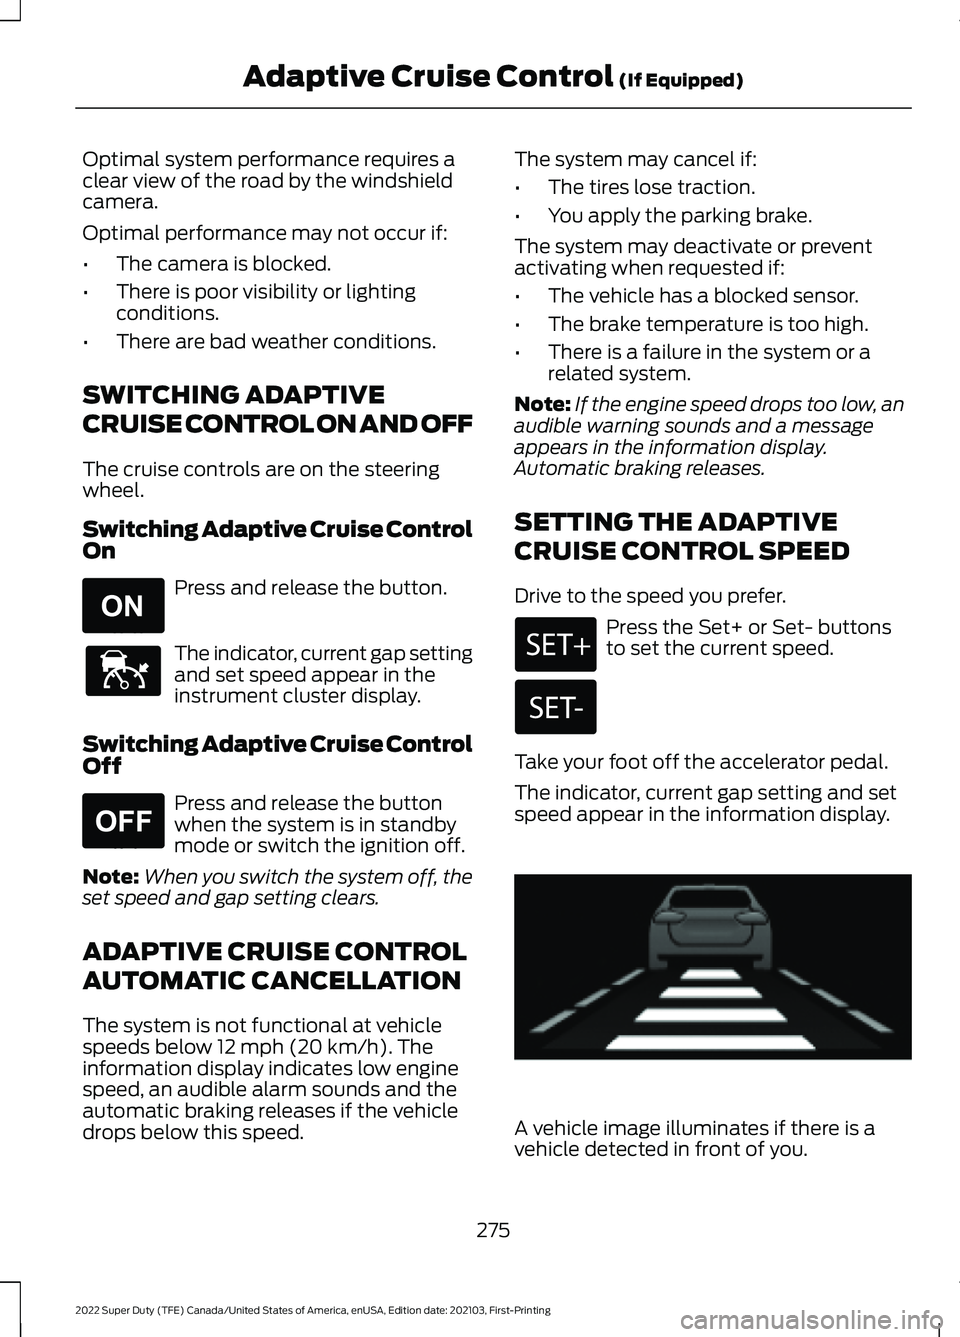
The indicator, current gap setting and set
speed appear in the information display. A vehicle image illuminates if there is a
vehicle detected in front of you.
275
2022 Super Duty (TFE) Canada/United States of America, enUSA, Edition date: 202103, First-Printing Adaptive Cruise Control
(If Equipped)E265296 E144529 E265297 E233874
Page 284 of 740
WHAT IS DRIVE MODE
CONTROL
Your vehicle has various drive modes that
you can select for different driving
conditions. Depending on the drive mode
that you select, the system adjusts various
vehicle settings.
HOW DOES DRIVE MODE
CONTROL WORK
Drive mode control adjusts your vehicle
configuration for each mode you select.
Changing the drive mode adjusts the
steering effort and feel of the steering
system.
The stability and traction control assist
your vehicle control in adverse conditions
or high-performance driving.
Throttle control enhances the powertrain
response, transmission controls become
optimized with shift schedules, and
four-wheel drive settings are optimized
and tuned to each mode.
Changing the drive mode can engage or
disengage the electronic locking
differentials.
Changing the drive mode changes the
four-wheel drive mode to the default
setting for the selected drive mode.
Note:
The system has diagnostic checks
that continuously monitor the system for
proper operation. If a mode is unavailable
due to a system fault, the drive mode
system defaults to normal. When the
system defaults to normal, the driveline
settings remain the same as prior to the
system fault. Note:
The system reverts to the normal
mode each time you start your vehicle. At
startup the system also displays a prompt
on the instrument cluster display that gives
you the option to return to the previously
selected drive mode during the last ignition
cycle. If you select yes, the system returns
to the last selected drive mode and the
default driveline settings associated with
that mode. If you select no, the system
remains in normal mode and the driveline
settings remain the same as selected in the
prior ignition cycle. If you do not select yes
or no, the system stays in normal mode and
the driveline settings remain the same as
selected in the prior ignition cycle.
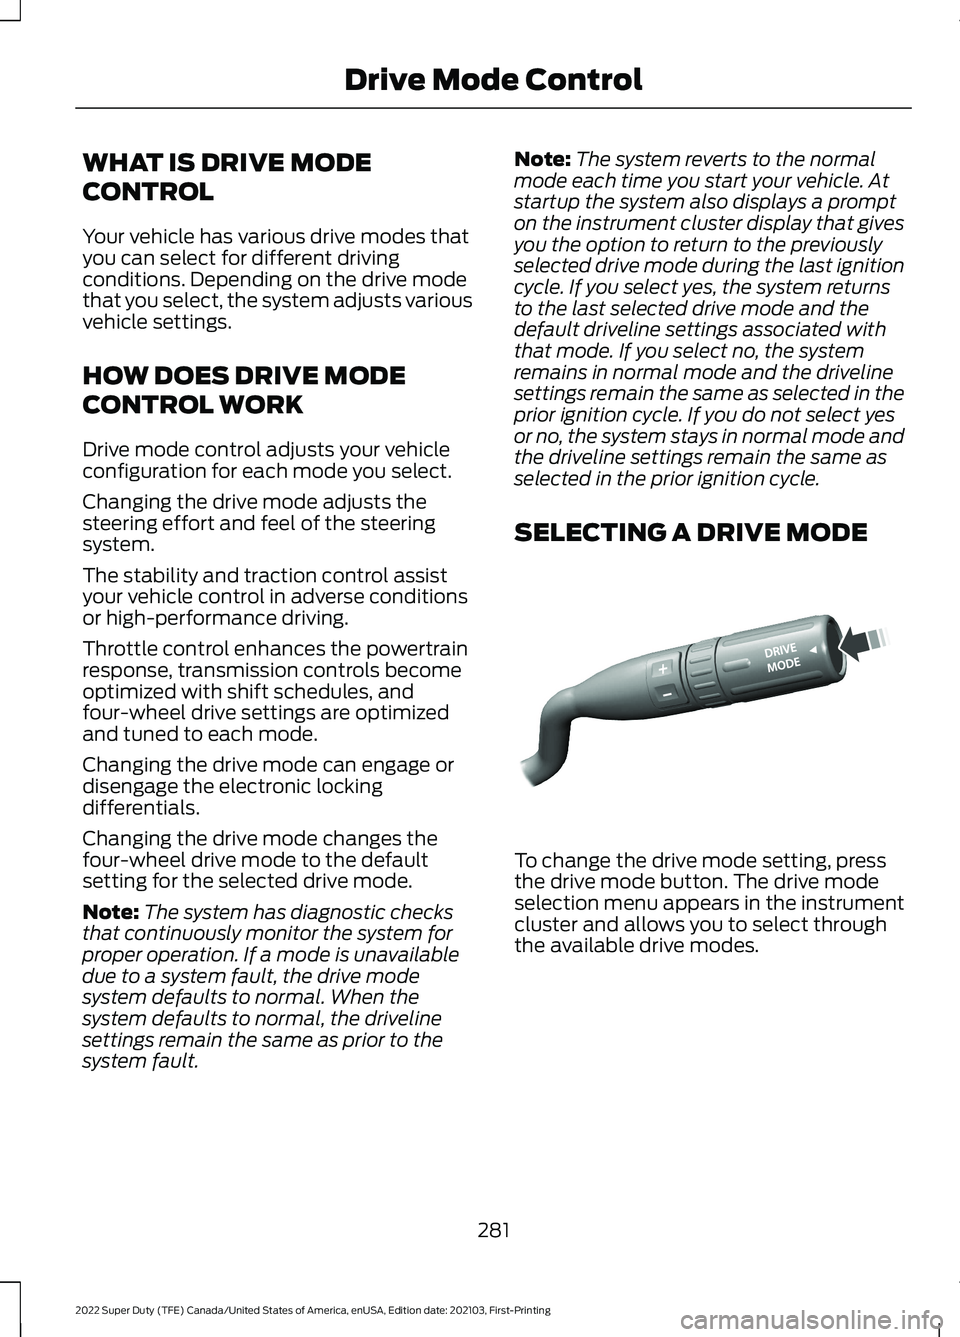
SELECTING A DRIVE MODE To change the drive mode setting, press
the drive mode button. The drive mode
selection menu appears in the instrument
cluster and allows you to select through
the available drive modes.
281
2022 Super Duty (TFE) Canada/United States of America, enUSA, Edition date: 202103, First-Printing Drive Mode ControlE249567
Page 285 of 740
DRIVE MODES
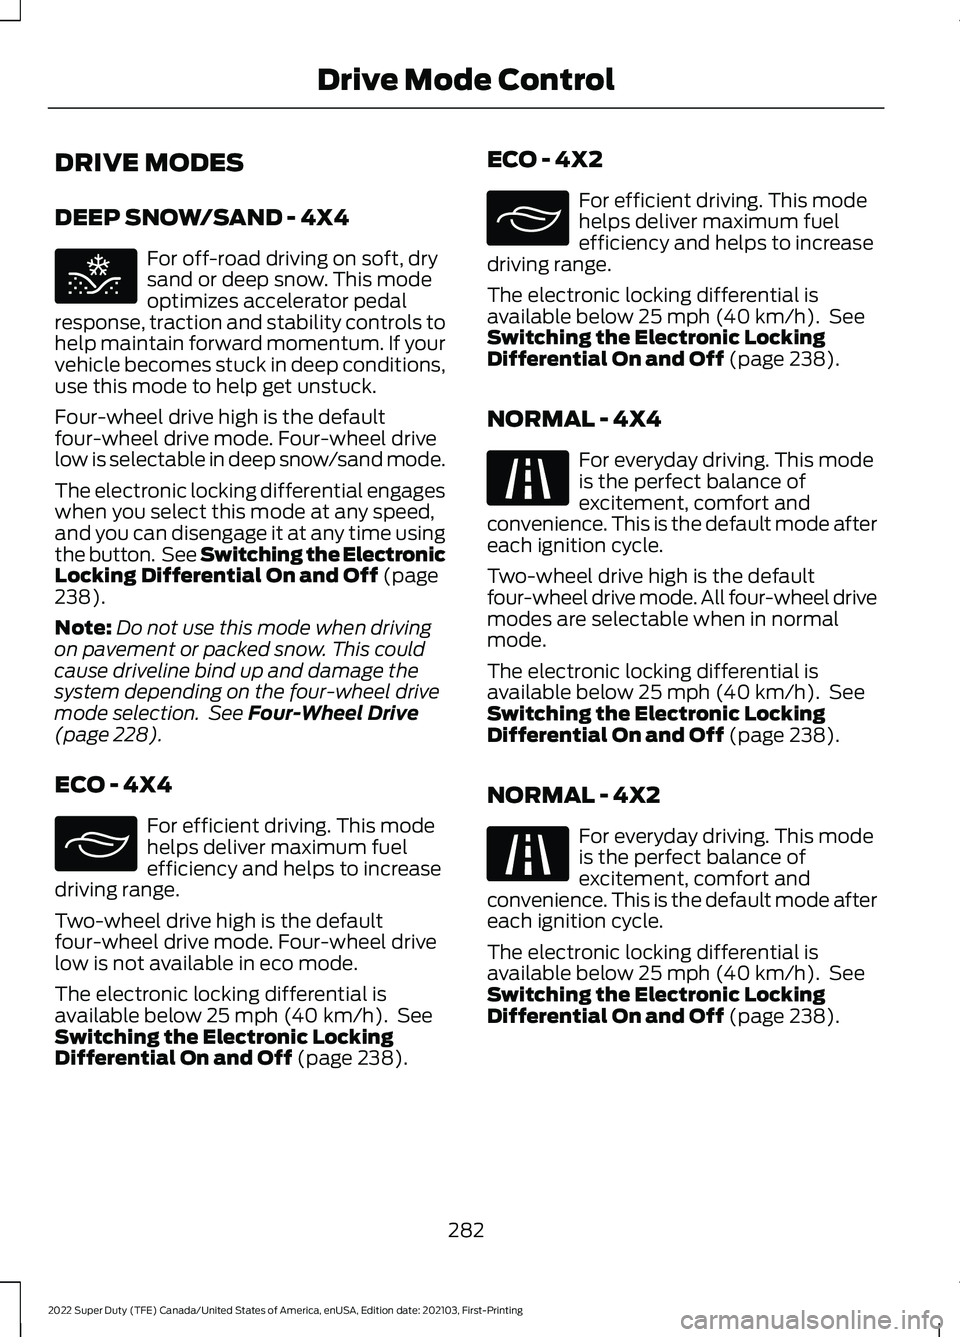
DEEP SNOW/SAND - 4X4
For off-road driving on soft, dry
sand or deep snow. This mode
optimizes accelerator pedal
response, traction and stability controls to
help maintain forward momentum. If your
vehicle becomes stuck in deep conditions,
use this mode to help get unstuck.
Four-wheel drive high is the default
four-wheel drive mode. Four-wheel drive
low is selectable in deep snow/sand mode.
The electronic locking differential engages
when you select this mode at any speed,
and you can disengage it at any time using
the button. See Switching the Electronic
Locking Differential On and Off (page
238).
Note: Do not use this mode when driving
on pavement or packed snow. This could
cause driveline bind up and damage the
system depending on the four-wheel drive
mode selection. See
Four-Wheel Drive
(page 228).
ECO - 4X4 For efficient driving. This mode
helps deliver maximum fuel
efficiency and helps to increase
driving range.
Two-wheel drive high is the default
four-wheel drive mode. Four-wheel drive
low is not available in eco mode.
The electronic locking differential is
available below
25 mph (40 km/h). See
Switching the Electronic Locking
Differential On and Off
(page 238). ECO - 4X2 For efficient driving. This mode
helps deliver maximum fuel
efficiency and helps to increase
driving range.
The electronic locking differential is
available below
25 mph (40 km/h). See
Switching the Electronic Locking
Differential On and Off
(page 238).
NORMAL - 4X4 For everyday driving. This mode
is the perfect balance of
excitement, comfort and
convenience. This is the default mode after
each ignition cycle.
Two-wheel drive high is the default
four-wheel drive mode. All four-wheel drive
modes are selectable when in normal
mode.
The electronic locking differential is
available below
25 mph (40 km/h). See
Switching the Electronic Locking
Differential On and Off
(page 238).
NORMAL - 4X2 For everyday driving. This mode
is the perfect balance of
excitement, comfort and
convenience. This is the default mode after
each ignition cycle.
The electronic locking differential is
available below
25 mph (40 km/h). See
Switching the Electronic Locking
Differential On and Off
(page 238).
282
2022 Super Duty (TFE) Canada/United States of America, enUSA, Edition date: 202103, First-Printing Drive Mode ControlE295420 E295413 E295413 E225310 E225310
Page 286 of 740
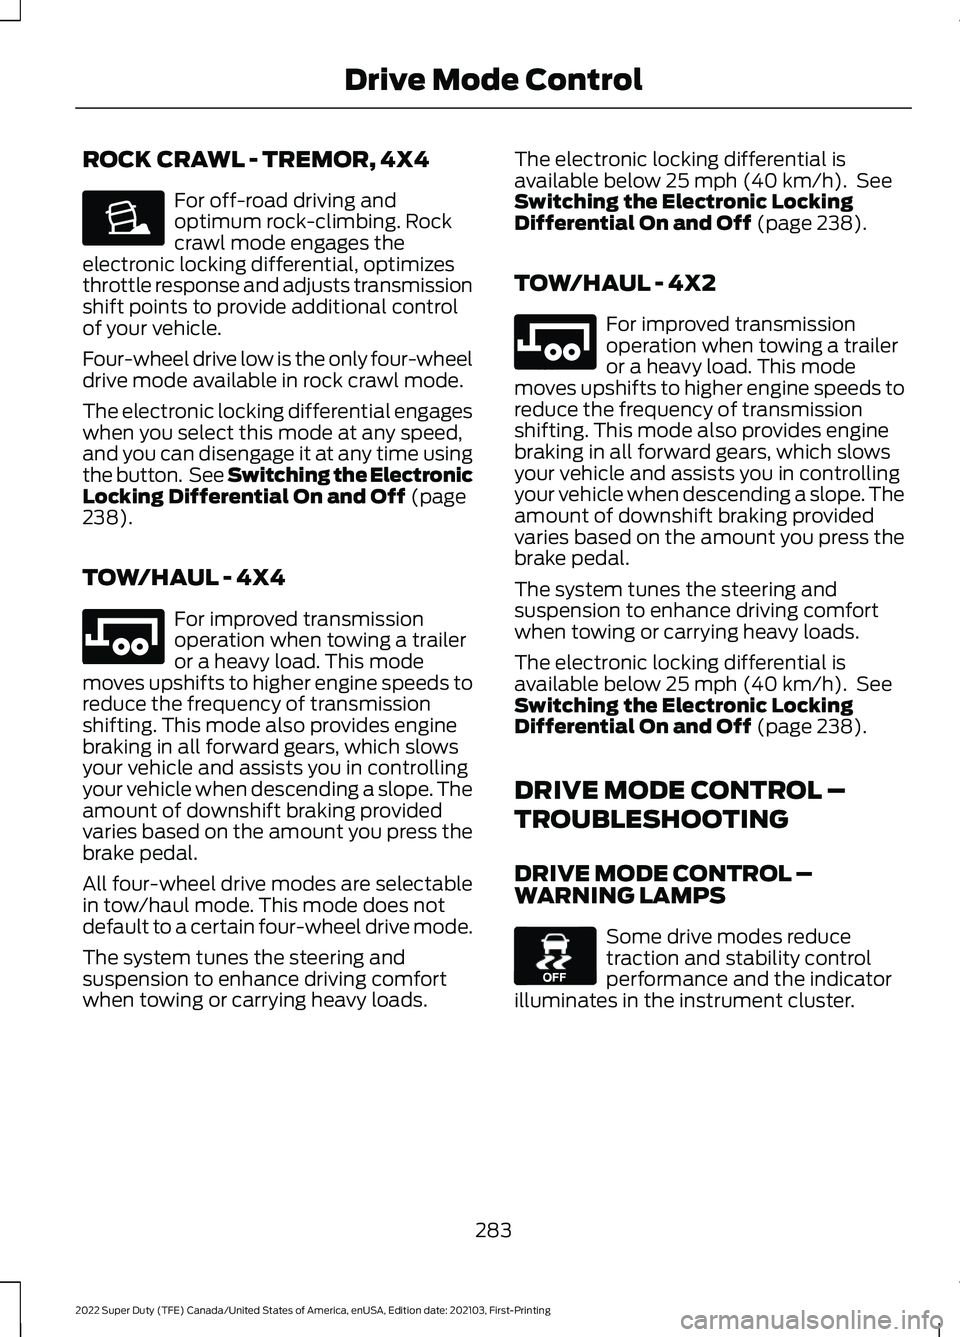
ROCK CRAWL - TREMOR, 4X4
For off-road driving and
optimum rock-climbing. Rock
crawl mode engages the
electronic locking differential, optimizes
throttle response and adjusts transmission
shift points to provide additional control
of your vehicle.
Four-wheel drive low is the only four-wheel
drive mode available in rock crawl mode.
The electronic locking differential engages
when you select this mode at any speed,
and you can disengage it at any time using
the button. See Switching the Electronic
Locking Differential On and Off (page
238).
TOW/HAUL - 4X4 For improved transmission
operation when towing a trailer
or a heavy load. This mode
moves upshifts to higher engine speeds to
reduce the frequency of transmission
shifting. This mode also provides engine
braking in all forward gears, which slows
your vehicle and assists you in controlling
your vehicle when descending a slope. The
amount of downshift braking provided
varies based on the amount you press the
brake pedal.
All four-wheel drive modes are selectable
in tow/haul mode. This mode does not
default to a certain four-wheel drive mode.
The system tunes the steering and
suspension to enhance driving comfort
when towing or carrying heavy loads. The electronic locking differential is
available below
25 mph (40 km/h). See
Switching the Electronic Locking
Differential On and Off
(page 238).
TOW/HAUL - 4X2 For improved transmission
operation when towing a trailer
or a heavy load. This mode
moves upshifts to higher engine speeds to
reduce the frequency of transmission
shifting. This mode also provides engine
braking in all forward gears, which slows
your vehicle and assists you in controlling
your vehicle when descending a slope. The
amount of downshift braking provided
varies based on the amount you press the
brake pedal.
The system tunes the steering and
suspension to enhance driving comfort
when towing or carrying heavy loads.
The electronic locking differential is
available below
25 mph (40 km/h). See
Switching the Electronic Locking
Differential On and Off
(page 238).
DRIVE MODE CONTROL –
TROUBLESHOOTING
DRIVE MODE CONTROL –
WARNING LAMPS Some drive modes reduce
traction and stability control
performance and the indicator
illuminates in the instrument cluster.
283
2022 Super Duty (TFE) Canada/United States of America, enUSA, Edition date: 202103, First-Printing Drive Mode ControlE225315 E246592 E246592 E130458
Page 289 of 740
WHAT IS THE LANE KEEPING
SYSTEM
The lane keeping system alerts you by
providing temporary steering wheel
vibration when it detects an unintended
lane departure.
HOW DOES THE LANE
KEEPING SYSTEM WORK
The lane keeping system uses a forward
looking camera mounted on the windshield
to monitor vehicle movement within the
travel lane.
When the camera detects a drift out of the
travel lane, the lane keeping system alerts
the driver by vibrating the steering wheel.
The driver can select the steering wheel
vibration intensity.
LANE KEEPING SYSTEM
PRECAUTIONS
WARNING: You are responsible for
controlling your vehicle at all times. The
system is designed to be an aid and does
not relieve you of your responsibility to
drive with due care and attention. Failure
to follow this instruction could result in
the loss of control of your vehicle,
personal injury or death. WARNING: The system will not
operate if the sensor cannot track the
road lane markings. WARNING:
The sensor may
incorrectly track lane markings as other
structures or objects. This can result in
a false or missed warning. WARNING:
In cold and severe
weather conditions the system may not
function. Rain, snow and spray can all
limit sensor performance. WARNING:
The system may not
operate properly if the sensor is blocked.
Keep the windshield free from
obstruction. WARNING:
If damage occurs in the
immediate area surrounding the sensor,
have your vehicle checked as soon as
possible. WARNING:
The system may not
correctly operate if your vehicle is fitted
with a suspension kit not approved by
us. WARNING:
Large contrasts in
outside lighting can limit sensor
performance.
LANE KEEPING SYSTEM
LIMITATIONS
The lane keeping system only operates
when the vehicle speed is greater than
40 mph (64 km/h)
.
The system works when the camera can
detect at least one lane marking.
The lane keeping system may not correctly
operate in any of the following conditions:
• The lane keeping system does not
detect at least one lane marking.
• You switch the turn signal on.
• You apply direct steering, accelerate
fast or brake hard.
• The vehicle speed is less than
40 mph
(64 km/h).
• The anti-lock brake, stability control or
traction control system activates.
286
2022 Super Duty (TFE) Canada/United States of America, enUSA, Edition date: 202103, First-Printing Lane Keeping System
(If Equipped)
Page 374 of 740
OFF-ROAD DRIVING
WHAT IS OFF-ROAD DRIVING
Off-road driving is driving your vehicle on
unsurfaced roads or trails, made from dirt,
rocks, sand and mud.
BASIC OFF-ROAD DRIVING
TECHNIQUES
Off-road Driving Hints
Before taking your vehicle off-roading, a
basic vehicle inspection should be done to
make sure that the vehicle is in top working
condition. It is always recommended that
at least two vehicles are used while
off-roading. The buddy system helps make
sure that help is close at hand should a
vehicle become stuck or damaged. It is also
wise to take supplies such as a first aid kit,
supply of water, tow strap, cell or satellite
phone with you any time an off-road
excursion is planned.
1. Grip the steering wheel with thumbs
on the outside of the rim. This will
reduce the risk of injury due to abrupt
steering wheel motions that occur
when negotiating rough terrain.
2. Throttle, brake and steering inputs should be made in a smooth and
controlled manner. Sudden inputs to
the controls can cause loss of traction
or upset the vehicle, especially while
on loose terrain or while crossing
obstacles such as rocks or logs.
3. Look ahead on your route noting upcoming obstacles, or any other
factors which may indicate a change
in available traction, and adjust the
vehicle speed and route accordingly. 4. When driving off-road, if the front or
rear suspension is bottoming out
and/or excessive contact with the
skid-plates is encountered, reduce
vehicle speed to avoid potential
damage to the vehicle.
5. When with other vehicles, it is recommended that communication is
used, and the lead vehicle notify other
vehicles of obstacles that could cause
potential vehicle damage.
6. Always keep available ground clearance in mind and pick a route that
minimizes the risk of catching the
underside of the vehicle on an obstacle.
7. When negotiating low speed obstacles,
applying light brake pressure in
conjunction with the throttle will help
prevent the vehicle from jerking and
will allow you to negotiate the obstacle
in a more controlled manner. Using 4L
will also help with this.
8. Off-roading requires a high degree of concentration. Even if your local law
does not prohibit alcohol use while
driving off-road, Ford strongly
recommends against drinking if you
plan to off-road.
Crossing Obstacles
• Review the path ahead before
attempting to cross any obstacle. It is
best if the obstacle is reviewed from
outside the vehicle so that there is a
good understanding of terrain condition
both in front of and behind the
obstacle.
• Approach obstacles slowly.
371
2022 Super Duty (TFE) Canada/United States of America, enUSA, Edition date: 202103, First-Printing Driving Hints
Page 377 of 740
When driving through standing water, drive
very slowly and do not stop your vehicle.
Your brake performance and traction could
be limited. After driving through water and
as soon as it is safe to do so:
•
Lightly press the brake pedal to dry the
brakes and to check that they work.
• Turn the steering wheel to check that
the steering power assist works.
Check the function of the following:
• Horn
• Exterior lights
FLOOR MATS WARNING: Use a floor mat
designed to fit the footwell of your
vehicle that does not obstruct the pedal
area. Failure to follow this instruction
could result in the loss of control of your
vehicle, personal injury or death. WARNING:
Pedals that cannot
move freely can cause loss of vehicle
control and increase the risk of serious
personal injury. WARNING:
Secure the floor mat
to both retention devices so that it
cannot slip out of position and interfere
with the pedals. Failure to follow this
instruction could result in the loss of
control of your vehicle, personal injury or
death. WARNING: Do not place additional
floor mats or any other covering on top
of the original floor mats. This could
result in the floor mat interfering with the
operation of the pedals. Failure to follow
this instruction could result in the loss of
control of your vehicle, personal injury or
death. WARNING:
Always make sure that
objects cannot fall into the driver foot
well while your vehicle is moving. Objects
that are loose can become trapped
under the pedals causing a loss of
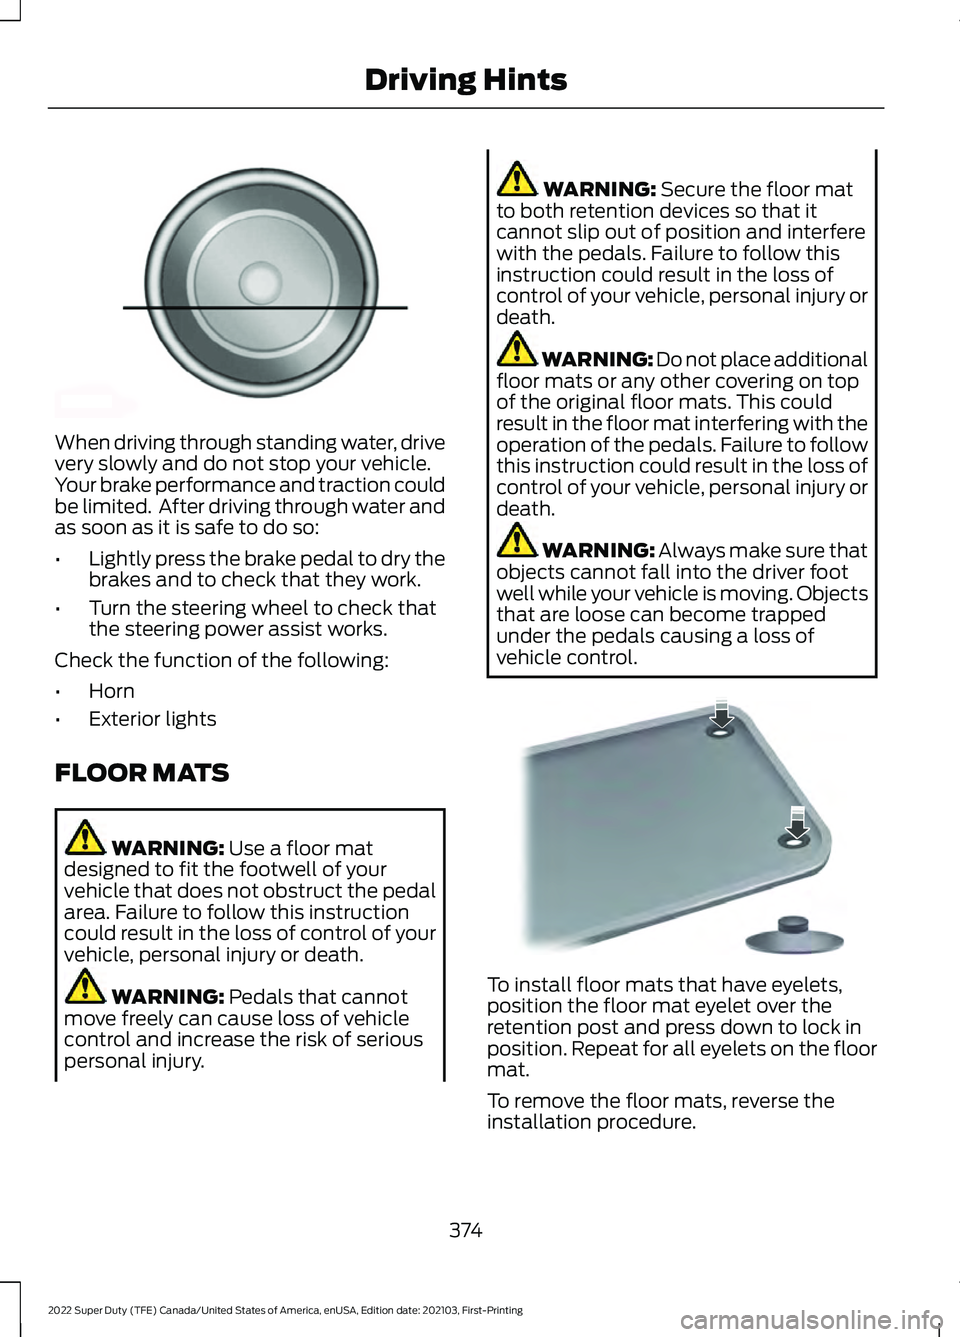
vehicle control. To install floor mats that have eyelets,
position the floor mat eyelet over the
retention post and press down to lock in
position. Repeat for all eyelets on the floor
mat.
To remove the floor mats, reverse the
installation procedure.
374
2022 Super Duty (TFE) Canada/United States of America, enUSA, Edition date: 202103, First-Printing Driving HintsE176913 E142666