instrument cluster FORD F-53 2019 Owners Manual
[x] Cancel search | Manufacturer: FORD, Model Year: 2019, Model line: F-53, Model: FORD F-53 2019Pages: 176, PDF Size: 9.98 MB
Page 4 of 176
Introduction
About This Manual..........................................5
Symbols Glossary............................................5
Perchlorate.........................................................7
Ford Credit..........................................................8
Replacement Parts Recommendation.............................................................................8
Special Notices................................................8
Mobile Communications Equipment.............................................................................9
Export Unique Options................................10
Environment
Protecting the Environment........................11
Steering Wheel
Adjusting the Steering Wheel....................12
Cruise Control..................................................12
Wipers and Washers
Windshield Wipers.........................................13
Windshield Washers.....................................13
Lighting
Lighting Control..............................................14
Instrument Lighting Dimmer.....................14
Daytime Running Lamps.............................15
Direction Indicators.......................................15
Instrument Cluster
Gauges...............................................................16
Warning Lamps and Indicators.................18
Audible Warnings and Indicators.............19
Information Displays
General Information......................................21
Information Messages.................................22
Starting and Stopping theEngine
General Information.....................................25
Ignition Switch................................................25
Starting a Gasoline Engine........................25
Engine Block Heater.....................................27
Fuel and Refueling
Safety Precautions.......................................29
Fuel Quality.....................................................29
Running Out of Fuel.....................................30
Refueling............................................................31
Fuel Consumption.........................................32
Engine Emission Control
Emission Law..................................................34
Catalytic Converter.......................................35
Transmission
Automatic Transmission............................38
Brakes
General Information......................................41
Hints on Driving With Anti-Lock Brakes...........................................................................41
Parking Brake..................................................42
Cruise Control
Principle of Operation.................................43
Using Cruise Control....................................43
Load Carrying
Load Limit........................................................45
Towing
Towing a Trailer..............................................50
Recommended Towing Weights..............51
Essential Towing Checks............................53
Towing the Vehicle on Four Wheels.......55
1
Motorhome (TY3) Canada/United States of America, enUSA, Edition date: 201803, Third-Printing-Table of Contents
Page 19 of 176
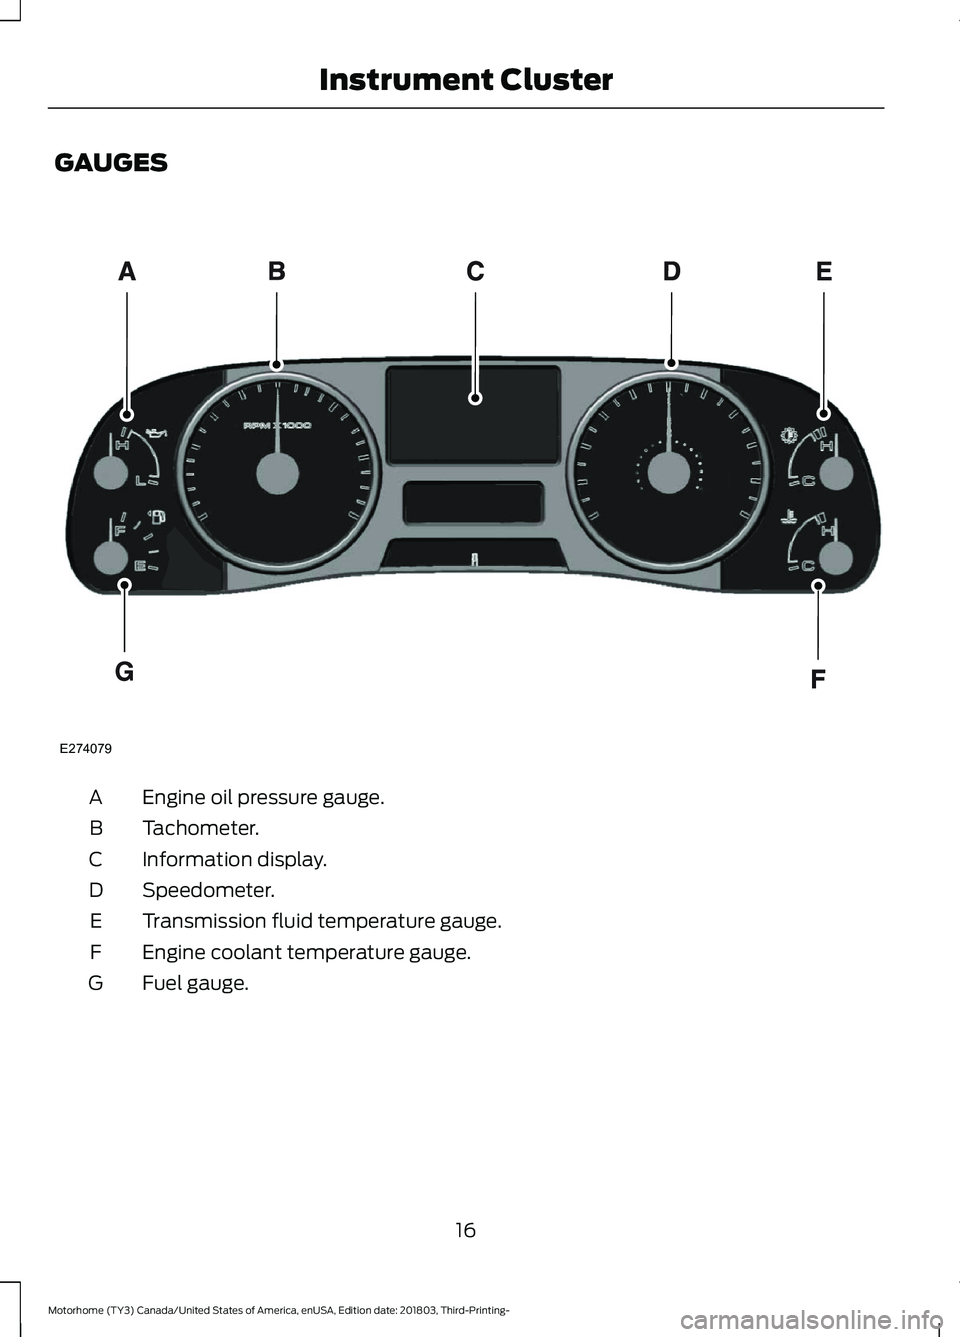
GAUGES
Engine oil pressure gauge.A
Tachometer.B
Information display.C
Speedometer.D
Transmission fluid temperature gauge.E
Engine coolant temperature gauge.F
Fuel gauge.G
16
Motorhome (TY3) Canada/United States of America, enUSA, Edition date: 201803, Third-Printing-Instrument ClusterE274079
Page 20 of 176
Engine Oil Pressure Gauge
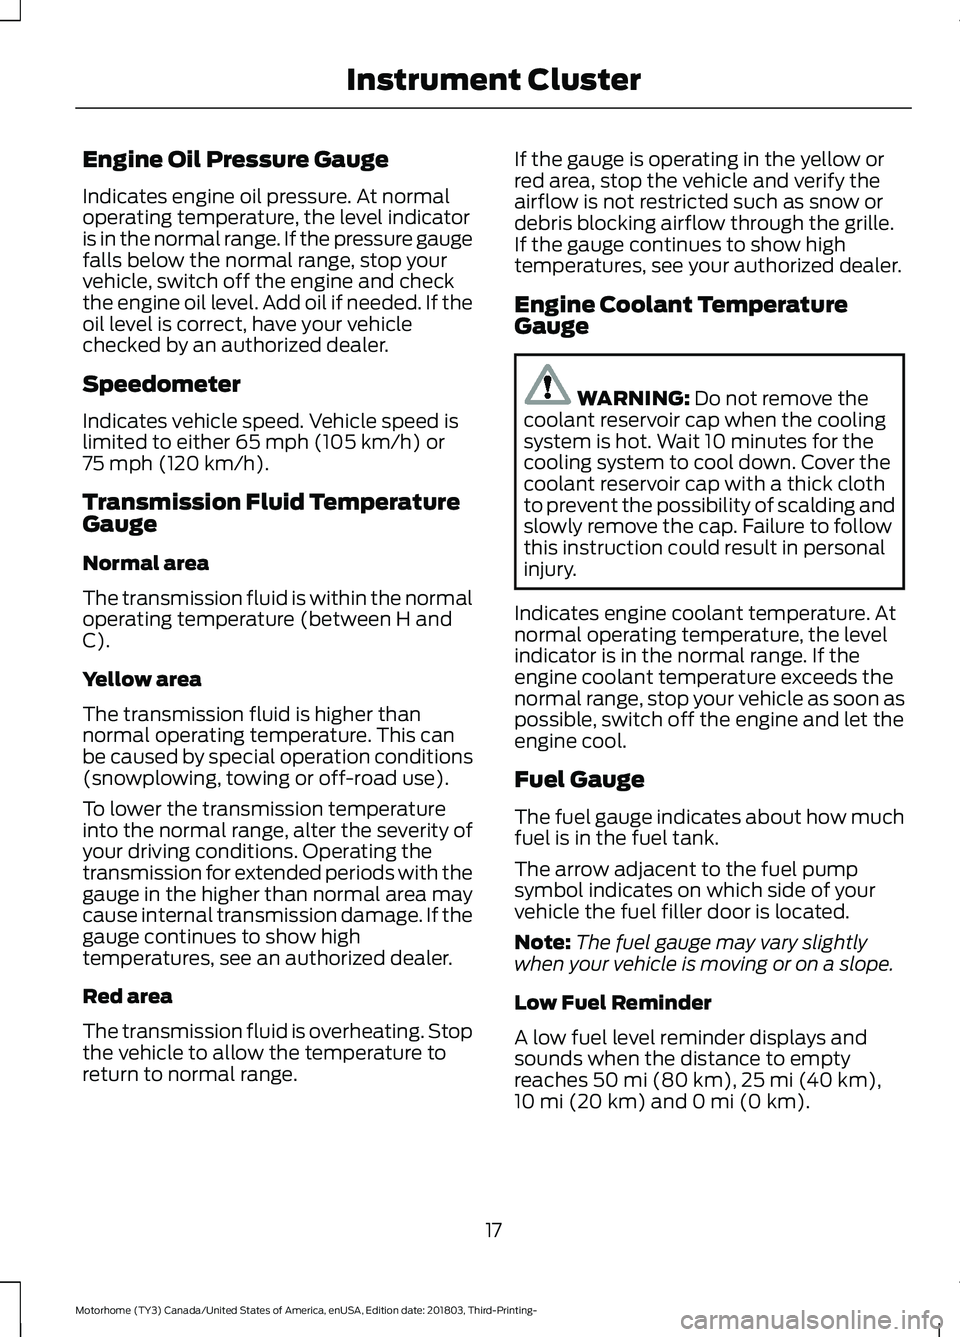
Indicates engine oil pressure. At normaloperating temperature, the level indicatoris in the normal range. If the pressure gaugefalls below the normal range, stop yourvehicle, switch off the engine and checkthe engine oil level. Add oil if needed. If theoil level is correct, have your vehiclechecked by an authorized dealer.
Speedometer
Indicates vehicle speed. Vehicle speed islimited to either 65 mph (105 km/h) or75 mph (120 km/h).
Transmission Fluid TemperatureGauge
Normal area
The transmission fluid is within the normaloperating temperature (between H andC).
Yellow area
The transmission fluid is higher thannormal operating temperature. This canbe caused by special operation conditions(snowplowing, towing or off-road use).
To lower the transmission temperatureinto the normal range, alter the severity ofyour driving conditions. Operating thetransmission for extended periods with thegauge in the higher than normal area maycause internal transmission damage. If thegauge continues to show hightemperatures, see an authorized dealer.
Red area
The transmission fluid is overheating. Stopthe vehicle to allow the temperature toreturn to normal range.
If the gauge is operating in the yellow orred area, stop the vehicle and verify theairflow is not restricted such as snow ordebris blocking airflow through the grille.If the gauge continues to show hightemperatures, see your authorized dealer.
Engine Coolant TemperatureGauge
WARNING: Do not remove thecoolant reservoir cap when the coolingsystem is hot. Wait 10 minutes for thecooling system to cool down. Cover thecoolant reservoir cap with a thick clothto prevent the possibility of scalding andslowly remove the cap. Failure to followthis instruction could result in personalinjury.
Indicates engine coolant temperature. Atnormal operating temperature, the levelindicator is in the normal range. If theengine coolant temperature exceeds thenormal range, stop your vehicle as soon aspossible, switch off the engine and let theengine cool.
Fuel Gauge
The fuel gauge indicates about how muchfuel is in the fuel tank.
The arrow adjacent to the fuel pumpsymbol indicates on which side of yourvehicle the fuel filler door is located.
Note:The fuel gauge may vary slightlywhen your vehicle is moving or on a slope.
Low Fuel Reminder
A low fuel level reminder displays andsounds when the distance to emptyreaches 50 mi (80 km),25 mi (40 km),10 mi (20 km) and 0 mi (0 km).
17
Motorhome (TY3) Canada/United States of America, enUSA, Edition date: 201803, Third-Printing-Instrument Cluster
Page 21 of 176
Note:The low fuel reminder can appear atdifferent fuel gauge positions depending onfuel economy conditions. This variation isnormal.
WARNING LAMPS AND
INDICATORS
The following warning lamps andindicators alert you to a vehicle conditionthat may become serious. Some lampsilluminate when you start your vehicle tomake sure they work. If any lamps remainon after starting your vehicle, refer to therespective system warning lamp for furtherinformation.
Note:Some warning indicators appear inthe information display and operate thesame as a warning lamp but do notilluminate when you start your vehicle.
Anti-Lock Brake System WarningLamp
If it illuminates when you aredriving, this indicates amalfunction. You will continueto have the normal braking system(without ABS) unless the brake systemwarning lamp is also illuminated. Have thesystem checked by your authorized dealer.
Battery
If it illuminates while driving, itindicates a malfunction. Switchoff all unnecessary electricalequipment and have the system checkedby your authorized dealer immediately.
Brake System Warning Lamp
WARNING: Driving your vehiclewith the warning lamp on is dangerous.A significant decrease in brakingperformance may occur. It may take youlonger to stop your vehicle. Have yourvehicle checked as soon as possible.Driving extended distances with theparking brake engaged can cause brakefailure and the risk of personal injury.
Note:Indicators vary depending on region.
This lamp is a dual function lamp and willilluminate when:
•You apply the parking brake with theignition on.
•Your vehicle has a brake fault or lowbrake fluid level, regardless of parkingbrake position.
If the lamp illuminates while youare moving, you may have theparking brake applied. Be surethat the parking brake is off.Have your vehicle checked assoon as possible if the lampcontinues to illuminate.
Brake Reserve System (If Equipped)
Illuminates to indicate normalhydromax booster reservesystem activation when theengine is off and the service brake pedal isapplied.
This light may also illuminate momentarilyif the engine is running and the driver turnsthe steering wheel fully in one directionwhile braking.
18
Motorhome (TY3) Canada/United States of America, enUSA, Edition date: 201803, Third-Printing-Instrument Cluster E144522 E146190
Page 22 of 176
If the light remains on while the engine isrunning, this indicates inadequate hydraulicbooster pressure or reserve pump systemfailure. Stop the vehicle as soon aspossible and seek service immediately byyour authorized dealer.
Cruise Control Indicator
Illuminates when you switch thisfeature on. See Using CruiseControl (page 43).
Direction Indicator
Illuminates when the left or rightdirection indicator or the hazardwarning flasher is turned on. Ifthe indicators stay on or flash faster, checkfor a burned out bulb.
Electronic Throttle Control
Illuminates when the engine hasdefaulted to a limp-homeoperation. See your authorizeddealer as soon as possible.
Fasten Seatbelt Warning Lamp
It illuminates and a chimesounds until you fasten theseatbelts.
Headlamp High Beam Indicator
Illuminates when you switch thehigh beam headlamps on. It willflash when you use theheadlamp flasher.
Service Engine Soon
If it illuminates when the engineis running this indicates amalfunction. The On BoardDiagnostics system has detected amalfunction of the vehicle emission controlsystem.
If it flashes, engine misfire may beoccurring. Increased exhaust gastemperatures could damage the catalyticconverter or other vehicle components.Drive in a moderate fashion (avoid heavyacceleration and deceleration) and haveyour vehicle immediately serviced.
It illuminates when you switch the ignitionon prior to engine start to check the bulband to indicate whether your vehicle isready for Inspection and Maintenance(I/M) testing.
Normally, it illuminates until the engine iscranked and automatically turns off if nomalfunctions are present. However, if after15 seconds it flashes eight times, thisindicates that your vehicle is not ready forInspection and Maintenance (I/M) testing.See Emission Law (page 34).
Tow Haul Indicator
Illuminates when the tow/haulfeature has been activated. If thelight flashes steadily, have thesystem serviced immediately, damage tothe transmission could occur.
AUDIBLE WARNINGS AND
INDICATORS
Fail-Safe Cooling Warning Chime
Sounds when the coolant gauge pointerhas moved to hot. There are three stagesof chimes:
19
Motorhome (TY3) Canada/United States of America, enUSA, Edition date: 201803, Third-Printing-Instrument ClusterE71340 E71880 E161509
Page 23 of 176
•Stage 1 is a single chime when theengine temperature begins to overheat.
•Stage 2 is multiple chimes and enginepower becomes limited in order to helpcool the engine.
•Stage 3 is multiple chimes and theengine will shut down.
Headlamps On Warning Chime
Sounds when you remove the key from theignition and open the driver's door and youhave left the headlamps or parking lampson.
Key in Ignition Warning Chime
Sounds when you open the driver's doorand you have left the key in the ignition.
Parking Brake On Warning Chime
Sounds when you have left the parkingbrake on and drive your vehicle. If thewarning chime remains on after you havereleased the parking brake, have thesystem checked by your authorized dealerimmediately.
Shift to Park Warning Chime
Sounds when you open the driver's doorand your vehicle is not in park.
20
Motorhome (TY3) Canada/United States of America, enUSA, Edition date: 201803, Third-Printing-Instrument Cluster
Page 41 of 176
AUTOMATIC TRANSMISSION
WARNING: Always set the parkingbrake fully and make sure you shift thegearshift lever to first gear. Switch theignition off and remove the key wheneveryou leave your vehicle.
WARNING: Do not apply the brakepedal and accelerator pedalsimultaneously. Applying both pedalssimultaneously for more than a fewseconds will limit engine performance,which may result in difficulty maintainingspeed in traffic and could lead to seriousinjury.
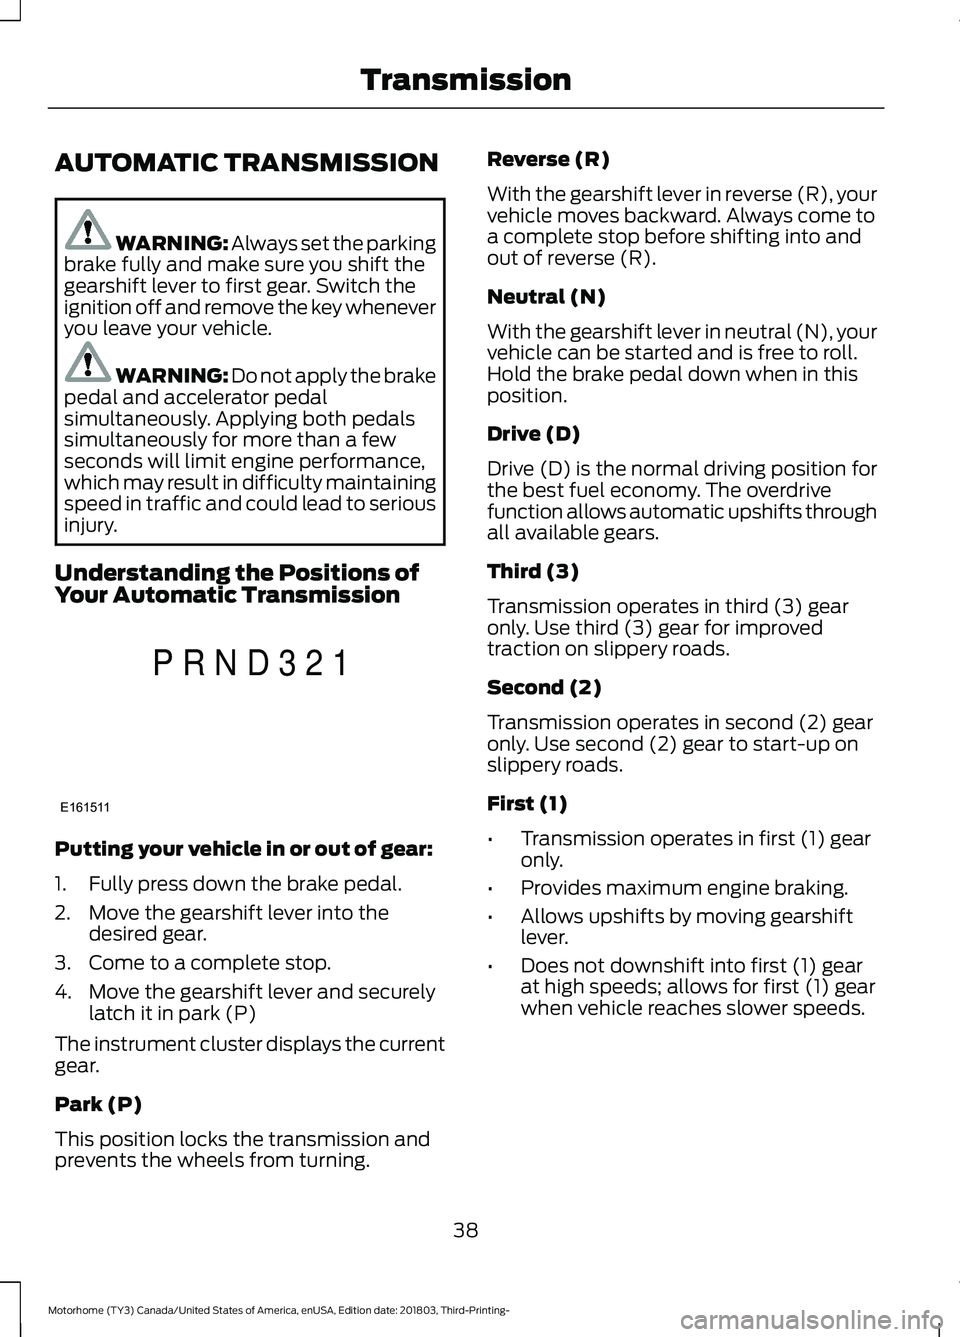
Understanding the Positions ofYour Automatic Transmission
Putting your vehicle in or out of gear:
1.Fully press down the brake pedal.
2.Move the gearshift lever into thedesired gear.
3.Come to a complete stop.
4.Move the gearshift lever and securelylatch it in park (P)
The instrument cluster displays the currentgear.
Park (P)
This position locks the transmission andprevents the wheels from turning.
Reverse (R)
With the gearshift lever in reverse (R), yourvehicle moves backward. Always come toa complete stop before shifting into andout of reverse (R).
Neutral (N)
With the gearshift lever in neutral (N), yourvehicle can be started and is free to roll.Hold the brake pedal down when in thisposition.
Drive (D)
Drive (D) is the normal driving position forthe best fuel economy. The overdrivefunction allows automatic upshifts throughall available gears.
Third (3)
Transmission operates in third (3) gearonly. Use third (3) gear for improvedtraction on slippery roads.
Second (2)
Transmission operates in second (2) gearonly. Use second (2) gear to start-up onslippery roads.
First (1)
•Transmission operates in first (1) gearonly.
•Provides maximum engine braking.
•Allows upshifts by moving gearshiftlever.
•Does not downshift into first (1) gearat high speeds; allows for first (1) gearwhen vehicle reaches slower speeds.
38
Motorhome (TY3) Canada/United States of America, enUSA, Edition date: 201803, Third-Printing-TransmissionE161511PRND321
Page 42 of 176
Tow/Haul Mode
WARNING: Do not use tow/haulwhen the road surface is slippery. Failureto follow this instruction could result inthe loss of control of your vehicle.
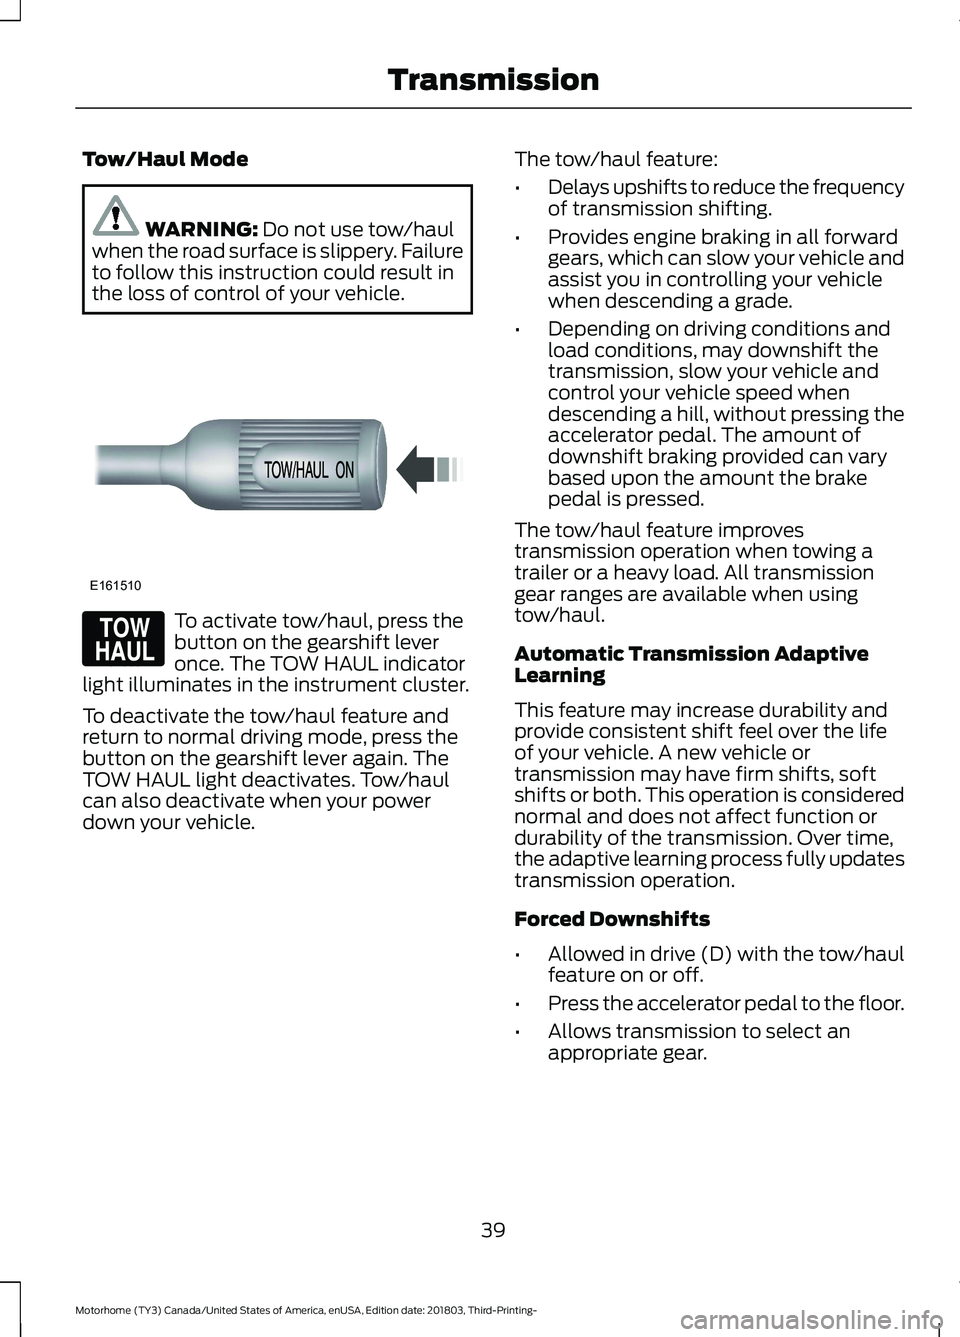
To activate tow/haul, press thebutton on the gearshift leveronce. The TOW HAUL indicatorlight illuminates in the instrument cluster.
To deactivate the tow/haul feature andreturn to normal driving mode, press thebutton on the gearshift lever again. TheTOW HAUL light deactivates. Tow/haulcan also deactivate when your powerdown your vehicle.
The tow/haul feature:
•Delays upshifts to reduce the frequencyof transmission shifting.
•Provides engine braking in all forwardgears, which can slow your vehicle andassist you in controlling your vehiclewhen descending a grade.
•Depending on driving conditions andload conditions, may downshift thetransmission, slow your vehicle andcontrol your vehicle speed whendescending a hill, without pressing theaccelerator pedal. The amount ofdownshift braking provided can varybased upon the amount the brakepedal is pressed.
The tow/haul feature improvestransmission operation when towing atrailer or a heavy load. All transmissiongear ranges are available when usingtow/haul.
Automatic Transmission AdaptiveLearning
This feature may increase durability andprovide consistent shift feel over the lifeof your vehicle. A new vehicle ortransmission may have firm shifts, softshifts or both. This operation is considerednormal and does not affect function ordurability of the transmission. Over time,the adaptive learning process fully updatestransmission operation.
Forced Downshifts
•Allowed in drive (D) with the tow/haulfeature on or off.
•Press the accelerator pedal to the floor.
•Allows transmission to select anappropriate gear.
39
Motorhome (TY3) Canada/United States of America, enUSA, Edition date: 201803, Third-Printing-TransmissionE161510 E161509
Page 46 of 176
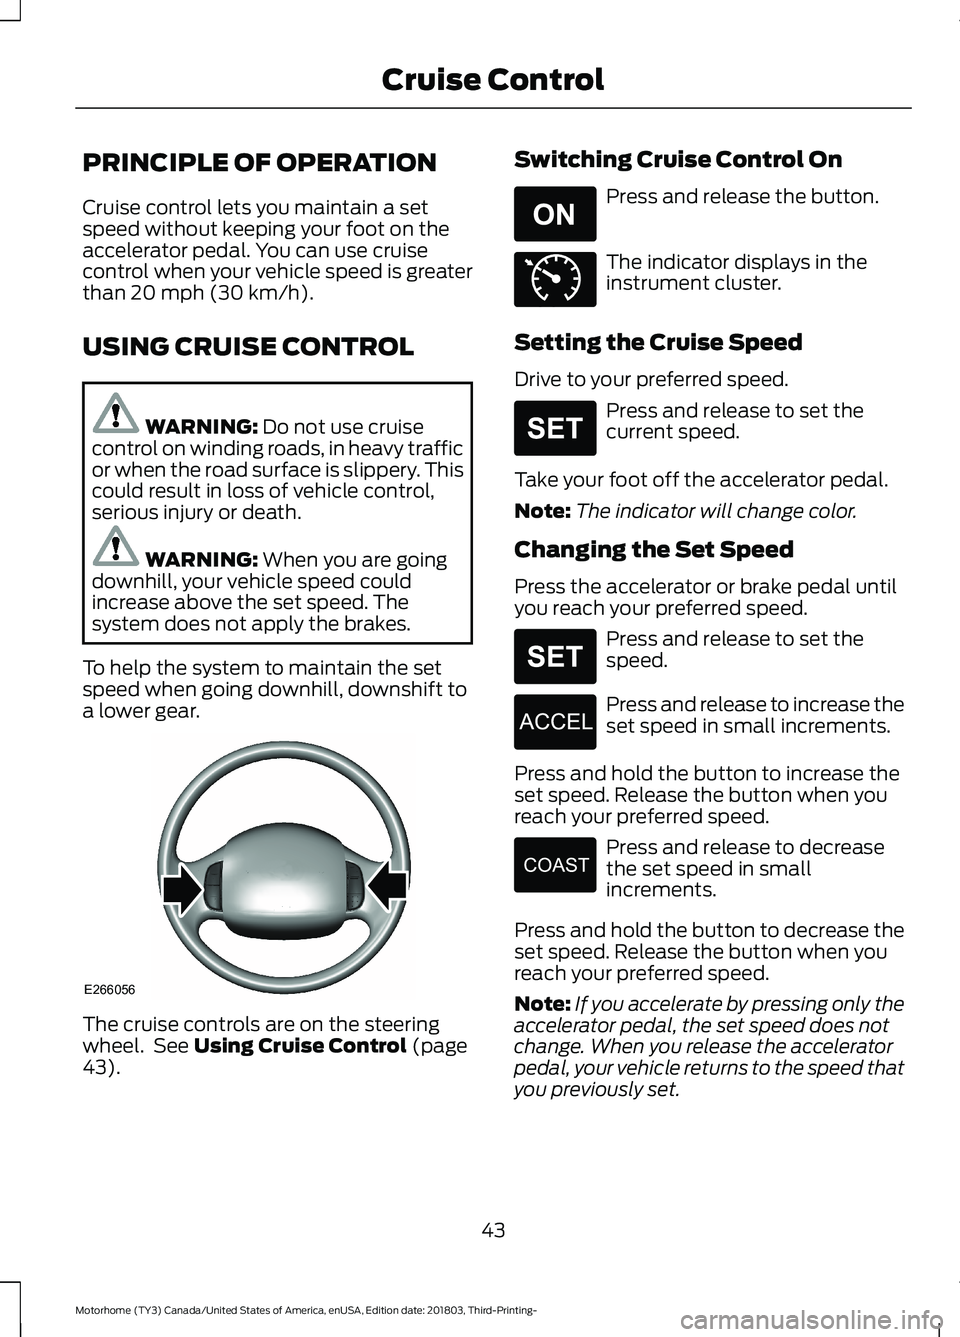
PRINCIPLE OF OPERATION
Cruise control lets you maintain a setspeed without keeping your foot on theaccelerator pedal. You can use cruisecontrol when your vehicle speed is greaterthan 20 mph (30 km/h).
USING CRUISE CONTROL
WARNING: Do not use cruisecontrol on winding roads, in heavy trafficor when the road surface is slippery. Thiscould result in loss of vehicle control,serious injury or death.
WARNING: When you are goingdownhill, your vehicle speed couldincrease above the set speed. Thesystem does not apply the brakes.
To help the system to maintain the setspeed when going downhill, downshift toa lower gear.
The cruise controls are on the steeringwheel. See Using Cruise Control (page43).
Switching Cruise Control On
Press and release the button.
The indicator displays in theinstrument cluster.
Setting the Cruise Speed
Drive to your preferred speed.
Press and release to set thecurrent speed.
Take your foot off the accelerator pedal.
Note:The indicator will change color.
Changing the Set Speed
Press the accelerator or brake pedal untilyou reach your preferred speed.
Press and release to set thespeed.
Press and release to increase theset speed in small increments.
Press and hold the button to increase theset speed. Release the button when youreach your preferred speed.
Press and release to decreasethe set speed in smallincrements.
Press and hold the button to decrease theset speed. Release the button when youreach your preferred speed.
Note:If you accelerate by pressing only theaccelerator pedal, the set speed does notchange. When you release the acceleratorpedal, your vehicle returns to the speed thatyou previously set.
43
Motorhome (TY3) Canada/United States of America, enUSA, Edition date: 201803, Third-Printing-Cruise ControlE266056 E265296 E71340 E265306 E265306 E266055 E266054
Page 88 of 176
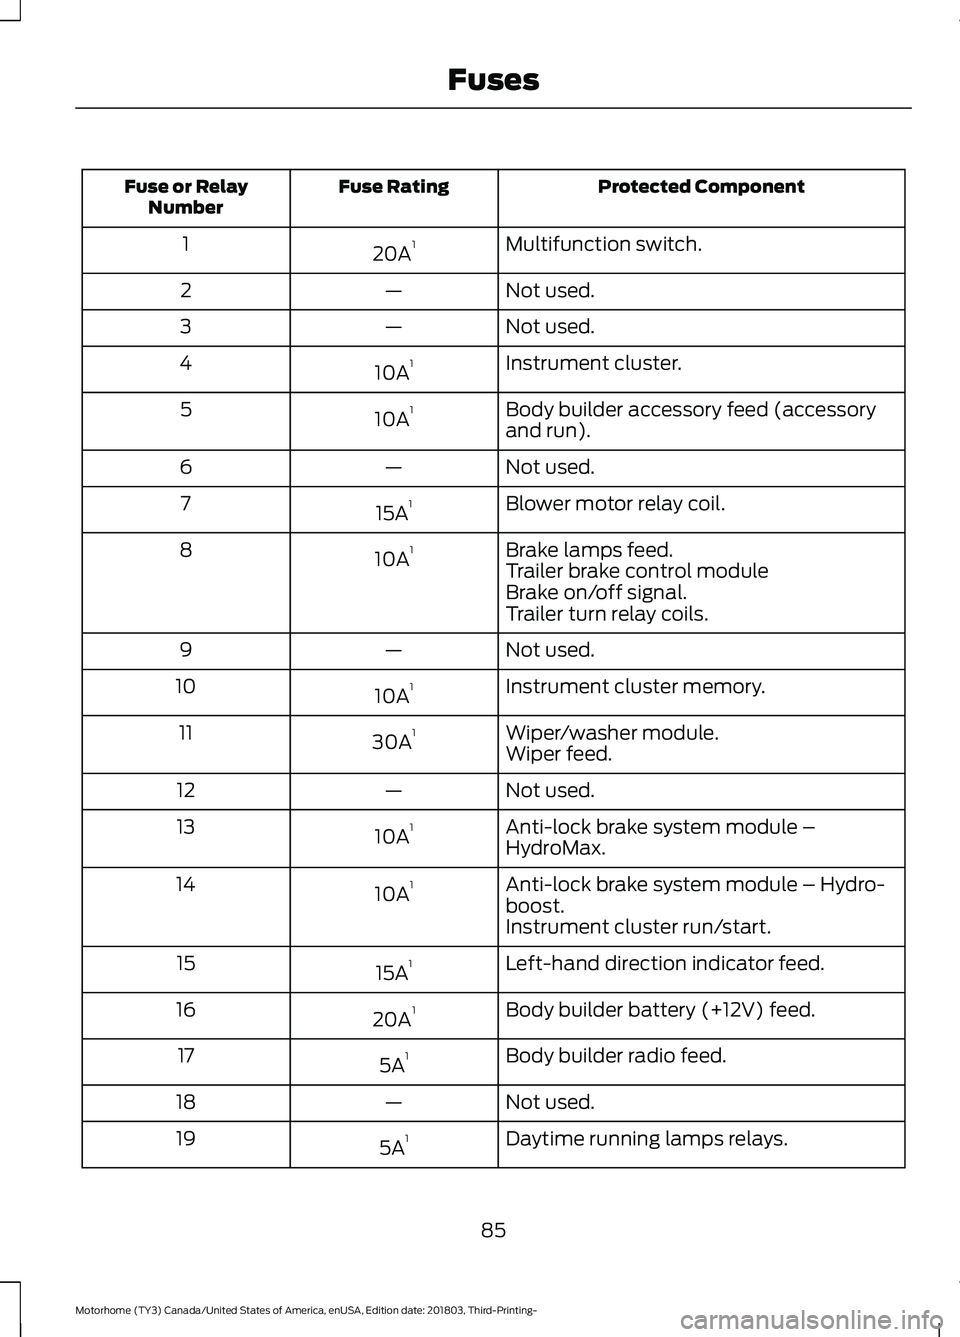
Protected ComponentFuse RatingFuse or RelayNumber
Multifunction switch.20A11
Not used.—2
Not used.—3
Instrument cluster.10A14
Body builder accessory feed (accessoryand run).10A15
Not used.—6
Blower motor relay coil.15A17
Brake lamps feed.10A18Trailer brake control moduleBrake on/off signal.Trailer turn relay coils.
Not used.—9
Instrument cluster memory.10A110
Wiper/washer module.30A111Wiper feed.
Not used.—12
Anti-lock brake system module –HydroMax.10A113
Anti-lock brake system module – Hydro-boost.10A114
Instrument cluster run/start.
Left-hand direction indicator feed.15A115
Body builder battery (+12V) feed.20A116
Body builder radio feed.5A117
Not used.—18
Daytime running lamps relays.5A119
85
Motorhome (TY3) Canada/United States of America, enUSA, Edition date: 201803, Third-Printing-Fuses