buttons FORD F-600 2022 Owners Manual
[x] Cancel search | Manufacturer: FORD, Model Year: 2022, Model line: F-600, Model: FORD F-600 2022Pages: 740, PDF Size: 12.6 MB
Page 8 of 740
Switching Maximum Defrost On and Off
........................................................................\
.149
Switching Maximum Cooling On and Off ........................................................................\
.
150
Switching the Heated Rear Window On and Off ........................................................
150
Setting the Blower Motor Speed ...........
150
Setting the Temperature ..........................
150
Directing the Flow of Air ...........................
150
Auto Mode .......................................................
151
Climate Control Hints .................................
152
Climate Control - Vehicles With: Manual Temperature
Control
Identifying the Climate Control Unit .....
154
Switching Climate Control On and Off ........................................................................\
.
154
Switching Recirculated Air On and Off ........................................................................\
.
154
Switching Air Conditioning On and Off ........................................................................\
.
154
Switching Defrost On and Off ................
154
Switching Maximum Defrost On and Off ........................................................................\
.
154
Switching Maximum Cooling On and Off ........................................................................\
.
154
Switching the Heated Rear Window On and Off ........................................................
155
Switching the Heated Mirrors On and Off ........................................................................\
.
155
Setting the Blower Motor Speed ...........
155
Setting the Temperature ..........................
155
Directing the Flow of Air ............................
155
Climate Control Hints ................................
156
Interior Air Quality
What Is the Cabin Air Filter .......................
157
Replacing the Cabin Air Filter ..................
157
Front Seats
Front Seat Precautions .............................
158Sitting in the Correct Position
.................
158
Manual Seats ................................................
159
Power Seats ...................................................
161
Massage Seats .............................................
164
Heated Seats ................................................
165
Ventilated Seats ..........................................
165
Rear Seats
Manual Seats ................................................
167
Heated Seats ................................................
169
Rear Occupant Alert System
What is the Rear Occupant Alert System ........................................................................\
..
171
How Does the Rear Occupant Alert System Work ..............................................
171
Rear Occupant Alert System Precautions ........................................................................\
..
171
Rear Occupant Alert System Limitations ........................................................................\
..
171
Switching Rear Occupant Alert System On and Off - Vehicles With: SYNC
........................................................................\
..
171
Switching Rear Occupant Alert System On and Off - Vehicles With: SYNC 3
........................................................................\
..
172
Switching Rear Occupant Alert System On and Off - Vehicles With: SYNC 4
........................................................................\
..
172
Rear Occupant Alert System Indicators - Vehicles With: SYNC ............................
172
Rear Occupant Alert System Indicators - Vehicles With: SYNC 3/SYNC 4 .......
172
Rear Occupant Alert System Audible Warnings .....................................................
173
Memory Function
What Is the Memory Function ................
174
Memory Function Precautions ...............
174
Locating the Memory Function Buttons ........................................................................\
.
174
Saving a Preset Position ...........................
174
5
2022 Super Duty (TFE) Canada/United States of America, enUSA, Edition date: 202103, First-Printing Table of Contents
Page 72 of 740
REMOTE CONTROL
LIMITATIONS
WARNING: Changes or
modifications not expressively approved
by the party responsible for compliance
could void the user's authority to operate
the equipment. The term "IC:" before the
radio certification number only signifies
that Industry Canada technical
specifications were met.
This device complies with Part 15 of the
FCC Rules and with Industry Canada
license-exempt RSS standard(s).
Operation is subject to the following two
conditions: (1) This device may not cause
harmful interference, and (2) This device
must accept any interference received,
including interference that may cause
undesired operation.
Make sure a valid remote control is within
5 ft (1.5 m)
from the front door handles
and rear of vehicle.
The system may not function if:
• The remote control remains stationary
for about a minute.
• The vehicle battery has no charge.
• The remote control battery has no
charge.
• There is interference causing issues
with the remote control frequencies.
• The remote control is too close to
metal objects or electronic devices, for
example keys or a cell phone.
USING THE REMOTE CONTROL
Use your remote control to access various
vehicle systems.
Note: The buttons on your remote may vary
depending on the vehicle region or options. Unlock Press the button to unlock all
doors. See
Unlocking and
Locking the Doors Using the
Remote Control
(page 83).
Lock Press the button to lock all
doors. See
Unlocking and
Locking the Doors Using the
Remote Control
(page 83).
Remote Start
(If Equipped) Press the button to remote start.
See
Remotely Starting and
Stopping the Vehicle (page
146).
Tailgate
(If Equipped) Press the button to open the
tailgate. See
Opening the
Tailgate Using the Remote
Control
(page 99).
Panic Alarm
(If Equipped) Press the button to sound the
panic alarm. See Sounding the
Panic Alarm
(page 70).
OPENING AND CLOSING THE
FLIP KEY
Opening Your Flip Key
Press the round button on the remote
control to extend the flip key.
69
2022 Super Duty (TFE) Canada/United States of America, enUSA, Edition date: 202103, First-Printing Keys and Remote ControlsE138629 E138623 E138625 E191530 E138624
Page 81 of 740
Emergency Assistance
If you set emergency assistance to always
on, you cannot switch it off with a MyKey.
Do Not Disturb
If you set do not disturb to always on, you
cannot switch it off with a MyKey.
Note:
If a phone is connected using Apple
CarPlay or Android Auto while driving with
a MyKey, the driver can receive phone calls
and text messages even if the do not disturb
restriction is on, and if the vehicle comes
with satellite radio, there is no restriction on
the adult content.
Traction and Stability Control
If you set traction control or stability
control to always on, you cannot switch it
off with a MyKey.
CREATING A MYKEY
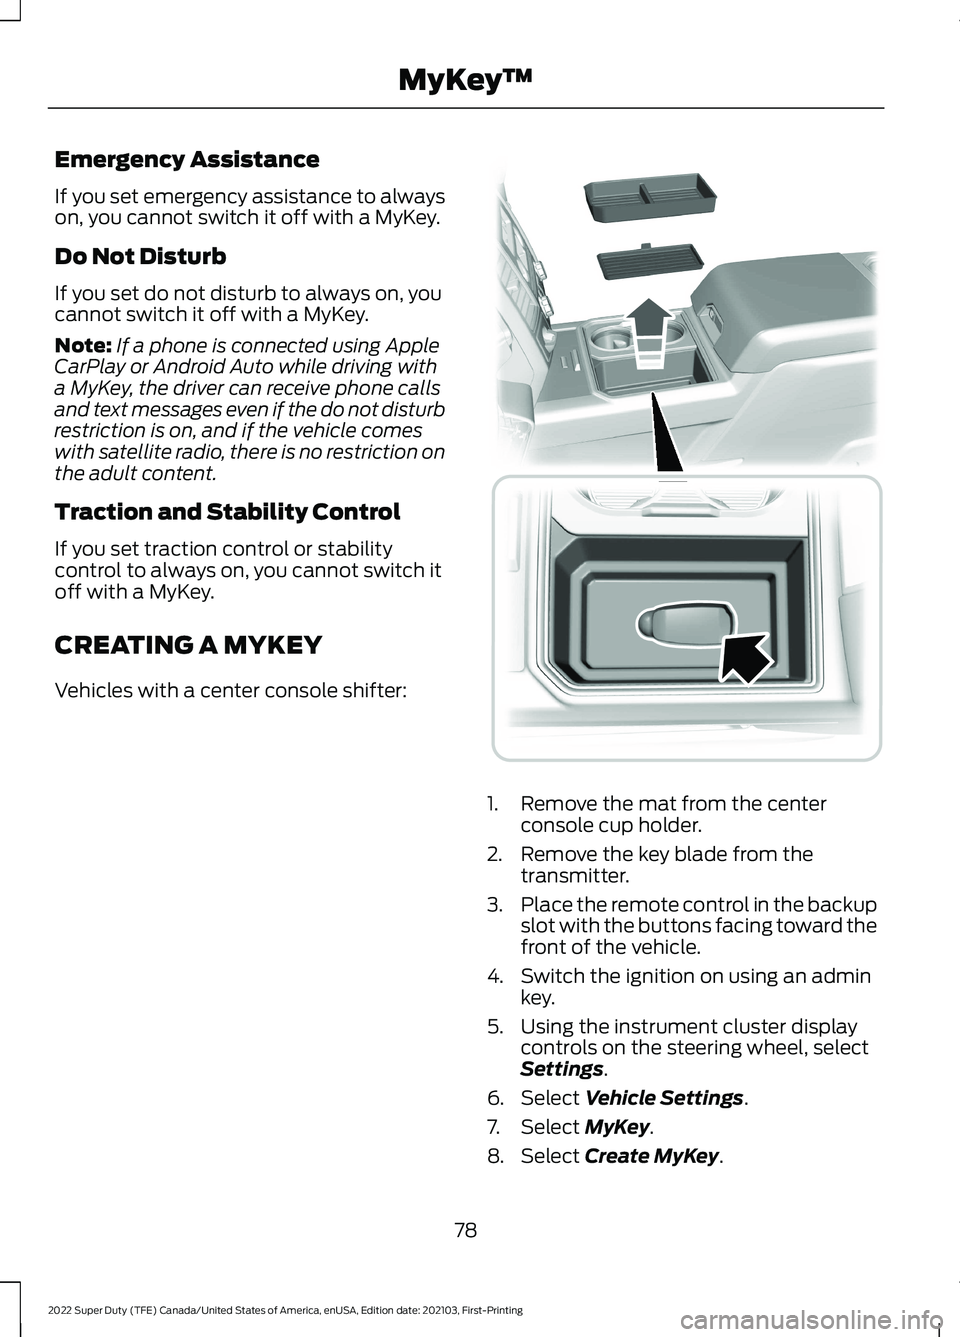
Vehicles with a center console shifter: 1. Remove the mat from the center
console cup holder.
2. Remove the key blade from the transmitter.
3. Place the remote control in the backup
slot with the buttons facing toward the
front of the vehicle.
4. Switch the ignition on using an admin key.
5. Using the instrument cluster display controls on the steering wheel, select
Settings.
6. Select
Vehicle Settings.
7. Select
MyKey.
8. Select
Create MyKey.
78
2022 Super Duty (TFE) Canada/United States of America, enUSA, Edition date: 202103, First-Printing MyKey
™ E226701
Page 82 of 740
9.
Select Create MyKey and press the OK
button.
Note: After you confirm the creation of a
MyKey, we recommend that you label this
key.
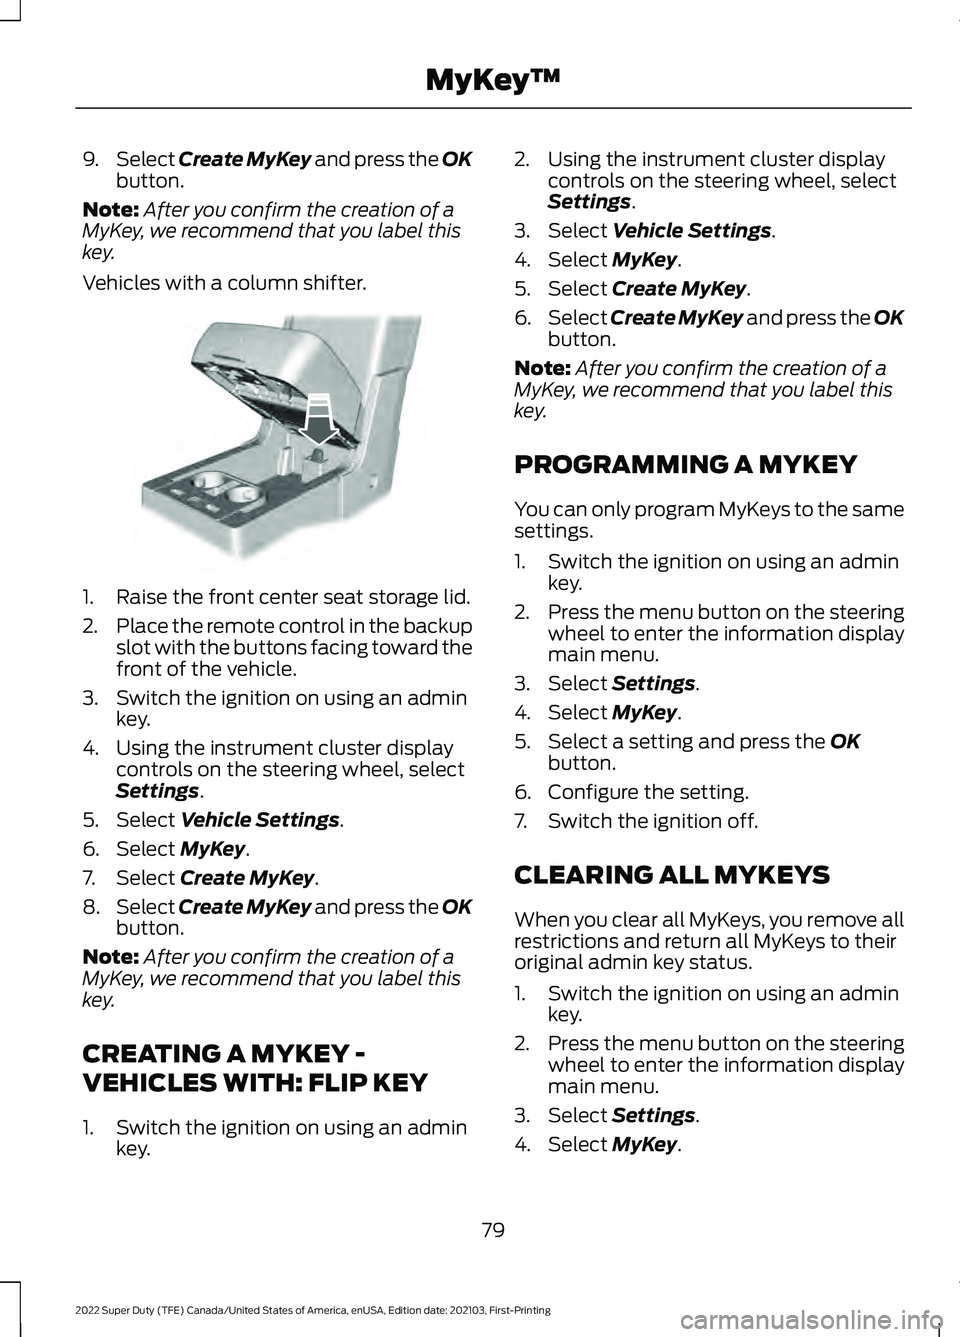
Vehicles with a column shifter. 1. Raise the front center seat storage lid.
2.
Place the remote control in the backup
slot with the buttons facing toward the
front of the vehicle.
3. Switch the ignition on using an admin key.
4. Using the instrument cluster display controls on the steering wheel, select
Settings
.
5. Select
Vehicle Settings.
6. Select
MyKey.
7. Select
Create MyKey.
8. Select
Create MyKey and press the OK
button.
Note: After you confirm the creation of a
MyKey, we recommend that you label this
key.
CREATING A MYKEY -
VEHICLES WITH: FLIP KEY
1. Switch the ignition on using an admin key. 2. Using the instrument cluster display
controls on the steering wheel, select
Settings
.
3. Select
Vehicle Settings.
4. Select
MyKey.
5. Select
Create MyKey.
6. Select
Create MyKey and press the OK
button.
Note: After you confirm the creation of a
MyKey, we recommend that you label this
key.
PROGRAMMING A MYKEY
You can only program MyKeys to the same
settings.
1. Switch the ignition on using an admin key.
2. Press the menu button on the steering
wheel to enter the information display
main menu.
3. Select
Settings.
4. Select
MyKey.
5. Select a setting and press the
OK
button.
6. Configure the setting.
7. Switch the ignition off.
CLEARING ALL MYKEYS
When you clear all MyKeys, you remove all
restrictions and return all MyKeys to their
original admin key status.
1. Switch the ignition on using an admin key.
2. Press the menu button on the steering
wheel to enter the information display
main menu.
3. Select
Settings.
4. Select
MyKey.
79
2022 Super Duty (TFE) Canada/United States of America, enUSA, Edition date: 202103, First-Printing MyKey
™E269950
Page 90 of 740
KEYLESS ENTRY LIMITATIONS
Make sure your remote control is within 3 ft
(1 m) from the front door handles and the
tailgate.
The system could not function if:
• The remote control remains stationary
for about a minute.
• The vehicle battery has no charge.
• The remote control battery has no
charge.
• There is interference causing issues
with the remote control frequencies.
• The remote control is too close to
metal objects or electronic devices, for
example keys or a cell phone.
KEYLESS ENTRY SETTINGS
Switching Keyless Entry On and
Off
1. Switch the ignition on using an original
key that has not been created as a
MyKey.
2. Press
Settings on the touchscreen.
3. Press
Vehicle Settings.
4. Press
Locks.
Reprogramming the Unlocking
Function
You can enable two-stage unlocking
function allowing you to unlock only the
driver door when you touch the unlock
sensor.
Press and hold both the lock and unlock
buttons on the remote control for four
seconds to disable or enable two-stage
unlocking. If you program the unlocking function so
that only the driver door unlocks, you can
unlock all of the other doors from inside
your vehicle using the power door lock
control. You can unlock individual doors
by pulling the interior door handles on
those doors.
USING KEYLESS ENTRY
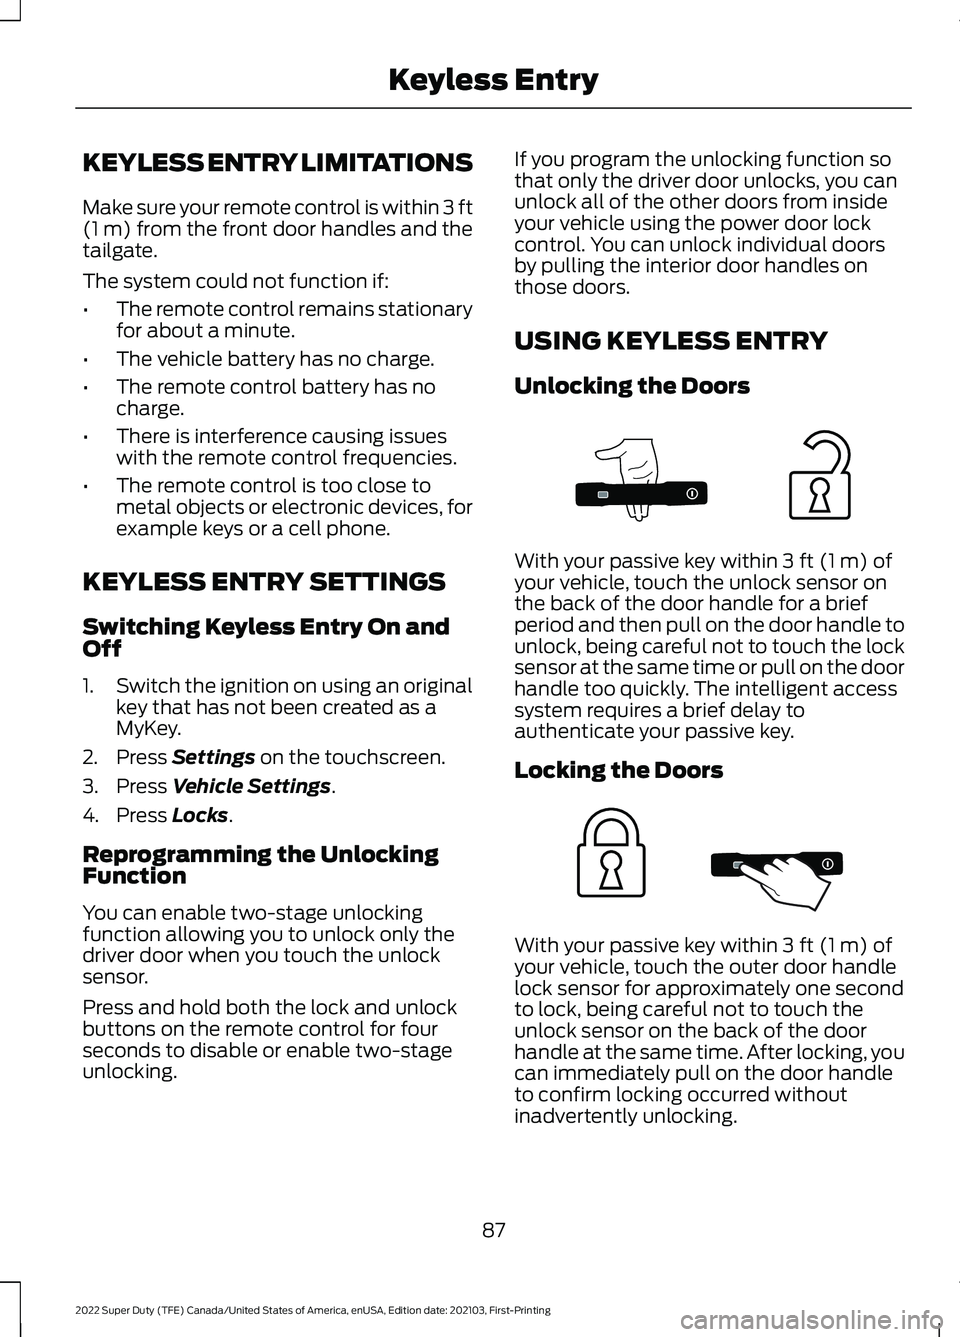
Unlocking the Doors
With your passive key within
3 ft (1 m) of
your vehicle, touch the unlock sensor on
the back of the door handle for a brief
period and then pull on the door handle to
unlock, being careful not to touch the lock
sensor at the same time or pull on the door
handle too quickly. The intelligent access
system requires a brief delay to
authenticate your passive key.
Locking the Doors With your passive key within
3 ft (1 m) of
your vehicle, touch the outer door handle
lock sensor for approximately one second
to lock, being careful not to touch the
unlock sensor on the back of the door
handle at the same time. After locking, you
can immediately pull on the door handle
to confirm locking occurred without
inadvertently unlocking.
87
2022 Super Duty (TFE) Canada/United States of America, enUSA, Edition date: 202103, First-Printing Keyless EntryE333747 E333746
Page 124 of 740
SWITCHING THE SPOT LAMPS ON
AND OFF (If Equipped)
The spot lamp buttons are near the lighting
control. Press the button to switch on the
left-hand spot lamp.
Press the button to switch on the
right-hand spot lamp.
Move the position of the exterior mirrors
to adjust the aim.
Note: The lighting control must be set to
the parking lamp position.
Note: The spot lamps illuminate the area
in front of and to the side of your vehicle.
EXTERIOR LAMP INDICATORS
Front Fog Lamp It illuminates when you switch
the front fog lamps on.
Turn Signal Lamp It flashes when you switch the
turn signal lamps on.
Note: An increase in the rate of flashing
warns of a failed turn signal lamp.
EXTERIOR LAMP AUDIBLE
WARNING
Exterior Lamps On
Sounds when you open the driver door and
the exterior lamps are on. AUTOMATIC HIGH BEAM
CONTROL (IF EQUIPPED)
HOW DOES AUTOMATIC HIGH
BEAM CONTROL WORK
Automatic high beam control turns the
high beams on if it is dark enough and no
other traffic is present. If it detects an
approaching vehicle ’s headlamps or tail
lamps, or street lighting ahead, the system
turns the high beams off.
A camera sensor, centrally mounted
behind the windshield of your vehicle,
continuously monitors conditions to turn
the high beams on and off.
121
2022 Super Duty (TFE) Canada/United States of America, enUSA, Edition date: 202103, First-Printing Exterior LightingE340436 E340437
Page 128 of 740
ADJUSTING THE INSTRUMENT
PANEL LIGHTING
BRIGHTNESS
The instrument lighting dimmer buttons
are on the lighting control.
Repeatedly press one of the
buttons to adjust the brightness.
AMBIENT LIGHTING (IF EQUIPPED)
SWITCHING AMBIENT LIGHTING
ON AND OFF
1. Press
Settings on the touchscreen.
2. Press
Vehicle Settings.
3. Press
Ambient Light.
4. Switch
Ambient Light on or off.
ADJUSTING AMBIENT LIGHTING
Drag the slider left or right.
INTERIOR LIGHTING –
TROUBLESHOOTING
INTERIOR LIGHTING –
FREQUENTLY ASKED QUESTIONS
Why do my courtesy lamps or interior
lamps turn off when I have them
switched on when I switch my vehicle
off? The battery saver turns the courtesy
lamps and interior lamps off after a
short period of time after you switch
your vehicle off.
125
2022 Super Duty (TFE) Canada/United States of America, enUSA, Edition date: 202103, First-Printing Interior LightingE291299 E296433
Page 144 of 740
USING THE INSTRUMENT
CLUSTER DISPLAY CONTROLS
WARNING: Driving while distracted
can result in loss of vehicle control, crash
and injury. We strongly recommend that
you use extreme caution when using any
device that may take your focus off the
road. Your primary responsibility is the
safe operation of your vehicle. We
recommend against the use of any
hand-held device while driving and
encourage the use of voice-operated
systems when possible. Make sure you
are aware of all applicable local laws
that may affect the use of electronic
devices while driving.
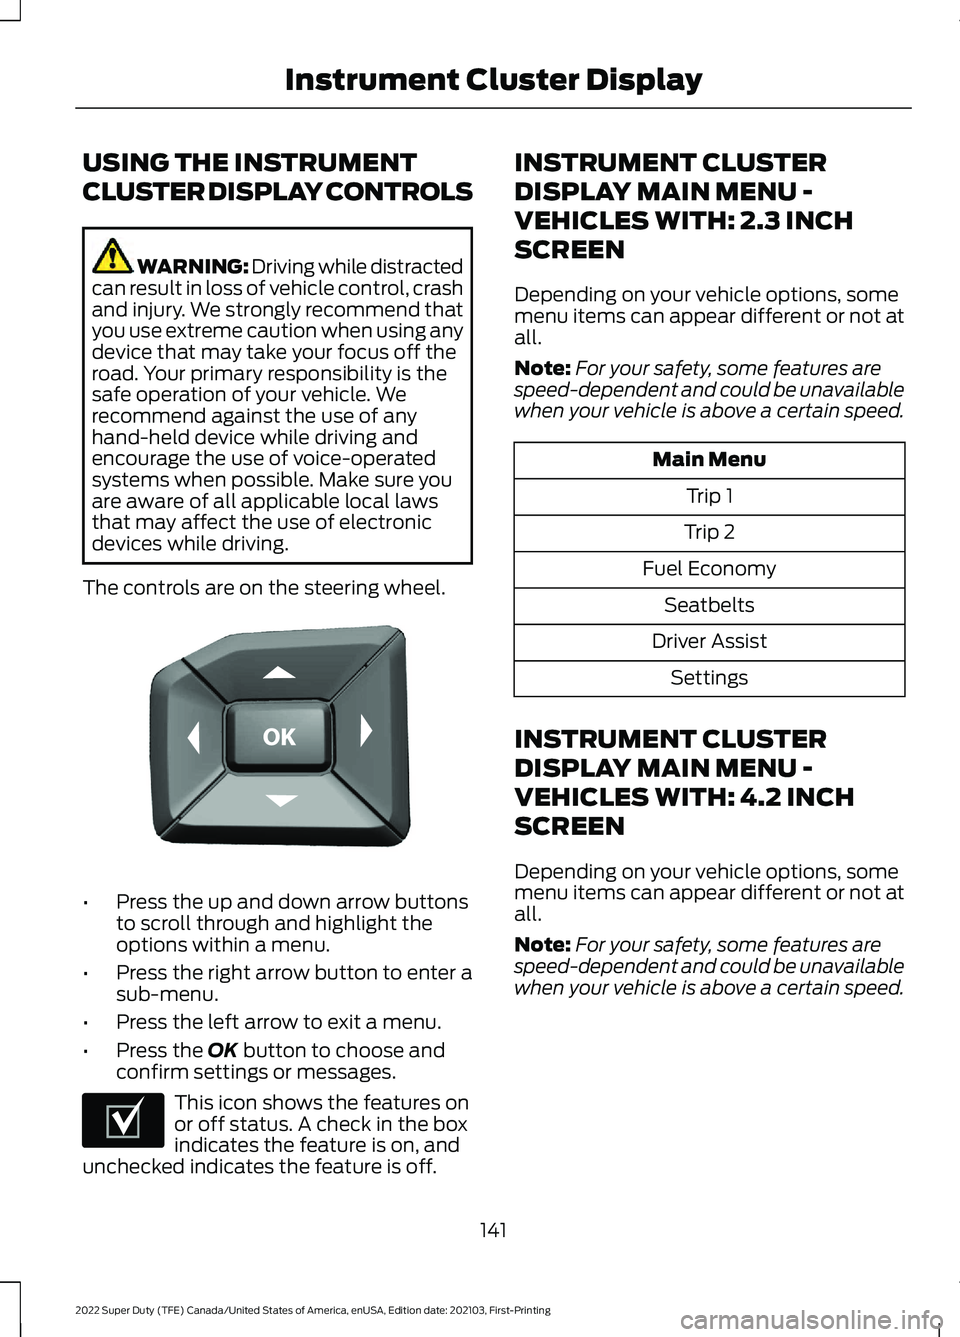
The controls are on the steering wheel. •
Press the up and down arrow buttons
to scroll through and highlight the
options within a menu.
• Press the right arrow button to enter a
sub-menu.
• Press the left arrow to exit a menu.
• Press the OK button to choose and
confirm settings or messages. This icon shows the features on
or off status. A check in the box
indicates the feature is on, and
unchecked indicates the feature is off. INSTRUMENT CLUSTER
DISPLAY MAIN MENU -
VEHICLES WITH: 2.3 INCH
SCREEN
Depending on your vehicle options, some
menu items can appear different or not at
all.
Note:
For your safety, some features are
speed-dependent and could be unavailable
when your vehicle is above a certain speed. Main Menu
Trip 1
Trip 2
Fuel Economy Seatbelts
Driver Assist Settings
INSTRUMENT CLUSTER
DISPLAY MAIN MENU -
VEHICLES WITH: 4.2 INCH
SCREEN
Depending on your vehicle options, some
menu items can appear different or not at
all.
Note: For your safety, some features are
speed-dependent and could be unavailable
when your vehicle is above a certain speed.
141
2022 Super Duty (TFE) Canada/United States of America, enUSA, Edition date: 202103, First-Printing Instrument Cluster DisplayE184451 E204495
Page 177 of 740
WHAT IS THE MEMORY
FUNCTION
The memory function recalls the position
of these features:
•
Driver seat.
• Power mirrors.
• Optional power steering column.
• Optional power adjustable pedals.
MEMORY FUNCTION
PRECAUTIONS WARNING: Before activating the
memory seat, make sure that the area
immediately surrounding the seat is clear
of obstructions and that all occupants
are clear of moving parts. WARNING:
Do not use the memory
function when your vehicle is moving.
LOCATING THE MEMORY
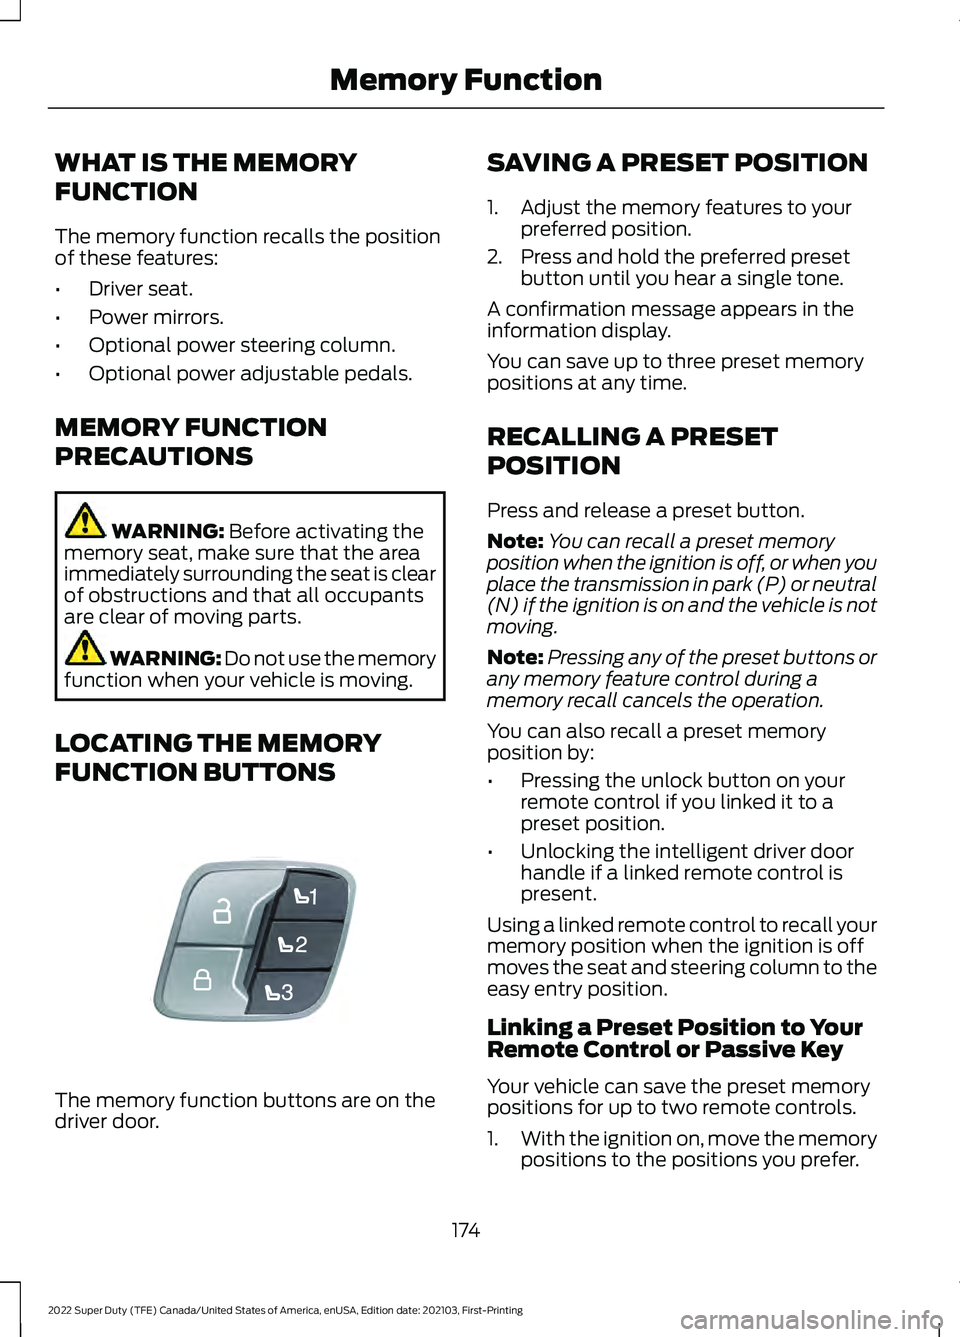
FUNCTION BUTTONS The memory function buttons are on the
driver door. SAVING A PRESET POSITION
1. Adjust the memory features to your
preferred position.
2. Press and hold the preferred preset button until you hear a single tone.
A confirmation message appears in the
information display.
You can save up to three preset memory
positions at any time.
RECALLING A PRESET
POSITION
Press and release a preset button.
Note: You can recall a preset memory
position when the ignition is off, or when you
place the transmission in park (P) or neutral
(N) if the ignition is on and the vehicle is not
moving.
Note: Pressing any of the preset buttons or
any memory feature control during a
memory recall cancels the operation.
You can also recall a preset memory
position by:
• Pressing the unlock button on your
remote control if you linked it to a
preset position.
• Unlocking the intelligent driver door
handle if a linked remote control is
present.
Using a linked remote control to recall your
memory position when the ignition is off
moves the seat and steering column to the
easy entry position.
Linking a Preset Position to Your
Remote Control or Passive Key
Your vehicle can save the preset memory
positions for up to two remote controls.
1. With the ignition on, move the memory
positions to the positions you prefer.
174
2022 Super Duty (TFE) Canada/United States of America, enUSA, Edition date: 202103, First-Printing Memory FunctionE307868
Page 179 of 740
WHAT IS THE GARAGE DOOR
OPENER
HomeLink Wireless Control
System
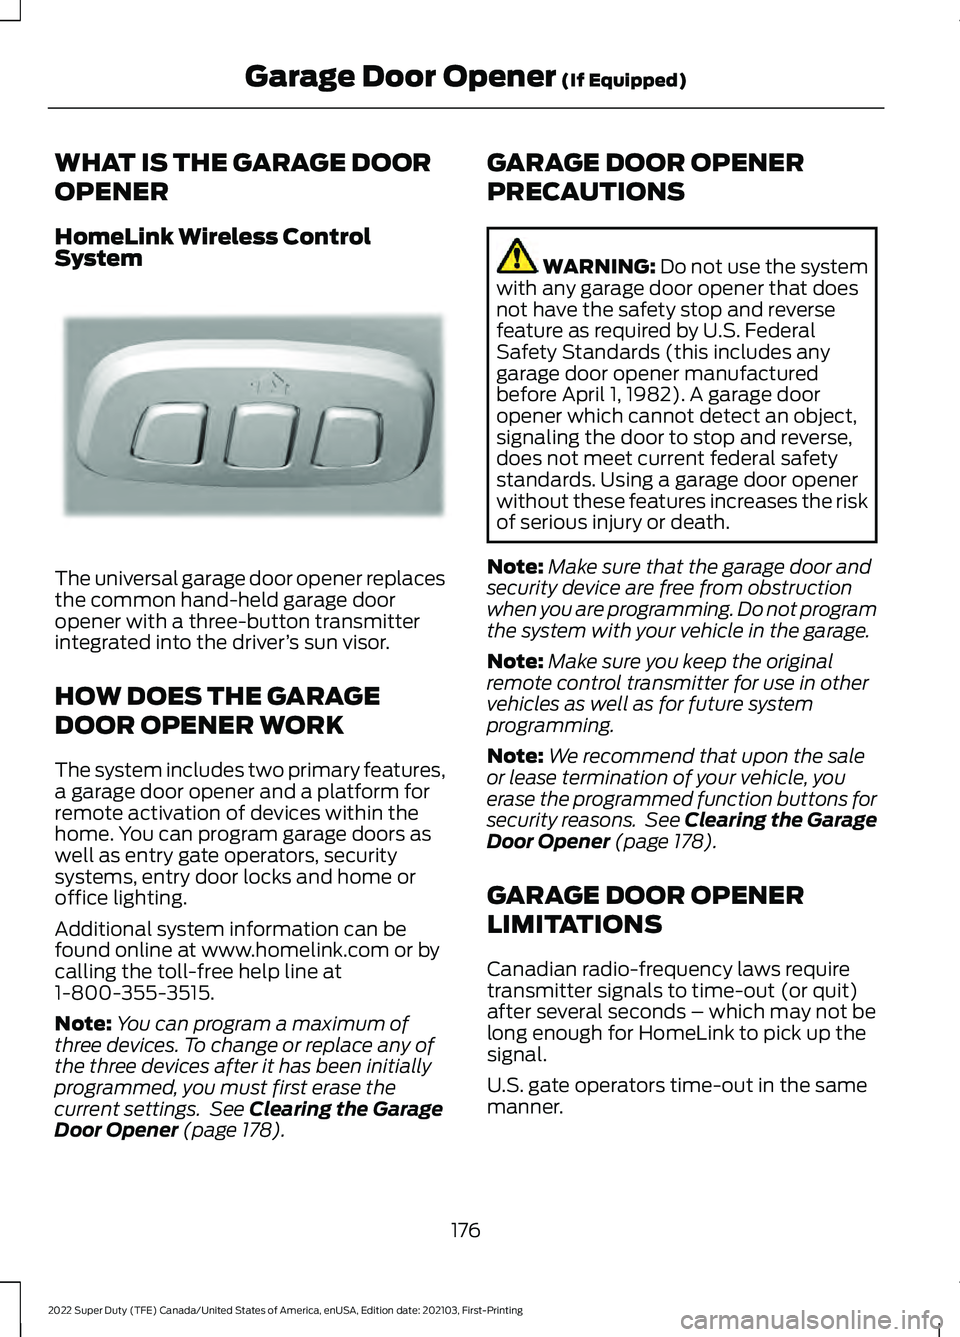
The universal garage door opener replaces
the common hand-held garage door
opener with a three-button transmitter
integrated into the driver
’s sun visor.
HOW DOES THE GARAGE
DOOR OPENER WORK
The system includes two primary features,
a garage door opener and a platform for
remote activation of devices within the
home. You can program garage doors as
well as entry gate operators, security
systems, entry door locks and home or
office lighting.
Additional system information can be
found online at www.homelink.com or by
calling the toll-free help line at
1-800-355-3515.
Note: You can program a maximum of
three devices. To change or replace any of
the three devices after it has been initially
programmed, you must first erase the
current settings. See Clearing the Garage
Door Opener (page 178). GARAGE DOOR OPENER
PRECAUTIONS WARNING:
Do not use the system
with any garage door opener that does
not have the safety stop and reverse
feature as required by U.S. Federal
Safety Standards (this includes any
garage door opener manufactured
before April 1, 1982). A garage door
opener which cannot detect an object,
signaling the door to stop and reverse,
does not meet current federal safety
standards. Using a garage door opener
without these features increases the risk
of serious injury or death.
Note: Make sure that the garage door and
security device are free from obstruction
when you are programming. Do not program
the system with your vehicle in the garage.
Note: Make sure you keep the original
remote control transmitter for use in other
vehicles as well as for future system
programming.
Note: We recommend that upon the sale
or lease termination of your vehicle, you
erase the programmed function buttons for
security reasons. See Clearing the Garage
Door Opener
(page 178).
GARAGE DOOR OPENER
LIMITATIONS
Canadian radio-frequency laws require
transmitter signals to time-out (or quit)
after several seconds – which may not be
long enough for HomeLink to pick up the
signal.
U.S. gate operators time-out in the same
manner.
176
2022 Super Duty (TFE) Canada/United States of America, enUSA, Edition date: 202103, First-Printing Garage Door Opener
(If Equipped)E188211