brake light FORD F SERIES MOTORHOME AND COMMERCIAL CHASSIS 1999 10.G Owners Manual
[x] Cancel search | Manufacturer: FORD, Model Year: 1999, Model line: F SERIES MOTORHOME AND COMMERCIAL CHASSIS, Model: FORD F SERIES MOTORHOME AND COMMERCIAL CHASSIS 1999 10.GPages: 96, PDF Size: 0.57 MB
Page 4 of 96
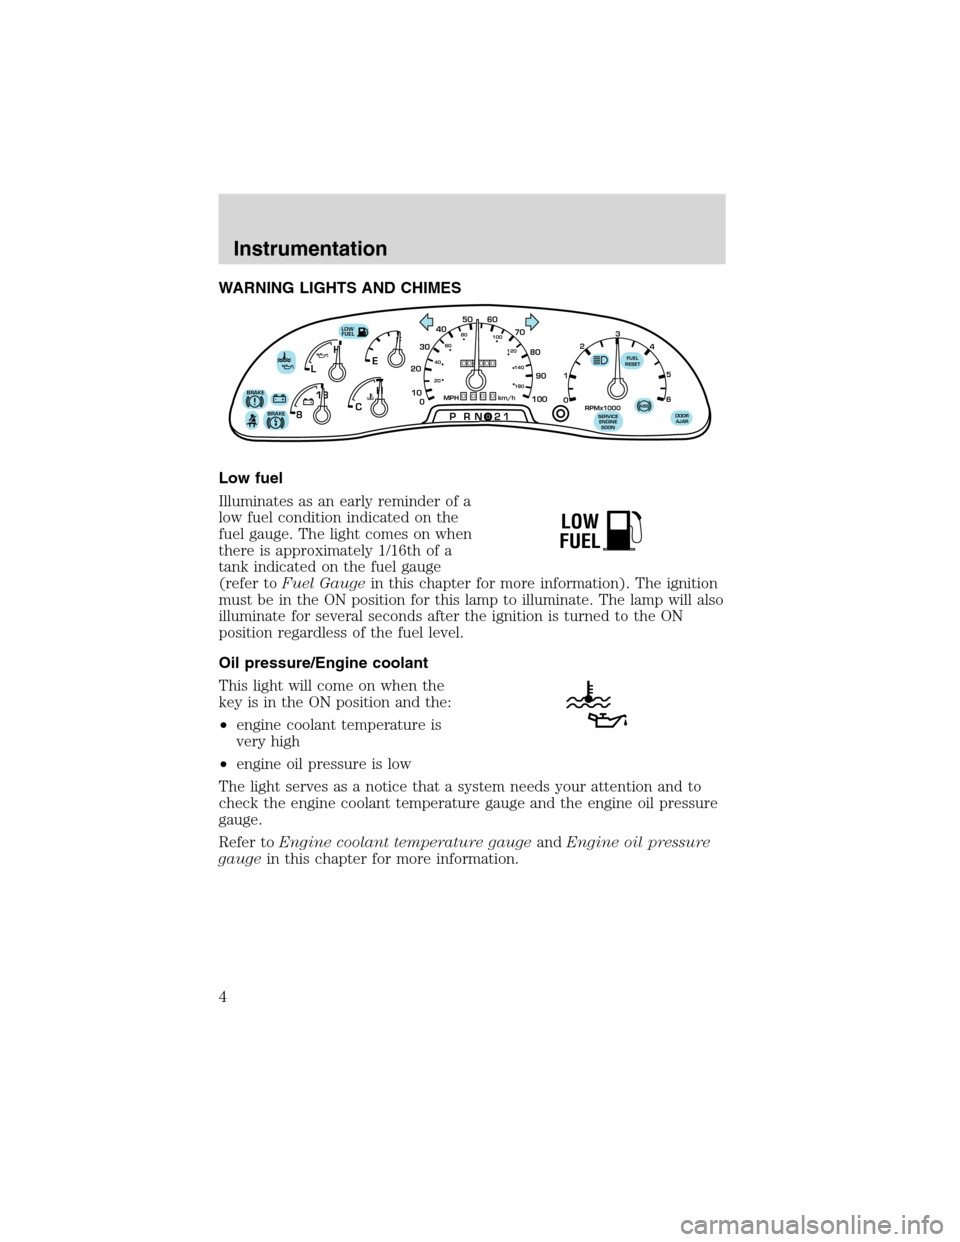
WARNING LIGHTS AND CHIMES
Low fuel
Illuminates as an early reminder of a
low fuel condition indicated on the
fuel gauge. The light comes on when
there is approximately 1/16th of a
tank indicated on the fuel gauge
(refer toFuel Gaugein this chapter for more information). The ignition
must be in the ON position for this lamp to illuminate. The lamp will also
illuminate for several seconds after the ignition is turned to the ON
position regardless of the fuel level.
Oil pressure/Engine coolant
This light will come on when the
key is in the ON position and the:
•engine coolant temperature is
very high
•engine oil pressure is low
The light serves as a notice that a system needs your attention and to
check the engine coolant temperature gauge and the engine oil pressure
gauge.
Refer toEngine coolant temperature gaugeandEngine oil pressure
gaugein this chapter for more information.
F
E
CH H
L
18
8
PRN 21LOW
FUEL
BRAKE!+ -+ -000000000
0
50
60
70
20
10
0 3040
80
90
100
20406080
100
120
140
180
MPH km/h
1
02
RPMx1000
3
4
5
6
SERVICE
ENGINE
SOONABS
FUEL
RESET
DOOR
AJARBRAKE
LOW
FUEL
Instrumentation
4
Page 5 of 96
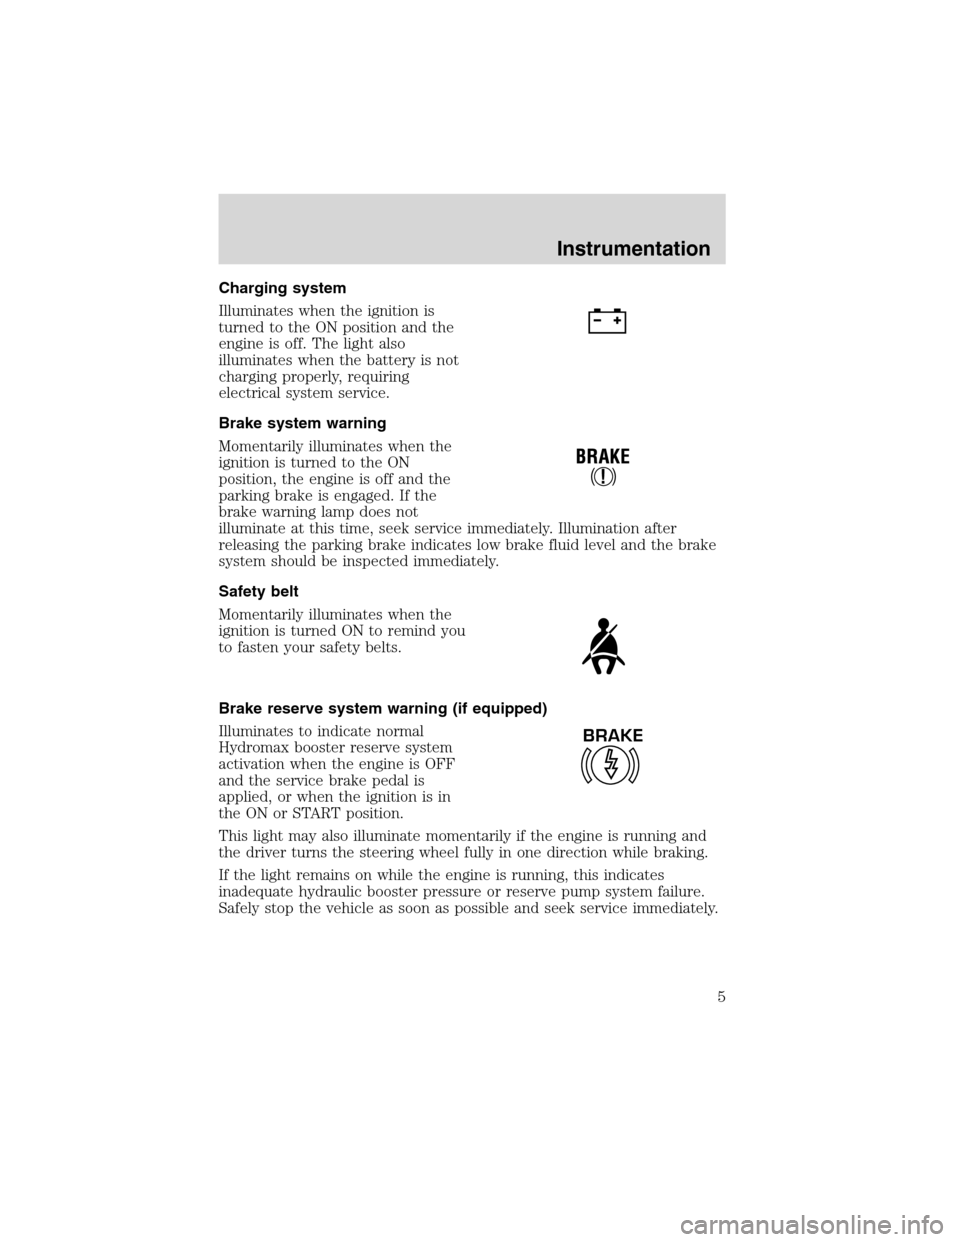
Charging system
Illuminates when the ignition is
turned to the ON position and the
engine is off. The light also
illuminates when the battery is not
charging properly, requiring
electrical system service.
Brake system warning
Momentarily illuminates when the
ignition is turned to the ON
position, the engine is off and the
parking brake is engaged. If the
brake warning lamp does not
illuminate at this time, seek service immediately. Illumination after
releasing the parking brake indicates low brake fluid level and the brake
system should be inspected immediately.
Safety belt
Momentarily illuminates when the
ignition is turned ON to remind you
to fasten your safety belts.
Brake reserve system warning (if equipped)
Illuminates to indicate normal
Hydromax booster reserve system
activation when the engine is OFF
and the service brake pedal is
applied, or when the ignition is in
the ON or START position.
This light may also illuminate momentarily if the engine is running and
the driver turns the steering wheel fully in one direction while braking.
If the light remains on while the engine is running, this indicates
inadequate hydraulic booster pressure or reserve pump system failure.
Safely stop the vehicle as soon as possible and seek service immediately.
BRAKE
Instrumentation
5
Page 8 of 96
3. The fuel cap may not have been properly installed and securely
tightened.
These temporary malfunctions can be corrected by filling the fuel tank
with good quality fuel and/or properly installing and securely tightening
the gas cap. After three driving cycles without these or any other
temporary malfunctions present, theService Engine Soonlight should
turn off. (A driving cycle consists of a cold engine startup followed by
mixed city/highway driving.) No additional vehicle service is required.
If theService Engine Soonlight remains on, have your vehicle serviced
at the first available opportunity.
Light is blinking:
Engine misfire is occurring which could damage your catalytic converter.
You should drive in a moderate fashion (avoid heavy acceleration and
deceleration) and have your vehicle serviced at the first available
opportunity.
Under engine misfire conditions, excessive exhaust temperatures
could damage the catalytic converter, the fuel system, interior
floor coverings or other vehicle components, possibly causing a fire.
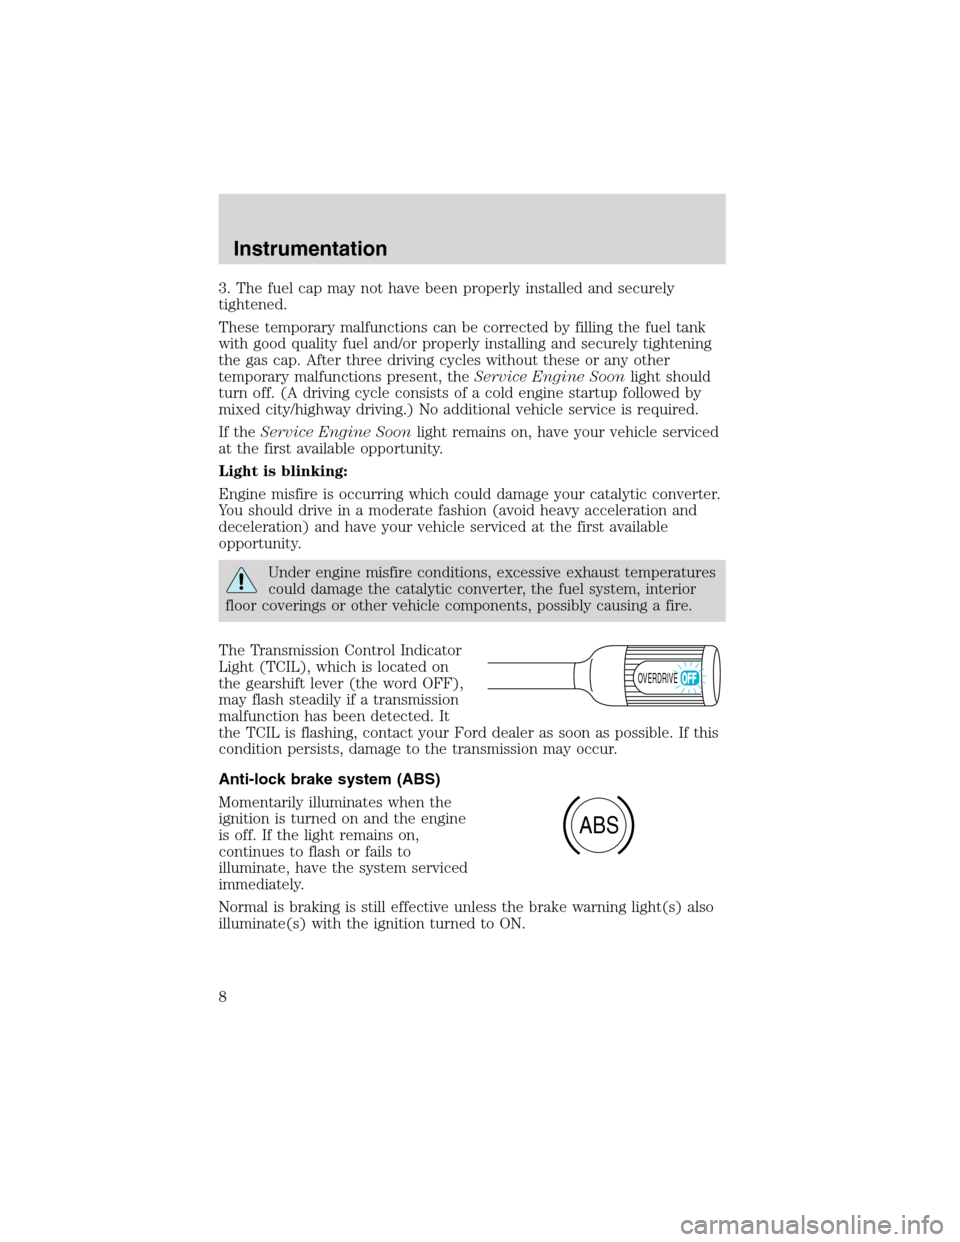
The Transmission Control Indicator
Light (TCIL), which is located on
the gearshift lever (the word OFF),
may flash steadily if a transmission
malfunction has been detected. It
the TCIL is flashing, contact your Ford dealer as soon as possible. If this
condition persists, damage to the transmission may occur.
Anti-lock brake system (ABS)
Momentarily illuminates when the
ignition is turned on and the engine
is off. If the light remains on,
continues to flash or fails to
illuminate, have the system serviced
immediately.
Normal is braking is still effective unless the brake warning light(s) also
illuminate(s) with the ignition turned to ON.
OVERDRIVE
ABS
Instrumentation
8
Page 23 of 96
Make sure the corresponding lights illuminate briefly. If a light fails to
illuminate, have the vehicle serviced.
•If the driver’s safety belt is fastened, the
light may not illuminate.
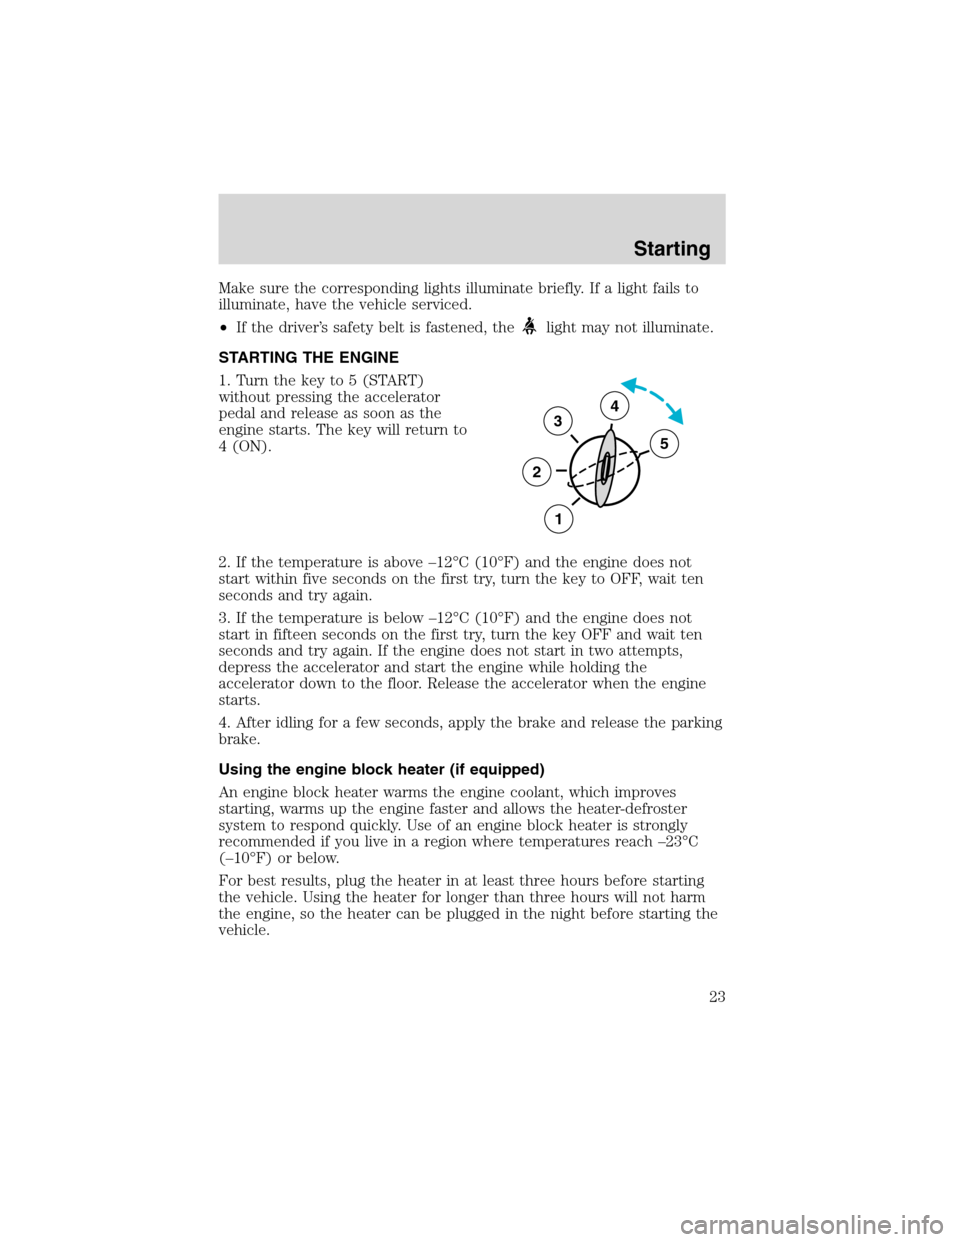
STARTING THE ENGINE
1. Turn the key to 5 (START)
without pressing the accelerator
pedal and release as soon as the
engine starts. The key will return to
4 (ON).
2. If the temperature is above –12°C (10°F) and the engine does not
start within five seconds on the first try, turn the key to OFF, wait ten
seconds and try again.
3. If the temperature is below –12°C (10°F) and the engine does not
start in fifteen seconds on the first try, turn the key OFF and wait ten
seconds and try again. If the engine does not start in two attempts,
depress the accelerator and start the engine while holding the
accelerator down to the floor. Release the accelerator when the engine
starts.
4. After idling for a few seconds, apply the brake and release the parking
brake.
Using the engine block heater (if equipped)
An engine block heater warms the engine coolant, which improves
starting, warms up the engine faster and allows the heater-defroster
system to respond quickly. Use of an engine block heater is strongly
recommended if you live in a region where temperatures reach –23°C
(–10°F) or below.
For best results, plug the heater in at least three hours before starting
the vehicle. Using the heater for longer than three hours will not harm
the engine, so the heater can be plugged in the night before starting the
vehicle.
3
2
1
5
4
Starting
23
Page 25 of 96
BRAKES
Your service brakes are self-adjusting. Refer to the Scheduled
maintenance guide for scheduled maintenance.
Occasional brake noise is normal and often does not indicate a
performance concern with the vehicle’s brake system. In normal
operation, automotive brake systems may emit occasional or intermittent
squeal or groan noises when the brakes are applied. Such noises are
usually heard during the first few brake applications in the morning;
however, they may be heard at any time while braking and can be
aggravated by environmental conditions such as cold, heat, moisture,
road dust, salt or mud. If a “metal-to-metal,” “continuous grinding” or
“continuous squeal” sound is present while braking, the brake linings
may be worn-out and should be inspected by a qualified service
technician.
If you are driving down a long or steep hill, shift to a lower gear.
Do not apply your brakes continuously, as they may overheat
and become less effective.
Anti-lock brake system (ABS) (if equipped)
On vehicles equipped with an anti-lock braking system (ABS), a noise
from the hydraulic pump motor and pulsation in the pedal may be
observed during ABS braking events. Pedal pulsation coupled with noise
while braking under panic conditions or on loose gravel, bumps, wet or
snowy roads is normal and indicates proper functioning of the vehicle’s
anti-lock brake system. The ABS performs a self-check at 17 km/h
(10 mph) after you start the engine and begin to drive away. A brief
mechanical noise may be heard during this test. This is normal. If a
malfunction is found, the ABS warning light will come on. If the vehicle
has continuous vibration or shudder in the steering wheel while braking,
the vehicle should be inspected by a qualified service technician.
Driving
25
Page 26 of 96
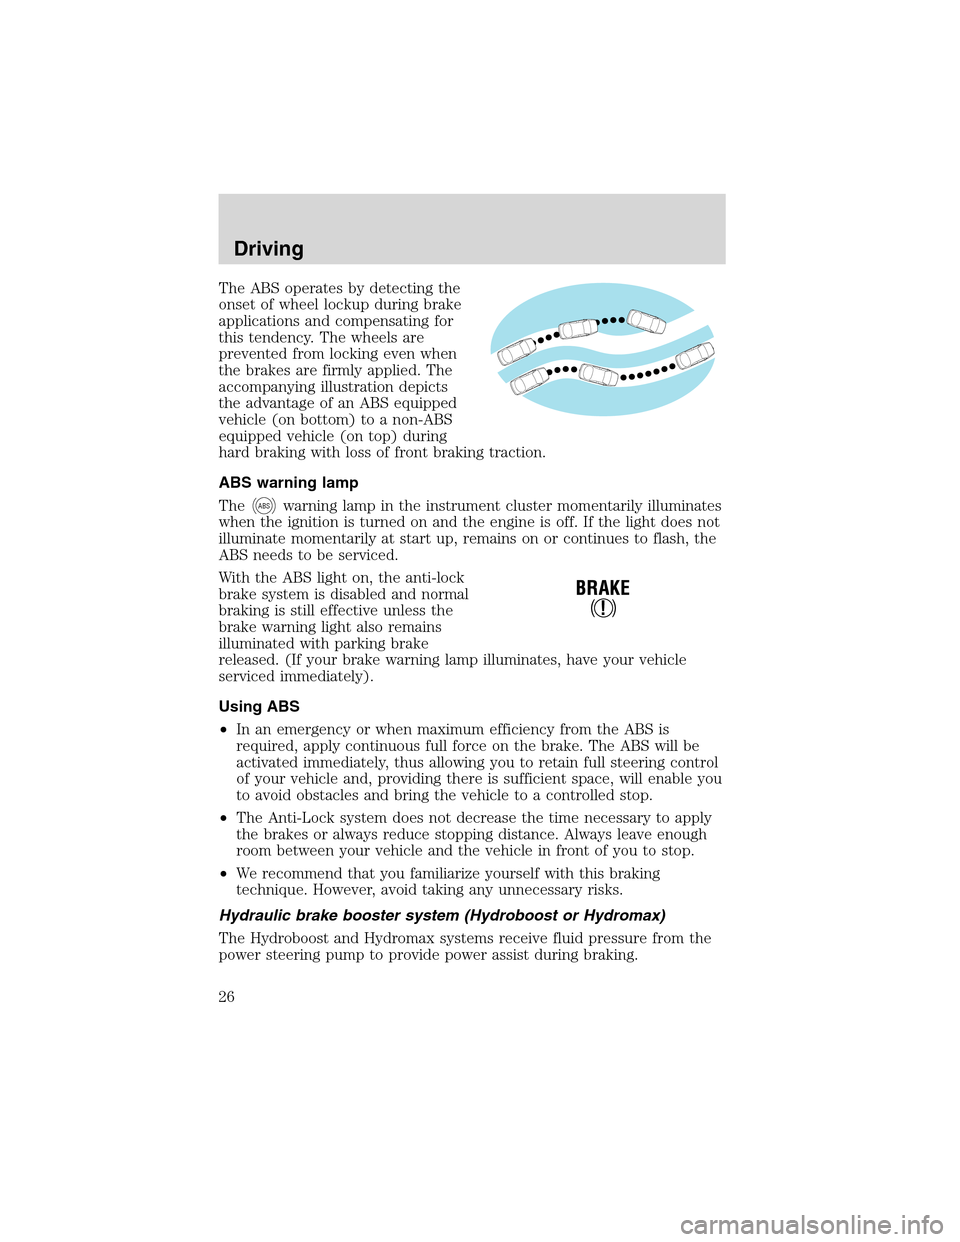
The ABS operates by detecting the
onset of wheel lockup during brake
applications and compensating for
this tendency. The wheels are
prevented from locking even when
the brakes are firmly applied. The
accompanying illustration depicts
the advantage of an ABS equipped
vehicle (on bottom) to a non-ABS
equipped vehicle (on top) during
hard braking with loss of front braking traction.
ABS warning lamp
The
ABSwarning lamp in the instrument cluster momentarily illuminates
when the ignition is turned on and the engine is off. If the light does not
illuminate momentarily at start up, remains on or continues to flash, the
ABS needs to be serviced.
With the ABS light on, the anti-lock
brake system is disabled and normal
braking is still effective unless the
brake warning light also remains
illuminated with parking brake
released. (If your brake warning lamp illuminates, have your vehicle
serviced immediately).
Using ABS
•In an emergency or when maximum efficiency from the ABS is
required, apply continuous full force on the brake. The ABS will be
activated immediately, thus allowing you to retain full steering control
of your vehicle and, providing there is sufficient space, will enable you
to avoid obstacles and bring the vehicle to a controlled stop.
•The Anti-Lock system does not decrease the time necessary to apply
the brakes or always reduce stopping distance. Always leave enough
room between your vehicle and the vehicle in front of you to stop.
•We recommend that you familiarize yourself with this braking
technique. However, avoid taking any unnecessary risks.
Hydraulic brake booster system (Hydroboost or Hydromax)
The Hydroboost and Hydromax systems receive fluid pressure from the
power steering pump to provide power assist during braking.
Driving
26
Page 29 of 96
3. Start the vehicle.
If it is necessary to use the above procedure to move the gearshift, it is
possible that a fuse has blown or the vehicle’s brakelamps are not
operating properly. Refer toFuses and relaysin theRoadside
emergencieschapter.
Do not drive your vehicle until you verify that the brakelamps
are working.
If your vehicle gets stuck in mud or snow it may be rocked out by
shifting from forward and reverse gears, stopping between shifts, in a
steady pattern. Press lightly on the accelerator in each gear.
Do not rock the vehicle for more than a few minutes. The
transmission and tires may be damaged or the engine may
overheat.
Always set the parking brake fully and make sure the gearshift is
latched in P (Park). Turn off the ignition whenever you leave
your vehicle.
If the parking brake is fully released, but the brake warning lamp
remains illuminated, the brakes may not be working properly.
See your dealer or a qualified service technician.
Driving with a 4–speed automatic transmission
Understanding gearshift positions
Pull the gearshift lever towards you and downward to move the
automatic gearshift.
Hold the brake pedal down while you move the gearshift lever
from P (Park) to another position. If you do not hold the brake
pedal down, your vehicle may move unexpectedly and injure someone.
Driving
29
Page 30 of 96
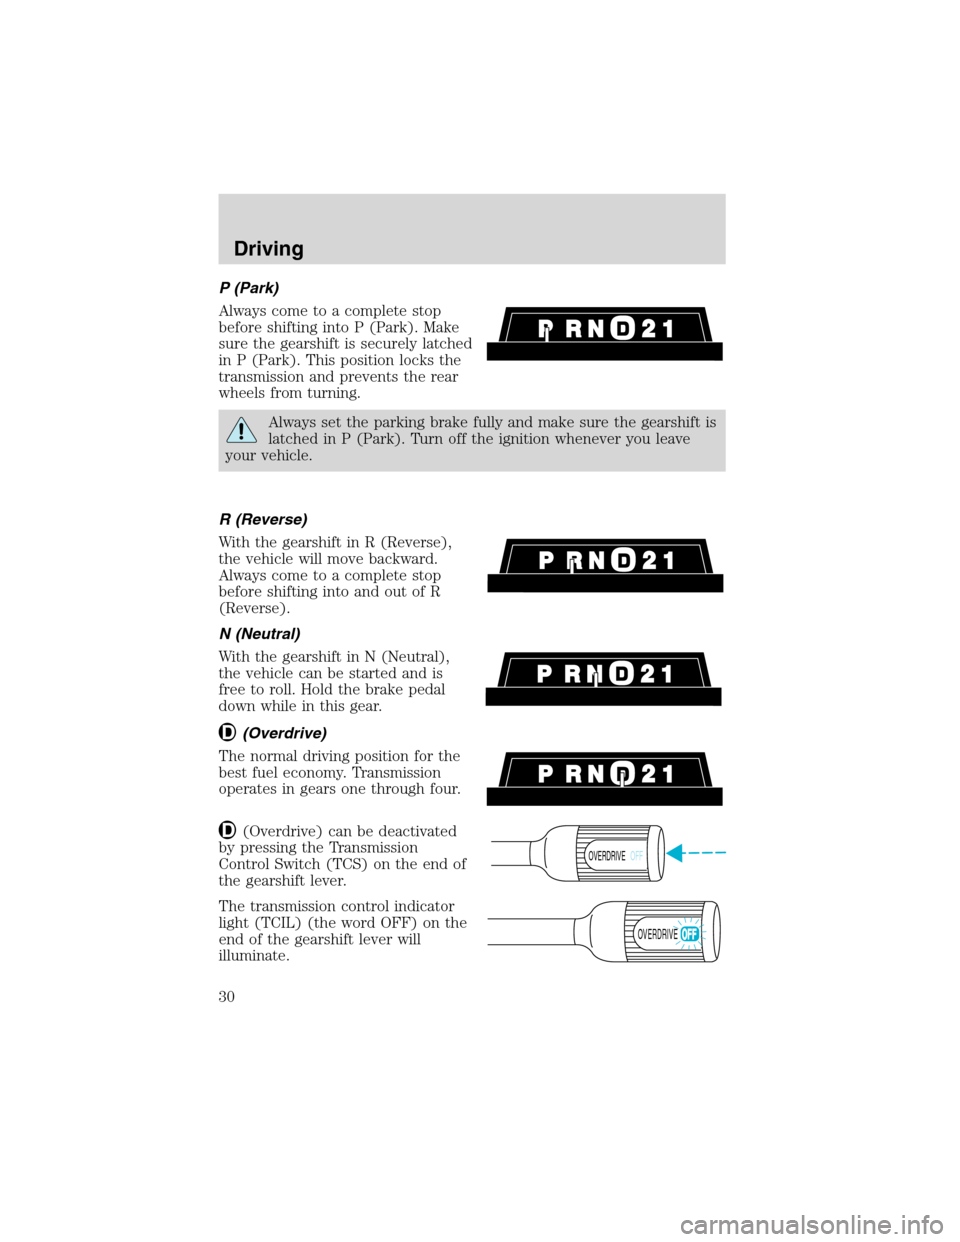
P (Park)
Always come to a complete stop
before shifting into P (Park). Make
sure the gearshift is securely latched
in P (Park). This position locks the
transmission and prevents the rear
wheels from turning.
Always set the parking brake fully and make sure the gearshift is
latched in P (Park). Turn off the ignition whenever you leave
your vehicle.
R (Reverse)
With the gearshift in R (Reverse),
the vehicle will move backward.
Always come to a complete stop
before shifting into and out of R
(Reverse).
N (Neutral)
With the gearshift in N (Neutral),
the vehicle can be started and is
free to roll. Hold the brake pedal
down while in this gear.
(Overdrive)
The normal driving position for the
best fuel economy. Transmission
operates in gears one through four.
(Overdrive) can be deactivated
by pressing the Transmission
Control Switch (TCS) on the end of
the gearshift lever.
The transmission control indicator
light (TCIL) (the word OFF) on the
end of the gearshift lever will
illuminate.
OVERDRIVEOFF
OVERDRIVE
Driving
30
Page 34 of 96
Once through the water, always try the brakes. Wet brakes do not stop
the vehicle as effectively as dry brakes. Drying can be improved by
moving your vehicle slowly while applying light pressure on the brake
pedal.
Driving through deep water where the transmission is submerged
may allow water into the transmission and cause internal
transmission damage.
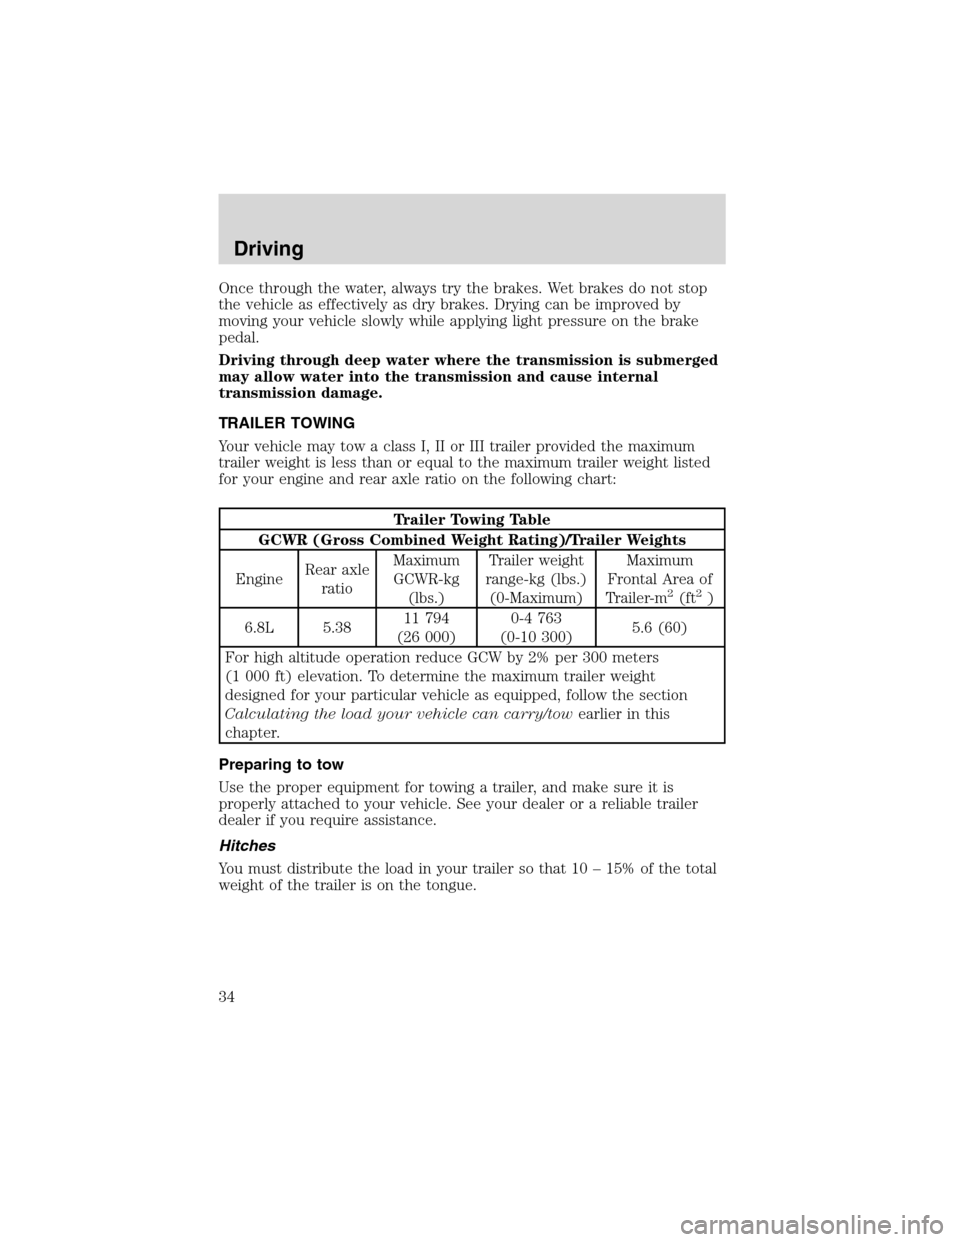
TRAILER TOWING
Your vehicle may tow a class I, II or III trailer provided the maximum
trailer weight is less than or equal to the maximum trailer weight listed
for your engine and rear axle ratio on the following chart:
Trailer Towing Table
GCWR (Gross Combined Weight Rating)/Trailer Weights
EngineRear axle
ratioMaximum
GCWR-kg
(lbs.)Trailer weight
range-kg (lbs.)
(0-Maximum)Maximum
Frontal Area of
Trailer-m
2(ft2)
6.8L 5.3811 794
(26 000)0-4 763
(0-10 300)5.6 (60)
For high altitude operation reduce GCW by 2% per 300 meters
(1 000 ft) elevation. To determine the maximum trailer weight
designed for your particular vehicle as equipped, follow the section
Calculating the load your vehicle can carry/towearlier in this
chapter.
Preparing to tow
Use the proper equipment for towing a trailer, and make sure it is
properly attached to your vehicle. See your dealer or a reliable trailer
dealer if you require assistance.
Hitches
You must distribute the load in your trailer so that 10 – 15% of the total
weight of the trailer is on the tongue.
Driving
34
Page 44 of 96
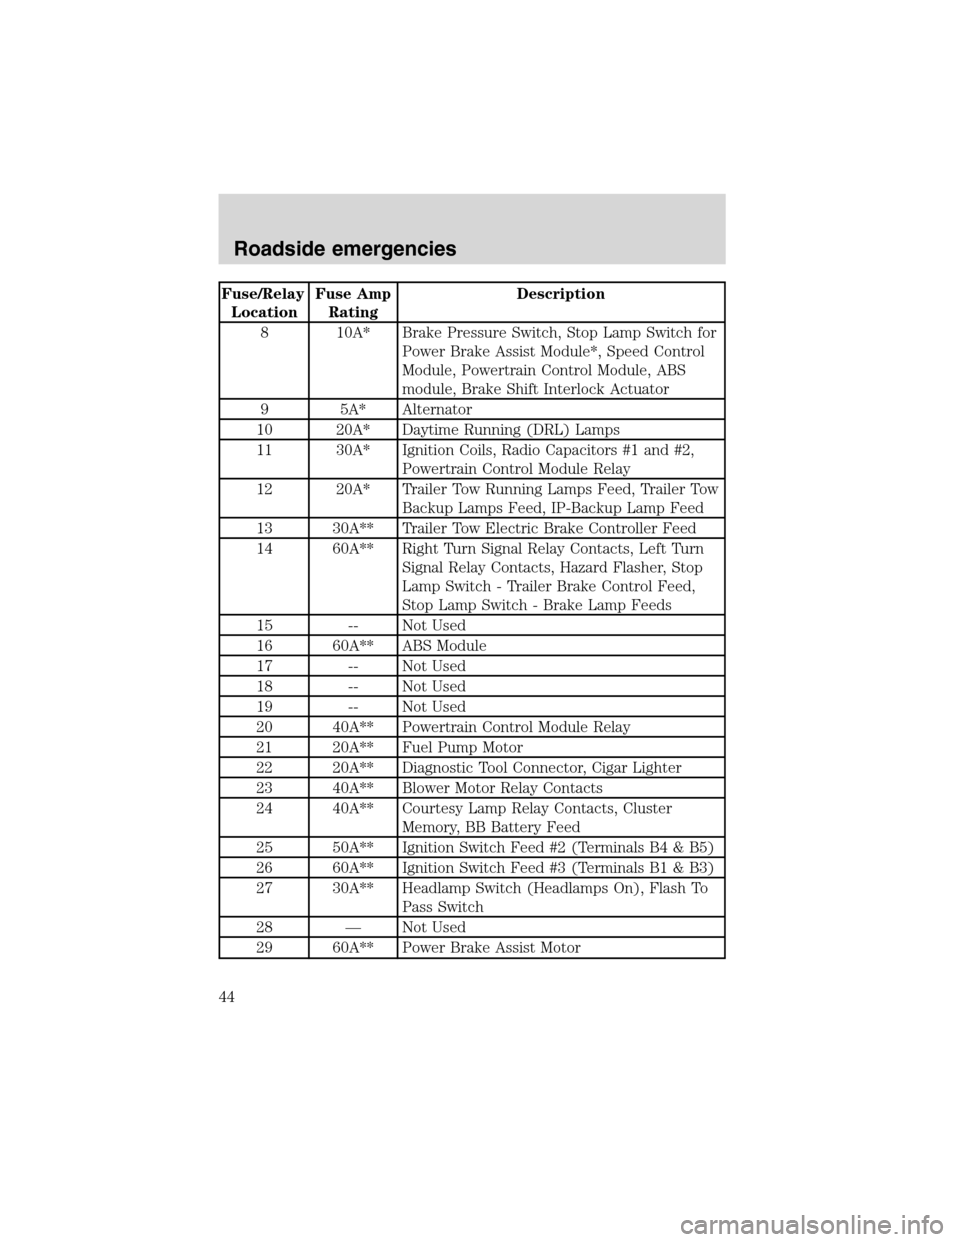
Fuse/Relay
LocationFuse Amp
RatingDescription
8 10A* Brake Pressure Switch, Stop Lamp Switch for
Power Brake Assist Module*, Speed Control
Module, Powertrain Control Module, ABS
module, Brake Shift Interlock Actuator
9 5A* Alternator
10 20A* Daytime Running (DRL) Lamps
11 30A* Ignition Coils, Radio Capacitors #1 and #2,
Powertrain Control Module Relay
12 20A* Trailer Tow Running Lamps Feed, Trailer Tow
Backup Lamps Feed, IP-Backup Lamp Feed
13 30A** Trailer Tow Electric Brake Controller Feed
14 60A** Right Turn Signal Relay Contacts, Left Turn
Signal Relay Contacts, Hazard Flasher, Stop
Lamp Switch - Trailer Brake Control Feed,
Stop Lamp Switch - Brake Lamp Feeds
15 -- Not Used
16 60A** ABS Module
17 -- Not Used
18 -- Not Used
19 -- Not Used
20 40A** Powertrain Control Module Relay
21 20A** Fuel Pump Motor
22 20A** Diagnostic Tool Connector, Cigar Lighter
23 40A** Blower Motor Relay Contacts
24 40A** Courtesy Lamp Relay Contacts, Cluster
Memory, BB Battery Feed
25 50A** Ignition Switch Feed #2 (Terminals B4 & B5)
26 60A** Ignition Switch Feed #3 (Terminals B1 & B3)
27 30A** Headlamp Switch (Headlamps On), Flash To
Pass Switch
28 — Not Used
29 60A** Power Brake Assist Motor
Roadside emergencies
44