flat tire FORD F SERIES MOTORHOME AND COMMERCIAL CHASSIS 1999 10.G Owners Manual
[x] Cancel search | Manufacturer: FORD, Model Year: 1999, Model line: F SERIES MOTORHOME AND COMMERCIAL CHASSIS, Model: FORD F SERIES MOTORHOME AND COMMERCIAL CHASSIS 1999 10.GPages: 96, PDF Size: 0.57 MB
Page 32 of 96
VEHICLE LOADING
Your vehicle’s load capacity is designed by weight, not volume, so you
cannot necessarily use all available space with large or heavy loads.
Maximum safe vehicle weights as well as tire, rim sizes and inflation
pressures are specified for your vehicle on the Safety Compliance
Certification Label. A Safety Compliance Certification Label was supplied
by Ford Motor Company to the Motorhome Manufacturer. The
manufacturer uses this information and supplies a Compliance
Certification Label which is located inside the vehicle to the left of the
driver.
Before loading a vehicle, familiarize yourself with the following terms:
•Base Curb Weight: Weight of the vehicle including any standard
equipment, fluids, lubricants, etc. It does not include passengers or
aftermarket equipment.
•Payload: Combined maximum allowable weight of cargo, passengers
and optional equipment. The payload equals the gross vehicle weight
rating minus base curb weight.
•GVW (Gross Vehicle Weight): Base curb weight plus payload
weight. The GVW is not a limit or a specification.
•GVWR (Gross Vehicle Weight Rating): Maximum total weight of
the base vehicle, passengers, optional equipment and cargo. The
GVWR is specific to each vehicle and is listed on the Safety
Compliance Label on the driver’s door pillar.
•GAWR (Gross Axle Weight Rating): Carrying capacity for each axle
system. The GAWR is specific to each vehicle and is listed on the
Safety Compliance Label on the driver’s door pillar.
•GCWR (Gross Combined Weight Rating): Maximum combined
weight of towing vehicle (including passengers and cargo) and the
trailer. The GCWR indicates the maximum loaded weight that the
vehicle is allowed to tow.
•Maximum Trailer Weight Rating: Maximum weight of a trailer the
vehicle is permitted to tow. The maximum trailer weight rating is
determined by subtracting the vehicle curb weight for each
engine/transmission combination, any required option weight for trailer
towing and the weight of the driver from the GCWR for the towing
vehicle.
Driving
32
Page 45 of 96
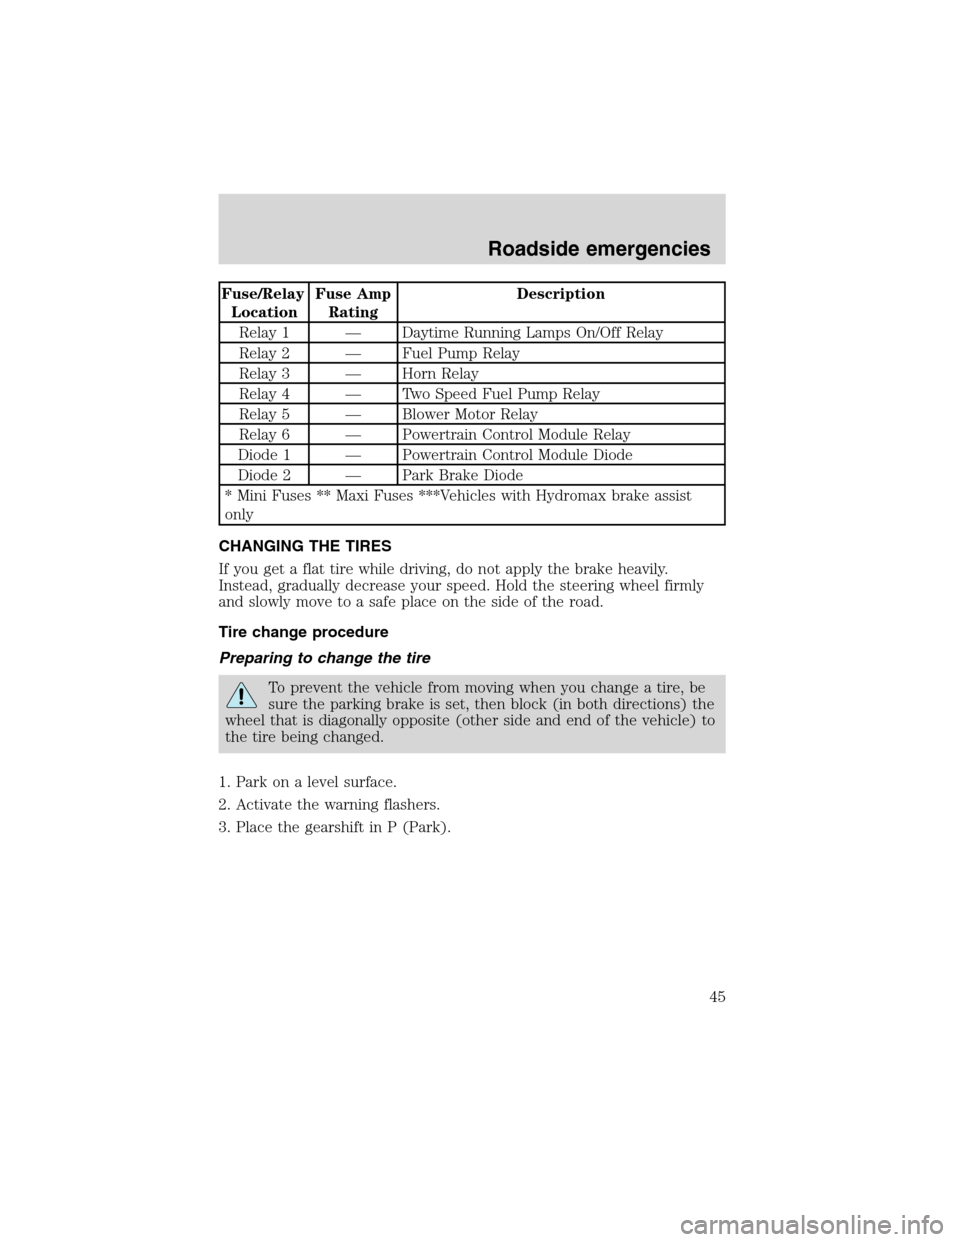
Fuse/Relay
LocationFuse Amp
RatingDescription
Relay 1 — Daytime Running Lamps On/Off Relay
Relay 2 — Fuel Pump Relay
Relay 3 — Horn Relay
Relay 4 — Two Speed Fuel Pump Relay
Relay 5 — Blower Motor Relay
Relay 6 — Powertrain Control Module Relay
Diode 1 — Powertrain Control Module Diode
Diode 2 — Park Brake Diode
* Mini Fuses ** Maxi Fuses ***Vehicles with Hydromax brake assist
only
CHANGING THE TIRES
If you get a flat tire while driving, do not apply the brake heavily.
Instead, gradually decrease your speed. Hold the steering wheel firmly
and slowly move to a safe place on the side of the road.
Tire change procedure
Preparing to change the tire
To prevent the vehicle from moving when you change a tire, be
sure the parking brake is set, then block (in both directions) the
wheel that is diagonally opposite (other side and end of the vehicle) to
the tire being changed.
1. Park on a level surface.
2. Activate the warning flashers.
3. Place the gearshift in P (Park).
Roadside emergencies
45
Page 47 of 96
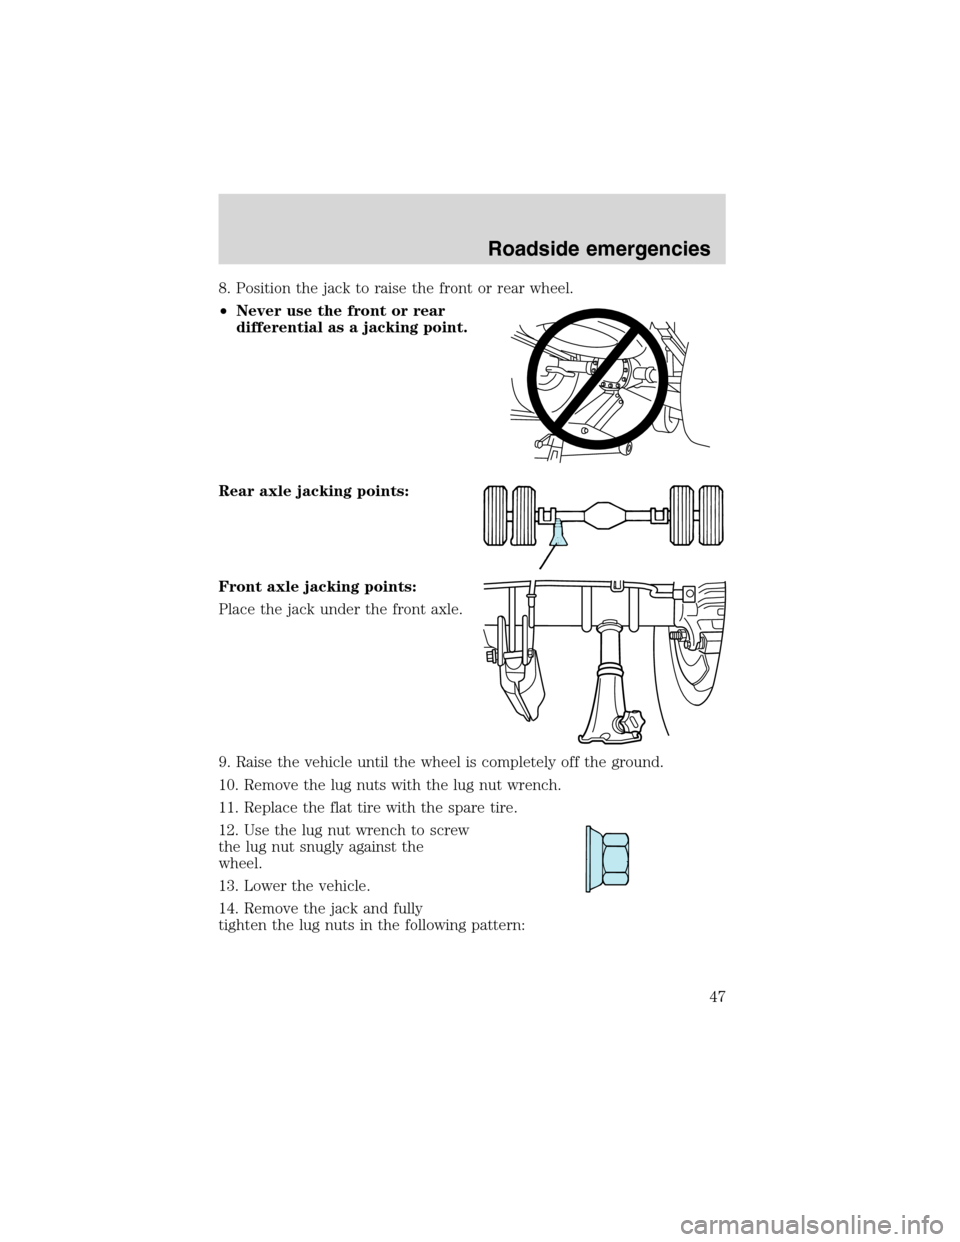
8. Position the jack to raise the front or rear wheel.
•Never use the front or rear
differential as a jacking point.
Rear axle jacking points:
Front axle jacking points:
Place the jack under the front axle.
9. Raise the vehicle until the wheel is completely off the ground.
10. Remove the lug nuts with the lug nut wrench.
11. Replace the flat tire with the spare tire.
12. Use the lug nut wrench to screw
the lug nut snugly against the
wheel.
13. Lower the vehicle.
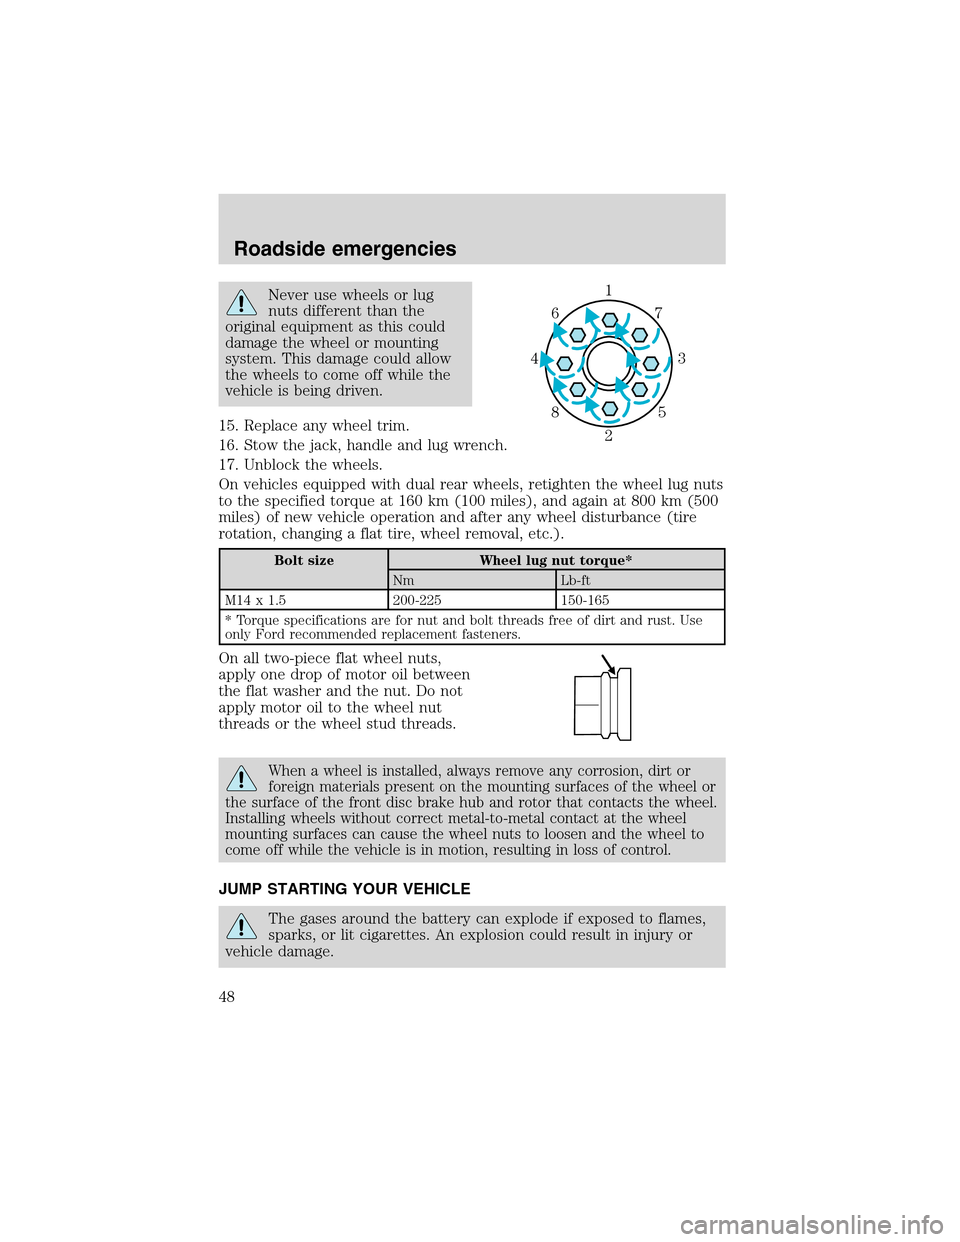
14. Remove the jack and fully
tighten the lug nuts in the following pattern:
Roadside emergencies
47
Page 48 of 96
Never use wheels or lug
nuts different than the
original equipment as this could
damage the wheel or mounting
system. This damage could allow
the wheels to come off while the
vehicle is being driven.
15. Replace any wheel trim.
16. Stow the jack, handle and lug wrench.
17. Unblock the wheels.
On vehicles equipped with dual rear wheels, retighten the wheel lug nuts
to the specified torque at 160 km (100 miles), and again at 800 km (500
miles) of new vehicle operation and after any wheel disturbance (tire
rotation, changing a flat tire, wheel removal, etc.).
Bolt size Wheel lug nut torque*
Nm Lb-ft
M14 x 1.5 200-225 150-165
* Torque specifications are for nut and bolt threads free of dirt and rust. Use
only Ford recommended replacement fasteners.
On all two-piece flat wheel nuts,
apply one drop of motor oil between
the flat washer and the nut. Do not
apply motor oil to the wheel nut
threads or the wheel stud threads.
When a wheel is installed, always remove any corrosion, dirt or
foreign materials present on the mounting surfaces of the wheel or
the surface of the front disc brake hub and rotor that contacts the wheel.
Installing wheels without correct metal-to-metal contact at the wheel
mounting surfaces can cause the wheel nuts to loosen and the wheel to
come off while the vehicle is in motion, resulting in loss of control.
JUMP STARTING YOUR VEHICLE
The gases around the battery can explode if exposed to flames,
sparks, or lit cigarettes. An explosion could result in injury or
vehicle damage.
1
3 4
27 6
5 8
Roadside emergencies
48
Page 69 of 96
2. Put the gearshift in P (Park), turn off all accessories and start the
engine.
3. Let the engine idle for at least one minute.
4. The relearning process will automatically complete as you drive the
vehicle.
•The vehicle may need to be driven 16 km (10 miles) or more to
relearn the idle and fuel trim strategy.
•If you do not allow the engine to relearn its idle trim, the idle quality
of your vehicle may be adversely affected until the idle trim is
eventually relearned.
If the battery has been disconnected or a new battery has been installed,
the clock and the preset radio stations must be reset once the battery is
reconnected.
•Always dispose of automotive
batteries in a responsible manner.
Follow your local authorized
standards for disposal. Call your
local authorized recycling center
to find out more about recycling
automotive batteries.
SERVICING YOUR TIRES
Checking the tire pressure
•Use an accurate tire pressure gauge.
•Check the tire pressure when tires are cold, after the vehicle has been
parked for at least one hour or has been driven less than 5 km
(3 miles).
•Adjust tire pressure to recommended specifications found on the
Certification Label.
Improperly inflated tires can affect vehicle handling and can fail
suddenly, possibly resulting in loss of vehicle control.
LEAD
RETURN
RECYCLE
Maintenance and care
69
Page 82 of 96
•Using the air conditioner or defroster may reduce fuel economy.
•Using speed control (if equipped) may improve fuel economy. Speed
control can help maintain a constant speed and reduce speed changes.
You may want to turn off the speed control in hilly terrain as
unnecessary shifting between third and fourth gears may occur and
could result in reduced fuel economy.
•Warming up a vehicle on cold mornings is not required and may
reduce fuel economy.
•Resting your foot on the brake pedal while driving may reduce fuel
economy.
•Combine errands and minimize stop-and-go driving.
Maintenance
•Keep tires properly inflated and use only recommended size.
•Operating a vehicle with the wheels out of alignment will reduce fuel
economy.
•Use recommended engine oil. Refer toLubricant Specifications.
•Perform all regularly scheduled maintenance items. Follow the
recommended maintenance schedule and owner maintenance checks
found in your vehicle Scheduled Maintenance Guide.
Conditions
•Heavily loading a vehicle or towing a trailer may reduce fuel economy
at any speed.
•Carrying unnecessary weight may reduce fuel economy (approximately
2 km/h [1 mpg] is lost for every 180 kg [400 lb] of weight carried).
•Adding certain accessories to your vehicle (for example bug
deflectors, rollover/light bars, running boards, ski/luggage racks) may
reduce fuel economy.
•Using fuel blended with alcohol may lower fuel economy.
•Fuel economy may decrease with lower temperatures during the first
12–16 km (8–10 miles) of driving.
•Driving on flat terrain offers improved fuel economy as compared to
driving on hilly terrain.
•Transmissions give their best fuel economy when operated in the top
cruise gear and with steady pressure on the gas pedal.
•Close windows for high speed driving.
Maintenance and care
82