lights FORD F SERIES MOTORHOME AND COMMERCIAL CHASSIS 2004 11.G Owners Manual
[x] Cancel search | Manufacturer: FORD, Model Year: 2004, Model line: F SERIES MOTORHOME AND COMMERCIAL CHASSIS, Model: FORD F SERIES MOTORHOME AND COMMERCIAL CHASSIS 2004 11.GPages: 120, PDF Size: 2.21 MB
Page 1 of 120
Introduction 3
Instrumentation 8
Warning and control lights 8
Gauges 11
Lights 14
Headlamps 14
Bulb replacement 15
Driver controls 16
Windshield wiper/washer control 16
Steering wheel adjustment 16
Speed control 17
Driving 20
Starting 20
Brakes 23
Transmission operation 27
Vehicle loading 31
Trailer towing 36
Roadside emergencies 39
Getting roadside assistance 39
Hazard flasher switch 40
Fuel pump shut-off switch 40
Fuses and relays 41
Changing tires 48
Jump starting 52
Wrecker towing 56
2004 Motorhome(mot)
Supplement
USA English(fus)
Table of contents
1
Page 8 of 120
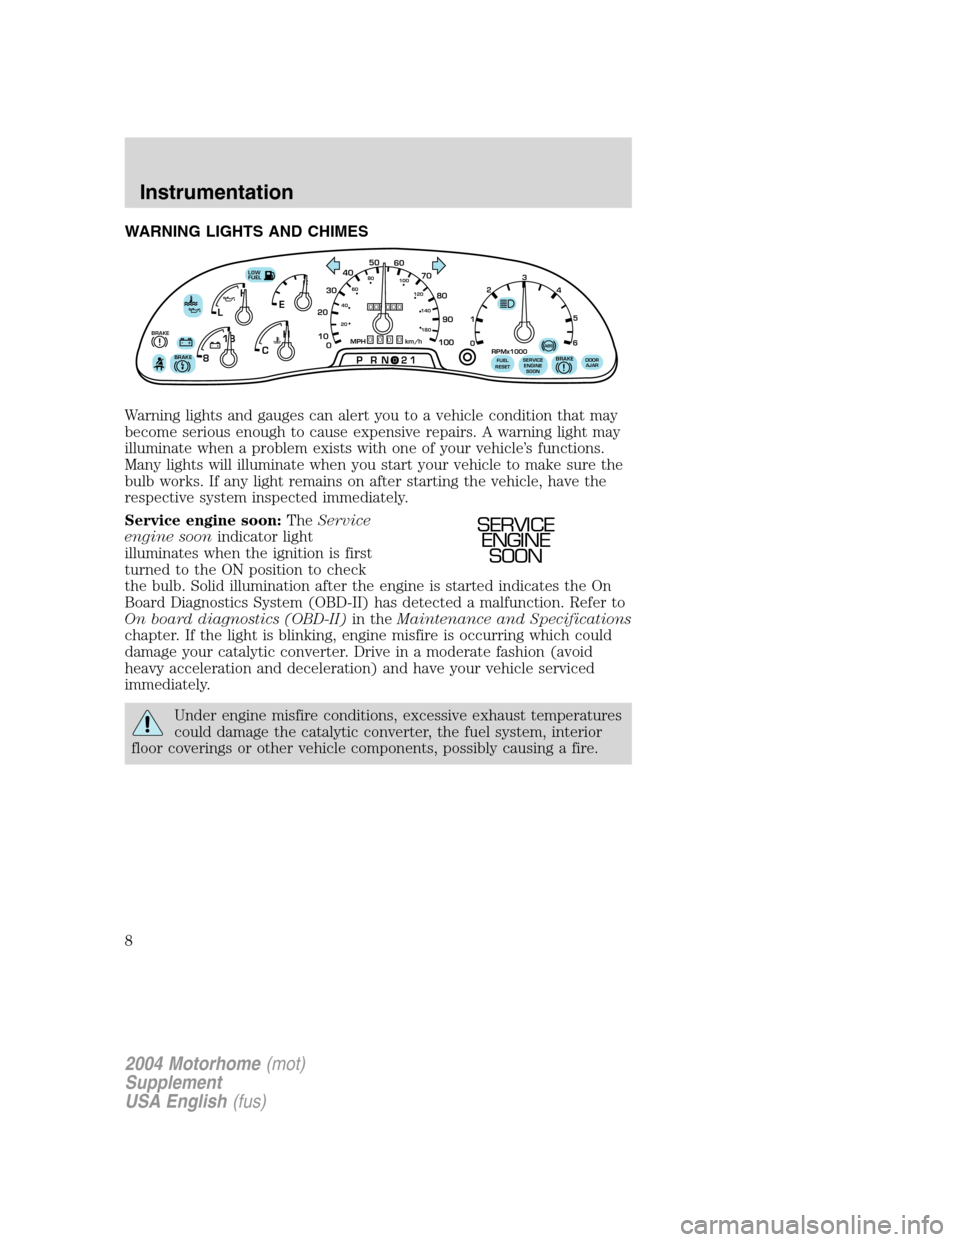
WARNING LIGHTS AND CHIMES
Warning lights and gauges can alert you to a vehicle condition that may
become serious enough to cause expensive repairs. A warning light may
illuminate when a problem exists with one of your vehicle’s functions.
Many lights will illuminate when you start your vehicle to make sure the
bulb works. If any light remains on after starting the vehicle, have the
respective system inspected immediately.
Service engine soon:TheService
engine soonindicator light
illuminates when the ignition is first
turned to the ON position to check
the bulb. Solid illumination after the engine is started indicates the On
Board Diagnostics System (OBD-II) has detected a malfunction. Refer to
On board diagnostics (OBD-II)in theMaintenance and Specifications
chapter. If the light is blinking, engine misfire is occurring which could
damage your catalytic converter. Drive in a moderate fashion (avoid
heavy acceleration and deceleration) and have your vehicle serviced
immediately.
Under engine misfire conditions, excessive exhaust temperatures
could damage the catalytic converter, the fuel system, interior
floor coverings or other vehicle components, possibly causing a fire.
F
E
CH H
L
18
8
PRN 21LOW
FUEL
BRAKE!
BRAKE!+ -+ -000000000
0
50
60
70
20
10
0 3040
80
90
100
20406080
100
120
140
180
MPH km/h
1
02
RPMx1000
3
4
5
6
SERVICE
ENGINE
SOONABSFUEL
RESETDOOR
AJARBRAKE
SERVICE
ENGINE
SOON
2004 Motorhome(mot)
Supplement
USA English(fus)
Instrumentation
Instrumentation
8
Page 10 of 120
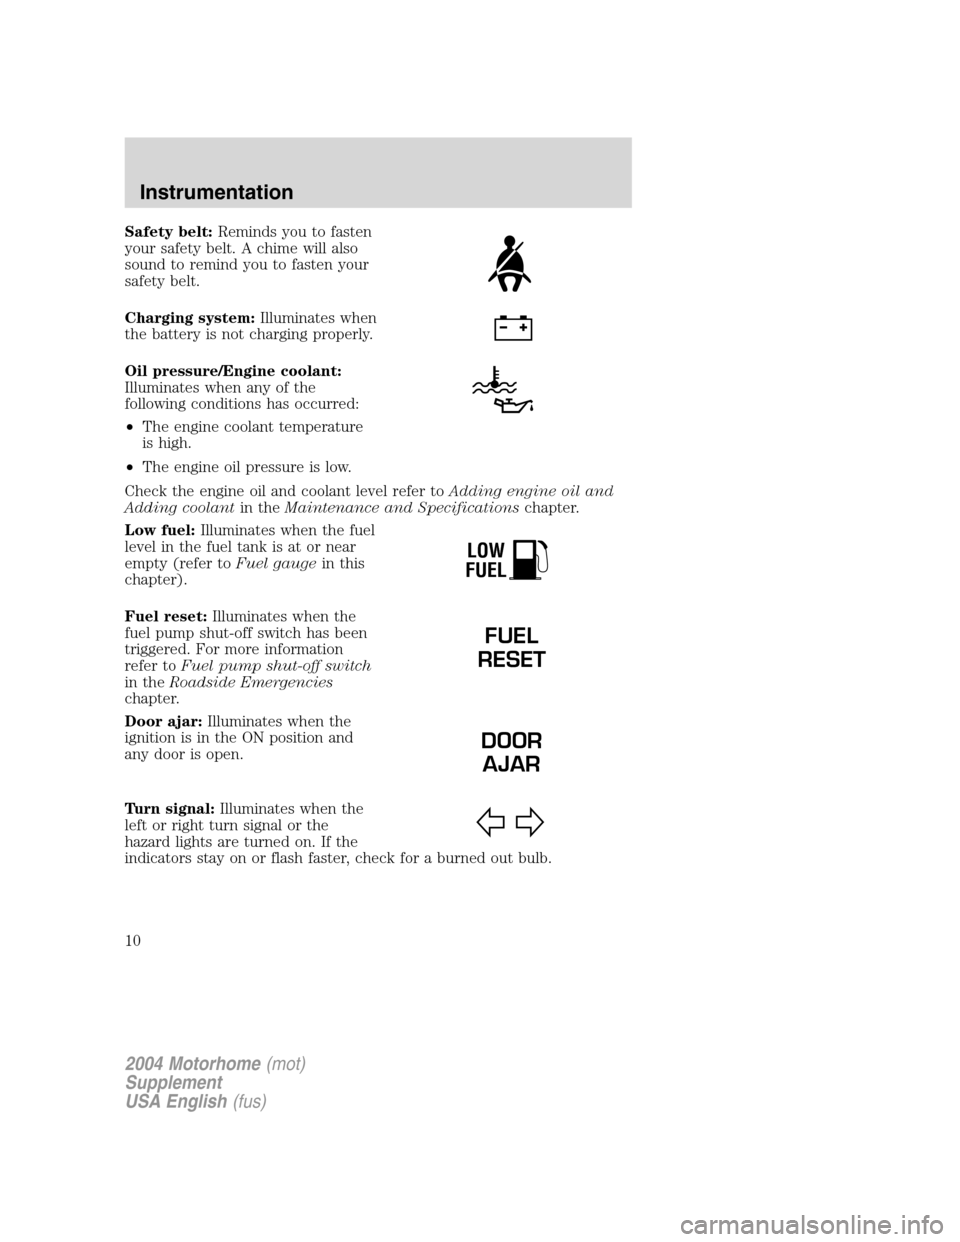
Safety belt:Reminds you to fasten
your safety belt. A chime will also
sound to remind you to fasten your
safety belt.
Charging system:Illuminates when
the battery is not charging properly.
Oil pressure/Engine coolant:
Illuminates when any of the
following conditions has occurred:
•The engine coolant temperature
is high.
•The engine oil pressure is low.
Check the engine oil and coolant level refer toAdding engine oil and
Adding coolantin theMaintenance and Specificationschapter.
Low fuel:Illuminates when the fuel
level in the fuel tank is at or near
empty (refer toFuel gaugein this
chapter).
Fuel reset:Illuminates when the
fuel pump shut-off switch has been
triggered. For more information
refer toFuel pump shut-off switch
in theRoadside Emergencies
chapter.
Door ajar:Illuminates when the
ignition is in the ON position and
any door is open.
Turn signal:Illuminates when the
left or right turn signal or the
hazard lights are turned on. If the
indicators stay on or flash faster, check for a burned out bulb.
LOW
FUEL
FUEL
RESET
DOOR
AJAR
2004 Motorhome(mot)
Supplement
USA English(fus)
Instrumentation
10
Page 14 of 120
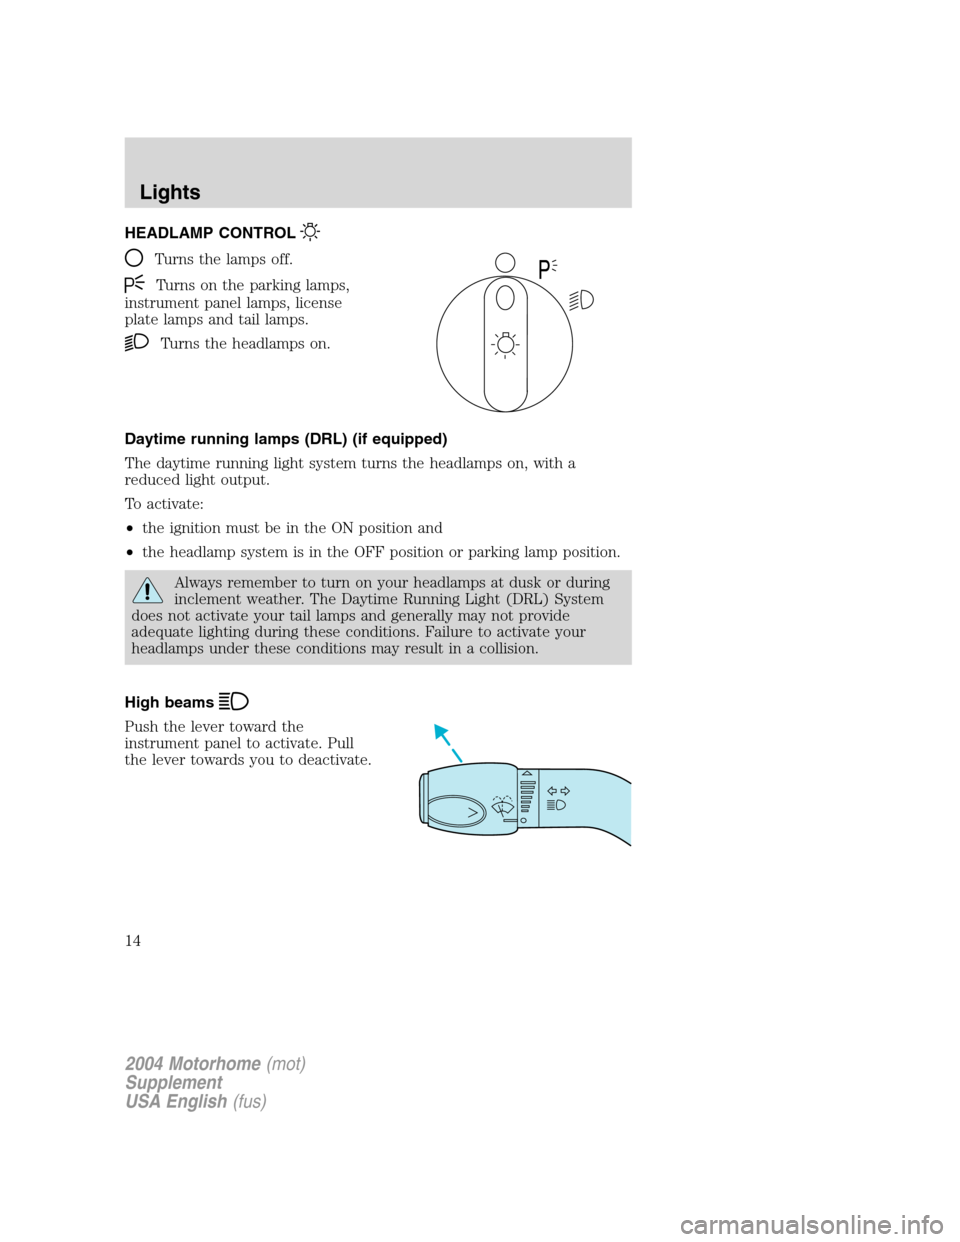
HEADLAMP CONTROL
Turns the lamps off.
Turns on the parking lamps,
instrument panel lamps, license
plate lamps and tail lamps.
Turns the headlamps on.
Daytime running lamps (DRL) (if equipped)
The daytime running light system turns the headlamps on, with a
reduced light output.
To activate:
•the ignition must be in the ON position and
•the headlamp system is in the OFF position or parking lamp position.
Always remember to turn on your headlamps at dusk or during
inclement weather. The Daytime Running Light (DRL) System
does not activate your tail lamps and generally may not provide
adequate lighting during these conditions. Failure to activate your
headlamps under these conditions may result in a collision.
High beams
Push the lever toward the
instrument panel to activate. Pull
the lever towards you to deactivate.
P
2004 Motorhome(mot)
Supplement
USA English(fus)
Lights
Lights
14
Page 15 of 120
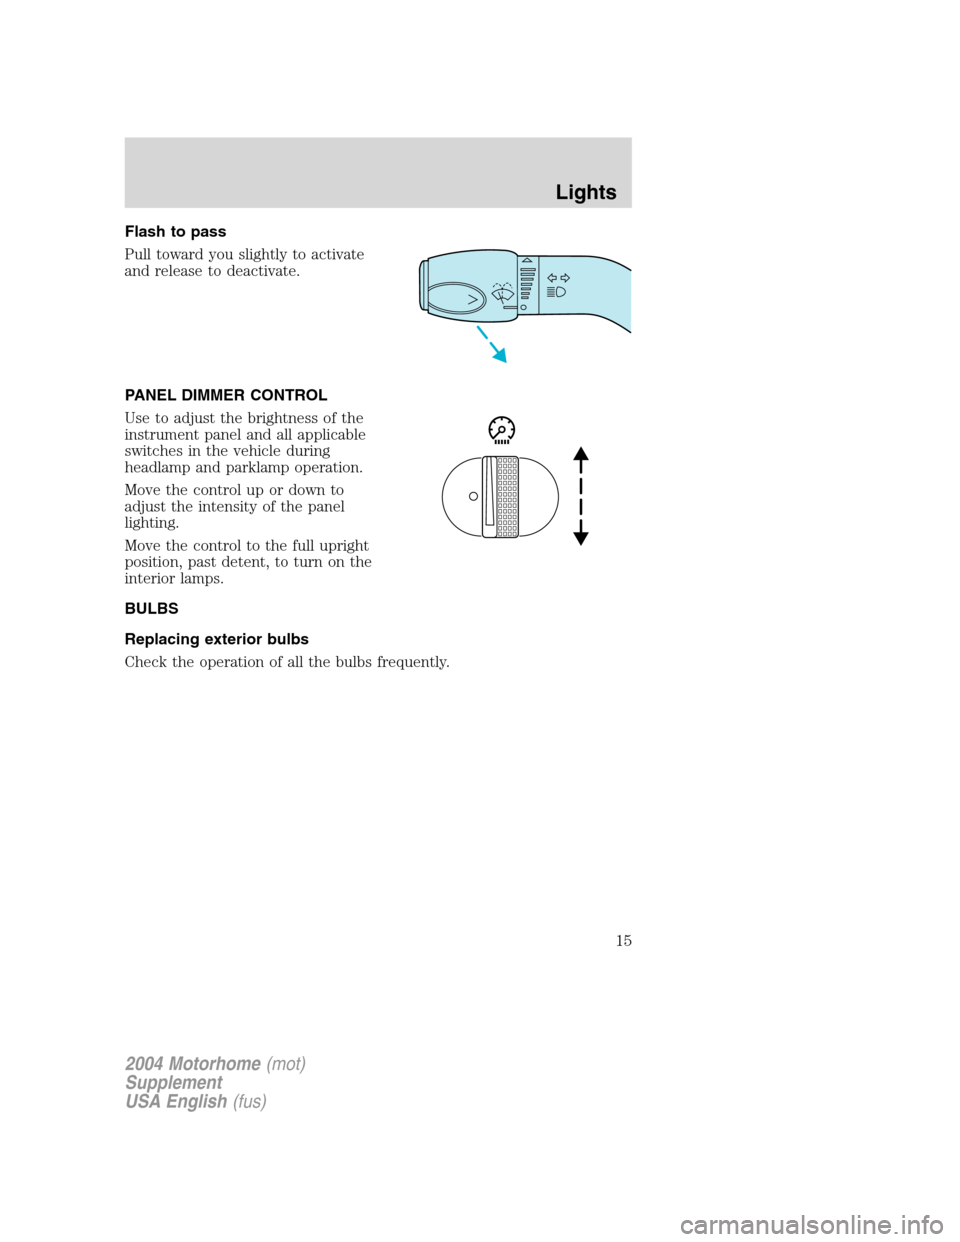
Flash to pass
Pull toward you slightly to activate
and release to deactivate.
PANEL DIMMER CONTROL
Use to adjust the brightness of the
instrument panel and all applicable
switches in the vehicle during
headlamp and parklamp operation.
Move the control up or down to
adjust the intensity of the panel
lighting.
Move the control to the full upright
position, past detent, to turn on the
interior lamps.
BULBS
Replacing exterior bulbs
Check the operation of all the bulbs frequently.
2004 Motorhome(mot)
Supplement
USA English(fus)
Lights
15
Page 20 of 120
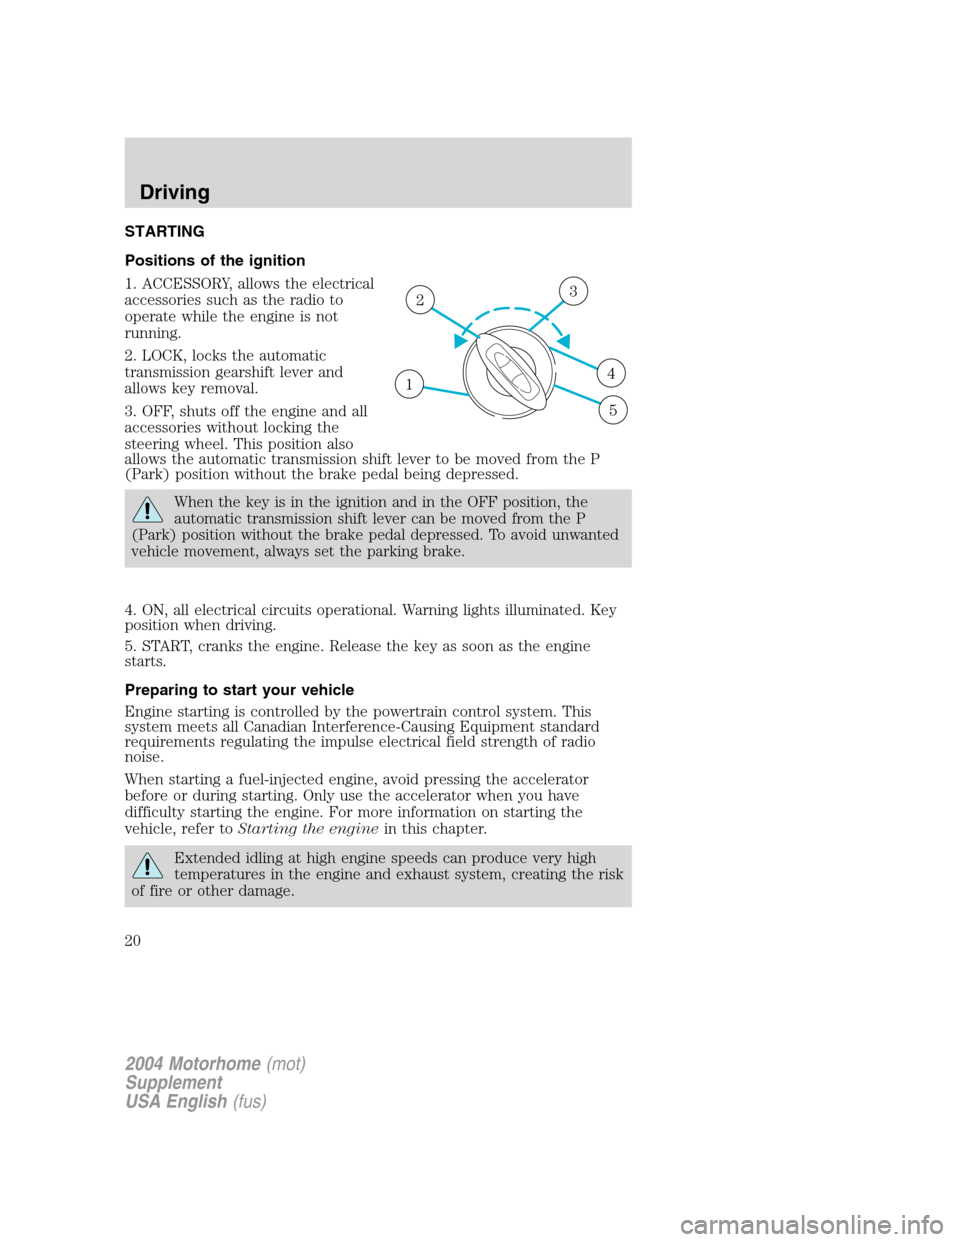
STARTING
Positions of the ignition
1. ACCESSORY, allows the electrical
accessories such as the radio to
operate while the engine is not
running.
2. LOCK, locks the automatic
transmission gearshift lever and
allows key removal.
3. OFF, shuts off the engine and all
accessories without locking the
steering wheel. This position also
allows the automatic transmission shift lever to be moved from the P
(Park) position without the brake pedal being depressed.
When the key is in the ignition and in the OFF position, the
automatic transmission shift lever can be moved from the P
(Park) position without the brake pedal depressed. To avoid unwanted
vehicle movement, always set the parking brake.
4. ON, all electrical circuits operational. Warning lights illuminated. Key
position when driving.
5. START, cranks the engine. Release the key as soon as the engine
starts.
Preparing to start your vehicle
Engine starting is controlled by the powertrain control system. This
system meets all Canadian Interference-Causing Equipment standard
requirements regulating the impulse electrical field strength of radio
noise.
When starting a fuel-injected engine, avoid pressing the accelerator
before or during starting. Only use the accelerator when you have
difficulty starting the engine. For more information on starting the
vehicle, refer toStarting the enginein this chapter.
Extended idling at high engine speeds can produce very high
temperatures in the engine and exhaust system, creating the risk
of fire or other damage.
1
23
4
5
2004 Motorhome(mot)
Supplement
USA English(fus)
Driving
Driving
20
Page 22 of 120
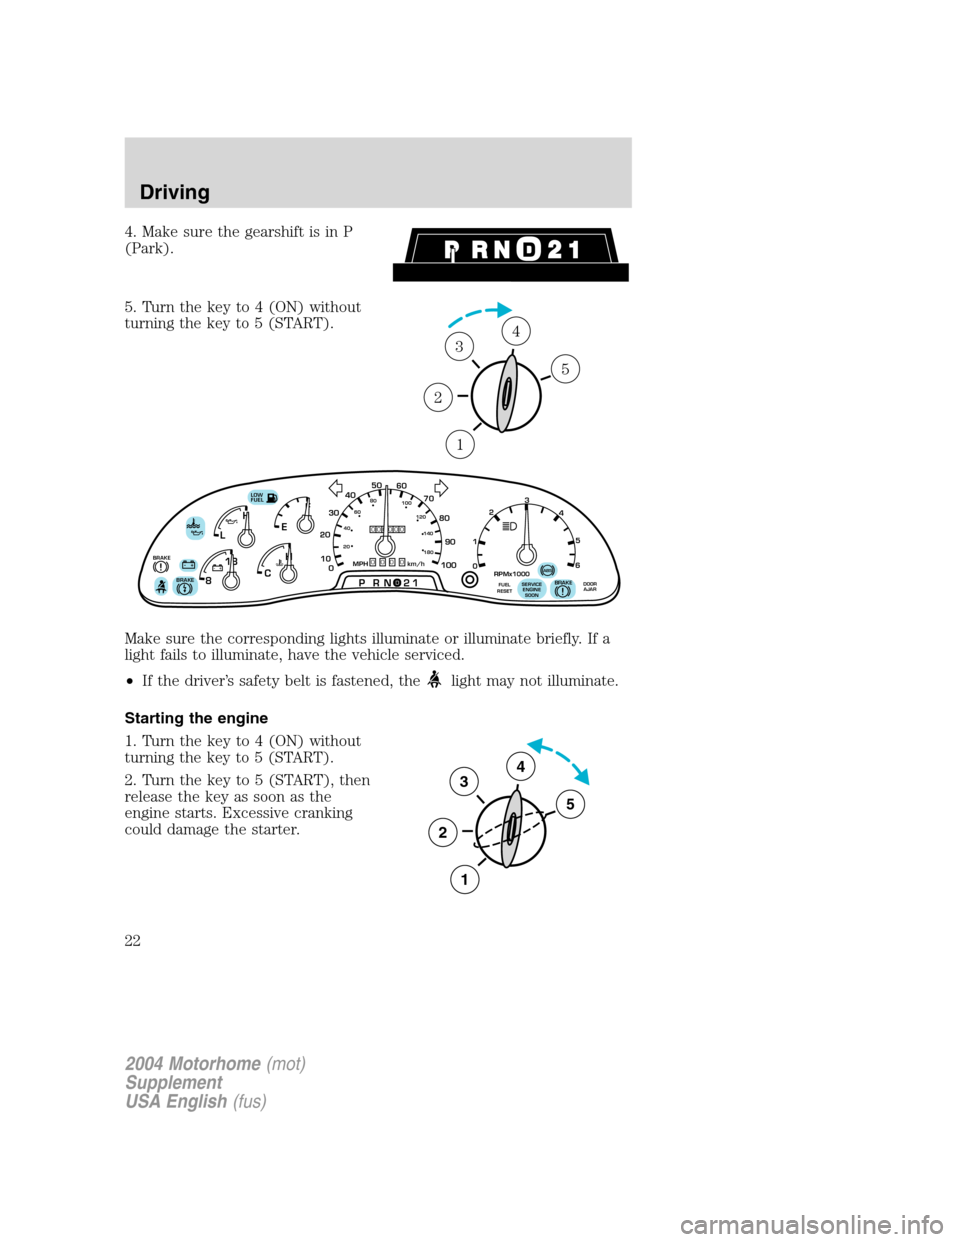
4. Make sure the gearshift is in P
(Park).
5. Turn the key to 4 (ON) without
turning the key to 5 (START).
Make sure the corresponding lights illuminate or illuminate briefly. If a
light fails to illuminate, have the vehicle serviced.
•If the driver’s safety belt is fastened, the
light may not illuminate.
Starting the engine
1. Turn the key to 4 (ON) without
turning the key to 5 (START).
2. Turn the key to 5 (START), then
release the key as soon as the
engine starts. Excessive cranking
could damage the starter.
1
2
34
5
F
E
CH H
L
18
8
PRN 21LOW
FUEL
BRAKE!
+ -+ -000000000
0
50
60
70
20
10
0 3040
80
90
100
20406080
100
120
140
180
MPH km/hBRAKE!
1
02
RPMx1000
3
4
5
6
SERVICE
ENGINE
SOONABSFUEL
RESETDOOR
AJARBRAKE
3
2
1
5
4
2004 Motorhome(mot)
Supplement
USA English(fus)
Driving
22
Page 38 of 120
Trailer lamps
Trailer lamps are required on most towed vehicles. Make sure all running
lights, brake lights, turn signals and hazard lights are working. See your
dealer or trailer rental agency for proper instructions and equipment for
hooking up trailer lamps.
Driving while you tow
When towing a trailer:
•Turn off the speed control. The speed control may shut off
automatically when you are towing on long, steep grades.
•Consult your local motor vehicle speed regulations for towing a trailer.
•To eliminate excessive shifting, use a lower gear. This will also assist
in transmission cooling.
•Anticipate stops and brake gradually.
Servicing after towing
If you tow a trailer for long distances, your vehicle will require more
frequent service intervals. Refer to your scheduled maintenance guide for
more information.
Trailer towing tips
•Practice turning, stopping and backing up before starting on a trip to
get the feel of the vehicle trailer combination. When turning, make
wider turns so the trailer wheels will clear curbs and other obstacles.
•Allow more distance for stopping with a trailer attached.
•If you are driving down a long or steep hill, shift to a lower gear. Do
not apply the brakes continuously, as they may overheat and become
less effective.
•The trailer tongue weight should be 10–15% of the loaded trailer
weight.
•After you have traveled 80 km (50 miles), thoroughly check your
hitch, electrical connections and trailer wheel lug nuts.
•To aid in engine/transmission cooling and A/C efficiency during hot
weather while stopped in traffic, place the gearshift lever in P (Park).
•Vehicles with trailers should not be parked on a grade. If you must
park on a grade, place wheel chocks under the trailer’s wheels.
2004 Motorhome(mot)
Supplement
USA English(fus)
Driving
38
Page 40 of 120
HAZARD LIGHTS CONTROL
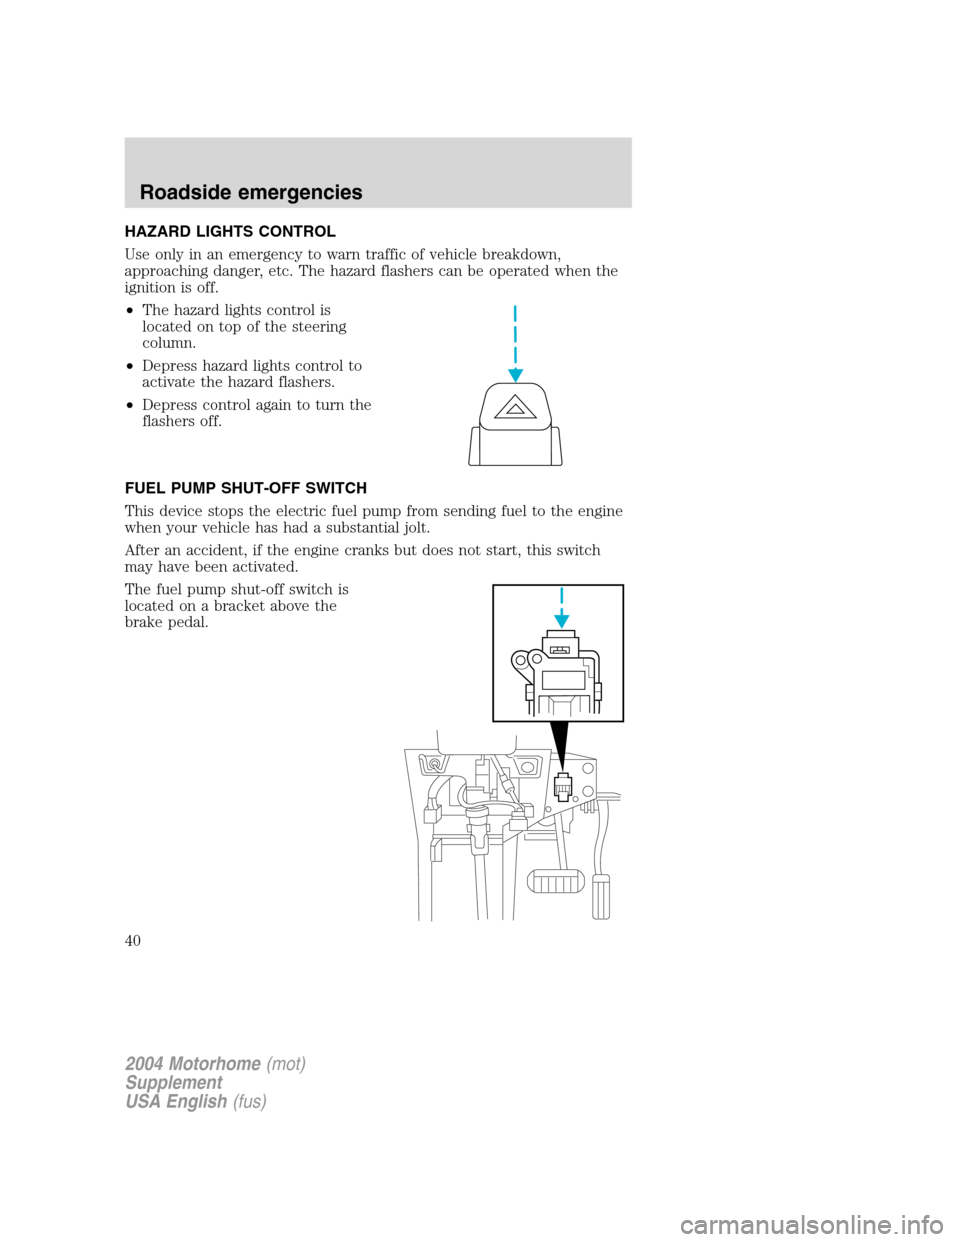
Use only in an emergency to warn traffic of vehicle breakdown,
approaching danger, etc. The hazard flashers can be operated when the
ignition is off.
•The hazard lights control is
located on top of the steering
column.
•Depress hazard lights control to
activate the hazard flashers.
•Depress control again to turn the
flashers off.
FUEL PUMP SHUT-OFF SWITCH
This device stops the electric fuel pump from sending fuel to the engine
when your vehicle has had a substantial jolt.
After an accident, if the engine cranks but does not start, this switch
may have been activated.
The fuel pump shut-off switch is
located on a bracket above the
brake pedal.
2004 Motorhome(mot)
Supplement
USA English(fus)
Roadside emergencies
40
Page 89 of 120
Readiness for Inspection/Maintenance (I/M) testing
In some localities, it may be a legal requirement to pass an I/M test of
the on-board diagnostics system. If your“Check Engine/Service Engine
Soon”light is on, refer to the description in theWarning lights and
chimessection of theInstrument clusterchapter. Your vehicle may not
pass the I/M test with the“Check Engine/Service Engine Soon”light on.
If the vehicle’s powertrain system or its battery has just been serviced,
the on-board diagnostics system is reset to a“not ready for I/M test”
condition. To ready the on-board diagnostics system for I/M testing, a
minimum of 30 minutes of city and highway driving is necessary as
described below:
•First, at least 10 minutes of driving on an expressway or highway.
•Next, at least 20 minutes driving in stop-and-go, city-type traffic with
at least four idle periods.
Allow the vehicle to sit for at least eight hours without starting the
engine. Then, start the engine and complete the above driving cycle. The
engine must warm up to its normal operating temperature. Once started,
do not turn off the engine until the above driving cycle is complete.
On board diagnostics (OBD-II)
Your vehicle is equipped with a computer that monitors the engine’s
emission control system. This system is commonly known as the On
Board Diagnostics System (OBD-II). This OBD-II system protects the
environment by ensuring that your vehicle continues to meet
government emission standards. The OBD-II system also assists the
service technician in properly servicing your vehicle. When theCheck
Engine/Service Engine Soonlight illuminates, the OBD-II system has
detected a malfunction. Temporary malfunctions may cause yourCheck
Engine/Service Engine Soonlight to illuminate. Examples are:
1.
The vehicle has run out of fuel. (The engine may misfire or run poorly.)
2. Poor fuel quality or water in the fuel.
3. The fuel cap may not have been securely tightened.
These temporary malfunctions can be corrected by filling the fuel tank
with good quality fuel and/or properly tightening the fuel cap. After three
driving cycles without these or any other temporary malfunctions
present, theCheck Engine/Service Engine Soonlight should turn off.
(A driving cycle consists of a cold engine startup followed by mixed
city/highway driving.) No additional vehicle service is required.
If theCheck Engine/Service Engine Soonlight remains on, have your
vehicle serviced at the first available opportunity.
2004 Motorhome(mot)
Supplement
USA English(fus)
Maintenance and specifications
89