FORD F SERIES MOTORHOME AND COMMERCIAL CHASSIS 2011 12.G Owner's Manual
Manufacturer: FORD, Model Year: 2011, Model line: F SERIES MOTORHOME AND COMMERCIAL CHASSIS, Model: FORD F SERIES MOTORHOME AND COMMERCIAL CHASSIS 2011 12.GPages: 156, PDF Size: 1.21 MB
Page 21 of 156
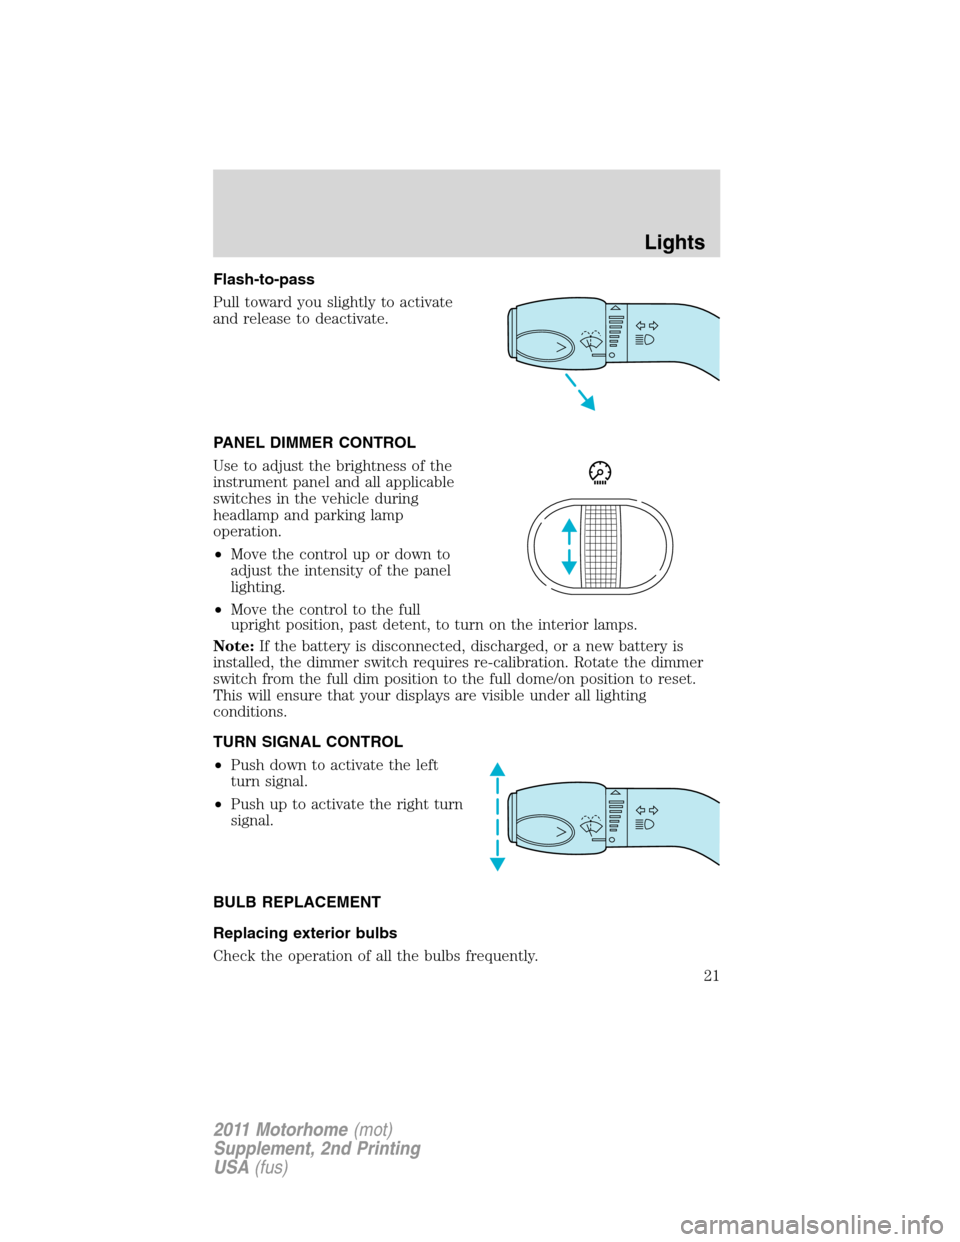
Flash-to-pass
Pull toward you slightly to activate
and release to deactivate.
PANEL DIMMER CONTROL
Use to adjust the brightness of the
instrument panel and all applicable
switches in the vehicle during
headlamp and parking lamp
operation.
•Move the control up or down to
adjust the intensity of the panel
lighting.
•Move the control to the full
upright position, past detent, to turn on the interior lamps.
Note:If the battery is disconnected, discharged, or a new battery is
installed, the dimmer switch requires re-calibration. Rotate the dimmer
switch from the full dim position to the full dome/on position to reset.
This will ensure that your displays are visible under all lighting
conditions.
TURN SIGNAL CONTROL
•Push down to activate the left
turn signal.
•Push up to activate the right turn
signal.
BULB REPLACEMENT
Replacing exterior bulbs
Check the operation of all the bulbs frequently.
Lights
21
2011 Motorhome(mot)
Supplement, 2nd Printing
USA(fus)
Page 22 of 156
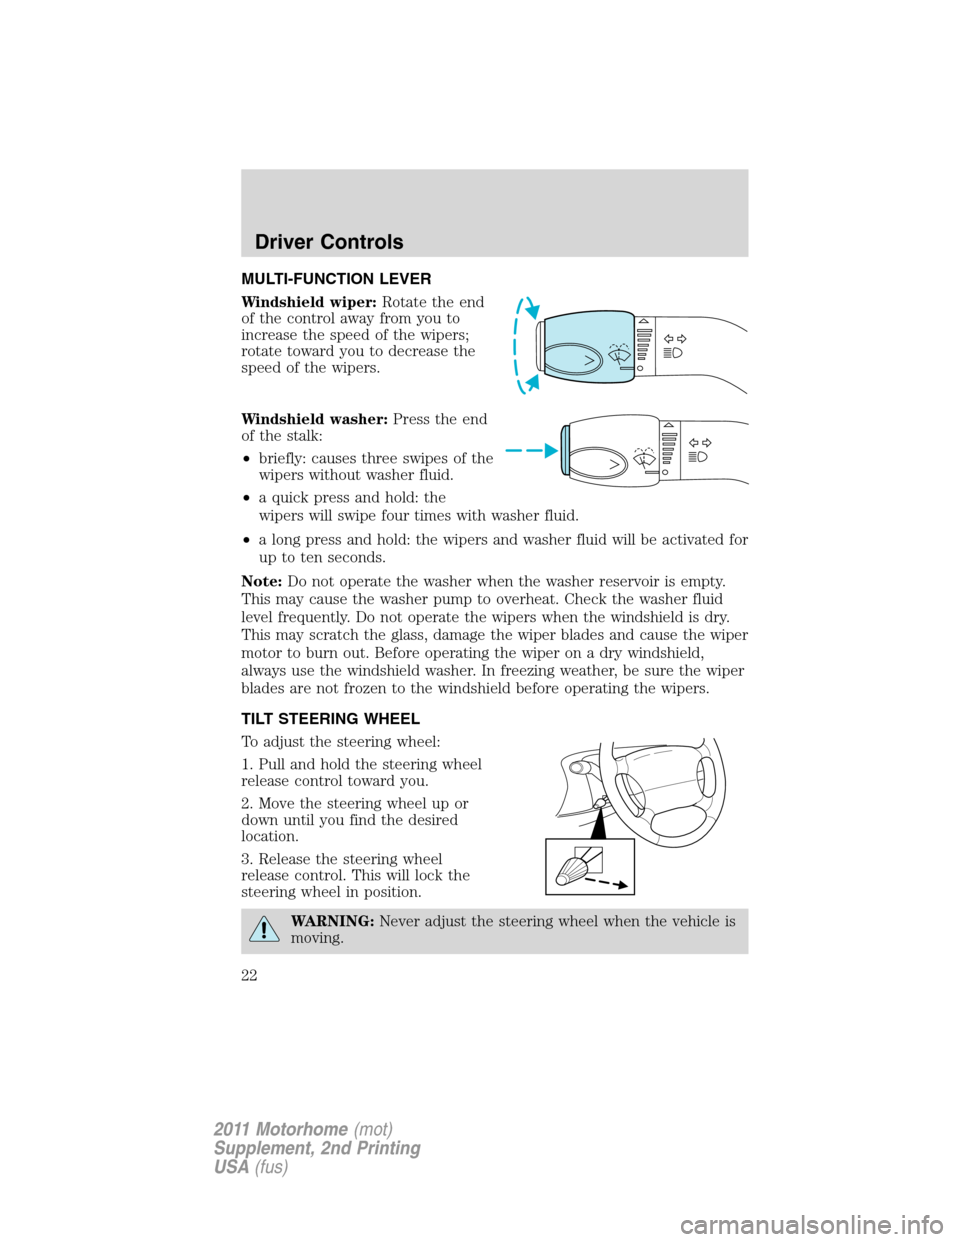
MULTI-FUNCTION LEVER
Windshield wiper:Rotate the end
of the control away from you to
increase the speed of the wipers;
rotate toward you to decrease the
speed of the wipers.
Windshield washer:Press the end
of the stalk:
•briefly: causes three swipes of the
wipers without washer fluid.
•a quick press and hold: the
wipers will swipe four times with washer fluid.
•a long press and hold: the wipers and washer fluid will be activated for
up to ten seconds.
Note:Do not operate the washer when the washer reservoir is empty.
This may cause the washer pump to overheat. Check the washer fluid
level frequently. Do not operate the wipers when the windshield is dry.
This may scratch the glass, damage the wiper blades and cause the wiper
motor to burn out. Before operating the wiper on a dry windshield,
always use the windshield washer. In freezing weather, be sure the wiper
blades are not frozen to the windshield before operating the wipers.
TILT STEERING WHEEL
To adjust the steering wheel:
1. Pull and hold the steering wheel
release control toward you.
2. Move the steering wheel up or
down until you find the desired
location.
3. Release the steering wheel
release control. This will lock the
steering wheel in position.
WARNING:Never adjust the steering wheel when the vehicle is
moving.
Driver Controls
22
2011 Motorhome(mot)
Supplement, 2nd Printing
USA(fus)
Page 23 of 156
SPEED CONTROL
With speed control set, you can maintain a set speed without keeping
your foot on the accelerator pedal.
WARNING:Do not use the speed control in heavy traffic or on
roads that are winding, slippery or unpaved.
Using speed control
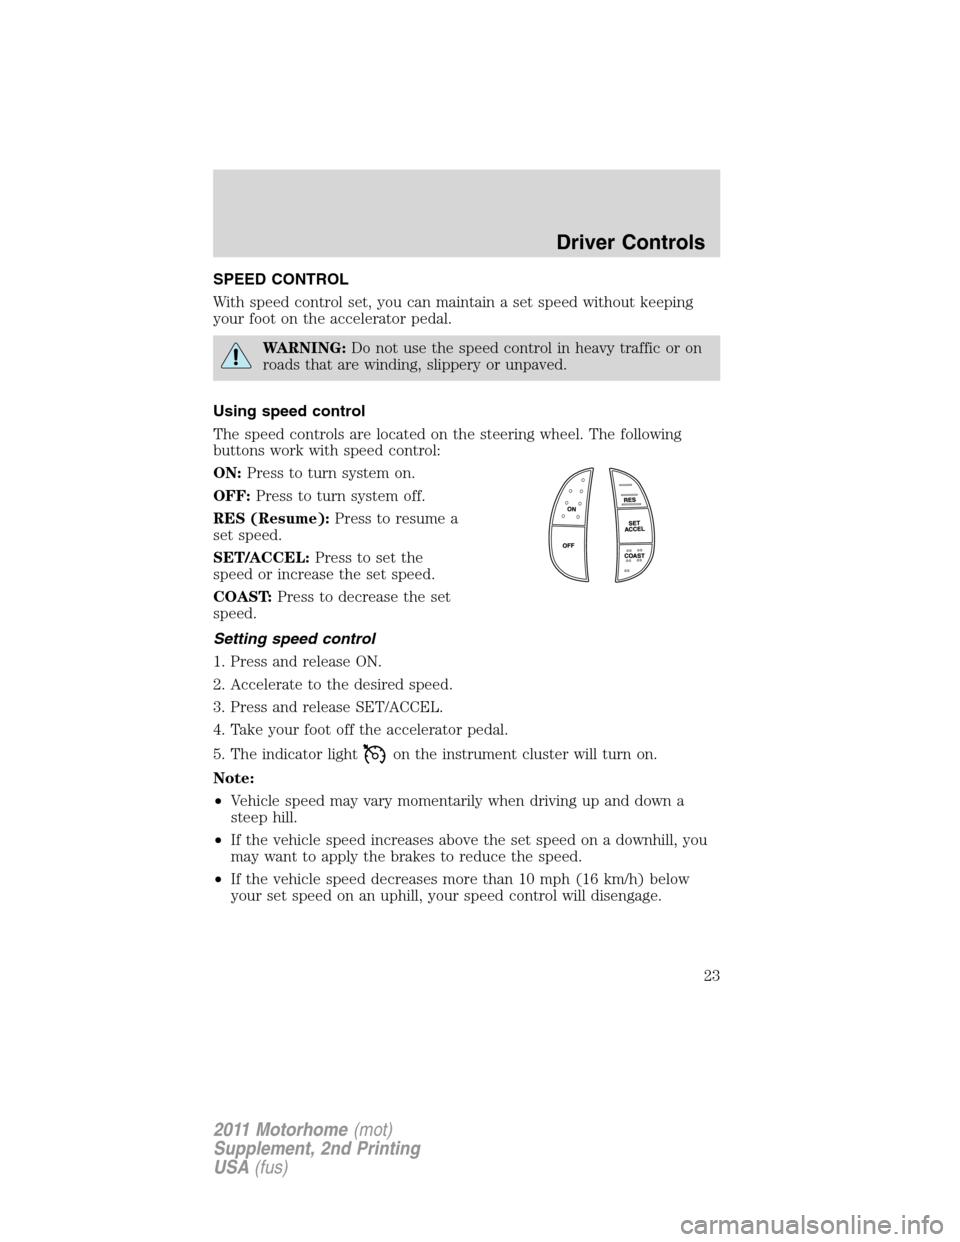
The speed controls are located on the steering wheel. The following
buttons work with speed control:
ON:Press to turn system on.
OFF:Press to turn system off.
RES (Resume):Press to resume a
set speed.
SET/ACCEL:Press to set the
speed or increase the set speed.
COAST:Press to decrease the set
speed.
Setting speed control
1. Press and release ON.
2. Accelerate to the desired speed.
3. Press and release SET/ACCEL.
4. Take your foot off the accelerator pedal.
5. The indicator light
on the instrument cluster will turn on.
Note:
•Vehicle speed may vary momentarily when driving up and down a
steep hill.
•If the vehicle speed increases above the set speed on a downhill, you
may want to apply the brakes to reduce the speed.
•If the vehicle speed decreases more than 10 mph (16 km/h) below
your set speed on an uphill, your speed control will disengage.
Driver Controls
23
2011 Motorhome(mot)
Supplement, 2nd Printing
USA(fus)
Page 24 of 156
Disengaging speed control
To disengage speed control, press the brake pedal. Disengaging speed
control will not erase the previous set speed.
Resuming a set speed
Press and release RES. This will automatically return the vehicle to the
previously set speed.
Increasing speed while using speed control
To increase the set speed:
•Press and hold SET/ACCEL until you get to the desired speed, then
release. You can also use SET/ACCEL to operate the tap-up function.
Press and release SET/ACCEL to increase the vehicle set speed in
1 mph (1.6 km/h) increments.
•Use the accelerator pedal to get to the desired speed. When the
vehicle reaches that speed, press and release SET/ACCEL.
Reducing speed while using speed control
To reduce the set speed:
•Press and hold COAST until you get to the desired speed, then
release. You can also use COAST to operate the tap-down function.
Press and release COAST to decrease the vehicle set speed in 1 mph
(1.6 km/h) increments.
•Press the brake pedal until the desired vehicle speed is reached, then
press and release SET/ACCEL.
Turning off speed control
To turn off the speed control, press OFF or turn off the ignition.
Note:When you turn off the speed control or the ignition, your speed
control set speed memory is erased.
Driver Controls
24
2011 Motorhome(mot)
Supplement, 2nd Printing
USA(fus)
Page 25 of 156
INFORMATION ABOUT UNIFORM TIRE QUALITY GRADING
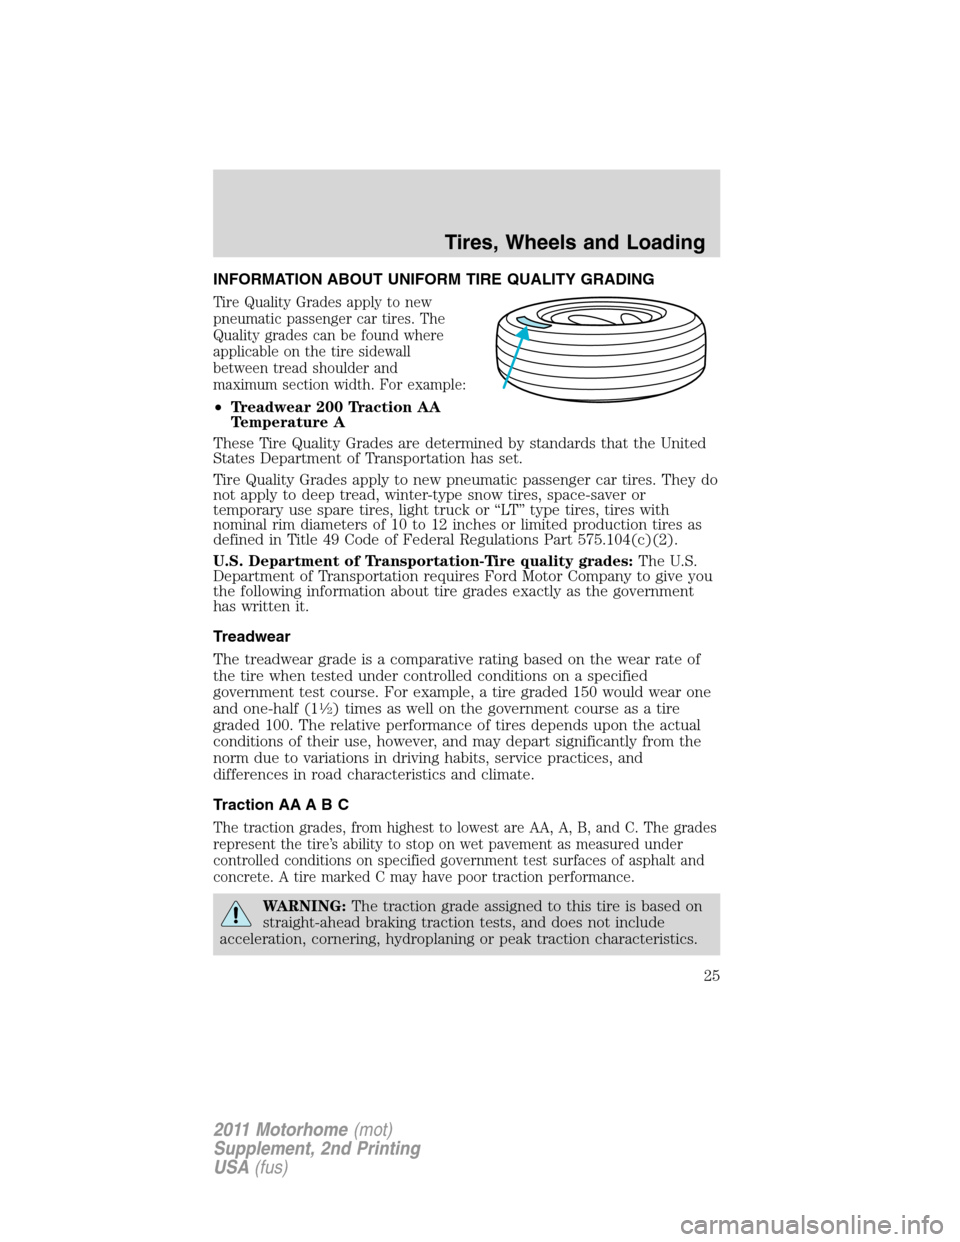
Tire Quality Grades apply to new
pneumatic passenger car tires. The
Quality grades can be found where
applicable on the tire sidewall
between tread shoulder and
maximum section width. For example:
•Treadwear 200 Traction AA
Temperature A
These Tire Quality Grades are determined by standards that the United
States Department of Transportation has set.
Tire Quality Grades apply to new pneumatic passenger car tires. They do
not apply to deep tread, winter-type snow tires, space-saver or
temporary use spare tires, light truck or “LT” type tires, tires with
nominal rim diameters of 10 to 12 inches or limited production tires as
defined in Title 49 Code of Federal Regulations Part 575.104(c)(2).
U.S. Department of Transportation-Tire quality grades:The U.S.
Department of Transportation requires Ford Motor Company to give you
the following information about tire grades exactly as the government
has written it.
Treadwear
The treadwear grade is a comparative rating based on the wear rate of
the tire when tested under controlled conditions on a specified
government test course. For example, a tire graded 150 would wear one
and one-half (1
1�2) times as well on the government course as a tire
graded 100. The relative performance of tires depends upon the actual
conditions of their use, however, and may depart significantly from the
norm due to variations in driving habits, service practices, and
differences in road characteristics and climate.
Traction AA A B C
The traction grades, from highest to lowest are AA, A, B, and C. The grades
represent the tire’s ability to stop on wet pavement as measured under
controlled conditions on specified government test surfaces of asphalt and
concrete. A tire marked C may have poor traction performance.
WARNING:The traction grade assigned to this tire is based on
straight-ahead braking traction tests, and does not include
acceleration, cornering, hydroplaning or peak traction characteristics.
Tires, Wheels and Loading
25
2011 Motorhome(mot)
Supplement, 2nd Printing
USA(fus)
Page 26 of 156
Temperature A B C
The temperature grades are A (the highest), B and C, representing the
tire’s resistance to the generation of heat and its ability to dissipate heat
when tested under controlled conditions on a specified indoor laboratory
test wheel. Sustained high temperature can cause the material of the tire
to degenerate and reduce tire life, and excessive temperature can lead to
sudden tire failure. The grade C corresponds to a level of performance
which all passenger car tires must meet under the Federal Motor Vehicle
Safety Standard No. 139. Grades B and A represent higher levels of
performance on the laboratory test wheel than the minimum required by
law.
WARNING:The temperature grade for this tire is established
for a tire that is properly inflated and not overloaded. Excessive
speed, underinflation, or excessive loading, either separately or in
combination, can cause heat buildup and possible tire failure.
TIRES
Tires are designed to give many thousands of miles of service, but they
must be maintained in order to get the maximum benefit from them.
Glossary of tire terminology
•Tire label:A label showing the OE (Original Equipment) tire sizes,
recommended inflation pressure and the maximum weight the vehicle
can carry.
•Tire Identification Number (TIN):A number on the sidewall of
each tire providing information about the tire brand and
manufacturing plant, tire size and date of manufacture. Also referred
to as DOT code.
•Inflation pressure:A measure of the amount of air in a tire.
•Standard load:A class of P-metric or Metric tires designed to carry a
maximum load at 35 psi [37 psi (2.5 bar) for Metric tires]. Increasing
the inflation pressure beyond this pressure will not increase the tire’s
load carrying capability.
•Extra load:A class of P-metric or Metric tires designed to carry a
heavier maximum load at 41 psi [43 psi (2.9 bar) for Metric tires].
Increasing the inflation pressure beyond this pressure will not increase
the tire’s load carrying capability.
Tires, Wheels and Loading
26
2011 Motorhome(mot)
Supplement, 2nd Printing
USA(fus)
Page 27 of 156
•kPa:Kilopascal, a metric unit of air pressure.
•PSI:Pounds per square inch, a standard unit of air pressure.
•Cold inflation pressure:The tire pressure when the vehicle has
been stationary and out of direct sunlight for an hour or more and
prior to the vehicle being driven for 1 mile (1.6 km).
•Recommended inflation pressure:The cold inflation pressure found
on the Safety Compliance Certification Label. See the completed
vehicle’s owner’s guide for the location of the Safety Compliance
Certification Label.
•Bead area of the tire:Area of the tire next to the rim.
•Sidewall of the tire:Area between the bead area and the tread.
•Tread area of the tire:Area of the perimeter of the tire that
contacts the road when mounted on the vehicle.
•Rim:The metal support (wheel) for a tire or a tire and tube assembly
upon which the tire beads are seated.
INFLATING YOUR TIRES
Safe operation of your vehicle requires that your tires are properly
inflated. Remember that a tire can lose up to half of its air pressure
without appearing flat.
Every day before you drive, check your tires. If one looks lower than the
others, use a tire gauge to check pressure of all tires and adjust if
required.
At least once a month and before long trips, inspect each tire and check
the tire pressure with a tire gauge (including spare, if equipped). Inflate
all tires to the inflation pressure recommended by Ford Motor Company.
You are strongly urged to buy a reliable tire pressure gauge, as automatic
service station gauges may be inaccurate. Ford recommends the use of a
digital or dial type tire pressure gauge rather than a stick type tire
pressure gauge.
Use the recommended cold inflation pressure for optimum tire
performance and wear. Under-inflation or over-inflation may cause
uneven treadwear patterns.
Tires, Wheels and Loading
27
2011 Motorhome(mot)
Supplement, 2nd Printing
USA(fus)
Page 28 of 156
WARNING:Under-inflation is the most common cause of tire
failures and may result in severe tire cracking, tread separation
or “blowout”, with unexpected loss of vehicle control and increased
risk of injury. Under-inflation increases sidewall flexing and rolling
resistance, resulting in heat buildup and internal damage to the tire. It
also may result in unnecessary tire stress, irregular wear, loss of
vehicle control and accidents. A tire can lose up to half of its air
pressure and not appear to be flat!
Always inflate your tires to the Ford recommended inflation pressure
even if it is less than the maximum inflation pressure information found
on the tire. The Ford recommended tire inflation pressure is found on
the Safety Compliance Certification Label or Tire Label. See the
completed vehicle’s owner’s guide for the location of the Safety
Compliance Certification Label or Tire Label. Failure to follow the tire
pressure recommendations can cause uneven treadwear patterns and
adversely affect the way your vehicle handles.
Maximum Permissible Inflation Pressureis the tire manufacturer’s
maximum permissible pressure and/or the pressure at which the
maximum load can be carried by the tire. This pressure is normally
higher than the manufacturer’s recommended cold inflation pressure
which can be found on the Safety Compliance Certification Label or Tire
Label. See the completed vehicle’s owner’s guide for the location of the
Safety Compliance Certification Label or Tire Label. The cold inflation
pressure should never be set lower than the recommended pressure on
the Safety Compliance Certification Label or Tire Label.
When weather temperature changes occur, tire inflation pressures also
change. A 10°F (6°C) temperature drop can cause a corresponding drop
of 1 psi (7 kPa) in inflation pressure. Check your tire pressures
frequently and adjust them to the proper pressure which can be found
on the Safety Compliance Certification Label or Tire Label.
To check the pressure in your tire(s):
1. Make sure the tires are cool, meaning they are not hot from driving
even a mile.
If you are checking tire pressure when the tire is hot, (i.e. driven more
than 1 mile [1.6 km]), never “bleed” or reduce air pressure. The tires are
hot from driving and it is normal for pressures to increase above
recommended cold pressures. A hot tire at or below recommended cold
inflation pressure could be significantly under-inflated.
Tires, Wheels and Loading
28
2011 Motorhome(mot)
Supplement, 2nd Printing
USA(fus)
Page 29 of 156
Note:If you have to drive a distance to get air for your tire(s), check
and record the tire pressure first and add the appropriate air pressure
when you get to the pump. It is normal for tires to heat up and the air
pressure inside to go up as you drive.
2. Remove the cap from the valve on one tire, then firmly press the tire
gauge onto the valve and measure the pressure with the tire gauge.
3. Add enough air to reach the recommended air pressure
Note:If you overfill the tire, release air by pushing on the metal stem in
the center of the valve. Then recheck the pressure with your tire gauge.
4. Replace the valve cap.
5. Repeat this procedure for each tire, including the spare.
Note:Some spare tires operate at a higher inflation pressure than the
other tires. For T-type/mini-spare tires (seeDissimilar Spare
Tire/Wheel Informationsection for description): Store and maintain at
60 psi (4.15 bars). For full-size and dissimilar spare tires (seeDissimilar
Spare Tire/Wheel Informationsection for description): Store and
maintain at the higher of the front and rear inflation pressure as shown
on Safety Compliance Certification Label or the Tire Label.
6. Visually inspect the tires to make sure there are no nails or other
objects embedded that could poke a hole in the tire and cause an air
leak.
7. Check the sidewalls to make sure there are no gouges, cuts or bulges.
Tires, Wheels and Loading
29
2011 Motorhome(mot)
Supplement, 2nd Printing
USA(fus)
Page 30 of 156
Tire inflation information
All tires with Steel Carcass Plies (if equipped):
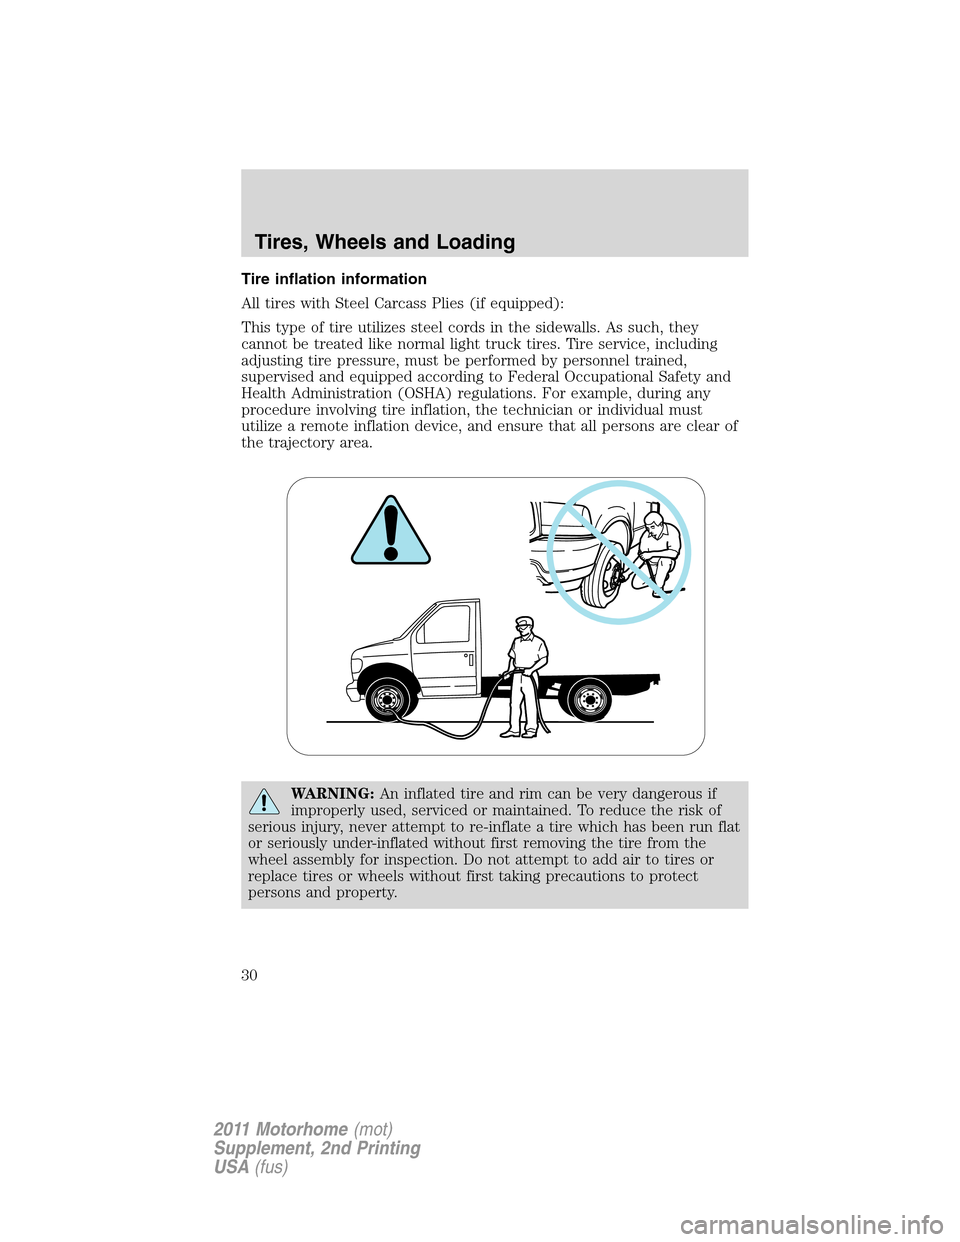
This type of tire utilizes steel cords in the sidewalls. As such, they
cannot be treated like normal light truck tires. Tire service, including
adjusting tire pressure, must be performed by personnel trained,
supervised and equipped according to Federal Occupational Safety and
Health Administration (OSHA) regulations. For example, during any
procedure involving tire inflation, the technician or individual must
utilize a remote inflation device, and ensure that all persons are clear of
the trajectory area.
WARNING:An inflated tire and rim can be very dangerous if
improperly used, serviced or maintained. To reduce the risk of
serious injury, never attempt to re-inflate a tire which has been run flat
or seriously under-inflated without first removing the tire from the
wheel assembly for inspection. Do not attempt to add air to tires or
replace tires or wheels without first taking precautions to protect
persons and property.
Tires, Wheels and Loading
30
2011 Motorhome(mot)
Supplement, 2nd Printing
USA(fus)