FORD F150 1999 10.G Manual Online
Manufacturer: FORD, Model Year: 1999, Model line: F150, Model: FORD F150 1999 10.GPages: 232, PDF Size: 1.56 MB
Page 81 of 232

Deactivating/activating the autolock feature
Before following the procedure, make sure that the ignition is OFF and
all vehicle doors and the liftgate window are closed.
You must complete steps 1-7 within 30 seconds or the procedure will
have to be repeated. If the procedure needs to be repeated, you must
wait 30 seconds.
1. Turn the ignition key to RUN.
2. Press the power door unlock control three times.
3. Turn the ignition key from RUN to OFF.
4. Press the power door unlock control three times.
5. Turn the ignition back to RUN. The horn will chirp.
6. Press the unlock control, then press the lock control. The horn will
chirp once if autolock was deactivated or twice (one short and one long
chirp) if autolock was activated.
7. Turn the ignition to OFF. The horn will chirp once to confirm the
procedure is complete.
Replacing the battery
The transmitter is powered by one coin type three-volt lithium battery
CR2032 or equivalent. Typical operating range will allow you to be up to
10 meters (33 feet) away from your vehicle. A decrease in operating
range can be caused by:
²weather conditions
²nearby radio towers
²structures around the vehicle
²other vehicles parked next to the vehicle
Controls and features
81
Page 82 of 232
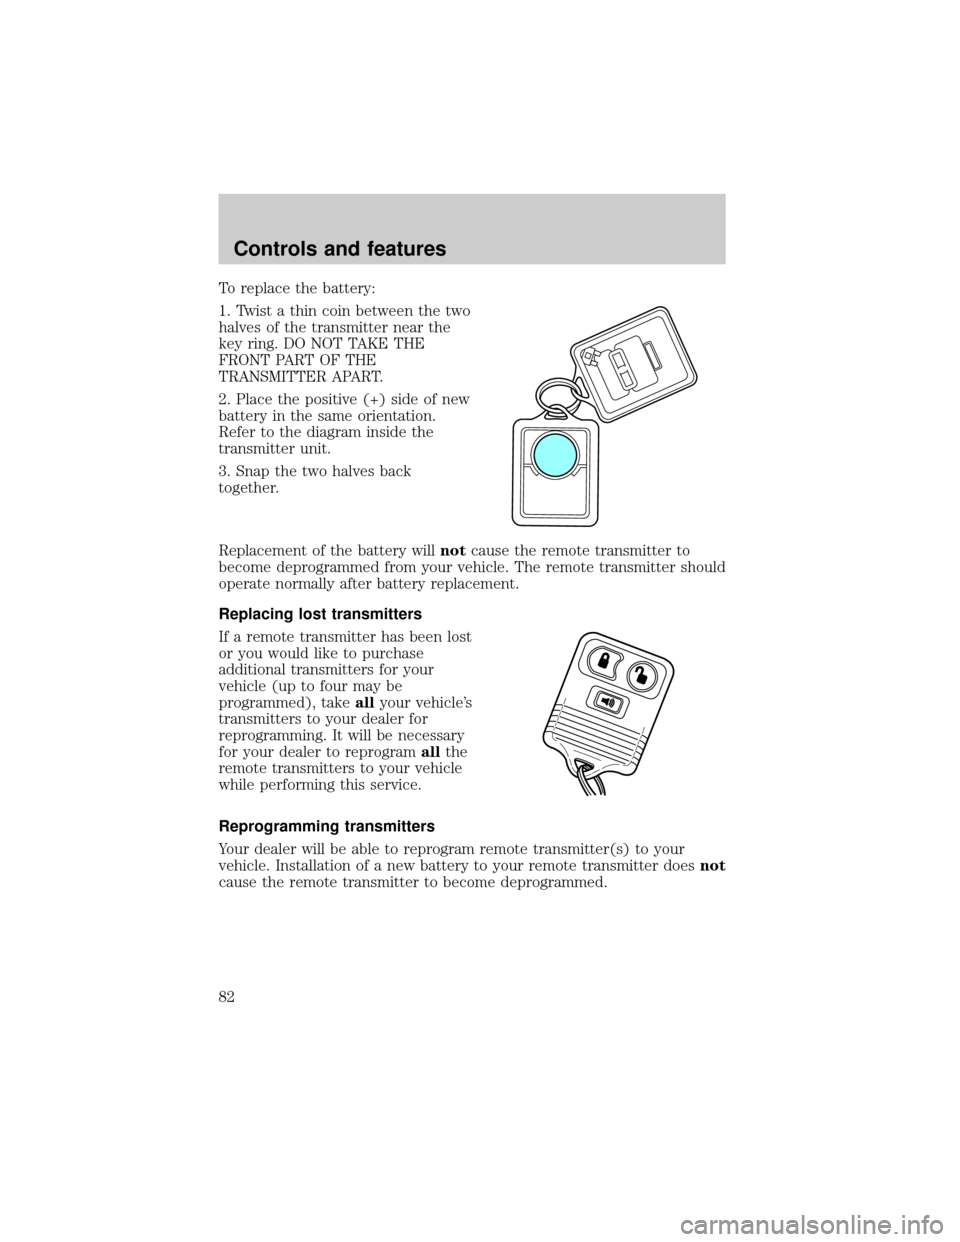
To replace the battery:
1. Twist a thin coin between the two
halves of the transmitter near the
key ring. DO NOT TAKE THE
FRONT PART OF THE
TRANSMITTER APART.
2. Place the positive (+) side of new
battery in the same orientation.
Refer to the diagram inside the
transmitter unit.
3. Snap the two halves back
together.
Replacement of the battery willnotcause the remote transmitter to
become deprogrammed from your vehicle. The remote transmitter should
operate normally after battery replacement.
Replacing lost transmitters
If a remote transmitter has been lost
or you would like to purchase
additional transmitters for your
vehicle (up to four may be
programmed), takeallyour vehicle's
transmitters to your dealer for
reprogramming. It will be necessary
for your dealer to reprogramallthe
remote transmitters to your vehicle
while performing this service.
Reprogramming transmitters
Your dealer will be able to reprogram remote transmitter(s) to your
vehicle. Installation of a new battery to your remote transmitter doesnot
cause the remote transmitter to become deprogrammed.
Controls and features
82
Page 83 of 232

Illuminated entry
The illuminated entry system will turn on the interior lights when the
remote transmitter unlock control is pressed.
The illuminated entry system will turn off the interior lights if the
ignition switch is turned to the RUN position, or if the remote
transmitter lock control is pressed, or after 25 seconds of illumination.
The inside lights will not turn off if:
²they have been turned on with the dimmer control or
²any door is open.
The battery save feature will turn off the interior lights 45 minutes after
the last door is closed, even if the dimmer control is on.
Controls and features
83
Page 84 of 232
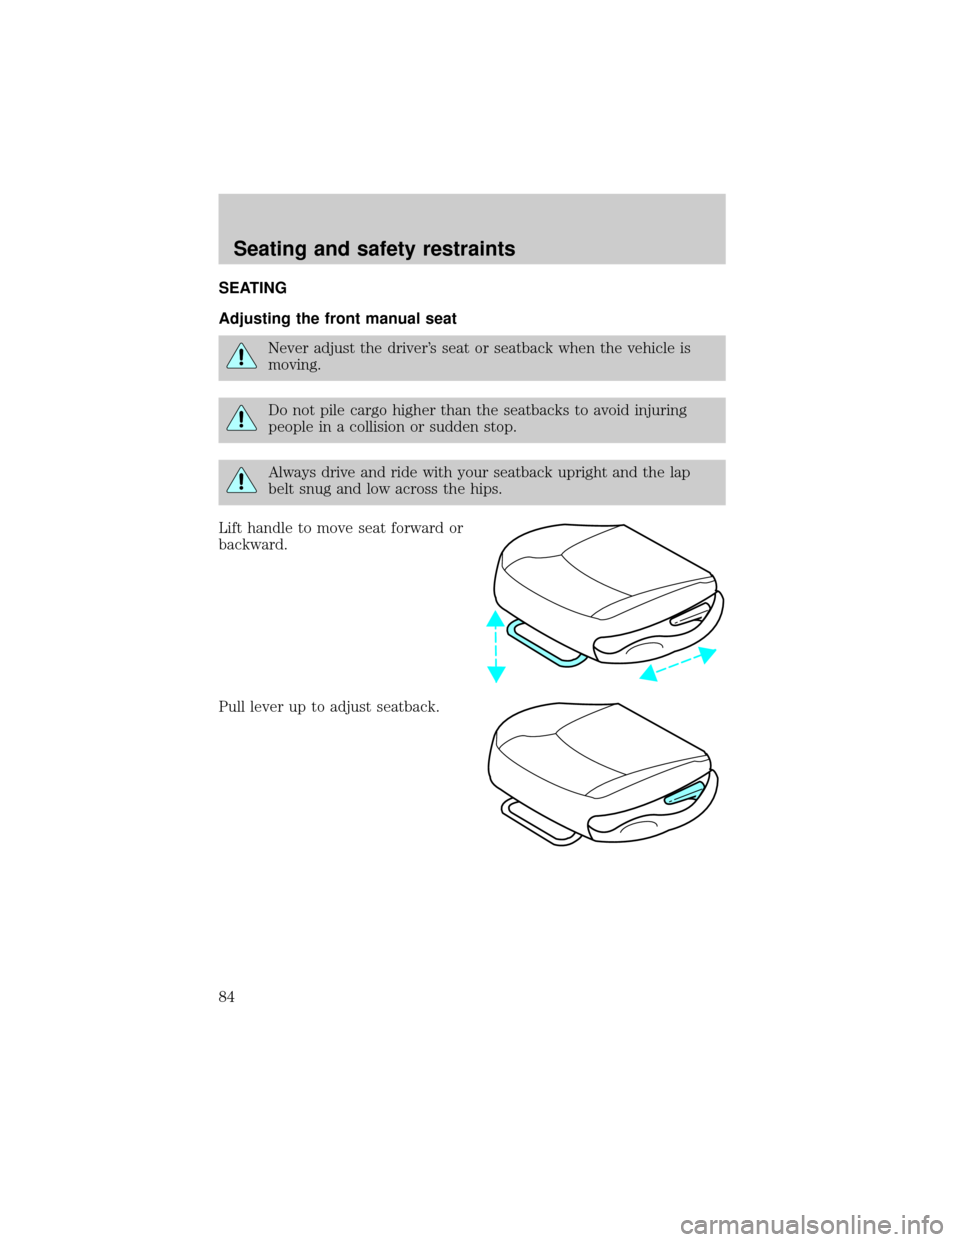
SEATING
Adjusting the front manual seat
Never adjust the driver's seat or seatback when the vehicle is
moving.
Do not pile cargo higher than the seatbacks to avoid injuring
people in a collision or sudden stop.
Always drive and ride with your seatback upright and the lap
belt snug and low across the hips.
Lift handle to move seat forward or
backward.
Pull lever up to adjust seatback.
Seating and safety restraints
84
Page 85 of 232
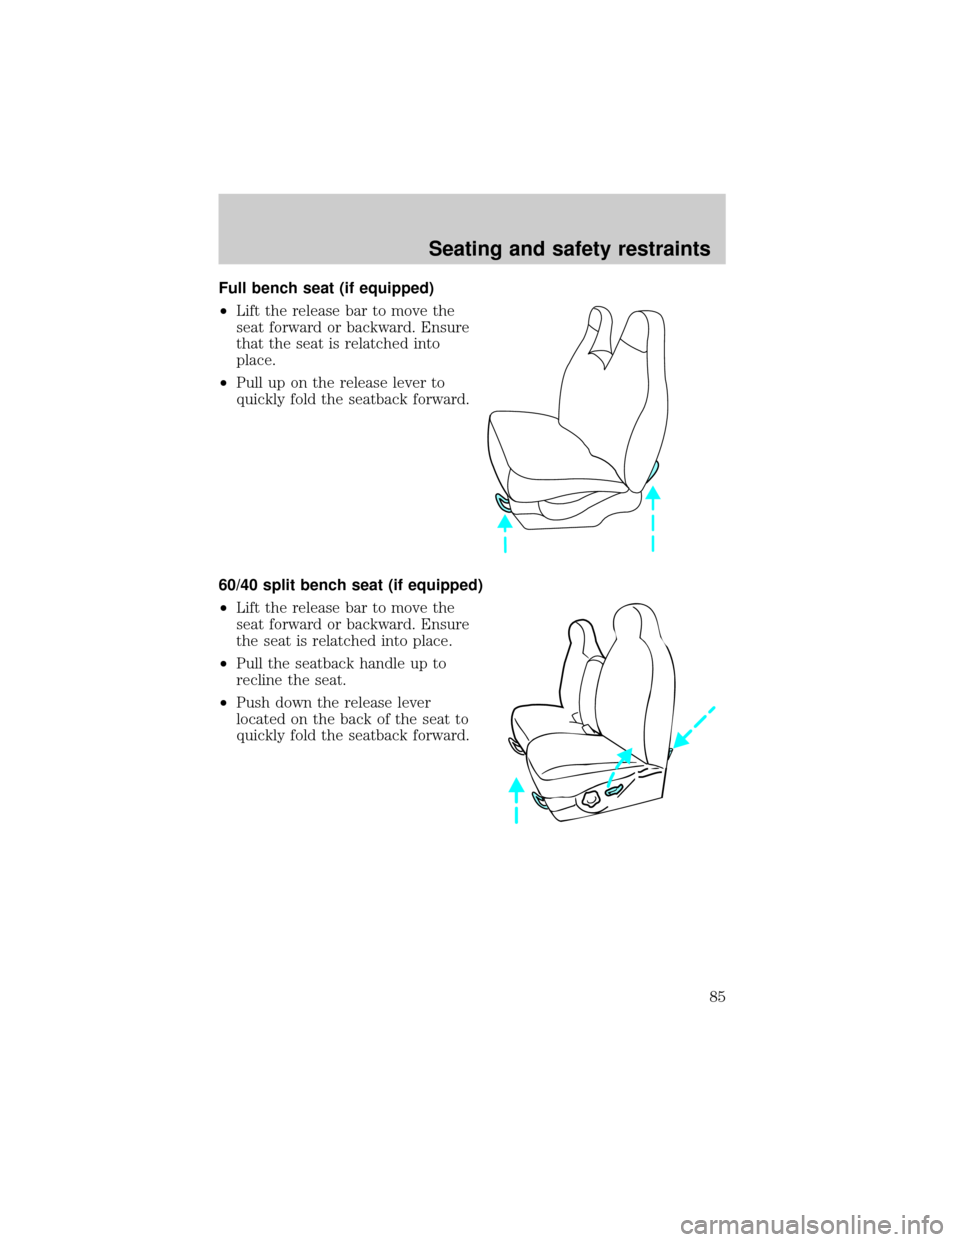
Full bench seat (if equipped)
²Lift the release bar to move the
seat forward or backward. Ensure
that the seat is relatched into
place.
²Pull up on the release lever to
quickly fold the seatback forward.
60/40 split bench seat (if equipped)
²Lift the release bar to move the
seat forward or backward. Ensure
the seat is relatched into place.
²Pull the seatback handle up to
recline the seat.
²Push down the release lever
located on the back of the seat to
quickly fold the seatback forward.
Seating and safety restraints
85
Page 86 of 232
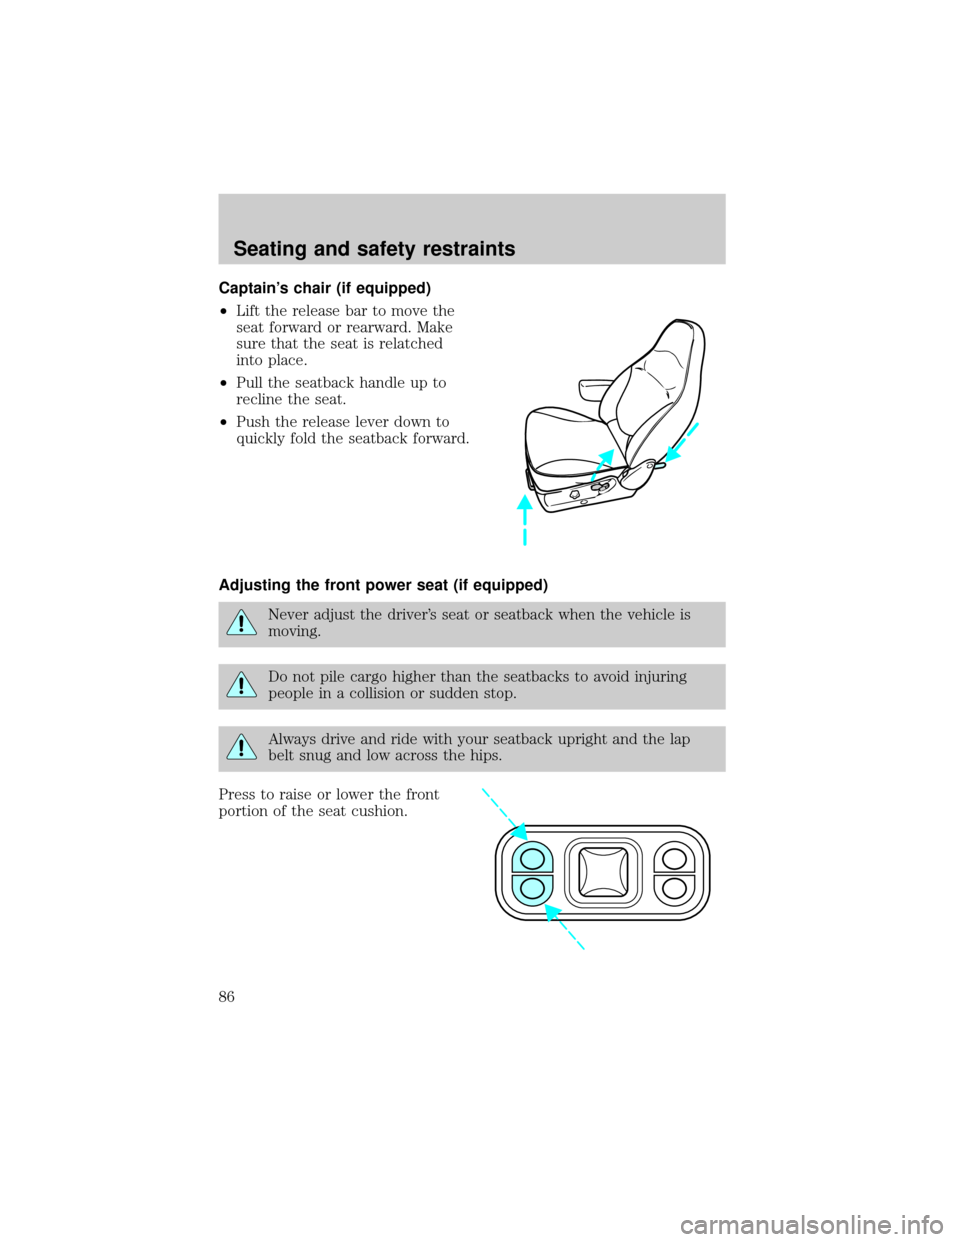
Captain's chair (if equipped)
²Lift the release bar to move the
seat forward or rearward. Make
sure that the seat is relatched
into place.
²Pull the seatback handle up to
recline the seat.
²Push the release lever down to
quickly fold the seatback forward.
Adjusting the front power seat (if equipped)
Never adjust the driver's seat or seatback when the vehicle is
moving.
Do not pile cargo higher than the seatbacks to avoid injuring
people in a collision or sudden stop.
Always drive and ride with your seatback upright and the lap
belt snug and low across the hips.
Press to raise or lower the front
portion of the seat cushion.
Seating and safety restraints
86
Page 87 of 232
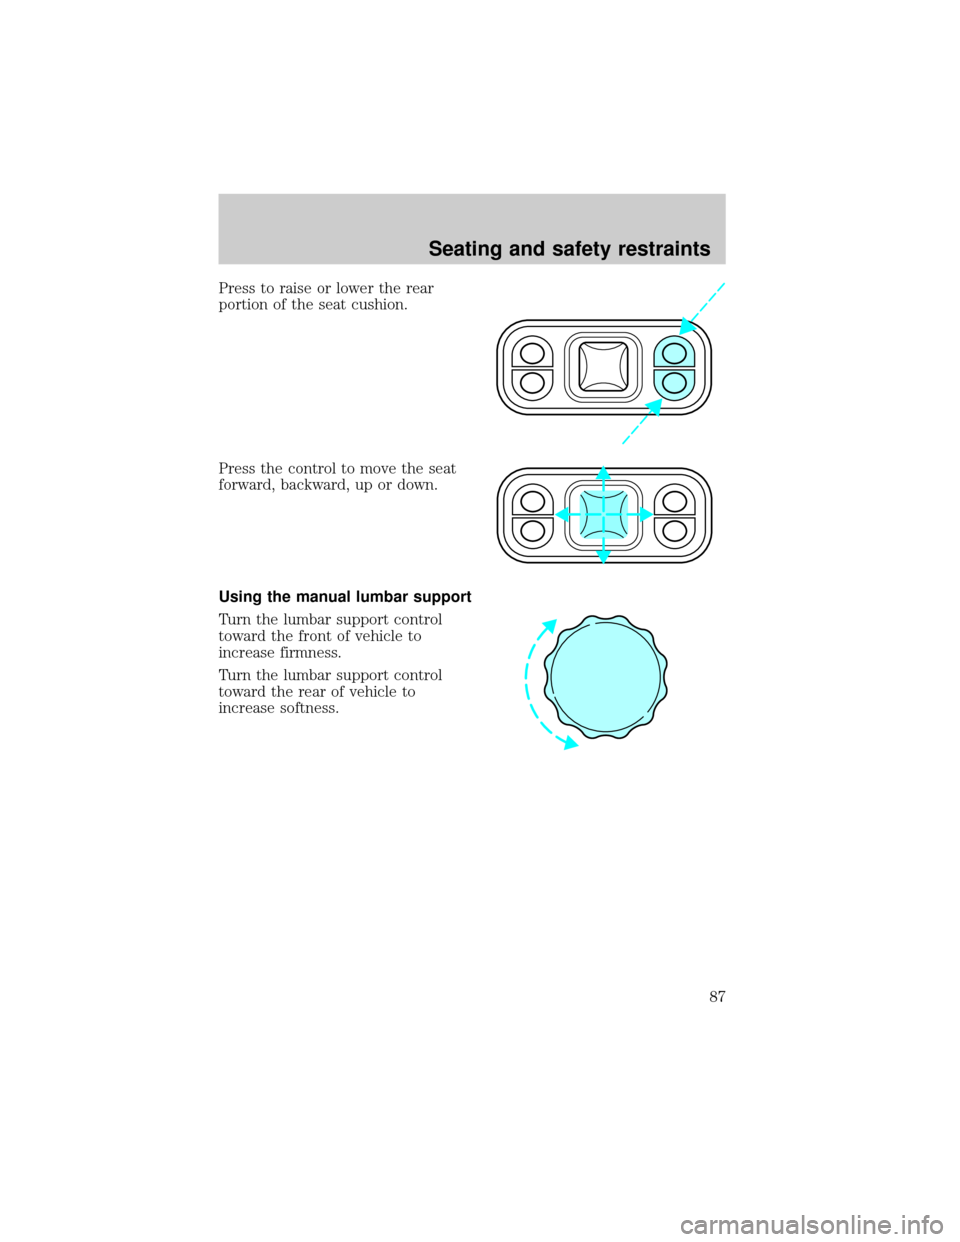
Press to raise or lower the rear
portion of the seat cushion.
Press the control to move the seat
forward, backward, up or down.
Using the manual lumbar support
Turn the lumbar support control
toward the front of vehicle to
increase firmness.
Turn the lumbar support control
toward the rear of vehicle to
increase softness.
Seating and safety restraints
87
Page 88 of 232
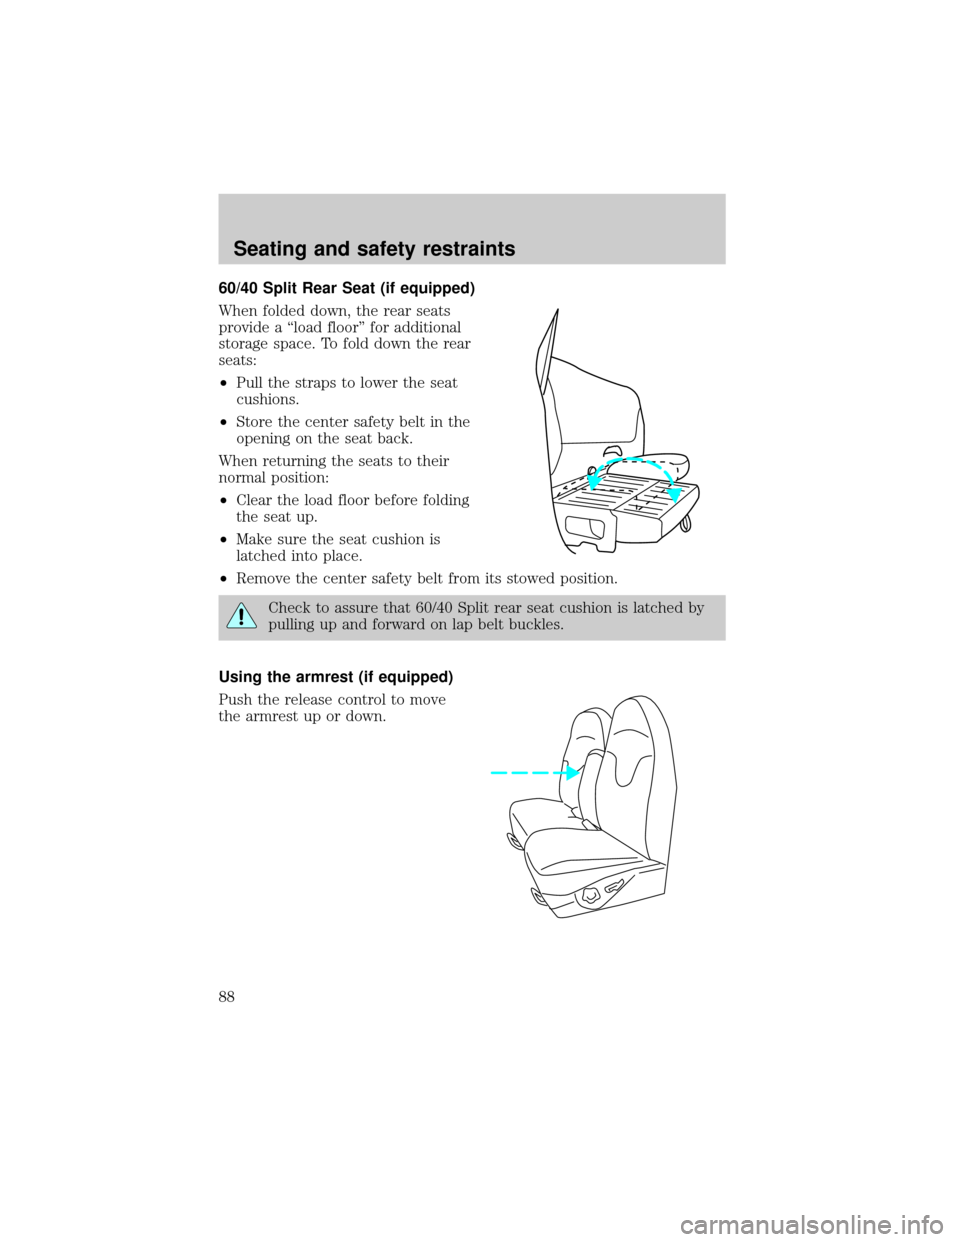
60/40 Split Rear Seat (if equipped)
When folded down, the rear seats
provide a ªload floorº for additional
storage space. To fold down the rear
seats:
²Pull the straps to lower the seat
cushions.
²Store the center safety belt in the
opening on the seat back.
When returning the seats to their
normal position:
²Clear the load floor before folding
the seat up.
²Make sure the seat cushion is
latched into place.
²Remove the center safety belt from its stowed position.
Check to assure that 60/40 Split rear seat cushion is latched by
pulling up and forward on lap belt buckles.
Using the armrest (if equipped)
Push the release control to move
the armrest up or down.
Seating and safety restraints
88
Page 89 of 232
SAFETY RESTRAINTS
Safety restraints precautions
Always drive and ride with your seatback upright and the lap
belt snug and low across the hips.
To prevent the risk of injury, make sure children sit where they
can be properly restrained.
Never let a passenger hold a child on his or her lap while the
vehicle is moving. The passenger cannot protect the child from
injury in a collision.
All occupants of the vehicle, including the driver, should always
properly wear their safety belts, even when an air bag SRS is
provided.
It is extremely dangerous to ride in a cargo area, inside or
outside of a vehicle. In a collision, people riding in these areas
are more likely to be seriously injured or killed. Do not allow people to
ride in any area of your vehicle that is not equipped with seats and
safety belts. Be sure everyone in your vehicle is in a seat and using a
safety belt properly.
Each seating position in your vehicle has a specific safety belt
assembly which is made up of one buckle and one tongue that
are designed to be used as a pair. 1) Use the shoulder belt on the
outside shoulder only. Never wear the shoulder belt under the arm. 2)
Never swing the safety belt around your neck over the inside shoulder.
3) Never use a single belt for more than one person.
Seating and safety restraints
89
Page 90 of 232
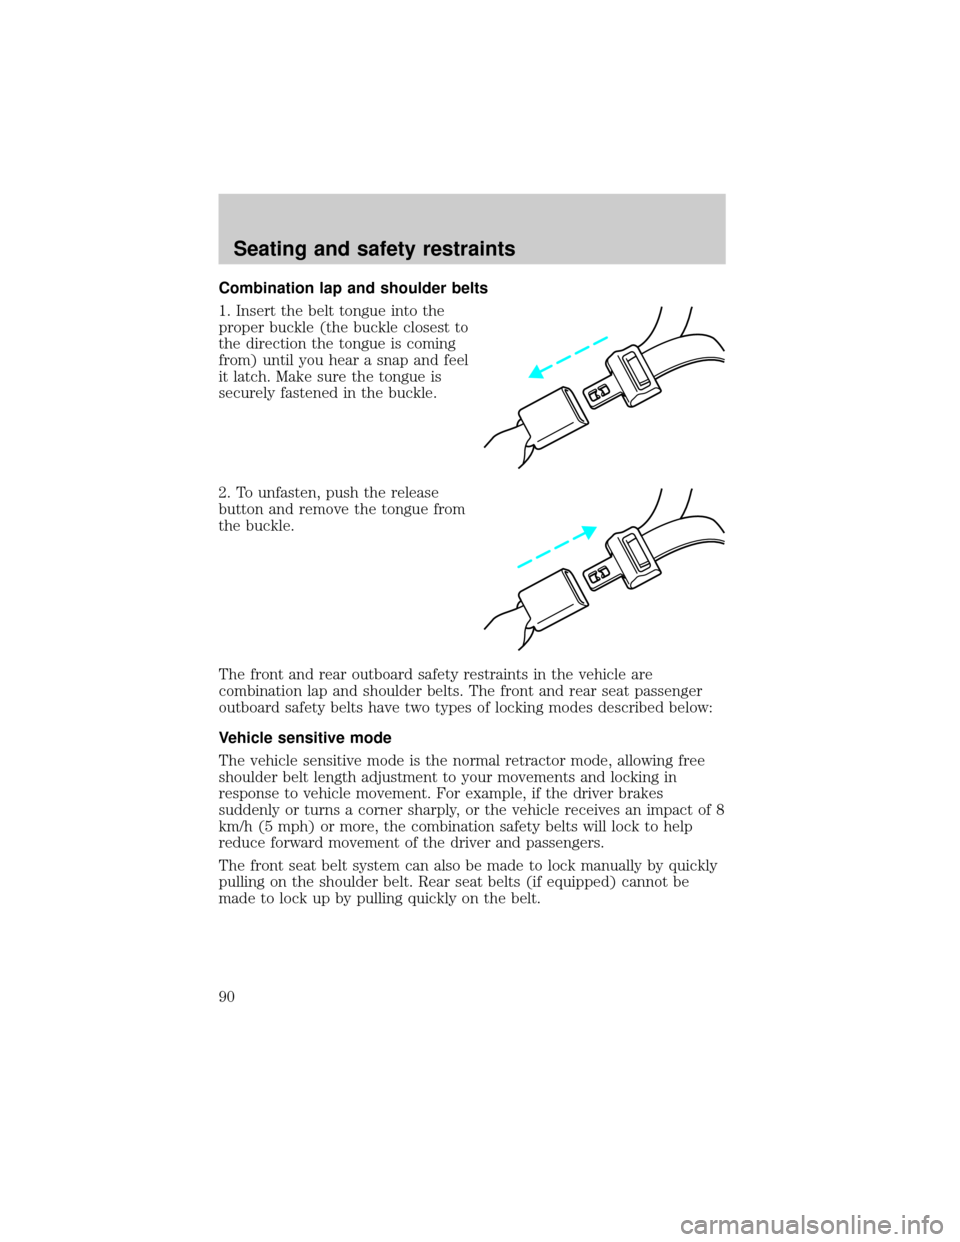
Combination lap and shoulder belts
1. Insert the belt tongue into the
proper buckle (the buckle closest to
the direction the tongue is coming
from) until you hear a snap and feel
it latch. Make sure the tongue is
securely fastened in the buckle.
2. To unfasten, push the release
button and remove the tongue from
the buckle.
The front and rear outboard safety restraints in the vehicle are
combination lap and shoulder belts. The front and rear seat passenger
outboard safety belts have two types of locking modes described below:
Vehicle sensitive mode
The vehicle sensitive mode is the normal retractor mode, allowing free
shoulder belt length adjustment to your movements and locking in
response to vehicle movement. For example, if the driver brakes
suddenly or turns a corner sharply, or the vehicle receives an impact of 8
km/h (5 mph) or more, the combination safety belts will lock to help
reduce forward movement of the driver and passengers.
The front seat belt system can also be made to lock manually by quickly
pulling on the shoulder belt. Rear seat belts (if equipped) cannot be
made to lock up by pulling quickly on the belt.
Seating and safety restraints
90