lock FORD F150 2003 10.G Service Manual
[x] Cancel search | Manufacturer: FORD, Model Year: 2003, Model line: F150, Model: FORD F150 2003 10.GPages: 280, PDF Size: 4.2 MB
Page 101 of 280
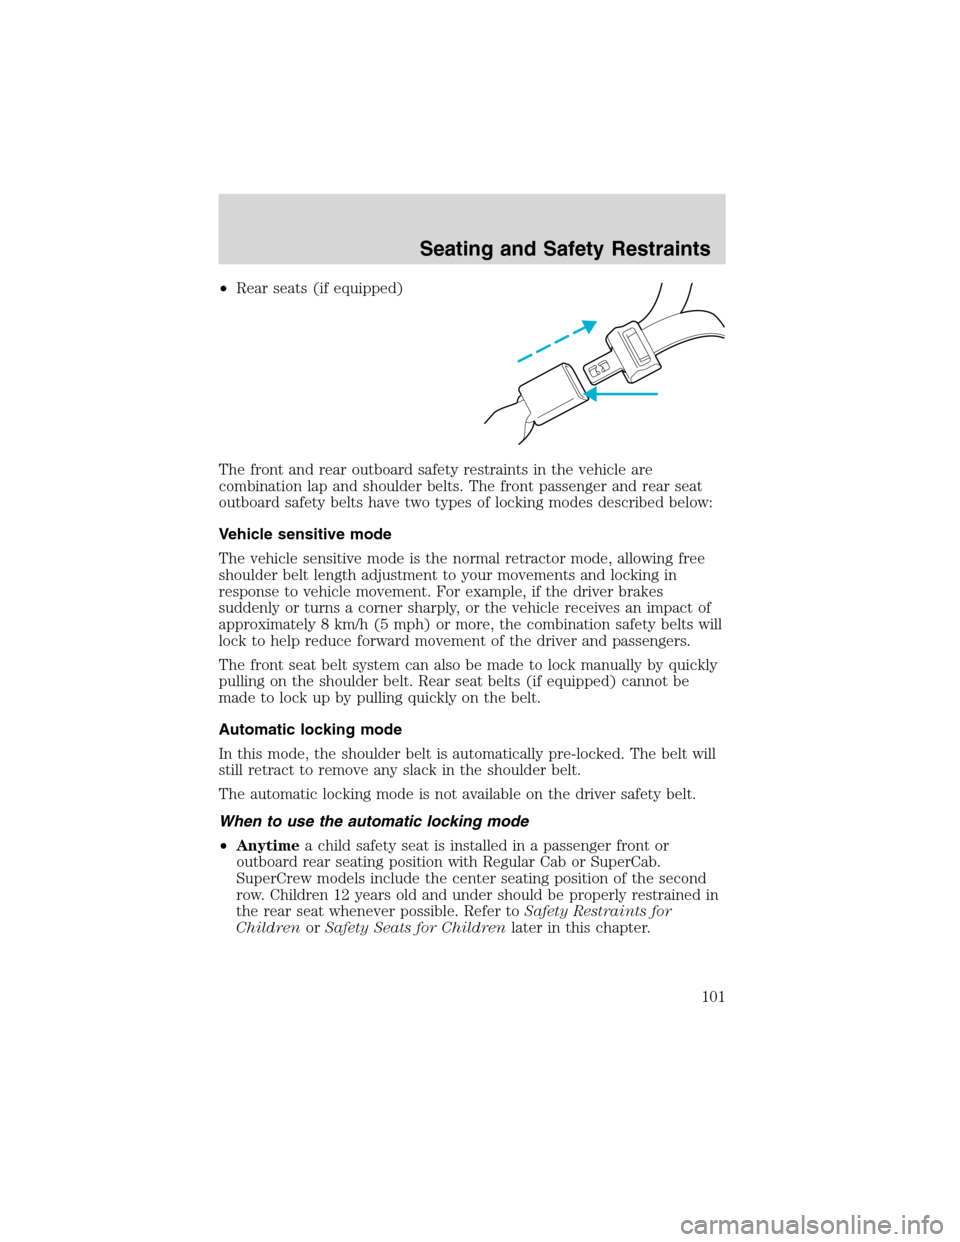
•Rear seats (if equipped)
The front and rear outboard safety restraints in the vehicle are
combination lap and shoulder belts. The front passenger and rear seat
outboard safety belts have two types of locking modes described below:
Vehicle sensitive mode
The vehicle sensitive mode is the normal retractor mode, allowing free
shoulder belt length adjustment to your movements and locking in
response to vehicle movement. For example, if the driver brakes
suddenly or turns a corner sharply, or the vehicle receives an impact of
approximately 8 km/h (5 mph) or more, the combination safety belts will
lock to help reduce forward movement of the driver and passengers.
The front seat belt system can also be made to lock manually by quickly
pulling on the shoulder belt. Rear seat belts (if equipped) cannot be
made to lock up by pulling quickly on the belt.
Automatic locking mode
In this mode, the shoulder belt is automatically pre-locked. The belt will
still retract to remove any slack in the shoulder belt.
The automatic locking mode is not available on the driver safety belt.
When to use the automatic locking mode
•Anytimea child safety seat is installed in a passenger front or
outboard rear seating position with Regular Cab or SuperCab.
SuperCrew models include the center seating position of the second
row. Children 12 years old and under should be properly restrained in
the rear seat whenever possible. Refer toSafety Restraints for
ChildrenorSafety Seats for Childrenlater in this chapter.
Seating and Safety Restraints
101
Page 102 of 280
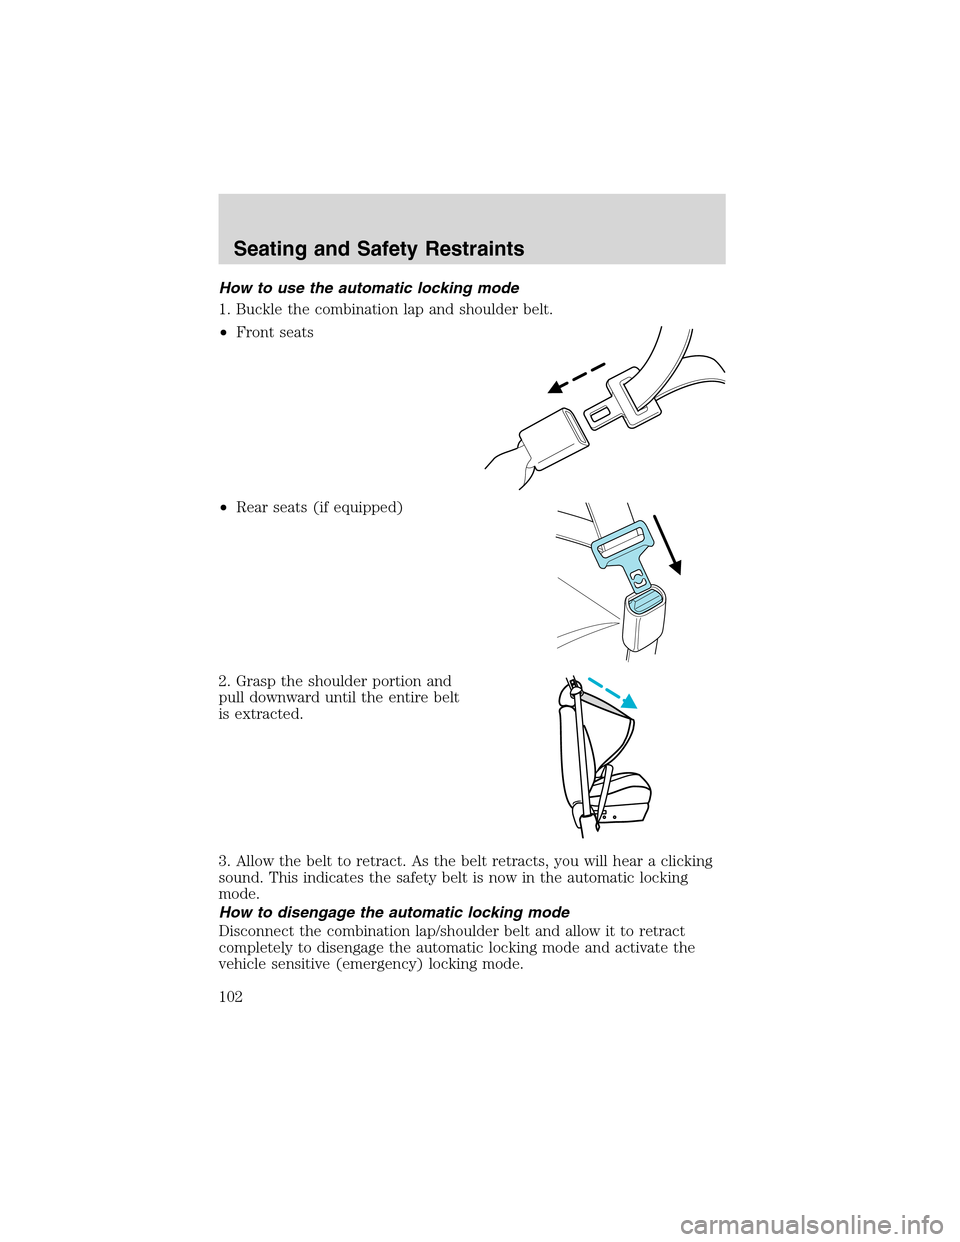
How to use the automatic locking mode
1. Buckle the combination lap and shoulder belt.
•Front seats
•Rear seats (if equipped)
2. Grasp the shoulder portion and
pull downward until the entire belt
is extracted.
3. Allow the belt to retract. As the belt retracts, you will hear a clicking
sound. This indicates the safety belt is now in the automatic locking
mode.
How to disengage the automatic locking mode
Disconnect the combination lap/shoulder belt and allow it to retract
completely to disengage the automatic locking mode and activate the
vehicle sensitive (emergency) locking mode.
Seating and Safety Restraints
102
Page 103 of 280
After any vehicle collision, the safety belt systems at all outboard
seating positions (except the driver position, which does not
have this feature) must be checked by a qualified technician to verify
that the automatic locking retractor feature for child seats is still
functioning properly. In addition, all seat belts should be checked for
proper function.
BELT AND RETRACTOR ASSEMBLY MUST BE REPLACED if
the seat belt assembly“automatic locking retractor”feature or
any other seat belt function is not operating properly when checked
according to the procedures in Workshop Manual. Failure to replace
the Belt and Retractor assembly could increase the risk of injury in
collisions.
Safety belt pretensioner
Your vehicle is equipped with safety belt pretensioners at the driver and
front outboard passenger seating positions.
The Seat Integrated Restraints (SIR) seat (which has shoulder belts
attached to the corners of the front seat back) is equipped with a buckle
pretensioner. Do NOT place objects between the seats, this could
interfere with the functioning of the pretensioner. For the SuperCab and
CrewCab base bench seats and all Regular Cab seating positions, the
safety belts are equipped with a retractor pretensioner.
The safety belt pretensioners are designed to activate only during certain
frontal or near-frontal collisions with sufficient longitudinal deceleration.
A safety belt pretensioner is a device which tightens the webbing of the
lap and shoulder belts during some collisions in such a way that they fit
more snugly against the body.
The driver and front outboard passenger safety belt system (including
retractors, buckles and height adjusters) must be replaced if the vehicle
is involved in a collision that results in the activation of the safety belt
pretensioners. Refer to theSafety belt maintenancesection in this
chapter.
Failure to replace the safety belt assembly under the above
conditions could result in severe personal injuries in the event of
a collision.
Seating and Safety Restraints
103
Page 104 of 280
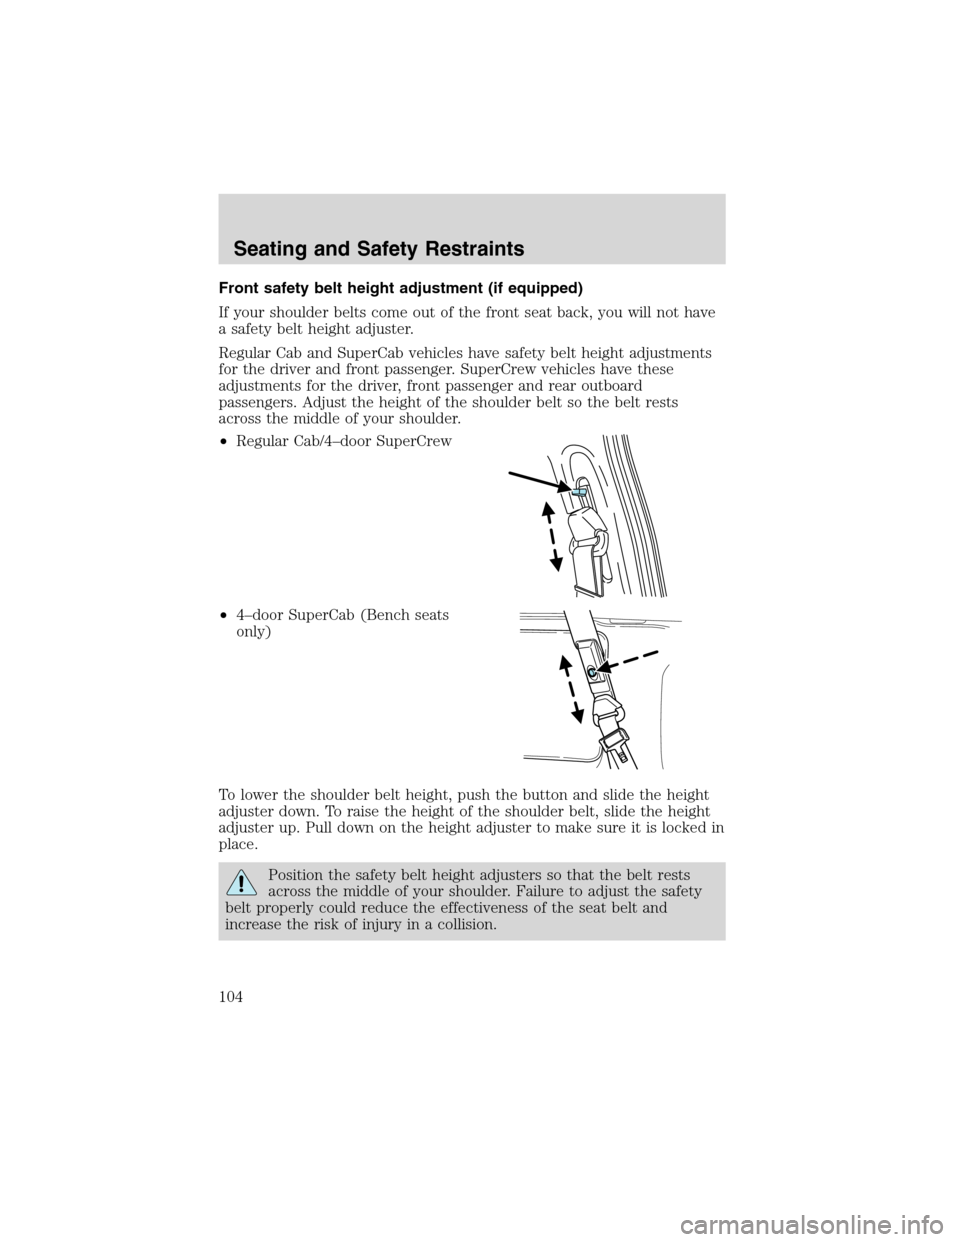
Front safety belt height adjustment (if equipped)
If your shoulder belts come out of the front seat back, you will not have
a safety belt height adjuster.
Regular Cab and SuperCab vehicles have safety belt height adjustments
for the driver and front passenger. SuperCrew vehicles have these
adjustments for the driver, front passenger and rear outboard
passengers. Adjust the height of the shoulder belt so the belt rests
across the middle of your shoulder.
•Regular Cab/4–door SuperCrew
•4–door SuperCab (Bench seats
only)
To lower the shoulder belt height, push the button and slide the height
adjuster down. To raise the height of the shoulder belt, slide the height
adjuster up. Pull down on the height adjuster to make sure it is locked in
place.
Position the safety belt height adjusters so that the belt rests
across the middle of your shoulder. Failure to adjust the safety
belt properly could reduce the effectiveness of the seat belt and
increase the risk of injury in a collision.
Seating and Safety Restraints
104
Page 124 of 280
•Put the safety belt in the automatic locking mode. Refer toAutomatic
locking mode(passenger side front and outboard rear seating
positions-Regular Cab and SuperCab) (passenger side front and rear
seating positions-SuperCrew) (if equipped).
Ford recommends the use of a child safety seat having a top tether
strap. Install the child safety seat in a seating position which is capable
of providing a tether anchorage. For more information on top tether
straps, refer toAttaching safety seats with tether straps.
Carefully follow all of the manufacturer’s instructions included
with the safety seat you put in your vehicle. If you do not install
and use the safety seat properly, the child may be injured in a sudden
stop or collision.
Installing child safety seats with combination lap and shoulder
belts
Air bags can kill or injure a child in a child seat.NEVERplace a
rear-facing child seat in front of an active air bag. If you must
use a forward-facing child seat in the front seat, move the seat all the
way back.
Children 12 and under should be properly restrained in the rear
seat whenever possible.
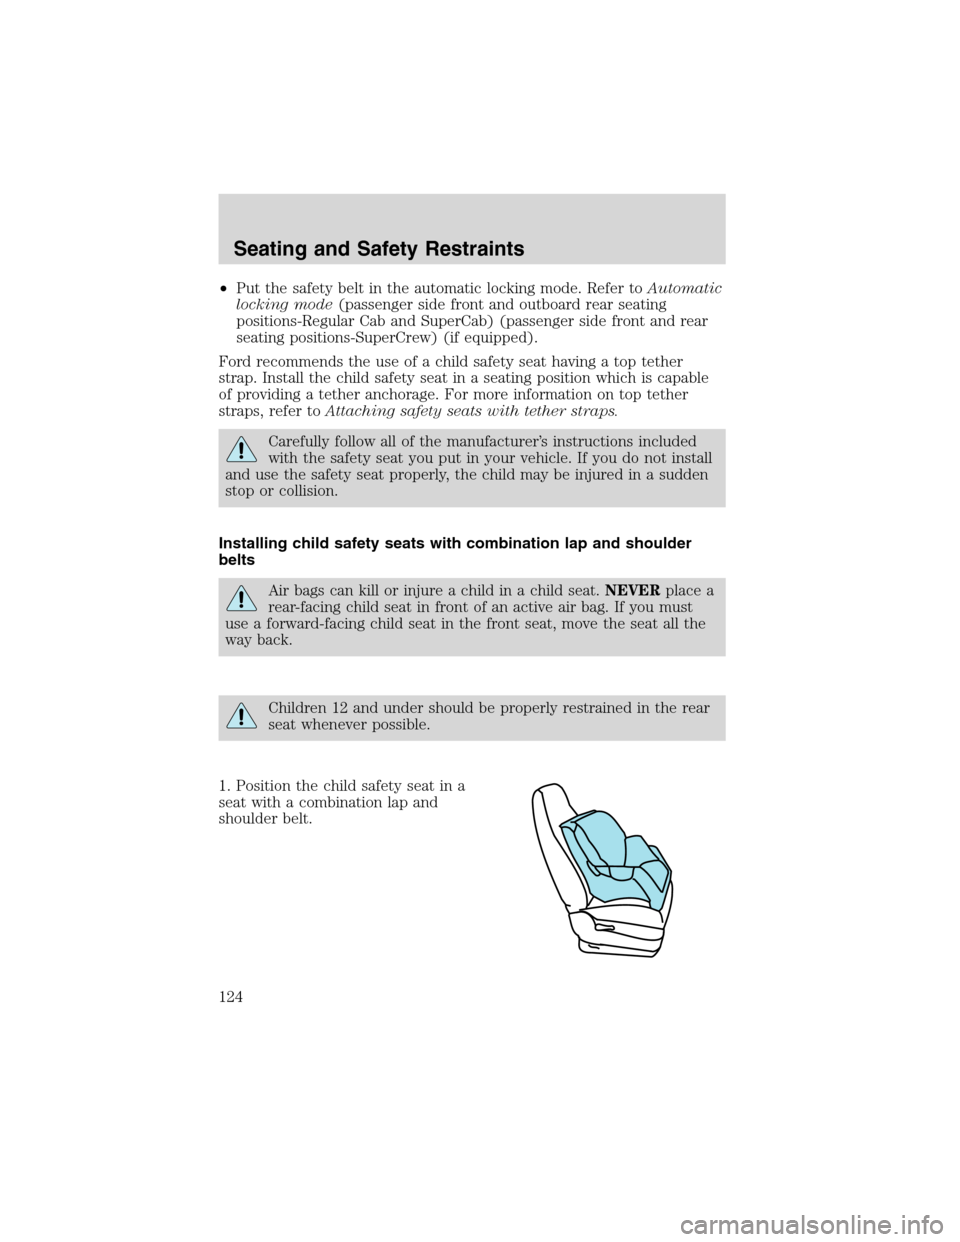
1. Position the child safety seat in a
seat with a combination lap and
shoulder belt.
Seating and Safety Restraints
124
Page 126 of 280
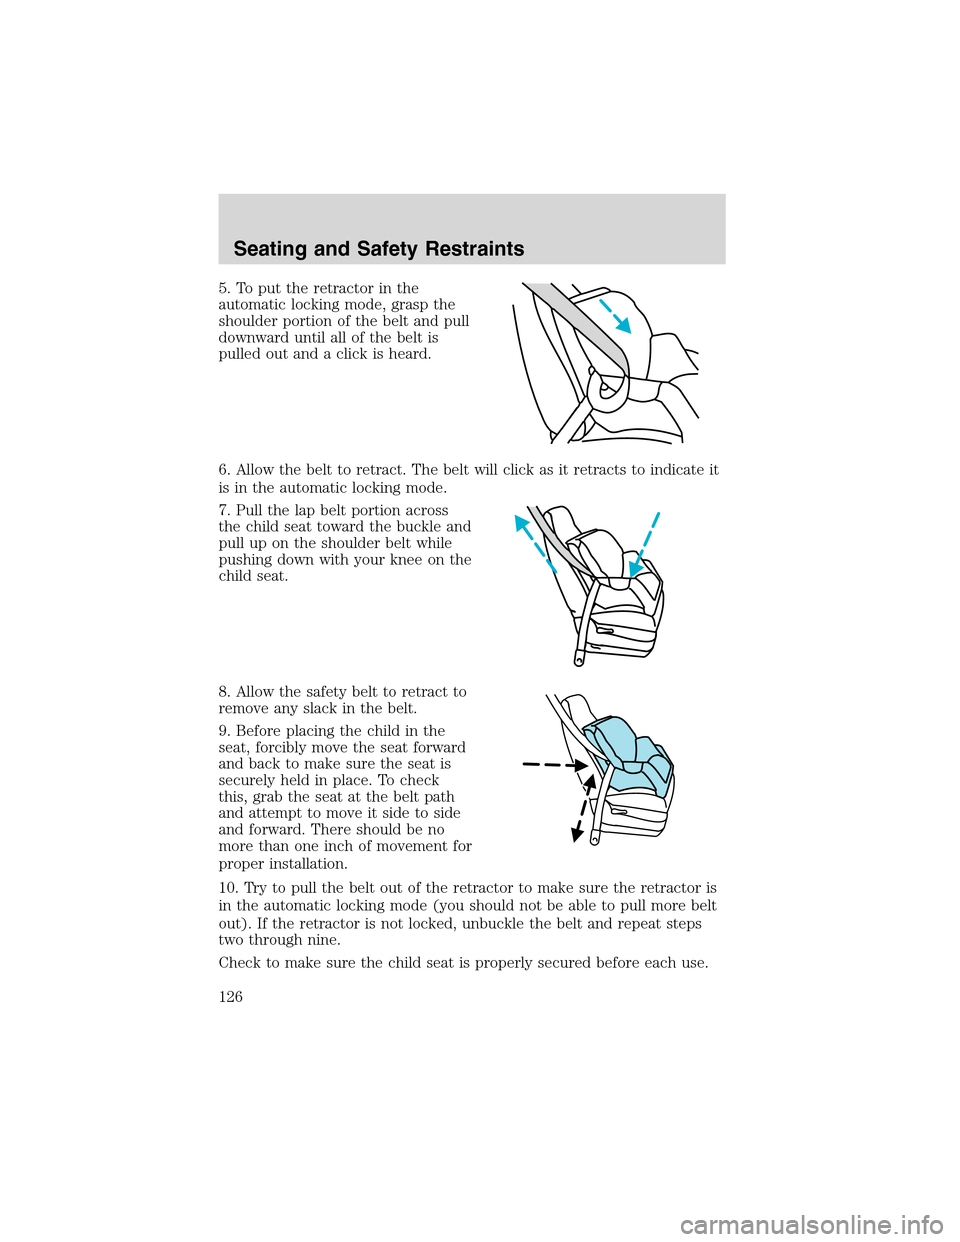
5. To put the retractor in the
automatic locking mode, grasp the
shoulder portion of the belt and pull
downward until all of the belt is
pulled out and a click is heard.
6. Allow the belt to retract. The belt will click as it retracts to indicate it
is in the automatic locking mode.
7. Pull the lap belt portion across
the child seat toward the buckle and
pull up on the shoulder belt while
pushing down with your knee on the
child seat.
8. Allow the safety belt to retract to
remove any slack in the belt.
9. Before placing the child in the
seat, forcibly move the seat forward
and back to make sure the seat is
securely held in place. To check
this, grab the seat at the belt path
and attempt to move it side to side
and forward. There should be no
more than one inch of movement for
proper installation.
10. Try to pull the belt out of the retractor to make sure the retractor is
in the automatic locking mode (you should not be able to pull more belt
out). If the retractor is not locked, unbuckle the belt and repeat steps
two through nine.
Check to make sure the child seat is properly secured before each use.
Seating and Safety Restraints
126
Page 127 of 280
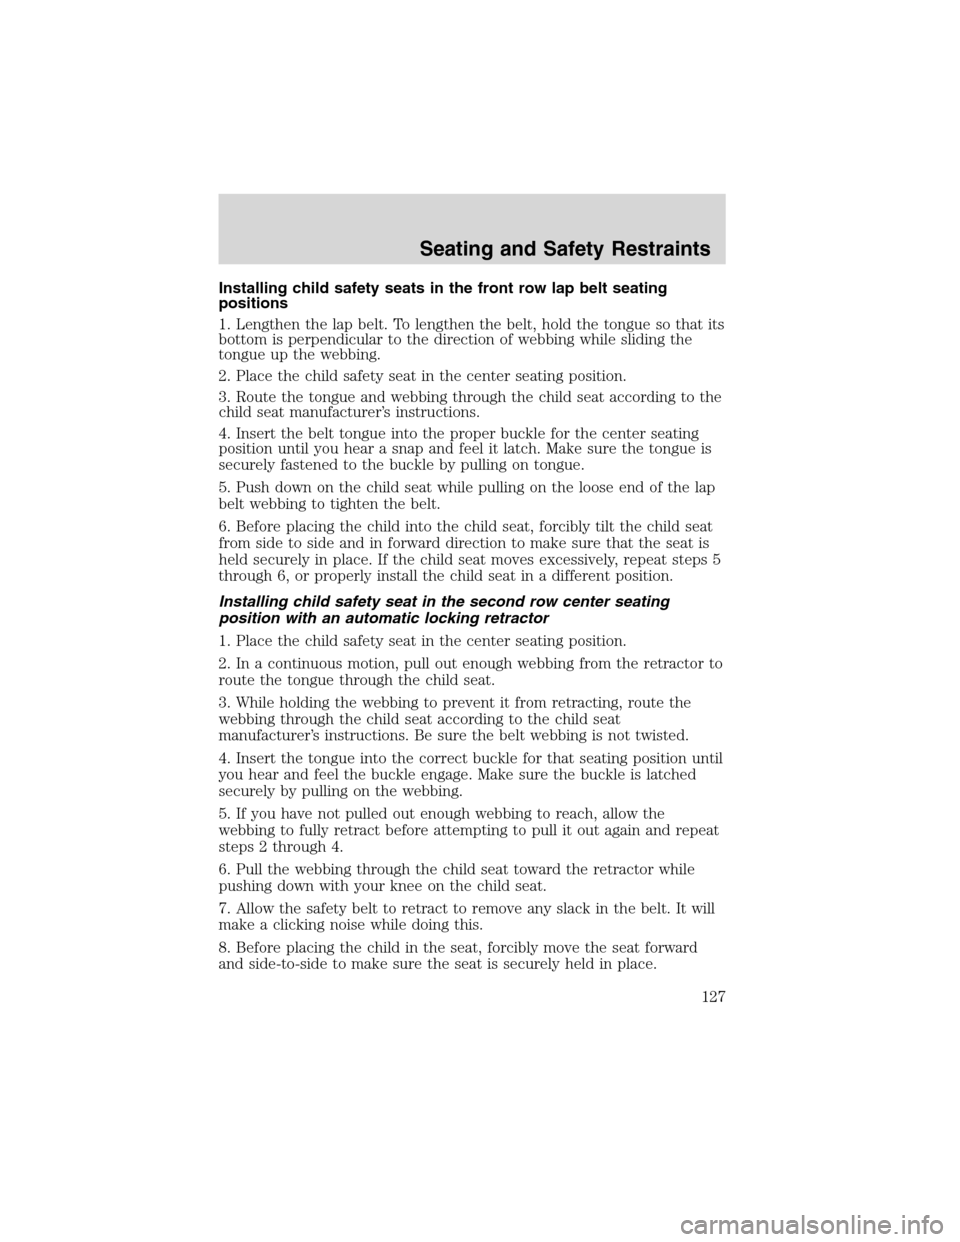
Installing child safety seats in the front row lap belt seating
positions
1. Lengthen the lap belt. To lengthen the belt, hold the tongue so that its
bottom is perpendicular to the direction of webbing while sliding the
tongue up the webbing.
2. Place the child safety seat in the center seating position.
3. Route the tongue and webbing through the child seat according to the
child seat manufacturer’s instructions.
4. Insert the belt tongue into the proper buckle for the center seating
position until you hear a snap and feel it latch. Make sure the tongue is
securely fastened to the buckle by pulling on tongue.
5. Push down on the child seat while pulling on the loose end of the lap
belt webbing to tighten the belt.
6. Before placing the child into the child seat, forcibly tilt the child seat
from side to side and in forward direction to make sure that the seat is
held securely in place. If the child seat moves excessively, repeat steps 5
through 6, or properly install the child seat in a different position.
Installing child safety seat in the second row center seating
position with an automatic locking retractor
1. Place the child safety seat in the center seating position.
2. In a continuous motion, pull out enough webbing from the retractor to
route the tongue through the child seat.
3. While holding the webbing to prevent it from retracting, route the
webbing through the child seat according to the child seat
manufacturer’s instructions. Be sure the belt webbing is not twisted.
4. Insert the tongue into the correct buckle for that seating position until
you hear and feel the buckle engage. Make sure the buckle is latched
securely by pulling on the webbing.
5. If you have not pulled out enough webbing to reach, allow the
webbing to fully retract before attempting to pull it out again and repeat
steps 2 through 4.
6. Pull the webbing through the child seat toward the retractor while
pushing down with your knee on the child seat.
7. Allow the safety belt to retract to remove any slack in the belt. It will
make a clicking noise while doing this.
8. Before placing the child in the seat, forcibly move the seat forward
and side-to-side to make sure the seat is securely held in place.
Seating and Safety Restraints
127
Page 129 of 280
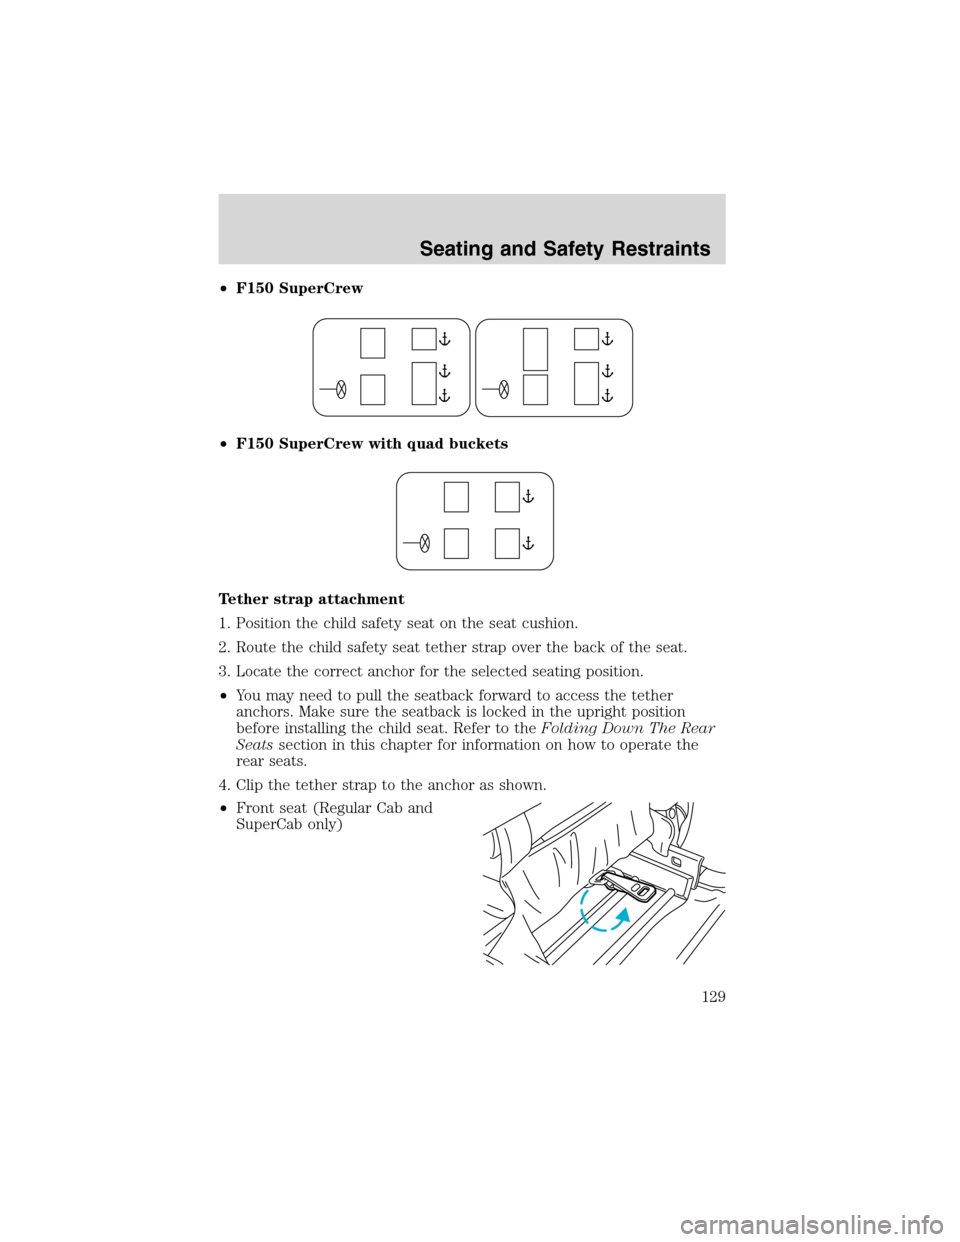
•F150 SuperCrew
•F150 SuperCrew with quad buckets
Tether strap attachment
1. Position the child safety seat on the seat cushion.
2. Route the child safety seat tether strap over the back of the seat.
3. Locate the correct anchor for the selected seating position.
•You may need to pull the seatback forward to access the tether
anchors. Make sure the seatback is locked in the upright position
before installing the child seat. Refer to theFolding Down The Rear
Seatssection in this chapter for information on how to operate the
rear seats.
4. Clip the tether strap to the anchor as shown.
•Front seat (Regular Cab and
SuperCab only)
Seating and Safety Restraints
129
Page 135 of 280
STARTING
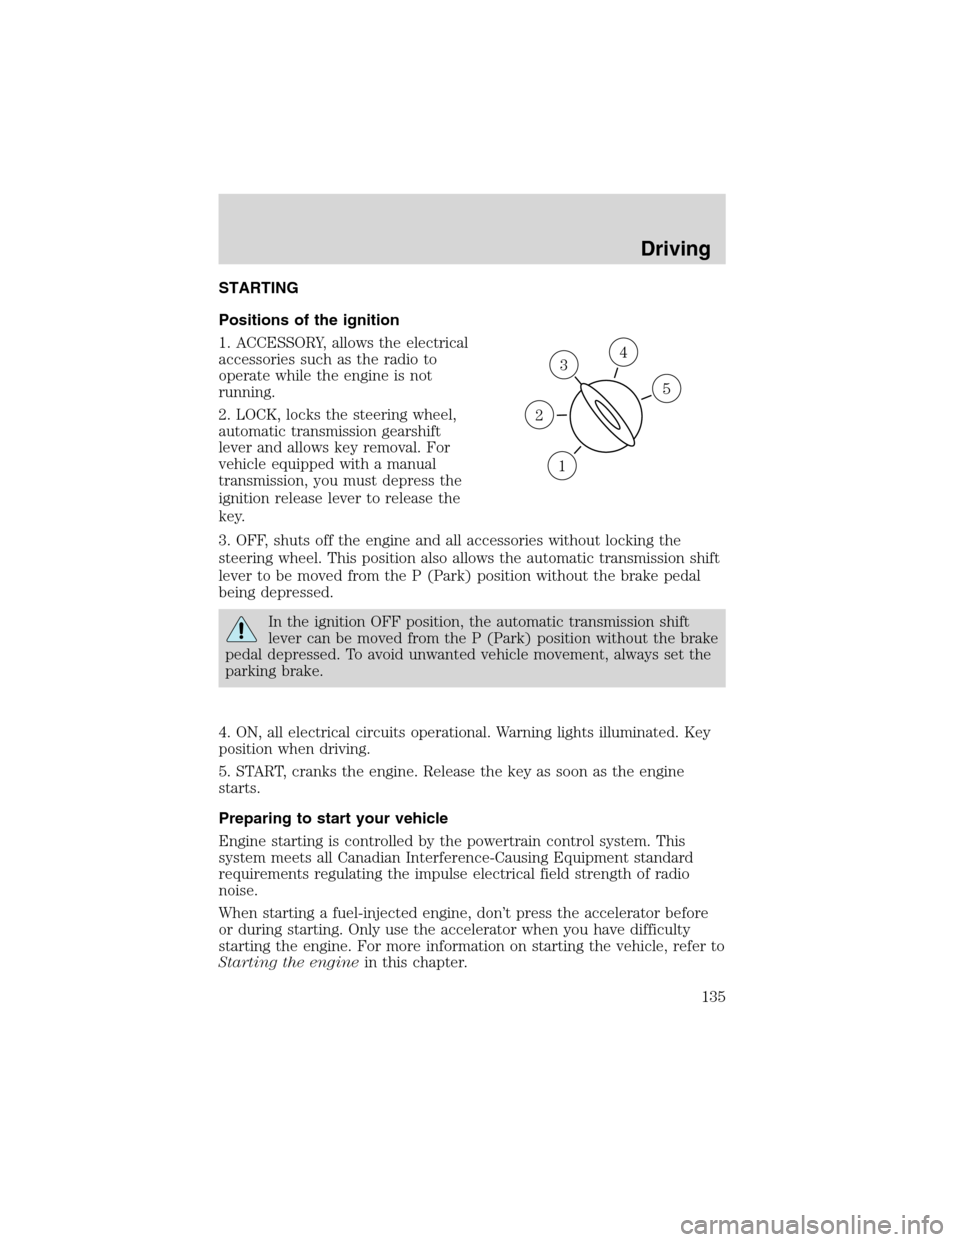
Positions of the ignition
1. ACCESSORY, allows the electrical
accessories such as the radio to
operate while the engine is not
running.
2. LOCK, locks the steering wheel,
automatic transmission gearshift
lever and allows key removal. For
vehicle equipped with a manual
transmission, you must depress the
ignition release lever to release the
key.
3. OFF, shuts off the engine and all accessories without locking the
steering wheel. This position also allows the automatic transmission shift
lever to be moved from the P (Park) position without the brake pedal
being depressed.
In the ignition OFF position, the automatic transmission shift
lever can be moved from the P (Park) position without the brake
pedal depressed. To avoid unwanted vehicle movement, always set the
parking brake.
4. ON, all electrical circuits operational. Warning lights illuminated. Key
position when driving.
5. START, cranks the engine. Release the key as soon as the engine
starts.
Preparing to start your vehicle
Engine starting is controlled by the powertrain control system. This
system meets all Canadian Interference-Causing Equipment standard
requirements regulating the impulse electrical field strength of radio
noise.
When starting a fuel-injected engine, don’t press the accelerator before
or during starting. Only use the accelerator when you have difficulty
starting the engine. For more information on starting the vehicle, refer to
Starting the enginein this chapter.
3
1
2
5
4
Driving
135
Page 139 of 280
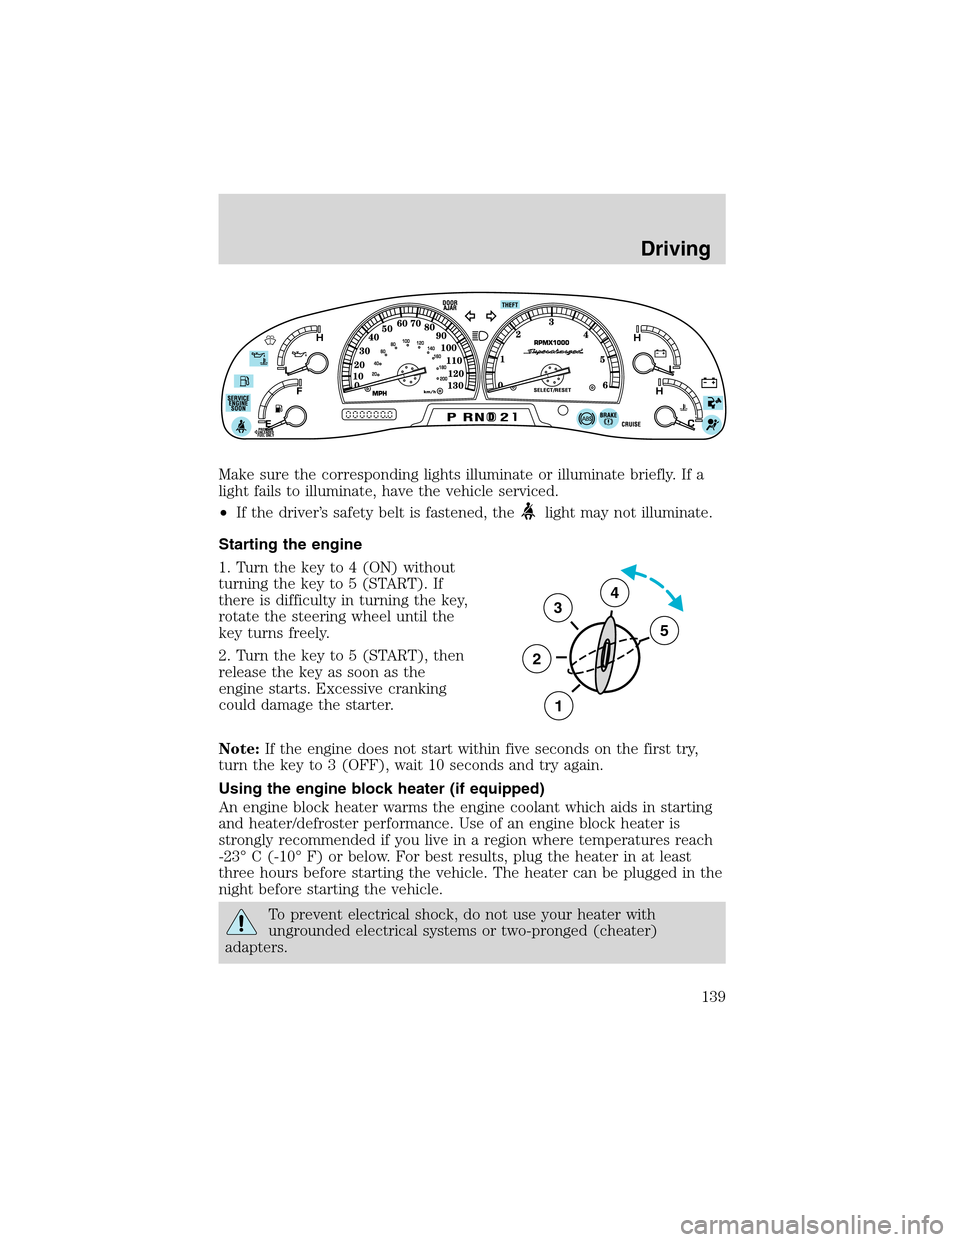
Make sure the corresponding lights illuminate or illuminate briefly. If a
light fails to illuminate, have the vehicle serviced.
•If the driver’s safety belt is fastened, the
light may not illuminate.
Starting the engine
1. Turn the key to 4 (ON) without
turning the key to 5 (START). If
there is difficulty in turning the key,
rotate the steering wheel until the
key turns freely.
2. Turn the key to 5 (START), then
release the key as soon as the
engine starts. Excessive cranking
could damage the starter.
Note:If the engine does not start within five seconds on the first try,
turn the key to 3 (OFF), wait 10 seconds and try again.
Using the engine block heater (if equipped)
An engine block heater warms the engine coolant which aids in starting
and heater/defroster performance. Use of an engine block heater is
strongly recommended if you live in a region where temperatures reach
-23°C (-10°F) or below. For best results, plug the heater in at least
three hours before starting the vehicle. The heater can be plugged in the
night before starting the vehicle.
To prevent electrical shock, do not use your heater with
ungrounded electrical systems or two-pronged (cheater)
adapters.
3
2
1
5
4
Driving
139