manual transmission FORD F150 2014 12.G Owners Manual
[x] Cancel search | Manufacturer: FORD, Model Year: 2014, Model line: F150, Model: FORD F150 2014 12.GPages: 472, PDF Size: 4.62 MB
Page 54 of 472
Sounding a Panic Alarm
Note:
The panic alarm will only operate
when the ignition is off. Press the button to activate the
alarm. Press the button again or
turn the ignition on to deactivate
it.
Remote Start (If Equipped) WARNING
To avoid exhaust fumes, do not use
remote start if your vehicle is parked
indoors or areas that are not well
ventilated. Note:
Do not use remote start if your vehicle
is low on fuel. The remote start button is on the
transmitter.
This feature allows you to start your
vehicle from outside the vehicle. The
transmitter has an extended operating
range.
Vehicles with automatic climate control
can be set to operate when you remote
start the vehicle. See
Climate Control
(page 106). A manual climate control
system will run at the setting it was set to
when you switch the vehicle off.
Many states and provinces have
restrictions for the use of remote start.
Check your local and state or provincial
laws for specific requirements regarding
remote start systems.
The remote start system will not work if
any of the following occur:
• The ignition is on.
• The alarm system triggers.
• You disable the feature.
• The hood is open. •
The transmission is not in
P.
• The vehicle battery voltage is too low.
• The service engine soon indicator is on.
Remote Starting the Vehicle
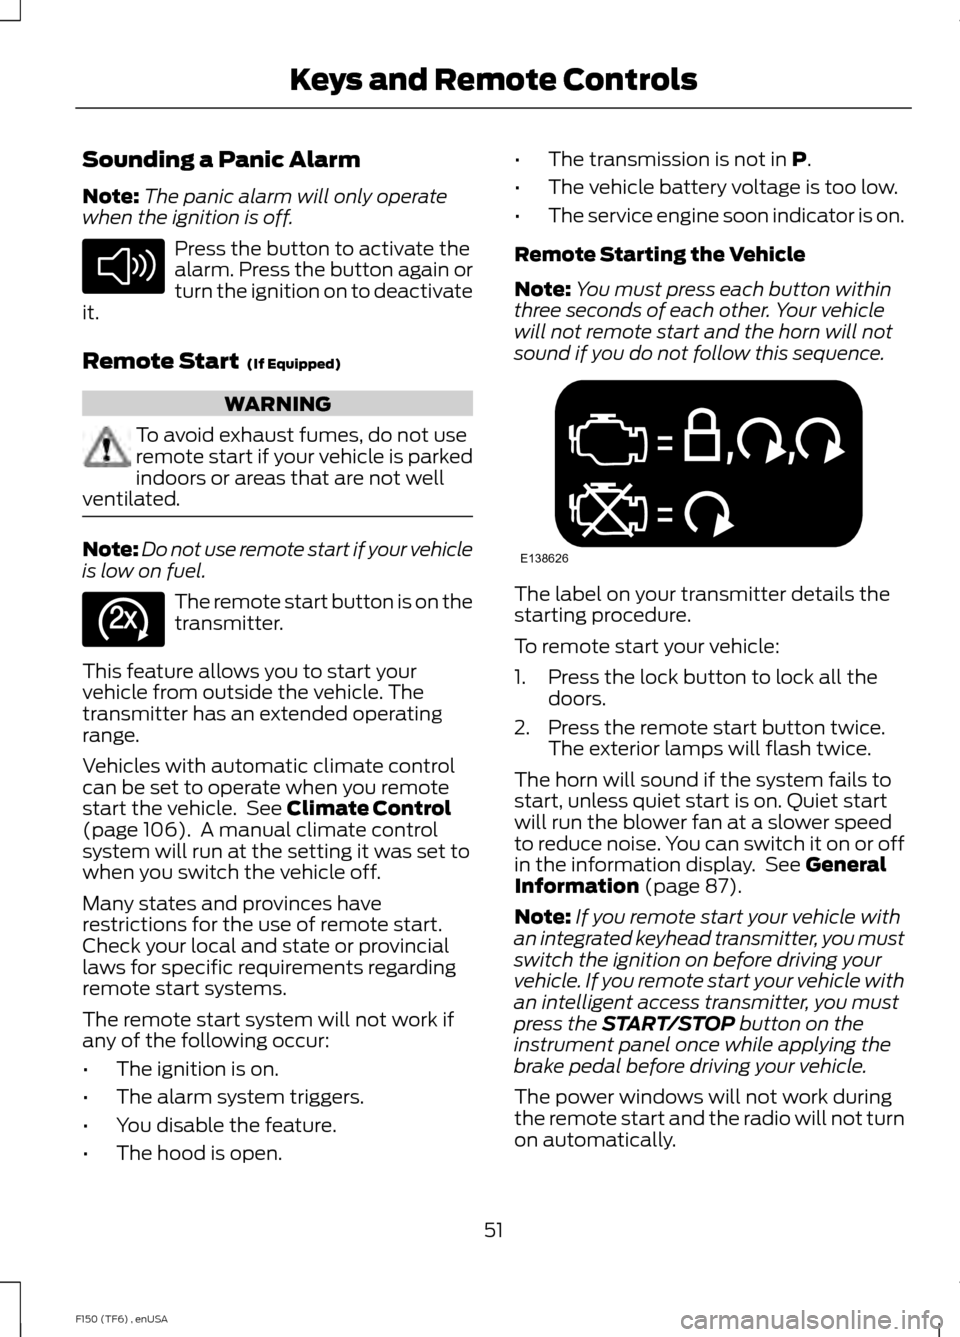
Note: You must press each button within
three seconds of each other. Your vehicle
will not remote start and the horn will not
sound if you do not follow this sequence. The label on your transmitter details the
starting procedure.
To remote start your vehicle:
1. Press the lock button to lock all the
doors.
2. Press the remote start button twice. The exterior lamps will flash twice.
The horn will sound if the system fails to
start, unless quiet start is on. Quiet start
will run the blower fan at a slower speed
to reduce noise. You can switch it on or off
in the information display. See
General
Information (page 87).
Note: If you remote start your vehicle with
an integrated keyhead transmitter, you must
switch the ignition on before driving your
vehicle. If you remote start your vehicle with
an intelligent access transmitter, you must
press the
START/STOP button on the
instrument panel once while applying the
brake pedal before driving your vehicle.
The power windows will not work during
the remote start and the radio will not turn
on automatically.
51
F150 (TF6) , enUSA Keys and Remote ControlsE138624 E138625 E138626
Page 151 of 472
The tow/haul feature improves
transmission operation when towing a
trailer or a heavy load. All transmission
gear ranges are available when using
tow/haul.
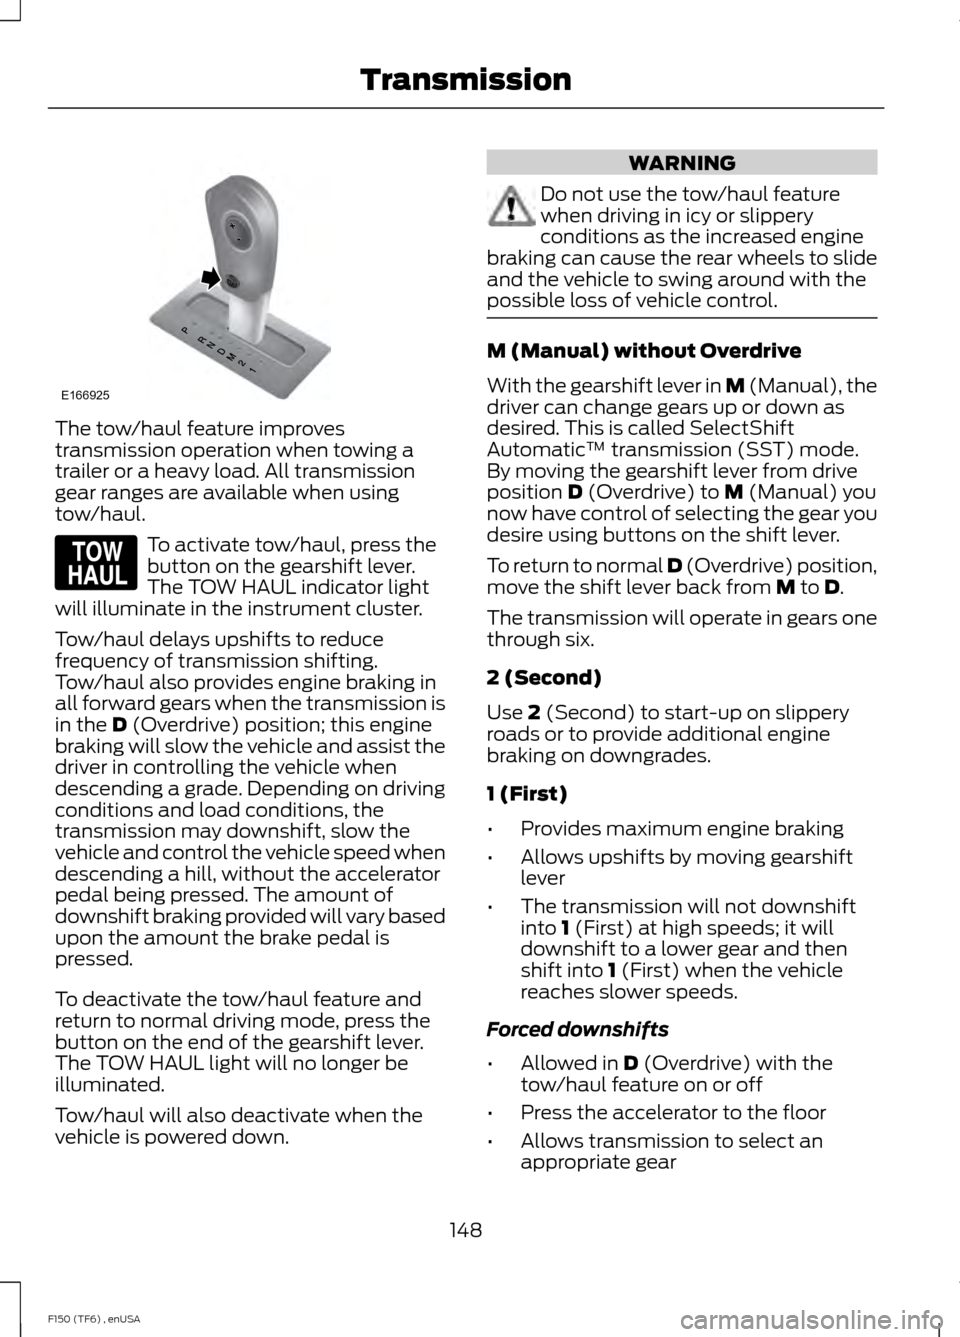
To activate tow/haul, press the
button on the gearshift lever.
The TOW HAUL indicator light
will illuminate in the instrument cluster.
Tow/haul delays upshifts to reduce
frequency of transmission shifting.
Tow/haul also provides engine braking in
all forward gears when the transmission is
in the D (Overdrive) position; this engine
braking will slow the vehicle and assist the
driver in controlling the vehicle when
descending a grade. Depending on driving
conditions and load conditions, the
transmission may downshift, slow the
vehicle and control the vehicle speed when
descending a hill, without the accelerator
pedal being pressed. The amount of
downshift braking provided will vary based
upon the amount the brake pedal is
pressed.
To deactivate the tow/haul feature and
return to normal driving mode, press the
button on the end of the gearshift lever.
The TOW HAUL light will no longer be
illuminated.
Tow/haul will also deactivate when the
vehicle is powered down. WARNING
Do not use the tow/haul feature
when driving in icy or slippery
conditions as the increased engine
braking can cause the rear wheels to slide
and the vehicle to swing around with the
possible loss of vehicle control. M (Manual) without Overdrive
With the gearshift lever in M (Manual), the
driver can change gears up or down as
desired. This is called SelectShift
Automatic
™ transmission (SST) mode.
By moving the gearshift lever from drive
position
D (Overdrive) to M (Manual) you
now have control of selecting the gear you
desire using buttons on the shift lever.
To return to normal
D (Overdrive) position,
move the shift lever back from M to D.
The transmission will operate in gears one
through six.
2 (Second)
Use
2 (Second) to start-up on slippery
roads or to provide additional engine
braking on downgrades.
1 (First)
• Provides maximum engine braking
• Allows upshifts by moving gearshift
lever
• The transmission will not downshift
into
1 (First) at high speeds; it will
downshift to a lower gear and then
shift into
1 (First) when the vehicle
reaches slower speeds.
Forced downshifts
• Allowed in
D (Overdrive) with the
tow/haul feature on or off
• Press the accelerator to the floor
• Allows transmission to select an
appropriate gear
148
F150 (TF6) , enUSA TransmissionE166925 E161509
Page 152 of 472
Understanding your SelectShift
Automatic® transmission (If Equipped)
Your vehicle is equipped with a SelectShift
Automatic
™ transmission gearshift lever.
The SelectShift Automatic transmission
gives you the ability to change gears up or
down (without a clutch) as desired. The
SelectShift Automatic transmission
feature has two modes: PRS and M mode.
By moving the gearshift lever from the D
(Drive) position to the M (Manual) position
you may now manually select the gear you
desire. Only the current gear will be
displayed.
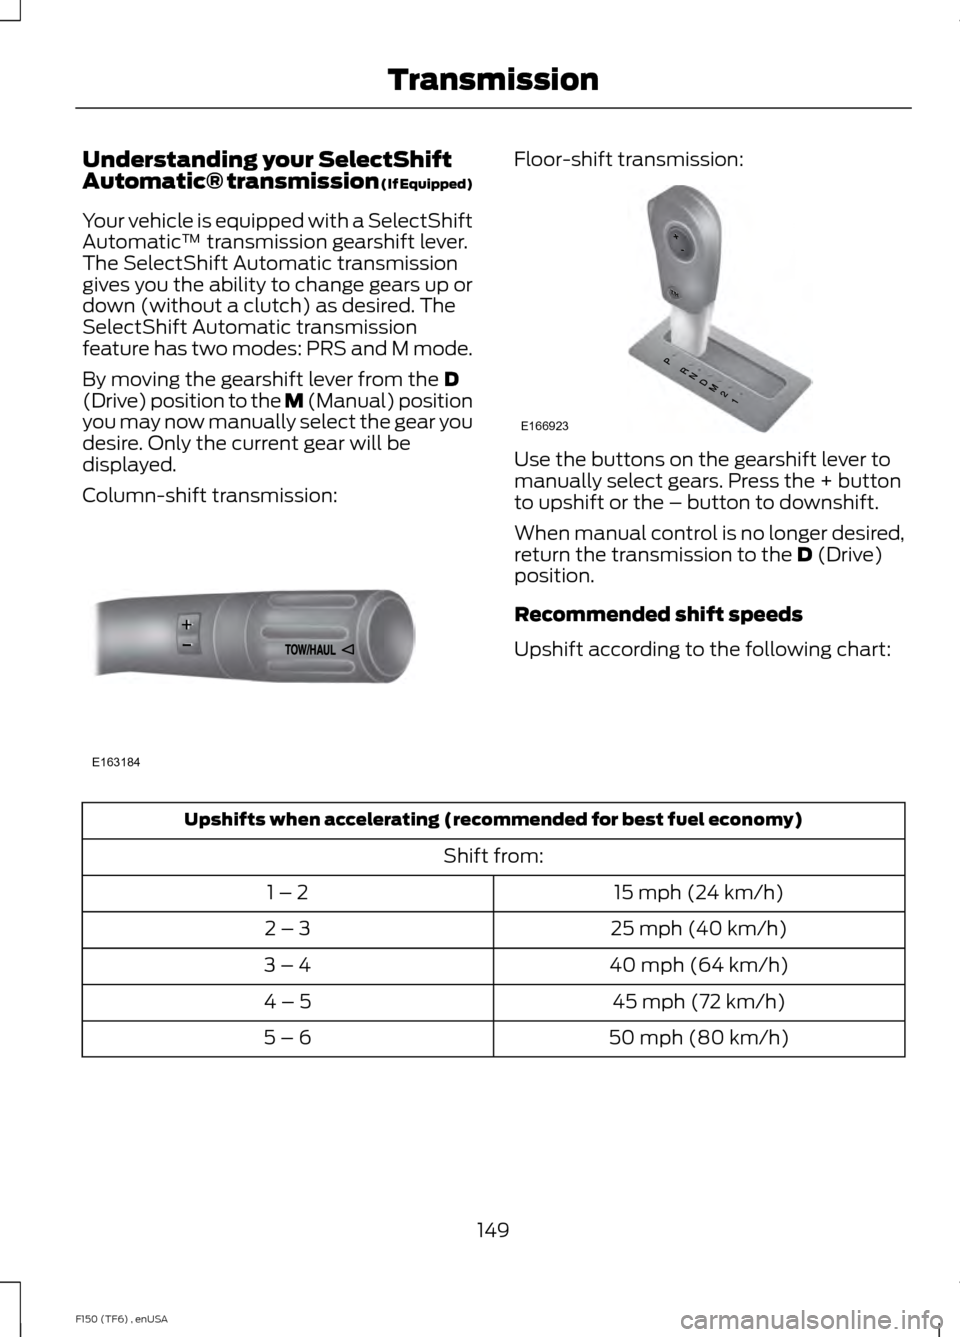
Column-shift transmission: Floor-shift transmission:
Use the buttons on the gearshift lever to
manually select gears. Press the + button
to upshift or the – button to downshift.
When manual control is no longer desired,
return the transmission to the
D (Drive)
position.
Recommended shift speeds
Upshift according to the following chart: Upshifts when accelerating (recommended for best fuel economy)
Shift from:15 mph (24 km/h)
1 – 2
25 mph (40 km/h)
2 – 3
40 mph (64 km/h)
3 – 4
45 mph (72 km/h)
4 – 5
50 mph (80 km/h)
5 – 6
149
F150 (TF6) , enUSA TransmissionE163184 E166923
Page 153 of 472
In order to prevent the engine from running
at too low an RPM, which may cause it to
stall, SelectShift will still automatically
make some downshifts if it has determined
that you have not downshifted in time.
Although SelectShift will make some
downshifts for you, it will still allow you to
downshift at any time as long as the
SelectShift determines that the engine will
not be damaged from over-revving.
SelectShift will not automatically upshift,
even if the engine is approaching the RPM
limit. It must be shifted manually by
pressing the + button.
Note:
Engine damage may occur if
excessive engine revving is held without
shifting.
PRS (Progressive Range Selection)
With the gearshift lever in D (Drive), press
the – button to active PRS. The available
and selected gears will be indicated on the
instrument cluster.
All available gears will be displayed with
the current gear indicated. Press the –
button again to lock out gears beginning
with the highest gear. Example: press the
– button twice to lock out 6th and 5th
gears. Only the available gears will be
displayed and the transmission will
automatically shift between the available
gears. Press the + button to unlock gears
to allow the transmission to shift to higher
gears. The transmission will shift
automatically within the gear range you
select.
Automatic Transmission Adaptive
Learning
This feature is designed to increase
durability and provide consistent shift feel
over the life of the vehicle. A new vehicle
or transmission may have firm shifts, soft
shifts or both. This operation is considered
normal and will not affect function or durability of the transmission. Over time,
the adaptive learning process will fully
update transmission operation.
Additionally, whenever the battery is
disconnected or a new battery installed,
the strategy must be relearned.
Brake-Shift Interlock
WARNINGS
Do not drive your vehicle until you
verify that the brake lamps are
working.
When doing this procedure, you will
be taking the vehicle out of park
which means the vehicle can roll
freely. To avoid unwanted vehicle
movement, always fully set the parking
brake prior to doing this procedure. Use
wheel chocks if appropriate. If the parking brake is fully released,
but the brake warning lamp remains
illuminated, the brakes may not be
working properly. See your authorized
dealer. Your vehicle is equipped with a brake-shift
interlock feature that prevents the
gearshift lever from being moved from
P
(Park) when the ignition is in the on
position and the brake pedal is not pressed.
If you cannot move the gearshift lever out
of P (Park) position with the ignition in the
on position and the brake pedal pressed,
a malfunction may have occurred. It is
possible that a fuse has blown or the
vehicle ’s brake lamps are not operating
properly. See
Fuse Specification Chart
(page 225).
If the fuse is not blown and the brake
lamps are working properly, the following
procedure will allow you to move the
gearshift lever from
P (Park):
150
F150 (TF6) , enUSA Transmission
Page 163 of 472
WARNINGS
Always set the parking brake fully
and make sure the gearshift is
latched in P (Park). Turn the ignition
to the off position and remove the key
whenever you leave your vehicle. On some Four-wheel drive vehicles, when
the transfer case is in the N (Neutral)
position, the engine and transmission are
disconnected from the rest of the driveline.
Therefore, the vehicle is free to roll even if
the automatic transmission is in P (Park)
or the manual transmission is in gear. Do
not leave the vehicle unattended with the
transfer case in the N (Neutral) position.
Always set the parking brake fully and turn
off the ignition when leaving the vehicle.
Maintenance and Modifications
The suspension and steering systems on
your vehicle have been designed and
tested to provide predictable performance
whether loaded or empty. For this reason,
we strongly recommend that you do not
make modifications such as adding or
removing parts (i.e. lift kits or stabilizer
bars) or by using replacement parts not
equivalent to the original factory
equipment.
We recommend that you use caution when
your vehicle has either a high load or device
(i.e. ladder or luggage racks). Any
modifications to your vehicle that raise the
center of gravity may cause your vehicle
to roll over when there is a loss of vehicle
control.
Failure to maintain your vehicle correctly
may void the warranty, increase your repair
cost, reduce vehicle performance and
operational capabilities and adversely
affect you and your passenger's safety. We
recommend you frequently inspect your
vehicle's chassis components when your
vehicle is subject to off road usage.
160
F150 (TF6) , enUSA Four-Wheel Drive (If Equipped)
Page 194 of 472
TOWING A TRAILER
WARNINGS
Do not exceed the GVWR or
the GAWR specified on the
certification label. Towing trailers beyond the
maximum recommended
gross trailer weight exceeds the
limit of the vehicle and could
result in engine damage,
transmission damage, structural
damage, loss of vehicle control,
vehicle rollover and personal
injury. Your vehicle may have electrical
items, such as fuses or relays,
related to towing. See the Fuses
chapter.
Your vehicle's load capacity
designation is by weight, not by
volume, so you cannot necessarily
use all available space when
loading a vehicle.
Towing a trailer places an extra
load on your vehicle's engine,
transmission, axle, brakes, tires
and suspension. Inspect these
components periodically during,
and after, any towing operation. Load Placement
To help minimize how trailer
movement affects your vehicle
when driving:
•
Load the heaviest items closest
to the trailer floor.
• Load the heaviest items
centered between the left and
right side trailer tires.
• Load the heaviest items above
the trailer axles or just slightly
forward toward the trailer
tongue. Do not allow the final
trailer tongue weight to go
above or below 10-15% of the
loaded trailer weight.
• Select a tow bar with the
correct rise or drop. When both
the loaded vehicle and trailer
are connected, the trailer frame
should be level, or slightly
angled down toward your
vehicle, when viewed from the
side.
When driving with a trailer or
payload, a slight takeoff vibration
or shudder may be present due to
the increased payload weight.
Additional information regarding
proper trailer loading and setting
your vehicle up for towing is
located in another chapter of this
manual. See
Load Limit (page
179). You can also find the
information in the RV & Trailer
Towing Guide, available at an
authorized dealer.
191
F150 (TF6) , enUSA Towing
Page 211 of 472
Ford Motor Company produces a towing
manual for all authorized tow truck
operators. Have your tow truck operator
refer to this manual for proper hook-up
and towing procedures for your vehicle.
It is acceptable to have your two-wheel
drive vehicle towed with the front wheels
on the ground (without dollies) and the
rear wheels off the ground.
We recommend towing a four-wheel drive
vehicle with all wheels off the ground, such
as using a wheel lift and dollies or flatbed
equipment.
TOWING THE VEHICLE ON
FOUR WHEELS
Emergency Towing
If your vehicle becomes inoperable
(without access to wheel dollies,
car-hauling trailer, or flatbed transport
vehicle), it can be flat-towed (all wheels
on the ground, regardless of the powertrain
and transmission configuration) under the
following conditions:
•
Your vehicle is facing forward for
towing in a forward direction.
• Place the transmission in position N. If
you cannot move the transmission into
N
, you may need to override it. See
Transmission (page 147).
• Maximum speed is 35 mph (56 km/h).
• Maximum distance is 50 miles (80
kilometers).
Recreational Towing
Note: Put your climate control system in
recirculated air mode to prevent exhaust
fumes from entering your vehicle. See
Climate Control
(page 106). Follow these guidelines if you have a need
for recreational towing, such as towing
your vehicle behind a motorhome. We
designed these guidelines to prevent
damage to your transmission.
Two-wheel Drive Vehicles
You cannot tow a two-wheel drive vehicle
with any wheels on the ground as vehicle
or transmission damage may occur. You
must tow your vehicle with all four wheels
off the ground, such as when using a
car-hauling trailer.
Four-wheel Drive Vehicles
You can only tow a four-wheel drive
vehicle with all wheels on the ground by
placing the transfer case in its neutral
position and engaging the
four-wheel-down towing feature. Perform
the steps outlined in the following section
after positioning your vehicle behind the
tow vehicle and properly securing them
together.
Four-wheel-down Towing
1.
Turn the ignition to the on position. Do
not start the engine.
2. Press and hold the brake pedal.
3. Rotate the four-wheel drive switch to 2H
.
4. Shift the transmission to position
N.
5. Rotate the four-wheel drive switch from
2H to 4L and back to 2H five
times within seven seconds.
Note: If completed successfully, the
information display shows NEUTRAL TOW
LEAVE IN N or NEUTRAL TOW ENABLED
LEAVE TRANSMISSION IN NEUTRAL
.
This indicates that your vehicle is safe to
tow with all wheels on the ground
Note: If you do not see the message in the
display, you must perform the procedure
again from the beginning.
208
F150 (TF6) , enUSA Towing
Page 324 of 472
AUDIO INPUT JACK
WARNINGS
Driving while distracted can result in
loss of vehicle control, crash and
injury. We strongly recommend that
you use extreme caution when using any
device that may take your focus off the
road. Your primary responsibility is the safe
operation of your vehicle. We recommend
against the use of any hand-held device
while driving and encourage the use of
voice-operated systems when possible.
Make sure you are aware of all applicable
local laws that may affect the use of
electronic devices while driving. For safety reasons, do not connect
or adjust the settings on your
portable music player while your
vehicle is moving. Store the portable music player in a
secure location, such as the center
console or the glove box, when your
vehicle is moving. Hard objects may
become projectiles in a collision or sudden
stop, which may increase the risk of serious
injury. The audio extension cable must be
long enough to allow the portable music
player to be safely stored while your
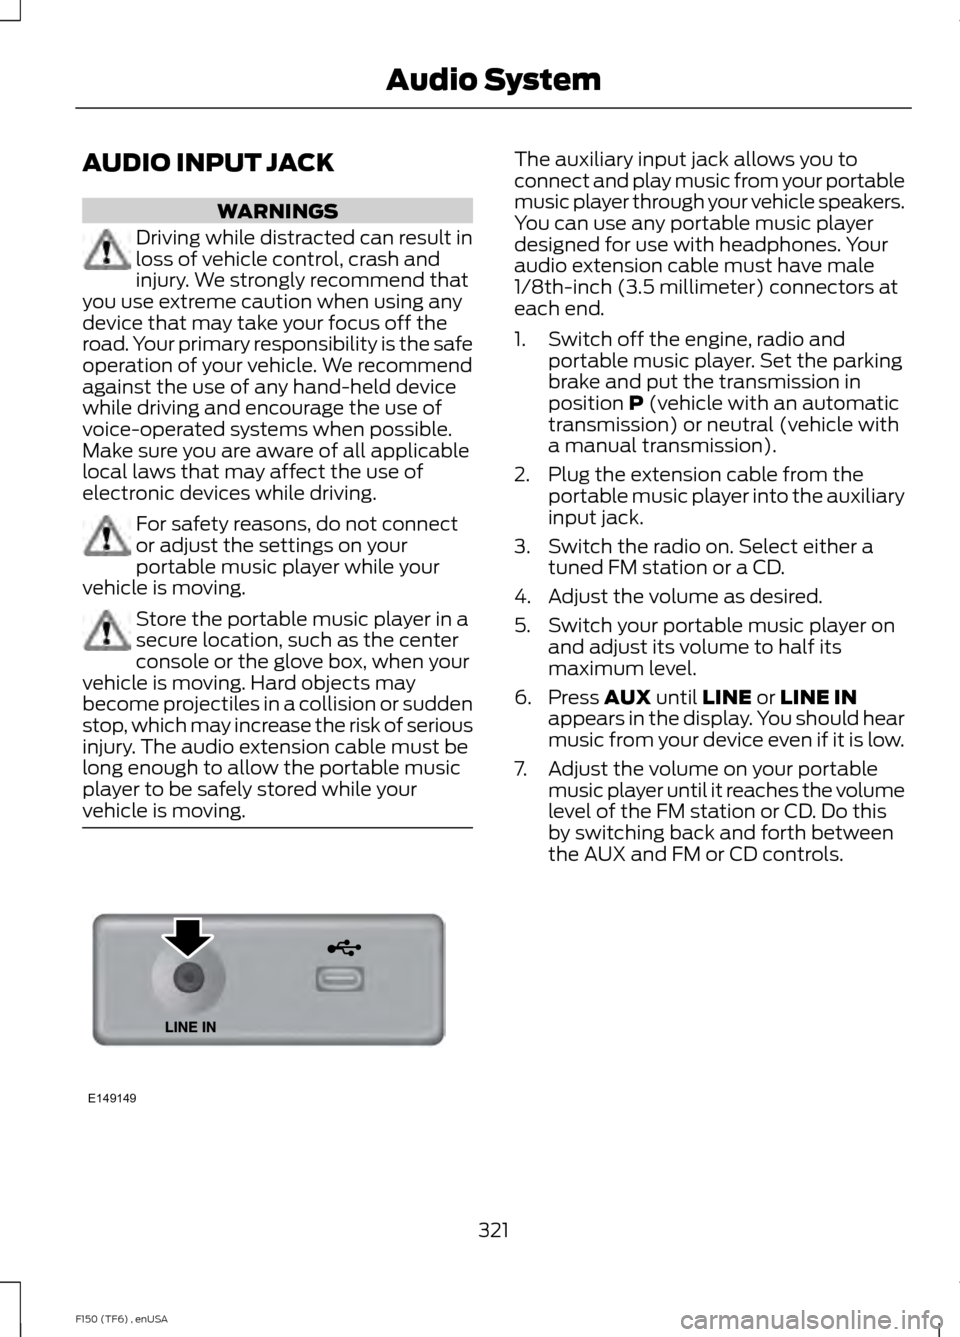
vehicle is moving. The auxiliary input jack allows you to
connect and play music from your portable
music player through your vehicle speakers.
You can use any portable music player
designed for use with headphones. Your
audio extension cable must have male
1/8th-inch (3.5 millimeter) connectors at
each end.
1. Switch off the engine, radio and
portable music player. Set the parking
brake and put the transmission in
position P (vehicle with an automatic
transmission) or neutral (vehicle with
a manual transmission).
2. Plug the extension cable from the portable music player into the auxiliary
input jack.
3. Switch the radio on. Select either a tuned FM station or a CD.
4. Adjust the volume as desired.
5. Switch your portable music player on and adjust its volume to half its
maximum level.
6. Press
AUX until LINE or LINE IN
appears in the display. You should hear
music from your device even if it is low.
7. Adjust the volume on your portable music player until it reaches the volume
level of the FM station or CD. Do this
by switching back and forth between
the AUX and FM or CD controls.
321
F150 (TF6) , enUSA Audio SystemE149149
Page 331 of 472
Pairing a Phone for the First Time
Note:
SYNC can support downloading up
to approximately 1000 entries per
Bluetooth-enabled cellular phone.
Note: Make sure to switch on the ignition
and the radio. Put the transmission in
position P.
Note: To scroll through the menus, press
the up and down arrows on your audio
system.
Wirelessly pairing your phone with SYNC
allows you to make and receive hands-free
calls.
1. Press the phone button. When the display indicates there is no phone
paired, press
OK.
2. When
Find SYNC appears in the
display, press OK.
3. Put your phone into Bluetooth discovery mode. See your device's
manual if necessary.
4. When prompted on your phone's display, enter the six-digit PIN provided
by SYNC in the radio display. The
display indicates when the pairing is
successful.
Depending on your phone's capability and
your market, the system may prompt you
with questions, such as setting the current
phone as the primary phone (the phone
SYNC automatically tries to connect with
first upon vehicle start-up) and
downloading your phonebook.
Pairing Subsequent Phones
Note: Make sure to switch on the ignition
and the radio. Put the transmission in
position
P.
Note: To scroll through the menus, press
the up and down arrows on your audio
system. 1.
Press the phone button, and then scroll
to System Settings. Press
OK.
2. Scroll to Bluetooth Devices. Press
OK.
3. Scroll to Add Bluetooth Device. Press OK
.
4. When
Find SYNC appears in the
display, press OK.
5. Put your phone into Bluetooth discovery mode. See your phone's
manual if necessary.
6. When prompted on your phone's display, enter the six-digit PIN provided
by SYNC in the radio display. The
display indicates when the pairing is
successful.
The system then prompts with questions,
such as if you would like to set the current
phone as the primary phone (the phone
SYNC automatically tries to connect with
first upon vehicle start-up) and download
your phone book.
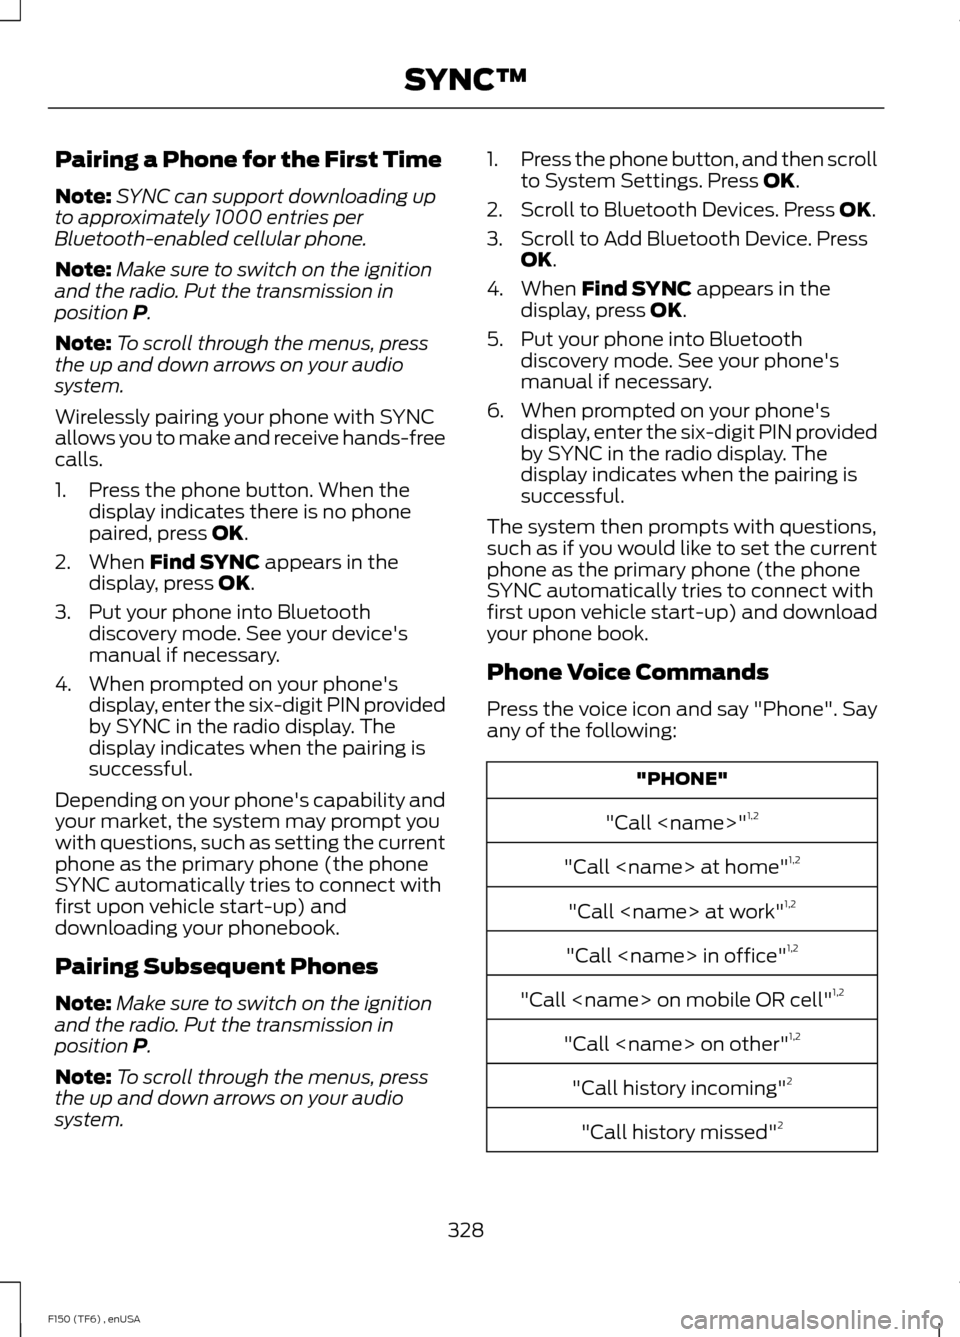
Phone Voice Commands
Press the voice icon and say "Phone". Say
any of the following: "PHONE"
"Call
"Call
"Call
"Call
"Call
"Call
"Call history incoming" 2
"Call history missed" 2
328
F150 (TF6) , enUSA SYNC™
Page 397 of 472
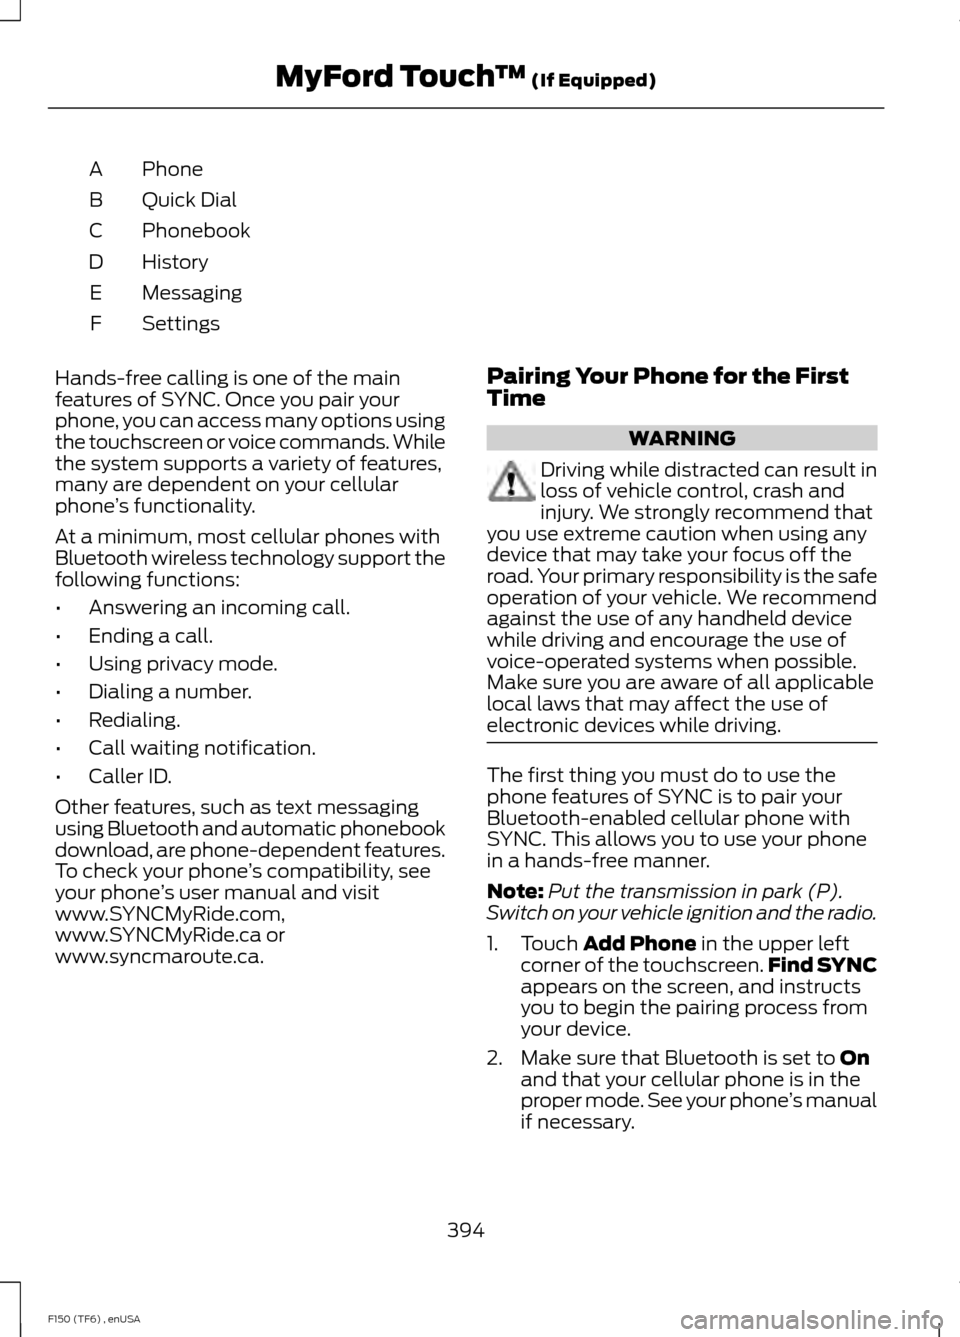
Phone
A
Quick Dial
B
Phonebook
C
History
D
Messaging
E
Settings
F
Hands-free calling is one of the main
features of SYNC. Once you pair your
phone, you can access many options using
the touchscreen or voice commands. While
the system supports a variety of features,
many are dependent on your cellular
phone ’s functionality.
At a minimum, most cellular phones with
Bluetooth wireless technology support the
following functions:
• Answering an incoming call.
• Ending a call.
• Using privacy mode.
• Dialing a number.
• Redialing.
• Call waiting notification.
• Caller ID.
Other features, such as text messaging
using Bluetooth and automatic phonebook
download, are phone-dependent features.
To check your phone ’s compatibility, see
your phone ’s user manual and visit
www.SYNCMyRide.com,
www.SYNCMyRide.ca or
www.syncmaroute.ca. Pairing Your Phone for the First
Time WARNING
Driving while distracted can result in
loss of vehicle control, crash and
injury. We strongly recommend that
you use extreme caution when using any
device that may take your focus off the
road. Your primary responsibility is the safe
operation of your vehicle. We recommend
against the use of any handheld device
while driving and encourage the use of
voice-operated systems when possible.
Make sure you are aware of all applicable
local laws that may affect the use of
electronic devices while driving. The first thing you must do to use the
phone features of SYNC is to pair your
Bluetooth-enabled cellular phone with
SYNC. This allows you to use your phone
in a hands-free manner.
Note:
Put the transmission in park (P).
Switch on your vehicle ignition and the radio.
1. Touch Add Phone in the upper left
corner of the touchscreen. Find SYNC
appears on the screen, and instructs
you to begin the pairing process from
your device.
2. Make sure that Bluetooth is set to
On
and that your cellular phone is in the
proper mode. See your phone ’s manual
if necessary.
394
F150 (TF6) , enUSA MyFord Touch
™
(If Equipped)