low beam FORD F150 2015 13.G Owners Manual
[x] Cancel search | Manufacturer: FORD, Model Year: 2015, Model line: F150, Model: FORD F150 2015 13.GPages: 549, PDF Size: 5.97 MB
Page 86 of 549
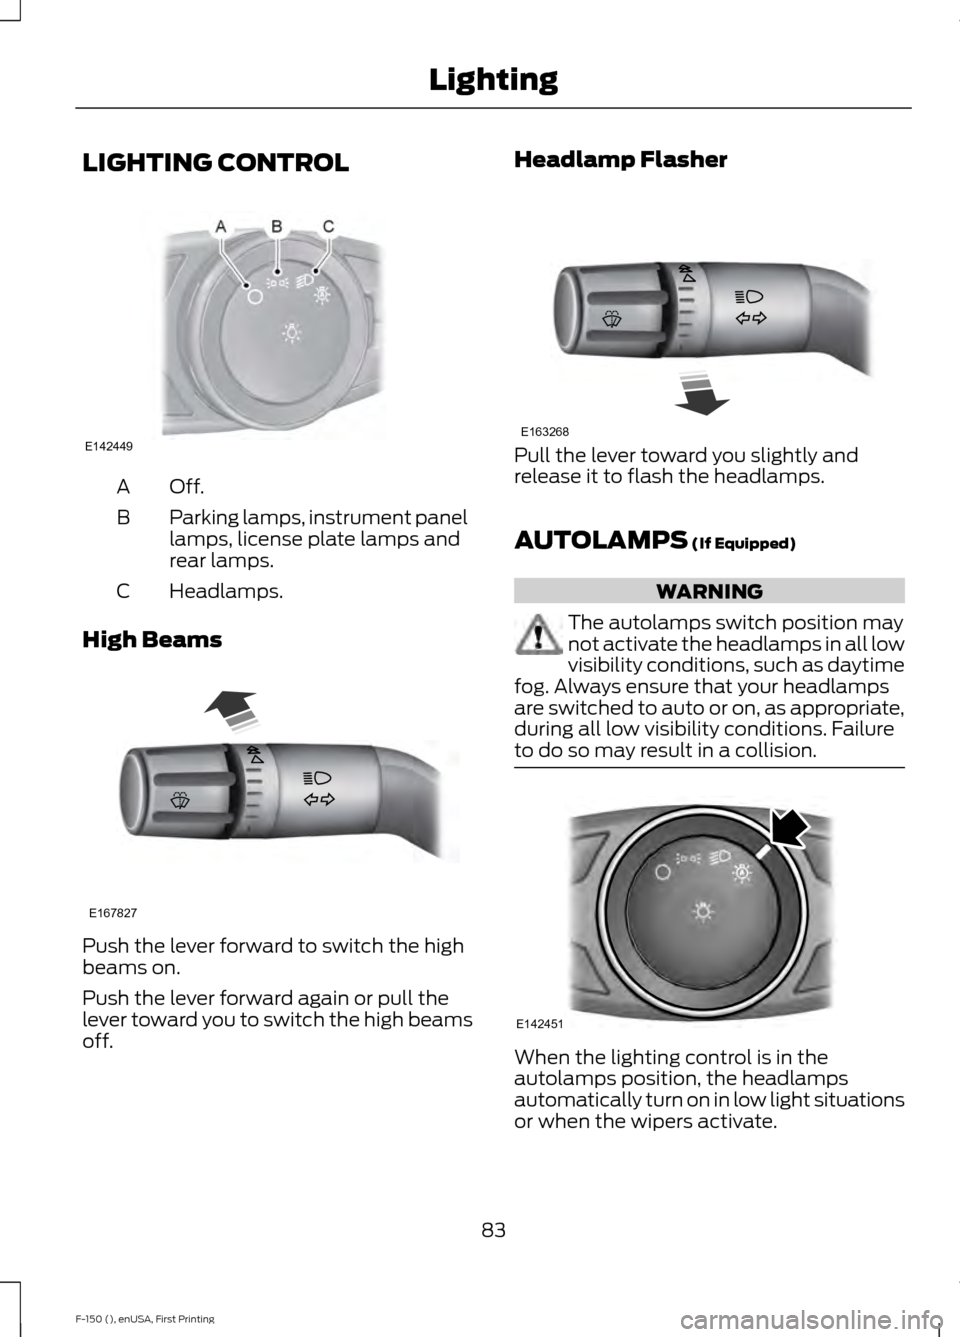
LIGHTING CONTROL
Off.A
Parking lamps, instrument panel
lamps, license plate lamps and
rear lamps.
B
Headlamps.
C
High Beams Push the lever forward to switch the high
beams on.
Push the lever forward again or pull the
lever toward you to switch the high beams
off. Headlamp Flasher
Pull the lever toward you slightly and
release it to flash the headlamps.
AUTOLAMPS (If Equipped)
WARNING
The autolamps switch position may
not activate the headlamps in all low
visibility conditions, such as daytime
fog. Always ensure that your headlamps
are switched to auto or on, as appropriate,
during all low visibility conditions. Failure
to do so may result in a collision. When the lighting control is in the
autolamps position, the headlamps
automatically turn on in low light situations
or when the wipers activate.
83
F-150 (), enUSA, First Printing LightingE142449 E167827 E163268 E142451
Page 87 of 549
If equipped, the following also activate
when the lighting control is in the
autolamps position and you switch them
on in the information display:
•
Configurable daytime running lamps.
• Automatic high beam control.
• Adaptive headlamp control.
The headlamps remain on for a period of
time after you switch the ignition off. Use
the information display controls to adjust
the period of time that the headlamps
remain on. See Information Displays
(page 105).
Note: With the headlamps in the
autolamps position, you cannot switch the
high beam headlamps on until the
autolamps system turns the low beam
headlamps on.
Windshield Wiper Activated
Headlamps
The windshield wiper activated headlamps
turn on within 10 seconds when you switch
the windshield wipers on and the lighting
control is in the autolamps position. They
turn off approximately 60 seconds after
you switch the windshield wipers off.
The headlamps will not turn on by wiper
activation:
• During a mist wipe.
• When the wipers are on to clear washer
fluid during a wash condition.
• If the wipers are in intermittent mode.
Note: If you switch autolamps and
autowipers on, the headlamps will
automatically turn on when the windshield
wipers continuously operate. INSTRUMENT LIGHTING
DIMMER
Note:
You disable the manual dimmer
when you adjust the setting to Auto
Dimming in the information display. See
Information Displays
(page 105).
Note: If you disconnect the battery or it
becomes discharged, the illuminated
components will switch to the maximum
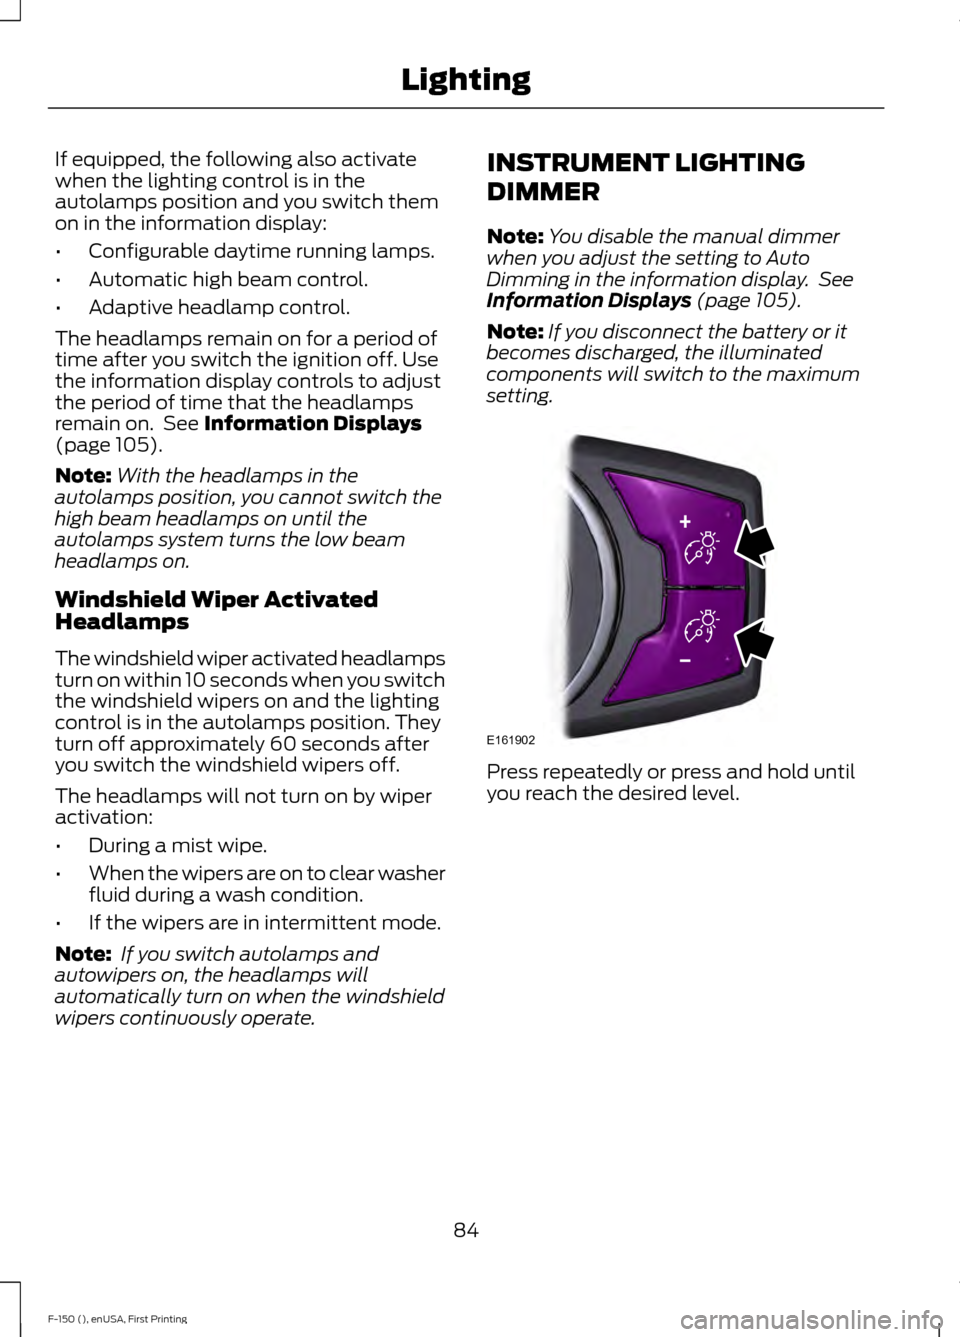
setting. Press repeatedly or press and hold until
you reach the desired level.
84
F-150 (), enUSA, First Printing LightingE161902
Page 88 of 549
DAYTIME RUNNING LAMPS (If
Equipped) WARNING
The daytime running lamps system
does not activate the rear lamps and
may not provide adequate lighting
during low visibility driving conditions. Also,
the autolamps switch position may not
activate the headlamps in all low visibility
conditions, such as daytime fog. Make sure
the headlamps are switched to auto or on,
as appropriate, during all low visibility
conditions. Failure to do so may result in a
crash. Type 1 - Conventional (Non-
Configurable)
The daytime running lamps turn on when:
1. The ignition is switched to the on
position.
2. The transmission is not in park (P) for vehicles with automatic transmissions
or the parking brake is released for
vehicles with manual transmissions.
3. The lighting control is in the off, parking
lamp or autolamps positions.
4. The headlamps are off.
Type 2 - Configurable
Switch the daytime running lamps on or
off using the information display controls.
See
Information Displays (page 105).
The daytime running lamps turn on when:
1. They are switched on in the information
display. See
Information Displays
(page 105).
2. The ignition is switched to the on position. 3. The transmission is not in park (P) for
vehicles with automatic transmissions
or the parking brake is released for
vehicles with manual transmissions.
4. The lighting control is in the autolamps
position.
5. The headlamps are off.
The other lighting control switch positions
do not activate the daytime running lamps,
and you can use them to temporarily
override autolamp control.
When switched off in the information
display, the daytime running lamps are off
in all lighting control switch positions.
AUTOMATIC HIGH BEAM
CONTROL
(If Equipped)
The system automatically turns on the high
beams if it is dark enough and no other
traffic is present. When it detects the
headlights of an approaching vehicle, the
tail lamps of the preceding vehicle or street
lighting, the system turns off the high
beams before they distract other drivers.
The low beams remain on.
Note: If it appears that automatic high
beam is not functioning properly, check the
windshield in front of the camera for a
blockage. A clear view of the road is required
for proper system operation. Make sure that
authorized personnel repair any windshield
damage in the area of the camera's field of
view.
Note: If the system detects a blockage such
as bird droppings, bug splatter, snow or ice,
and you do not observe changes, the system
may go into low beam mode until you clear
the blockage. A message may also appear
in the information display noting the front
camera is blocked.
85
F-150 (), enUSA, First Printing Lighting
Page 89 of 549
Note:
Typical road dust, dirt and water
spots do not affect the performance of the
automatic high beam control. However, in
cold or inclement weather conditions, you
may notice a decrease in the availability of
the automatic high beam control, especially
at start up. If you want to change the beam
state independently of the system, you may
switch the high beams on or off using the
lighting control switch. Automatic high
beam control resumes when conditions are
correct.
Note: Using much larger tires or equipping
vehicle accessories such as snowplows can
modify your vehicle's ride height and
degrade automatic high beam control
performance.
A camera sensor, centrally mounted
behind the windshield of your vehicle,
continuously monitors conditions to decide
when to switch the high beams off and on.
Once the system is active, the high beams
switch on if:
• The outside light level is low enough.
• There is no traffic in front of your
vehicle.
• The vehicle speed is greater than
32 mph (52 km/h).
The high beams switch off if:
• The system detects the headlamps of
an approaching vehicle or the rear
lamps vehicle in front of you.
• Vehicle speed falls below
27 mph
(44 km/h).
• The outside light level is high enough
that high beams are not required.
• The system detects severe rain, snow
or fog.
• The camera is blocked. Activating the System
Switch on automatic high beam control
using the information display and
autolamps. See
Information Displays
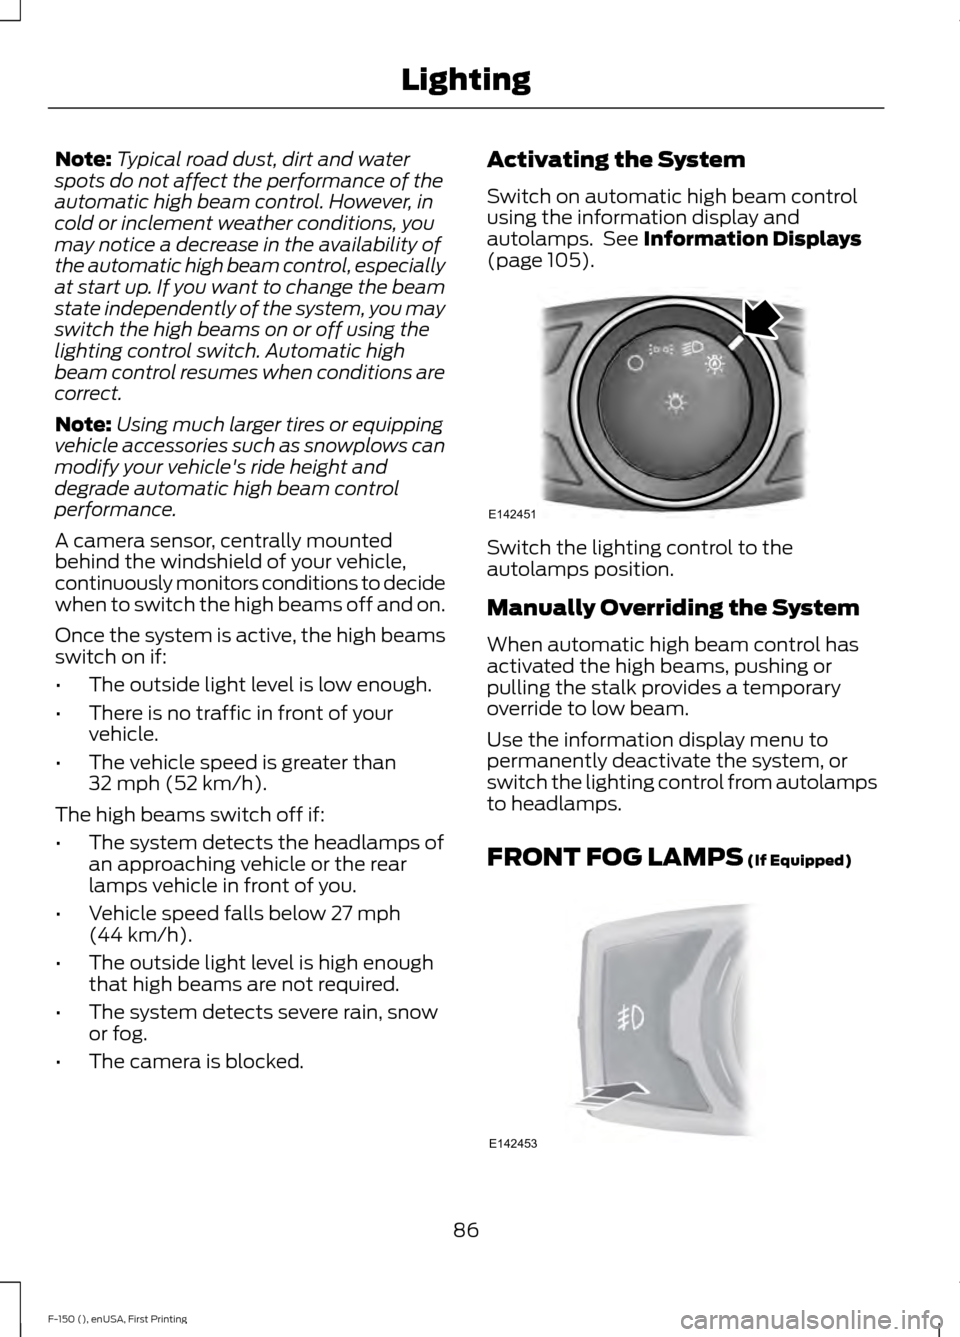
(page 105). Switch the lighting control to the
autolamps position.
Manually Overriding the System
When automatic high beam control has
activated the high beams, pushing or
pulling the stalk provides a temporary
override to low beam.
Use the information display menu to
permanently deactivate the system, or
switch the lighting control from autolamps
to headlamps.
FRONT FOG LAMPS
(If Equipped)
86
F-150 (), enUSA, First Printing LightingE142451 E142453
Page 103 of 549
Transmission Fluid Temperature
Gauge
Indicates transmission fluid temperature.
At normal operating temperature, the level
indicator will be in the normal range. If the
transmission fluid temperature exceeds
the normal range, stop the vehicle as soon
as safely possible and verify the airflow is
not restricted such as snow or debris
blocking airflow through the grill. Also,
higher than normal operating temperature
can be caused by special operation
conditions (i.e. snowplowing, towing or
off-road use). Refer to Special operating
conditions in the scheduled maintenance
information for instructions. Operating the
transmission for extended periods with the
gauge in the higher than normal area may
cause internal transmission damage. You
need to alter the severity of your driving
conditions to lower the transmission
temperature into the normal range. If the
gauge continues to show high
temperatures, see an authorized dealer.
Information Display
Odometer
Located in the bottom of the information
display. Registers the accumulated
distance your vehicle has traveled.
Compass
Displays the vehicle
’s heading direction.
Trip Computer
See General Information (page 105).
Vehicle Settings and Personalization
See
General Information (page 105). WARNING LAMPS AND
INDICATORS
The following warning lamps and
indicators will alert you to a vehicle
condition that may become serious. Some
lamps will illuminate when you start your
vehicle to make sure they work. If any
lamps remain on after starting your vehicle,
refer to the respective system warning
lamp for further information.
Note:
Some warning indicators appear in
the information display and function the
same as a warning lamp but do not display
when you start your vehicle.
Adaptive Cruise Control
(If Equipped) The speed control system
indicator light changes color to
indicate what mode the system
is in: See Using Adaptive Cruise Control
(page
214).
Anti-Lock Braking System If it illuminates when you are
driving, this indicates a
malfunction. You will continue
to have normal braking (without Anti-lock
braking system) unless the brake system
warning lamp is also illuminated. Have the
system checked by an authorized dealer.
Automatic High Beam
(If Equipped) Illuminates when this feature is
on. See Automatic High Beam
Control
(page 85).
Auto Start-stop
(If Equipped) It will illuminate to inform you
when the engine shuts down or
in conjunction with a message.
100
F-150 (), enUSA, First Printing Instrument ClusterE144524
Page 105 of 549
Engine Oil
If it illuminates with the engine
running or when you are driving,
this indicates a malfunction.
Stop your vehicle as soon as it is safe to
do so and switch the engine off. Check the
engine oil level. See Engine Oil Check
(page 302).
Note: Do not resume your journey if it
illuminates despite the level being correct.
Have the system checked by your authorized
dealer immediately.
Fasten Safety Belt It will illuminate and a chime will
sound to remind you to fasten
your safety belt.
Four-Wheel Drive Indicators
(If
Equipped)
Note: Some indicators will appear different
depending on vehicle options.
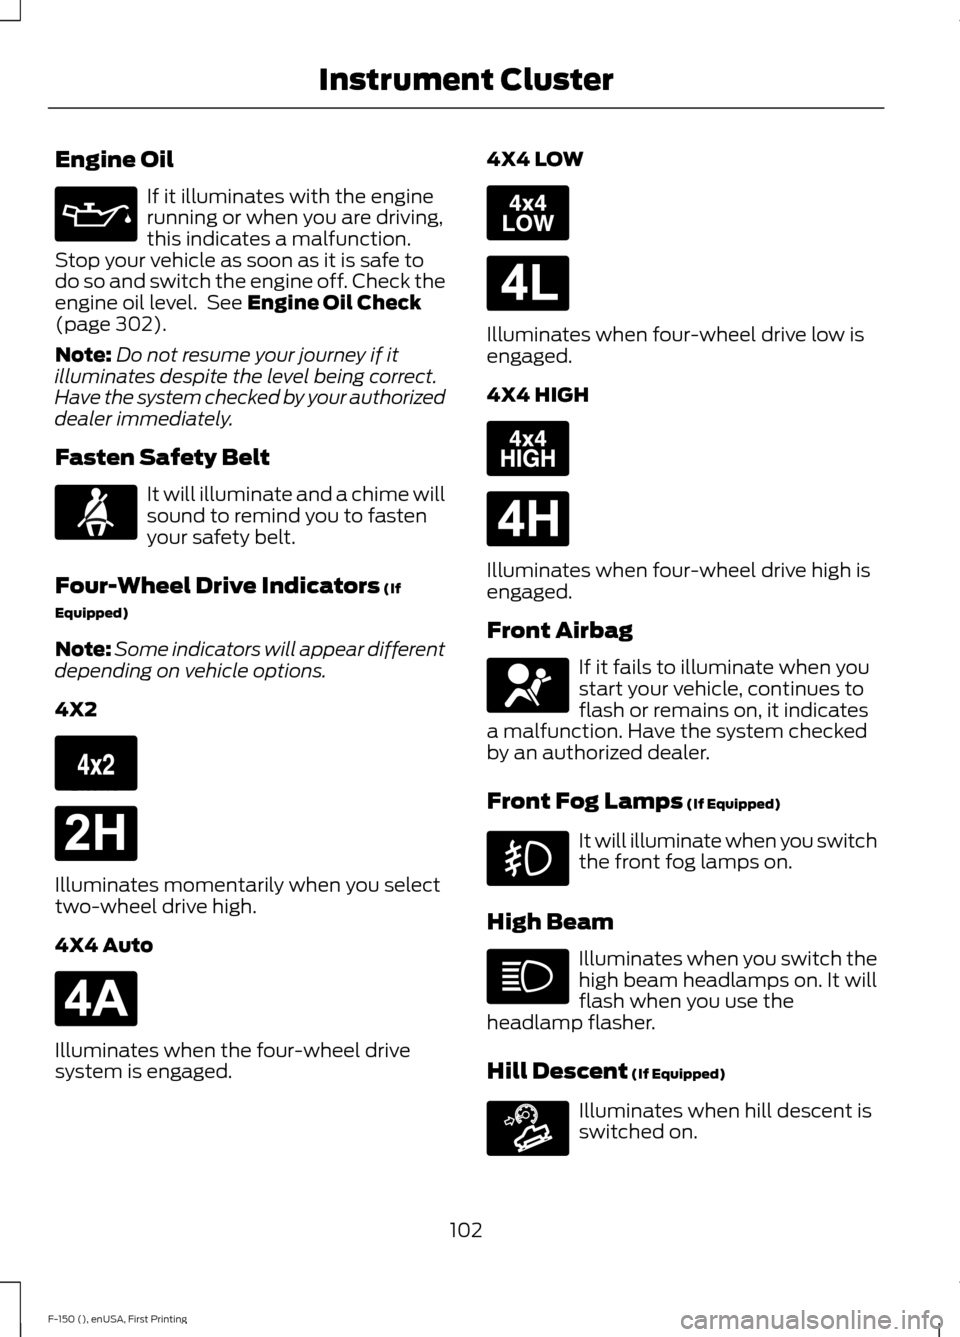
4X2 Illuminates momentarily when you select
two-wheel drive high.
4X4 Auto
Illuminates when the four-wheel drive
system is engaged. 4X4 LOW Illuminates when four-wheel drive low is
engaged.
4X4 HIGH
Illuminates when four-wheel drive high is
engaged.
Front Airbag
If it fails to illuminate when you
start your vehicle, continues to
flash or remains on, it indicates
a malfunction. Have the system checked
by an authorized dealer.
Front Fog Lamps
(If Equipped) It will illuminate when you switch
the front fog lamps on.
High Beam Illuminates when you switch the
high beam headlamps on. It will
flash when you use the
headlamp flasher.
Hill Descent
(If Equipped) Illuminates when hill descent is
switched on.
102
F-150 (), enUSA, First Printing Instrument Cluster E163173 E181778 E181781 E163174 E181780 E163175 E181779 E163171
Page 121 of 549
Off Road
Pitch, steering angle, roll, Elocker and 4X4
Power Distribution
Settings Use the arrow buttons to
configure different driver setting
choices.
Note:
Some items are optional and may
not appear. Settings
Auto High Beam - check enabled or uncheck disabled
Blindspot - check enabled or uncheck disabled
Cross Traffic Alert - check enabled or uncheck disabled
Driver Alert - check enabled or uncheck disabled
Rear Park Aid - check enabled or uncheck disabled High, Normal or Low
Sensitivity
Collision
Warn
On or Off
Warn
Adaptive or Normal
Cruise
Control
Alert only, Aid only or both
Mode
Lane keeping
Sys
High, Normal or Low
Intensity
Normal or Towing
DTE Calcula-
tion
Auto Engine Off - check enabled or uncheck disabled
Vehicle
Easy Entry/Exit - check enabled or uncheck disabled Off or XXX
seconds
Autolamp Delay
Lighting
Daytime Lights - check enabled or
uncheck disabled
Autounlock - check enabled or uncheck
disabled
Locks
118
F-150 (), enUSA, First Printing Information DisplaysE176098
Page 314 of 549
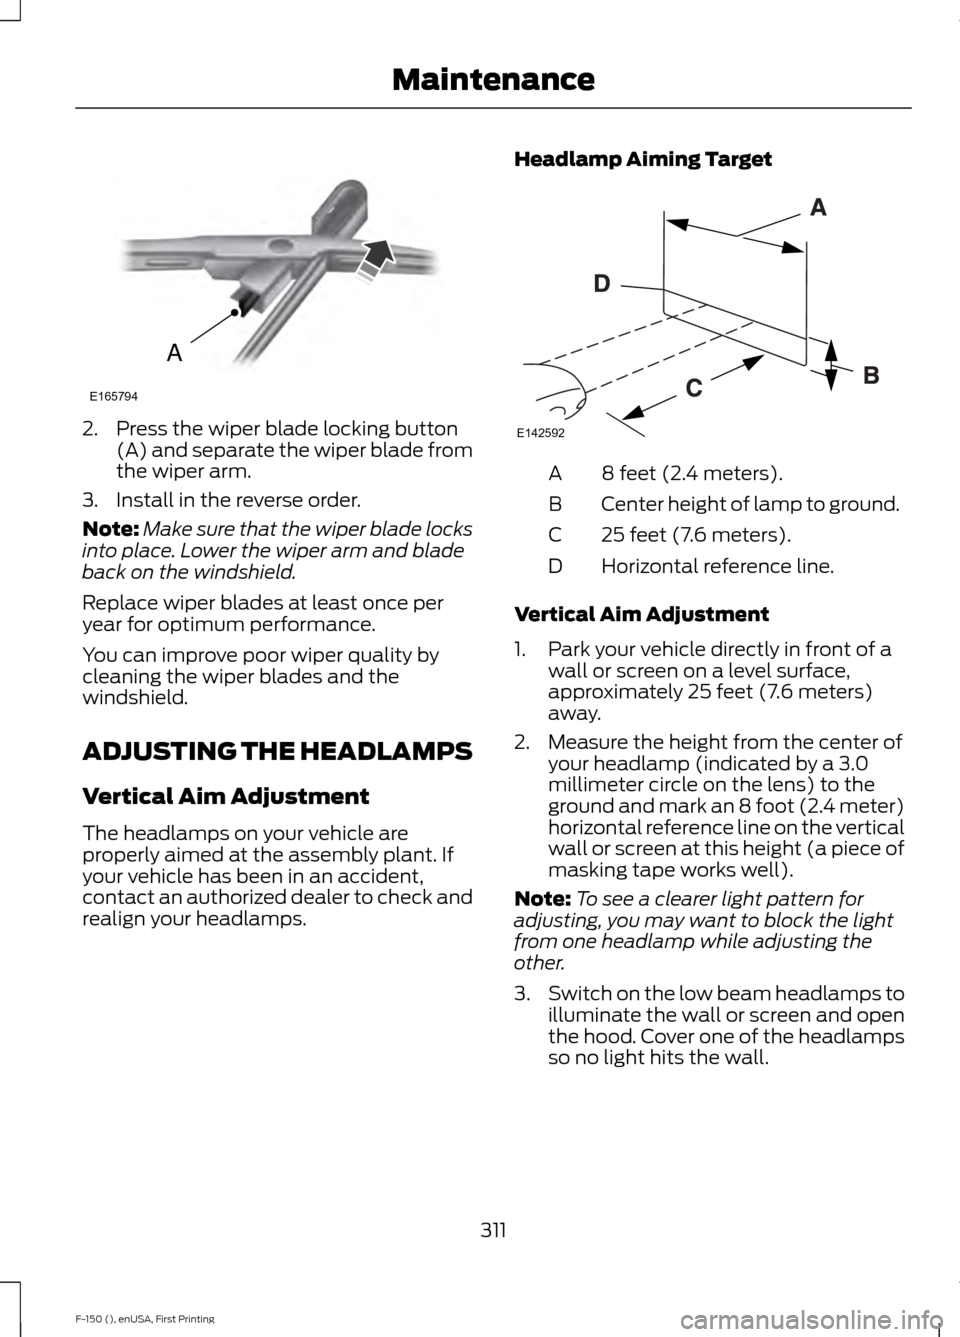
2. Press the wiper blade locking button
(A) and separate the wiper blade from
the wiper arm.
3. Install in the reverse order.
Note: Make sure that the wiper blade locks
into place. Lower the wiper arm and blade
back on the windshield.
Replace wiper blades at least once per
year for optimum performance.
You can improve poor wiper quality by
cleaning the wiper blades and the
windshield.
ADJUSTING THE HEADLAMPS
Vertical Aim Adjustment
The headlamps on your vehicle are
properly aimed at the assembly plant. If
your vehicle has been in an accident,
contact an authorized dealer to check and
realign your headlamps. Headlamp Aiming Target 8 feet (2.4 meters).
A
Center height of lamp to ground.
B
25 feet (7.6 meters).
C
Horizontal reference line.
D
Vertical Aim Adjustment
1. Park your vehicle directly in front of a wall or screen on a level surface,
approximately 25 feet (7.6 meters)
away.
2. Measure the height from the center of your headlamp (indicated by a 3.0
millimeter circle on the lens) to the
ground and mark an 8 foot (2.4 meter)
horizontal reference line on the vertical
wall or screen at this height (a piece of
masking tape works well).
Note: To see a clearer light pattern for
adjusting, you may want to block the light
from one headlamp while adjusting the
other.
3. Switch on the low beam headlamps to
illuminate the wall or screen and open
the hood. Cover one of the headlamps
so no light hits the wall.
311
F-150 (), enUSA, First Printing MaintenanceA
E165794 E142592
Page 316 of 549
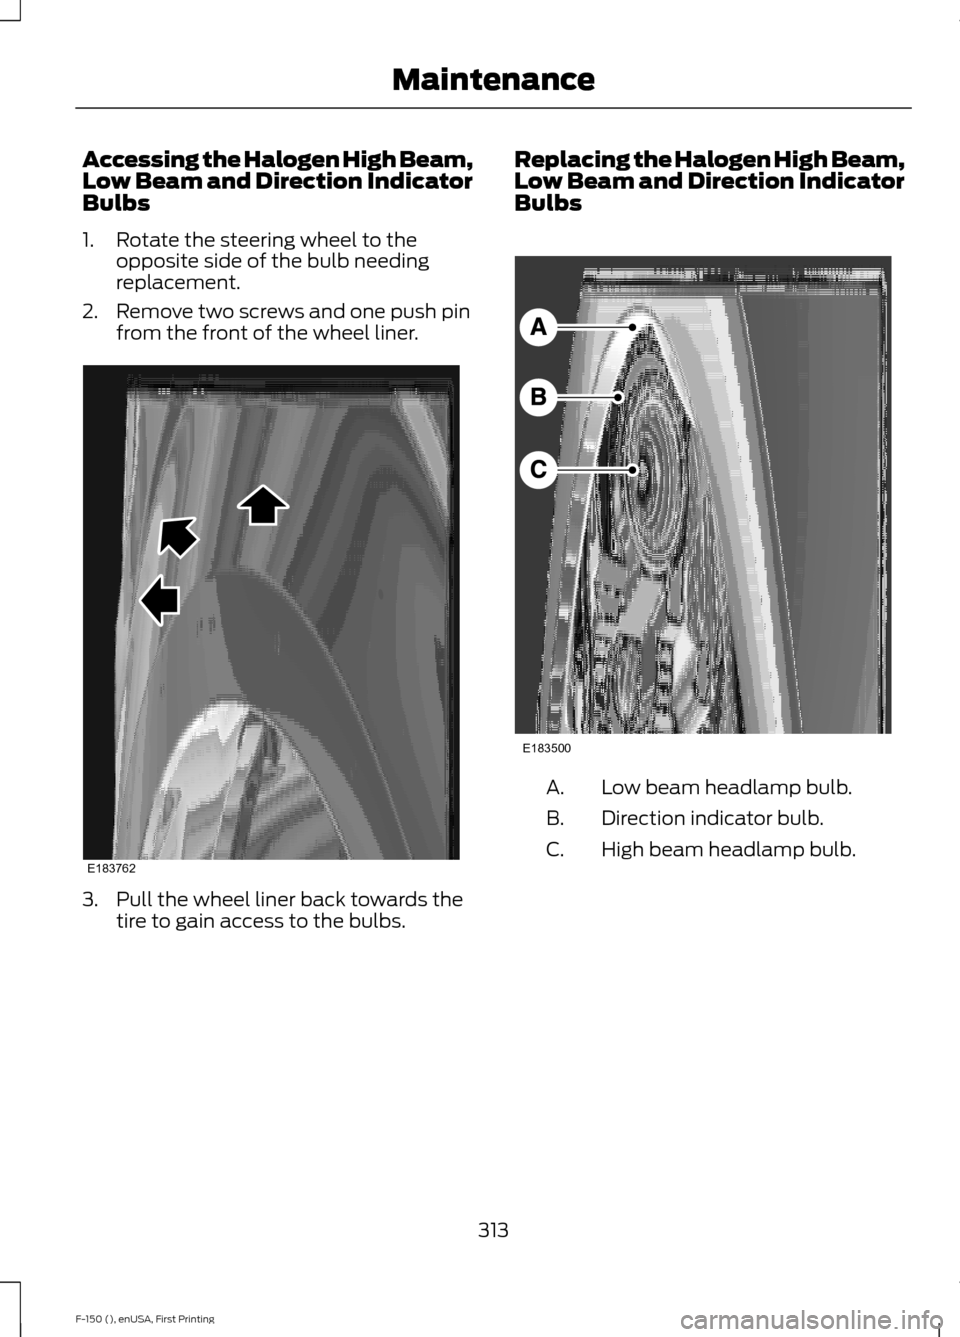
Accessing the Halogen High Beam,
Low Beam and Direction Indicator
Bulbs
1. Rotate the steering wheel to the
opposite side of the bulb needing
replacement.
2. Remove two screws and one push pin from the front of the wheel liner. 3. Pull the wheel liner back towards the
tire to gain access to the bulbs. Replacing the Halogen High Beam,
Low Beam and Direction Indicator
Bulbs
Low beam headlamp bulb.
A.
Direction indicator bulb.
B.
High beam headlamp bulb.
C.
313
F-150 (), enUSA, First Printing MaintenanceE183762 E183500
Page 317 of 549
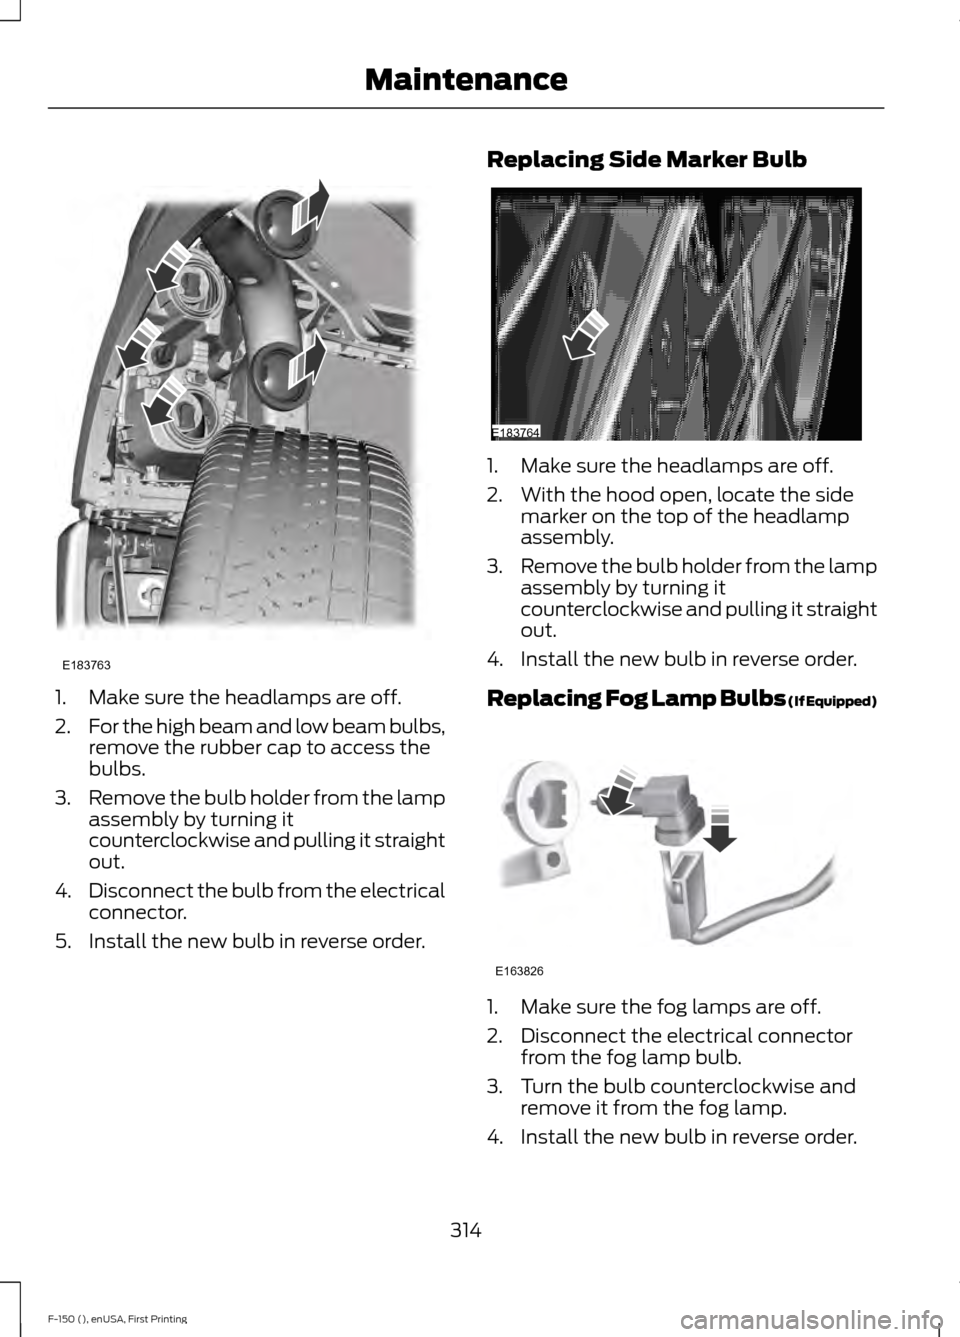
1. Make sure the headlamps are off.
2.
For the high beam and low beam bulbs,
remove the rubber cap to access the
bulbs.
3. Remove the bulb holder from the lamp
assembly by turning it
counterclockwise and pulling it straight
out.
4. Disconnect the bulb from the electrical
connector.
5. Install the new bulb in reverse order. Replacing Side Marker Bulb 1. Make sure the headlamps are off.
2. With the hood open, locate the side
marker on the top of the headlamp
assembly.
3. Remove the bulb holder from the lamp
assembly by turning it
counterclockwise and pulling it straight
out.
4. Install the new bulb in reverse order.
Replacing Fog Lamp Bulbs (If Equipped) 1. Make sure the fog lamps are off.
2. Disconnect the electrical connector
from the fog lamp bulb.
3. Turn the bulb counterclockwise and remove it from the fog lamp.
4. Install the new bulb in reverse order.
314
F-150 (), enUSA, First Printing MaintenanceE183763 E183764 E163826